
Leden
Бесплатная программа для печати на этикетках для принтеров Leden
Скачать Leden Software v.5.32 (free driver)
Руководство пользователя к принтерам Leden LG630, 660, 693, 696, 693С, 696С.pdf
Скачать руководство пользователя к принтерам Leden LG630, 660, 693, 696, 693С, 696С.pdf
Драйвер к принтеру Leden
Скачать драйвер к принтеру Leden.zip
Cab
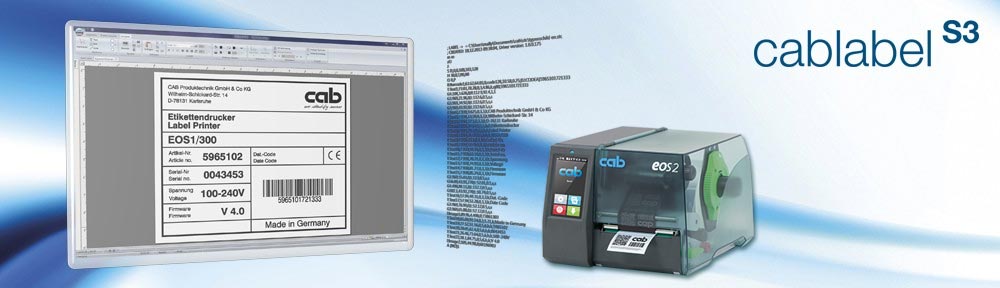
Свободно распространяемая программа для печати этикеток Cablabel S3 Lite для принтеров САВ
Скачать CablabelS3 v.1.4.0.6
Русскоязычная инструкция по эксплуатации принтеров CAB SQUIX
Скачать BA_SQUIX_ru.pdf
Драйвер к принтеру Cab SQUIX
Драйвер к принтеру Cab SQUIX.zip
Zota CP819
Бесплатная программа PrindaTP.Editor250124-E-R для печати на кабельном принтере Zota CP819
Скачать PrindaTP.Editor250124-E-R.zip
Zota CP819 руководство пользователя.pdf
Скачать Инструкция к принтеру СР819.pdf
Godex
Бесплатная программа GoLabel II для печати этикеток для принтера Godex
Скачать GoLabel_II_V2.1.1.zip
G530 руководство пользователя.pdf
Скачать G530 руководство пользователя.pdf
Драйвер Godex 2022.2_M-2.zip
Скачать драйвер Godex 2022.2_M-2.zip
Драйвер Godex 2024.3_M_0.zip
Скачать драйвер Godex 2024.3_M_0.zip
Canon
Программа для принтеров Canon MK5000.pdf
Скачать программу для принтеров Canon MK5000.pdf
Руководство пользователя к принтерам Canon MK5000-MK3000.pdf
Скачать руководство пользователя к принтерам Canon MK5000-MK3000.pdf
Подписывайтесь на наш телеграмм-канал. Там мы публикуем актуальные новинки нашего каталога, оказываем поддержку и консультируем в реальном времени, а также делимся последними событиями, которые происходят в компании!
|
Оставляйте Ваш запрос с подробным описанием вашей задачи, |
Написать сообщение |
03.04.2024
Статья с рекомендациями по выбору оборудования для струйной…
подробнее
05.03.2024
Поздравляем с международным женским днем!
подробнее
06.02.2024
Представляем новый двуцветный промышленный маркер — Markal…
подробнее
Драйверы и программы
На этой странице вы можете скачать актуальную версию драйверов Windows для печати этикеток на принтерах различных производителей и моделей (SATO, cab, POSTEK).
Здесь вы найдете как оригинальные Windows-драйверы, так и драйверы печати от компании Europlus.
Также на этой странице представлены для скачивания бесплатные версии программного обеспечения для подключения к ПК и работы термотрансферных принтеров только определенных марок и производителей.
Для того, чтобы скачать программу для печати этикеток, найдите в списке необходимый вам пункт и нажмите на иконку. Далее следуйте инструкции по загрузке программы.
Оригинальные Windows-драйверы для принтеров этикеток
Windows-драйверы от компании Europlus
Бесплатное программное обеспечение для создания и печати этикеток
Программа ANSER MessagePro II (создание на ПК сообщений для термоструйных принтеров ANSER)
Вспомогательное ПО и программы для конфигурирования принетров
Програмное обспечение cablabel S3 для создания дизайна этикетки и формирования задания для печати. Существуют 3 бесплатные версии cablabel S3: Demo, Lite, Viewer и 2 платные: Print и Pro. Подробное сравнение в сводной таблице. Скачать cablabel S3 можно напрямую или через оформление заказа, если Вам требуется консультация для выбора и помощь в настройке наших инженеров.
В cablabel можно легко интегрировать специальные функции, такие как соединение с базами данных или верификатор штрих-кодов.
€0.00 – €440.00
Артикул: cablabel
Бренд: cab
-
Описание
-
Детали
Описание
Версии ПООписаниеТехнические данныеДокументация и ссылки
Версии ПО cablabel S3
Организация печати этикеток в различных компаниях может отличаться. Например, создание и печать этикеток может выполняться разными сотрудниками. Для адаптации возможностей программного обеспечения к конкретному рабочему процессу компания cab предлагает следующие продукты.
Версия Lite (бесплатная)
Программу cablabel S3 Lite можно бесплатно скачать на сайте производителя. Предназначена для создания и печати простых этикеток.
Версия Pro
Программа cablabel S3 Pro позволяет создавать этикетки для масштабного промышленного применения и разрабатывать сложные решения для печати этикеток.
Основные преимущества:
• данная версия пригодна для дизайна и печати этикеток наравне с CodeSoft или NiceLabel, так как она видит драйвера, установленные в Windows. Это позволяет отправлять задания на печать не только на принтеры cab, но и на принтеры сторонних производителей;
• создание сложных счётчиков и возможность подключения к внешним источникам данных.
Версия Print
Программа cablabel S3 Print предназначена для использования, например, на тех рабочих местах на складе или производстве,
где необходимо, чтобы оператор не мог изменить шаблон этикетки. Интерфейс пользователя максимально упрощён и предоставляет только те функции, которые необходимы для отправки на печать готовых этикеток. Оператор выбирает этикетку из списка и получает её изображение на экране для визуального контроля. Затем он может ввести переменную информацию и количество этикеток,
которое нужно напечатать. Это упрощает работу и уменьшает количество возможных ошибок.
Версия Demo (бесплатная)
Демонстрационная версия cablabel S3 Demo позволяет заинтересованным пользователям бесплатно установить и попробовать в действии программу cablabel. Пользователю будут доступны все функции версии Pro, исключая просмотр кода JScript и поддержку автономного режима. Также возможна печать этикеток, но эта функция ограничена только целями тестирования. Срок действия версии ограничен 30 днями. Возможна только одна активация на одного пользователя.
Версия Viewer (бесплатная)
Программа cablabel S3 Viewer показывает предварительный просмотр этикетки в окне Проводника (Windows Explorer).
Версия Viewer может помочь, например, когда в технологическом процессе есть этап одобрения, либо нужна проверка на соответствие требованиям со стороны поставщика или клиента
| Артикул | Имя | Версия ПО | Цена | Купить |
|---|---|---|---|---|
| 5588009+ | ПО cablabel S3 — Demo | Demo | €0.00 |
Количество товара ПО cablabel S3 |
| 5588000+ | ПО cablabel S3 — Lite | Lite | €0.00 |
Количество товара ПО cablabel S3 |
| 5588004+ | ПО cablabel S3 — Viewer | Viewer | €0.00 |
Количество товара ПО cablabel S3 |
| 5588002+ | ПО cablabel S3 — Print | €360.00 |
Количество товара ПО cablabel S3 |
|
| 5588001+ | ПО cablabel S3 — Pro | Pro | €440.00 |
Количество товара ПО cablabel S3 |
Описание
Программа разработана по модульному принципу и может быть постепенно адаптирована к вашим потребностям. Для упрощения ваших задач был создан полный набор функций и инструментов: в программу включены расширенные функции счетчика, поля даты, формулы и соединение с базой данных.
Cablabel S3 также поддерживает автономный режим, а такие элементы, как JScript Viewer, интегрируются через плагин, чтобы наилучшим образом поддерживать нативное программирование Jscript.
В cablabel можно легко интегрировать специальные функции, такие как соединение с базами данных или верификатор штрих-кодов.
Технические данные
| cablabel S3 Lite | cablabel S3 Pro |
|---|---|
| Поставляется с каждым принтером | Лицензия на компьютер по запросу |
| Совместим только c принтерами cab | Поддерживает все принтеры обнаруженные и установленные в Windows |
| Многострочные тексты | Дополнительные параметры текста: максимальная ширина и перенос |
| — | Текстовое поле с различными пометками по обнаружению ключевых слов (например, аллергенов) |
| — | Мастер отображения символов для вставки специальных символов |
| Только растровая графика типа bmp, jpg, tif, … | Также векторная графика типа dxf, plt, svg, … |
| Около 30 типов штрих-кодов линейный, 2D, GS1 и композитный | Около 35 типов штрих-кодов в том числе варианты ЕАН 18/128 |
| — | Мастер штрих-кодов для создания GS1/EAN /UCC-128, FACT/MH10 и QR |
| — | Опция верификатора штрих-кода |
| Поля запросов со свободным вводом | Дополнительные параметры поля запроса: маска ввода и список выбора |
| — | Мастер создания составных запросов |
| Счетчики основного типа числовое значение и инкремент + / -1 | Счетчики расширенных типов буквенно-цифровые и инкрементные +/ — n |
| — | Дополнительные параметры счетчика: частота, сброс и сохранение значения |
| — | Дата и время (включая смещение) Мастер создания формата |
| — | Формула: математические операции, манипулирование строками и т. д. |
| — | Базовый компилятор ABC с библиотекой кода |
| — | Переменные: источники данных с информацией о этикетке, принтере, компьютер и т. д. |
| — | Подключение к: Access, Excel, Базы данных OLE DB, ODBC, ASCII, Коннектор базы данных в автономном режиме |
| — | Средство просмотра кода JScript для обзора “на лету” |
| — | Импорт файлов JScript в формате LBL |
| Сохранение только в формат STC | Также экспорт в формат PDF и изображение PNG |
Системные Требования
• ПК с процессором 2 ГГц или выше
• 1 ГБ свободной оперативной памяти (в зависимости от операционной системы)
• 500 МБ свободного места на жестком диске
• 32/64 битная операционная система Microsoft®
— Windows Vista Windows Server 2008 Windows 7 Windows Server 2008 R2
— Windows 8 Windows Server 2012
— Windows 8.1 Windows Server 2012 R2
— Windows 10 Windows Server 2016
— Windows Server 2019
— Terminalserver / Citrix не поддерживаются.
• Права администратора на ПК при установке и активации
Детали
| Версия ПО |
Demo, Lite, Viewer, Print, Pro |
|---|
Operator's Manual

cablabel S3
2 Operator's Manual                                                                                                                        2
  for the following products

   Family                                           Art. Nr       Type
                                                   5588000        cablabel S3 Lite
                                                   5588009        cablabel S3 Demo
   Labelling Software cablabel S3
                                                   5588001        cablabel S3 Pro
                                                   5588010        cablabel S3 Pro Laser

  Edition: 01/2019 - Part. No.: 9009606

  Copyright
  This documentation as well as translation hereof are property of cab Produkttechnik GmbH & Co. KG.
  The replication, conversion, duplication or divulgement of the whole manual or parts of it for other intentions than its original
  intended purpose demand the previous written authorization by cab.
  Trademark
  Microsoft® is a registered trademark of the Microsoft Corporation.
  Windows® is a registered trademark of the Microsoft Corporation.
  TrueTypeTM is a registered trademark of the Apple Computer, Inc.
  Editor
  Regarding questions or comments please contact cab Produkttechnik GmbH & Co. KG.
  Topicality
  Due to the constant further development of our products discrepancies between documentation and product can occur.
  Please check www.cab.de for the latest update.
  Terms and conditions
  Deliveries and performances are effected under the General conditions of sale of cab.

  Germany                              USA                           Taiwan                             China
  cab Produkttechnik GmbH & Co KG      cab Technology, Inc.          cab Technology Co., Ltd.           cab (Shanghai) Trading Co., Ltd.
  Karlsruhe                            Chelmsford, MA                Taipei                             Guangzhou
  Phone +49 721 6626 0                 Phone +1 978 250 8321         Phone +886 (02) 8227 3966          Phone +86 (020) 2831 7358
  www.cab.de                           www.cab.de/us                 www.cab.de/tw                      www.cab.de/cn

  France                               Mexico                        China                              South Africa
  cab technologies s.à.r.l.            cab Technology, Inc.          cab (Shanghai) Trading Co., Ltd.   cab Technology (Pty) Ltd.
  Niedermodern                         Juárez                        Shanghai                           Randburg
  Phone +33 388 722 501                Phone +52 656 682 4301        Phone +86 (021) 6236 3161          Phone +27 11 886 3580
  www.cab.fr                           www.cab.de/es                 www.cab.de/cn                      www.cab.de/za

  Representatives in other countries on request.
Table of contents                                                                                                                                                          3

1         Introduction............................................................................................................................................. 5
1.1       Instructions................................................................................................................................................ 5
1.2       System requirements................................................................................................................................ 5
1.3       cablabel S3 specifications......................................................................................................................... 6

2         Installation............................................................................................................................................... 7
2.1       Installing on computer............................................................................................................................... 7
2.2       Program starting........................................................................................................................................ 9
2.3       Activation................................................................................................................................................. 10
2.3.1         Online activation.................................................................................................................................11
2.3.2         File activation.....................................................................................................................................11

3      Overview................................................................................................................................................ 12
3.1    Main interface.......................................................................................................................................... 12
3.2    Designer.................................................................................................................................................. 13
3.2.1     Drawing toolbar................................................................................................................................. 14
3.2.2     Special toolbar................................................................................................................................... 14
3.2.3     Edit toolbar........................................................................................................................................ 14
3.2.4     Font toolbar....................................................................................................................................... 15
3.2.5     Fill / Outline toolbar........................................................................................................................... 15
3.2.6     Arrange toolbar.................................................................................................................................. 16
3.2.7     Database toolbar............................................................................................................................... 17
3.2.8     View toolbar....................................................................................................................................... 17
3.2.9     Objects properties............................................................................................................................. 17
3.2.10    Layers................................................................................................................................................ 18
3.2.11    Status bar.......................................................................................................................................... 19

4     Configuration......................................................................................................................................... 20
4.1   Global settings........................................................................................................................................ 20
4.1.1    General tab........................................................................................................................................ 20
4.1.2    Expert mode...................................................................................................................................... 20
4.1.3    Grid tab.............................................................................................................................................. 21
4.1.4    Object tab.......................................................................................................................................... 21
4.1.5    Background tab................................................................................................................................. 22
4.1.6    Fill & outline....................................................................................................................................... 22
4.1.7    Color management............................................................................................................................ 23
4.2   Devices................................................................................................................................................... 24
4.2.1    Add a device...................................................................................................................................... 24
4.2.2    Delete a device.................................................................................................................................. 25
4.2.3    Rename a device.............................................................................................................................. 25
4.2.4    Configure a device............................................................................................................................ 25
4.2.5    Device options................................................................................................................................... 26
4.2.6    System devices / Document devices................................................................................................. 26

5       Use.......................................................................................................................................................... 27
5.1     New label creation................................................................................................................................... 27
5.1.1      New blank label................................................................................................................................. 27
5.1.2      New label using the wizard................................................................................................................ 28
5.1.3      New label from an existing label........................................................................................................ 28
5.2     Inserting objects in the document........................................................................................................... 28
5.2.1      Object settings................................................................................................................................... 29
5.2.2      Object Fill & outline........................................................................................................................... 29
5.2.3      Inserting texts.................................................................................................................................... 30
5.2.3.1          Negative text................................................................................................................................ 30
5.2.3.2          Visual information about the font properties................................................................................ 31
5.2.3.3          Highlighting keywords.................................................................................................................. 31
5.2.3.4          Text tags...................................................................................................................................... 32
5.2.3.5          Hyphenation................................................................................................................................. 33
5.2.3.6          Interpretation of Unicode syntax.................................................................................................. 33
5.2.3.7          Multi line and max width.............................................................................................................. 34
4   Table of contents                                                                                                                                                         4

    5.2.4      Inserting pictures............................................................................................................................... 35
    5.2.5      Inserting graphical objects................................................................................................................. 36
    5.2.6      Inserting barcodes............................................................................................................................. 36
    5.2.7      Inserting datasource.......................................................................................................................... 37
    5.2.7.1        Prompt fields................................................................................................................................ 37
    5.2.7.2        Counter........................................................................................................................................ 39
    5.2.7.3        Datetime fields............................................................................................................................. 40
    5.2.7.4        Formula........................................................................................................................................ 42
    5.2.7.5        Variables...................................................................................................................................... 44
    5.2.7.6        Database..................................................................................................................................... 45
    5.3     Document settings.................................................................................................................................. 45
    5.4     Label printing........................................................................................................................................... 46
    5.4.1      Printing on a two color printer............................................................................................................ 48
    5.4.2      Printing on a double sided printer...................................................................................................... 48
    5.5     Save a label on a memory card.............................................................................................................. 49
    5.5.1      Saving to a printer, a card reader or a file......................................................................................... 49
    5.5.2      Saving in a database......................................................................................................................... 50
    5.6     Keyboard shortcuts................................................................................................................................. 51

    6         Plugins................................................................................................................................................... 53
    6.1       Printer spooler......................................................................................................................................... 54
    6.1.1         Managing print jobs and printer functions......................................................................................... 54
    6.1.2         Printer status..................................................................................................................................... 55
    6.1.3         Memory card management .............................................................................................................. 55
    6.1.4         Printer display ................................................................................................................................... 56
    6.2       JScript code viewer................................................................................................................................. 56
    6.3       Variable information................................................................................................................................ 57
    6.4       Character map........................................................................................................................................ 57
    6.5       Compound prompts................................................................................................................................. 58
    6.6       Barcode wizards...................................................................................................................................... 59
    6.6.1         GS1/EAN/UCC-128 and GS1 Datamatrix wizard.............................................................................. 59
    6.6.2         FACT/MH10 wizard........................................................................................................................... 60
    6.6.3         QR wizard.......................................................................................................................................... 61
    6.7       ABC code................................................................................................................................................ 62
    6.8       Database wizard..................................................................................................................................... 63
    6.9       Layout table management....................................................................................................................... 65
    6.10      Keywords................................................................................................................................................ 66

    7         Appendix................................................................................................................................................ 68
    7.1       Installation parameters............................................................................................................................ 68
    7.2       Start parameters..................................................................................................................................... 70
1 Introduction 5
1.1 Instructions
Important information and instructions in this documentation are designated as follows:
Danger!
Draws your attention to an exceptionally grave, impending danger to your health or life.
Warning!
! Indicates a hazardous situation that could lead to injuries or material damage.
Attention!
! Draws attention to possible dangers, material damage or loss of quality.
Notice!
i Gives you tips. They make a working sequence easier or draw attention to important working processes.
Environment!
Gives you tips on protecting the environment.
Handling instruction.
Reference to section, position, illustration number or document.
Option (accessories, devices, special fittings).
Hour Information in the display.
1.2 System requirements
• PC with 2 GHz Processor or higher
• 32/64 bit Microsoft® Windows® operating system with latest updates:
Windows Vista Server 2008
Windows 7 Server 2008 R2
Windows 8 Server 2012
Windows 8.1 Server 2012 R2
Windows 10
• 1 GB available RAM (depending on the system)
• 500 MB available hard disk space
• Administrator rights on local computer for installation and activation
6 1 Introduction 6
1.3 cablabel S3 specifications
Print
Lite Pro Print
Server(1)
General functions
Languages:
English, French, German, Spanish, Italian, Polish
Chinese (simplified and traditional), Korean
Creating labels with layers management
Wizard-based user interface
cab labels formats
Printing labels
JScript code viewer
Unicode support
True WYSIWYG
Multiline texts, paragraph
TrueType fonts
Text alignment and decimals formatting
Max width of text and hyphenation
Text box with various markups (e.g. for highlighting allergens)
Graphic import Raster (bmp, jpg, tif, ...)
Vector (dxf, plt, svg, ...)
Color support
Background image or color
Linear, 2D, GS1 and composite types of barcodes (2)
Barcode wizard GS1/EAN/UCC-128, FACT/MH10 and QR
Prompt fields free
with input mask and choice list
Barcode verifier and compound prompts
Date and time including offsets and format wizards
Counter basic (numeric and increment +/-1)
advanced (alphanumeric, increment +/-n, reset, ...)
Formula: mathematical operations, manipulate strings, ...
Laser devices support (3) (3)
ABC basic compiler support with code library
Variable graphics and character map
Variables: datasources with information about the label, the printer, ...
View and control of the printer display(4)
Database functions
OLE DB, ODBC, ASCII (5) (5)
Database Connector
Query editor
Multiple tables and databases (5) (5)
Import / export functions
Print to file
Export to graphic PNG
Export to PDF
Import of LBL JScript files
Printing functions
Interfaces: serial, parallel, USB, Ethernet, WLAN
Number of native cab printers unlimited unlimited unlimited (6)
Printer spooler
Bidirectional communication
Standalone mode
Network printer (TCP/IP)
Windows printer
Table 1 Specifications
(1)
In progress (4) Depending on printer model and used port
(2)
Except EAN 18/128 barcodes (5) Run queries only
(3)
Specific version (6) Depending on license
2 Installation 7
2.1 Installing on computer
Notice!
i It is possible to do a silent installation of cablabel S3 directly in command line.
7.1 Installation parameters.
XX Insert the delivered CD-Rom in your computer, the installation should start automatically.
If the autorun does not start or if you have downloaded the installation file, double-click on the file
« cablabelS3_XXXX_Setup.exe » to begin the installation (where XXXX matches your version).
XX Select the installation language of the program.
Figure 1 Select installation language
XX Start installation and read the user license.
Figure 2 Start of installation program Figure 3 License agreement
8 2          Installation                                                                                               8

             XX Enter user information.

  Figure 4    User information

             XX The program will be installed by default in the displayed folder, you can change it only if required.

  Figure 5    Choose of target folder                                Figure 6    Choose of start menu folder
2          Installation                                                                                                             9

           XX Select the additional tasks to be done by the installation program and check the selected options summary.
           XX Click on Install.

Figure 7    Additional tasks                                     Figure 8    Installation summary

           XX Wait until the end of the installation.

Figure 9    Installation progress                                Figure 10 End of installation

2.2        Program starting
           After installing cablabel S3, an icon of the program is placed on the user desktop and/or in the start menu (depending
           on selected installation options).
           XX Start the program by double clicking on one of these icons.
10 2       Installation                                                                                  10

   2.3     Activation
           Depending on the installed version, an activation is needed before you can use the program.
            Attention!
       !    Except the Lite version, the program cannot be used without being activated.

           At the first start, a message will ask you to activate the program.

           Figure 11   Program activation

           After clicking on yes, the activation wizard starts.

           Figure 12   Activation wizard
2       Installation                                                                                                              11

2.3.1   Online activation

        Figure 13   Online activation

        XX Enter product key provided with your purchase.
        XX Click on the Activate button.
           The software will be automatically activated after some seconds through internet.
        Notice!
    i   An internet access is required for online activation.
        Otherwise you will have to use the file activation.

2.3.2   File activation

        Figure 14   File activation

        If you don't have an internet access or if online activation did not work, it is possible to use this alternate method.
        An activation request will be sent after a few steps.
        In this case, after entering your product key by clicking on the Request button an email will be prepared for sending
        to our activation service. The activation file will be returned to you by email once generated.
        This file must be transferred to the computer where cablabel S3 is installed.
        XX Select the received activation file with the suited button.
        XX Click on the Activate button.
        XX After activation, the software will restart automatically.
12 3         Overview                                                                                                  12

   3.1       Main interface
             After activation and restarting, the welcome page appears:

         2                       1
                                                                                                                  10   11

                                                                                                           3

                                                                          4

                                                 5

                                                 6

                                                                              8

                                                                                            9
                                       7

             Figure 15    cablabel S3 welcome page

              1.    Quick access bar             Quick access to the most common commands (open, save ...)
              2.    Main button                  Access to main software commands
              3.    Toolbar                      Access to different objects and properties of selected ribbon
              4.    Welcome page                 Starting page
              5.    New label                    Create a new label
              6.    Open label                   Open an existing label
              7.    Status bar                   Status and information
              8.    Recent files                 List of last opened labels, with favorites pinning possibility
              9.    File information             Preview and information of the selected label
              10.     /                          Show / hide the toolbar
              11. Help button                    Access to the operator's manual you are currently reading
3 Overview 13
3.2 Designer
The Designer let you create a label and place different objects on it.
1
2
3 4
5
Figure 16 Designer
1. Opened labels Tab with the opened labels
2. Layout orientation Portrait / Landscape (orientation without objects by holding "Ctrl" key)
3. Layers Layers with the different objects
4. Prompt list List with the different prompt fields of Formular type
5. Label Label with the different objects
Notice!
i The Layers (3) and the Prompt list (4), are available under the Display options button in the Designer
ribbon. 5.3 Document settings
The properties of the different prompts are also available by right-clicking in the Prompt list (4).
14 3       Overview                                                                                                   14

   3.2.1   Drawing toolbar
           The Drawing toolbar is composed of the most used objects on a label.

                       1              2       3       5              1.   Selection cursor
                                                                     2.   Text
                                                                     3.   Picture
                                                              7      4.   Line
                                                                     5.   Rectangle and square
                                                                     6.   Polygon
                                                                     7.   Circle and ellipse
                                  4                   6

            Figure 17 Drawing toolbar

           Notice!
       i   "Ctrl" key allows to draw the objects with a free angle, instead of an horizontal or vertical alignment.
           "Alt" key allows to draw the objects starting from the center, instead of the top left corner.

   3.2.2   Special toolbar
           The Special toolbar is composed of special objects to insert a barcode or a datasource.
                              1           2 3                        1.   Barcode
                                                          5          2.   Prompt field
                                                          6
                                                                     3.   Date / time
                                                                     4.   Formula
                                                                     5.   Counter
                                                                     6.   ABC code
                                              4

            Figure 18 Special toolbar

   3.2.3   Edit toolbar
           The Edit toolbar is composed of basic edition commands.
                                                                     1.   Paste
                              1           2       3                  2.   Cut
                                                                     3.   Delete
                                                                     4.   Undo
                                                      6
                                                                     5.   Redo
                                                                     6.   Copy

                                          4       5

            Figure 19 Edit toolbar
3 Overview 15
3.2.4 Font toolbar
The Font toolbar is composed of different text formatting commands.
1. Font face
2. Font size (height) in mm
1 2
3. Bold
4. Italic
5. Underline
6. Left alignment
7. Center alignment
3 4 5 6 7 8 9 10 8. Right alignment
9. Font width
10. Advanced properties 5.2.3 Inserting texts
Figure 20 Font toolbar
3.2.5 Fill / Outline toolbar
The Fill / Outline toolbar is composed of the different commands to change the filling and outline of a drawing
object.
1 3 5 1. Fill color
2. Fill style
3. Outline color
4. Outline width
5. Outline style
6. Advanced properties 5.2.2 Object Fill & outline
2 4 6
Figure 21 Fill / Outline toolbar
16 3       Overview                                                                                                            16

   3.2.6   Arrange toolbar
           The Arrange toolbar is composed of different commands to adjust the objects position.
                                                                 1.   Alignment of selected objects
                              1          2
                                                                 2.   Arrangement of selected objects

                      Figure 22   Arrange toolbar

                                                                 1.   Horizontal alignment of selected objects
                                                                 2.   Vertical alignment of selected objects
                                                 1
                                                                 3.   Centering of selected objects in the label
                                                                 4.   Rotation of selected objects

                                                 2

                                                 3

                                                 4

           Figure 23 Alignment options

                                                                 1.   Objects stack up position in the label (front)
                                             1
                                                                 2.   Objects stack up position in the label (back)
                                                                 3.   Group / ungroup selected objects
                                             2                        Selected objects are only displayed as grouped, but
                                                                      sent individually to the printer.
                                                                 4.   Pack / unpack selected objects
                                             3                        Selected objects are merged and sent to the printer as
                                                                      one picture.

                                             4

           Figure 24 Arrange options
3 Overview 17
3.2.7 Database toolbar
The Database toolbar is composed of the different commands to connect and use a database.
1. Create / change database connection
2. Display the result of the query
1
3. First record
2
4. Previous record
5. Actual record position
6. Next record
3 4 5 6 7 7. Last record
Figure 25 Database toolbar
Notice!
i
The database toolbar appears only when the database plugin is loaded. 6.8 Database wizard
This plugin is not available in every versions of cablabel S3.
3.2.8 View toolbar
The View toolbar is composed of the different visual commands.
1. Display view settings
1
2. Label and paper properties
2
Figure 26 View toolbar
Notice!
i It is possible to set a picture to the label background in the display options.
If you use pre-printed labels, this background picture can for example display your pre-printed label.
So you have a real view of your resulting label when placing objects on it.
3.2.9 Objects properties
Different options are also available by right-clicking on the objects from label or layers:
Figure 27 Objects properties
18 3        Overview                                                                                                                        18

   3.2.10   Layers
            Layers contain all different objects composing a label.
            Each layer can be hide or locked. Each object on the layer can also be individually hide or locked in order to prevent
            moving.
            A layer can also be assigned to a pre-defined printing resolution. For example one layer for a 300 dpi resolution.

                                                                        1.   Add a new layer
                                                        4 5             2.   Delete selected layer
                                                                        3.   Expand / Collapse all layers
              1           2                  3                          4.   Pin layers window
              6                                               12        5.   Close layers window
                                                                        6.   Edit / lock layer
                                                                        7.   Object visible / invisible on display and printing
              7
                                                                        8.   Object lock
                                                              13        9.   Object invisible only on printing but sent to the device
                                                                        10. Layer visibility
                                                                        11. Object locked by the layer
                                                                        12. Neutral layer
              8                                               14        13. Object preview on label
                                                                        14. Object linked to another (for example linked to a datasource)
                                                                        15. 300 dpi layer
              9
                                                                        16. Barcode verifier enabled

              10                                              15

              11

                                                              16

             Figure 28 Layers

            Notice!
       i    Layer objects assigned to a specific resolution, will only be printed on devices supporting the same resolution.
            For example objects from a 200 dpi layer, will not be printed on a 300 or 600 dpi device.
            This can be useful to display the real size of a barcode.
3             Overview                                                                                                                          19

              Different options are available by right-clicking on the layers:
                                                                         1.      Display the default objects properties window
         1
                                                                         2.      Apply the properties to all objects of the selected layer
         2
                                                                         3.      Apply the properties to the selected object
         3
                                                                         4.      Show a preview of the object in the label
         4
                                                                         5.      Neutral layer device-independent
         5
                                                                         6.      Layer forced for 200 dpi devices
         6
                                                                         7.      Layer forced for 300 dpi devices
         7
                                                                         8.      Layer forced for 600 dpi devices
         8
                                                                         9.      Layer forced for laser devices
         9
                                                                         10. Force printing layer for the corresponding print resolution
         10                                                              11. If printing is not allowed, the objects in the layer are visible
         11                                                                  on the screen but are not sent to the device
         12                                                              12. Allow to rename selected layer
         13
                                                                         Only if there are several layers in the document:
         14
                                                                         13. Bring the selected layers forward

         15
                                                                         14. Bring the selected layers to front
                                                                         15. Send the selected layers to back
         16
                                                                         16. Send the selected layers backward
               Figure 29 Layers properties

3.2.11        Status bar
              The status bar display different states and information of the active label.
                            2       4       6                                                                     11 13    15       16

                 1              3       5        7      8         9       10                                       12 14                 17

              Figure 30    Status bar

               1.    Cursor coordinates (in mm) on label
               2.    Show / hide dot grid
               3.    Show / hide line grid
               4.    Enable / disable snap to grid
               5.    Show / hide cursor guide
               6.    Enable / disable last object repetition
               7.    Current time
               8.    Switch to printer spooler
               9.    Num Lock status
               10. Caps Lock status
               11. View adjust to the page width
               12. View adjust to the whole page
               13. Enable / disable automatic resizing of the page when the window is resized
               14. Zoom on selection
               15. Zoom level
               16. Zoom level slider
               17. cablabel S3 version
20 4 Configuration 20
4.1 Global settings
cablabel S3 settings are available under the Settings button in the General ribbon. You can for
example change the software language or style (color theme).
Attention!
! These settings are the default settings which will be applied when creating a new label.
4.1.1 General tab
In this tab you will find the parameters related to the program.
1. Application style (color theme)
2. Application language
3. Show / hide the Label Creator Wizard
1 4. Show / hide the display of tooltips on objects
2
5. Enable / disable the Expert mode
6. Enable / disable the creation of a backup file
3
7. Includes or not the layout name in the picture
4
name calculation generated for a printer
5
6 8. Do not resend font or image if it can be found
7 locally on the device
8 9. Default search folder where pictures are stored
10. Default extension for picture files
9
10
Figure 31 General global settings
4.1.2 Expert mode
The Expert mode allows access to some features reserved for advanced users.
It allows:
- to print documents without correction even if the parameters are outside the device specifications
Notice! 5.4 Label printing
- in standalone mode, to disable the automatic TrueType font uploading of fixed texts
5.5 Save a label on a memory card
- to display the System devices tab when configuring a device if a document is opened
4.2.6 System devices / Document devices
- to access the Color management for each object 5.2.2 Object Fill & outline
4       Configuration                                                                                                            21

4.1.3   Grid tab
        In this tab you will find the display-related settings.

                                                                       1.   Grid type (none, dots or lines)
                                                                       2.   Grid color
    1                                                       2          3.   Grid size
    3                                                       4          4.   Group settings
                                                                       5.   Enable / disable automatic alignment of objects on
                                                                            the grid
                                                                       6.   Show / hide the cursor guide
                                                            5
                                                                       7.   Show / hide the rulers
                                                            6
                                                                       8.   Show / hide numbers on rulers
    7                                                       10         9.   Origin position of the rulers
    8                                                       11         10. Rulers color
    9
                                                                       11. Rulers size

         Figure 32 Global grid settings

4.1.4   Object tab
        In this tab you will find the parameters related to objects.

                                                                       1.   Settings on mouse over an object on the label
                                                                       2.   Settings when selecting an object on the label
    1                                                             2

         Figure 33 Global objects settings
22 4 Configuration 22
4.1.5 Background tab
In this tab you will find the settings related to the background.
1. Background color
2. Label background color
1 3. Path and name of the label background picture file
4. Browse your computer to select a picture file
2 5. Delete the label background picture
4 5
6. Show / hide the label background picture
3
7. Enable / disable the transparency of the label
6 10
background picture (if this picture supports
7 11 transparency)
8
8. Enable / disable saving the picture in the label file
9
9. Specify the picture position
10. Picture offset in horizontal direction
11. Picture offset in vertical direction
Figure 34 Global background settings
4.1.6 Fill & outline
In this tab you will find the parameters related to the filling and outline of objects as well as text fonts.
1. Objects fill settings
2. Objects outline settings
1 2
3. Font type and size
4. Font style
5. Color management for color printers page 23
3
4
5
Figure 35 Global fill and outline
4           Configuration                                                                                                                 23

4.1.7       Color management

    i       Notice!
            Picture split color settings are only used when printing on a two color printer.

            When printing on a two color printer (XC ...), you can specify the secondary color to print.
            For this you can select a color from the list or pick it directly on the screen or in your label using the eyedropper tool.
            The objects defined with this color will then automatically send to the secondary color printhead.
            Different settings to adjust the tolerance of this color are also available.
            The gamma correction allows you to change the rendering of the lightest colors.
            Colors auto levels redefines the color scale by applying the lightest pixel to the white color and the darkest one to the
            black color.

                                                                              1.   Show / hide the help panel
                                                                          1
                                                         3                    2.   Picture split color
        2                                                                     3.   Pick color from screen
                                                                              4.   Hue and saturation tolerance ranges
        4
                                                                              5.   Enable / disable separation on head 1
                                                                              6.   Enable / disable gamma correction
                                                                              7.   Enable / disable automatic correction of color
        5
                                                                                   levels

        6

        7

             Figure 36 Color management
24 4           Configuration                                                                                                                24

   4.2         Devices
               All cab devices drivers are build-in in cablabel S3.
               Devices are installed in the main application and their print settings will be saved in the document after the first
               printing.
                Attention!
       !        Unlike other labelling software, in cablabel S3 the label is created regardless of the device or resolution.
                The label can then be printed on any device.
                So, there is no default or active device.

   4.2.1       Add a device
               To add a new device click on the Configure printers list button                      in the general ribbon or click on the
               Printers tab on the welcome page.
               XX Select the device type (1) and device model (2) to install from the right list.
               XX Double-click on selected model (2) or click on Install selected device button (3) to install it.
                  It will be added on the left in the installed devices (4).
               XX Validate with the OK button (5).

           4
                                                                            1                Attention!
           6                                                                         !       With cablabel S3 Pro, it is possible
                                                                                             to use any other non native device
                                                                                             (6), provided that it is detected and
                                                                                             installed as a printer on Windows.

                                                                            2                However, standalone mode and
                                                                                             "Replace" cannot be used on these
                                                                                             devices, and the data integrity is not
                                                                                             guaranteed on the printout.

                                                                            3

                Figure 37 Devices list                    5

                                                                         After adding a device, the port selection window opens
                                                                         automatically.
           1                                                             XX Select port type (1) and port settings (2).
           2
                                                                                     Notice!
                                                                                i    The available port types depend on the selected
                                                                                     device.

                Figure 38 Port settings
4       Configuration                                                                                                               25

4.2.2   Delete a device
        XX Select device model to delete in the installed devices list on the left.
        XX Right-click on it and select the Remove device command.

4.2.3   Rename a device
        Each device is installed with a default name.
        To change this name:
        XX Select device model in the installed devices list on the left.
        XX Right-click on it and select the Rename device command.
        XX Enter new name.

4.2.4   Configure a device
                                                                  To configure a device :
                                                                  XX Select the device to configure in the installed devices list
                                                                     on the left.
                                                                  XX Double-click on this device or right-click and select
                                                                     Configure device.
                                                                  XX Change the wished settings.
                                                                  XX Validate with the OK button.

                                                                              Notice!
                                                                       i      A non native device can be configured in the
                                                                              same way from cablabel S3 Pro, with the help of
                                                                              the Windows driver provided with this one.

         Figure 39 Device settings
26 4       Configuration                                                                                                             26

   4.2.5   Device options
                                                                   To add a device option :
                                                                   XX Select the device to configure in the installed devices list
                                                                      on the left.
                                                                   XX Double-click on this device or right-click and select
                                                                      Configure device.
                                                                   XX Go to Options tab.
                                                                   XX Select connected option in the list.
                                                                   XX Change the wished settings.
                                                                   XX Validate with the OK button.

            Figure 40 Device options

   4.2.6   System devices / Document devices
           When a document is printed, system devices settings are automatically copied into it.
           By next printing these document settings are automatically recalled.

           Figure 41   System / document devices list

           Notice!
       i   The System devices tab is only displayed in Expert mode.
           By default it is the Document devices tab which is displayed.

            Attention!
       !    An already printed document will use the device settings saved into it.
            To change these settings, you have to change them in the device settings of this document and not in the
            system settings.
5 Use 27
5.1 New label creation
There are 3 possibilities to create a new label on the welcome page.
Figure 42 Welcome page
5.1.1 New blank label
XX Click on the New label button to start the wizard.
XX Set the information of your label and its layout.
XX Click on the Next button.
Attention!
! Label width (1)
always correspond
to the printing width,
regardless to its
orientation.
1
Notice!
i The layout country of label
(2) is used for:
2 - the text language
Hyphenation
- the datetime fields in
regional format
Datetime fields
- the printing of numbers
with decimal separator
Figure 43 Label Creator Wizard
28 5         Use                                                                                                                       28

   5.1.2     New label using the wizard
             The Label Creator Wizard allows you, for example, to create your label from a pre-defined format among many
             existing references.

              Figure 44 Label Creator Wizard for new labels              Figure 45 Pre-defined label formats

   5.1.3     New label from an existing label
             This option allows you to easily duplicate a label. You can choose to keep its content or only the label layout, the
             printing and databases settings.

             Figure 46   Duplicate a label

   5.2       Inserting objects in the document
             Notice!
         i   Different settings are available for the objects. They are described in the help panel on the right, which is hidden by
             default. You can display this panel by clicking on the "i" icon (1) at the top right of the object properties window.

                                     1

              Figure 47 Show / Hide help                                   Figure 48 Help panel
5           Use                                                                                                                             29

5.2.1       Object settings
            In the General tab you will find the general settings of an object.

                                                                                                                Attention!
                                                                                                        !       The object name (1)
                                                                                                                and the JScript name
        1
                                                                                                                (2) are limited to 32 non
        2
                                                                                                                special characters.
        3
                                                                                                                They must also be
                                                                                                                unique on the label.

                                                                                                            Notice!
        4                                                                                               i   Depending on the object,
                                                                                                            some size and position
                                                                                                            settings (4) are calculated
                                                                                                            automatically or cannot be
        5                                                                                                   changed.

        6

             Figure 49 General settings of an object

             1.   Name of the object to identify it in cablabel S3       2.   Name used on printer for example in standalone mode
                  (layers, datasource, etc.)
             3.   Free text available for the user                       4.   Size and Position of the objet in the label
             5.   Rotation of the object                                 6.   Allows to format a number with decimal separator

5.2.2       Object Fill & outline
            In this tab you will find the parameters related to the filling and outline of an object.

                                                                                                            Notice!
                                                                                                        i   The option (2) extracts the
                                                                                                            lightness value from
                                                                                                            the fill color and convert
                                                                                                            it to corresponding dot
        1                                                                 3                                 density (0%, 6%, 12%,
                                                                                                            25%, 38%, 50%, 100%).
        2                                                                 4                                 This allows to print a filled
                                                                                                            shape in grayscale.
                                                                                                            The custom Color
                                                                                                            management for each
        5
                                                                                                            object (6) is only displayed
                                                                                                            in Expert mode.

        6

             Figure 50 Fill and outline parameters of an object

             1.   Fill color and style of the object                          2.   Use the lightness of color
             3.   Outline color and style of the object                       4.   Outline width
             5.   Specific parameters depending on the object type            6.   Custom color management for this object
30 5 Use 30
5.2.3 Inserting texts
To insert a text:
XX Select the Text object in the toolbar 3.2.1 Drawing toolbar
XX Click somewhere in the label where you want to insert the object
XX Enter the wished text in the edit field (1)
XX Select the different options related to the text (2) such as font, size ...
XX Validate by clicking on the OK button (9)
Notice!
i Move the mouse over the
1 kerning (5) and the text (6)
to get some
Visual information about
the font properties.
The Multi line options
(7) allow you to set the
2 display of a long text or
with a dynamic content
For more information.
3 4
Multi line and max width
It is possible to insert
7
5 special characters in
6 a visual form, by right-
clicking (8) in an editable
field of a text, a formula or
a barcode.
For more information
6.4 Character map
8
Figure 51 Inserting texts 9
5.2.3.1 Negative text
It is also possible to put a text in negative and to specify the size of the frame around this text. To do this:
XX Enable the negative option by clicking on the button (3)
XX Define the size of the frame by clicking on the button (4)
Figure 52 Text in negative
XX Validate by clicking on the OK button
5 Use 31
5.2.3.2 Visual information about the font properties
Figure 53 Font properties Figure 54 Kerning
Height : size of font in mm Squeeze : width of text in %
MaxWidth : max width of paragraph in mm LineSpacing : line spacing for a paragraph in %
BaseLine : baseline for the characters in mm Tracking : letter spacing for the characters in mm
5.2.3.3 Highlighting keywords
You can highlight (bold, italic ...) automatically specific words in a sentence or a text (ex allergens).
For this, cablabel S3 has a built-in list of pre-defined keywords containing the most common allergens in different
languages. You can also create your own custom list of keywords. 6.10 Keywords
When creating or editing a text:
XX Select the Keywords (1) tab
XX Enable the option Keywords formatting (2)
XX Choose the type of settings to use (3)
XX Validate by clicking on the OK button
For specific settings:
XX Select the wished language(s) from the dropdown list (3)
XX Select the type of formatting (bold, italic...) (4)
1
Attention!
2
! If the option Keywords
formatting (2) is
3 used, the text object is
sent to the printer as a
picture.
4
Figure 55 Keywords formatting
32 5         Use                                                                                                                      32

   5.2.3.4   Text tags
             The tags allow you to change manually the formatting of a text part. They often work in pairs, with an opening tag and
             a closing tag, and they can also overlap.

              Attention!
       !      If text tags are used, the text object is sent to the printer as a picture.

              Figure 56 Text with tags                                                              Figure 57 Result on printout

              Opening tag             Closing tag              Description
                                                        Bold
                                                        Italic
                                                        Underline
                                                        Empty frame around the characters
                                      Characters color with the value of the color in hexadecimal format
                                                               (rr, gg, and bb from 00 to FF)
                                                Converts the characters to uppercase letters
                                                Converts the characters to lowercase letters
                                          Full frame around the characters with the filling color in
                                                               hexadecimal format (rr, gg, and bb from 00 to FF)
                                                    Characters in negative
                                              Size of font with the height h in mm
                                                 Aligns the characters of a line to the left of the text area
                                       Aligns the characters of a line to the center of the text area
                                                Aligns the characters in a line to the right of the text area
                                                           Inserting a line break
             Table 2   Tags list
5 Use 33
5.2.3.5 Hyphenation
When creating a text, you can select to enable or not the word hyphenation at end of line in a paragraph with a
maximum defined width.
When creating or editing a text:
XX Select the Language tab (1)
XX Select the language for the text in the list (2)
XX Enable / disable Hyphenation by clicking on the checkbox (3)
XX Validate by clicking on the OK button
Notice!
i The text language (2) is
selected by default:
1
- first depending on the
layout country of label
New blank label
- or else depending on the
application language
2 Global settings
3
Figure 58 Hyphenation
5.2.3.6 Interpretation of Unicode syntax
When creating a text, you can select to enable or not the interpretation of Unicode syntax, for the characters entered
manually or inserted from the character map.
If checked, the [U:x] syntax is directly interpreted, in order to see in cablabel S3 the rendering of Unicode characters,
as they will then be reproduced on printout or with a barcode reader.
Attention!
! Depending on the characters, it is sometimes necessary to disable the interpretation. For example using a
text object containing a carriage return as a datasource for a barcode.
When creating or editing a text:
XX Select the Miscellaneous tab (1)
XX Enable / disable Interpretation of Unicode syntax by clicking on the checkbox (2)
XX Validate by clicking on the OK button
With interpretation:
1
Without interpretation:
2
Figure 59 Interpretation of Unicode syntax Figure 60 Result in cablabel S3
34 5         Use                                                                                                                        34

   5.2.3.7   Multi line and max width
             By default a text without carriage return is always displayed on a single line. A long text or with a dynamic content,
             requires then a fixed paragraph width.

             To define a paragraph width:
             XX Select the Font tab (1)
             XX Increase / Decrease the Line spacing (2) which is specific to each font
             XX Specify the Max width of paragraph (3) at which a line break will then automatically be done

                                                                                                           Attention!
                                                                                                   !       The automatic line
                                                                                                           break does not work
                                                                                                           in standalone mode,
                                                                                                           because each line of
                                                                                                           a paragraph is sent
                                                                                                           individually to the
         1                                                                                                 printer.
                                                                                                           And if the contents
                                                                                                           of the paragraph is
                                                                                                           dynamic, the text object
                                                                                                           is sent to the printer as
                                                                                                           a picture.

                                                                                               2
                                                                                               3

              Figure 61 Multi line

             It is also possible to use the max width options:
             XX Select the Miscellaneous tab (4)
             XX Enable the option Reduce font size (5) to reduce automatically the size of text, as long as it exceeds the Max
                width of paragraph (3).
                And when the Minimum size limit (6) is reached, a line break is then done.
             XX Enable the option Truncate (7) to cut the characters beyond the Max width of paragraph (3) and to not do a
                line break
             XX Validate by clicking on the OK button

                                                                                                           Attention!
                                                                                                   !       If the option Reduce
                                                                                                           font size (5) is used,
                                                                                                           the text object is sent to
                                                                                                           the printer as a picture.

                                                 4
                                                                                                          Notice!
                                                                                                   i      It is possible to combine
                                                                                                          the Reduce font size
                                                                                                          (5) and Truncate (7)
                                                                                                          options. In this case,
                                                                                                          the text is first reduced
                                                                                                          until the minimum size,
         5
                                                                    6                                     then truncated if it still
                                                                                                          exceeds the max width of
         7
                                                                                                          paragraph.

              Figure 62 Max width options
5 Use 35
5.2.4 Inserting pictures
To insert a picture:
XX Select the Picture object in the toolbar 3.2.1 Drawing toolbar
XX Click somewhere in the label where you want to insert the object and draw the frame containing the picture at the
required size
XX Select a picture file (1) on your computer
XX Validate by clicking the Open button (2) to insert the object
Figure 63 Inserting pictures 1 2
You can edit the properties of the picture to adjust various parameters, for this:
XX Right click on the previously inserted picture and select Properties or double click on the picture
XX Adjust the different parameters
Notice!
i It is possible to use in
1 the filename (1) the
environment variables of
Windows.
For example %PUBLIC%
instead of C:\User\Public.
The vector picture
properties (2) are only
used for some vector
2
pictures, as for example
DWG, DXF, PLT, SVG.
Figure 64 Picture properties
36 5 Use 36
5.2.5 Inserting graphical objects
To insert a graphic:
XX Select the graphical object (line, rectangle...) in the toolbar 3.2.1 Drawing toolbar
XX Click somewhere in the label where you want to insert the object and draw the graphic
XX Click again to insert the object
5.2.6 Inserting barcodes
It is possible to select between many type of linear (1D) and two-dimensional (2D) barcodes.
To insert a barcode:
XX Select the Barcode object in the toolbar 3.2.2 Special toolbar
XX Click somewhere in the label where you want to insert the object
XX Select barcode type (1)
XX Set its properties (2)
XX Specify a fixed value by using the input mask (3) or, depending on the barcode type, use the barcode wizard (4)
6.6 Barcode wizards
XX Validate by clicking the OK button (5)
1
2
Attention!
6 ! The Verifier (6) only works
on one barcode per label.
7
4
3
Figure 65 Barcode 5 Figure 66 Barcode verifier
Attention!
! The properties (2), the input mask of the barcode value (3), the wizard (4) or the Mode of the verifier (7) are
depending on the selected barcode type.
You can edit the properties of the barcode to adjust other parameters, for this:
XX Right click on the previously inserted barcode and select Properties or double click on the barcode
XX Adjust the different parameters
5 Use 37
5.2.7 Inserting datasource
Notice!
i Most of special objects are composed of two elements: the object itself acting as a datasource and a linked text
taking resulting content.
5.2.7.1 Prompt fields
A prompt field allows the user to enter data before printing without modifying the layout.
To insert a prompt field:
XX Select the prompt field object 3.2.2 Special toolbar
XX Adjust the different parameters
There are two types of prompt fields (2) :
• Standalone: the prompt is asked for on the printer's display and the user fills it directly on the printer.
• Formular: the user fills the prompt in the software, before the printing starts or in the prompt list.
1. Activate / deactivate the prompt field
2. Type of prompt field
3. Prompt text displayed to the user for the input
1 4. Optional value proposed to the user, with the
2 possibility to create a choice list page 38
3
4 5. Text displayed only in the software, if there is no
5 default value or current value.
6 This text is necessary to place and to set the prompt
7 field in the label.
8 6. Length of the input line (0 = no length limitation)
9 7. Filters the input values. This is useful to avoid the
10
input of wrong values page 38
11
8. It will be asked again for this prompt each "n" labels in
12 standalone mode (0 = it will be asked for this prompt
only at the beginning of the print job)
9. Deletes the input value between repeated prompts
10. It will be asked again for this prompt at each iteration
in standalone mode during a printing loop
11. It will be asked again for this prompt, if no record could
be found in a database connected in standalone mode
Figure 67 Prompt field 12. Edit the Compound prompts list
13
6.5 Compound prompts
XX Validate by clicking on the OK button (13)
XX Click somewhere in the label where you want to insert the object
Notice!
i The display of several prompts,
is ordered according to their
positions in the layers.
Attention!
! Depending to their
embedding, in for example a
formula or a query, the order
will be defined automatically.
Figure 68 Layers Figure 69 Prompt list
38 5           Use                                                                                                                         38

               •     Choice list with fixed content
                                                                          1.   Select the Fixed list type
           1                     5                                        2.   Enter the text to add to the list
                                                                          3.   Click the Add button to add the text to the list (4)
           4                                                              4.   You can also choose to Sort the list (5)
                                                                               alphabetically
                                                                          5.   Validate by clicking on the OK button (6)

                                         3

           2

                                             6

                   Figure 70 Fixed choice list

               Notice!
       i       When the type of prompt field is set to Standalone, the operation will depend on the printer model.
               Only printers with touchscreen support this feature.

               •     Choice list with dynamic content
                                                                          When the type of prompt field is set to Formular, it is
                                 4                                        possible to select a choice list with a dynamic content
           1                     5                                        from a dataset of a database.
                                                                          1.   Select the Dataset list type
                                                                3
                                                                          2.   Select the index field, used for the search and the
           2                                                                   positioning
                                                                          3.   Select the listed field(s), with at least the index field
                                                                          4.   You can also choose to Sort the list
                                                                               alphabetically
                                                                          5.   The user can enter other data than those listed by
                                                                               disabling Fixed list
                                                   6
                                                                          6.   Validate by clicking on the OK button

                   Figure 71 Dataset choice list

               •     Input mask
                                                                          1.   Length of the input line (0 = no length limitation)
                                                                          2.   Type of allowed character
           1                                                              3.   Allow or not the space character
                                         4                                4.   Type of allowed case
           2
                                                                          5.   Validate by clicking on the OK button
           3

                                                                                     Notice!
                                                                               i     For a prompt field of Formular type, the
                                                                                     input value is automatically converted to the
                                                                                     selected case type (4).

                                     5

                   Figure 72 Mask settings
5 Use 39
5.2.7.2 Counter
A counter allows to create an automatic counting during printing.
To insert a counter:
XX Select the counter object 3.2.2 Special toolbar
XX Adjust the different parameters
1. Kind of counter, numeric, alphabetic, alphanumeric or
hexadecimal.
2. After printing, the counter is reset to its start value.
1
2
3. The current counter value is saved on the memory
3 card of printer.
Allows for example to continue the counting on
4 multiple print jobs in standalone mode.
4. The current counter value is saved to a file on the
5 computer.
6 Allows for example to continue the counting on
7 multiple print jobs from different computers.
8
5. Start value, then current value of the counter.
6. Maximum value of the counter and number of digits
for the text mask. The counter will restart at 0 after
reaching this value.
7. Increment value which can be positive or negative
8. Number of labels to print between each increment
Attention!
Figure 73 Counter
9 ! The option Save the value in the
printer (3) only works on one counter per
label.
XX Validate by clicking the OK button (9)
XX Click somewhere in the label where you want to insert the object
40 5 Use 40
5.2.7.3 Datetime fields
A datetime field allows to do a timestamp during printing.
To insert a datetime field:
XX Select the datetime object 3.2.2 Special toolbar
XX Adjust the different parameters
1. Select the wished datetime format from the list of
predefined formats
2. Tabs of date, time and offsets parameters
3. Wizard to create a custom datetime format or datetime
offsets
1
4. Allows to insert a char in the custom format, which can
2
for example be used as a separator.
Enter wished char in the editable field, and click on the
Add button to insert it.
3 5. Allows to define or modify a custom format, either:
- by using the wizard in the date / time tabs.
4 - by entering in the editable field the different
date / time parameters listed below.
5 6 - by clicking on the "..." button to select a datasource
containing the date / time parameters.
7
6. Deletes the custom format or the link to datasource
7. Use the computer's clock instead of the printer's clock.
If checked, the datetime fields will not be updated in
standalone mode.
Figure 74 Datetime field
Date parameters:
- d: numeric day in 1 or 2 digits, 1-31
- dd: numeric day always in 2 digits, 01-31
- dd2: first 2 letters of day in regional format (ex: th for thursday)
- ddd: first 3 letters of day in regional format (ex: thu for thursday)
- dddd: complete weekday name in regional format (ex: thursday)
- d1: numeric day of the year always in 3 digits, 001-366 (ex: 045 for the 14th of february)
- w or ISOWDay: numeric day of the week in ISO standard format, 1-7 with 7 for sunday
- w0: numeric day of the week, 0-6 with 0 for sunday
- ww: numeric week in 1 or 2 digits, 1-53
- ww2: numeric week always in 2 digits, 01-53
- m: numeric month in 1 or 2 digits, 1-12
- mm: numeric month always in 2 digits, 01-12
- mmm: first 3 letters of month in regional format (ex: Jan for january)
- mmmm: complete month name in regional format (ex: January)
- yy: numeric year in 2 digits
- yyyy: numeric year in 4 digits
- Date: date with separators in regional format
- ISODate: numeric date in ISO standard format (ex: yyyymmdd)
- ISOOrdinal: numeric date in ISO ordinal format (ex: yyyyd1)
Notice!
i The weekday name, the month name and the date with separators in regional format, will be printed depending on
the layout country of label or the country of device 5.1.1 New blank label.
На чтение 11 мин Просмотров 1.1к. Опубликовано 24.10.2020
Программное обеспечение для маркировки Cablabel S3 Proот CAB является решением для профессионального дизайна этикеток в промышленном секторе. В программу интегрированы три основные функции: создание, печать и управление заданиями на печать этикеток. Программа разработана по модульному принципу и может быть постепенно адаптирована к вашим потребностям. Для упрощения ваших задач был создан полный набор функций и инструментов: в программу включены расширенные функции счетчика, поля даты, формулы и соединение с базой данных. В программном обеспечении cablabel ваши индивидуальные отпечатки этикеток являются гибкими, поскольку программа может подключаться ко всем системам этикеток CAB. Cablabel также поддерживает автономный режим, а такие элементы, как JScript Viewer, интегрируются через плагин, чтобы наилучшим образом поддерживать нативное программирование Jscript. Поскольку cablabel также может импортировать уже существующие файлы JScript, переключение легко и быстро. Если метка изменяется в интерфейсе конструктора, информация автоматически обновляется в Jscript-Viewer (в режиме реального времени). Специальные функции, такие как Database Connector или Barcode Analyzers, могут быть легко интегрированы.
Функции:
cablabel S3 Lite
cablabel S3 Pro
Поставляется с каждым принтером
Лицензия на компьютер по запросу
Совместим только с кабельными принтерами
Поддерживает все принтеры, обнаруженные и установленные в Windows
Дополнительные параметры текста: максимальная ширина и переносы
Текстовое поле с различными наценками по определению ключевых слов (например, аллергены)
Мастер отображения символов для вставки специальных символов
Растровая графика только типа bmp, jpg, tif,…
Также векторная графика типа dxf, plt, svg,…
Около 30 видов штрих-кодов линейных, 2D, GS1 и композитных
Около 35 типов штрих-кодов, включая варианты EAN 18/128
Мастер штрих-кода для создания GS1 / EAN / UCC-128, FACT / MH10 и QR
Опция проверки штрих-кода
Подскажите поля с бесплатным входом
Дополнительные параметры поля приглашения: маска ввода и список выбора
Мастер создания составных подсказок
Счетчики базовые типа числовые и приращения +/- 1
Счетчики расширенные типов буквенно-цифровых и приращения +/- n
Дополнительные параметры счетчика: частота, сброс и сохранение значения
Дата и время, включая смещения и мастера для создания формата
Формула: математические операции, манипуляции со строками и т. Д.
ABC базовый компилятор с библиотекой кода
Переменные: источники данных с информацией о этикетке, принтере, компьютере и т. Д.
Подключение к: Доступ, файлы Excel, базы данных OLE DB, ODBC, ASCII, Database Connector в автономном режиме
Просмотрщик кода JScript для обзора на лету
Импорт файлов JScript в формате LBL
Сохранение только в формате STC
Также экспорт в формат PDF и изображение PNG
First create a text object, by filling in the data on one line. When you need to add a line break, do not use the “Enter” key on the keyboard, but instead insert the special character “Carriage Return”, using the character map of cablabel S3 Pro.
Then disable the interpretation of Unicode syntax, to display the text as it is in the software. And if you do not want to print this source text, just make it invisible for printing.
- Creation of the multi line text
Then create a new text object, having as datasource the text object created previously.
Since the interpretation of Unicode syntax is by default enabled, the text is then displayed over multiple lines, because the carriage return is automatically interpreted by the software.
And of course, this multi line text is printed as shown on the screen (What You See Is What You Get).
Notice: since the content of the multi line text is dynamic, this object is sent to the printer as a picture.
- Creation of the barcode
Finally create the barcode, having also as datasource the text object created at first.
In this way, when you need to update the data, only modify the source text. The changes are then automatically propagated to linked objects, in this case the multi line text and the barcode.
Good to know: the carriage return is encoded as well and can possibly be interpreted when reading the barcode. This will depend on used reading device and its configuration.
- To go further
In order to check the contents of a barcode, you can use an app with the smartphone, but not all show the special characters. Another method is to simply connect a barcode reader to the computer, then to create a new text file with Notepad++ and to show all characters.
Finally, this DataMatrix can then be used to automatically fill in the input fields of another label, for example in cablabel S3 Print or even in standalone mode. Thus the operator will perform only one action, that is reading the barcode, instead of having to fill in and validate individually each prompt field.
Attention: in this case, it is strongly recommended to first configure the barcode reader, in order to add a delay after the validation of a prompt field. Because depending on the response time of the computer or the printer, the read information may arrive too fast to be processed correctly.
Download example files for cablabel S3 Pro:
First, to better understand the vocabulary from this environment, here is a correspondence of the main terms used in Excel and a database:
| Excel | Access or other databases |
| Workbook or Excel file | Database or Access file |
| Sheet | Table |
| Column | Field |
| Row | Record |
| Cells | Data |
With cablabel S3 Pro, it is possible to define a connection to an Excel and Access file or any other database, allowing to create new data sources that can be used dynamically by the label objects.
Of course, the choice of the database depends particularly on, the advantages and disadvantages of each solution, the hardware and software budget, the knowledge of each, etc.
Good to know: it is not mandatory to install Excel or Access on all computers with cablabel S3 Pro or Print, because the OLE DB provider “Access Database Engine” from Microsoft is sufficient to connect to the data files.
Thereby, the Excel workbook is often favoured for creating and managing a data source, since it has the advantage of being relatively simple and convenient to use. But in order to be fully exploitable with cablabel S3, there are nevertheless some precautions to take:
- Do not use spaces or other special characters in the name of the sheets.
- Do not add empty rows, titles or other texts at the beginning of the sheet.
- The first row of a sheet must imperatively contain, either the field names or the first record.
- Raw data should be preferred, by avoiding applying to the cells a format or a formatting specific to Excel.
Without forgetting that the Excel spreadsheet does not have all features of a database, and that some disadvantages are also to be taken into account:
- Depending on the versions, it is possible to have only one access per file. The same data source can therefore not be used simultaneously by Excel and the cablabel S3 software.
- There is no optimization, like that brought by indexing data. Queries on large tables are therefore longer.
- The field type “BLOB” does not exist. It is therefore for example impossible to save the label in the database.
More information on this subject is also available on the Microsoft website:
In summary, a properly structured Excel workbook, is very suitable for creating a small data source with a dedicated use for cablabel S3.
However, as soon as you have a need for simultaneous access or better performance, it is then better to opt for Access or another database, knowing that the data can be transferred quite easily.
When designing a label in cablabel S3, the different properties of a text (bold, italic…) are applied to the entire content of the object.
With the Pro and Print version, the keywords plugin allows to highlight automatically specific words in a sentence or text, as for example for the allergens.
Since the version 1.2.0.1 of the software, you can now use text tags.
Based on the principle of HTML language, this new feature provides the ability to change manually the formatting of a text part.
Moreover, you can also insert these tags in other editable fields, such as the prefix or the suffix of a text, the operations of a formula, or even directly into your database.
The software will then interpret them and display the result of the formatting on the screen, as it will later be printed on the label.
The whole list of the text tags is available in the Operator’s manual of software (PDF, 5 MB).
Download example file for cablabel S3 Lite and Pro:
Yes of course, but only according to the case and under certain conditions.
Here is a summary of different situations needing the activation of the software and how to proceed.
In order to benefit from the latest features provided by the addition of plugins, as the keywords, the variable information or the compound prompts, sometimes a reactivation of the software is required after its update.
In this example, some plugins are not correctly loaded. Then you mostly just have to redo an activation procedure through the wizard, reachable from the “About” button in the General tab.
- Reinstallation
If you need to reinstall the software, for example due to change of computer or operating system, there is the possibility to perform a request for reactivation, by filling in the form available on our website:
Once your request has been considered, you will then receive the necessary instructions by email at the address indicated.
- Additional installation
On the other hand, when you wish to use the software on an additional workstation, you first have to purchase either an additional license or a new license.
For more information about this subject or to know all the modalities, you can contact directly your usual reseller.
When designing my label, I created a counter and set a starting value.
But how can I change this value dynamically, without having to edit each time the properties of my counter?
In order to perform this easily in standalone mode, you need:
- To create a prompt field asking the start value.
- To insert a basic counter of numeric type.
- Then to add together both values with a formula.
And to go further, here is a more complex design in formular mode with:
- a decremental counter.
- a dynamic formatting in relation to the number of digits entered.
- an automatic reset of the counter, when the current value reaches 1.
Attention: if an operation of the “Math” category is calculated directly on the printer (for example using operands from a datasource), the result is printed by default with 2 digits after the comma.
To change this behaviour, you have as in these cases, to add a “Formatting” operation.
Download example files for cablabel S3 Pro:
You want to create your labels with cablabel S3, but you don’t know which version to choose?
In order to help you to make this decision based on your needs, here is a summary of the main differences and exclusive possibilities:
| cablabel S3 Lite | cablabel S3 Pro |
| Delivered with every printer | License per computer on request |
| Compatible with cab printers only |
Supports all printers detected and installed on Windows |
| Additional text options: max width and hyphenation |
|
| Text box with various markups by keyword detection (e.g. allergens) |
|
| Character map wizard for inserting special characters |
|
| Raster graphics only of type bmp, jpg, tif, … |
Also vector graphics of type dxf, plt, svg, … |
| About 30 types of barcodes linear, 2D, GS1 and composite |
About 35 types of barcodes including the EAN 18/128 variants |
| Barcode wizard for creating GS1/EAN /UCC-128, FACT/MH10 and QR |
|
| – | Barcode verifier option |
| Additional prompt field options: input mask and choice list |
|
| Wizard for creating compound prompts |
|
| Counters basic of type numeric and increment +/-1 |
Counters advanced of types alphanumeric and increment +/-n |
| Additional counter options: frequency, resetting and saving of the value |
|
| Date and time including offsets and wizards for creating the format |
|
| Formula: mathematical operations, manipulate strings, etc. |
|
| ABC basic compiler with code library |
|
| Variables: data sources with information about the label, the printer, the computer, etc. |
|
| Connection to: Access, Excel files, OLE DB, ODBC, ASCII databases, Database Connector in stand alone mode |
|
| JScript code viewer for an overview on the fly |
|
| – | Import of JScript files in LBL format |
| Saving only in STC format |
Also export to PDF format and PNG image |
More information is also available on our website:
Another property to check in the layout is the “gap”, even if the default value of 3 mm is suitable for most of the labels.
This dimension corresponds to the distance between the labels, and is also measured in the printing direction or in the unwinding direction of the label roll.
Thereby, the gap added to the label height, determines the total height of the page and therefore also the minimum material feed during printing.
In case of using a material with a gap, you have therefore to be careful that the value indicated in the layout is simply lower or equal to the value measured between the labels:
This avoids some detection problems by the label sensor of printer and especially the emergence of non-printed labels.
And in case of using a continuous material, you are free to set a gap value:
- for example to print the labels one after the other.
- or to intentionally leave more space between each label.
When you try to connect with cablabel S3 Pro to an Excel or Access file, created with the version 2007 or later, and you get the following error message:
Then it is necessary to download and install the 32-bit version of the OLE DB provider “Access Database Engine” from the following Microsoft website:
Notice: if the setup of Access Database Engine warns you that a 64-bit version of Microsoft Office is already installed, you must start it manually by the command prompt “cmd”, from the file location and also with the parameter “/quiet” behind the file name.
Let’s see some tips, to find more easily the size of a label and especially to avoid mixing the measures.
The easiest way is, to use the information given in the label designation, or if applicable on the packaging and inside the roll.
The first number corresponds to the width and the second to the height.
Thereby, with a:
-
Format 60×40 mm ⇒ w >You can also directly measure the size of the label. But in this case, you must be careful to correctly identify the width.
The height coincides then with the label feed, in the printing direction or in the unwinding direction of label roll. The size of the label is therefore independent of its orientation and also of the reading direction!
Click on the following link, to see some examples of measurements:
You will use cablabel S3 with a cab printer connected to the network?
To connect the printer, you need first to:
- Connect the cab printer to the network with a not provided Ethernet cable or if appropriate by Wi-Fi.
- After that restart the printer.
- And search in the « Short status » menu, the information about the IPv4 address corresponding to your used connection type.
Attention: for the assignment or reservation of an IP address, please contact your system administrator.
To configure cablabel S3 you need to:
- First, install or update your cablabel S3 version.
- After that add a new device corresponding to your model.
- Then select the « TCP » port type and fill in the IP address previously collected on the printer.
Notice: the installation of the Windows driver is only necessary for the MACH1 and MACH2 printers, or if you want to use a cab printer from the network with any other software.
For more information or for an installation of the Windows driver, download the detailed guide:
Характеристики
для контроля, для печати, для разработки
Описание
конструкция ярлыка шлихов cablabel S3, управление печати и контроль всех систем маркировки кабины. Развитие приборов и програмного обеспечения синхронизировано.
Это автоматический перевод. (просмотреть оригинал на английском языке)
«>