
-
Dji-Club
-
→
Файлы -
→
Документация -
→
Руководство пользователя DJI Mini 3 Pro — на русском языке
Загрузил
Информация
-
Загружен:
Aug 12 2022 03:50 PM -
Последнее обновление:
Aug 12 2022 04:41 PM -
Размер:
8.92МБ -
Просмотров:
8512 -
Скачан:
202
5 Голосов
DJI Mini 3 Pro
2
Не нашел в нете руководства пользователя по дрону DJI Mini 3 Pro на русском языке. Пришлось потратить свое время и перевести. Если кто может предложить более удачные формулировки в руководстве, то можно предлагать, готов скорректировать документ.
Что нового в этой версии 1.2 (Посмотреть все изменения)
- Добавлена поддержка FocusTrack, QuickShots (Dronie, Rocket, Circle, Helix и Boomerang) и Hyperlapse в портретном режиме, а также добавлен режим USB.
Так же вам могут быть интересны файлы
Случайные файлы
-
78
Всего файлов -
3
Всего категорий -
5
Всего авторов -
18096
Всего загрузок -
Руководство пользователя DJI Mini 3 Pro — на русском языке
Последний файл -
NAlex
Последний автор
- Dji-Club
- → Файлы
- → Документация
- → Руководство пользователя DJI Mini 3 Pro — на русском языке
- Политика конфиденциальности
About DJI Mini 3 Pro
Before going airborne, take a few minutes to become familiar with your drone. We have prepared [Video Tutorial], [Product Specifications], and [User Manual] for your reference, to help you get a quick overview of the product.
Video Tutorial
This new drone will give both professional and casual content creators additional ways to capture photos and videos. For a step-by-step guide to the usage of DJI Mini 3 Pro, please click the below picture to view the tutorials.
Product Specifications
To get more details about specifications of the product, please click on the link: DJI Mini 3 Pro Specifications
To compare DJI Mini 3 Pro with other DJI consumer drones, click: Consumer Drones Comparison
User Manual
For details about product usage, check: DJI Mini 3 Pro User Manual
Unboxing and Getting Started
Unboxing
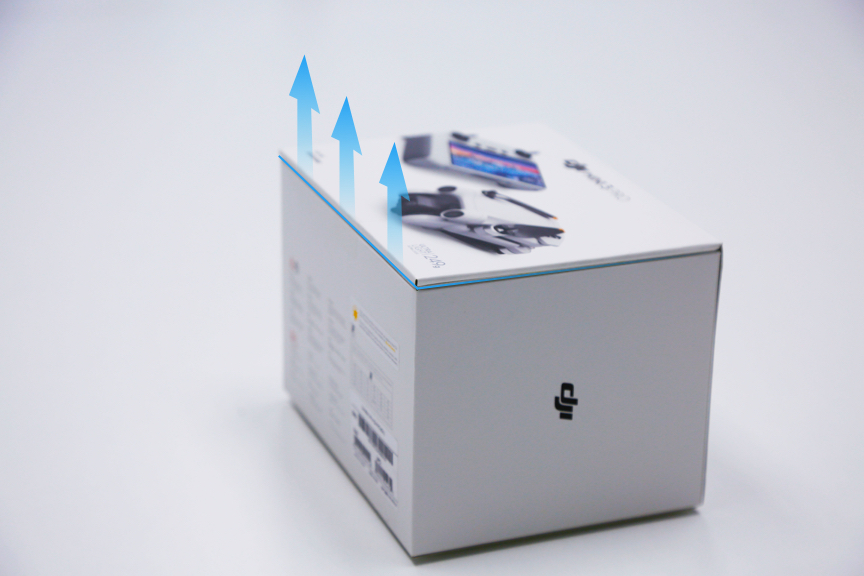
1. First, use a knife to gently open the packaging along the blue line as shown in the figure below, and then open the packaging box in the direction indicated by the arrow (please take the greatest of care when using a sharp tool).
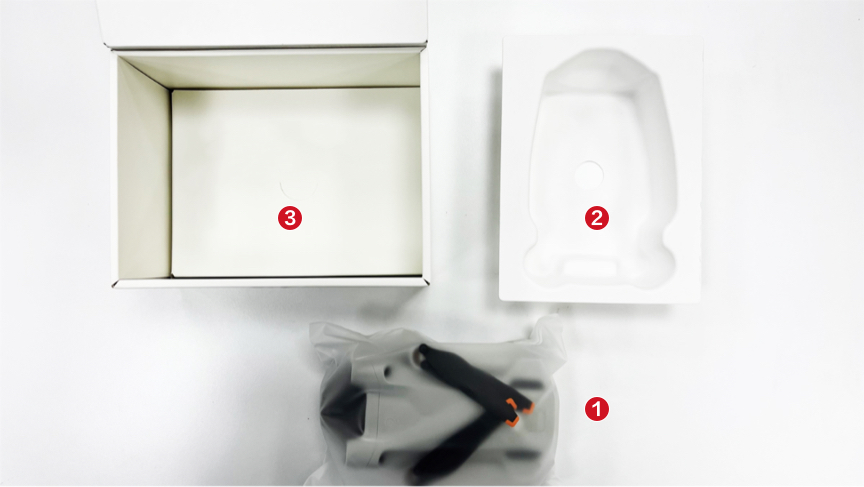
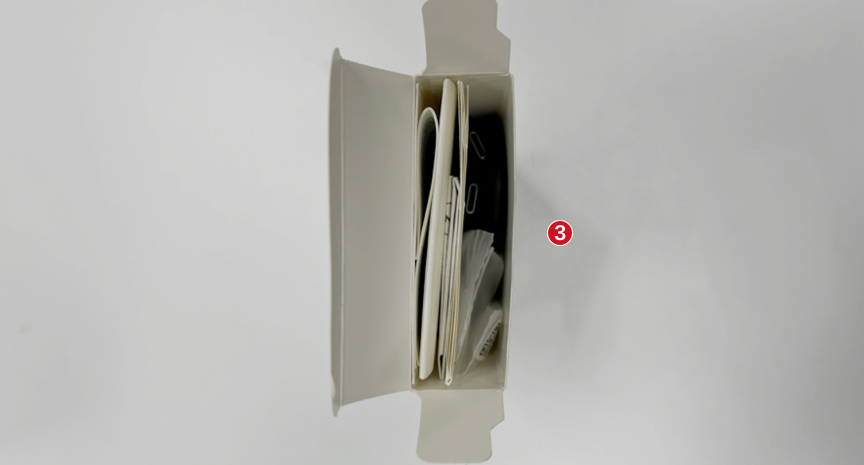
2. Take out the drone, remove the inner container, and there is an accessory box inside the package.
For DJI Mini 3 Pro (RC/RC-N1) combo, there is a remote controller under the accessory box.
In the Box for Different Combos:
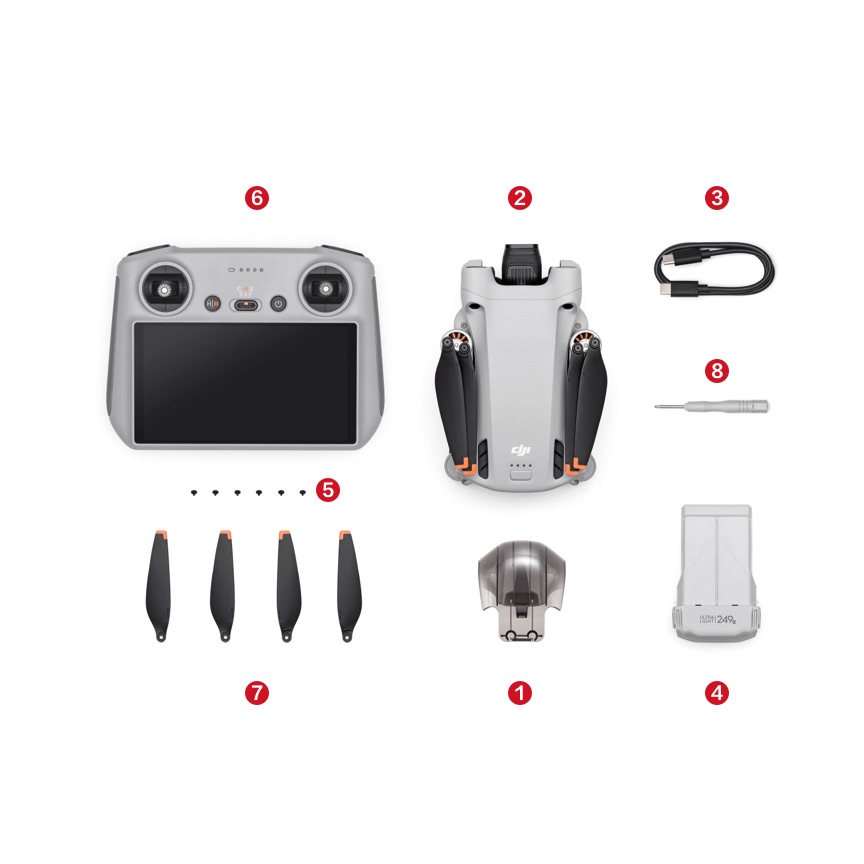
1. DJI Mini 3 Pro (DJI RC)
① Gimbal Protector; ② DJI Mini 3 Pro; ③ Type-C to Type-C PD Cable; ④ DJI Mini 3 Pro Intelligent Flight Battery; ⑤ Screws; ⑥ DJI RC; ⑦ Spare Propellers; ⑧ Screwdriver.
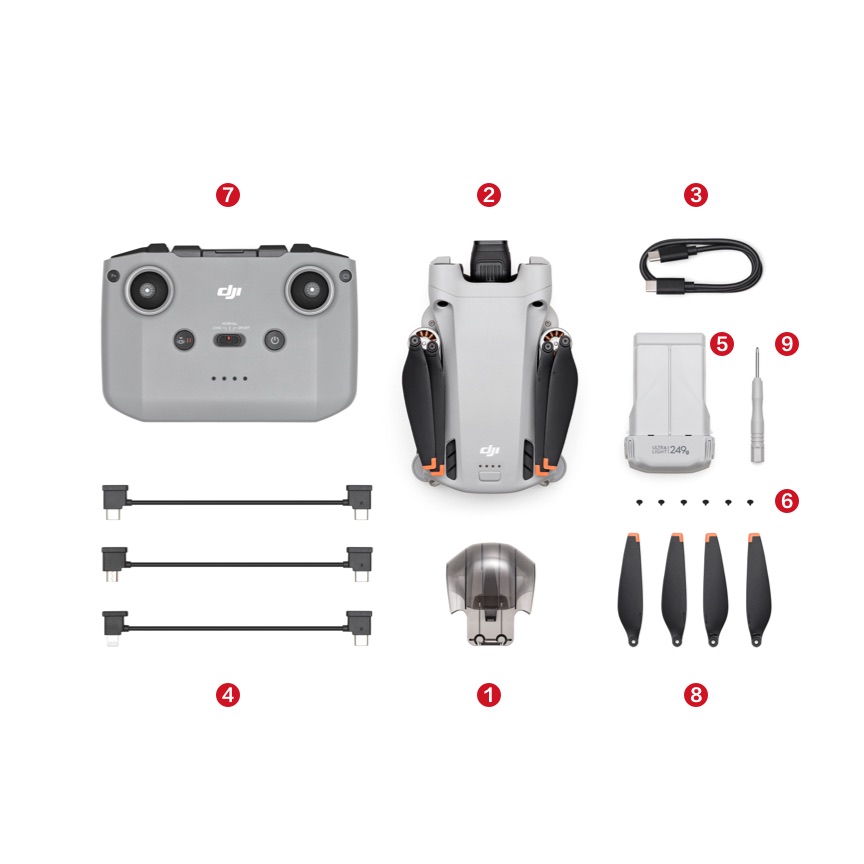
2. DJI Mini 3 Pro (RC-N1)
① Gimbal Protector; ② DJI Mini 3 Pro; ③ Type-C to Type-C PD Cable; ④ DJI RC-N1 RC Cable; ⑤ DJI Mini 3 Pro Intelligent Flight Battery; ⑥ Screws; ⑦ DJI RC-N1 Remote Controller; ⑧ Spare Propellers; ⑨ Screwdriver.
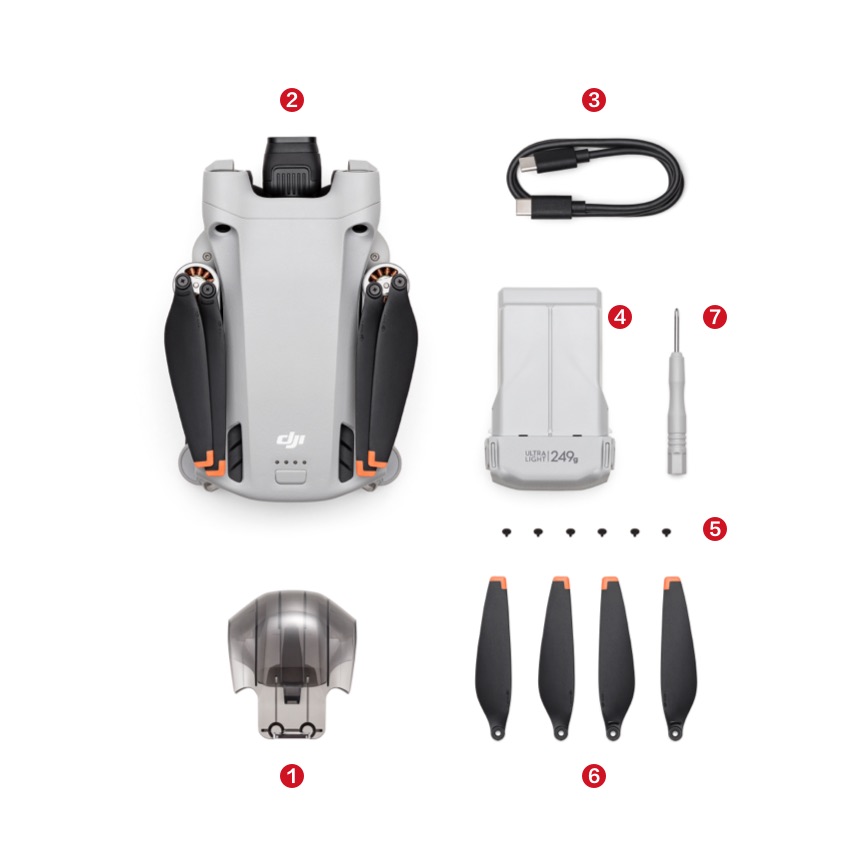
3. DJI Mini 3 Pro (No RC)
① Gimbal Protector; ② DJI Mini 3 Pro; ③ Type-C to Type-C PD Cable; ④ DJI Mini 3 Pro Intelligent Flight Battery; ⑤ Screws; ⑥ Spare Propellers; ⑦ Screwdriver.
Tips:
Please pay special attention to the following two accessories:
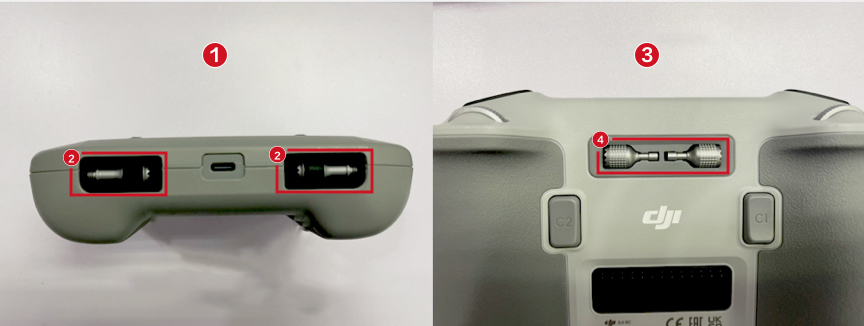
1. RC Control Stick
Remove the control sticks from the storage slots and mount them on the remote controller.
The control sticks of RC-N1 are located at the bottom of the remote controller, while the control sticks of DJI RC are at the back of the remote controller. Please see the figures below:
RC-N1: The control sticks are at the bottom of the remote controller.
DJI RC: The control sticks are at the back of the remote controller.
2. RC Cable
DJI RC-N1 comes with a built-in RC Cable (Lightning Connector). Please see the figure below:
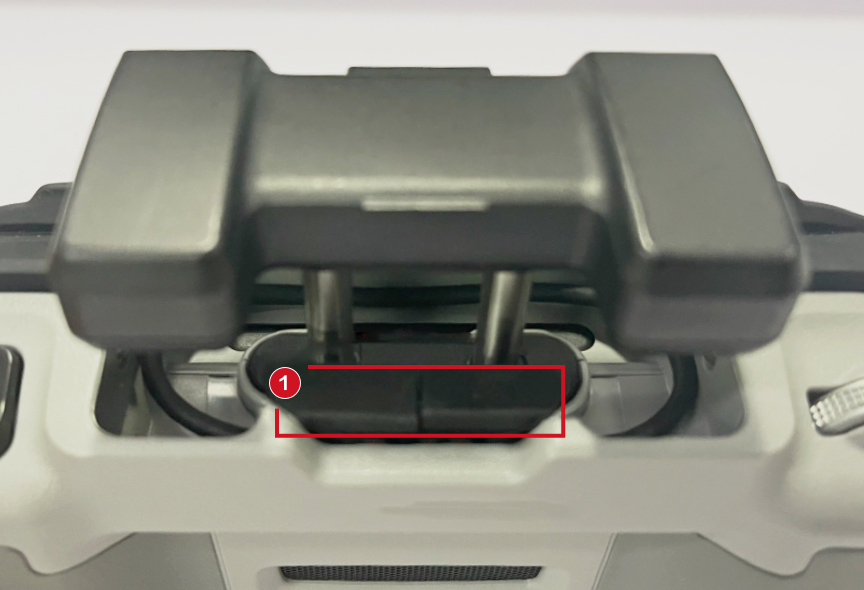
Removing the Gimbal Protector
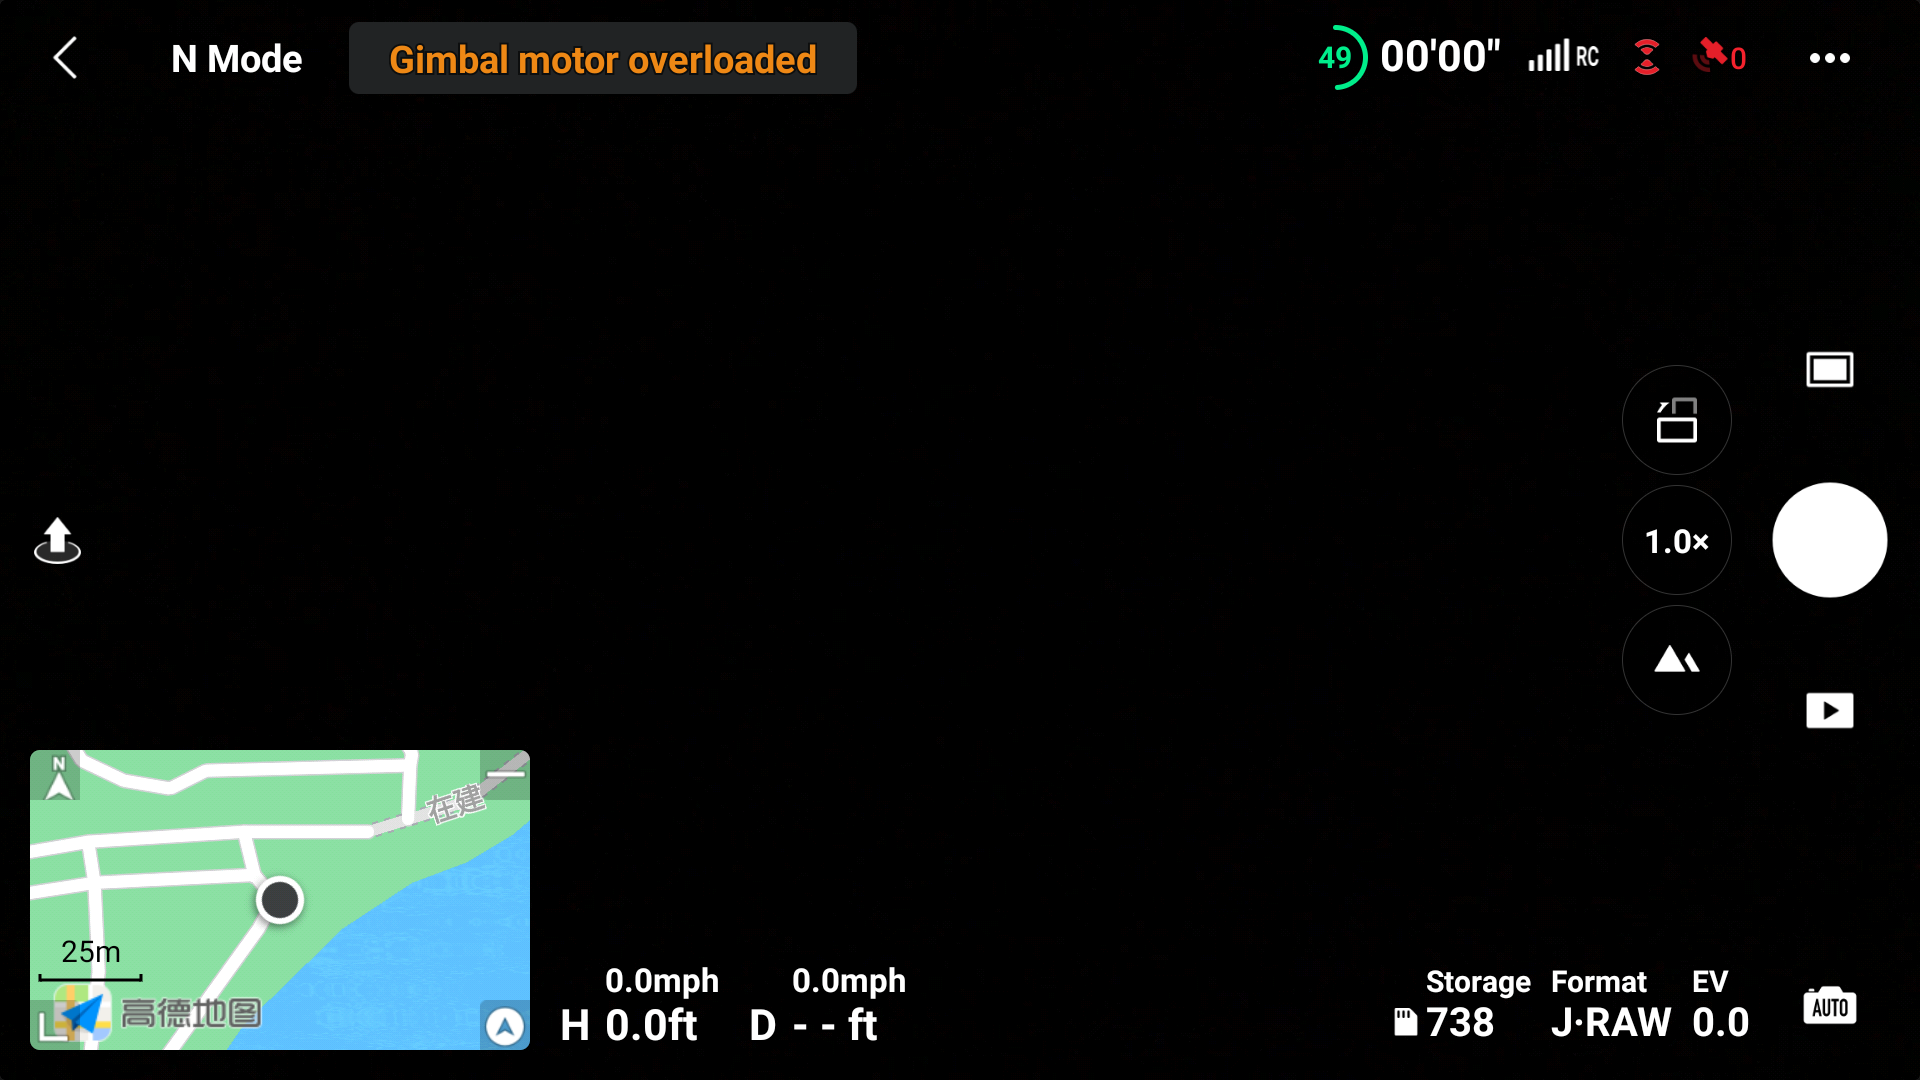
[Important] Remove the gimbal protector from the camera before powering on the drone.
· When powering on the drone, the gimbal will rotate and perform self-check*. If the gimbal protector is not removed, the motor may be damaged or the service life will be affected, or even impact the flight safety after takeoff.
· To safeguard the camera lens and gimbal axis arm, you’d better attach the gimbal protector to your drone during daily storage or carrying outdoors.
* If the drone is powered on without activation, the gimbal will not rotate and run self-check.
How to Remove the Gimbal Protector?
Push the lower buckle towards the camera to remove the gimbal protector.
How to Attach the Gimbal Protector?
Fit in the upper buckle of the gimbal protector to the aircraft slot first.
Press the lower buckle into the slot at the bottom of the aircraft.
Powering on or off the Device
The most crucial point of flying a drone is powering on and off.
Powering on the Drone
Press the Power button at the top of the drone once, and then press and hold it for 2 s until the battery level LEDs blink green and a warning tone is played. If the aircraft status indicator on the drone blinks red, yellow, and green alternately, the drone is powered on successfully.
Powering off the Drone
Press the Power button once, and then press and hold it for 2 s until the aircraft status indicator and battery status LED light off, which indicates that the drone is powered off successfully.
Powering on the Remote Controller
Press the Power button once, and then press and hold it for 2 s until the battery level LEDs blink green and a warning tone is played, which indicates that the remote controller is powered on successfully.
Powering off the Remote Controller
It is the same as powering on: Press the Power button once, and then press and hold it for 2 s until the battery level LEDs light off and a warning tone is played, which indicates that the remote controller is powered off successfully.
Status Indicator Descriptions
You can tell the status of your device through the blinking patterns of the aircraft status indicator. Different color indicates different status of the aircraft, and the blinking frequency as well.
Refer to the table below for more information about the aircraft status indicators.
Attaching and Removing the Propellers
As we all know, there are two types of propeller/motor: CW and CCW, and you can easily recognize it through the mark on it. Before mounting the propeller, better confirm the mark on each first.
Mounting the Propellers
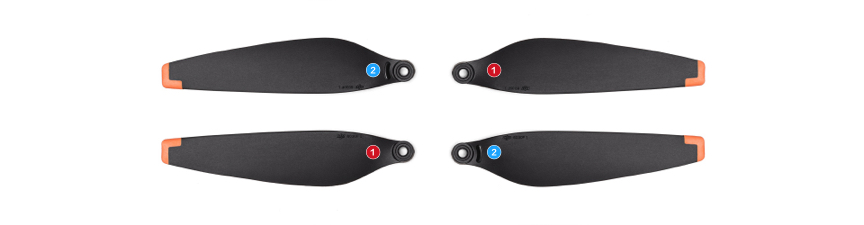
1. Distinguishing between Propellers
Distinguish Between propellers by checking whether there are marks on it.
If the propeller is mounted in an improper way, the drone cannot take off.
① Without a raised mark; ②With a raised mark.
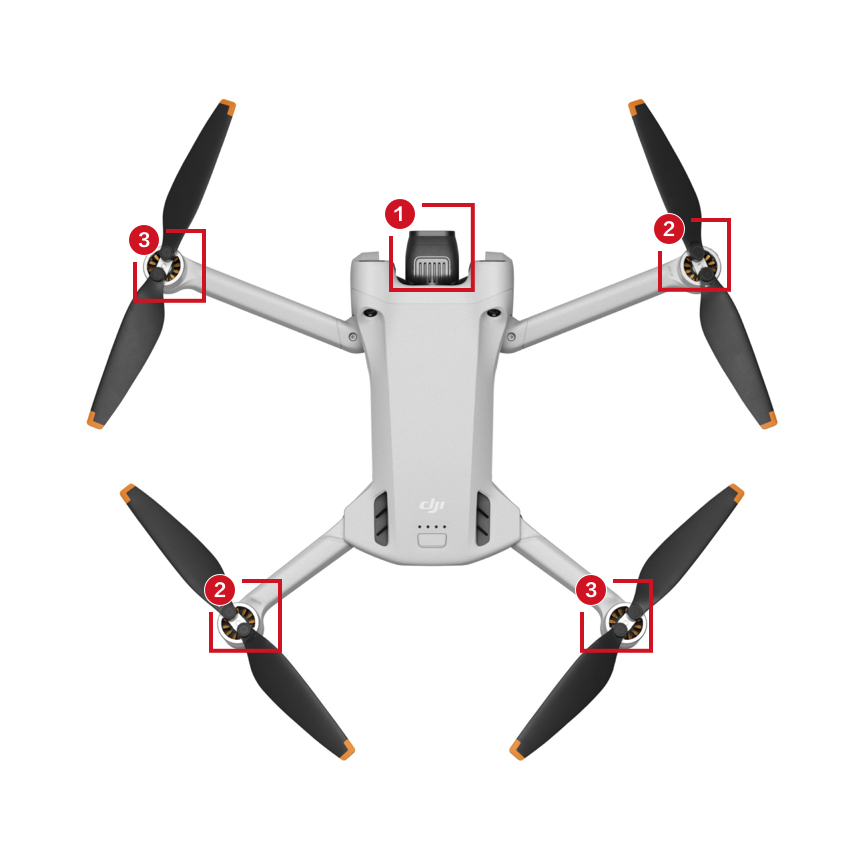
2. Mounting the Propellers
Step 1: Place the drone and confirm the orientation of the drone’s camera as shown below;
Step 2: Use the given screwdriver to mount the propeller with a mark to the motor;
Step 3: Mount the propeller without a mark to the motor.
① Orientation of the Drone’s Camera; ② Mount the propellers with a raised mark; ③ Mount the propellers without a raised mark.
Removing the Propellers
Use the given screwdriver to unscrew the screws, and then remove the propellers.
Mounting and Removing the Battery
Note that the battery can be charged without being removed from the drone. If you would like to install or remove the battery from the drone, please see below:
Updating the Firmware
Power on the drone and remote controller, and launch DJI Fly. If a new firmware update is available, follow the on-screen instructions to update the firmware.
Click here and watch the tutorial (Jump to 2 minutes 28 seconds).
Activating Your Device
DJI Mini 3 Pro requires activation before first use. After powering on the aircraft and remote controller, follow the on-screen prompts to activate the device using DJI Fly.
Step 1: Download the app.
DJI Fly is required for product activation and connection. Click Here to download and install the app.
Step 2: Connect the drone to other devices.
Before takeoff, connect the drone to the remote controller and mobile device to realize flight control and image transmission. Brand-new aircraft have already been linked upon shipment. Therefore, you can use your device directly without linking.
Linking via DJI Fly
1. Connect the aircraft, remote controller and the mobile device (There is no need to connect the mobile device for DJI RC).
2. In the Camera View of the DJI Fly app, tap “…” in the top right corner to enter the Control interface, and then tap “Re-pair to Aircraft (Link)”.
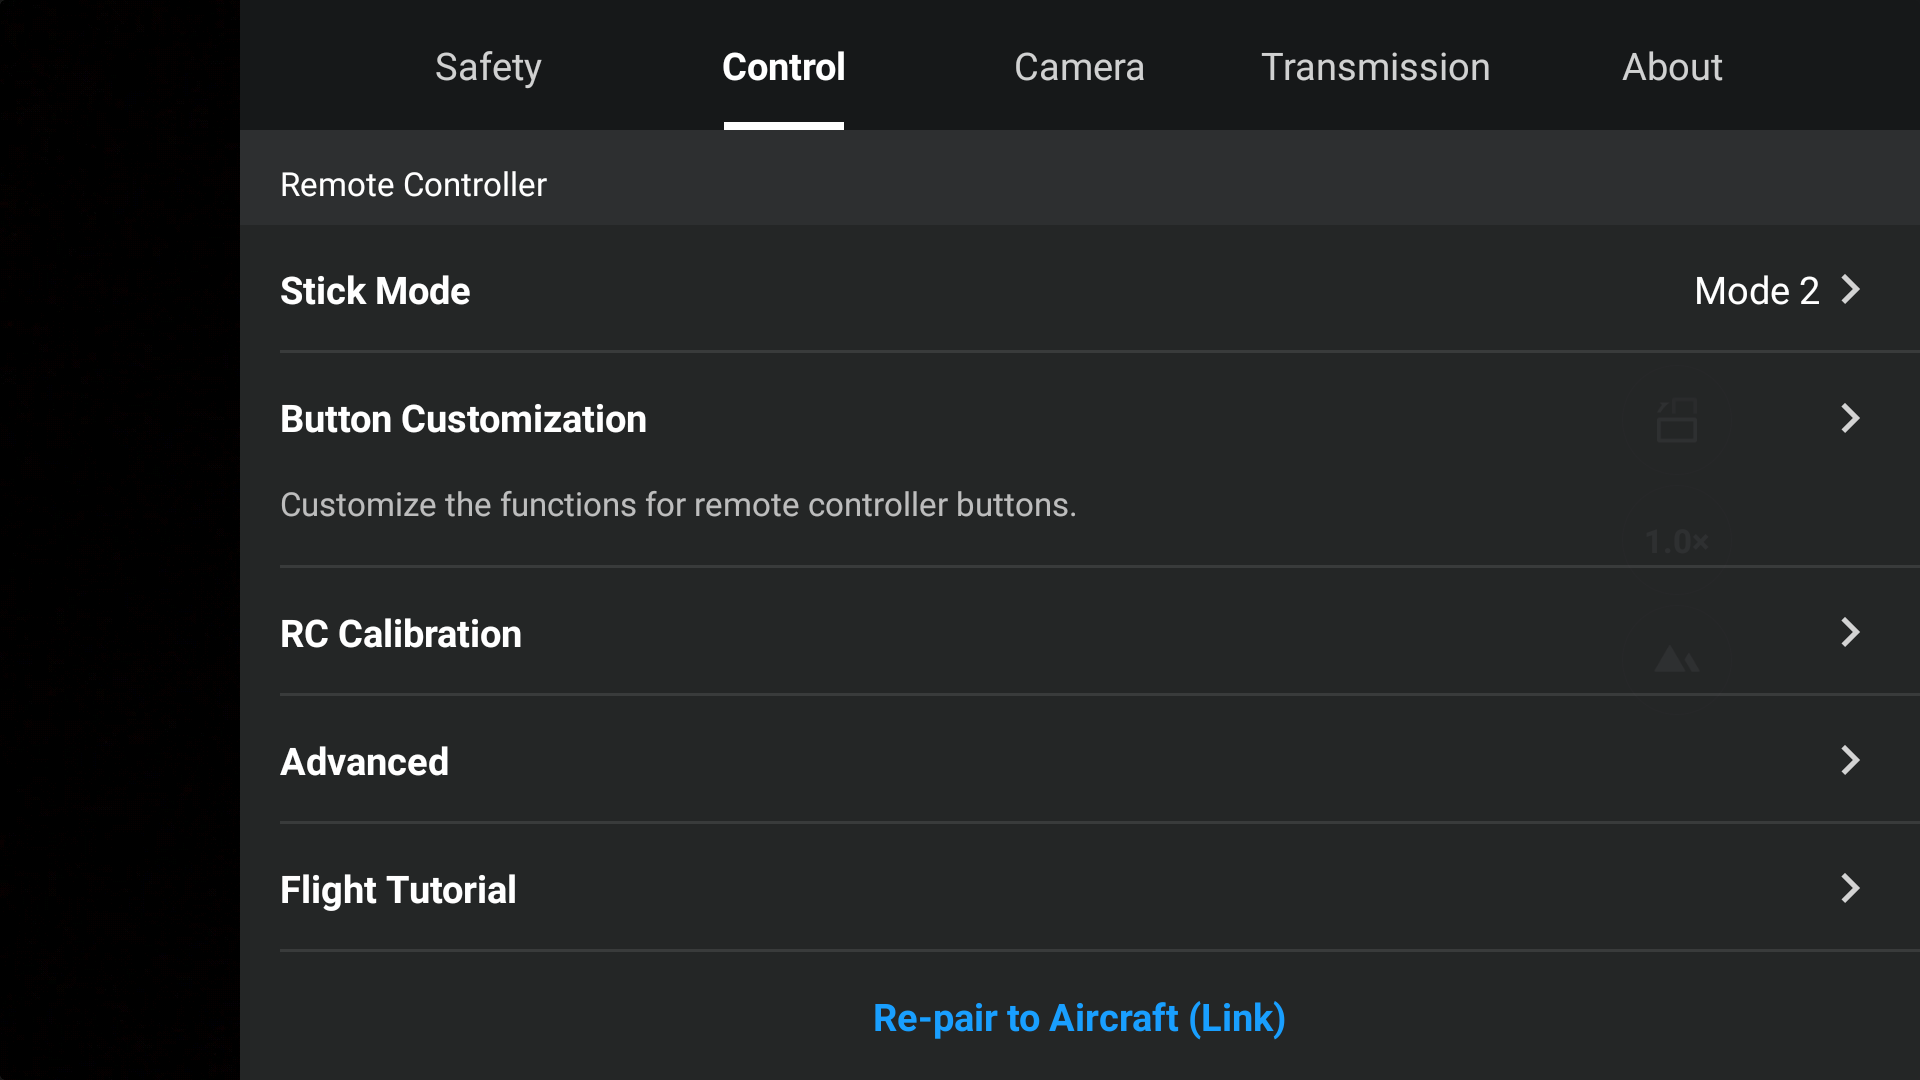
3. Press and hold the Power button on the aircraft. The aircraft will beep once when it is ready to link. After the linking is successfully, the aircraft will beep twice and the battery level LEDs of the remote controller start blinking and turn solid.
For more details about linking, refer to: Aircraft Linking Guide
Step 3: Activate for the First Time.
Power on the aircraft and remote controller, launch the DJI Fly app, and then complete the activation according to the on-screen instructions (An Internet connection is required for activation).
For an overview of how to activate your device, click here and watch the video.
Checking Activation Information
Check the activation details of your device through the Activation Information Inquiry page.
* For your reference, click to know about how to Check Your Product’s Serial Number
* Your device is warranted by DJI from the date of receipt, which will not be affected by the activation status of your device. Go to After-Sales Service Policies to learn more about the warranty period of product and components.
Using the Remote Controller
This guide includes a comprehensive and exhaustive overview and explanation of buttons on the remote controller: Using DJI RC-N1 Remote Controller and DJI RC
Remote Controller Compatibility
DJI Mini 3 Pro currently supports two remote controllers: DJI RC and DJI RC-N1 Remote Controller
|
Remote Controller Model |
Applicable Products |
|
DJI RC |
DJI Mini 3 DJI Mavic 3 Classic DJI Mini 3 Pro DJI Mavic 3 DJI Air 2S |
|
RC-N1 Remote Controller |
DJI Mini 3 DJI Mavic 3 Classic DJI Mini 3 Pro DJI Mavic 3 DJI Air 2S Mavic Air 2 DJI Mini 2 |
Mobile Device Compatibility
The mobile devices in the compatibility list that have been strictly tested for DJI Mini 3 Pro. To know more about the compatibility of DJI Mini 3 Pro, check: DJI Mini 3 Pro Supported Mobile Devices
If your phone is not on the list of supported devices?
Mobile devices that are not on the compatibility list have not been verified for stable use. In theory, a device that meets system requirements can be used, but stable performance cannot be guaranteed. We recommend that you download the app first and go to a nearby DJI retail store to check whether your phone is compatible with Mini 3 Pro.
Charging Instructions
It is a general curiosity to know the battery level of your drone, which is typically used by pilots to efficiently prepare for a swift flight to the blue skies.
Press the Power button on the aircraft/remote controller for 1s to check the battery level. The battery level LEDs display the power level of the battery. If no more than two LEDs light up, please charge the battery soon.
Choosing a Charger
DJI Mini 3 Pro package does not come with a charger, so please refer to the following instructions to choose an appropriate charger.
• DJI Mini 3 Pro supports the PD fast charging protocol, so you can use the PD charger with the included PD fast charging cable (Type-C to Type-C PD Cable) to charge the aircraft;
• If you need one, we recommend DJI 30W USB-C Charger.
• Other common PD fast chargers can be used, such as Apple USB-C Power Adapter or Android GaN charger.
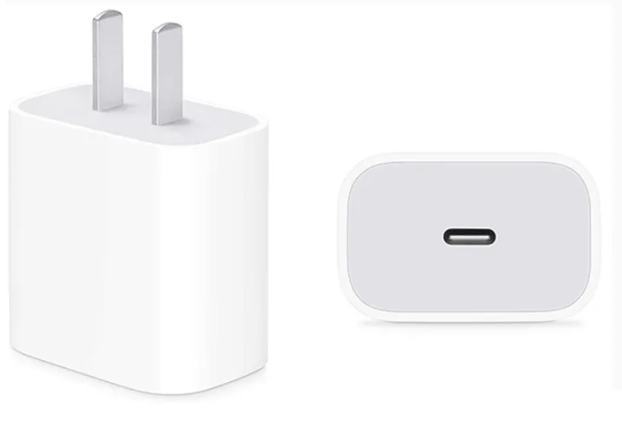
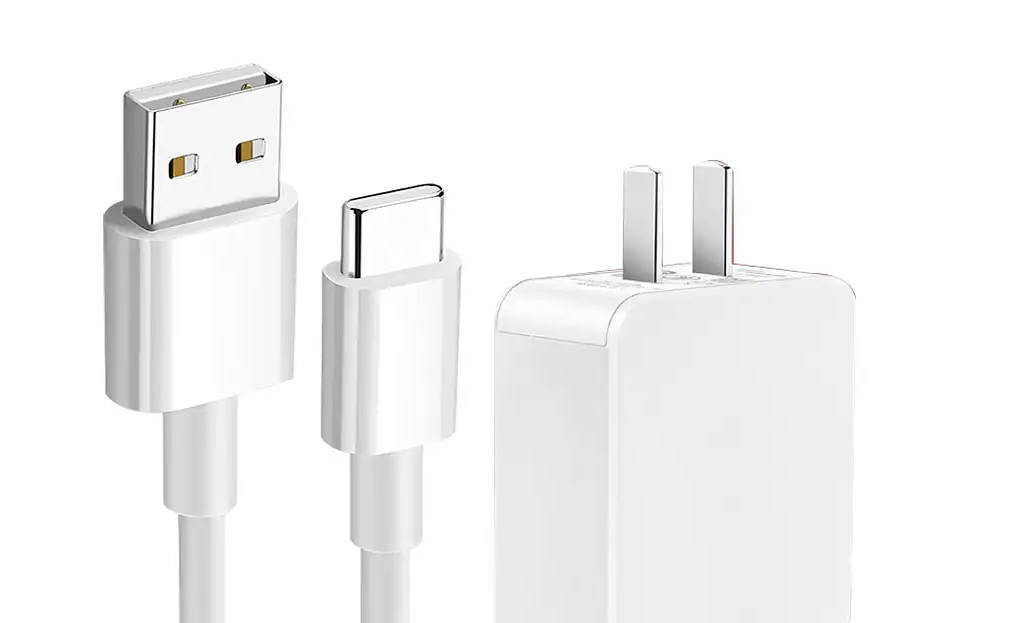
• If no PD charger is available, try using USB-C charger and USB-A to USB-C cable as shown below for charging.
Charging Duration
1. Charging the Drone
• Charging the battery mounted to the aircraft
When used with the DJI 30W USB-C Charger, it takes about 64 minutes to fully charge one Intelligent Flight Battery and 101 minutes for one Intelligent Flight Battery Plus.
• Using the Battery Charging Hub
When used with the DJI 30W USB-C Charger, the charging hub can fully charge one Intelligent Flight Battery in approximately 56 minutes and one Intelligent Flight Battery Plus in approximately 78 minutes.
2. Charging the Remote Controller
• DJI RC
The battery can be fully charged in about 1 hour and 30 minutes with a maximum charging power of 15W.
RC-N1 Remote Controller
The battery can be fully charged in about 3 hours and 30 minutes with a maximum charging power of 10W.
Charging Method
Prepare your drone, remote controller, and USB-C charger, then follow the instructions below for charging.
Battery Maintenance
1. Discharge the battery to 40%-65% (the third battery level LED lights up or blinks) if it will not be used for 10 days or more.
2. Charge and discharge the battery about every three months to maintain good battery health. If the battery is stored after completely drained, it may over-discharge and be damaged.
3. Always store Intelligent Flight Batteries in a well-ventilated place.
4. The battery will enter hibernation mode if depleted and stored for an extended period of time. Recharge the battery to bring it out of hibernation.
Exporting Footage
Storage
· DJI Mini 3 Pro includes a modest 1.2GB of internal storage, so you can snap some photos and record videos if you forget to bring a memory card.Photos and videos are stored in the internal storage by default if a microSD card is not installed.
· The combo does not come with a microSD card. We recommend you choose a microSD card that is UHS-I Speed Class 3 or above. Click to buy if necessary: SanDisk Extreme microSD Card 128 GB.
· DJI RC does not come with the internal storage, but can be equipped with a microSD card. After a memory card is installed, you can use the product for capturing photos/videos, keeping cache files, and recording screen.
If you won’t use it for caching files or recording screen, the memory card is not a must.
Installing and Removing a Memory Card
If you have purchased a memory card, you can insert it into the black memory card adapter, which can be attached to the TF slot on PC for further file transfer. Please note that the memory card is inserted into the drone without the card adapter.
If only one microSD card is available, please insert it into the microSD card slot on the aircraft following “Inserting MicroSD Card to Aircraft” as shown below.
Exporting the Photos/Videos
QuickTransfer is a handy feature that DJI added to the drone to make it easy to download unaltered footage from the drone wirelessly. Or you can connect the drone to the remote controller and mobile device for exporting.
QuickTransfer: Only DJI Mini 3、DJI Mavic 3 Classic、DJI Mavic 3 series, DJI Mini 3 Pro, and DJI Mini 2 support the QuickTransfer function. With QuickTransfer, DJI enables a direct connection of the drone with the smartphone to upload photos and videos from the drone to the smartphone.
Connecting your aircraft to the remote controller and mobile device: It is applicable to all DJI drones. Connect the remote controller to your drone and the mobile device, and download the photos or videos through the app. (It is more suitable for downloading the wonderful moments after the flight.)
QuickTransfer
1. Power on the drone, and wait until the aircraft self-diagnostics is completed.
2. Enable the Bluetooth and Wi-Fi functions of the mobile device, launch DJI Fly to check if a “Switch to QuickTransfer Mode (DJI Mini 3 Pro)” prompt pops up. Then tap to enter. (When using QuickTransfer for the first time, press and hold the Power button on the aircraft for two seconds to switch to QuickTransfer mode.)
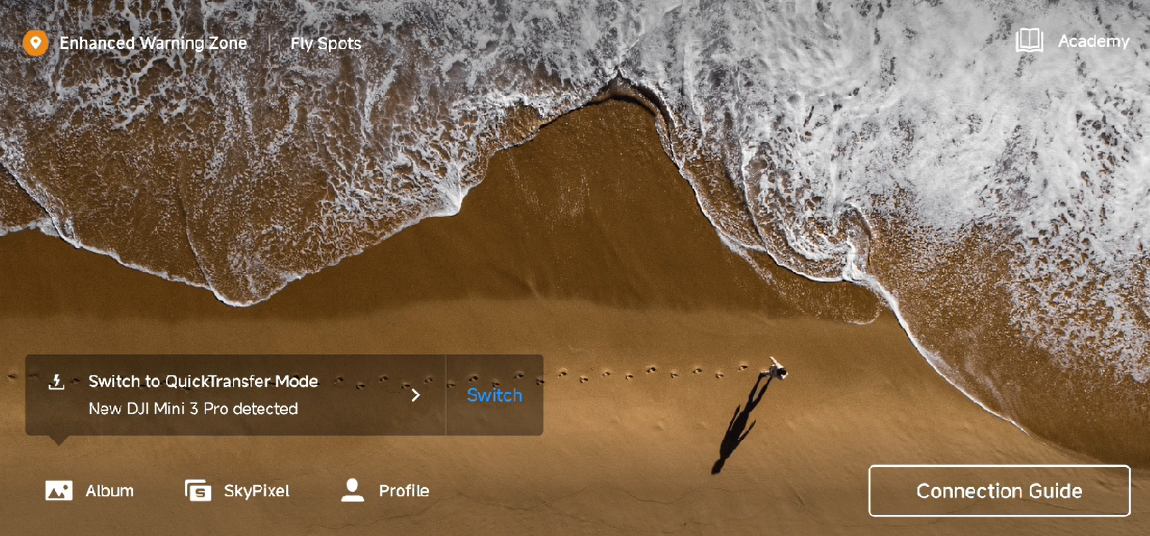
3. Choose to connect to the aircraft Wi-Fi.
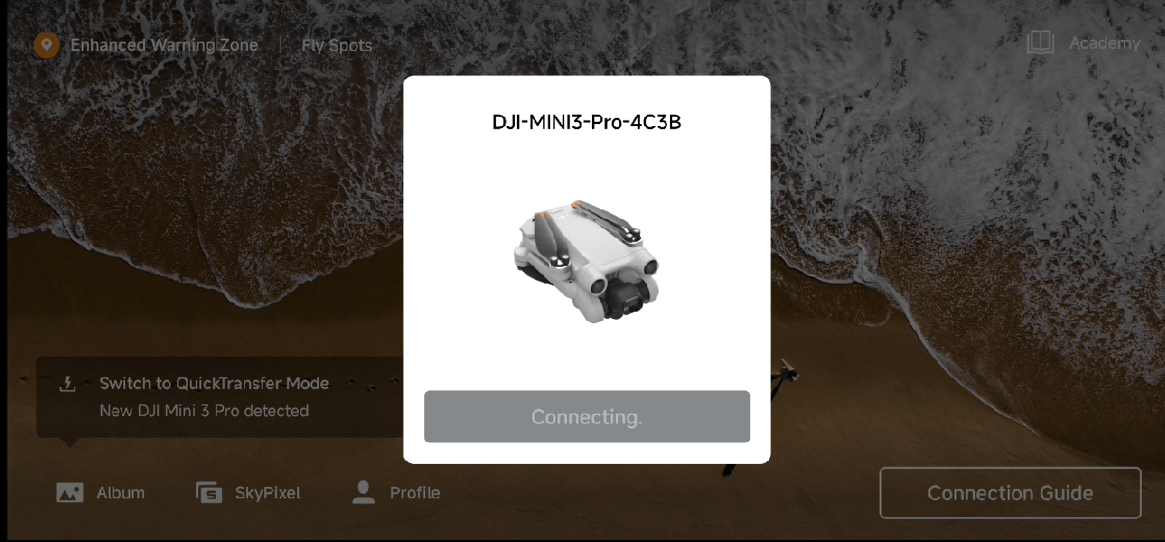
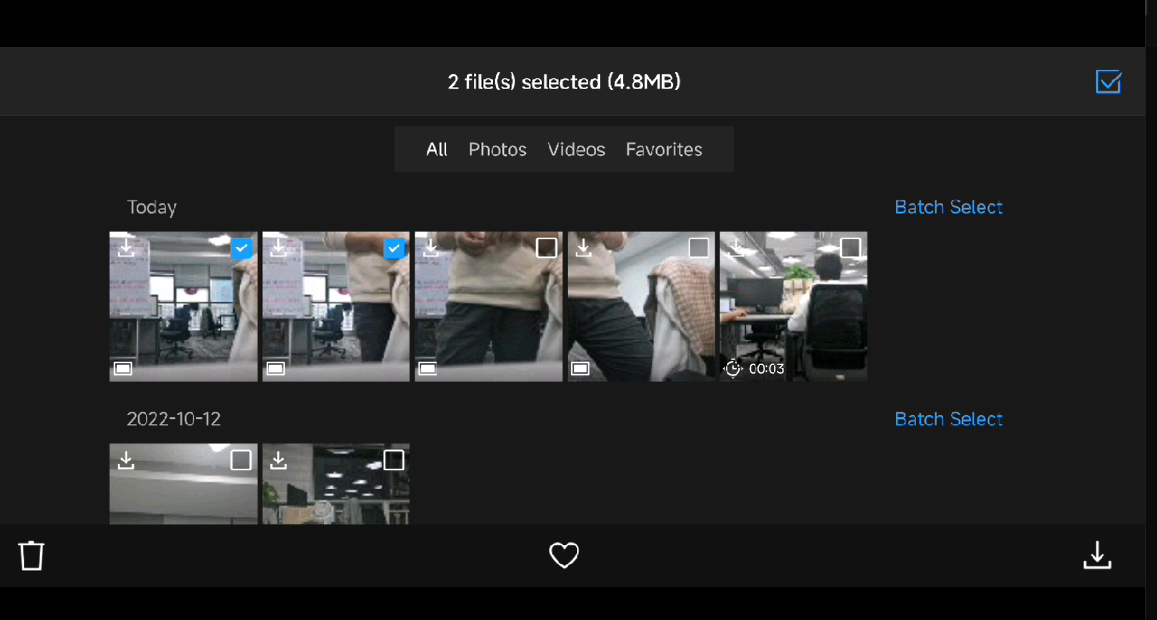
4. Select the required footage and choose the download path to download photos and videos from the aircraft to the mobile device.
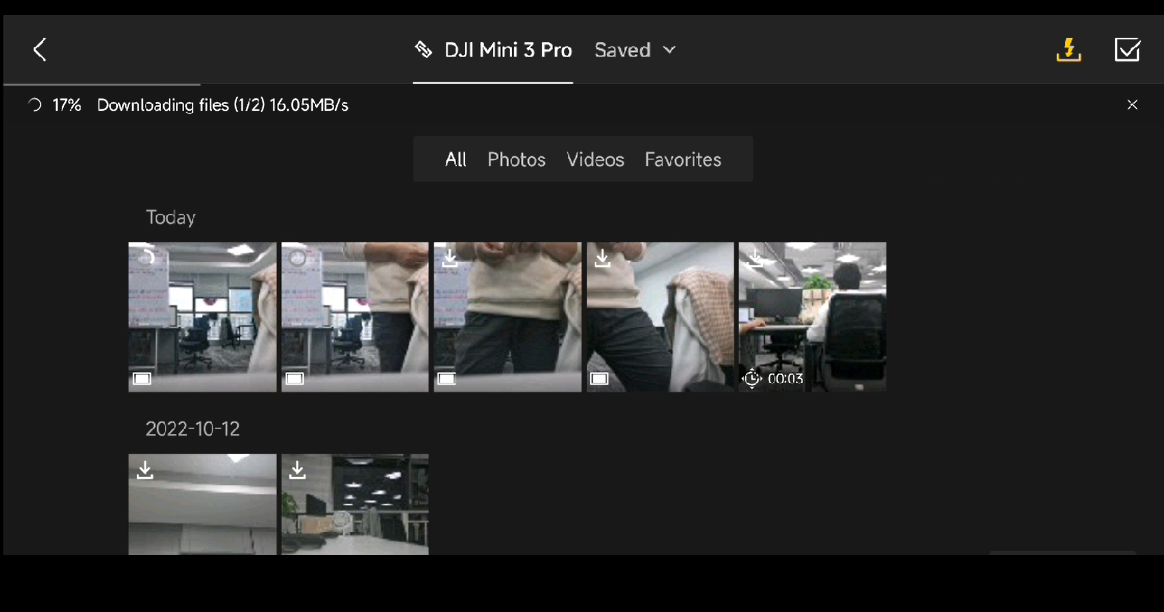
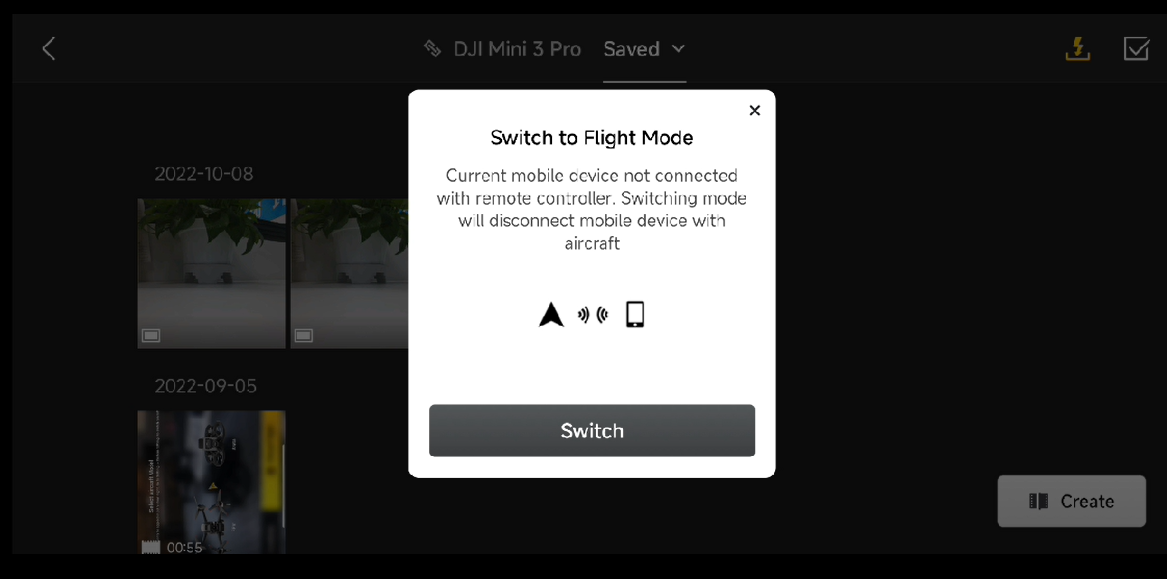
When the mobile device is already connected to the remote controller and QuickTransfer is required, make sure that the aircraft is connected to the remote controller, and tap the icon at the upper right corner to access the files on the aircraft. In this mode, the file download speed increases but the aircraft cannot be controlled via a remote controller.
Safety Flight
Flight Polices
1. Laws and Regulations
Please check local policies and regulations before flying:Checking Policies and Regulations
2. GEO Zone
To determine whether you’ll need to unlock an area before flying there, start by checking:
• Click to check GEO Zone.
Flight Environment Requirements
1. Always fly in open areas and keep your drone within line of sight. For safety reasons, you should never fly above people, animals, or moving vehicles.
2. Always fly at a safe altitude and at locations that are clear of building and other obstacles
The maximum flight altitude can be set to 500 m above ground level. For details about maximum flight distance, refer to the official specifications. Beginner pilots should not be able to fly very far.
Safety Tips
1. Keep your hands on the control sticks to maintain control throughout flight
2. Take off with strong GPS signal to set a Home Point and ensure positioning stability.
3. Check your drone for damage and fully charge your equipment before each flight.
Intermediate Operations
Hyperlapse
Hyperlapse shooting modes include Free, Circle, Course Lock, and Waypoint.
A Hyperlapse video is one that speeds up real-time footage so that the viewer can quickly see what has happened. The process of slowly changing objects or scenes is compressed, which will present a strange and wonderful sight in a short period of time.
FocusTrack
FocustTrack includes Spotlight, ActiveTrack, and Point of Interest.
Portrait Mode
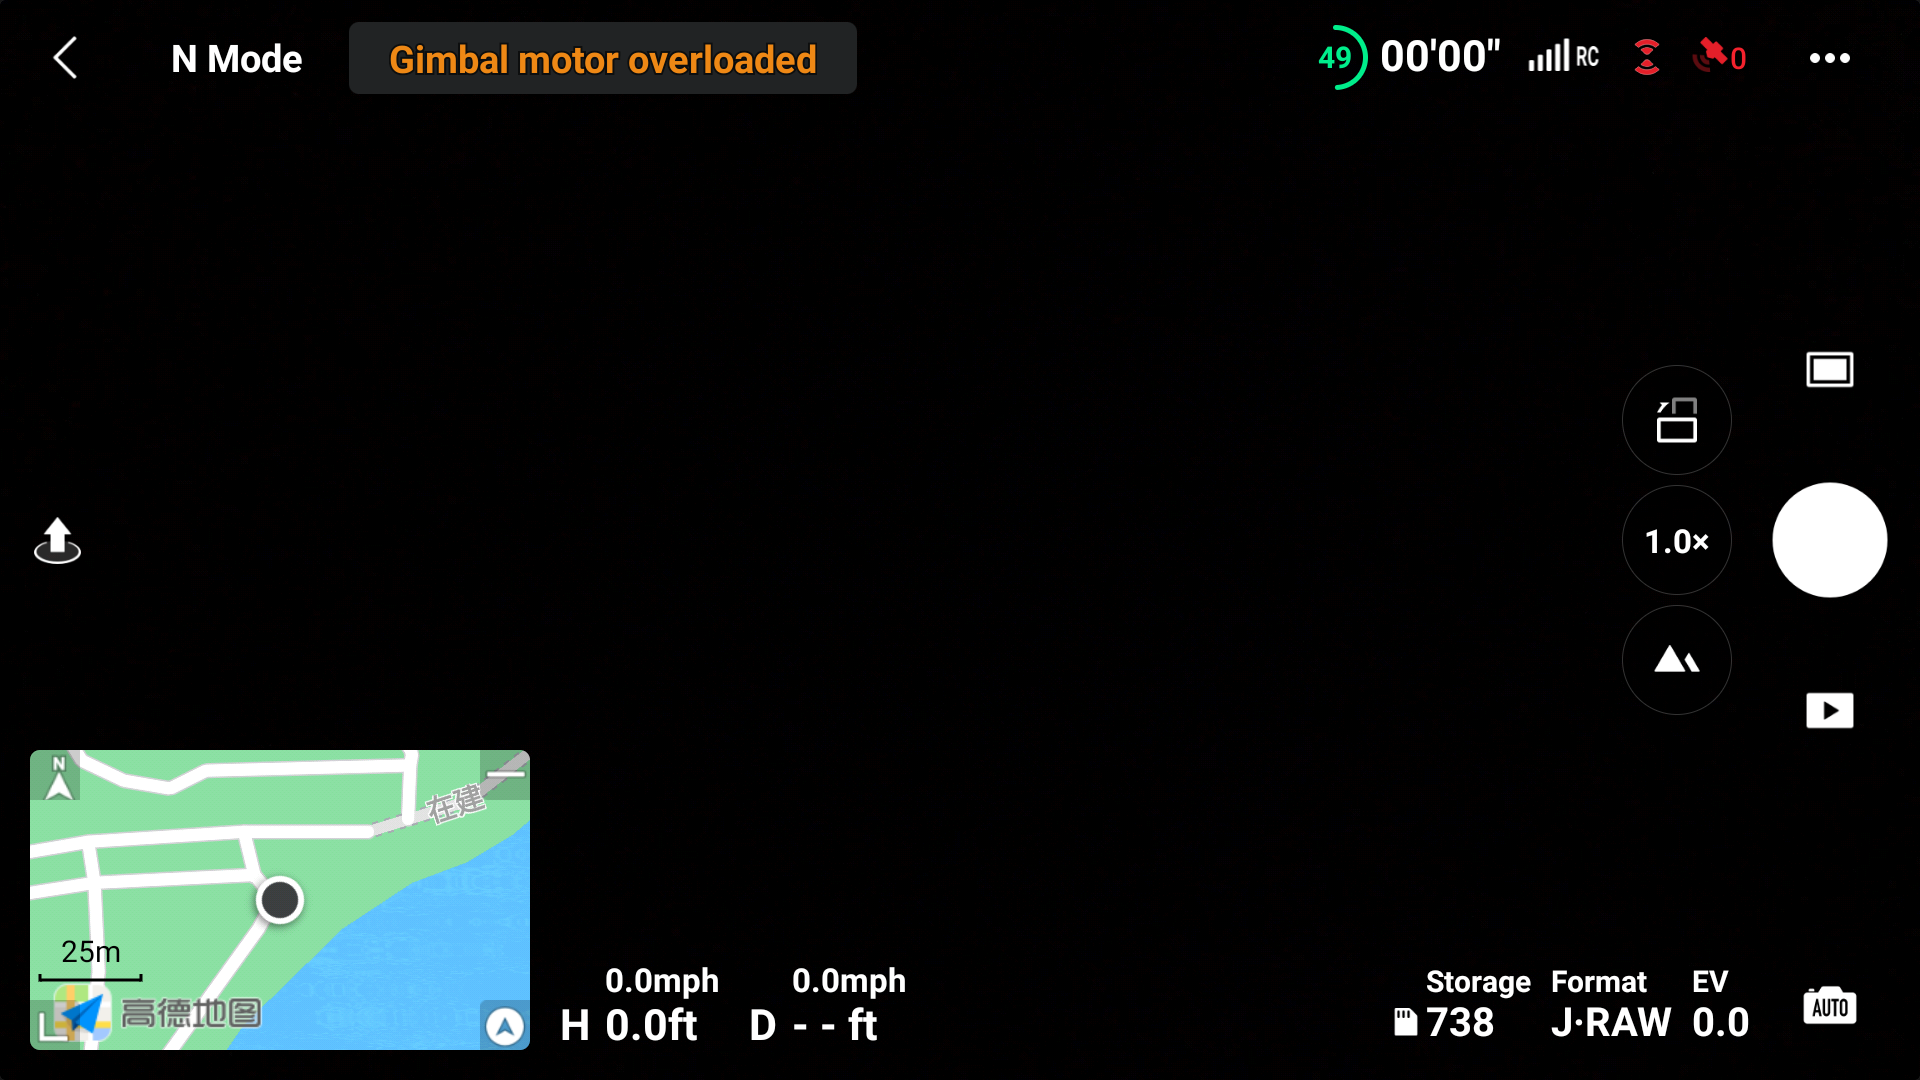
DJI Mini 3 Pro has a unique capability of rotating the camera to portrait orientation. Tap the Portrait Mode Switch on the app view to enter Portrait Mode.
Zooming
DJI Mini 3 Pro supports digital zoom.
Live Streaming
When using DJI RC-N1 remote controller with your mobile device, you can live stream with your Mini 3 Pro via DJI Fly. Live streaming is not available when using DJI RC.
Go to 「“…” > Transmission > Enable Livestreaming」to broadcast the camera view in real time. Mini 3 Pro supports livestream platforms and multiple resolutions for you to choose from and connect with your world face-to-face at any time.
Note to input the RTMP address as below: RTMP address/stream key. Please do add the “/” forward slash between the RTMP address and the stream key. Only in this way, the live streaming screen can be displayed.
Panorama
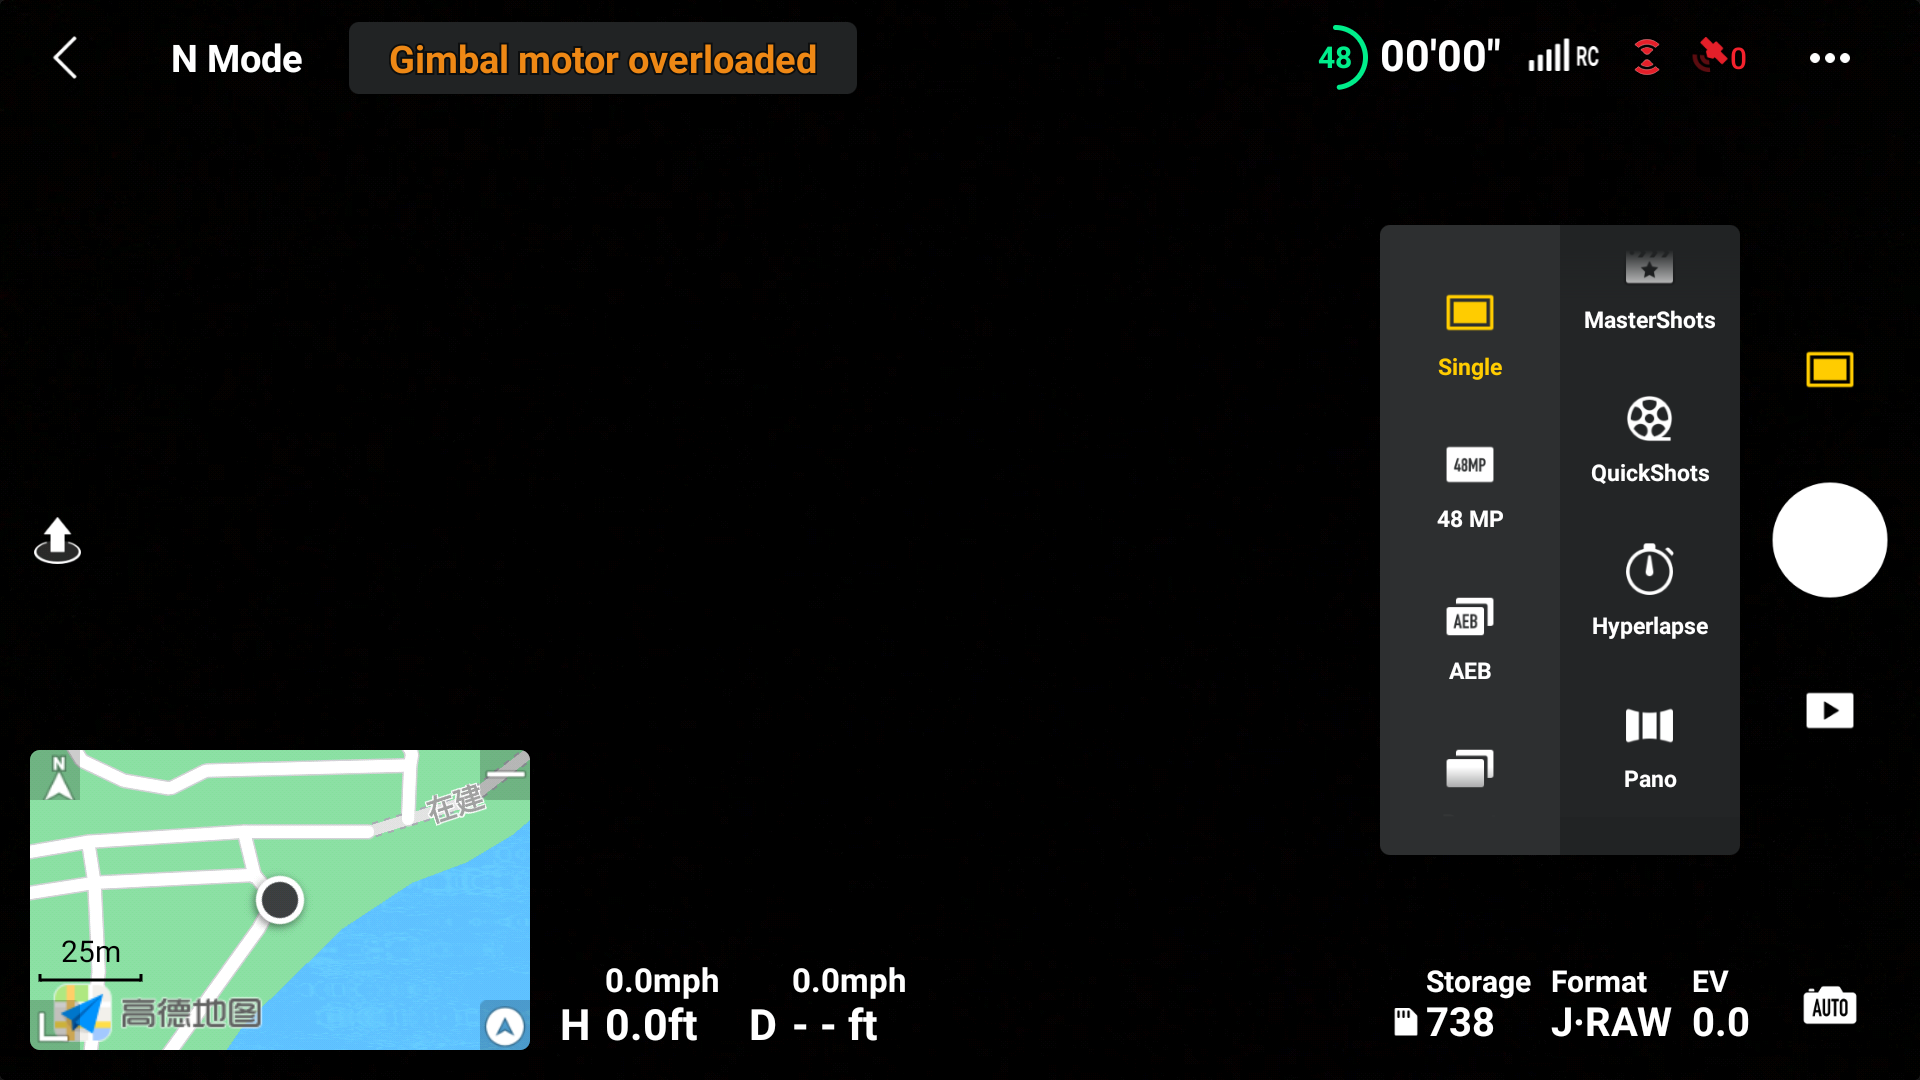
DJI Mini 3 Pro supports Panorama shooting mode: Sphere, 180°, Wide Angle, and Vertical.
Smart RTH
Smart RTH is initiated either by tapping the RTH icon at the left side of the screen or by pressing and holding the RTH button on the remote controller.
Click here and watch the tutorial (Jump to 5 minutes 42 seconds).
Waypoints
DJI Mini 3 Pro does not support Waypoint Flight or Mission Planning.
Point of Interest
DJI Mini 3 Pro supports Point of Interest.
Click here and watch the tutorial (Jump to 1 minutes 50 seconds).
Available Accessories
Accessory Purchase
4 must-have accessories for your Mini 3 Pro to fly longer and more safely, and get great video.
Popular Accessories
DJI Mini 3 Pro Fly More Kit Plus
DJI Mini 3 Pro Fly More Kit
DJI Mini 3 Pro Intelligent Flight Battery Plus
DJI Mini 3 Pro Intelligent Flight Battery
Фотография, фотосессии, интерьерная и промышленная съемка, 360° 3D виртуальные туры Калининград

На катере

На автомобиле

На мотоцикле

На автодоме

Эксклюзивные фотосессии

Последние темы на форуме:
- Вы здесь:
- Главная >
- РУНДУК >
- Полезное >
- Руководство пользователя DJI Mini 3 Pro
Здесь можно не только брать, но и можно делиться с другими.
Проблемы со скачиванием/закачиванием – тебе сюда: Помощь
Подробно о закачке
Руководство пользователя DJI Mini 3 Pro
Руководство пользователя v1.4 2022.10 DJI Mini 3 Pro на русском языке.
Information
Добавлен: 2024-01-22
Размер: 2.5 Mb
Оценка:
Добавил: Valery
Скачан: 17
Пароль: vodkomotornik.ru
Похожие файлы:
Добавить комментарий
——/——-
Зайти на борт
Апартамент Калининград
Присоединяйся!
Новое на сайте

1 2 3 4 5
Новые файлы в Рундуке
Новые объявления
Новое фото в галерее
- Гиперболический параболоид — филиал Большого театра России в Калининграде
- Автор: Valery
- Категория: Панорама
- Просмотров: 59
На сайте
Сейчас 26 гостей и 0 пользователей онлайн:
]]>
Очень частый вопрос по новому квадрокоптеру DJI Mini 3 PRO — почему он не летает влево и вправо как летал Mini2? Как включить дрон dji mini 3 pro чтобы летал в бок?
Причем если установить режим Sport, то он летает. А в режимах Cine и Normal не летает.
Плюс он летает в бок в режимах Cine и Normal если выбрать точку приоритета, а в свободном полете никак.
Дело в том что у дрона DJI Mini 3 PRO нет боковых датчиков и производитель в целях безопасности ограничил новичкам полеты в стороны (и нет об этом в инструкции на русском)
Решается это просто — надо выключить в dji mini 3 настройках флаг который ограничивает эти полеты
Инструкция: Чтобы зайти в настройки кликните 3 точки, затем раздел безопасность, и ниже облёта препятствий есть строка на английском — вот этот флаг и надо выключить
Теперь все летает! Снимайте и присылайте нам ваши работы — лучшие видеоролики разместим в специальном разделе для популяризации отдыха в России
ВАЖНО! теперь дрон может удариться о препятствие своим боком — смотрите не только на экран, но периодически осматривайте место с обоих боков от квадрокоптера — слева и справа.
РЕКОМЕНДУЕМ поставить защиту пропеллеров.
Полет на дроне это не только удовольствие для себя, можно показать красивые уголки России всем кто еще их не видел: Фотопанорамы курортов снятые с квадрокоптера DJI
Опасайтесь нападения хищных птиц на ваш квадрокоптер: соколы, орлы, ястребы, совы и даже ворОны
Внимание! весной и осенью действует акция КЭШБЭК 20% на отдых в России, чтобы не было проблем с получением кэшбэка надо заранее зарегистрировать вашу карту МИР. Инструкция как проверить регистрацию карты в программе лояльности ЗДЕСЬ
ОСТАВИТЬ E-MAIL ИЛИ ЗАКАЗАТЬ ОБРАТНЫЙ ЗВОНОК
Обращайтесь в службу поддержки клиентов.
Телефон: 8 (918) 745-37-48
E-mail: kurortinfo@mail.ru
Горящие путевки в санатории КМВ
Что такое мини-дрон?
Мини-дроны достаточно малы, чтобы их можно было носить в кармане, и весят менее 250 г. Несмотря на то, что мини-дроны могут поместиться в вашей руке, их не следует путать с игрушечными дронами.
Это не означает, что они технологически скомпрометированы, поскольку они сохраняют такое же качество камеры и многие функции, обычно присущие более крупным дронам. Нано-дроны являются одними из самых маленьких дронов, но с уменьшением размера происходит компромисс в функциональности и качестве.
Зачем покупать мини-дрон?
Люди могут купить мини-дрон, потому что он доступен по цене, портативен, прост в управлении и может снимать уникальные виды с воздуха. Мини-дроны — бюджетный вариант для новичков, изучающих аэрофото- и видеосъемку.
Благодаря высокой портативности мини-дрон можно брать с собой в полеты в различных местах. Более того, мини-дроны удобны в использовании и позволяют снимать углы, которые недоступны традиционным камерам.
Идеально подходит для новичков:
Легко летать в помещении:
3 лучших мини-дрона 2023 года
DJI Mini 4 Pro
Лучший универсальный мини-дрон для профессиональных авторов
DJI Mini 4 Pro — наш самый продвинутый дрон с мини-камерой на сегодняшний день. Он объединяет в себе мощные возможности визуализации, всенаправленное обнаружение препятствий, ActiveTrack 360° с новым режимом трассировки и передачу видео в формате FHD на 20 км, предоставляя еще больше возможностей как профессионалам, так и новичкам.
● Менее 249 г
● Настоящая вертикальная съемка HDR 4K/60 кадров в секунду
● Всенаправленное обнаружение препятствий
● Увеличенный срок службы батареи
● Передача видео в формате FHD на 20 км
● АктивТрек 360°
DJI Mini 4 Pro (DJI RC-N2)
Удобство регулирования до 249 г. Улучшенное изображение, всенаправленное распознавание, ActiveTrack 360° и передача видео в формате FHD на расстояние 20 км.
DJI Mini 4 Pro (DJI RC 2)
В комплект входит DJI RC 2 с 5,5-дюймовым ярким экраном с разрешением 1080p и яркостью 700 нит для простого и эффективного управления.
Миниатюрный DJI Mini 4 Pro с огромными возможностями настолько же мощный, насколько и портативный. При весе менее 249 г и улучшенных функциях безопасности, таких как всенаправленное обнаружение препятствий, он не только соответствует требованиям регулирования, но и является самым безопасным в своей серии. Благодаря сенсору размером 1/1,3 дюйма и первоклассным функциям он по-новому определяет, что значит летать на Mini.
DJI Mini 3
Лучший мини-дрон для семьи
Благодаря максимальному времени полета от обычной батареи 38 минут и максимальному времени полета от интеллектуальной батареи 51 минута DJI Mini 3 поможет вам наслаждаться полетом со спокойствием.
● Менее 249 г
● Увеличенный срок службы батареи
● 4K HDR-видео
● Настоящая вертикальная съемка
● Интеллектуальные функции
● 38 км/ч (уровень 5) Сопротивление ветру
DJI Mini 3 (DJI RC-N1)
Сверхпортативный DJI Mini 3 потрясающе и легко снимает видео с разрешением 4K HDR, интеллектуальными функциями и вертикальной съемкой.
DJI Mini 3 — это мини-дрон с камерой, созданный для приключений. Он имеет увеличенное время автономной работы, детализированное видео 4K HDR и такие забавные функции, как настоящая вертикальная съемка, позволяющая делать снимки, оптимизированные для социальных сетей. Независимо от того, снимаете ли вы эпическое путешествие или просто проводите день на заднем дворе, Mini 3 всегда готов.
DJI Mini 2 SE
Лучший мини-дрон для новичков
Возьмите с собой DJI Mini 2 SE, чтобы увидеть уникальный ракурс, который заставит ваши моменты пролететь незаметно. Компактный и удобный Mini 2 SE — ваш идеальный спутник в путешествии, который изменит способ запечатлеть любимые моменты.
● Менее 249 г
● Легко использовать
● Передача видео на 10 км
● Интеллектуальные режимы
● Максимальное время полета 31 минута
● 38 км/ч (уровень 5) Сопротивление ветру
DJI Mini 2 SE
Сверхлегкий дрон с камерой, который легко носить с собой. 1/2,3-дюймовая CMOS-камера обеспечивает четкое видео 2,7K и интеллектуальные функции.
DJI Mini 2 SE всего несколькими нажатиями автоматически записывает и снимает видеоролики профессионального уровня, которыми можно поделиться прямо в социальных сетях. Независимо от того, являетесь ли вы новичком или более опытным пилотом, приложение DJI Fly поможет вам добиться впечатляющих результатов вместе с саундтреками и фильтрами.
Мини дроны RC
Если вы ищете лучшие пульты дистанционного управления (RC) для мини-дронов, обратите внимание на DJI. Являясь ведущим брендом в индустрии дронов, DJI предлагает широкий ассортимент высококачественных пультов дистанционного управления, предназначенных для обеспечения надежного и беспрепятственного управления вашими дронами.
Благодаря расширенным функциям, эргономичному дизайну и передовым технологиям DJI создает свои пульты дистанционного управления, обеспечивающие беспрецедентные возможности для пилотов дронов. Независимо от того, являетесь ли вы новичком или опытным пилотом, покупка пультов дистанционного управления от DJI гарантирует, что вы инвестируете в первоклассное качество и производительность.
Как управлять мини-дроном?
Нужно ли регистрировать мини-дрон?
Мир мини-дронов может быть пугающим, но только не с DJI