

Инструкции по установке и использованию
Специальные программы
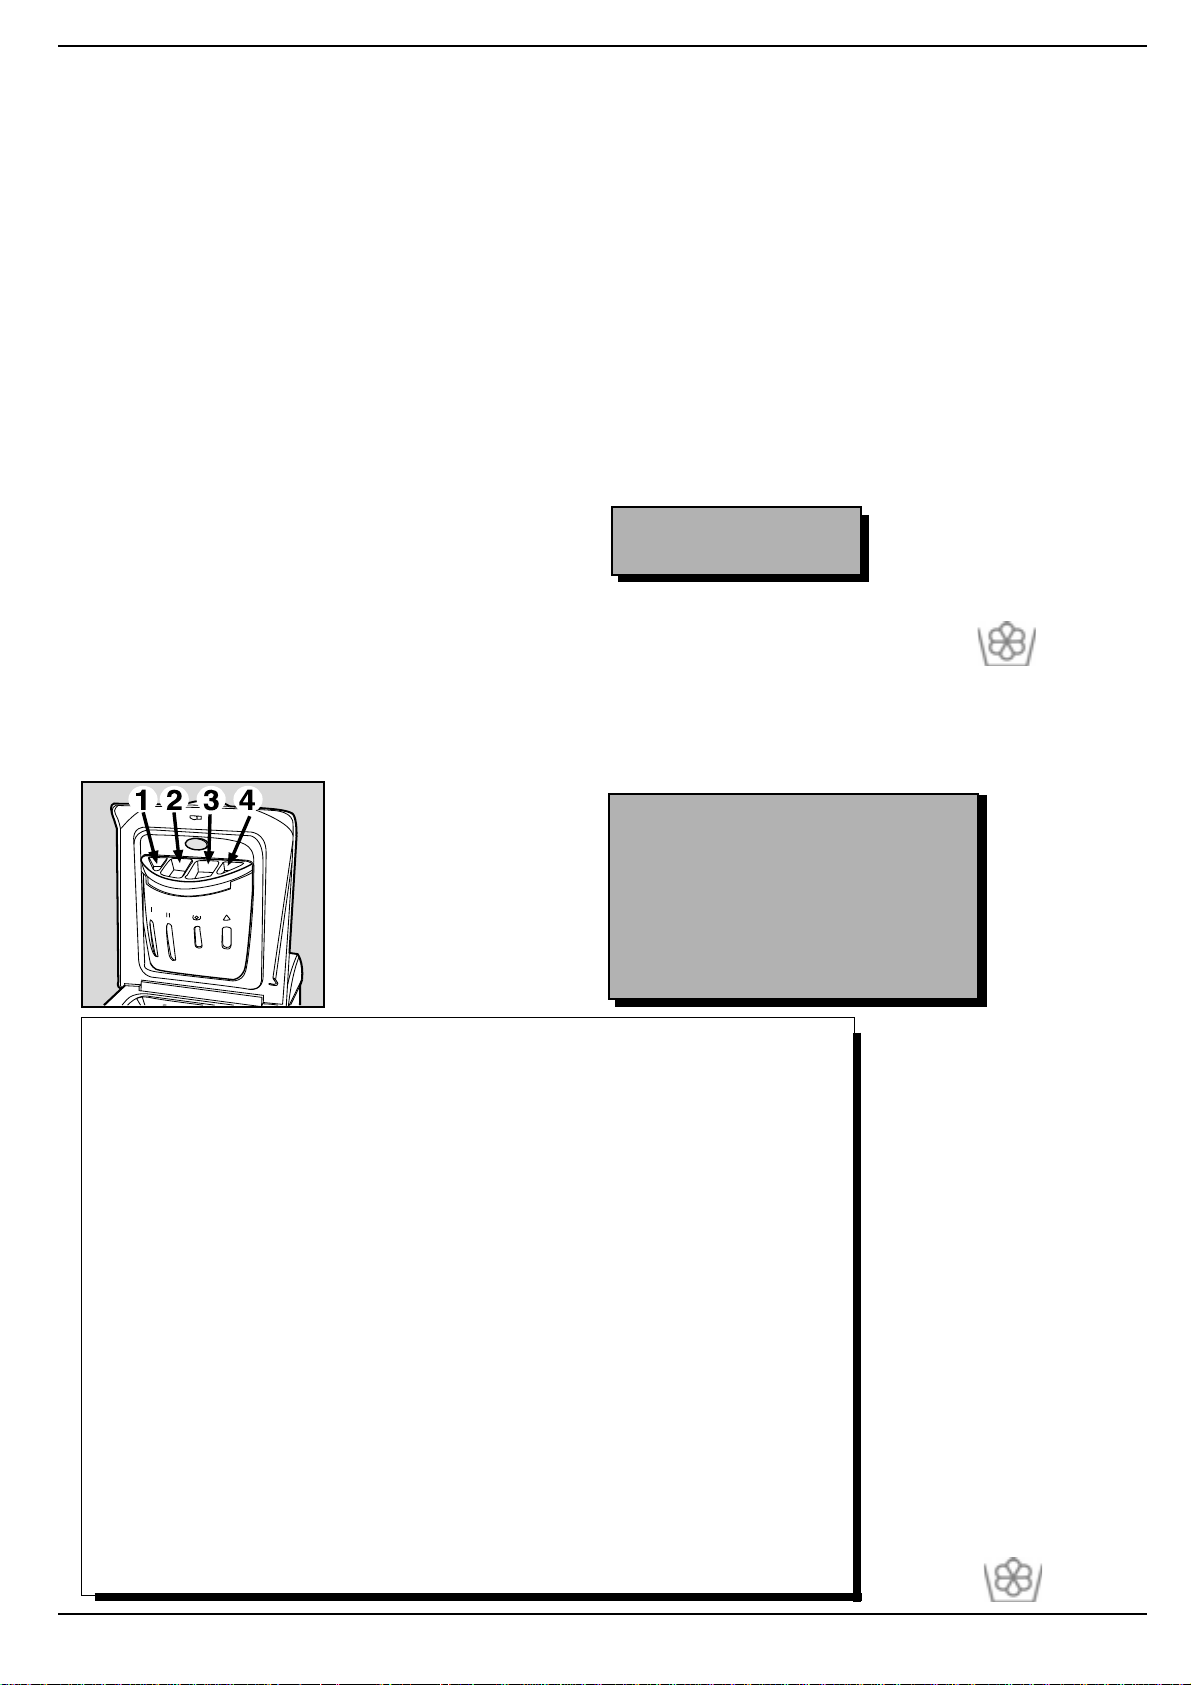
4- Класс А при 40°C.
Âaøà стиральная машина может выполнять специальную программу стирки при низкой температуре, обеспечивая при
этом хорошие результаты. Выбрав программу 4 при температуре 40°C, благодаря особым усилиям стиральной машины и более
продолжительному циклу стирки Вы получите такие же результаты, что и при стирке при 60°C.
8 — 30-ти минутная ежедневная стирка при 30°.
Ваша стиральная машина может выполнять программу быстрой стирки для слабо
загрязненной одежды. Выберите программу 8 при температуре 30°C и можете стирать одежду из самых разных тканей (кроме шерсти и
шелка), при максимальной загрузке барабана 3 кг. Программа, длящаяся около 30 минут, отличается экономным расходом электроэнергии.
РЕКОМЕНДУЕМ ИСПОЛЬЗОВАТЬ ЖИДКОЕ МОЮЩЕЕ СРЕДСТВО.
Ткань и степень
загрязнения
Прог-
рамма
Темпе-
ратура
МС/
предв.
стирка
МС/
основная
стирка
Смягчи-
тель
Отбели-
ватель
Длитель—
ность
цикла,
мин
Описание
цикла стирки
ЗАПРОГРАММИРОВАНН-
ЫЙ ÏÓÑK
С задержкой на 12-9-3-1 ч
Пуск через 12-9-3-1 ч
Стоп / Сброс
Reset
Прерывание / Отмена выбранной
программы
ÕËÎÏÎK
Очень сильно загрязненное белое
белье (простыни, скатерти и т.п.)
1
Max
u
u
u
150
Предварительная стирка, стирка при
высокой температуре, полоскание,
промежуточный и окончательный отжим
Сильно загрязненное белое белье
(простыни, скатерти и т.п.)
2
Max
u
u
Деликатн./-
Обычн.
135
Стирка при высокой температуре,
полоскание, промежуточный и
окончательный отжим
Очень сильно загрязненное белое
белье (простыни, скатерти и т.п.)
3
60°C
u
u
Деликатн./-
Обычн.
115
Стирка при 60°C, полоскание,
промежуточный и окончательный отжим
Сильно загрязненное белое и
линяющее цветное белье
4
40°C
u
u
150
Long Стирка при 40°C, полоскание,
промежуточный и окончательный отжим
Сильно загрязненное белое и
линяющее цветное белье
5
40°C
u
u
Деликатн./-
Обычн.
110
Стирка при 40°C, полоскание,
промежуточный и окончательный отжим
Полоскание / Отбеливание
u
Деликатн./-
Обычн.
Полоскание, промежуточный и
окончательный отжим
Отжим
Слив и окончательный отжим
Стоп / Сброс
Прерывание / Отмена выбранной
программы
ÑÈÍÒÅÒÈKÀ
Сильно загрязненная, цветная,
линяющая (детская одежда и пр.)
6
60°C
u
u
Деликатн.
100
Предварительная стирка, стирка при 60°C,
полоскание, остановка с водой или
деликатный отжим
Слабо загрязненная, деликатная
цветная (любая одежда)
7
40°C
u
u
Деликатн.
70
Стирка при 40°C, полоскание, остановка с
водой или деликатный отжим
Слабо загрязненная, деликатная
цветная (любая одежда)
8
30°C
u
u
30
Стирка при 30°C, полоскание и
деликатный отжим
Полоскание / Отбеливание
u
Деликатн.
Полоскание, остановка с водой или
деликатный отжим
Смягчение
u
Полоскание с автоматическим добавле-
нием смягчителя, остановка с водой или
деликатный отжим
Антисминаемость —
Удержание полоскания
Остановка с водой для шелка и особо
деликатных изделий
Отжим
Слив и деликатный отжим
Стоп / Сброс
Прерывание / Отмена выбранной
программы
ДЕЛИК АТНЫЕ ÒKÀÍÈ
Шерсть
9
40°C
u
u
60
Стирка при 40°C, полоскание и
деликатный отжим
Особо деликатные ткани и одежда
(занавеси, шелк, вискоза и пр.)
10 30°C
u
u
50
Стирка при 30°C, полоскание, остановка с
водой или слив
Полоскание
u
Полоскание, остановка с водой или слив
Антисминаемость —
Удержание полоскания
Остановка с водой для шелка и особо
деликатных изделий
Отжим
Слив и деликатный отжим (для шерсти)
Слив
Слив
Стоп / Сброс
Прерывание / Отмена выбранной
программы
Программы на все случаи жизни
Что стираем сегодня?
Важно:Чтобы отменить только что установленную программу, выберите один из символов ) (Стоп / Сброс) и подождите по
крайней мере 5 сек.
Данные в таблице, являются справочными и могут меняться в зависимости от модели машины, количества и типа стираемых вещей,
температуры и жесткости воды в водопроводной системе, также как и от температуры в комнате.
9
AT 84
Consigli per lavare meglio
The secrets
of fabrics
How to get better results
Instructions for
Ex
GB
installation and use
Mode
F
dinstallation et demploi
Инструкции по установке и
CIS
использованию
Beüzemelési és
HU
használati utasítás
Instrucciones para la
E
instalación y el uso
Top loading
washing machine
safe
and easy to use
Class A at
40°C
The first washing machine to give a perfect
wash at only 40°C
Cashmere
Gold
The first washing
machine to have «The
Woolmark Company»
recognition
QuicQuic
Quic
QuicQuic
Here are the 12 topics explained in this manual. Read,
learn and have fun: you will discover many secret ways
to get a better wash, more easily and making your
washing machine last longer. And especially keeping
an eye on safety.
Installation and removal (p. 2) Installation and removal (p. 2)
1.
Installation and removal (p. 2)
Installation and removal (p. 2) Installation and removal (p. 2)
Installation, after delivery or transport, is the most important
operation for the correct functioning of your washing machine.
Always check:
1.1.
1. That the electric system complies with the law;
1.1.
2.2.
2. That the inlet and draining pipes are connected correctly;
2.2.
3.3.
3. That the washing machine is levelled properly: something
3.3.
worth checking for the life of your washing machine and the
quality of your wash;
4.4.
That the tub fastening screwsThat the tub fastening screws
4.
That the tub fastening screws (on the back of the appliance)
4.4.
That the tub fastening screwsThat the tub fastening screws
have been removedhave been removed
have been removed.
have been removedhave been removed
Safety for you and your children (p. 3)Safety for you and your children (p. 3)
2.
Safety for you and your children (p. 3)
Safety for you and your children (p. 3)Safety for you and your children (p. 3)
Here you will find the necessary guidelines for the safety of
your entire household. Because safety is very important indeed.
k Guidek Guide
k Guide
k Guidek Guide
Useful tips to avoid mistakes (p.  Useful tips to avoid mistakes (p.
7.
Useful tips to avoid mistakes (p.
Useful tips to avoid mistakes (p. Useful tips to avoid mistakes (p.
Years back, our grandmothers were the ones who gave us good
advice — and in those days synthetic fibres did not exist: washing
was easy. Today, your washing machine gives you helpful
advice.
What goes in your washing machine andWhat goes in your washing machine and
3.
What goes in your washing machine and
What goes in your washing machine andWhat goes in your washing machine and
how to start it (p. 4)how to start it (p. 4)
how to start it (p. 4)
how to start it (p. 4)how to start it (p. 4)
A correct distribution of your laundry is vital both to the successful
outcome of the wash and to the life of your appliance. Learn all
the tips and secrets to dividing your linen: colour, type of fabric
and tendency of creating fuzz are the most important criteria.
Understanding the control panel (p. 5)Understanding the control panel (p. 5)
4.
Understanding the control panel (p. 5)
Understanding the control panel (p. 5)Understanding the control panel (p. 5)
The control panel is very simple. It has only a few essential
buttons to help you choose any type of wash cycle, ranging
from the most energetic, capable of cleaning a mechanic’s
overalls, to the most delicate for wool. Familiarising with it will
help you get the best out of your wash, while spending less and
helping your washing machine last longer. It’s easy.
Guide to the wash programmes (p. 6)Guide to the wash programmes (p. 6)
5.
Guide to the wash programmes (p. 6)
Guide to the wash programmes (p. 6)Guide to the wash programmes (p. 6)
Herein is an easy table to help you choose the right programme,
temperature, detergents and possible additives. Choose the
right programme and you will get better results with your wash
while saving time, water and energy, day after day.
How to close the drum (p. 9)How to close the drum (p. 9)
8.
How to close the drum (p. 9)
How to close the drum (p. 9)How to close the drum (p. 9)
Open and shut the doors fully for a safe wash cycle.
The detergent dispenser (p. 10)The detergent dispenser (p. 10)
9.
The detergent dispenser (p. 10)
The detergent dispenser (p. 10)The detergent dispenser (p. 10)
How to use the detergent dispenser.
PrPr
obob
10.
Before calling a technician, read these pages: immediate
solutions may be found for a number of problems. If the problem
persists, call Ariston customer services and any failure will be
repaired as soon as possible.
11 .
Your washing machine is a true friend: with just a bit of care, it
will repay you with loyalty and devotion.
With the necessary upkeep, it will wash for years and years to
come.
lems and solutions (p.lems and solutions (p.
Pr
ob
lems and solutions (p.
PrPr
obob
lems and solutions (p.lems and solutions (p.
Care and maintenance (p.Care and maintenance (p.
Care and maintenance (p.
Care and maintenance (p.Care and maintenance (p.
11 and 12) 11 and 12)
11 and 12)
11 and 12) 11 and 12)
13) 13)
13)
13) 13)
Guide to understanding labels and symbols (p. 7-8) Guide to understanding labels and symbols (p. 7-8)
6.
Guide to understanding labels and symbols (p. 7-8)
Guide to understanding labels and symbols (p. 7-8) Guide to understanding labels and symbols (p. 7-8)
The international symbols on the labels of your garments are
easy to understand and equally important for the success of
your wash. The guide includes simple instructions to help you
choose the suitable wash programme, the right temperature,
wash cycles, ironing methods and specific Ariston symbols.
11
1 Instructions for installation and use
11
TT
ecec
hnical fhnical f
12.
T
ec
hnical f
TT
ecec
hnical fhnical f
Herein are the technical features of your washing machine:
model type number, electric and water specifications, size,
capacity, speed of the spin cycle and compliance with Italian
and European rules and regulations.
eatures (p.eatures (p.
eatures (p.
eatures (p.eatures (p.
14) 14)
14)
14) 14)
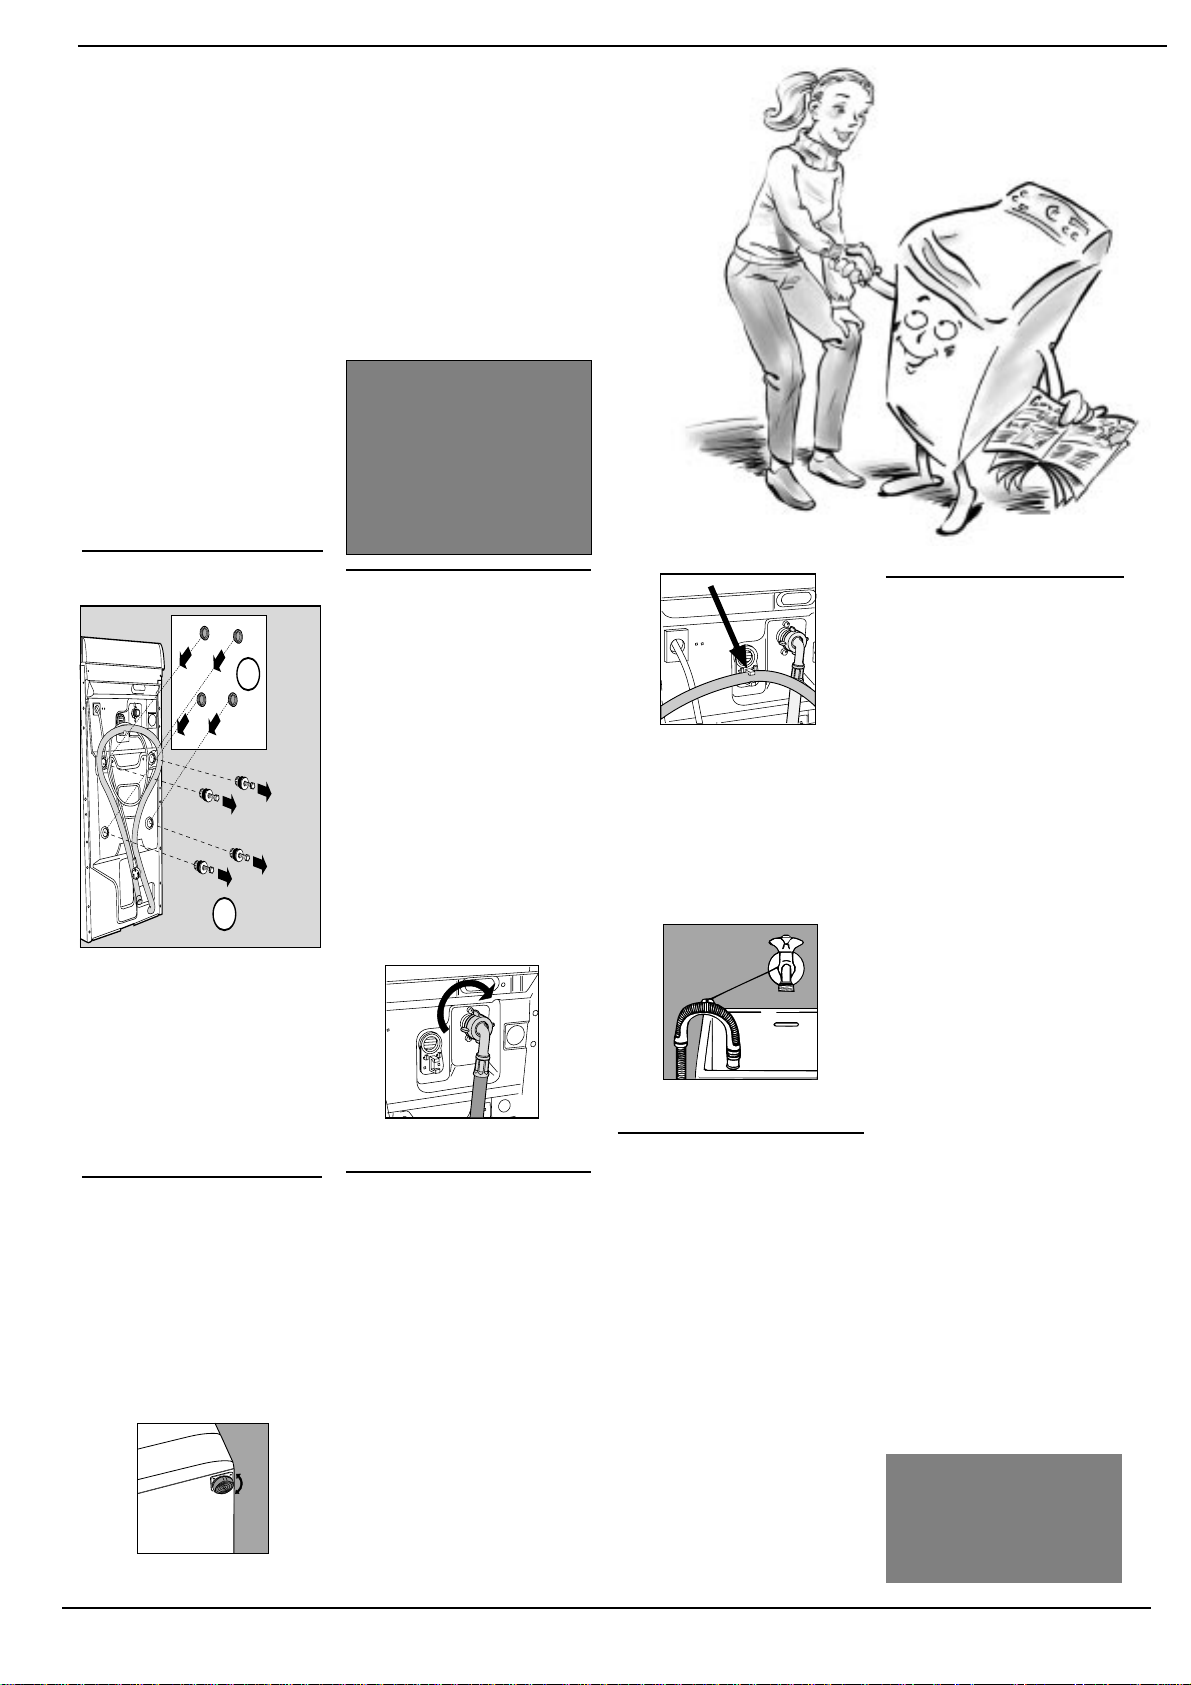
Installation and removal
When theWhen the
When the
When theWhen the
appliance arrivesappliance arrives
appliance arrives
appliance arrivesappliance arrives
Whether new or just transported to a new house, installation is extremely
important for the correct functioning of your washing machine.
After removing the appliance
from its packaging, check that
it is intact. If in doubt, contact
a qualified technician
immediately.
machine is blocked, formachine is blocked, for
machine is blocked, for
machine is blocked, formachine is blocked, for
transportation, by fourtransportation, by four
transportation, by four
transportation, by fourtransportation, by four
screws and rubber washersscrews and rubber washers
screws and rubber washers
screws and rubber washersscrews and rubber washers
on the back panel.on the back panel.
on the back panel.
on the back panel.on the back panel.
Unblocking: removeUnblocking: remove
Unblocking: remove
Unblocking: removeUnblocking: remove
the 4 screws!the 4 screws!
the 4 screws!
the 4 screws!the 4 screws!
The inside of theThe inside of the
The inside of the
The inside of theThe inside of the
2
1
Before using the washing
machine,
screwsscrews
screws, remove the rubber
screwsscrews
washers with the relative
spacer (keeping all the parts)
and use the plastic tabs
provided to fill in the holes.
Warning:Warning:
Warning: should the screws
Warning:Warning:
be re-used, make sure you
fasten the shorter at the top.
LevellingLevelling
Levelling
LevellingLevelling
The washing machine must be
levelled appropriately in order to
guarantee its correct functioning.
TT
o leo le
vel the appliancevel the appliance
T
o le
vel the appliance
TT
o leo le
vel the appliancevel the appliance
must be adjustedmust be adjusted
must be adjusted; the angle of
must be adjustedmust be adjusted
inclination, measured according
to the worktop, must not exceed
2°. When placed on fitted carpet,
make sure the ventilation is not
obstructed within its surroundings.
The feet are adjustable.
remove theremove the
remove the
remove theremove the
,,
the f the f
eeteet
,
the f
eet
,,
the f the f
eeteet
Do not throw the blocking
screws and the spacers
away. In the event of a
removal, they can be used
to block the components
inside the appliance again
and so protect it during
transport.
Connection to the waterConnection to the water
Connection to the water
Connection to the waterConnection to the water
mainsmains
mains
mainsmains
Water pressure must range
within the values indicated on
the data plate on the rear of
your washing machine.
Connect the inlet hose
(situated unassembled inside
the drum) to a cold water tap
with a 3/4 gas threaded mouth.
If the water pipes are new or
left unused, run the water until
it is clear and free of debris.
Attach the hose to the
appliance, in line with the
appropriate water pipe inlet at
the top right.ù
Water hose inlet to be fitted to
the top right.
Connecting the drain hoseConnecting the drain hose
Connecting the drain hose
Connecting the drain hoseConnecting the drain hose
On the back of the appliance,
towards the top, you will find a
hook onto which you should
fasten the drain hose if
necessary . Insert the other end
in a wall draining duct or place
it on the edge of a sink or tub
avoiding excessive kinks and
bending.
at a height ranging from 60 toat a height ranging from 60 to
at a height ranging from 60 to
at a height ranging from 60 toat a height ranging from 60 to
100 cm.100 cm.
100 cm.
100 cm.100 cm.
In case it is necessary to fix the
end of the hose at a height
below 60 cm from the ground,
it must be fixed in the
appropriate hook placed on
the back panel as mentioned
above.
It should be placedIt should be placed
It should be placed
It should be placedIt should be placed
The hook to be used in case the
drain hose ends at a height
below 60 cm.
If the hose drains into a tub or
sink, apply the plastic guide
and tie it to the tap.
The guide for draining into tubs
and sinks.
The hose must neverThe hose must never
The hose must never
The hose must neverThe hose must never
remain immerremain immer
remain immer
remain immerremain immer
Extensions are inadvisable. In
case of absolute need, the
extension must have the same
diameter as the original hose
and must not exceed 150 cm
in length. In case of wall
draining pipes, their efficiency
must be checked by a qualified
technician. If the dwelling is on
one of the upper floors of a
building, there may be drain
trap problems causing the
washing machine to load and
unload water continuously.
In order to avoid such an
inconvenience, special antidrain trap valves are available
in shops.
sed in watersed in water
sed in water
sed in watersed in water
..
.
..
Electric connectionElectric connection
Electric connection
Electric connectionElectric connection
Before connecting the
appliance to the electric
socket, be sure that:
1) the electric socket is able
to sustain the appliance’s
maximum power load
indicated on the data plate
and in compliance with the
law;
2) the supply voltage is
included within the values
indicated on the data
plate;
3) the socket is compatible
with the appliance’s plug.
If not, do not use adapters,
but replace either the
socket or the plug;
4) electric household appliances must be equipped
with an «earthing» system,
5) that the machine is not
placed on top of the power
supply cable once the
connection has been
made.
Warning!
Any modifications made to the
factory settings or an irregular electric connection, any
electrical, mechanical or hydraulic modification whatsoever to the appliance shall
render the guarantee invalid
and shall relieve the manufacturer and retailer of any and
all liability.
Plastic bags, polystyrene
foam, screws and other
packaging parts are not
children’s toys, and are
potentially dangerous.
Instructions for installation and use
22
2
22

More and more important
YY
our safour saf
Y
our saf
YY
our safour saf
yy
our cour c
y
our c
yy
our cour c
hildrenhildren
hildren
hildrenhildren
ety and that ofety and that of
ety and that of
ety and that ofety and that of
Y our washing machine has been built in compliance
with the strictest international safety regulations.
T o protect you and all your family .
Read these indications and all
the information in this manual
carefully: they are an important
source, not only of numerous
useful tips, but also of vital
information on safety, use and
maintenance
1. In case of malfunctioning,1. In case of malfunctioning,
.
1. In case of malfunctioning,
1. In case of malfunctioning,1. In case of malfunctioning,
first unplug the appliancefirst unplug the appliance
first unplug the appliance
first unplug the appliancefirst unplug the appliance
from the wall socket and turnfrom the wall socket and turn
from the wall socket and turn
from the wall socket and turnfrom the wall socket and turn
off the water tapoff the water tap
off the water tap; do not under
off the water tapoff the water tap
any circum-stances touch
internal parts in order to
attempt repairs. This will also
render the guarantee invalid.
2.2.
The washing machineThe washing machine
2.
The washing machine
2.2.
The washing machineThe washing machine
should not be installed inshould not be installed in
should not be installed in
should not be installed inshould not be installed in
an outdoor environmentan outdoor environment
an outdoor environment,
an outdoor environmentan outdoor environment
not even when a roof
shelters the area, because
it may be very dangerous
to leave it exposed to rain
and thunderstorms.
3.3.
It must only be used byIt must only be used by
3.
It must only be used by
3.3.
It must only be used byIt must only be used by
adults adults
adults and exclusively for
adults adults
washing clothes following
the instructions provided in
this manual.
4.4.
4. Should it have to be moved,
4.4.
pull the white lever, situated
on the left beneath the
base, and the retractable
wheels will appear, thus
allowing for easy movement.
5.5.
5. Before loading the
5.5.
washing machine,
sure the drum is emptysure the drum is empty
sure the drum is empty.
sure the drum is emptysure the drum is empty
6.6.
Never touch the washingNever touch the washing
6.
Never touch the washing
6.6.
Never touch the washingNever touch the washing
machine when barefootmachine when barefoot
machine when barefoot
machine when barefootmachine when barefoot
with wet or dampwith wet or damp
or
with wet or damp
with wet or dampwith wet or damp
hands or feethands or feet
hands or feet.
hands or feethands or feet
«I only want an authorised
specialised technician with
original Ariston spare
parts!»
makemake
make
makemake
7.7.
Never use extensions orNever use extensions or
7.
Never use extensions or
7.7.
Never use extensions orNever use extensions or
multiple plugsmultiple plugs
multiple plugs, which are
multiple plugsmultiple plugs
particularly dangerous in
humid environments. The
power supply cable must
never be bent or dangerously compressed.
8.8.
Do not remove the filterDo not remove the filter
8.
Do not remove the filter
8.8.
Do not remove the filterDo not remove the filter
while the appliance is on.while the appliance is on.
while the appliance is on.
while the appliance is on.while the appliance is on.
Do not use hand washDo not use hand wash
Do not use hand wash
Do not use hand washDo not use hand wash
detergentdetergent
detergent because the
detergentdetergent
abundance of foam could
come out from the lid and
cause damage.
9.9.
Never pull on the plugNever pull on the plug
9.
Never pull on the plug or
9.9.
Never pull on the plugNever pull on the plug
the washing machine to
disconnect it from the wall
socket: it is extremely
dangerous.
10.10.
10.While the appliance is
10.10.
functioning,
the drain waterthe drain water
the drain water as it could
the drain waterthe drain water
reach very high temperatures.
children’s reachchildren’s reach
children’s reach.
children’s reachchildren’s reach
force the washingforce the washing
force the washing
force the washingforce the washing
machine doormachine door
machine door because this
machine doormachine door
could damage the safety
block on the opening,
which serves to protect
from accidental openings.
11.11.
This appliance is intendedThis appliance is intended
11.
This appliance is intended
11.11.
This appliance is intendedThis appliance is intended
for domestic use.for domestic use.
for domestic use.
for domestic use.for domestic use.
Industrial use (in hotels,
restaurants and laundries)
compromises its original
manufacturing characteristics and invalidates the
guarantee.
do not touchdo not touch
do not touch
do not touchdo not touch
Keep it out ofKeep it out of
Keep it out of
Keep it out ofKeep it out of
NeverNever
Never
NeverNever
How to change the power supply cableHow to change the power supply cable
How to change the power supply cable
How to change the power supply cableHow to change the power supply cable
The power supply cable is special and can be purchased exclusively from authorised
Ariston T echnical Service Centres.
T o replace it, do as follows:
1. Make sure that the washing
machine is switched off and unplugged.
Fig. 1
2. Remove the appliance base
and unscrew the 2 screws on
the bottom right-hand side, then
unscrew the 6 rear screws, on
the left-hand side, and remove
the side panel by tipping it
slightly outwards and pulling it
out. (fig. 1 and 2).
Fig. 2
3. Disconnect the electricity sup-
ply to the radio interference suppresser by removing the connector (fig. 3).
4. Unscrew the 2 outer filter fastening screws and, with the help
of a screwdriver (see fig. 4), release it from the back panel by
pulling upwards.
Fig. 3
5. Once you have positioned
the new power supply cable, reconnect the connector, making
sure the safety hook is securely
in place.
You must contact a qualified
professional to replace the
power supply cable. The same
must respect the applicable
norms in force.
Fig. 4
33
3 Instructions for installation and use
33
M
What goes in yWhat goes in y
What goes in y
What goes in yWhat goes in y
Before washing, you can do a great deal for better results. Divide your garments according to fabric and colour.
Read the labels and follow their indications. Alternate small items with large ones.
Before washing.Before washing.
Before washing.
Before washing.Before washing.
Divide your washing according
to the type of fabric and colour
resistance: sturdy fabrics should
be separated from delicate
ones.
Light colours should be
separated from dark ones.
Empty all pockets (coins, paper ,
money and small objects) and
check the buttons. Mend
immediately or remove loose
buttons as they could fall off
during the wash cycle.
The labels say it all.The labels say it all.
The labels say it all.
The labels say it all.The labels say it all.
Always look at the labels: they
tell you everything about your
garment and how to wash it in
the best way possible.
The table on page 7 shows you
all the secrets of the symbols
found on labels. Their
indications are a valuable guide
to a better wash and to longer
lasting clothes.
Alternate small itemsAlternate small items
Alternate small items
Alternate small itemsAlternate small items
with large ones.with large ones.
with large ones.
with large ones.with large ones.
Unfold all your washing. Place
it loose inside the drum and
follow the indications as to the
recommended load quantity for
the different wash programmes.
Your clothes will come out
cleaner and with fewer creases.
Garments treated withGarments treated with
Garments treated with
Garments treated withGarments treated with
petrpetr
ol-based stain remool-based stain remo
petr
ol-based stain remo
petrpetr
ol-based stain remool-based stain remo
Do not place garments in your
washing machine that have
been treated with petrol, pure
alcohol, trichlorethylene etc.
until these products have
evaporated completely.
our washing macour washing mac
our washing mac
our washing macour washing mac
Dividing your garments
according to fabric and
colour is very important
for good results.
verver
..
ver
.
verver
..
hine?hine?
hine?
hine?hine?
HoHo
Ho
HoHo
Putting your appliance
in place and moving it.
If your washing machine is
equipped with a special set of
retractable wheels you can
easy move it. To lower the
wheels and thus move the
appliance effortlessly, just pull
the lever, situated on the lefthand side beneath the base.
Once the appliance is in the
required position, put the lever
back in place. The washing
machine is now firmly in place.
After installing your new washing machine, start a wash cycle (with the appliance empty) by setting programme
«1» at 60 degrees C.
Starting the washing machine
in the right way is important for
the quality of your wash, for
preventing problems and for
lengthening the life of your
appliance. After loading your
washing and pouring in the
detergent together with any
additives, always check that:
w to starw to star
w to star
w to starw to star
For delicate garments:
protect underwear, tights
and stockings, children’s
socks and delicate items
by placing them in a
canvas pouch
t the appliancet the appliance
t the appliance
t the appliancet the appliance
See figure. (Just for equipped
models)
1. The appliance doors are
firmly shut.
2. The plug is inserted in the
socket.
3. The water tap is turned on.
4. button G is on the O position.
5. The set of retractable wheels
is stored away (i.e. the wheels
are not touching the floor).
Choose the desired programme
The programme is selected
according to the type of
garments that need to be
washed and how dirty these are.
To select the programme,
consult the table on page 6. Turn
knob A and set it to the number
corresponding to the desired
programme. Select the
temperature using knob B, in
the case turn the knob C
selecting the spin speed and, if
necessary, press the function
buttons (D-E-F); finally press the
ON-OFF button G (position I).
Don’t forget to select “12h, 9h,
3h 1 h” (one position) whether
you need such delaied wash.
At the end of the wash cycle…
Wait for approximately two
minutes.
Then turn the washing machine
off by pressing ON-OFF button
G (O position). You can now
open the washing machine
doors safely. After having
removed the freshly cleaned
washing, leave the doors open
or ajar so that the humidity left
inside can evaporate.
Always turn the water tap off.
Remember that, in the event
of a power failure, or should
the washing machine switch
itself off, the programme
selected will start up again
from where it was interrupted.
Instructions for installation and use
44
4
44
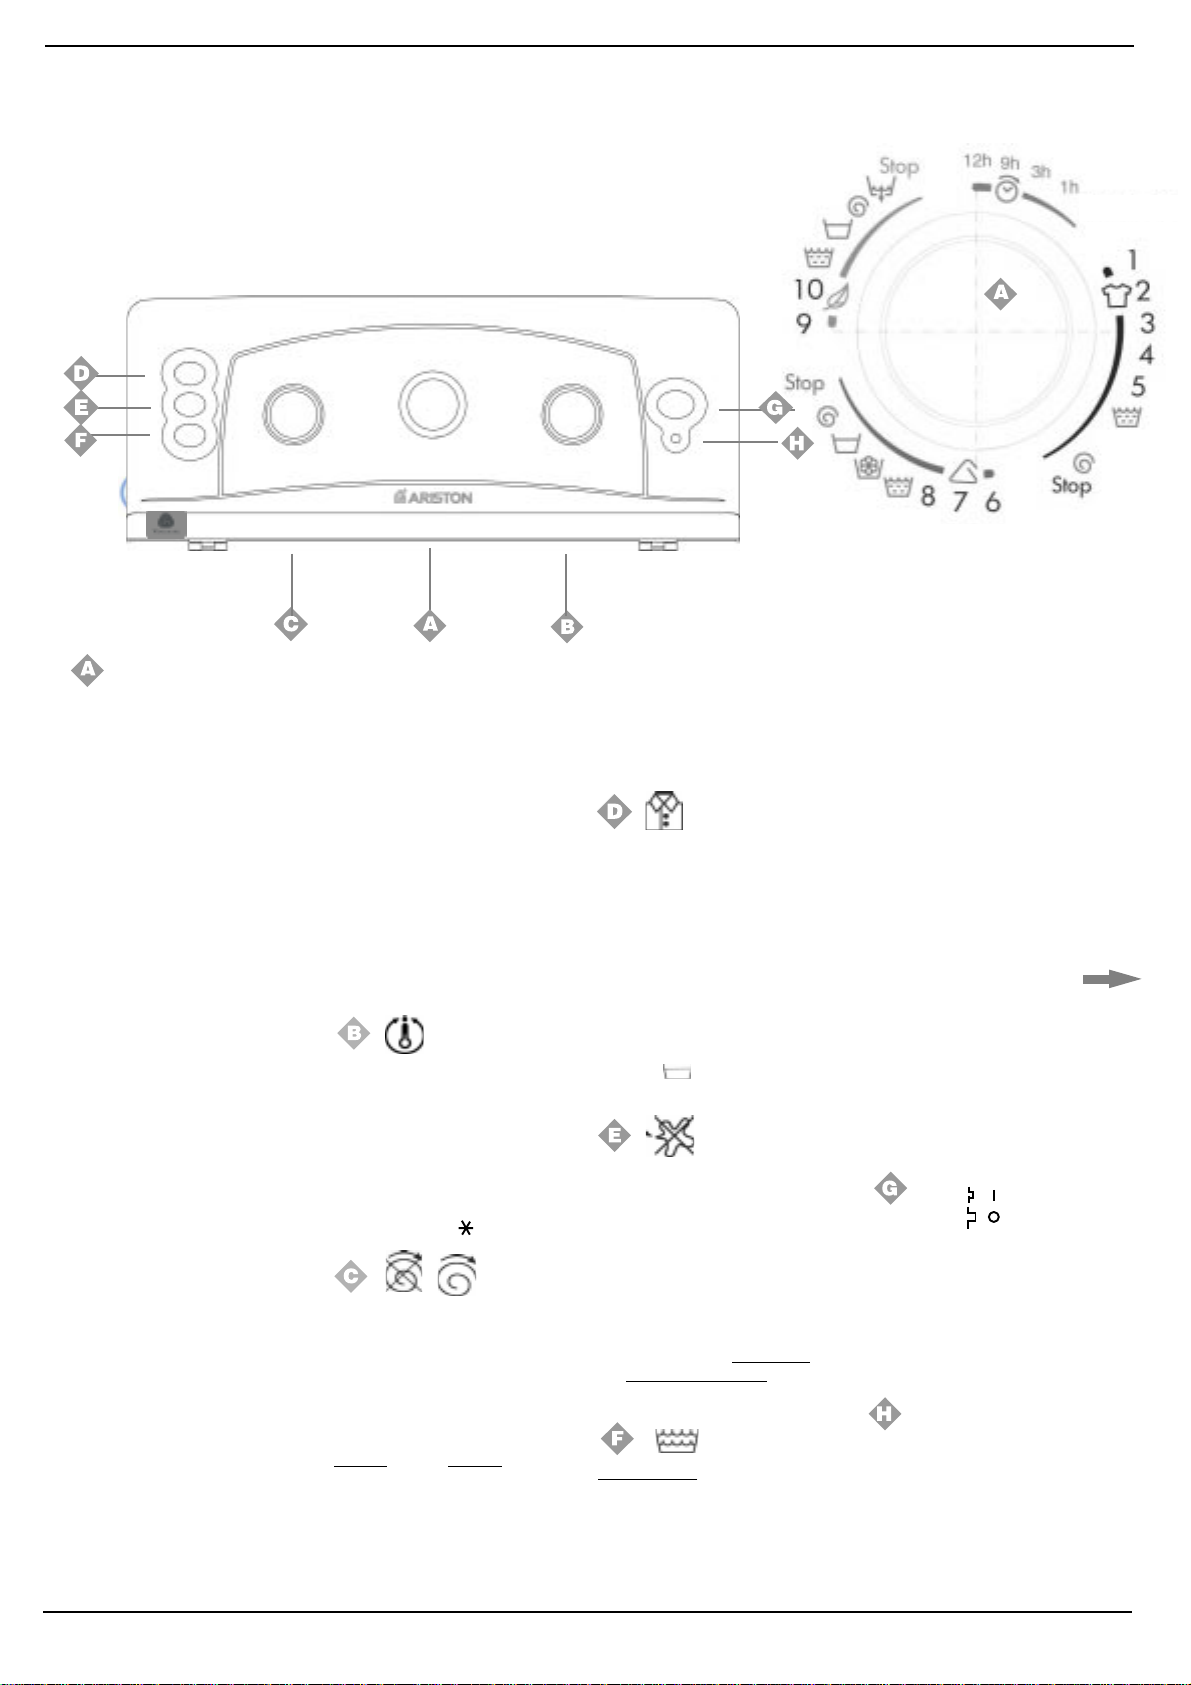
Understanding the control panel
Here I’m in commandHere I’m in command
Here I’m in command
Here I’m in commandHere I’m in command
Making the right choice is important. And it’s easy.
The knobThe knob
The knob
The knobThe knob
with your washingwith your washing
with your washing
with your washingwith your washing
machine’s washmachine’s wash
machine’s wash
machine’s washmachine’s wash
programmesprogrammes
programmes
programmesprogrammes
Reset
Programme selector knobProgramme selector knob
Programme selector knob
Programme selector knobProgramme selector knob
and programmed startand programmed start
and programmed start
and programmed startand programmed start
It is used to select the wash
programme.
TT
urn this knob curn this knob c
T
urn this knob c
TT
urn this knob curn this knob c
To select the programmes, the
mark situated on the knob must
be aligned with the symbol/
number that corresponds to the
desired programme.
Now press the on/off button
position), and lamp
flashing. After 5 seconds, the
setting is accepted, lamp
flashing (staying lit) and the
wash cycle begins.
If you want to interrupt the
programme in progress or set a
new one, select one of the
positions Stop and wait 5
seconds: when the cancellation
has been accepted, lamp
flash, at this point you can set
the new one or turn the
appliance off, should you wish
to add some garments, by then
waiting for approximately 2
minutes before opening the
appliance doors.
YY
ou can also use this knob toou can also use this knob to
Y
ou can also use this knob to
YY
ou can also use this knob toou can also use this knob to
delay the start of the washingdelay the start of the washing
delay the start of the washing
delay the start of the washingdelay the start of the washing
machine.machine.
machine.
machine.machine.
Select one of the four positions
for the programmed start (after
12 hours, 9h, 3h or 1 hour),
press the on/off button
position) and wait 5 seconds.
This is when the setting has
been accepted (lamp
flashing and stays lit) and you
can select the programme you
require.
locloc
kwise onlkwise onl
loc
kwise onl
locloc
kwise onlkwise onl
HH
H will begin
HH
GG
G (
GG
HH
H stops
HH
HH
H will
HH
GG
G (
GG
HH
H stops
HH
HH
Lamp
H flashes in a special way
HH
(2” on and 4” off) to indicate that
the programmed start has been
yy
..
y
.
yy
..
set. Even during this phase, you
can open the appliance door
and change the wash load.
After the wash cycle has been
set and accepted by the
washing machine, any changes
to the position of the knob will
II
I
II
be of no use (except in the Stop/
Reset position).
TT
emperature contremperature contr
T
emperature contr
TT
emperature contremperature contr
It is used to set the wash
temperature indicated in the
programme table (on page 6).
It also allows you to reduce the
temperature recommended for
the selected programme, and
even to set a cold wash cycle
( snow symbol ).
Spin exclusion/variation KnobSpin exclusion/variation Knob
Spin exclusion/variation Knob
Spin exclusion/variation KnobSpin exclusion/variation Knob
It is used to exclude the spin
cycle and/or to reduce the
spin speed of the selected
programme. The maximum
speed for the four types of
fabric are:
II
I
II
FabricFabric
Fabric
FabricFabric
CottonCotton
Cotton max rpm
CottonCotton
SyntheticsSynthetics
Synthetics 800 rpm
SyntheticsSynthetics
WoolWool
Wool 600 rpm
WoolWool
SilkSilk
Silk none
SilkSilk
SpeedSpeed
Speed
SpeedSpeed
ol knobol knob
ol knob
ol knobol knob
In any case, the appliance
distributes the load at low
speed.
EasyEasy
iron iron
Easy
EasyEasy
This function allows your
washing to come out of the
machine without creases,
making it much easier to iron.
You can use it with
programmes
6-76-7
6-7 (Synthetics),
6-76-7
Press this button in programmes
cycle will come to a stop on
symbol . You can complete
it by pressing button
Stain removalStain removal
Stain removal
Stain removalStain removal
Thanks to this command, the
washing machine will carry out a
more intensive wash that
optimises the effectiveness of the
liquid additives, thus allowing
more resistant stains to be
removed.
SS
tain tain
S
tain
SS
tain tain
cannotcannot
cannot
cannotcannot
thethe
the
thethe
is enabled.is enabled.
is enabled.
is enabled.is enabled.
Extra RinseExtra Rinse
Extra Rinse
Extra RinseExtra Rinse
This function increase the
quantity of water during the
rinse cycles
fabrics.fabrics.
fabrics. Use of this function is
fabrics.fabrics.
recommended to improve
buttonbutton
iron
button
iron iron
buttonbutton
3-53-5
3-5 (Cotton),
3-53-5
1010
10 Silk.
1010
4-5-6-7-104-5-6-7-10
4-5-6-7-10 and the wash
4-5-6-7-104-5-6-7-10
DD
D again.
DD
(see page (see page
(see page
(see page (see page
When you press theWhen you press the
When you press the
When you press theWhen you press the
RR
emoval button,emoval button,
R
emoval button,
RR
emoval button,emoval button,
run run
run
run run
Easy Easy
II
Easy
I
Easy Easy
II
PP
thethe
P
the
PP
thethe
ron ron
unctionunction
ron f
unction
ron ron
unctionunction
for resistantfor resistant
for resistant
for resistantfor resistant
re-washre-wash
re-wash
re-washre-wash
(button (button
(button
(button (button
ss
s
ss
9 9
9
9 9
and and
and
and and
-10-10
-10
-10-10
youyou
you
youyou
DD
D
DD
The information
contained in the
table is purely
indicative. It could in
fact vary depending
on the appliance
model, the quantity
and type of garments
to wash, the hardness
and temperature of
the mains water
supply, as well as the
temperature of the
environment.
rinsing results when washing
full loads and large quantities
of detergent are used.
Recommended in case of
detergent contact allergies.
Option available with program-
1-2-3-5-6-71-2-3-5-6-7
mes
1-2-3-5-6-7
1-2-3-5-6-71-2-3-5-6-7
))
)
))
ON-OFFON-OFF
ON-OFF
ON-OFFON-OFF
When button
washing machine is switched
on, when it is not the machine is
switched off.
TT
urning the macurning the mac
T
urning the mac
TT
urning the macurning the mac
not cancel the selectednot cancel the selected
not cancel the selected
not cancel the selectednot cancel the selected
programme.programme.
programme.
programme.programme.
))
)
))
ON-OFF lampON-OFF lamp
ON-OFF lamp
ON-OFF lampON-OFF lamp
Lamp
appliance is switched on and
awaiting a programme to be set.
A steady light means the
appliance has accepted the
selected programme.
G G
G is pressed, the
G G
hine off doeshine off does
hine off does
hine off doeshine off does
H H
H flashes when the
H H
55
5 Instructions for installation and use
55

What are you washing today?
A prA pr
A pr
A prA pr
Type of fabric and
degree of soil
ogramme fogramme f
ogramme f
ogramme fogramme f
Progr.
Knob
Temp.
Knob
Detergent
for p r ewash
or all seasonsor all seasons
or all seasons
or all seasonsor all seasons
Detergent
for wash
Fabric
softener
Bleach Cycle
length
(minutes)
Description of wash
cycle
PROGRAMMED START
After 12 — 9 — 3 -1 hours Delaied Start by 12-9-1 hours
Reset/Stop
Reset
Interrupts/Cancels selected Program.
COTTON
Exceptionally soiled whites
(Sheets, tablecloths, etc.)
Heavily soiled whites
tablec l oths, etc.)
Normally soiled whites
tablec l oths, etc.)
Normally soiled whites and fast
colours
Normally soiled whites and fast
colours
Rinse cycles/Bleach
Spin cycle Draining and final spin cycle
Stop/Reset Interrupts/Cancels selected programme
(sheets,
(sheets,
1Max
2Max
3 60°C
4 40°C
5 40°C
u u u
u u
u u
u u
u u
u
Delicate/Trad-
itional
Delicate/Trad-
itional
Delicate/Trad-
itional
Delicate/Trad-
itional
Pre-wash, Wash at high temperature,
155
rinses, intermediate and final spin cycles
Wash at high temperature, rinses,
140
intermediate and final spin cycles
Wash at 60°C, rinses, intermediate and
140
final spin cycles
Long Wash cycle at 40°C,
160
intermediate and final spin cycles
Wash cycle at 40°C,
90
intermediate and final spin cycles
Rinse cycles, intermediate and final spin
cycles
rinse cycles,
rinse cycles,
SYNTHETICS
Heavily soiled fast colour synthetics
(baby linen, etc.)
Delicate colour synthetics
of slightly soiled garments)
Delicate colour synthetics
of slightly soiled garments)
Rinse cycles/Bleach
Fabric softener
An ti -cre a s e — Rinse Hold Rinse hold for silk and especially delicate
Spin cycle Draining and delicate spin cycle
Stop/Reset Interrupts/Cancels selected programme
(all types
(all types
6 60°C
7 40°C
8 30°C
u u
u u
u u
u
u
Delica te
Delica te
Wash at 60°C, rinses, anti-crease or
105
delicate spin cycle
Wash cycle at 40°C,
75
crease or delicate spin cycle
Wash cycle at 30°C,
30
delicate spin cycle
Rinse cycles, anti-crease or delicate spin
cycle
Rinse cycles with automatic introduction of
softener, anti-crease or delicate spin cycle
garments
rinse cycles, anti-
rinse cycles and
DELICATES
Wool
, particularly delicate garments
Silk
and fabrics (curtains, silk, viscose, etc.)
Rinse cycles
An ti -cre a s e — Rinse Hold Rinse hold for silk and especially delicate
Spin cycle Draining and delicate spin cycle (wool)
9 40°C
10 30°C
u u
u u
u
Wash cycle at 40°C
55
delicate spin cycle
Wash cycle at 30°C,
crease or draining
45
Rinse cycles, anti-crease or draining
garments
, rinse cycles and
rinse cycles, anti-
Draining Draining
Stop/Reset Interrupts/Cancels selected programme
Important:Important:
Important: To cancel the wash programme you have just set, select one of the position “Reset- Stop”
Special programmes
4— Class A at 40°C
temperatures. By setting programme 4 at a temperature of 40°C, the results you will obtain will be the same as you
would normally obtain at 60°C thanks to the washing machine’s action and the length of the wash cycle.
Your washing machine has a special programme to allow you to obtain optimum results even at low
Important:Important:
for 3 seconds.
8— Daily wash at 30° in 30 minutes. Your washing machine has a programme designed to wash lightly soiled garments
in a short amount of time. By setting programme 8 at a temperature of 30°C, you can wash different fabrics together
(except for woollen and silk items), with a maximum load of 3 kg. This programme allows you to save on both time and
energy as it only lasts approximately 30 minutes. WE RECOMMEND THE USE OF LIQUID DETERGENT.
Instructions for installation and use
66
6
66
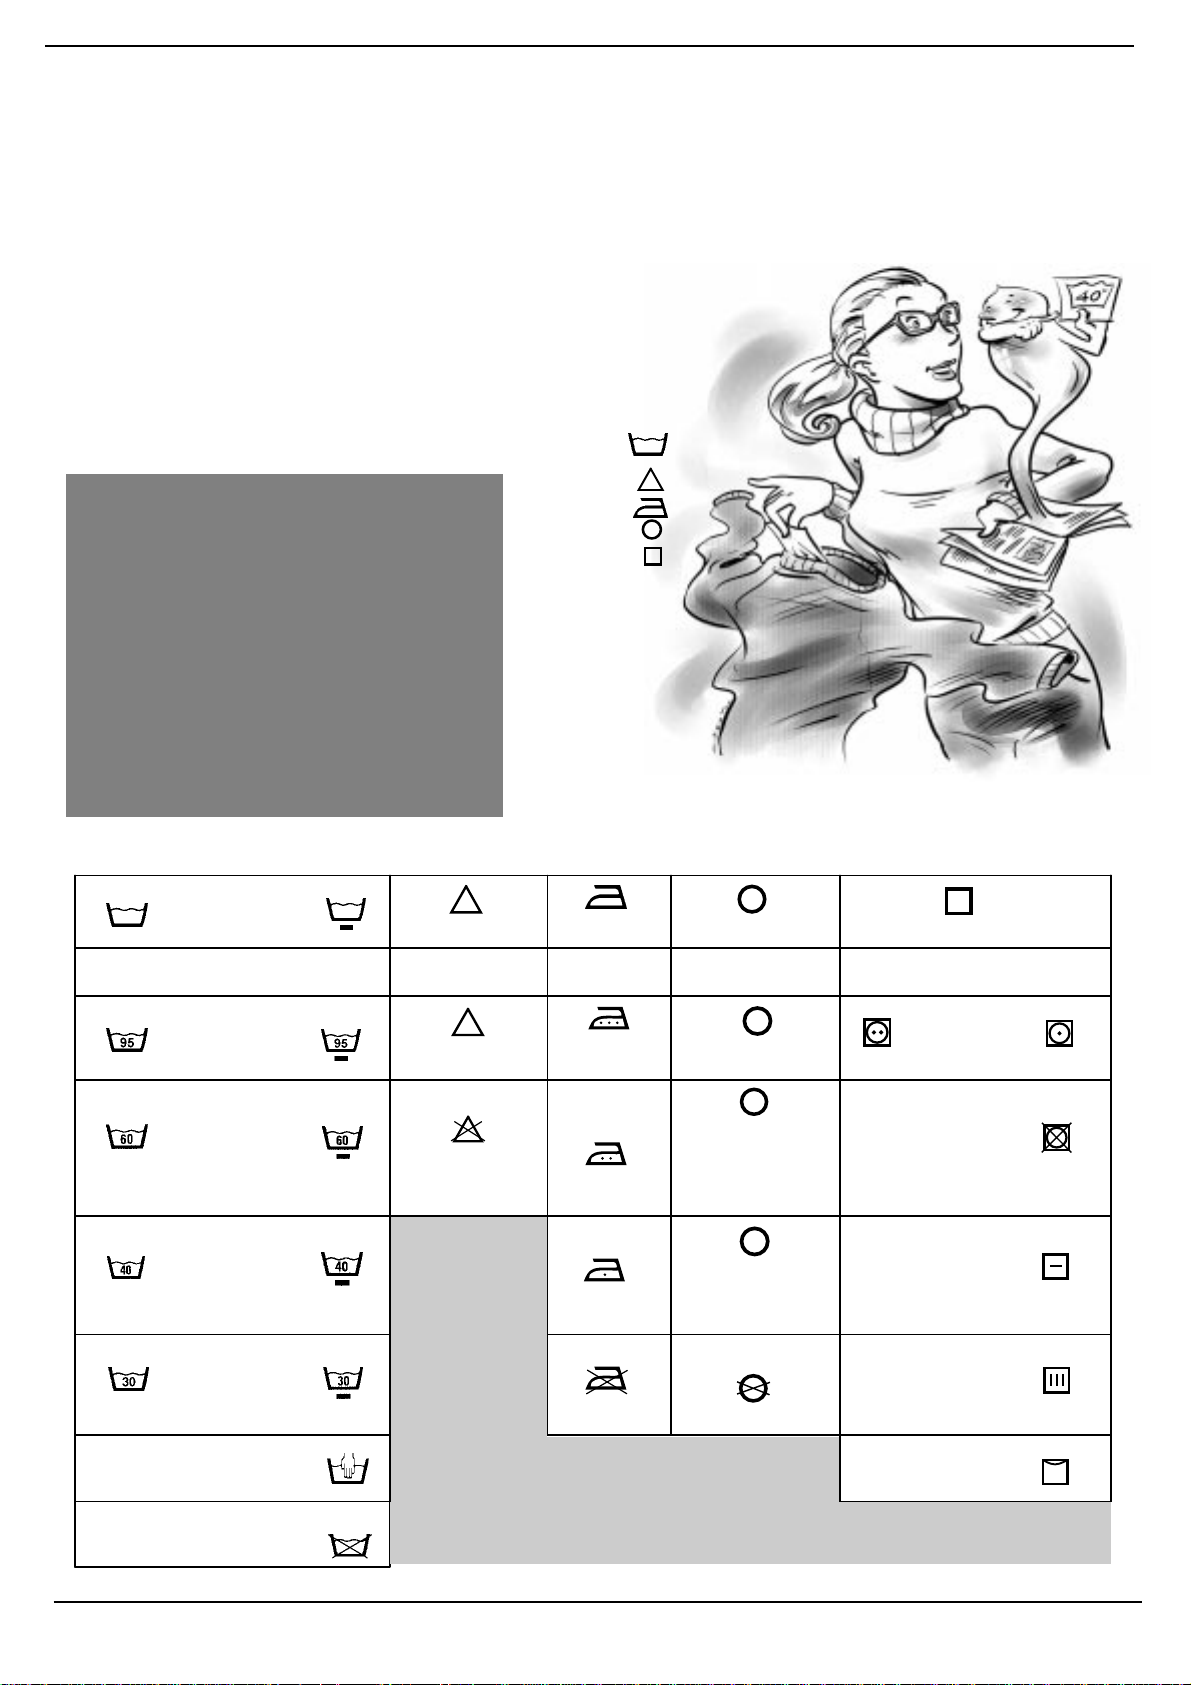
Understanding labels and the symbolsUnderstanding labels and the symbols
Understanding labels and the symbols
Understanding labels and the symbolsUnderstanding labels and the symbols
ff
or the vor the v
f
or the v
ff
or the vor the v
Learn the meaning of these symbols and you will get better results, your garments
will last longer and your machine will repay you by washing better.
arious Ariston arious Ariston
arious Ariston
arious Ariston arious Ariston
TT
op Loaderop Loader
T
op Loader
TT
op Loaderop Loader
s…s…
s…
s…s…
All over Europe, garment
labels contain messages
expressed in small yet
important symbols.
Understanding them is very
important if you want to get
Useful tips
Turn shirts inside out to get better
results and make them last longer .
better results and treat your
garments the way they they
deserve to be treated.
These symbols are divided in
five different categories and
shapes:
wash cycle wash cycle
wash cycle
wash cycle wash cycle
bleaching bleaching
bleaching
bleaching bleaching
ironing ironing
ironing
ironing ironing
dry cleaning dry cleaning
dry cleaning
dry cleaning dry cleaning
drying drying
and
drying
drying drying
.
,
,
,
Always empty pockets of their
contents.
Look at the label: it will always give
you useful advice.
When loading your washing,
alternate large and small garments.
Consult and learn the symbols in this table: they will help you obtain a better wash, treat your clothesConsult and learn the symbols in this table: they will help you obtain a better wash, treat your clothes
Consult and learn the symbols in this table: they will help you obtain a better wash, treat your clothes
Consult and learn the symbols in this table: they will help you obtain a better wash, treat your clothesConsult and learn the symbols in this table: they will help you obtain a better wash, treat your clothes
prpr
operloperl
yy
,,
and g and g
pr
prpr
operl
operloperl
y
,
and g
yy
,,
and g and g
et a better perfet a better perf
et a better perf
et a better perfet a better perf
ormance out of yormance out of y
ormance out of y
ormance out of yormance out of y
our washing macour washing mac
our washing mac
our washing macour washing mac
Make sure you select the right temperature
hinehine
..
hine
.
hinehine
..
Strong
Movement
Wash
cycle Bleaching Ironing Dry cleaning Drying
Delicate
Movement
Wash cycle
95°C
Wash cycle
60°C Do not bleach
Wash cycle
40°C
Wash cycle
30°C
Delicate
hand wash
Do not
wash in
water
Can be bleached
in c old water
c
l
Hot iron max
200°C
Warm iron
max 150°C
Cool iron
max 110°C
Do not iron
Dry cleaning with
Dry cleaning with
aviation gasoline,
pure alcohol, R111
Dry cleaning with
aviation gasoline,
A
all solvents
P
perchloride,
and R113
F
pure alcohol and
R113
Do not dry clean
High
tem p.
Can be
tumble-dried
Do not
tumble dry
Lay flat to
dry
Hang to dry
non-spin
garments
Dry on
hangers
Mild
Temp.
dried
77
7 Instructions for installation and use
77
ON
OFF
Start-reset
Rinse
Rinse level/Extra
rinse
Silk and curtains
Daily wash at 30° in
30′
Delayed start
Pre-wash Wash Max°
90° Wash
60° Wash
Delicate 40° Wash
60° Synthetics
50° Synthetics
40° Synthetics
Fabric softener
Rinse hold Anti-crease
Spin cycle
Spin cycle variation
or no spin cycle
Water Draining
Wash cycle intensity
Wool
Hand wash
Useful tips to avoid mistakes
Never use your washing ma-
chine to wash… torn, fraying or
non-hemmed linen. If it is absolutely necessary, place it in a bag
for protection. Brightly coloured
linen with whites.
Persistent or special stains
Treat these before washing by
rubbing the toughest stains with
a special detergent, with detergent paste or specific stain removers (see the inset on treating
special stains with stain removers on page 9).
Watch the weight!
For best results, do not exceed
the weight limits stated below
(figures show weight when dry):
— Sturdy fabrics:
maximum 5 kg
— Synthetic fabrics:
maximum 2.3 kg
— Delicate fabrics:
maximum 2 kg
— Pure virgin wool:
maximum 1 kg
— Towelling:
maximum 2.3 kg
How much does it weigh?
1 sheet 400-500 gr.
1 pillowcase 150-200 gr.
1 tablecloth 400-500 gr.
1 bathrobe 900-1,200 gr.
1 towel 150-250 gr.
Coloured T-shirts, printed
ones and shirts last longer if
turned inside out before washing.
Printed T-shirts and sweatshirts
should always be ironed inside
out.
Salopette alert.
Very popular «salopette» type overalls have straps with hooks that can
damage the drum of your washing
machine or other garments during
the wash. By placing the hooks in
the bib pocket and fastening them
with safety pins, all risks are
avoided.
Easy iron
Stain removal
Half load
Spécial
Temperature setting
taches
Holidays: unplug the appli-
ance.
When you go on holiday, we recommend that you unplug your
washing machine, turn off the
water inlet tap and leave the door
open or ajar. This way, both the
drum and the gasket will remain
nice and dry and unpleasant
odours will not develop inside the
washing machine.
WOOL CYCLE
For best results, use
a specific detergent,
taking care not to
exceed a load of 1kg.
How to wash almost anything
Curtains.
Curtains tend to crease a great
deal. Here is a tip to reduce creasing: fold the curtains and place
them in a pillow case or mesh
bag. Do not load anything else,
so that the overall weight does
not exceed the half load. Remem-
ber to use the specific programme
10 which automatically excludes
the spin cycle.
Quilted coats and wind-
cheaters.
You can wash quilted coats and
wind-cheaters, too, if they are
padded with goose or duck down.
The important thing is not to run
a 5 kg load.
Once you have removed mud and
dirt from trainers, you can wash
them with jeans and other tough
garments. Do not wash trainers
with whites.
Cashmere Gold: As gentle as a hand wash
The first washing machine to have «The Woolmark Company» recognition.
The Cashmere Gold programme
was designed to machine wash
the most delicate and precious
woollen and Cashmere garments.
The Merloni Elettrodomestici
«Wool-Cashmere» programme has
been approved by The Woolmark
Company for washing woollen
garments labelled «hand wash
only» featuring The Woolmark
Company Brands. This is the first
delicate hand wash cycle offered
by a washing machine approved
by The Woolmark Company.
(M.0206).
This result has been achieved
thanks to the speed of the drum
(90 rpm), even during the rinse
phase, which prevents the fibres
from rubbing.
Always use programme 9 ( wool)
with all garments labelled hand
wash: the tub with a hand in it.
it is advisable to use specific detergents for woollen garments.
Trainers.
Instructions for installation and use
88
8
88
When detergents and water are not enough…
How to get rid of some special stainsHow to get rid of some special stains
How to get rid of some special stains
How to get rid of some special stainsHow to get rid of some special stains
— Red wine. Leave to soak with detergent, rinse and treat with acetic acid or citric acid, then rinse. Treat any residue with
bleach.
— Blood. Fresh stains should be treated immediately with cold water. In the event of dry blood stains, leave to soak overnight
with a special detergent and then rub with soapy water.
— Dry grease stains. Moisten with turpentine, dab the stains with your fingertips and a cotton cloth, after placing the
garment on a soft surface.
— Rust. Oxysalt (can be found in a chemists) hot molten, or a cold anti-rust product. Old stains may have already damaged
the fabric: risk of holes
— Mould stains Treat with bleach, rinse thoroughly (only white and coloured garments resistant to chlorine).
— Oil paint. Moisten with detergent petrol, dab the stains after placing the garment on top of a soft cloth, then treat
repeatedly with the detergent.
— Ink and biro. Dab with cotton soaked in methyl alcohol or alcohol at 90°.
— Tar. Dab with fresh butter, rub in turpentine then wash immediately.
— Wax. Scrape away, then run a hot iron between two sheets of absorbent paper. Then rub in cotton with turpentine or
methyl alcohol.
— Chewing gum. Rub in nail polish remover and wipe with a clean rag.
— Mould. Cotton and white linen should be placed in a solution of 5 parts water, one bleach and a spoon of vinegar, then
washed immediately. For other white fabrics, use hydrogen peroxide at 10 volumes and wash immediately.
— Lipstick. Dab with ether on wool or cotton. Use trichlorethylene for silk.
— Nail polish. Place a sheet of absorbent paper on the side of the stain, wet it with nail polish remover, shifting the garment
as the sheet gradually changes colour.
— Grass. Dab with a wad of cotton soaked in methyl alcohol.
For a safe wash cycle
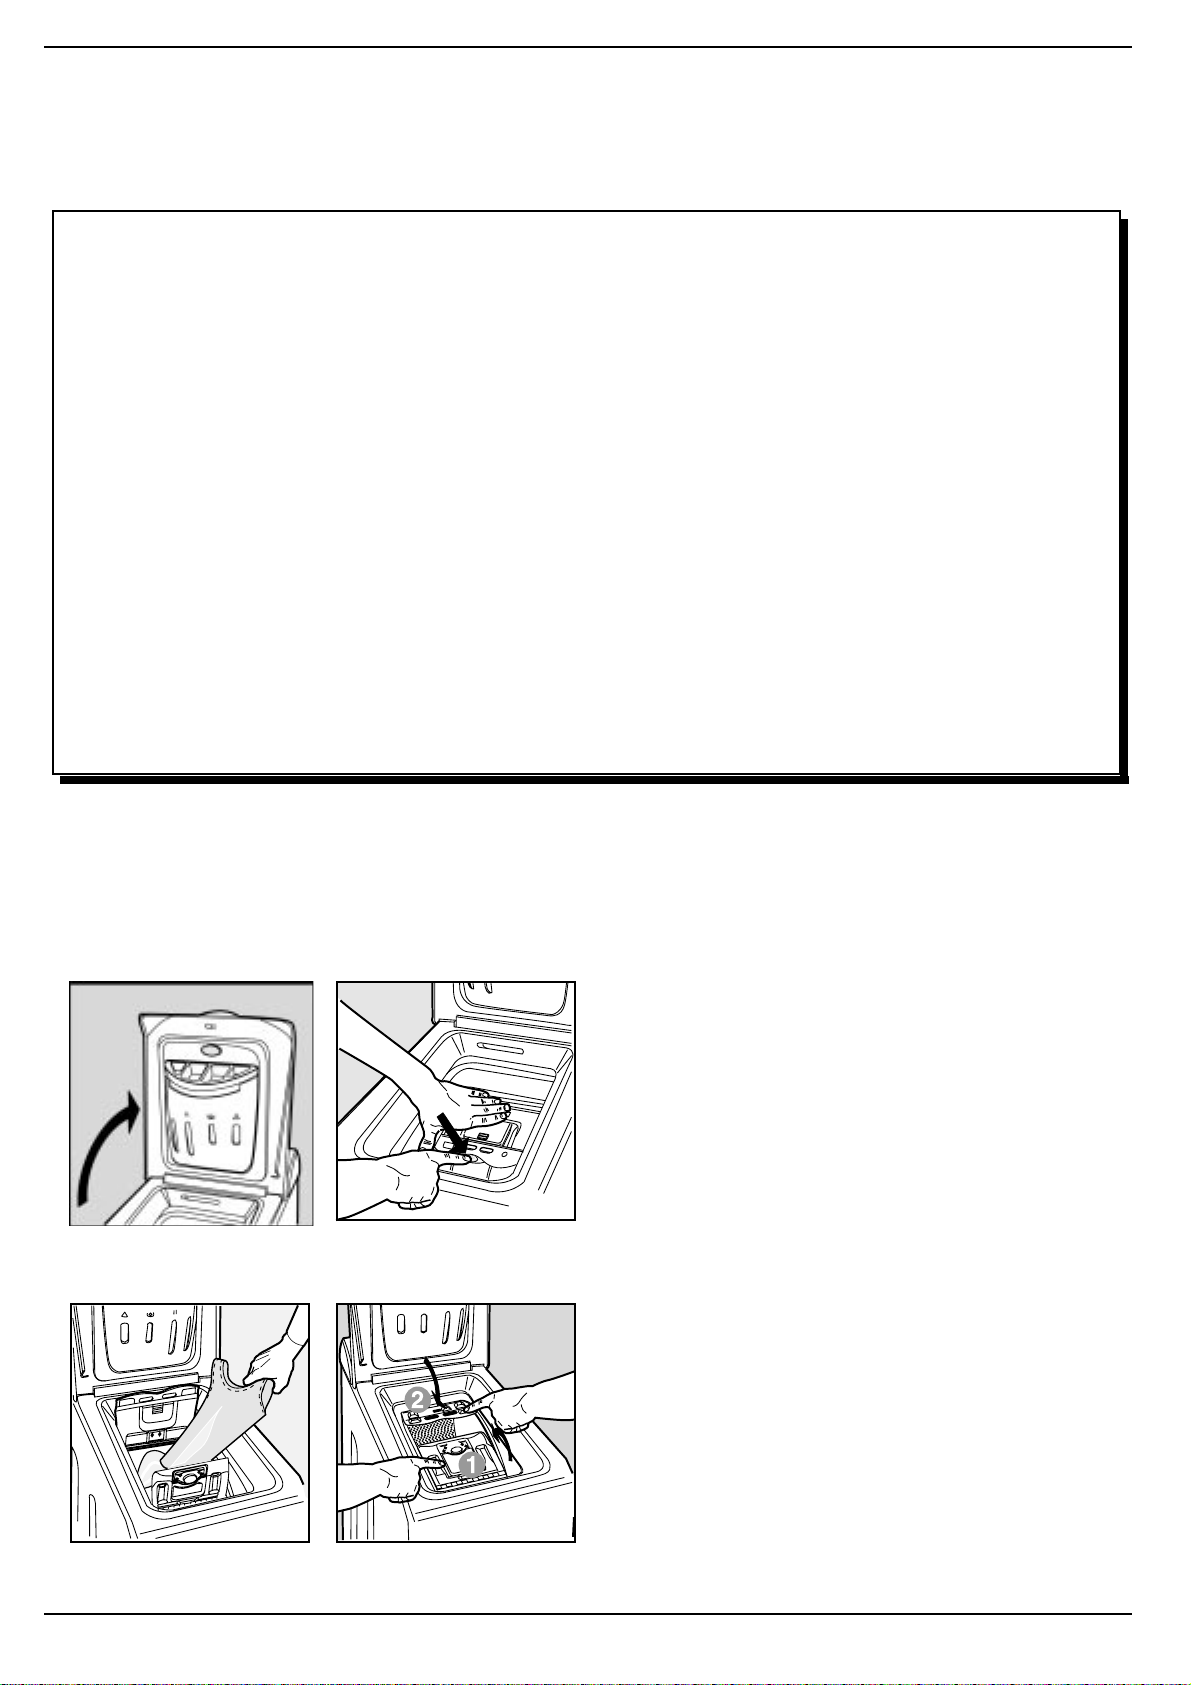
How to open and shut the drumHow to open and shut the drum
How to open and shut the drum
How to open and shut the drumHow to open and shut the drum
A) OPENING (Fig. 1).A) OPENING (Fig. 1).
A) OPENING (Fig. 1). Lift the external lid and open it completely.
A) OPENING (Fig. 1).A) OPENING (Fig. 1).
B) Then open the drum using both hands as shown in Fig. 2:B) Then open the drum using both hands as shown in Fig. 2:
B) Then open the drum using both hands as shown in Fig. 2:
B) Then open the drum using both hands as shown in Fig. 2:B) Then open the drum using both hands as shown in Fig. 2:
— press the button indicated by the arrow in Fig. 2 lightly downwards,
with one hand firmly resting on the doors to prevent them from
suddenly opening and hurting your fingers;- therefore follow the
appliance doors along as these unhook and open easily.
Fig. 1
Fig. 1
Fig. 3
Fig. 2
Fig. 2
Fig. 4
C) LOC) LO
ADING ADING
THE THE
WW
C) LO
ADING
C) LOC) LO
ADING ADING
D) SHUTTING. (Fig. 4).D) SHUTTING. (Fig. 4).
D) SHUTTING. (Fig. 4).
D) SHUTTING. (Fig. 4).D) SHUTTING. (Fig. 4).
— close the drum fully by first shutting the front door followed by the
rear one;
— then ensure the hooks on the front door are perfectly housed
within the seat of the rear door;
— after the hooks have clicked into position, press both doors lightly
downwards to make sure they do not come loose;
— finally shut the external lid.
THE
THE THE
ASHING MAASHING MA
W
ASHING MA
WW
ASHING MAASHING MA
CHINE.CHINE.
CHINE.
CHINE.CHINE.
(Fig. (Fig.
(Fig.
(Fig. (Fig.
3). 3).
3).
3). 3).
99
9 Instructions for installation and use
99
It’s important for a good wash
The secrets of the deterThe secrets of the deter
The secrets of the deter
The secrets of the deterThe secrets of the deter
gg
ent dispenserent dispenser
g
ent dispenser
gg
ent dispenserent dispenser
The first secret: the detergent dispenser is in a handy position underneath the appliance door.
You should add detergent and
any additives following the
dosage recommended by the
manufacturers: generally, all
the indications you need are
on the box.
Doses vary Doses vary
Doses vary
Doses vary Doses vary
wash load, the waterwash load, the water
wash load, the water
wash load, the waterwash load, the water
hardness and how soiled thehardness and how soiled the
hardness and how soiled the
hardness and how soiled thehardness and how soiled the
washing is. Do not exceed.washing is. Do not exceed.
washing is. Do not exceed.
washing is. Do not exceed.washing is. Do not exceed.
More detergent does notMore detergent does not
More detergent does not
More detergent does notMore detergent does not
necessarily mean greaternecessarily mean greater
necessarily mean greater
necessarily mean greaternecessarily mean greater
wash efficiencwash efficienc
wash efficienc
wash efficiencwash efficienc
contrary…contrary…
contrary…
contrary…contrary…
Experience will help you select
the right dosage almost
automatically: it will become
your secret.
When pouring in the softener
in compartment
exceeding the “max” level
indicated.
The washing machine automatically adds the softener to
according toaccording to
according to
according toaccording to
yy
,,
on the on the
y
,
on the
yy
,,
on the on the
33
3, avoid
33
the wash in each pro-gramme.
Liquid detergent is to beLiquid detergent is to be
Liquid detergent is to be
Liquid detergent is to beLiquid detergent is to be
poured in just a few secondspoured in just a few seconds
poured in just a few seconds
poured in just a few secondspoured in just a few seconds
before starting the washbefore starting the wash
before starting the wash
before starting the washbefore starting the wash
cycle.cycle.
cycle.
cycle.cycle.
Remember that liquid de-Remember that liquid de-
Remember that liquid de-
Remember that liquid de-Remember that liquid detergent is particularly sui-tergent is particularly sui-
tergent is particularly sui-
tergent is particularly sui-tergent is particularly suitable for wash cycles of up totable for wash cycles of up to
table for wash cycles of up to
table for wash cycles of up totable for wash cycles of up to
60 degrees and those not60 degrees and those not
60 degrees and those not
60 degrees and those not60 degrees and those not
requiring pre-washing.requiring pre-washing.
requiring pre-washing.
requiring pre-washing.requiring pre-washing.
Liquid or powder detergents
are sold together with special
containers that are to be placed
directly inside the washing
machine drum, according to
the instructions found on the
detergent box.
Never use hand wash
detergent, because it may form
too much foam, which could
damage the washing machine.
One last secret: when washing
with cold water, always reduce
the amount of detergent you
use: it dissolves less easily in
cold water than in hot water, so
part of it would be wasted.
Pre-wash, bleach and fabricPre-wash, bleach and fabric
Pre-wash, bleach and fabric
Pre-wash, bleach and fabricPre-wash, bleach and fabric
softenersoftener
softener
softenersoftener
Should it be necessary to
bleach, set the special
programmes and pour the
bleach into compartment
of the detergent dispenser.
When you pour the bleach in,
take care not to exceed the
“max”“max”
“max” level indicated.
“max”“max”
The use of bleach excludesThe use of bleach excludes
The use of bleach excludes
The use of bleach excludesThe use of bleach excludes
the possibility of running athe possibility of running a
the possibility of running a
the possibility of running athe possibility of running a
pre-wash.pre-wash.
pre-wash.
pre-wash.pre-wash.
TT
raditional braditional b
T
raditional b
TT
raditional braditional b
be used on sturdy whitebe used on sturdy white
be used on sturdy white
be used on sturdy whitebe used on sturdy white
fabrics, whereas delicatefabrics, whereas delicate
fabrics, whereas delicate
fabrics, whereas delicatefabrics, whereas delicate
bleach can be used forbleach can be used for
bleach can be used for
bleach can be used forbleach can be used for
coloured fabrics andcoloured fabrics and
coloured fabrics and
coloured fabrics andcoloured fabrics and
synthetics.synthetics.
synthetics. You cannot
synthetics.synthetics.
bleach with the “Silk” program
me and with the “Special
Programmes” (see page 6).
leacleac
leac
leacleac
h can onlh can onl
h can onl
h can onlh can onl
N.B.:N.B.:
N.B.:
N.B.:N.B.:
1) Concentrated bleach must1) Concentrated bleach must
1) Concentrated bleach must
1) Concentrated bleach must1) Concentrated bleach must
be diluted in all cases.be diluted in all cases.
be diluted in all cases.
be diluted in all cases.be diluted in all cases.
4 4
4
4 4
2) For concentrated2) For concentrated
2) For concentrated
2) For concentrated2) For concentrated
detergents (in powder ordetergents (in powder or
detergents (in powder or
detergents (in powder ordetergents (in powder or
liquid), use a programmeliquid), use a programme
liquid), use a programme
liquid), use a programmeliquid), use a programme
without pre-washing.without pre-washing.
without pre-washing.
without pre-washing.without pre-washing.
3) For detergents contained3) For detergents contained
3) For detergents contained
3) For detergents contained3) For detergents contained
in a ball or in tablets, do notin a ball or in tablets, do not
in a ball or in tablets, do not
in a ball or in tablets, do notin a ball or in tablets, do not
run a pre-wash.run a pre-wash.
run a pre-wash.
run a pre-wash.run a pre-wash.
yy
y
yy
Fabric Softener AdditionFabric Softener Addition
Fabric Softener Addition
Fabric Softener AdditionFabric Softener Addition
Fabric softener makes your
washing softer and decreases
the electrostatic load of synthetic
fibres.
Degrees of water hardness
Level -Feature German French
°dH °T.H
In compartment 1:
pre-wash (powder)pre-wash (powder)
pre-wash (powder)
pre-wash (powder)pre-wash (powder)
In compartment 2:
the wash cycle (powder and liquid)the wash cycle (powder and liquid)
the wash cycle (powder and liquid)
the wash cycle (powder and liquid)the wash cycle (powder and liquid)
In compartment 3:
In compartment 4:
Cutting costs efficiently
FULL LOAD
The best way to save on energy, water, detergent and time is to use your washing machine,
washing a full recommended load.
A full load instead of two half loads allows you to SAVE up to 50% of energy.
USE LESS DETERGENT IF: you are washing few garments, the washing is only soiled
lightly, foam forms during washing or the water is not very hard, or soft even (please see
small table above with the degrees of water hardness). To find out how hard the water in
your area is, contact your local Water Works.
IS PRE-W ASHING STRICTL Y NECESSAR Y?
Only for extremely soiled garments.
Programming a wash WITHOUT pre-washing for lightly soiled or medium soiled garments
allows you to SAVE on detergent, time, water and between 5 and 15% of energy.
IS W ASHING WITH HOT WA TER STRICTL Y NECESSAR Y?
Treating stains with a stain remover or soaking garments with dry stains in water before
washing can reduce the need to programme a wash using hot water.
Use a wash programme at 60° to SAVE up to 50% of energy.
BEFORE USING A DRYING CYCLE …
Select a high speed spin cycle, where the spin speed can be adjusted, if the washing should
be dried in a tumble-dryer. A reduced water content in the washing allows you to SAVE
both time and energy in the drying programme.
Detergent forDetergent for
Detergent for
Detergent forDetergent for
Detergent forDetergent for
Detergent for
Detergent forDetergent for
Fabric softenerFabric softener
Fabric softener
Fabric softenerFabric softener
BleachBleach
Bleach
BleachBleach
A guide to running your
household appliances cheaply
while respecting the environment.
1 — Soft
2 — Medium
3 — Hard
4 — Very hard
0- 7 0-15
8-14 16-25
15-21 26-37
more than
21
more than
the manufacturer’s instructions.
The fabric softener is
automatically inserted into the
machine during the last rinse.
At the end of the wash
programme, some water will be
left in compartment 3. This is
used for the inlet of denser fabric
softeners into the machine, i.e.
to dilute the more concentrated
softeners.
Should more than a normal
amount of water remain in
compartment 3, this means the
emptying device is blocked,
thus interrupting the suction
effect of the device.
For cleaning instructions, see
page 13. Never pour fabric
softeners together with starch
into the dispenser, as the
overflow system could get
clogged.
37
Fabric softeners can be
used for towelling fabrics,
knitwear,
curtains, etc.
Pour the fabric
softener into
compartment 3
of the dispenser following
Instructions for installation and use
1010
10
1010
Troubleshooting
BefBef
Bef
BefBef
Your washing machine could fail to work. In most cases, the problems arising can be easily solved without having to
call for a technician. Before calling for assistance, always check these points.
The washing machineThe washing machine
The washing machine
The washing machineThe washing machine
fails to start.fails to start.
fails to start.
fails to start.fails to start.
Is the plug correctly Is the plug correctly
Is the plug correctly
Is the plug correctly Is the plug correctly
inserted in the socket?inserted in the socket?
inserted in the socket? It
inserted in the socket?inserted in the socket?
could have been moved
whilst cleaning.
Is there electricity in the Is there electricity in the
Is there electricity in the
Is there electricity in the Is there electricity in the
house?house?
house?
house?house?
A circuit breaker could have
gone off, perhaps because
too many appliances are on
at the same time. Or
perhaps because of a
general power failure in
your entire area.
Is the appliance door shutIs the appliance door shut
Is the appliance door shut
Is the appliance door shutIs the appliance door shut
properly?properly?
properly?
properly?properly?
For safety reasons, the
ore calling,ore calling,
ore calling,
ore calling,ore calling,
washing machine cannot
work if the door is open or
not shut properly.
Is the ON/OFF button Is the ON/OFF button
Is the ON/OFF button
Is the ON/OFF button Is the ON/OFF button
pressed?pressed?
pressed?
pressed?pressed?
If it is, then a programmed
start has been set.
Is the programmed startIs the programmed start
Is the programmed start
Is the programmed startIs the programmed start
knob, on those modelsknob, on those models
knob, on those models
knob, on those modelsknob, on those models
concerned, in the correctconcerned, in the correct
concerned, in the correct
concerned, in the correctconcerned, in the correct
position?position?
position?
position?position?
Is the water tap turned on? Is the water tap turned on?
Is the water tap turned on?
Is the water tap turned on? Is the water tap turned on?
For safety reasons, if the
washing machine does not
load water, it cannot start a
wash cycle.
read the f read the f
read the f
read the f read the f
olloollo
ollo
olloollo
wingwing
wing
wingwing
RIGHT RIGHT
RIGHT
RIGHT RIGHT
T urning off the water
tap after each wash
limits the use of the
washing machine’s
hydraulic system and
eliminate leakage
risks when no-one is
at home.
T ry to only leave the
appliance in use
unattended if the place
where it is located is
equipped with a floor
drain.
Always leave all
appliance doors ajar .
This will avoid the
formation of bad
odours.
Clean the appliance’s
exteriors delicately.
T o clean the exteriors
and the rubber parts of
the appliance, always
use a cloth dipped in
lukewarm soapy water .
WRONG
Leave the washing machine
plugged in while cleaning.
Even during maintenance,
the appliance should always
be unplugged.
Use solvents and aggressive abrasives.
Never use solvents or
abrasives to clean the
external and rubber parts
of the washing machine.
Neglect the detergent
dispenser .
It is removable and can
easily be cleaned by leaving
it under running water .
Go on holiday without
thinking about it.
Before leaving, always
make sure that the washing
machine is unplugged and
that the water tap is turned
off.
?
The washing machineThe washing machine
The washing machine
The washing machineThe washing machine
fails to load waterfails to load water
fails to load water
fails to load waterfails to load water
Is the tap correctly Is the tap correctly
Is the tap correctly
Is the tap correctly Is the tap correctly
attached to the pipe?attached to the pipe?
attached to the pipe?
attached to the pipe?attached to the pipe?
Is there a water shortage?Is there a water shortage?
Is there a water shortage?
Is there a water shortage?Is there a water shortage?
There could be work in
progress in your building or
street.
Is there enough pressure?Is there enough pressure?
Is there enough pressure?
Is there enough pressure?Is there enough pressure?
The autoclave may be
malfunctioning.
Is the tap filter clean?Is the tap filter clean?
Is the tap filter clean? If the
Is the tap filter clean?Is the tap filter clean?
water is very calcareous, or
if work has recently been
carried out on the water
piping, the tap filter could be
clogged with particles and
debris.
Is the rubber hose bent?Is the rubber hose bent?
Is the rubber hose bent?
Is the rubber hose bent?Is the rubber hose bent?
The tract of the rubber hose
bringing water to the
washing machine must be
as straight as possible.
Make sure it is not
squashed or bent.
..
.
..
The washing machineThe washing machine
The washing machine
The washing machineThe washing machine
continuously loadscontinuously loads
continuously loads
continuously loadscontinuously loads
and unloads waterand unloads water
and unloads water
and unloads waterand unloads water
Is the drain hoseIs the drain hose
Is the drain hose
Is the drain hoseIs the drain hose
positioned too low?positioned too low?
positioned too low? It must
positioned too low?positioned too low?
be installed at a height
ranging from 60 to 100 cm.
Is the hose’Is the hose’
Is the hose’
Is the hose’Is the hose’
immersed in water?immersed in water?
immersed in water?
immersed in water?immersed in water?
Does the wall drainageDoes the wall drainage
Does the wall drainage
Does the wall drainageDoes the wall drainage
system have a breathersystem have a breather
system have a breather
system have a breathersystem have a breather
pipe? pipe?
pipe? If the problem
pipe? pipe?
persists even after these
checks, turn off the water
tap, switch the appliance off
and call for assistance.
If you live on an upper floor
of your building, there may
be a problem with your
drain trap.
To solve this problem, a
special valve must be
installed.
..
.
..
s mouths mouth
s mouth
s mouths mouth
11 11
11 Instructions for installation and use
11 11
The washing machineThe washing machine
The washing machine
The washing machineThe washing machine
does not drain or spin.does not drain or spin.
does not drain or spin.
does not drain or spin.does not drain or spin.
Does the selectedDoes the selected
Does the selected
Does the selectedDoes the selected
programme foresee waterprogramme foresee water
programme foresee water
programme foresee waterprogramme foresee water
draining?draining?
draining? Some wash
draining?draining?
cycles require enabling the
draining manually.
Has the Has the
Has the
Has the Has the
function — in thosefunction — in those
function — in those
function — in thosefunction — in those
appliances where it isappliances where it is
appliances where it is
appliances where it isappliances where it is
foreseen — been enabled?foreseen — been enabled?
foreseen — been enabled?
foreseen — been enabled?foreseen — been enabled?
This function requires
enabling the draining
manually.
Is the drain pump clogged?Is the drain pump clogged?
Is the drain pump clogged?
Is the drain pump clogged?Is the drain pump clogged?
To check it, turn off the tap,
unplug the washing
machine and follow the
instructions on page 12, or
call for technical assistance.
“Anti-crease”“Anti-crease”
“Anti-crease”
“Anti-crease”“Anti-crease”
Always get
assistance from
authorised
technicians and
always insist on
original spare parts
Is the rubber hose bent?Is the rubber hose bent?
Is the rubber hose bent?
Is the rubber hose bent?Is the rubber hose bent?
The tract of the drain hose
must be as straight as
possible. Make sure it is not
squashed or bent.
Is the washing macIs the washing mac
Is the washing mac
Is the washing macIs the washing mac
drain duct clogged? drain duct clogged?
drain duct clogged? Is
drain duct clogged? drain duct clogged?
there an extension on the
drain hose? If so, is it
positioned incorrectly,
blocking the water flow?
The washing machineThe washing machine
The washing machine
The washing machineThe washing machine
vibrates too muchvibrates too much
vibrates too much
vibrates too muchvibrates too much
during the spin cycle.during the spin cycle.
during the spin cycle.
during the spin cycle.during the spin cycle.
Has the internal floatingHas the internal floating
Has the internal floating
Has the internal floatingHas the internal floating
unit been correctlyunit been correctly
unit been correctly
unit been correctlyunit been correctly
unblocked duringunblocked during
unblocked during
unblocked duringunblocked during
installation? installation?
installation? See page 2
installation? installation?
on installation procedures.
Has the washing machineHas the washing machine
Has the washing machine
Has the washing machineHas the washing machine
been levelled correctly?been levelled correctly?
been levelled correctly?
been levelled correctly?been levelled correctly?
The levelling of the
appliance should be
checked periodically. In
time, the appliance could
move imperceptibly. Adjust
the feet and check them
with a level.
Has it got enough roomHas it got enough room
Has it got enough room
Has it got enough roomHas it got enough room
arar
ound it?ound it?
ar
ound it? The appliance
arar
ound it?ound it?
hine’hine’
hine’
hine’hine’
should not be leaning
against any sanitary fixtures
and must have some free
space around it. If it is
placed on a fitted carpet
floor, ensure that there is
enough room for air to
ss
s
ss
circulate between the
appliance feet and the
carpet.
The washing machineThe washing machine
The washing machine
The washing machineThe washing machine
leaks.leaks.
leaks.
leaks.leaks.
Is the metal ring of the inletIs the metal ring of the inlet
Is the metal ring of the inlet
Is the metal ring of the inletIs the metal ring of the inlet
hose properly attached?hose properly attached?
hose properly attached?
hose properly attached?hose properly attached?
Turn off the tap, unplug the
appliance and try tightening
its attachment without
forcing it.
Is the detergent dispenserIs the detergent dispenser
Is the detergent dispenser
Is the detergent dispenserIs the detergent dispenser
obstructed? obstructed?
obstructed? Try extracting
obstructed? obstructed?
it and washing it under tap
water.
Is the drain hose wellIs the drain hose well
Is the drain hose well
Is the drain hose wellIs the drain hose well
attacattac
hed?hed?
attac
hed? Turn off the tap,
attacattac
hed?hed?
unplug the appliance and
try tightening its attachment.
TT
oo moo m
ucuc
h fh f
T
oo m
TT
oo moo m
Is the detergent suitableIs the detergent suitable
Is the detergent suitable
Is the detergent suitableIs the detergent suitable
for washing-machinefor washing-machine
for washing-machine
for washing-machinefor washing-machine
use?use?
use? Make sure that it
use?use?
bears the definition «for
washing-machines» or
«hand and machine wash»,
or the like.
Is the correct amountIs the correct amount
Is the correct amount
Is the correct amountIs the correct amount
being used?being used?
being used? An excessive
being used?being used?
amount of detergent,
besides producing too
much foam, does not
guarantee a more effective
wash, and causes scaling
in the internal parts of the
appliance.
If, despite all checks, the
washing machine fails to
function and the problem
persists, call your nearest
authorised Customer Service
Centre, providing the following
information:
— the type of malfunctioning— the type of malfunctioning
— the type of malfunctioning
— the type of malfunctioning— the type of malfunctioning
— the model type no.— the model type no.
— the model type no.
— the model type no.— the model type no.
(Model……. ) (Model……. )
(Model……. )
(Model……. ) (Model……. )
— the serial number (S/N …..)— the serial number (S/N …..)
— the serial number (S/N …..)
— the serial number (S/N …..)— the serial number (S/N …..)
These indications can be found
on the data plate situated on
the back of the washing
machine front base. (fig. 1)
uc
ucuc
h f
h fh f
oam.oam.
oam.
oam.oam.
When in need, check the pump and the rubber hose.When in need, check the pump and the rubber hose.
When in need, check the pump and the rubber hose.
When in need, check the pump and the rubber hose.When in need, check the pump and the rubber hose.
The washing machine comes equipped with a self-cleaning pump that does not require any cleaning or maintenance. Small objects
may accidentally fall into the pump: coins, hair clips, loose buttons and other small items. T o avoid possible damage, they are
withheld in an accessible pre-chamber , situated at the lower end of the pump.
To access this pre-chamber, just remove the panel covering the
bottom of the washing machine (fig. 1); then lift the cover rotating it
anti-clockwise (fig. 2) and check its contents accurately.
The rubber hose
Check the rubber hose at least once a year. If you see any cracks,
replace it immediately. When you use your washing machine, water
pressure is very strong and a cracked hose could easily split open.
Fig. 1
Fig. 1
Fig. 2
Warning: make sure that the wash cycle has come to a full stop and unplug the appliance before removing the lid as well as before any
type of maintenance procedure. It is normal to find that a little water comes out after removing the lid. When replacing the panel, make
sure you insert the hooks situated at the bottom of the washing machine in the right slots before pushing it back against the appliance.
Instructions for installation and use
1212
12
1212
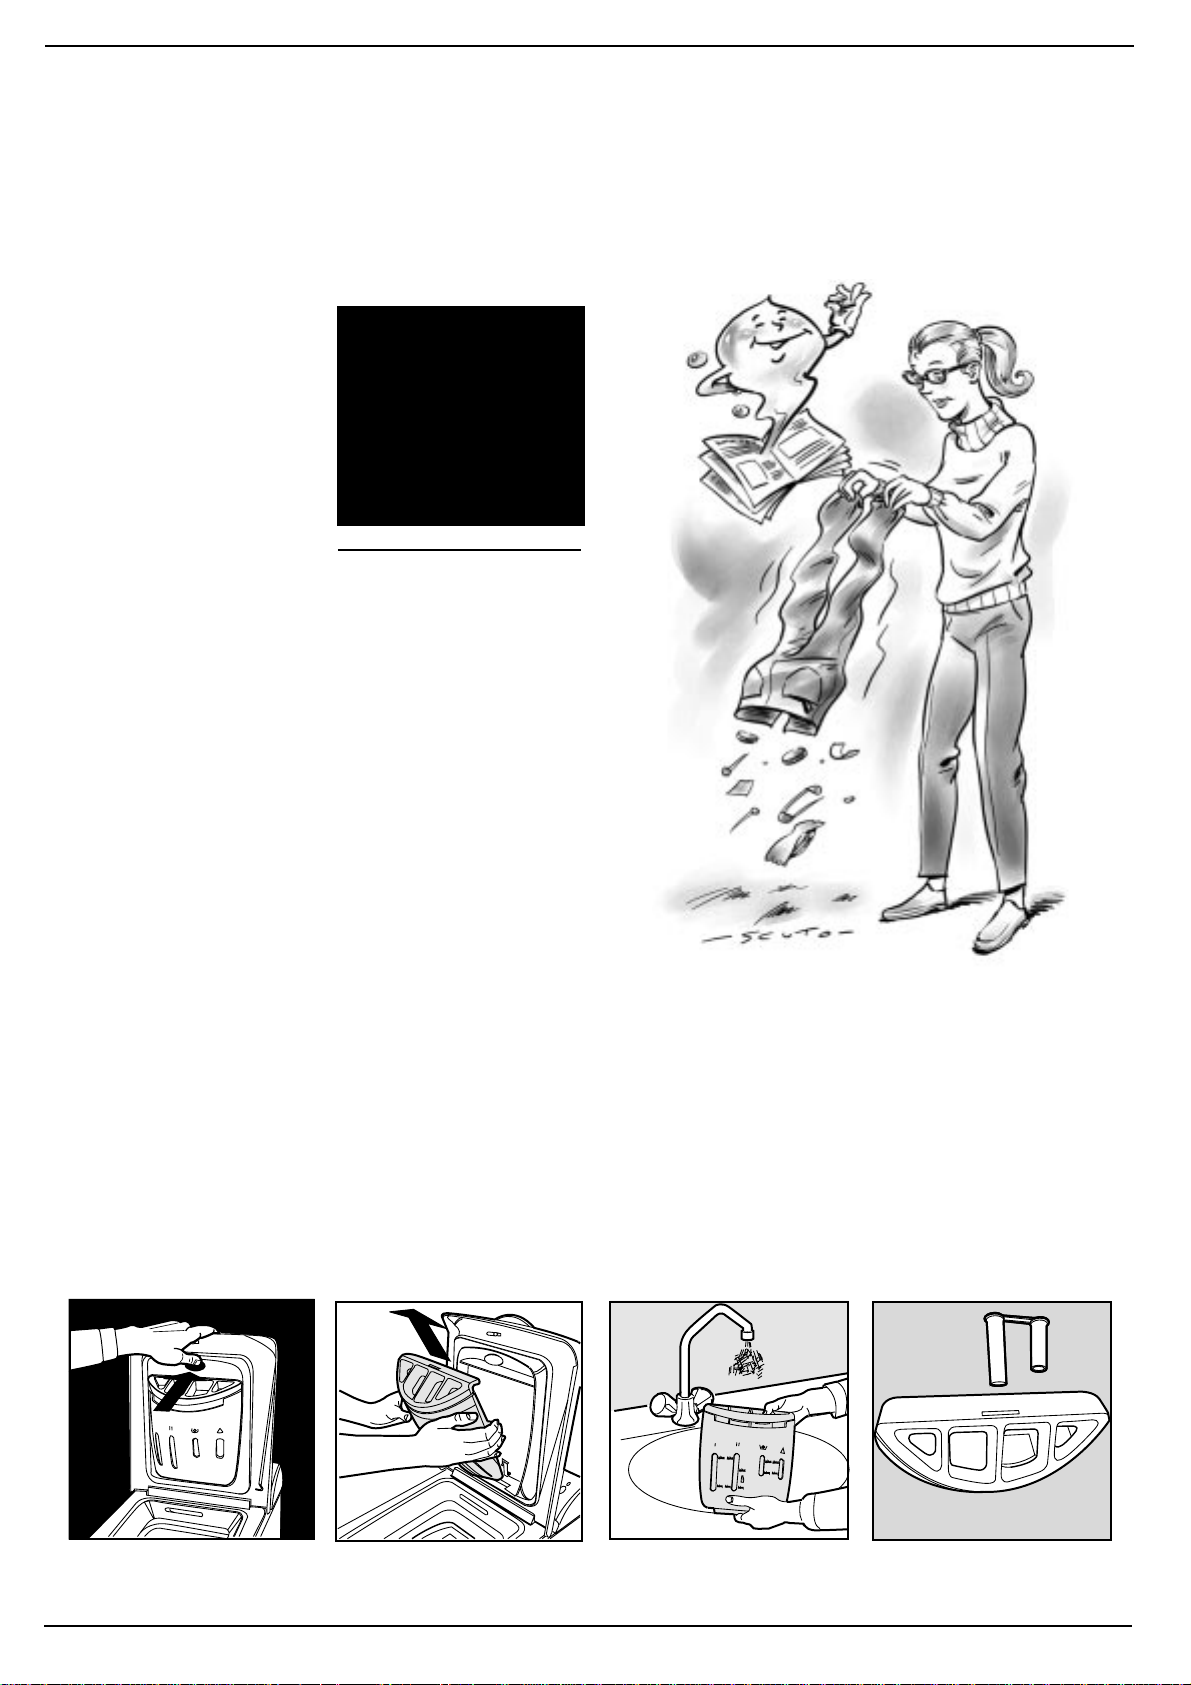
Easy Care and Maintenance
TT
reat it well and it’ ll be yreat it well and it’ ll be y
T
reat it well and it’ ll be y
TT
reat it well and it’ ll be yreat it well and it’ ll be y
Y our washing machine is a r eliable companion in life and on
friend ffriend f
friend f
friend ffriend f
oreore
ore
oreore
verver
ver
verver
the job. It is just as important for you to keep it in shape.
ourour
our
ourour
Your washing machine is
designed to last a lifetime
without any problems. A few
simple steps help keep it in
shape and last longer.
Firstly, you must turn off the
water tap after each wash:
the constant pressure of water
could warp a few of the
component parts.
In addition, by doing so, you
will avoid the risk of leaks when
no-one is at home.
If the water in your area is too
hard, use a deliming product
(water is hard if it often leaves
whitish stains around taps or
drains, especially of bath tubs.
For more accurate information
as to the type of water in your
system, call the local water
works or a local plumber).
Pockets must always be
emptied by removing even
coins, pins, badges and any
other hard object.
The washing machine exterior
should be cleaned with a cloth
dipped in lukewarm soapy
water.
It is important to wash
the detergent dispenser
regularly.
To prevent dried washing
powder from
accumulating, place the
dispenser under running
water for a few minutes.
Never exaggerate with
detergent doses.
Normal detergents already
contain deliming agents. Only
if the water is particularly hard,
that is, rich in lime content, do
we recommend the use of a
specific product at every wash.
A periodical wash cycle with a
dose of a deliming product,
without detergents or
washing, may prove useful.
Never use too much detergent
or additives because this
could cause an excess
amount of foam, scaling and
possible damage to the
component parts of your
washing machine.
HoHo
Ho
w to cw to c
w to c
HoHo
w to cw to c
Disassembly:Disassembly:
Disassembly:
Disassembly:Disassembly:
Press lightly on the large button on the front of the detergent
dispenser and pull it upwards
(fig. 1).
Fig. 1
lean the deterlean the deter
lean the deter
lean the deterlean the deter
Do not forget to empty all pockets:
small metallic objects can cause damage to your
washing machines drum during the spin cycle.
gg
ent dispenserent dispenser
g
ent dispenser
gg
ent dispenserent dispenser
Cleaning:Cleaning:
Cleaning:
Cleaning:Cleaning:
Then clean the dispenser under a tap (fig. 3) using an old toothbrush and, once the pair of siphons inserted in the top of compartments 1 and 2 (fig. 4) have been pulled out, check whether
the same are not clogged and then rinse them.
Fig. 2
Fig. 3
Reassembly:Reassembly:
Reassembly:
Reassembly:Reassembly:
Do not forget to reinsert the
pair of siphons into the special
housings and then to replace
the dispenser into its seat,
clicking it into place (fig. 4, 2
and 1).
Fig. 4
1313
13 Instructions for installation and use
1313
We take care of your loads
Electronic ABC balancing ofElectronic ABC balancing of
Electronic ABC balancing of
Electronic ABC balancing ofElectronic ABC balancing of
your spin cycleyour spin cycle
your spin cycle
your spin cycleyour spin cycle
Warning
This appliance is equipped
with an electronic autobalancing device (
Balance Control)
enables the spin cycle to be
run at high speed only with
well-distributed wash loads.
An unbalanced wash load
would in fact seriously
damage the appliance.
Before each spin cycle phase,
the ABC auto-balancing
system makes the drum
perform repeated revolutions,
both clockwise and anticlockwise, in order to distribute the
garments inside it uniformly
and then to start the spin cycle
off gently .
Auto
that
In special load conditions,
these revolutions may not be
sufficient to distribute the
weight inside the drum evenly
(if there are towel bathrobes,
blankets and sheets inside it
that have formed a “ball”, etc.).
In these conditions, two
different things may happen:
— the ABC system “accepts” the
imbalance, but reduces
the spin speed. In this
case, the clothes will come
out wetter than usual;
— the ABC system deems this
imbalance to be beyond the
acceptability threshold and
excludes the spin cycle. In
this case, take out the
washing, unroll the
garments and put them all
back into the appliance and
set the spin cycle
programme.
In both cases, it is not a matter
of poor appliance quality, but
raher one of the more
advanced features it has to
protet it from breakages,
vibrations, movements on the
floor or other inconveniences.
T echnical features
Model
Dimensions
Capacity
Electric
connections
Water connections
Spin speed/min
Controlling
programmes in
accordance with
IEC Norm 456
The manufacturer reserves the right to make any modifications whatsoever, at any time and without notice, to the appliance or any of its accessories that may be deemed necessary for technical or commercial requirements.
AT 84
wi dt h c m 4 0
heigh t c m 8 5
dep th cm 60
from 1 to 5 kg
voltage 230 Volts 50Hz
maximum absorbed power 2100 W
maximum pressure 1 Mpa (10 bar)
minimum pressure 0.05 Mpa (0.5 bar)
drum ca pa city 42 litres
up to 80 0 r.p .m .
TT
ecec
T
TT
hnical fhnical f
ec
hnical f
ecec
hnical fhnical f
run with a load of 5.0 kg, programme 3, 60° C
This appliance conforms with the following European Community Directives:
— 73/23/EEC of 19/02/73 (Low Voltage) and subsequent modifications
— 89/336/EEC of 03/05/89 (Electromagnetic Compatibility) and subsequent modifications
eatureseatures
eatures
eatureseatures
Instructions for installation and use
14 14
14
14 14

Merloni Elettrodomestici
Viale Aristide Merloni 47
60044 Fabriano
Italie
Tel +39 0732 6611
Fax +39 0732 662501
www.merloni.com
12/2002 — 195 033 153 03 — XEROX BUSINESS SERVICES — DOCUTECH
Les secrets
AT 84
des tissus
Des conseils pour mieux laver
Mode
F
dinstallation et demploi
Classe A à
40°C
Le premier lave-linge
qui lave parfaitement
à 40°C
Cachemire
Gold
Le premier lave-linge
recommandé par
The Woolmark
Company
Lave-linge top loader
sûr
et facile à utiliser
Guide rapide
Découvrez ci-dessous les 12 sujets qui seront développés
dans les pages de ce manuel. Lisez, apprenez, amusezvous: vous découvrirez un tas de petits secrets pour laver
mieux, avec moins defforts tout en augmentant la
longévité de votre lave-linge. Et surtout, en toute
sécurité .
1. Installation et déménagement (page 2)
Pour un bon fonctionnement du lave-linge, lopération la plus importante après sa livraison ou après un déménagement, est sans aucun
doute son installation. Vérifiez toujours:
1. si linstallation électrique est conforme.
2. si les tuyaux darrivée et de vidange de leau sont bien raccordés
correctement. Ne jamais utiliser des tuyaux usés.
3. si le lave-linge est bien de niveau. Cest important: pour la
longévité de votre lave-linge et pour la qualité de votre lavage.
4. que toutes les vis de fixation du tambour, situées à l’arrière
du lave-linge, ont bien été enlevées.
2. Sécurité pour vous et vos enfants (page 3)
7. Conseils utiles pour ne pas vous tromper (page
Vous y trouverez tous les conseils indispensables à votre sécurité et à
celle de votre famille. Cest ce quil y a de plus important.
Autrefois, on suivait les bons conseils de grand-mère — et les matières
synthétiques nexistaient pas: il était donc facile de laver. Aujourdhui,
cest votre lave-linge qui vous donne de bons conseils et vous permet
même de laver laine et cachemire aussi bien quune blanchisseuse.
3. Comment charger votre lave-linge et le mettre
en service (page 4)
Triez correctement votre linge: cest une opération importante dont
la réussite de votre lessive dépend entièrement. Apprenez tous les
trucs et tous les secrets pour bien trier votre lessive: les couleurs, les
textiles, la tendance à produire des peluches, voilà quels sont les
critères les plus importants.
8.
Pour un lavage en toute sécurité ouvrez et fermez bien les portes.
9. Le tiroir à produits lessiviels (page 10)
4. Bien maîtriser le bandeau de commandes
(page 5 — 6)
Le bandeau de commandes de votre lave-linge est très simple.
Quelques commandes essentielles pour choisir les types de lavage,
du plus énergique, pour laver une combinaison de mécanicien,
jusquau plus délicat pour le cachemire. Apprenez à vous en servir,
vous laverez mieux et prolongerez la durée de vie de votre lave-linge.
Cest facile.
Comment utiliser le tiroir à produits lessiviels et le bac à eau de Javel.
10. Problèmes et solutions (pages 11 et 12)
Avant dappeler un technicien, lisez ces pages: de nombreux problèmes
peuvent trouver une solution immédiate. Si vous narrivez pas à les
résoudre, appelez alors le numéro de votre SAV et en un rien de temps
la panne sera réparée.
5. Guide des programmes de lavage
(page 6)
Un tableau facile à consulter pour cerner dun seul coup doeil tous les
programmes, les températures, les produits lessiviels et additionnels.
Utilisez le bon et vous obtiendrez de meilleurs résultats en économisant
du temps, de leau et de lélectricité, jour après jour.
11. Soin et entretien (page 13)
Votre lave-linge estun ami: quelques petites attentions suffisent pour
quelle vous rende la pareille en fidélité et dévotion.
Chouchoutez-la, elle lavera pour vous pendant des années et des
années.
Comment fermer le tambour (page 9)
6. Guide pour comprendre les étiquettes et les
symboles Ariston (pages 7-8)
Les symboles reportés sur les étiquettes des vêtements sont très
faciles à comprendre et importants quant à la réussite du lavage. Ce
guide vous aidera à vous y retrouver parmi les températures
conseillées, les types de lavage et de repassage.
Mode dinstallation et demploi
1
12. Caractéristiques techniques (page 14)
Vous y trouverez les caractéristiques techniques de votre lave-linge:
sigle du modèle, spécifications électriques et hydrauliques,
dimensions, capacité, vitesse dessorage et conformité aux normes
et aux directives italiennes et européennes.
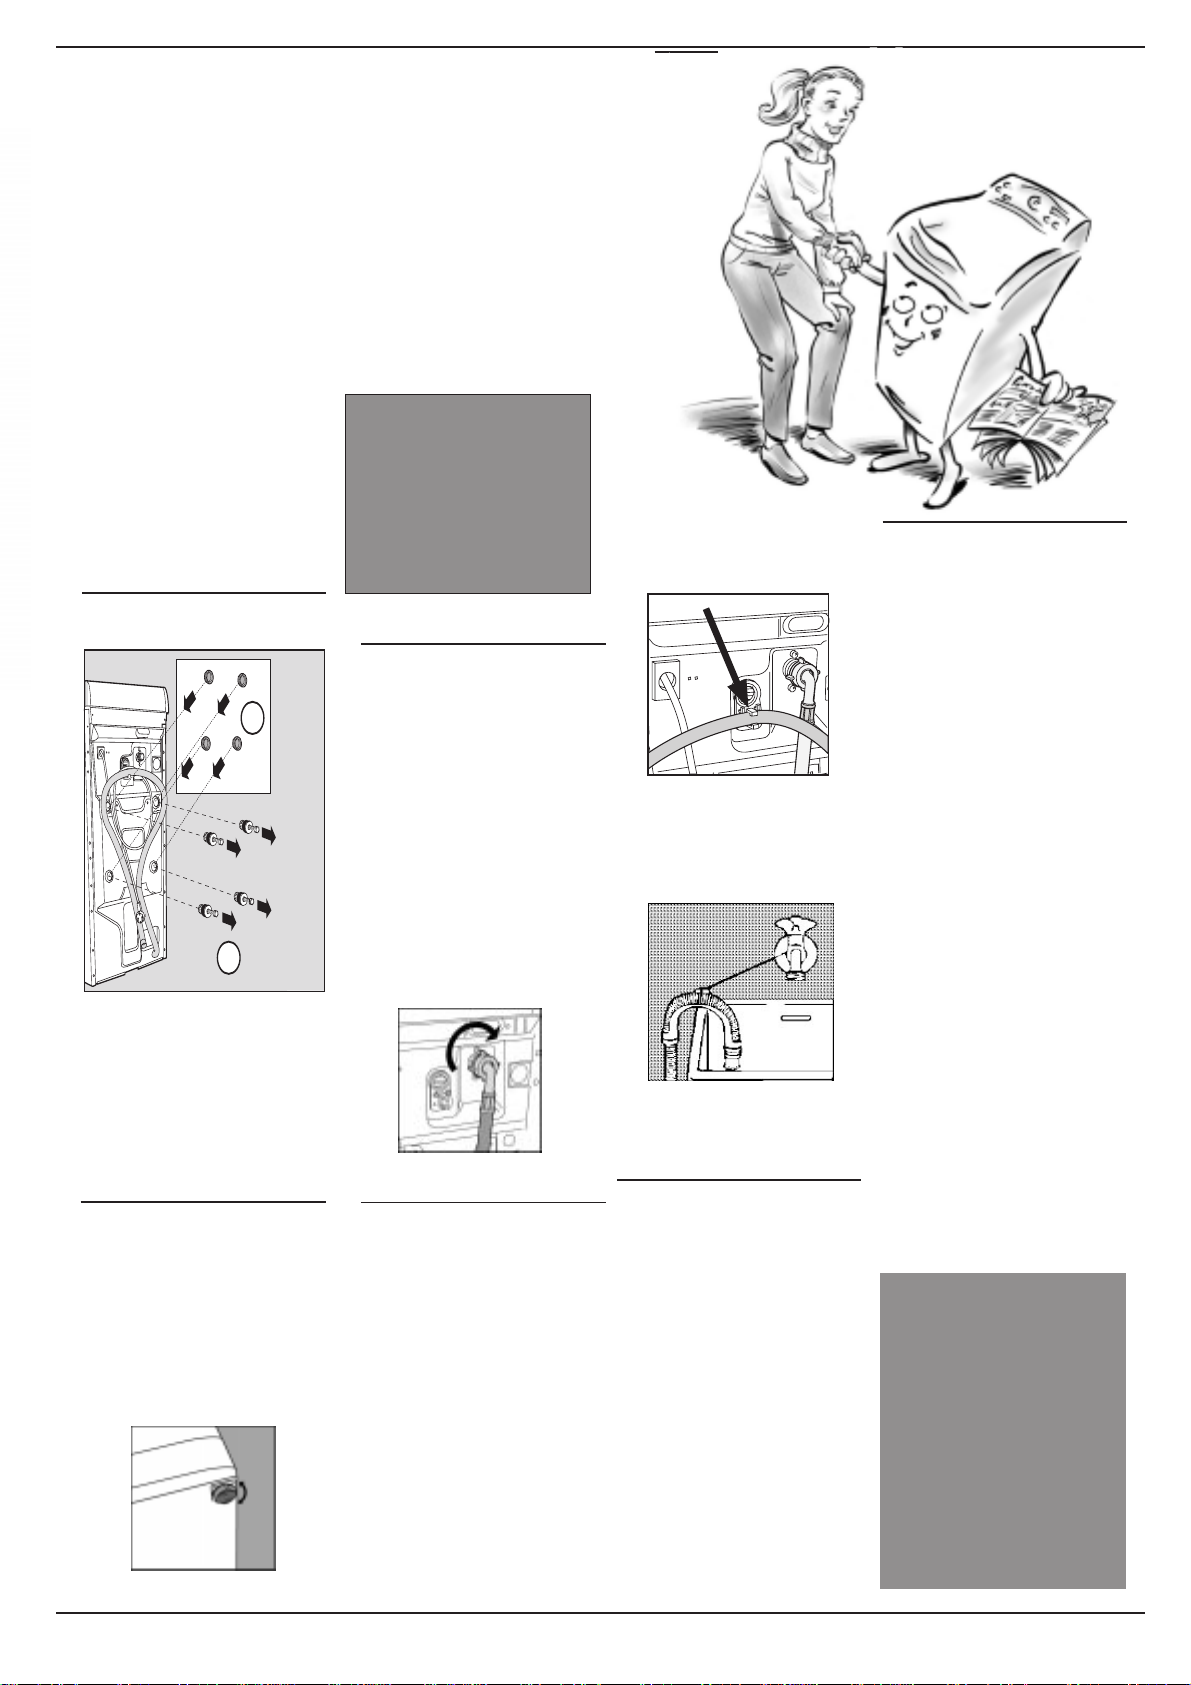
Installation et déménagement
Quand votre lavelinge arrive
Que votre lave-linge soit neuf ou que vous veniez juste de
déménager, son bon fonctionnement dépend en grande partie
de son installation.
A
près avoir déballé l’appareil,
vérifiez s’il est en bon état. En cas de
doute, faites appel à un professionnel
du secteur. Pour permettre son
transport, l’in-térieur du lavelinge a été blo-qué à l’aide de
quatre vis et de caoutchoucs sur
le pan- neau arrière de la
machine.
Déblocage: enlever les
4 vis!
2
1
Avant de brancher votre lave-linge, enlevez les vis, le caoutchouc
et la cale (conservez bien toutes
ces pièces) et bouchez les trous
à l’aide des cache-trous en plastique fournis avec l’appareil.
Attention: en cas de réutilisation, les vis plus courtes doivent
être montées dessus.
Mise à niveau
Pour bien fonctionner, il est important
que votre lave-linge soit bien posé à
plat. Pour bien le niveler, il suffit
d’agir sur ses pieds; son angle
d’inclinaison , mesuré sur le plan de
travail, ne doit pas depasser 2°. Si
vous avez de la moquette,
attention à ce que la ventilation
ne soit pas bouchée au niveau de
la zone dappui.
Les pieds avant sont réglables
Conservez les vis de
blocage et les cales. En cas
de déménagement vous
pourrez vous en resservir
pour bloquer les pièces
internes du lave-linge et le
protéger ainsi contre les
chocs pendant son
transport.
Raccordement à la
prise d’eau
La pression de l’eau doit être
comprise entre les valeurs indiquées
sur la plaquette fixée à l’arrière de
l’appareil. Raccordez le tuyau
d’arrivée que vous trouvez, démonté,
à l’intérieur du tambour à une prise
d’eau froide à embout fileté 3/4 gaz.
Si les tuyauteries de l’eau sont neuves
ou inutilisées depuis longtemps,
faites couler l’eau jusqu’à ce qu’elle
soit limpide et sans impuretés avant
de raccorder. Raccordez le tuyau à
la machine, au niveau de la prise
d’eau prévue en haut, à droite.
Prise d’eau à monter en haut à
droite.
Raccordement du tuyau
de vidange
Un crochet situé à l’arrière de la
machine, en haut, vous permet
éventuellement de fixer le tuyau de
vidange. Introduisez l’autre extrémité
dans un conduit d’évacuation murale ou bien accrochez-le à l’évier ou à
la baignoire en évitant de l’écraser
ou de trop le plier. Il faut absolument
qu’il débouche entre 60 et 100 cm de
haut.
Si vous êtes obligé de fixer
l’extrémité à moins de 60 cm audessus du sol, il faut que vous fixiez
le tuyau au crochet susmentionné
prévu dans le panneau arrière de la
machine.
Le crochet à utiliser si le tuyau
débouche à moins de 60 cm de
haut.
Si le tuyau évacue dans la baignoire
ou dans le lavabo, appliquez le
support en plastique et attachez-le
au robinet.
Le guide pour le vindange en
baignoire ou lavabo.
Ne le laissez jamais
tremper dans l’eau.
L’utilisation de rallonges est
absolument déconseillée. Si vous ne
pouvez vraiment pas vous en passer,
il faut qu’elle ait le même diamètre
que le tuyau original et moins de
150 cm de long. En cas d’évacuation
murale, faites vérifier son efficacité
par un professionnel agréé. Si vous
habitez en étage dans un immeuble,
il peut y avoir des phénomènes de
siphonnement qui font que votre
lave-linge prend et évacue l’eau
continuellement.
Pour supprimer cet inconvé-nient ,
vous pouvez trouver dans le
commerce des valves spéciales antisiphonnement.
M
Branchement
électrique
Avant de brancher la machine à la
prise de courant, contrôlez que:
1) la prise de courant est conforme
aux normes et que sa charge
électrique est bien apte à
supporter la puissance maximum
de la machine figurant sur la
plaquette des caractéri-stiques;
2) la tension d’alimentation est bien
comprise entre les valeurs
figurant sur la plaquette des
caractéri-stiques;
3) la prise est bien compati- ble avec
la fiche de la machine. En
cas d’incompatibilité, n’utilisez
pas d’adaptateurs mais remplacez
la prise ou la fiche;
4) votre installation électrique dispose bien d’une «mise à la terre».
5) une fois la machine branchée,
elle ne s’appuie pas sur le câble
d’alimentation.
Attention !
Le constructeur et le vendeur déclinent
toute responsabilité et aucune garantie
ne sera due en cas de modification
apportée au raccordement prévu par
l’usine, de mauvais raccordement
électrique, de modification électrique,
mécanique ou hydraulique subis par
la machine.
Attention!
Nous déclinons toute
responsabilité en cas
de non respect des
normes énumérées ci-
dessus.
Ne laissez pas les
enfants jouer avec les
sachets plastique, le
polystyrène expansé,
les vis et les autres
éléments demballage,
ils pourraient être
dangereux.
Mode dinstallation et demploi
2
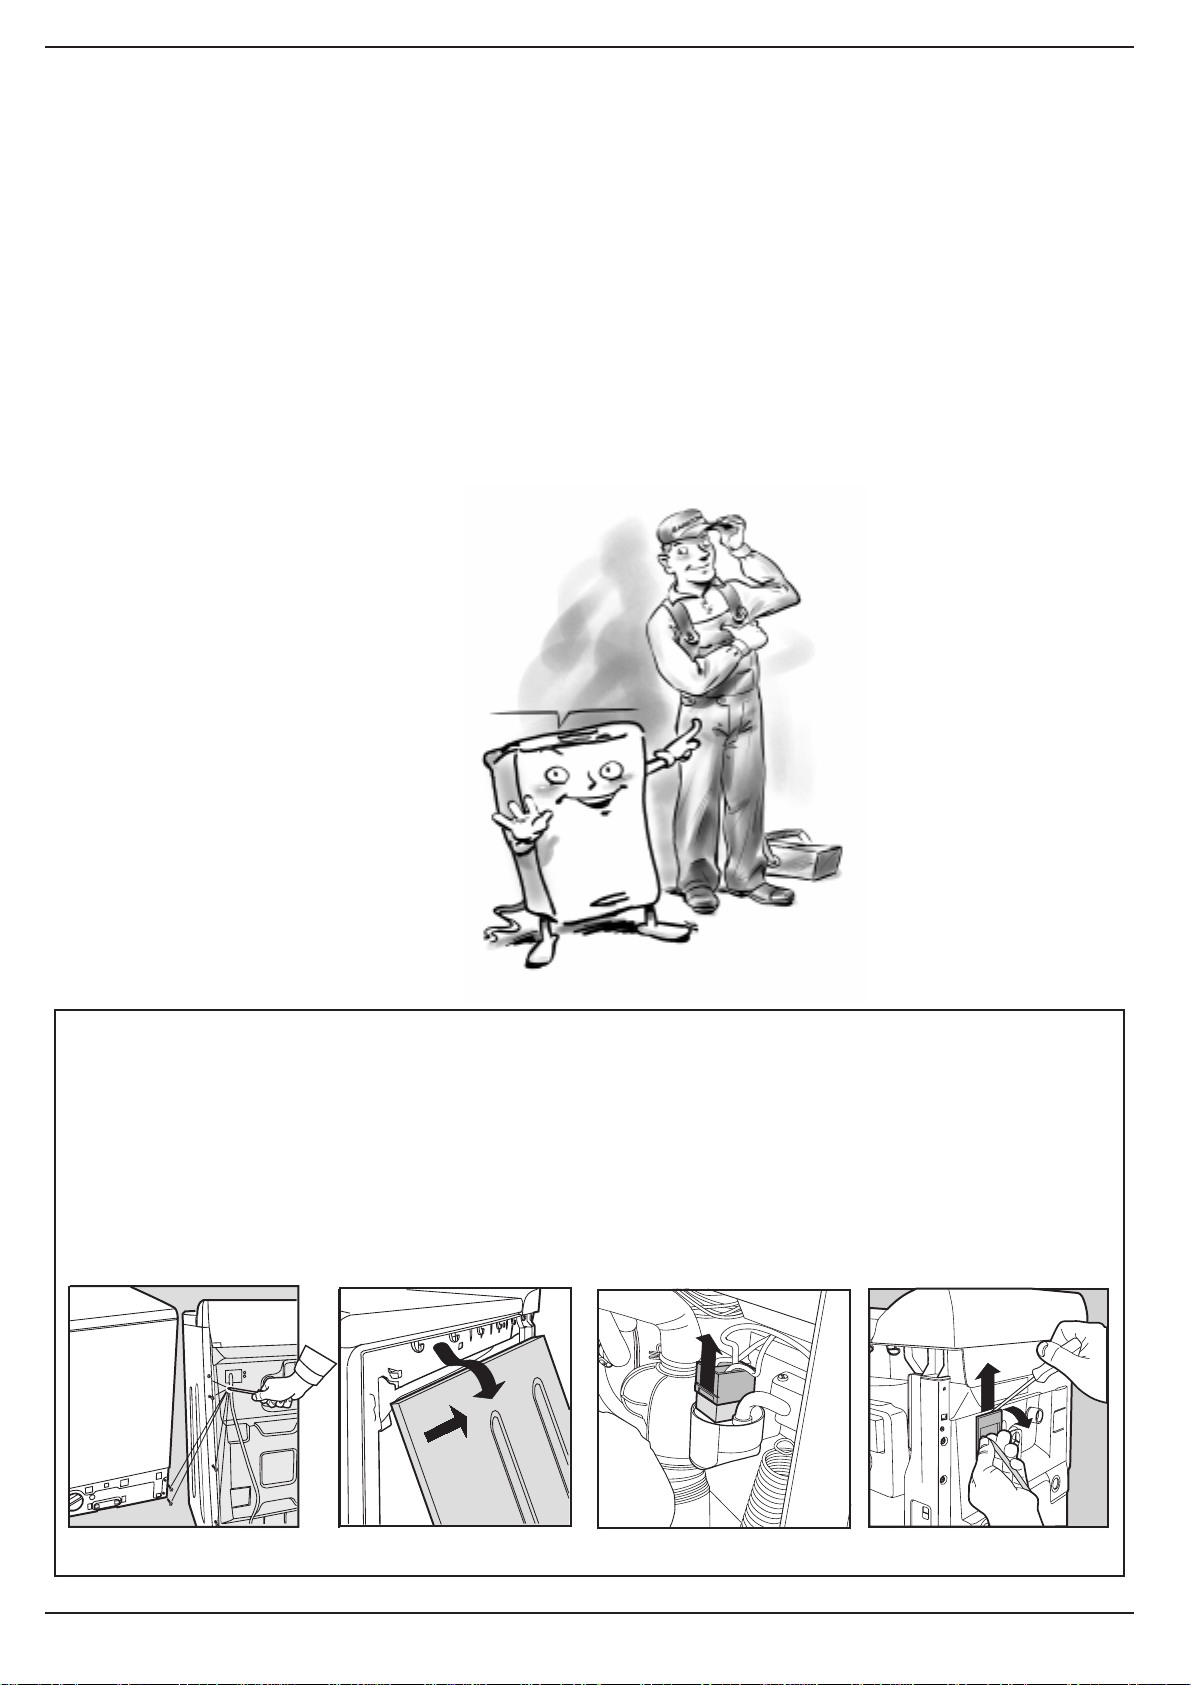
Ce qui compte par dessus tout
Votre sécurité et celle de
votre lave-linge a été fabriqué selon les normes
vos enfants
Lisez attentivement ces conseils
ainsi que toutes les informations
contenues dans ce mode d’emploi:
ils vous fourniront no n seulement
des renseignements utiles mais
aussi des conseils importants sur
la sécurité, l’utilisation et
l’entretien.
1. Margherita ne doit pas
être installée dehors,
même à labri, car il est très
dangereux de la laisser
exposée à la pluie et aux
orages.
2. Elle ne doit être utilisée
que par des adultes et
exclusivement pour laver du
linge selon les instructions
reportées dans ce mode
demploi.
3. Deux ou trois personnes sont
nécessaires pour la
déplacer en faisant très
attention. Ne jamais la
déplacer seul car la
machine est très lourde
ou utilisez un engin de
manutention (diable).
4. Avant dintroduire votre
linge, contrôlez si le
tambour est bien vide.
5. Ne touchez jamais la
machine pieds nus ou bien
les mains ou les pieds
mouillés ou humides.
6. Nutilisez ni rallonges ni
prises multiples, dange-
reuses surtout dans des
endroits humides. Le câble
dalimentation ne doit être ni
plié ni écrasé.
7. Nouvrez pas le tiroir à
produits lessiviels pendant le fonctionnement
Jexige un professionnel
qualifié et agréé
et des pièces de rechange
originales garanties
Ariston!
internationales de sécurité les plus sévères. Pour
vous protéger ainsi que votre famille.
de la machine; nutilisez
jamais de lessive pour
lavage à la main sa mousse
abondante pourrait
endommager les parties
internes de la machine.
8. Ne tirez jamais sur le
câble ni sur le lave-linge
pour débrancher la fiche de
la prise murale: cest
extrêmement dangereux..
9. En cours de fonctionnement,
ne touchez pas à leau
évacuée, elle peut atteindre
des températures très
élevées. Gardez vos enfants
à bonne distance. Ne forcez
jamais pour ouvrir les
portes vous risqueriez
dendommager le mécanisme de sécurité prévu pour
prévenir les ouvertures
accidentelles.
10. En cas de panne, fermez
avant tout le robinet de
leau et débranchez la
fiche de la prise murale;
nessayez en aucun cas
daccéder aux mécanismes
internes pour la réparer.
11. Cet appareil est destiné
à un usage domestique.
Aucune garantie ne sera due
en cas dusage industriel
(Hôtels, Restaurants, Blanchisseries, etc.) qui en compromet les caractéristiques
de construction dorigine.
Comment changer le câble d’alimentationComment changer le câble d’alimentation
Comment changer le câble d’alimentation
Comment changer le câble d’alimentationComment changer le câble d’alimentation
Le câble d’alimentation est un
câble spécial qui n’est disponible qu’auprès des SA V autorisés.
Pour le remplacer, procédez comme
suit :
1. Contrôlez que le lave-linge
est bien éteint et que la fiche est
bien débranchée.
Fig. 1
2. Déposez la base, dévissez
d’abord les 2 vis de droite en bas
puis les 6 vis de gauche à l’arrière, déposez le panneau latéral
en l’inclinant légèrement vers
vous pour le dégager. (fig. 1 et
2).
3. Sortez le connecteur pour déconnectez le filtre antiparasite
(fig. 3).
Fig. 2
4. Dévissez les 2 vis extérieures
qui fixent le filtre et, à l’aide d’un
tournevis (voir fig. 4), dégagezle du panneau arrière en le tirant
vers le haut.
5. Après avoir monté le nouveau
câble, raccordez le connecteur en
vérifiant que le crochet de sécurité tienne bien.
Fig. 3
Pour le remplacer, nous vous
conseillons de faire appel à un
spécialiste du secteur qui devra
respecter les normes applicables en l’espèce.
Fig. 4
3
Mode dinstallation et demploi
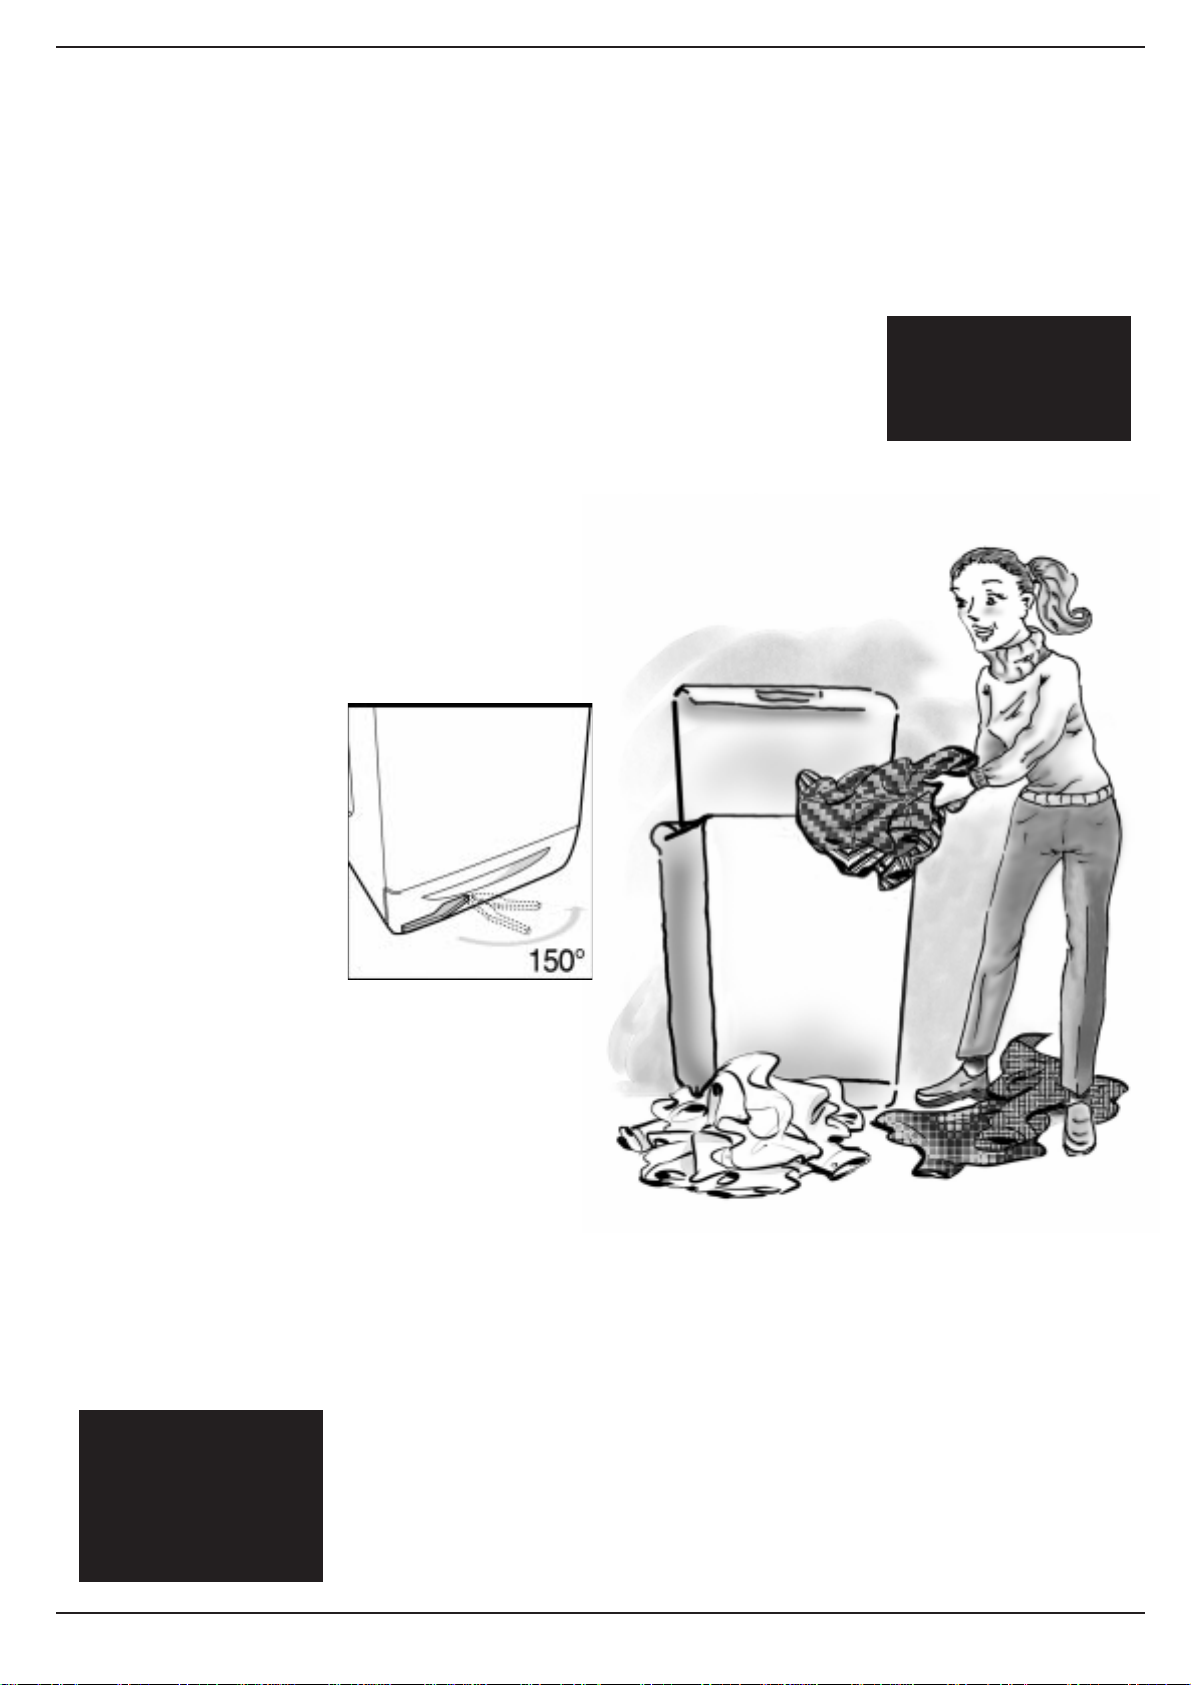
M
Que placer dans votre lave-
Quelques astuces pour mieux laver. Triez votre linge en tenant compte des
linge?
textiles et des couleurs. Attention aux étiquettes, suivez leurs indications.
Alternez les petites et les grandes pièces.
Avant de laver.
Triez votre linge selon le type de
tissu et la résistance des
couleurs: les tissus plus résistants
doivent être séparés des délicats.
Séparez les couleurs claires des
couleurs foncées.
Videz toutes les poches (pièces
de monnaie, papier, argent et
petits objets) et contrôlez les
boutons. Recousez tout de suite
les boutons ballants, vous
éviterez ainsi quils ne se
détachent en cours de lavage
.
Les étiquettes vous
disent tout ce quil faut.
Lisez toujours les étiquettes: vous
saurez tout sur vos vêtements et
sur leurs meilleures conditions de
lavage.
Page 7, nous vous dévoilerons
tous les secrets qui se cachent
derrière les symboles reportés sur
les étiquettes des vêtements.
Leurs indications sont précieuses,
elles vous aideront à conserver
la beauté de vos vêtements.
Démarrage de votre lave-linge
Mise en place, déplacementsMise en place, déplacements
Mise en place, déplacements.
Mise en place, déplacementsMise en place, déplacements
Si votre lave-linge est muni d’un
chariot spécial avec roues
rétractiles, vous pouvez le
déplacer facilement. Pour faire
descendre ce chariot et pouvoir
ainsi déplacer sans effort votre
lave-linge, vous devez tirer le
levier situé en bas à gauche, sous
la base. Une fois le lave-linge
déplacé, remettez-le dans la
position initiale. Le lave-linge est
ainsi solidement mis en place.
Voir figure. (Seulement pour les
modéles prevues)
Triez votre linge par
type de tissu et
couleur: vous
obtiendrez de
meilleurs résultats
Dès son installation, démarrez un cycle de lavage
en sélectionnant le programme «» à 60 degrés.
Une bonne mise en service de
votre lave-linge est primordiale
tant pour la qualité du lavage que
pour éviter des problèmes et
augmenter sa longévité. Après
avoir chargé le linge et dosé les
produits lessiviels,
contrôlez toujours si:
Chouchoutez votre
linge: placez vos
pièces de lingerie, vos
bas et vos vêtements
délicats dans un
sachet en toile pour
les protéger
1. Les portes sont bien
fermées.
2. La fiche est bien branchée
dans la prise.
3. Le robinet de leau est ouvert.
4. La touche G est dans la
position O
5
. Le chariot des roues rétractiles
est dans la position de repos (les
roues ne sont pas en contact avec
le sol).
Choisissez un programme
Choisissez ce programme en
fonction du type de linge à laver.
Pour opérer ce choix, consultez
le tableau page 6. Tournez le
bouton A pour amener le
programme choisi en face du
repère, programmez la tempé-
rature à l’aide du bouton B,
vérifiez que le bouton C est bien
dans la position que vous désirez,
sinon utilisez les touches D, E et
F , puis appuyez sur le bouton
marche/arrêt G (position I mar-
che).
Noubliez pas enfin de
sélectionner , si vous le désirez,
le «départ différé» avant le cycle
de lavage.
Une fois le lavage terminé…
Attendez que lindicateur
lumineux H séteigne: il faut
compter environ trois minutes.
Eteignez alors la machine en
appuyant sur la touche marchearrêt G (position O arrêt).
Vous pouvez alors ouvrir les portes
en toute sécurité. Après avoir sorti
le linge, laissez les portes
ouvertes ou entrouvertes pour
que lhumidité à lintérieur puisse
sévaporer.
Fermez toujours le robinet de
leau.
Noubliez pas quen cas de
coupure de courant ou si vous
éteignez le lave-linge, le
programme sélectionné reste
mémorisé.
Mode dinstallation et demploi
4
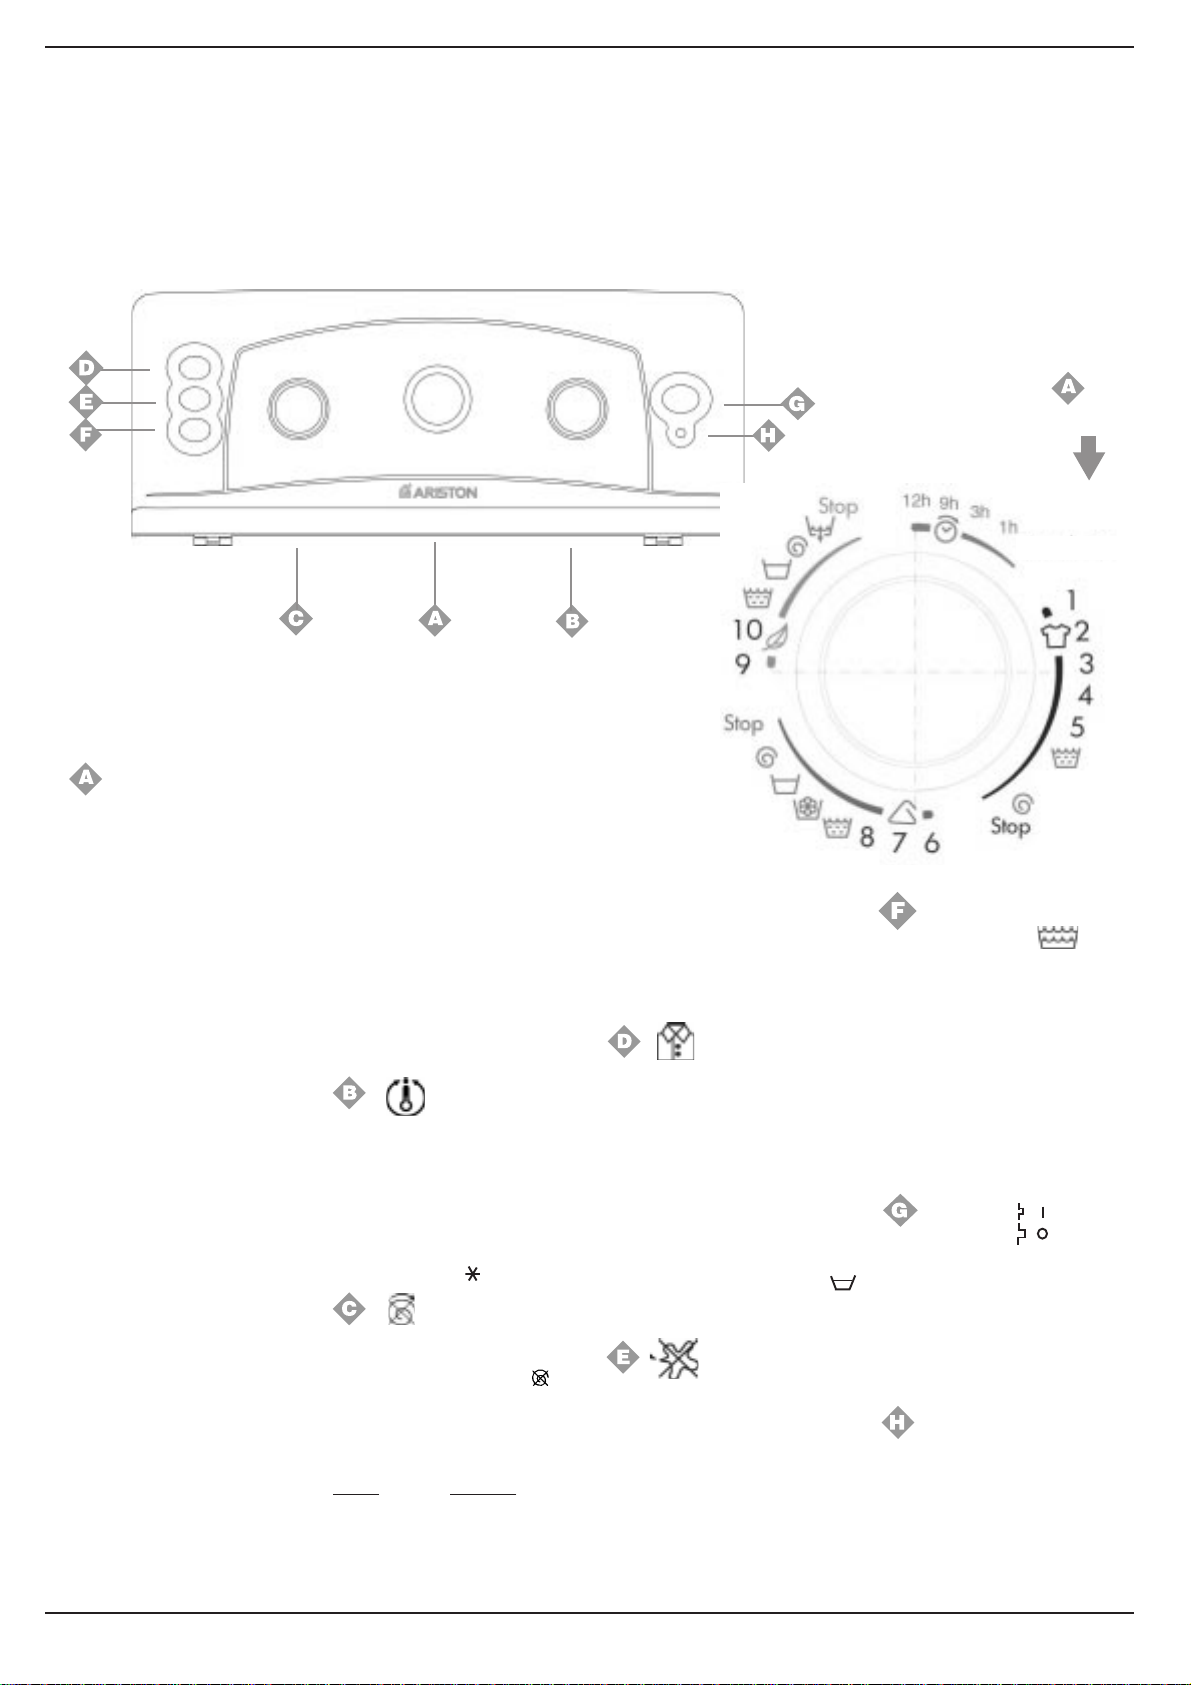
Maîtrise du panneau de commandes
Cest vous qui commandez
Choisir les bons programmes: cest important et cest facile.
Le SélecteurLe Sélecteur
Le Sélecteur
Le SélecteurLe Sélecteur
des programmes dedes programmes de
des programmes de
des programmes dedes programmes de
votre lave-lingevotre lave-linge
votre lave-linge
votre lave-lingevotre lave-linge
Reset
Bouton programmes et
départ différé
Il sert à sélectionner le programme
de lavage.
Ne tournez ce bouton que dans le
sens des aiguilles d’une montre.
Pour sélectionner les programmes,
amenez le symbole/numéro
correspondant au programme
désiré en face du repère.
Appuyez alors sur la touche marche / arrêt G (position marche), la
lampe-témoin H commence à
clignoter. Au bout de 5″, la sélection
est acceptée, la lampe-témoin H
cesse de clignoter (mais reste
allumée) et le cycle de lavage
débute.
Si vous désirez interrompre le
lavage en cours ou en programmer
un autre, sélectionnez l’un des mots
Stop/Annulation et attendre 5″:
quand l’annulation est acceptée, la
lampe-témoin H clignote, vous
pouvez alors éteindre votre
machine.
Vous pouvez utiliser ce bouton
pour différer le fonctionnement
du lave-linge.
Sélectionnez une des quatre
positions de départ différé, appuyez
sur la touche marche/arrêt G
(position marche) et attendre 5″.
La sélection est alors acceptée (la
lampe-témoin H reste allumée) et
vous pouvez sélectionner le
programme souhaité.
L’indicateur lumineux H clignote de
façon particulière (2″ allumé et 4″
éteint) pour signaler qu’il y a
programmation d’un départ différé.
Pendant cette phase, vous pouvez
ouvrir les portes pour compléter
votre chargement de linge.
Une fois que le cycle de lavage a été
sélectionné et accepté par le lavelinge, un changement de position du
bouton naura aucune conséquence
(sauf dans les positions Stop/
Annulation).
Bouton température
Il sert à sélectionner la température
de lavage indiquée dans le tableau des
programmes (voir page 6). Il vous
permet aussi de réduire la température
conseillée pour le programme
sélectionné, jusquau lavage à froid
(symbole neige ).
Bouton réduction essorage
Il sert à supprimer lessorage
(sélectionnez le symbole
réduire la vitesse dessorage du
programme sélectionné. Les
vitesses maximum prévues
pour les 4 types de tissu sont:
Tissu Vitesse
Coton max tours min.
Synthétiques
Laine 600 tours min.
Soie non
800 tours min.
) et à
De toute manière, la machine
procède à une répartition de la
charge à faible vitesse.
Repassage facile
Grâce à cette fonction, votre
linge ne sera pas froissé et donc
beaucoup plus facile à repasser.
Vous pouvez l’utiliser avec les
programmes 3, 5 (Coton), 6, 7
(Mélangés) et 10 (Soie et voilages).
Si vous appuyez sur cette touche
en utilisant les programmes 4, 5 ,
6, 7 et 10, votre cycle de lavage
s’arrêtera en face du symbole ,
pour l’achever, appuyez à nouveau
sur la touche D .
Anti-tâches (voir pages 9-10)
Grâce à cette commande votre
lavelinge effectue un lavage plus
intense qui optimise leffet des
addittifs liquides permettant ainsi
déliminer les tâches les plus
difficiles. Quand la touche antitaches est activée, pas de
prélavage e Rèpassage facile (D)
sont possible.
Rinçage plus
Elle vous permet daugmenter le
vigueur du rinçage. Nous vous
conseillons de lutiliser pour
améliorer le rinçage de votre linge
en cas de pleine charge (beaucoup
de lessive) et dhypersensibilité
aux produits lessiviels (allergies de
contact).Cette option est
disponible avec les programmes 1-
2-3-5-6-7.
Marche-arrêt
Appuyez sur la touche G pour
allumer votre lave-linge,
relachez-la pour léteindre.
L’arrêt de la machine
n’annule pas le programme
sélectionné.
Voyant marche-arrêt
Le voyant H clignote pour
signaler que la machine est
allumée et attend dêtre
programmée. Sa lumière fixe
indique que le programme
sélectionné est accepté.
Mode dinstallation et demploi
5
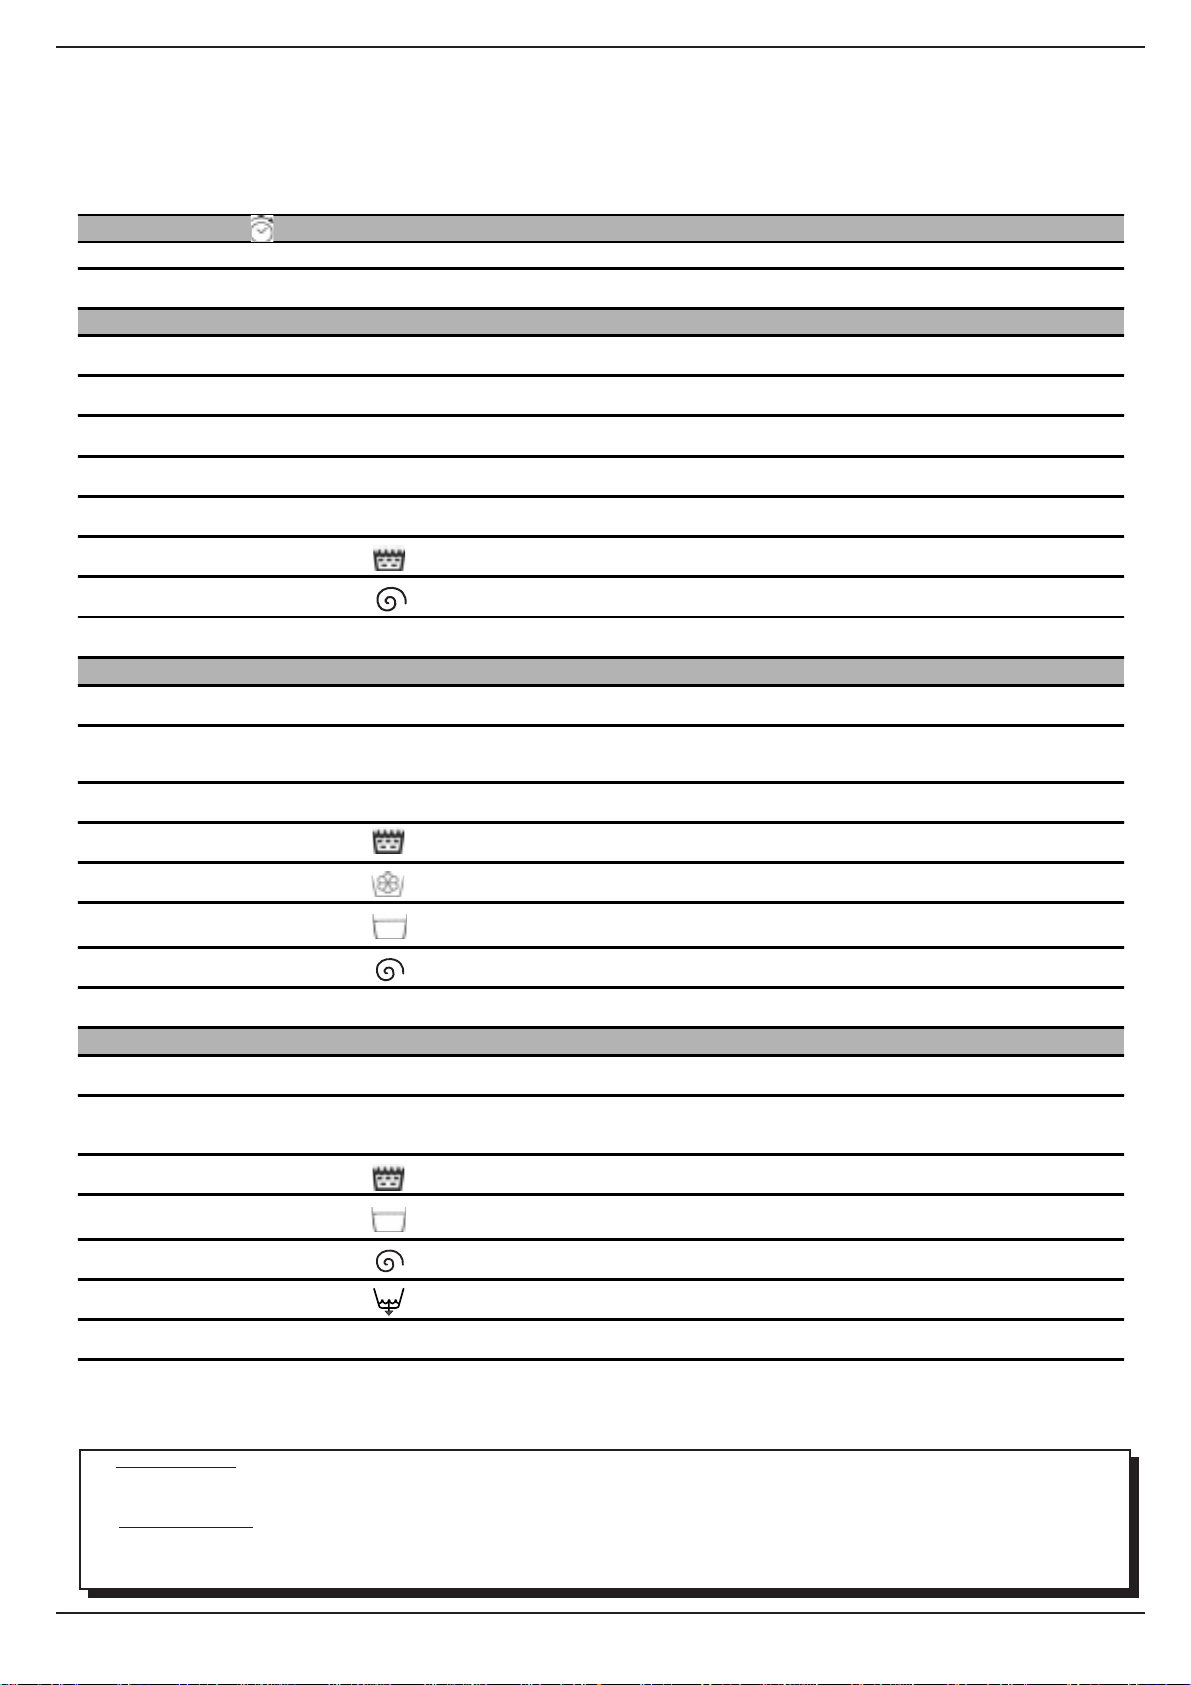
Que laver, aujourdhui?
M
Des programmes pour toutes les saisons
Nature des tissus et
degré de salissure
DEPART DIFFERE
Retard de 12 — 9 — 3 — 1 — heures
Stop/Annulation
COTON
Blancs extrêmement sales
(draps, nappes, etc.)
Blancs extrêmement sales
(draps, nappes, etc.)
Bla ncs et coule urs résistante s très
sales
Blan cs peu sales et coulseurs
délicates (chemises, pulls, etc.)
Blan cs peu sales et coulseurs
délicates (chemises, pulls, etc.)
Rinçage/Javel
Essorage
Bouton
programmes
Bouton
température
Pré lavage
1Max°C
2Max°C
3 60°C
4 40°C
5 40°C
Lessive
lavage
Assoupliss.
u u u
u u
u u
u u
u u
u
Antitaches/
Javel
Dél./Trad.
Dél./Trad.
Dél./Trad.
Dél./Trad.
Durée du
cycle
(minutes)
160
140
140
160
90
Description du cycle de lavage
Diffère le départ de 12-9-3-1 heures
Interrompt/Annule le programme
sélectionné
Prélavage tiède, lavage à 90°C
essorages intermédiaires et final
Lavage à 90°C
intermédiaires et final
Lavage à 60°C,
intermédiaires et final
Lavage long à 40°C,
intermédiaires et final
Lavage à 40°C,
intermédiaires et final
Rinçages
Vidange et essorage final
, rinçages, essorages
rinçages, essorages
rinçages, essorages
, et essorages intermediaires et final
, rinça ges,
rinçages, essorages
Stop/Annulation
TISSUS MÉLANGÉS
Synthétiques couleurs résista ntes très
sales (linge de bébé, etc.)
Synthétiques couleurs résistantes
assez sales (linge en toute genre
légèrement sales)
Synthétiques couleurs délicates
(linge en tout genre légèrement sale)
Rinçage/Javel
Assouplissant
Arrêt cuve pleine — Anti-froissement
Essorage
Stop/Annulation
DÉLICAT
Laine
Soie et Voilages.
tissus particulièrement délicats
rideaux, soie, viscose, etc.
(
Rinçages
Arrêt cuve pleine — Antifroissement
Vêtements et
)
Essorage
6 60°C
7 40°C
830°C
9 40°C
10 30°C
u u
u u
u u
u
u
u u
u u
u
Délicate
Délicate
Dél./Trad.
Interrompt/Annule le programme
sélectionné
avage à 60°C
L
110
essorage délicat
Lavage à 40°C
essorage délicat
70
Lavage à 30°C,
35
Rinçages, et essorages
Rinçages avec prélèvement de l’assouplissant
Anti-froissement pour linge
particulièrement délicat
Vidange et essorage délicat
Interrompt/Annule le programme
sélectionné
Lavage à 40°C,
45
Lavage à 30°C,
vidange
55
Rinçage et essorage délicat
Anti-froissement pour linge
particulièrement délicat
Vidange et essorage délicat
, rinçages, anti-froissement ou
, rinçages, anti-froissement ou
rinçages et essorage délicat
intermediaires et final
rinçages et essorage délicat
rinçages, anti-froissement ou
Vidange
Stop/Annulation
Vidange et essoraeg délicat
Interrompt/Annule le programme
sélectionné
Important: pour annuler le programme de lavage à peine sélectionné, appuyez pendant au moins 3 secondes sur le bouton A (Départ/Annullation)
Les données reportées dans le tableau sont fournies à titre indicatif, elles peuvent varier selon la quantité et le type de
linge, la température de l’eau d’alimentation et la température ambiante.
Programmes Spéciaux
4 — Classe A à 40°C.
Votre machine à laver
vous offre un programme spécial vous permettant dobtenir dexcellents résultats
même à de basses températures. En choisissant le programme 4 à 40° C, vous obtiendrez les résultats que vous obtenez
normalement à 60°C, grâce aux performances de votre lave-linge et au prolongement de la durée de lavage.
8 — Lavage Express. Votre machine à laver dispose dun programme spécial permettant de laver des vêtements peu
sales en un rien de temps. En choisissant le programme 8 à 30°C, vous pouvez laver ensemble des tissus différents
(sauf laine et soie), avec une capacité maximum de 3 kg. Ce programme permet de faire des économies de temps et
délectricité, parce quil ne dure que 30 minutes environ. NOUS VOUS CONSEILLONS DUTILISER DES LESSIVES LIQUIDES.
Mode dinstallation et demploi
6
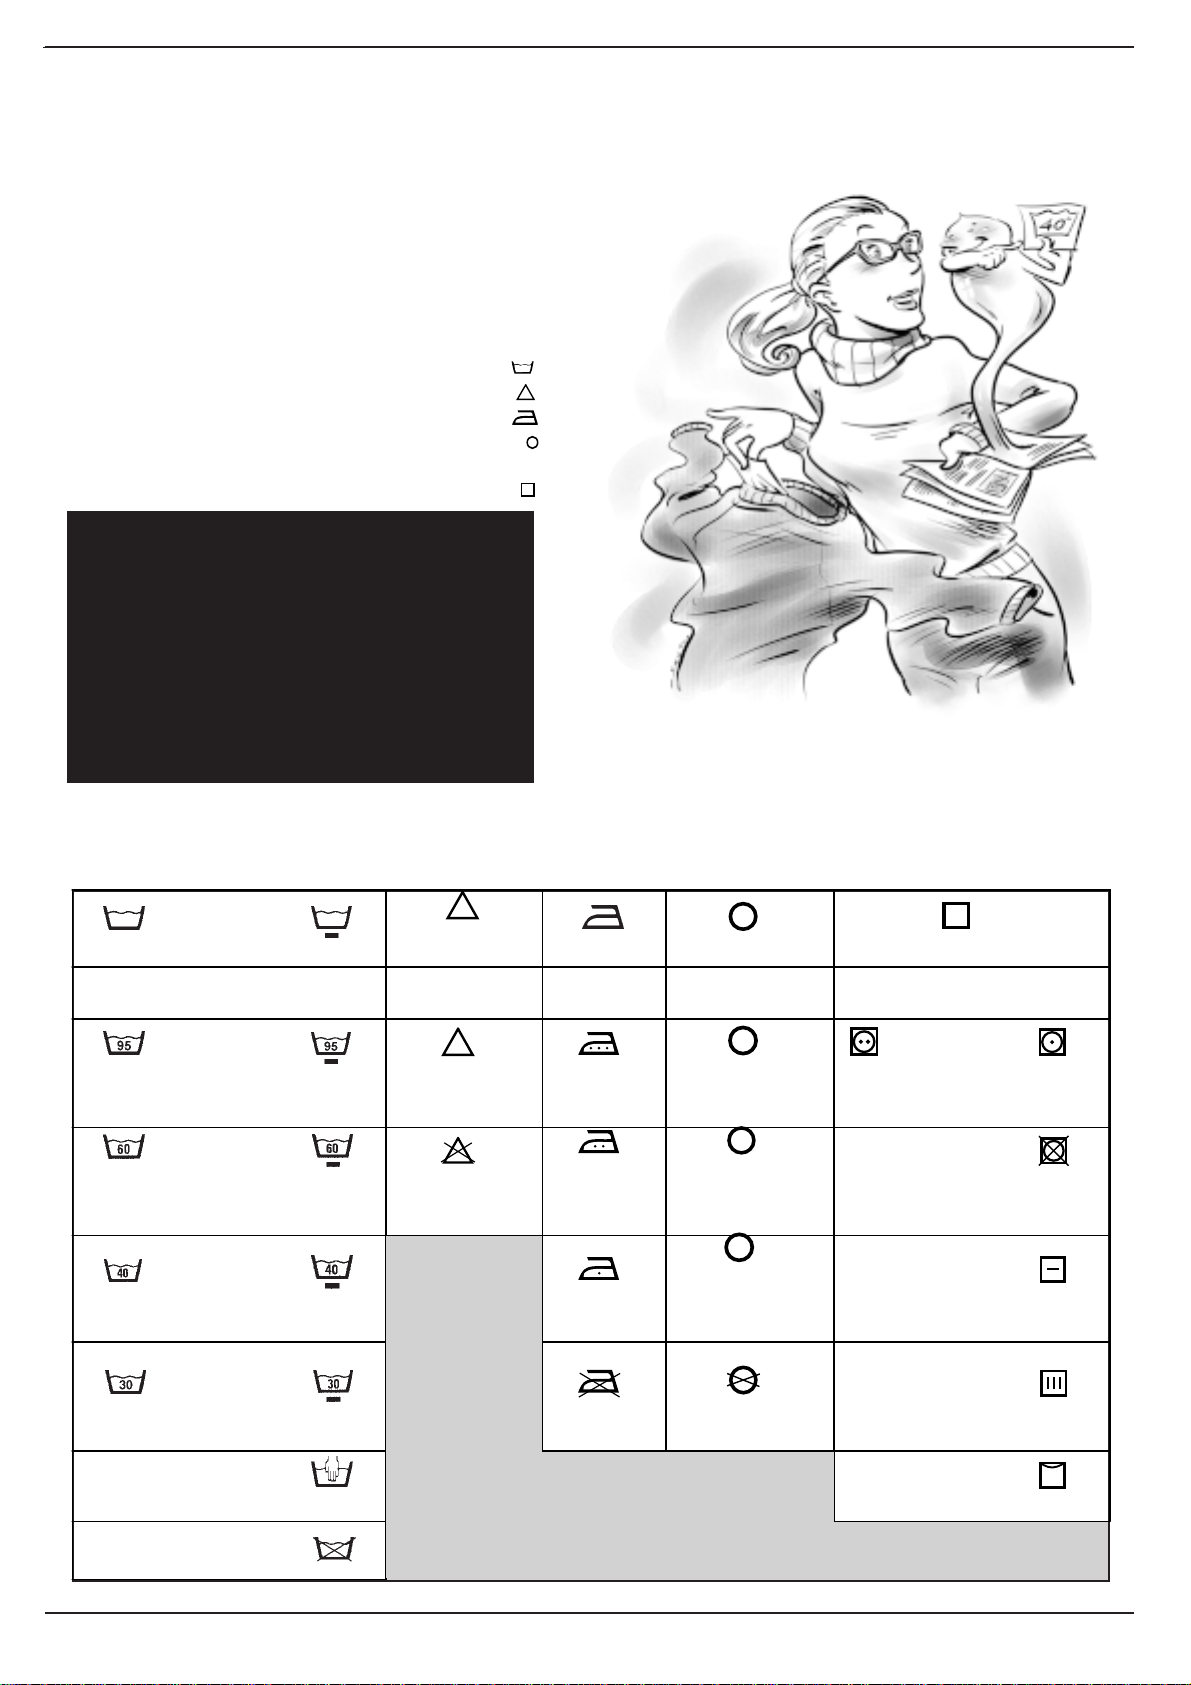
Sachez lire les étiquettes
et les symboles de lavage des differents
modèles top loader Ariston
Apprenez à lire ces symboles, vous laverez mieux,
votre linge durera plus longtemps et votre lave-linge
ne vous en servira que mieux.
Partout en Europe, les étiquettes
contiennent des messages sous
forme de petits mais très
importants symboles. Il est
primordial dapprendre à les
comprendre pour mieux laver et
traiter vos vêtements.
On compte cinq catégories de
sigles différents :
lavage
,
Javel ,
repassage ,
nettoyage à sec
et enfin
séchage
.
Conseils Utiles
Retournez les chemises, elles seront mieux
lavées et dureront plus longtemps.
Videz bien les poches.
Lisez les étiquettes: leurs conseils sont
précieux et utiles.
Dans le tambour, alternez grandes et petites
pièces de linge.
Lisez et mémorisez les symboles de ce tableau:
vous apprendrez à mieux laver et traiter votre linge et à augmenter
les performances de votre Ariston.
Attention à ne pas vous tromper
de température….
Action forte
Lavage
Lavage à
95°C
Lavage à
60°C
Lavage à
40°C
Lavage à
30°C
Lavage à
la ma in
Action
délicate
Traitement
Javel Repassa ge Nettoyage à sec Séchage
Temp.
élevée
c
l
Traitement
autorisé en eau
froide
Traitement
interdit
Repassa ge
fort max
200°C
Repassa ge
moyen max
150°C
A
Nettoya ge à sec
tous type s d e
solvants
P
Nettoya ge à sec au
perch lor., esse nce
d’aviation, alcool
pur, R111 et R113
autorisé en
sèche-linge
F
Nettoya ge à sec à
Repassa ge
max 110°C
Repassa ge
interdit
l’essence
d’aviation, alcool
pur et R113
Nettoyage à sec
interdit
non esso ré
Séchage sur
Temp.
modérée
Séchage
Séchage
interdit en
sèche-linge
Séchage à
plat
Séchage
suspen du
pour
vêtement
cintre
Mode dinstallation et demploi
7
Lavage
interdit
Loading…
Раздел: Бытовая, кухонная техника, электроника и оборудование
Тип: Стиральная Машина
Характеристики, спецификации
Дополнительное полоскание:
Да
Отложенный старт:
1/ 3/ 9/ 12 ч
»Ручная стирка» шерсти:
Да
Тип управления:
механический
Уровень шума при стирке:
60 дБ
Уровень шума при отжиме:
71 дБ
Защита от протечек:
доп. опция
Наим. защиты от протечек:
Menalux
Габаритные размеры (В*Ш*Г):
85*40*60 см
Максимальная загрузка:
5 кг
Макс. скорость отжима:
850 об/мин
Энергопотребление за цикл:
0.95 кВтч
Класс энергоэффективности:
A
Потребляемая мощность:
2100 Вт
Тип загрузки:
вертикальная
Инструкция к Стиральной Машине Ariston AT 84
AT 84
Ex
Instructions for
GB
installation and use
Consigli per lavare meglio
Mode
The secrets
F
dinstallation et demploi
Èíñòðóêöèè ïî óñòàíîâêå è
of fabrics
CIS
èñïîëüçîâàíèþ
How to get better results
Beüzemelési és
HU
használati utasítás
Instrucciones para la
E
instalación y el uso
Class A at
40°C
The first washing ma-
chine to give a perfect
wash at only 40°C
Top loading
Cashmere
Gold
washing machine
The first washing
machine to have «The
Woolmark Company»
safe
recognition
and easy to use
QuicQuic
QuicQuic
Quic
k Guidek Guide
k Guidek Guide
k Guide
Here are the 12 topics explained in this manual. Read,
learn and have fun: you will discover many secret ways
to get a better wash, more easily and making your
washing machine last longer. And especially keeping
an eye on safety.
1.
Installation and removal (p. 2) Installation and removal (p. 2)
Installation and removal (p. 2)
Installation and removal (p. 2) Installation and removal (p. 2)
Installation, after delivery or transport, is the most important
operation for the correct functioning of your washing machine.
Always check:
1.1.
1.1.
1. That the electric system complies with the law;
2. That the inlet and draining pipes are connected correctly;
2.2.
2.2.
3. That the washing machine is levelled properly: something
3.3.
3.3.
worth checking for the life of your washing machine and the
quality of your wash;
4.
4.4.
4.4.
That the tub fastening screws (on the back of the appliance)
That the tub fastening screwsThat the tub fastening screws
That the tub fastening screwsThat the tub fastening screws
have been removed.
have been removedhave been removed
have been removedhave been removed
7.
Useful tips to avoid mistakes (p.
Useful tips to avoid mistakes (p. Useful tips to avoid mistakes (p.
Useful tips to avoid mistakes (p. Useful tips to avoid mistakes (p.
2.
Safety for you and your children (p. 3)Safety for you and your children (p. 3)
Safety for you and your children (p. 3)Safety for you and your children (p. 3)
Safety for you and your children (p. 3)
Years back, our grandmothers were the ones who gave us good
advice — and in those days synthetic fibres did not exist: washing
Here you will find the necessary guidelines for the safety of
was easy. Today, your washing machine gives you helpful
your entire household. Because safety is very important indeed.
advice.
3.
What goes in your washing machine andWhat goes in your washing machine and
What goes in your washing machine andWhat goes in your washing machine and
What goes in your washing machine and
8.
How to close the drum (p. 9)How to close the drum (p. 9)
How to close the drum (p. 9)How to close the drum (p. 9)
How to close the drum (p. 9)
how to start it (p. 4)
how to start it (p. 4)how to start it (p. 4)
how to start it (p. 4)how to start it (p. 4)
Open and shut the doors fully for a safe wash cycle.
A correct distribution of your laundry is vital both to the successful
outcome of the wash and to the life of your appliance. Learn all
the tips and secrets to dividing your linen: colour, type of fabric
9.
The detergent dispenser (p. 10)
The detergent dispenser (p. 10)The detergent dispenser (p. 10)
The detergent dispenser (p. 10)The detergent dispenser (p. 10)
and tendency of creating fuzz are the most important criteria.
How to use the detergent dispenser.
4.
Understanding the control panel (p. 5)Understanding the control panel (p. 5)
Understanding the control panel (p. 5)Understanding the control panel (p. 5)
Understanding the control panel (p. 5)
10.
Pr
PrPr
PrPr
ob
obob
obob
lems and solutions (p.lems and solutions (p.
lems and solutions (p.lems and solutions (p.
lems and solutions (p.
11 and 12)
11 and 12) 11 and 12)
11 and 12) 11 and 12)
The control panel is very simple. It has only a few essential
buttons to help you choose any type of wash cycle, ranging
from the most energetic, capable of cleaning a mechanic’s
Before calling a technician, read these pages: immediate
overalls, to the most delicate for wool. Familiarising with it will
solutions may be found for a number of problems. If the problem
help you get the best out of your wash, while spending less and
persists, call Ariston customer services and any failure will be
helping your washing machine last longer. It’s easy.
repaired as soon as possible.
5.
Guide to the wash programmes (p. 6)
Guide to the wash programmes (p. 6)Guide to the wash programmes (p. 6)
Guide to the wash programmes (p. 6)Guide to the wash programmes (p. 6)
11.
Care and maintenance (p.Care and maintenance (p.
Care and maintenance (p.Care and maintenance (p.
Care and maintenance (p.
13) 13)
13)
13) 13)
Herein is an easy table to help you choose the right programme,
Your washing machine is a true friend: with just a bit of care, it
temperature, detergents and possible additives. Choose the
will repay you with loyalty and devotion.
right programme and you will get better results with your wash
With the necessary upkeep, it will wash for years and years to
while saving time, water and energy, day after day.
come.
6.
Guide to understanding labels and symbols (p. 7-8) Guide to understanding labels and symbols (p. 7-8)
Guide to understanding labels and symbols (p. 7-8) Guide to understanding labels and symbols (p. 7-8)
Guide to understanding labels and symbols (p. 7-8)
12.
TT
TT
T
ecec
ecec
ec
hnical fhnical f
hnical fhnical f
hnical f
eatures (p.
eatures (p.eatures (p.
eatures (p.eatures (p.
14)
14) 14)
14) 14)
The international symbols on the labels of your garments are
Herein are the technical features of your washing machine:
easy to understand and equally important for the success of
model type number, electric and water specifications, size,
your wash. The guide includes simple instructions to help you
capacity, speed of the spin cycle and compliance with Italian
choose the suitable wash programme, the right temperature,
and European rules and regulations.
wash cycles, ironing methods and specific Ariston symbols.
11
1 Instructions for installation and use
11
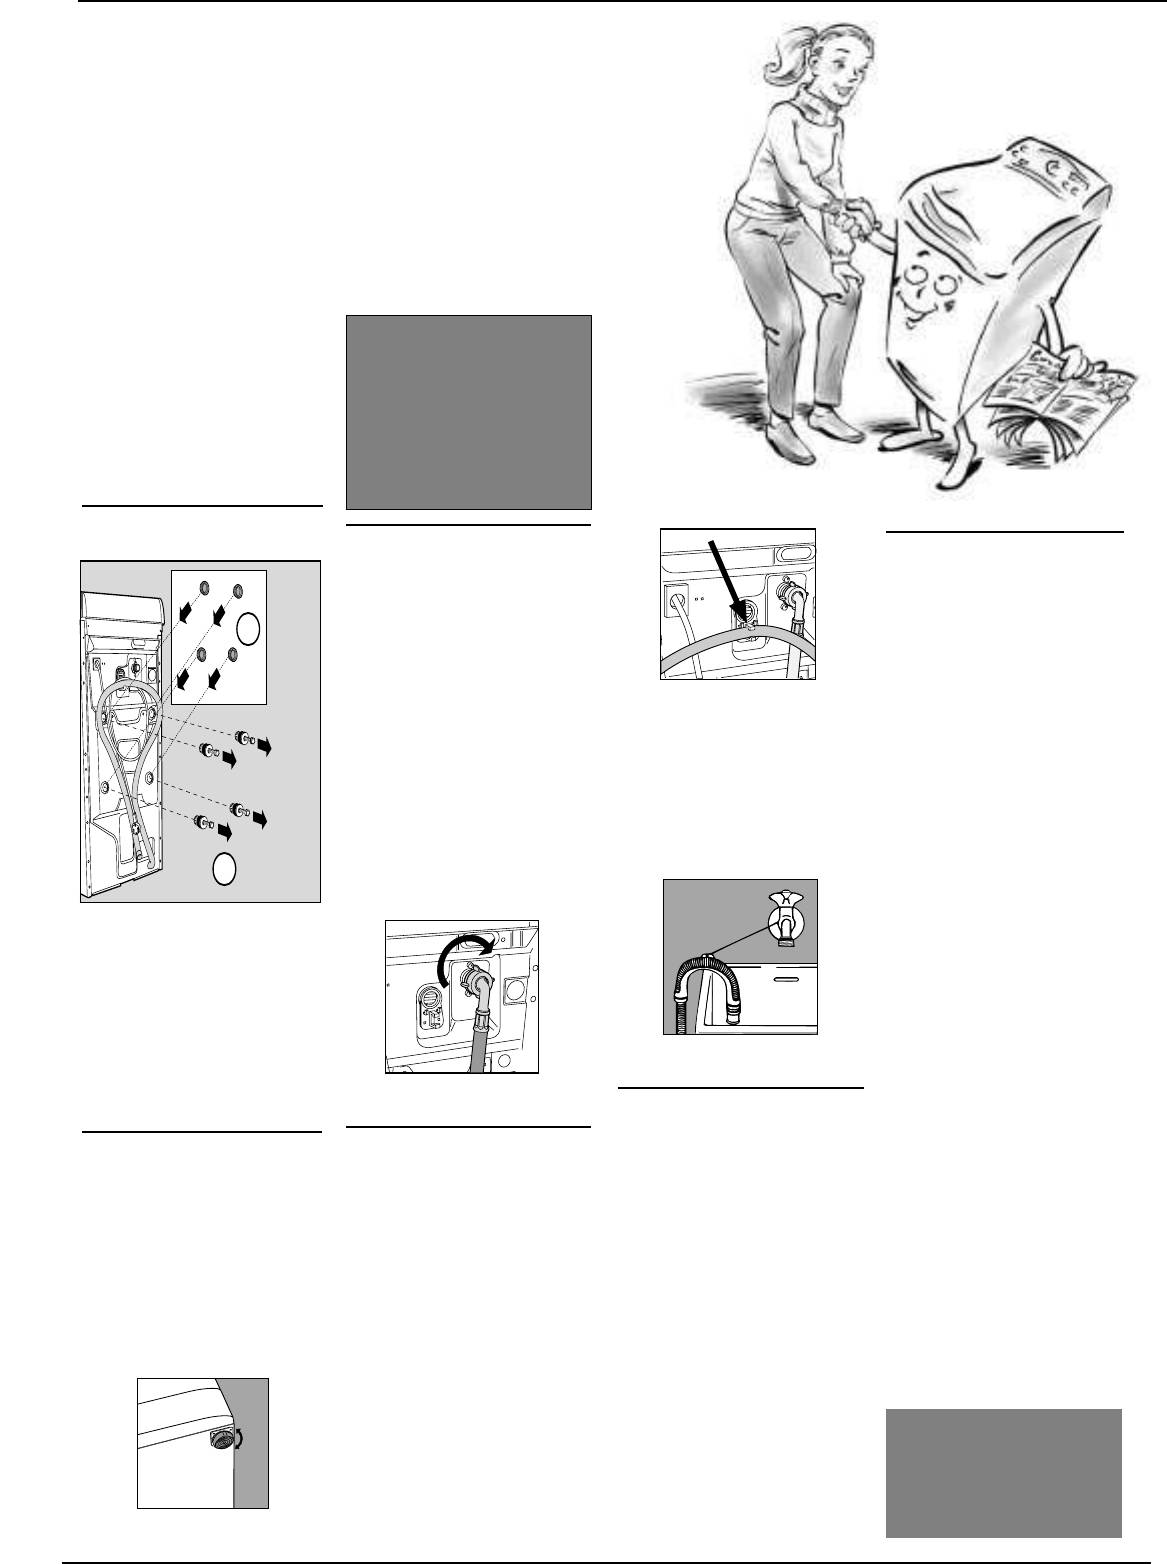
Installation and removal
When the
When theWhen the
When theWhen the
appliance arrives
appliance arrivesappliance arrives
appliance arrivesappliance arrives
Whether new or just transported to a new house, installation is extremely
important for the correct functioning of your washing machine.
After removing the appliance
Do not throw the blocking
from its packaging, check that
screws and the spacers
it is intact. If in doubt, contact
away. In the event of a
a qualified technician
removal, they can be used
immediately.
The inside of theThe inside of the
The inside of the
The inside of theThe inside of the
to block the components
machine is blocked, for
machine is blocked, formachine is blocked, for
machine is blocked, formachine is blocked, for
inside the appliance again
transportation, by fourtransportation, by four
transportation, by four
transportation, by fourtransportation, by four
and so protect it during
screws and rubber washersscrews and rubber washers
screws and rubber washersscrews and rubber washers
screws and rubber washers
transport.
on the back panel.
on the back panel.on the back panel.
on the back panel.on the back panel.
Unblocking: removeUnblocking: remove
Unblocking: removeUnblocking: remove
Unblocking: remove
the 4 screws!
the 4 screws!the 4 screws!
the 4 screws!the 4 screws!
Connection to the waterConnection to the water
Connection to the waterConnection to the water
Connection to the water
Electric connection
Electric connectionElectric connection
Electric connectionElectric connection
mainsmains
mains
mainsmains
Before connecting the
Water pressure must range
appliance to the electric
within the values indicated on
socket, be sure that:
the data plate on the rear of
2
1) the electric socket is able
your washing machine.
to sustain the appliance’s
Connect the inlet hose
maximum power load
(situated unassembled inside
The hook to be used in case the
indicated on the data plate
the drum) to a cold water tap
drain hose ends at a height
and in compliance with the
with a 3/4 gas threaded mouth.
below 60 cm.
law;
If the water pipes are new or
left unused, run the water until
2) the supply voltage is
it is clear and free of debris.
included within the values
Attach the hose to the
If the hose drains into a tub or
indicated on the data
appliance, in line with the
plate;
sink, apply the plastic guide
appropriate water pipe inlet at
and tie it to the tap.
3) the socket is compatible
1
the top right.ù
with the appliance’s plug.
If not, do not use adapters,
Before using the washing
but replace either the
machine,
remove the
remove theremove the
remove theremove the
socket or the plug;
screwsscrews
screwsscrews
screws, remove the rubber
4) electric household appli-
washers with the relative
ances must be equipped
spacer (keeping all the parts)
with an «earthing» system,
and use the plastic tabs
5) that the machine is not
provided to fill in the holes.
The guide for draining into tubs
placed on top of the power
Warning:Warning:
Warning:Warning:
Warning: should the screws
and sinks.
supply cable once the
be re-used, make sure you
Water hose inlet to be fitted to
connection has been
fasten the shorter at the top.
the top right.
The hose must never
The hose must neverThe hose must never
The hose must neverThe hose must never
made.
Levelling
LevellingLevelling
Connecting the drain hoseConnecting the drain hose
LevellingLevelling
Connecting the drain hoseConnecting the drain hose
Connecting the drain hose
remain immerremain immer
remain immerremain immer
remain immer
sed in watersed in water
sed in watersed in water
sed in water
..
..
.
Warning!
The washing machine must be
On the back of the appliance,
Extensions are inadvisable. In
Any modifications made to the
levelled appropriately in order to
towards the top, you will find a
case of absolute need, the
factory settings or an irregu-
guarantee its correct functioning.
hook onto which you should
extension must have the same
lar electric connection, any
T
TT
TT
o leo le
o leo le
o le
vel the appliance
vel the appliancevel the appliance
vel the appliancevel the appliance
,,
,
,,
the f the f
the f the f
the f
eeteet
eeteet
eet
fasten the drain hose if
diameter as the original hose
must be adjusted; the angle of
must be adjustedmust be adjusted
necessary. Insert the other end
electrical, mechanical or hy-
must be adjustedmust be adjusted
and must not exceed 150 cm
inclination, measured according
in a wall draining duct or place
in length. In case of wall
draulic modification whatso-
to the worktop, must not exceed
it on the edge of a sink or tub
draining pipes, their efficiency
ever to the appliance shall
2°. When placed on fitted carpet,
avoiding excessive kinks and
must be checked by a qualified
render the guarantee invalid
make sure the ventilation is not
bending.
It should be placedIt should be placed
It should be placedIt should be placed
It should be placed
technician. If the dwelling is on
and shall relieve the manufac-
obstructed within its surroundings.
at a height ranging from 60 to
at a height ranging from 60 toat a height ranging from 60 to
at a height ranging from 60 toat a height ranging from 60 to
one of the upper floors of a
turer and retailer of any and
100 cm.
100 cm.100 cm.
100 cm.100 cm.
building, there may be drain
In case it is necessary to fix the
all liability.
trap problems causing the
end of the hose at a height
washing machine to load and
below 60 cm from the ground,
Plastic bags, polystyrene
unload water continuously.
foam, screws and other
it must be fixed in the
In order to avoid such an
packaging parts are not
appropriate hook placed on
inconvenience, special anti-
children’s toys, and are
the back panel as mentioned
drain trap valves are available
potentially dangerous.
above.
The feet are adjustable.
in shops.
Instructions for installation and use
2
22
22
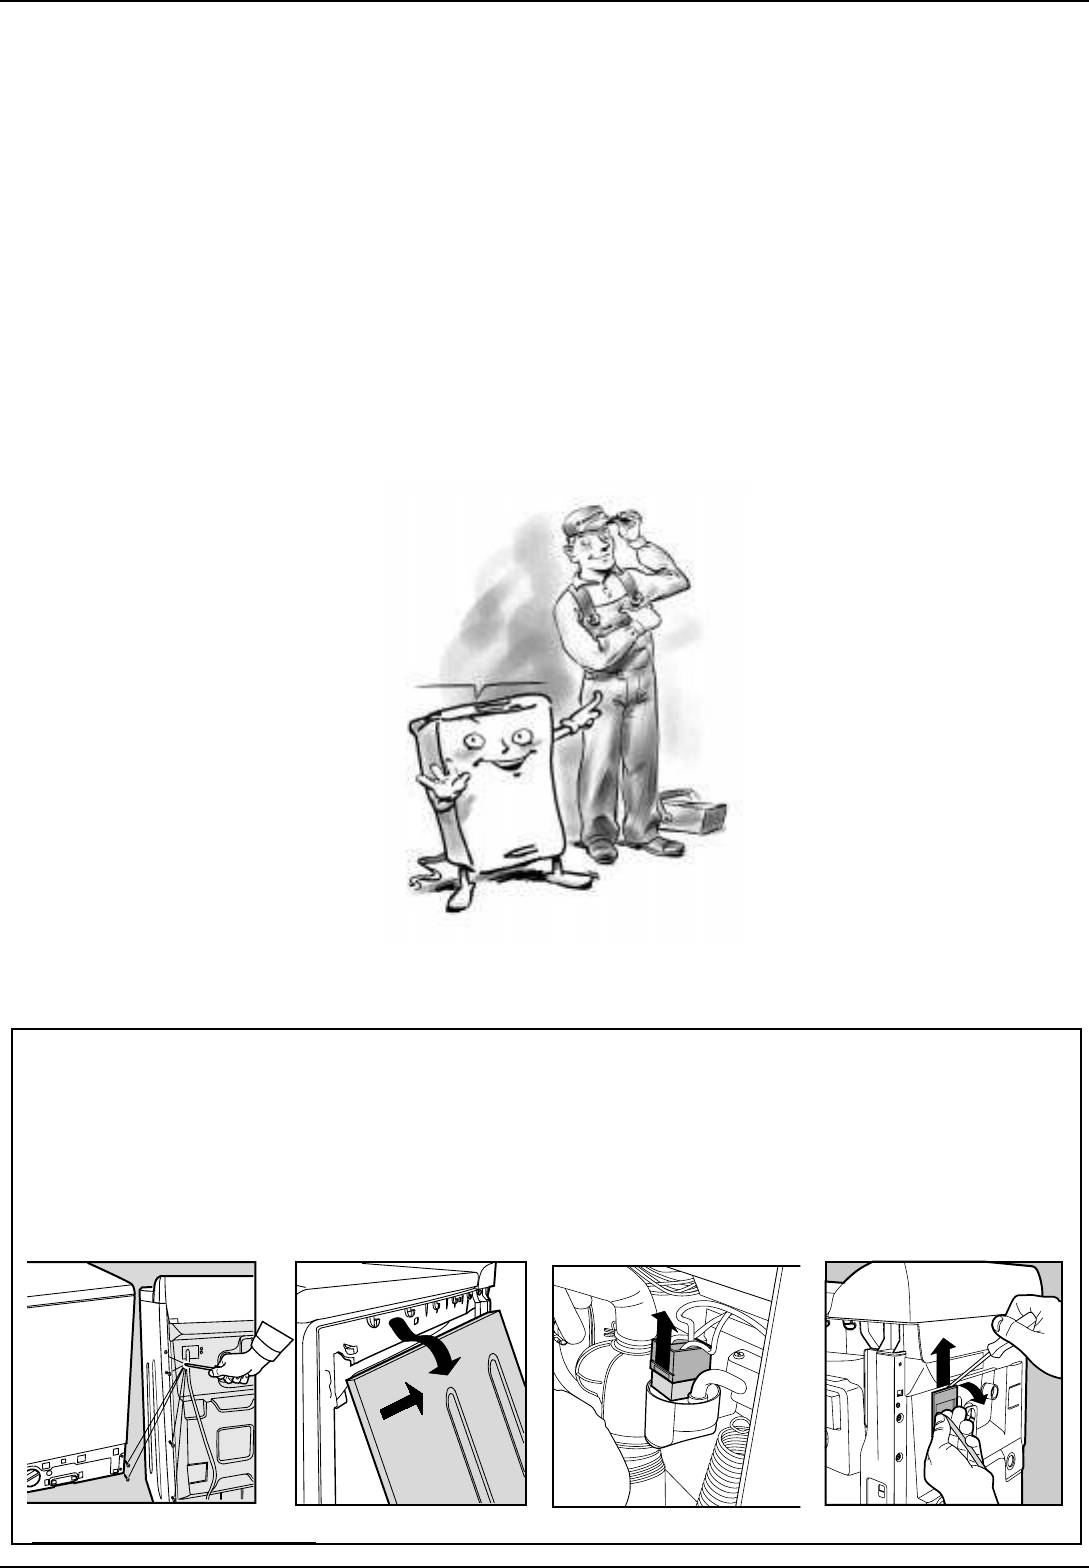
More and more important
YY
Y
YY
our safour saf
our safour saf
our saf
ety and that of
ety and that ofety and that of
ety and that ofety and that of
Your washing machine has been built in compliance
with the strictest international safety regulations.
yy
y
yy
our c
our cour c
our cour c
hildren
hildrenhildren
hildrenhildren
To protect you and all your family.
Read these indications and all
on the left beneath the
7.7.
7.
7.7.
Never use extensions or
Never use extensions orNever use extensions or
Never use extensions orNever use extensions or
abundance of foam could
the information in this manual
base, and the retractable
multiple plugs, which are
multiple plugsmultiple plugs
multiple plugsmultiple plugs
come out from the lid and
carefully: they are an important
wheels will appear, thus
particularly dangerous in
cause damage.
source, not only of numerous
allowing for easy move-
humid environments. The
9.9.
9.9.
9.
Never pull on the plugNever pull on the plug
Never pull on the plug or
Never pull on the plugNever pull on the plug
useful tips, but also of vital
ment.
power supply cable must
the washing machine to
information on safety, use and
5. Before loading the
5.5.
5.5.
never be bent or dange-
disconnect it from the wall
maintenance
washing machine,
make
makemake
makemake
rously compressed.
socket: it is extremely
sure the drum is emptysure the drum is empty
sure the drum is empty.
sure the drum is emptysure the drum is empty
.
1. In case of malfunctioning,
1. In case of malfunctioning,1. In case of malfunctioning,
1. In case of malfunctioning,1. In case of malfunctioning,
8.
8.8.
8.8.
Do not remove the filter
Do not remove the filterDo not remove the filter
Do not remove the filterDo not remove the filter
dangerous.
first unplug the appliancefirst unplug the appliance
first unplug the appliancefirst unplug the appliance
first unplug the appliance
6.6.
6.6.
6.
Never touch the washingNever touch the washing
Never touch the washing
Never touch the washingNever touch the washing
while the appliance is on.
while the appliance is on.while the appliance is on.
while the appliance is on.while the appliance is on.
10.10.
10.10.
10.While the appliance is
from the wall socket and turn
from the wall socket and turnfrom the wall socket and turn
from the wall socket and turnfrom the wall socket and turn
machine when barefoot
machine when barefootmachine when barefoot
machine when barefootmachine when barefoot
Do not use hand wash
Do not use hand washDo not use hand wash
Do not use hand washDo not use hand wash
functioning,
do not touch
do not touchdo not touch
do not touchdo not touch
off the water tap; do not under
off the water tapoff the water tap
off the water tapoff the water tap
or
with wet or damp
with wet or dampwith wet or damp
with wet or dampwith wet or damp
detergent because the
detergentdetergent
detergentdetergent
the drain waterthe drain water
the drain waterthe drain water
the drain water as it could
any circum-stances touch
hands or feethands or feet
hands or feet.
hands or feethands or feet
reach very high tempera-
internal parts in order to
tures.
Keep it out ofKeep it out of
Keep it out ofKeep it out of
Keep it out of
attempt repairs. This will also
children’s reach.
children’s reachchildren’s reach
children’s reachchildren’s reach
NeverNever
NeverNever
Never
render the guarantee invalid.
force the washingforce the washing
force the washing
force the washingforce the washing
2.
2.2.
2.2.
The washing machineThe washing machine
The washing machineThe washing machine
The washing machine
machine doormachine door
machine door because this
machine doormachine door
should not be installed in
should not be installed inshould not be installed in
should not be installed inshould not be installed in
could damage the safety
an outdoor environmentan outdoor environment
an outdoor environment,
an outdoor environmentan outdoor environment
«I only want an authorised
block on the opening,
not even when a roof
specialised technician with
original Ariston spare
which serves to protect
shelters the area, because
parts!»
from accidental openings.
it may be very dangerous
to leave it exposed to rain
11.11.
11.11.
11.
This appliance is intendedThis appliance is intended
This appliance is intendedThis appliance is intended
This appliance is intended
and thunderstorms.
for domestic use.for domestic use.
for domestic use.for domestic use.
for domestic use.
3.
3.3.
3.3.
It must only be used byIt must only be used by
It must only be used byIt must only be used by
It must only be used by
Industrial use (in hotels,
adults adults
adults and exclusively for
adults adults
restaurants and laundries)
washing clothes following
compromises its original
the instructions provided in
manufacturing charac-
this manual.
teristics and invalidates the
4.4.
4.4.
4. Should it have to be moved,
guarantee.
pull the white lever, situated
How to change the power supply cableHow to change the power supply cable
How to change the power supply cable
How to change the power supply cableHow to change the power supply cable
The power supply cable is spe-
2. Remove the appliance base
3. Disconnect the electricity sup-
5. Once you have positioned
cial and can be purchased ex-
and unscrew the 2 screws on
ply to the radio interference sup-
the new power supply cable, re-
clusively from authorised
the bottom right-hand side, then
presser by removing the connec-
connect the connector, making
Ariston Technical Service Cen-
unscrew the 6 rear screws, on
tor (fig. 3).
sure the safety hook is securely
tres.
the left-hand side, and remove
in place.
the side panel by tipping it
4. Unscrew the 2 outer filter fas-
You must contact a qualified
To replace it, do as follows:
slightly outwards and pulling it
tening screws and, with the help
professional to replace the
1. Make sure that the washing
out. (fig. 1 and 2).
of a screwdriver (see fig. 4), re-
power supply cable. The same
machine is switched off and un-
lease it from the back panel by
must respect the applicable
plugged.
pulling upwards.
norms in force.
Fig. 1
Fig. 2
Fig. 3
Fig. 4
33
33
3 Instructions for installation and use
M
What goes in yWhat goes in y
What goes in yWhat goes in y
What goes in y
our washing macour washing mac
our washing macour washing mac
our washing mac
hine?hine?
hine?hine?
hine?
Before washing, you can do a great deal for better results. Divide your garments according to fabric and colour.
Read the labels and follow their indications. Alternate small items with large ones.
Before washing.
Before washing.Before washing.
Before washing.Before washing.
Alternate small items
Alternate small itemsAlternate small items
Alternate small itemsAlternate small items
Dividing your garments
Divide your washing according
with large ones.with large ones.
with large ones.with large ones.
with large ones.
to the type of fabric and colour
according to fabric and
resistance: sturdy fabrics should
Unfold all your washing. Place
colour is very important
be separated from delicate
it loose inside the drum and
for good results.
ones.
follow the indications as to the
Light colours should be
recommended load quantity for
separated from dark ones.
the different wash programmes.
Empty all pockets (coins, paper,
Your clothes will come out
money and small objects) and
cleaner and with fewer creases.
check the buttons. Mend
Garments treated withGarments treated with
immediately or remove loose
Garments treated withGarments treated with
Garments treated with
petrpetr
petrpetr
petr
ol-based stain remool-based stain remo
ol-based stain remool-based stain remo
verver
verver
buttons as they could fall off
ol-based stain remo
ver
.
..
..
during the wash cycle.
Do not place garments in your
washing machine that have
The labels say it all.
The labels say it all.The labels say it all.
been treated with petrol, pure
The labels say it all.The labels say it all.
Always look at the labels: they
alcohol, trichlorethylene etc.
tell you everything about your
until these products have
garment and how to wash it in
evaporated completely.
the best way possible.
The table on page 7 shows you
all the secrets of the symbols
found on labels. Their
indications are a valuable guide
to a better wash and to longer
lasting clothes.
Ho
HoHo
HoHo
w to starw to star
w to starw to star
w to star
t the appliance
t the appliancet the appliance
t the appliancet the appliance
Putting your appliance
in place and moving it.
If your washing machine is
equipped with a special set of
retractable wheels you can
easy move it. To lower the
wheels and thus move the
appliance effortlessly, just pull
the lever, situated on the left-
hand side beneath the base.
Once the appliance is in the
required position, put the lever
back in place. The washing
See figure. (Just for equipped
machine is now firmly in place.
models)
After installing your new washing machine, start a wash cycle (with the appliance empty) by setting programme
«1» at 60 degrees C.
Starting the washing machine
1. The appliance doors are
consult the table on page 6. Turn
Then turn the washing machine
in the right way is important for
firmly shut.
knob A and set it to the number
off by pressing ON-OFF button
the quality of your wash, for
2. The plug is inserted in the
corresponding to the desired
G (O position). You can now
preventing problems and for
socket.
programme. Select the
open the washing machine
lengthening the life of your
3. The water tap is turned on.
temperature using knob B, in
doors safely. After having
appliance. After loading your
4. button G is on the O position.
the case turn the knob C
removed the freshly cleaned
washing and pouring in the
5. The set of retractable wheels
selecting the spin speed and, if
washing, leave the doors open
detergent together with any
is stored away (i.e. the wheels
necessary, press the function
or ajar so that the humidity left
additives, always check that:
are not touching the floor).
buttons (D-E-F); finally press the
inside can evaporate.
Choose the desired program-
ON-OFF button G (position I).
Always turn the water tap off.
For delicate garments:
me
Don’t forget to select “12h, 9h,
protect underwear, tights
The programme is selected
3h 1 h” (one position) whether
Remember that, in the event
and stockings, children’s
according to the type of
you need such delaied wash.
of a power failure, or should
socks and delicate items
garments that need to be
At the end of the wash cycle…
the washing machine switch
by placing them in a
washed and how dirty these are.
Wait for approximately two
itself off, the programme
canvas pouch
To select the programme,
minutes.
selected will start up again
from where it was interrupted.
Instructions for installation and use
4
44
44
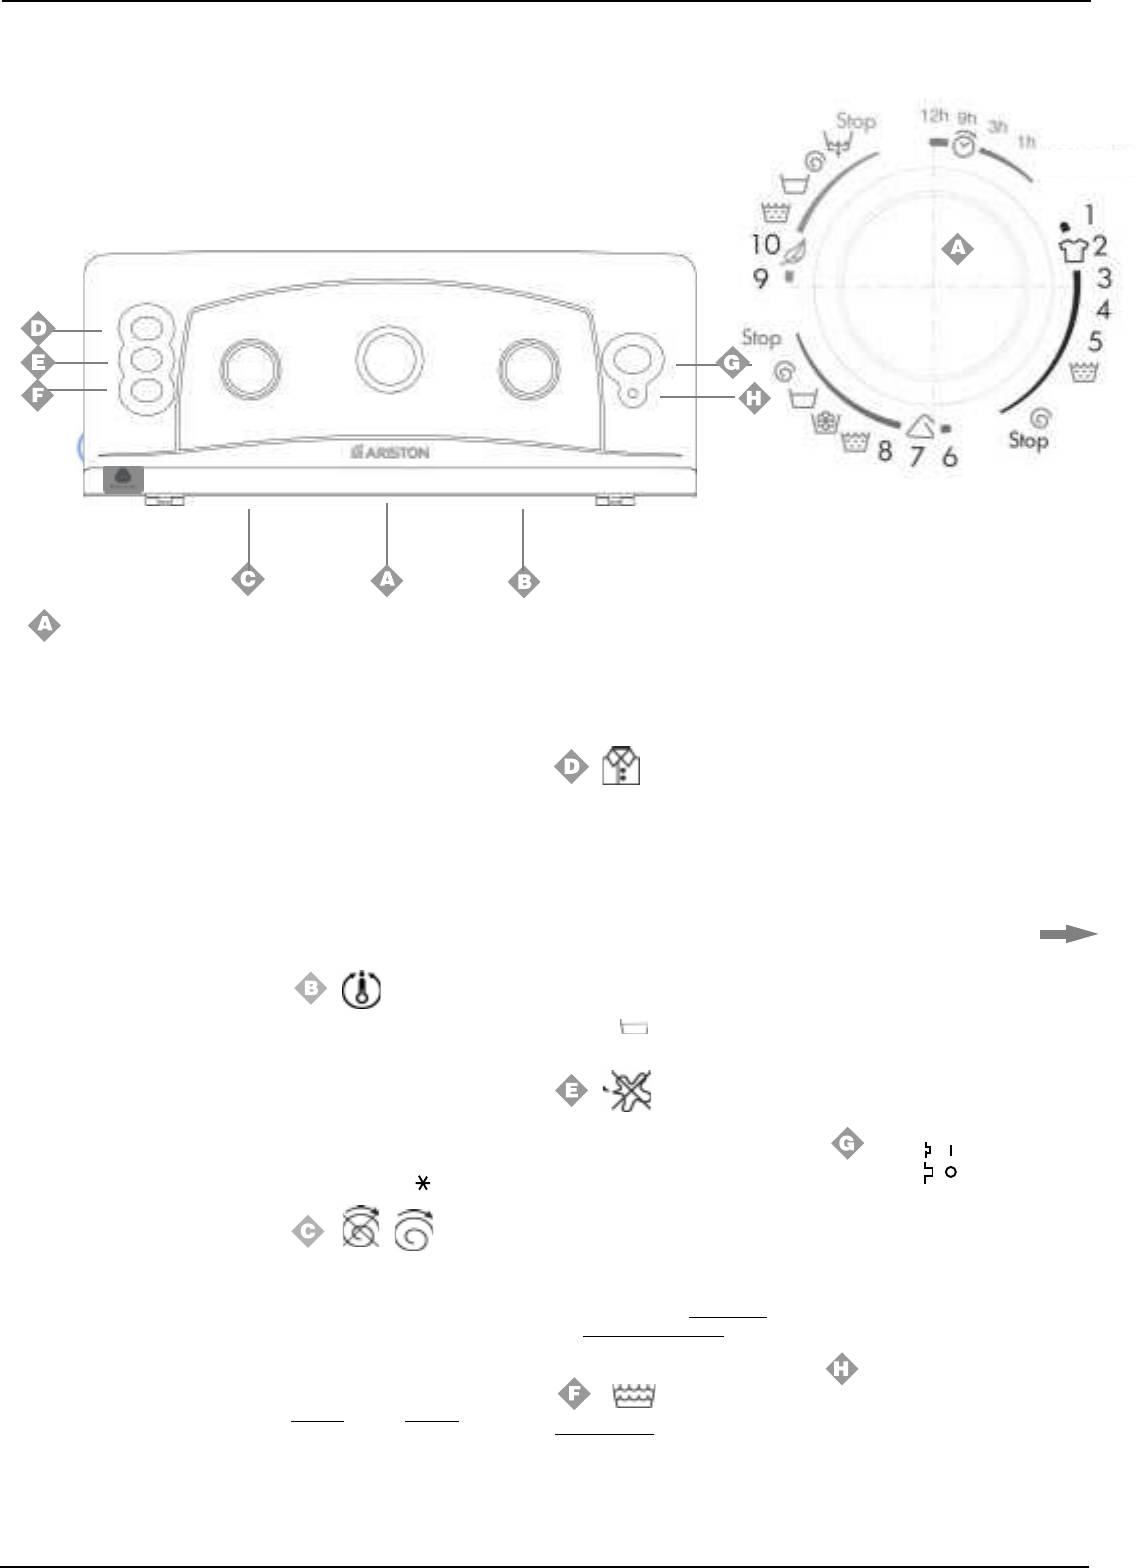
Understanding the control panel
Here I’m in command
Here I’m in commandHere I’m in command
Here I’m in commandHere I’m in command
Making the right choice is important. And it’s easy.
Reset
The knobThe knob
The knobThe knob
The knob
with your washing
with your washingwith your washing
with your washingwith your washing
machine’s wash
machine’s washmachine’s wash
machine’s washmachine’s wash
programmesprogrammes
programmesprogrammes
programmes
Programme selector knob
Programme selector knobProgramme selector knob
Programme selector knobProgramme selector knob
and programmed start
and programmed startand programmed start
and programmed startand programmed start
The information
Lamp
HH
HH
H flashes in a special way
In any case, the appliance
It is used to select the wash
contained in the
(2” on and 4” off) to indicate that
distributes the load at low
programme.
table is purely
the programmed start has been
speed.
TT
TT
T
urn this knob curn this knob c
urn this knob curn this knob c
urn this knob c
locloc
locloc
loc
kwise onl
kwise onlkwise onl
kwise onlkwise onl
yy
y
yy
..
.
..
indicative. It could in
set. Even during this phase, you
fact vary depending
can open the appliance door
To select the programmes, the
on the appliance
and change the wash load.
mark situated on the knob must
Easy
EasyEasy
EasyEasy
iron
iron iron
iron iron
button
buttonbutton
buttonbutton
model, the quantity
After the wash cycle has been
be aligned with the symbol/
This function allows your
and type of garments
set and accepted by the
number that corresponds to the
washing to come out of the
to wash, the hardness
washing machine, any changes
and temperature of
desired programme.
machine without creases,
to the position of the knob will
the mains water
Now press the on/off button
GG
GG
G (
I
II
II
making it much easier to iron.
be of no use (except in the Stop/
supply, as well as the
position), and lamp
H will begin
HH
HH
You can use it with
Reset position).
temperature of the
flashing. After 5 seconds, the
programmes
3-5 (Cotton),
3-53-5
3-53-5
environment.
setting is accepted, lamp
HH
HH
H stops
6-76-7
6-76-7
6-7 (Synthetics),
1010
1010
10 Silk.
flashing (staying lit) and the
Press this button in program-
rinsing results when washing
wash cycle begins.
mes
4-5-6-7-104-5-6-7-10
4-5-6-7-104-5-6-7-10
4-5-6-7-10 and the wash
full loads and large quantities
If you want to interrupt the
cycle will come to a stop on
of detergent are used.
programme in progress or set a
TT
T
TT
emperature contr
emperature contremperature contr
emperature contremperature contr
ol knobol knob
ol knobol knob
ol knob
symbol . You can complete
Recommended in case of
new one, select one of the
It is used to set the wash
it by pressing button
D again.
DD
DD
detergent contact allergies.
positions Stop and wait 5
temperature indicated in the
Option available with program-
seconds: when the cancellation
programme table (on page 6).
mes
1-2-3-5-6-7
1-2-3-5-6-71-2-3-5-6-7
1-2-3-5-6-71-2-3-5-6-7
has been accepted, lamp
HH
HH
H will
It also allows you to reduce the
flash, at this point you can set
temperature recommended for
Stain removal
Stain removalStain removal
Stain removalStain removal
(see page
(see page (see page
(see page (see page
ss
s
ss
9
9 9
9 9
-10-10
-10-10
-10
))
)
))
the new one or turn the
the selected programme, and
Thanks to this command, the
appliance off, should you wish
even to set a cold wash cycle
washing machine will carry out a
to add some garments, by then
ON-OFFON-OFF
( snow symbol ).
ON-OFFON-OFF
ON-OFF
more intensive wash that
waiting for approximately 2
When button
G is pressed, the
G G
G G
optimises the effectiveness of the
minutes before opening the
washing machine is switched
liquid additives, thus allowing
appliance doors.
on, when it is not the machine is
more resistant stains to be
Spin exclusion/variation KnobSpin exclusion/variation Knob
Spin exclusion/variation Knob
Spin exclusion/variation KnobSpin exclusion/variation Knob
switched off.
removed.
When you press theWhen you press the
When you press theWhen you press the
When you press the
T
TT
TT
urning the mac
urning the macurning the mac
urning the macurning the mac
hine off doeshine off does
hine off doeshine off does
hine off does
YY
YY
Y
ou can also use this knob toou can also use this knob to
ou can also use this knob to
ou can also use this knob toou can also use this knob to
It is used to exclude the spin
S
SS
SS
tain
tain tain
tain tain
RR
RR
R
emoval button,emoval button,
emoval button,emoval button,
emoval button,
youyou
you
youyou
not cancel the selectednot cancel the selected
not cancel the selected
not cancel the selectednot cancel the selected
delay the start of the washingdelay the start of the washing
delay the start of the washingdelay the start of the washing
delay the start of the washing
cycle and/or to reduce the
cannotcannot
cannotcannot
cannot
run run
run run
run
thethe
thethe
the
PP
PP
P
re-washre-wash
re-wash
re-washre-wash
and
and and
and and
machine.
machine.machine.
machine.machine.
spin speed of the selected
the
thethe
thethe
Easy Easy
Easy Easy
Easy
II
I
II
ron
ron ron
ron ron
f
unctionunction
unctionunction
unction
(button (button
(button (button
(button
DD
DD
D
))
))
)
programme.
programme.programme.
programme.programme.
Select one of the four positions
programme. The maximum
is enabled.
is enabled.is enabled.
is enabled.is enabled.
for the programmed start (after
speed for the four types of
12 hours, 9h, 3h or 1 hour),
fabric are:
ON-OFF lamp
ON-OFF lampON-OFF lamp
ON-OFF lampON-OFF lamp
press the on/off button
G (
GG
GG
II
II
I
FabricFabric
FabricFabric
Fabric
SpeedSpeed
Speed
SpeedSpeed
Extra RinseExtra Rinse
Extra RinseExtra Rinse
Extra Rinse
Lamp
H H
H H
H flashes when the
position) and wait 5 seconds.
CottonCotton
Cotton max rpm
CottonCotton
This function increase the
appliance is switched on and
This is when the setting has
SyntheticsSynthetics
Synthetics 800 rpm
SyntheticsSynthetics
been accepted (lamp
H stops
HH
HH
quantity of water during the
awaiting a programme to be set.
WoolWool
WoolWool
for resistantfor resistant
for resistant
A steady light means the
flashing and stays lit) and you
Wool 600 rpm
rinse cycles
for resistantfor resistant
can select the programme you
fabrics.fabrics.
fabrics.fabrics.
fabrics. Use of this function is
appliance has accepted the
SilkSilk
SilkSilk
Silk none
require.
recommended to improve
selected programme.
5 Instructions for installation and use
55
55

What are you washing today?
A pr
A prA pr
A prA pr
ogramme fogramme f
ogramme fogramme f
ogramme f
or all seasonsor all seasons
or all seasonsor all seasons
or all seasons
Progr.
Temp.
Detergent
Detergent
Fabric
Bleach Cycle
Type of fabric and
Description of wash
Knob
Knob
for pre—
for wash
softener
length
degree of soil
wash
(minutes)
cycle
PROGRAMMED START
After 12 — 9 — 3 —1 hours Delaied Start by 12-9-1 hours
Reset/Stop
Reset
Interrupts/Cancels selected Program.
COTTON
Exceptionally soiled whites
u u u
Pre-wash, Wash at high temperature,
1Max
(Sheets, tablecloths, etc.)
155
rinses, intermediate and final spin cycles
Heavily soiled whites
(sheets,
u u
Delicate/Trad—
Wash at high temperature, rinses,
2Max
140
tablecloths, etc.)
itional
intermediate and final spin cycles
Normally soiled whites
(sheets,
u u
Wash at 60°C, rinses, intermediate and
3 60°C
Delicate/Trad—
tablecloths, etc.)
140
final spin cycles
itional
Normally soiled whites and fast
Long Wash cycle at 40°C,
rinse cycles,
4 40°C
u u
colours
160
intermediate and final spin cycles
Normally soiled whites and fast
Wash cycle at 40°C,
rinse cycles,
5 40°C
u u
Delicate/Trad—
colours
90
intermediate and final spin cycles
itional
Rinse cycles/Bleach
u
Delicate/Trad—
Rinse cycles, intermediate and final spin
itional
cycles
Spin cycle Draining and final spin cycle
Stop/Reset Interrupts/Cancels selected programme
SYNTHETICS
Heavily soiled fast colour synthetics
u u
Wash at 60°C, rinses, anti-crease or
6 60°C
(baby linen, etc.)
105
delicate spin cycle
Delicate colour synthetics
(all types
u u
Wash cycle at 40°C,
rinse cycles, anti-
7 40°C
of slightly soiled garments)
Delicate
75
crease or delicate spin cycle
Delicate colour synthetics
(all types
u u
Wash cycle at 30°C,
rinse cycles and
8 30°C
of slightly soiled garments)
30
delicate spin cycle
Rinse cycles/Bleach
u
Rinse cycles, anti-crease or delicate spin
Delicate
cycle
Fabric softener
u
Rinse cycles with automatic introduction of
softener, anti-crease or delicate spin cycle
Anti-crease — Rinse Hold Rinse hold for silk and especially delicate
garments
Spin cycle Draining and delicate spin cycle
Stop/Reset Interrupts/Cancels selected programme
DELICATES
Wool
Wash cycle at 40°C
, rinse cycles and
9 40°C
u u
55
delicate spin cycle
Silk
, particularly delicate garments
u u
Wash cycle at 30°C,
rinse cycles, anti-
10 30°C
and fabrics (curtains, silk, viscose, etc.)
45
crease or draining
Rinse cycles
u
Rinse cycles, anti-crease or draining
Anti-crease — Rinse Hold Rinse hold for silk and especially delicate
garments
Spin cycle Draining and delicate spin cycle (wool)
Draining Draining
Stop/Reset Interrupts/Cancels selected programme
Important:Important:
Important: To cancel the wash programme you have just set, select one of the position “Reset- Stop”
Important:Important:
Special programmes
for 3 seconds.
4— Class A at 40°C
Your washing machine has a special programme to allow you to obtain optimum results even at low
temperatures. By setting programme 4 at a temperature of 40°C, the results you will obtain will be the same as you
would normally obtain at 60°C thanks to the washing machine’s action and the length of the wash cycle.
8—
Daily wash at 30° in 30 minutes. Your washing machine has a programme designed to wash lightly soiled garments
in a short amount of time. By setting programme 8 at a temperature of 30°C, you can wash different fabrics together
(except for woollen and silk items), with a maximum load of 3 kg. This programme allows you to save on both time and
energy as it only lasts approximately 30 minutes. WE RECOMMEND THE USE OF LIQUID DETERGENT.
Instructions for installation and use
6
66
66
Understanding labels and the symbols
Understanding labels and the symbolsUnderstanding labels and the symbols
Understanding labels and the symbolsUnderstanding labels and the symbols
f
ff
ff
or the v
or the vor the v
or the vor the v
arious Ariston
arious Ariston arious Ariston
arious Ariston arious Ariston
T
TT
TT
op Loaderop Loader
op Loaderop Loader
op Loader
s…s…
s…
s…s…
Learn the meaning of these symbols and you will get better results, your garments
will last longer and your machine will repay you by washing better.
All over Europe, garment
better results and treat your
labels contain messages
garments the way they they
expressed in small yet
deserve to be treated.
important symbols.
These symbols are divided in
Understanding them is very
five different categories and
important if you want to get
shapes:
wash cycle
wash cycle wash cycle
wash cycle wash cycle
,
bleaching bleaching
bleaching bleaching
bleaching
,
Useful tips
ironing ironing
ironing ironing
ironing
,
dry cleaning dry cleaning
dry cleaning
dry cleaning dry cleaning
Turn shirts inside out to get better
and
drying
drying drying
drying drying
.
results and make them last longer.
Always empty pockets of their
contents.
Look at the label: it will always give
you useful advice.
When loading your washing,
Make sure you select the right temperature
alternate large and small garments.
Consult and learn the symbols in this table: they will help you obtain a better wash, treat your clothesConsult and learn the symbols in this table: they will help you obtain a better wash, treat your clothes
Consult and learn the symbols in this table: they will help you obtain a better wash, treat your clothesConsult and learn the symbols in this table: they will help you obtain a better wash, treat your clothes
Consult and learn the symbols in this table: they will help you obtain a better wash, treat your clothes
prpr
prpr
pr
operloperl
operloperl
operl
y
yy
yy
,,
,,
,
and g and g
and g and g
and g
et a better perfet a better perf
et a better perfet a better perf
et a better perf
ormance out of y
ormance out of yormance out of y
ormance out of yormance out of y
our washing macour washing mac
our washing macour washing mac
our washing mac
hinehine
hinehine
hine
..
..
.
Wash
cycle Bleaching Ironing Dry cleaning Drying
Strong
Delicate
High
Mild
Movement
Movement
temp.
Tem p .
Can be
A
c
l
tumble-dried
Wash cycle
Can be bleached
Hot iron max
Dry cleaning with
95°C
in cold water
200°C
all solvents
Do not
P
tumble dry
Dry cleaning with
perchloride,
aviation gasoline,
Wash cycle
Warm iron
pure alcohol, R111
60°C Do not bleach
max 150°C
and R113
Lay flat to
F
dry
Dry cleaning with
aviation gasoline,
Wash cycle
Cool iron
pure alcohol and
40°C
max 110°C
R113
Hang to dry
non-spin
dried
Wash cycle
garments
30°C
Do not iron
Do not dry clean
Dry on
Delicate
hangers
hand wash
Do not
wash in
water
7 Instructions for installation and use
77
77
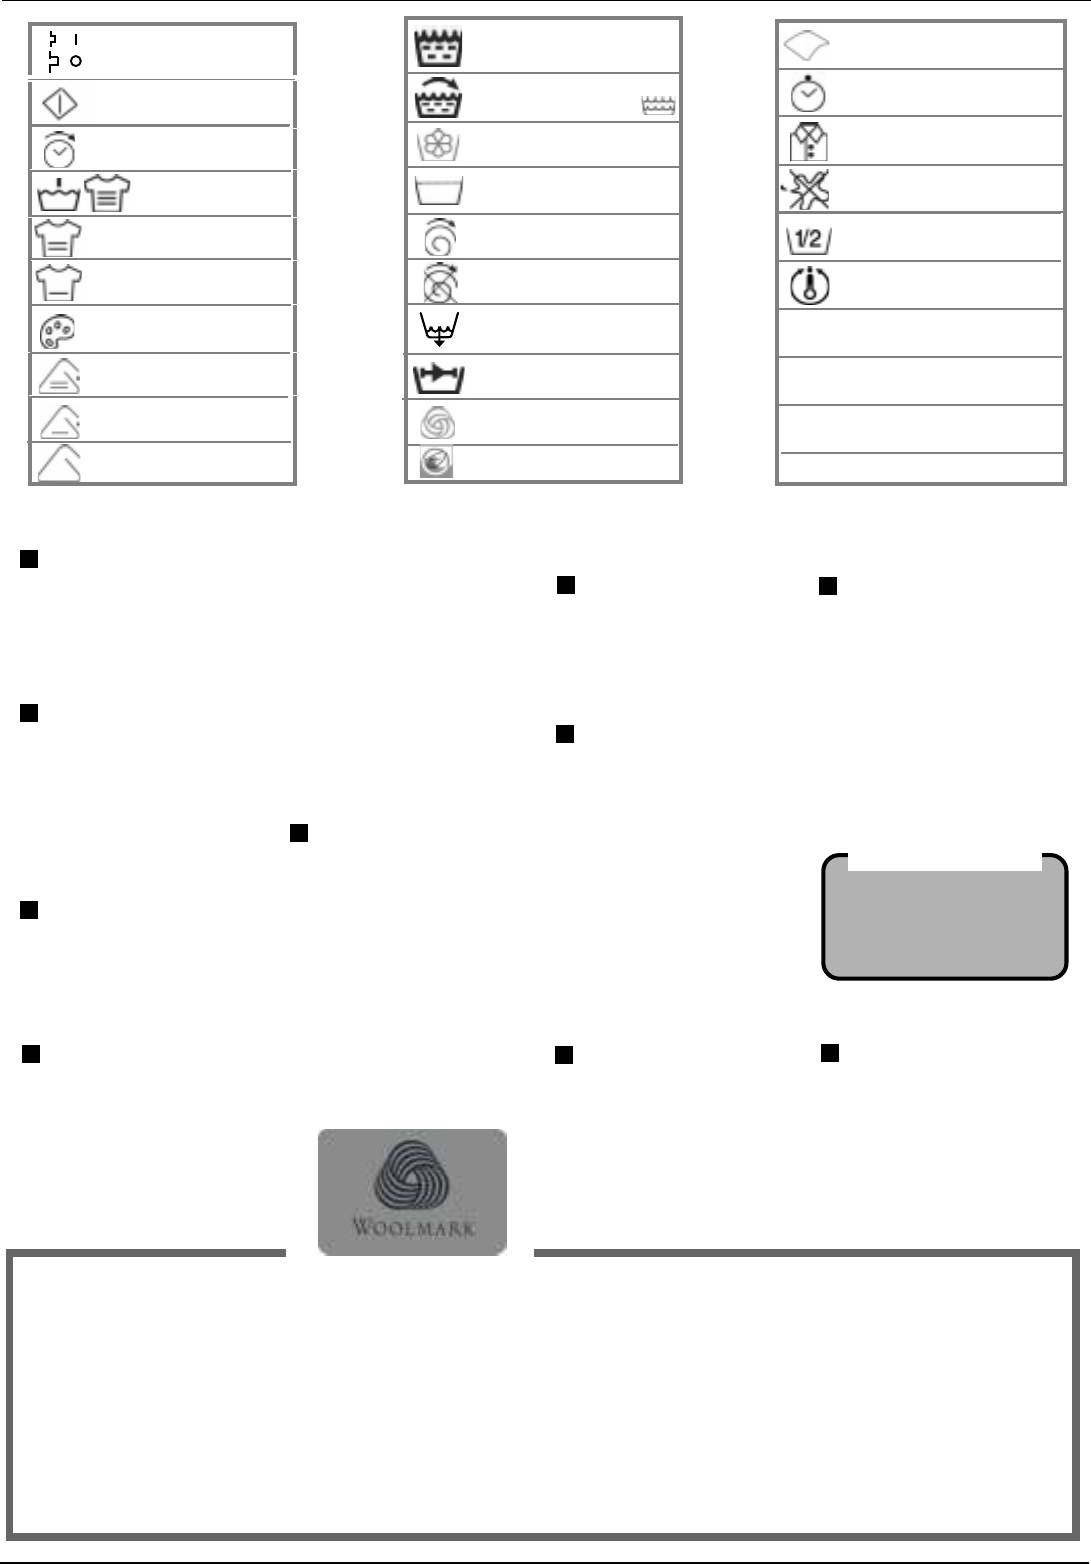
ON
Silk and curtains
Rinse
OFF
Rinse level/Extra
Daily wash at 30° in
Start-reset
rinse
30′
Easy iron
Delayed start
Fabric softener
Pre-wash —
Rinse hold —
Stain removal
Wash Max°
Anti-crease
90° Wash
Spin cycle
Half load
Spin cycle variation
Temperature setting
Spécial
60° Wash
or no spin cycle
taches
Delicate 40° Wash
Water Draining
60° Synthetics
Wash cycle intensity
50° Synthetics
Wool
40° Synthetics
Hand wash
Useful tips to avoid mistakes
Never use your washing ma-
(figures show weight when dry):
chine to wash… torn, fraying or
Coloured T-shirts, printed
Holidays: unplug the appli-
— Sturdy fabrics:
non-hemmed linen. If it is abso-
ones and shirts last longer if
maximum 5 kg
ance.
lutely necessary, place it in a bag
— Synthetic fabrics:
turned inside out before washing.
When you go on holiday, we rec-
for protection. Brightly coloured
maximum 2.3 kg
Printed T-shirts and sweatshirts
ommend that you unplug your
linen with whites.
— Delicate fabrics:
should always be ironed inside
washing machine, turn off the
maximum 2 kg
out.
water inlet tap and leave the door
Persistent or special stains
— Pure virgin wool:
open or ajar. This way, both the
Treat these before washing by
maximum 1 kg
Salopette alert.
drum and the gasket will remain
rubbing the toughest stains with
— Towelling:
Very popular «salopette» type over-
nice and dry and unpleasant
maximum 2.3 kg
a special detergent, with deter-
alls have straps with hooks that can
odours will not develop inside the
gent paste or specific stain re-
damage the drum of your washing
washing machine.
movers (see the inset on treating
machine or other garments during
How much does it weigh?
special stains with stain remov-
the wash. By placing the hooks in
1 sheet 400-500 gr.
WOOL CYCLE
ers on page 9).
the bib pocket and fastening them
1 pillowcase 150-200 gr.
with safety pins, all risks are
1 tablecloth 400-500 gr.
For best results, use
Watch the weight!
avoided.
1 bathrobe 900-1,200 gr.
a specific detergent,
For best results, do not exceed
1 towel 150-250 gr.
taking care not to
the weight limits stated below
exceed a load of 1kg.
How to wash almost anything
Curtains.
ber to use the specific programme
Quilted coats and wind-
Trainers.
Curtains tend to crease a great
10 which automatically excludes
cheaters.
Once you have removed mud and
deal. Here is a tip to reduce creas-
the spin cycle.
You can wash quilted coats and
dirt from trainers, you can wash
ing: fold the curtains and place
wind-cheaters, too, if they are
them with jeans and other tough
them in a pillow case or mesh
padded with goose or duck down.
garments. Do not wash trainers
bag. Do not load anything else,
The important thing is not to run
with whites.
so that the overall weight does
a 5 kg load.
not exceed the half load. Remem-
Cashmere Gold: As gentle as a hand wash
The first washing machine to have «The Woolmark Company» recognition.
The Cashmere Gold programme
been approved by The Woolmark
by The Woolmark Company.
Always use programme 9 (wool)
was designed to machine wash
Company for washing woollen
(M.0206).
with all garments labelled hand
the most delicate and precious
garments labelled «hand wash
This result has been achieved
wash: the tub with a hand in it.
woollen and Cashmere gar-
only» featuring The Woolmark
thanks to the speed of the drum
it is advisable to use specific de-
ments.
Company Brands. This is the first
(90 rpm), even during the rinse
tergents for woollen garments.
The Merloni Elettrodomestici
delicate hand wash cycle offered
phase, which prevents the fibres
«Wool-Cashmere» programme has
by a washing machine approved
from rubbing.
Instructions for installation and use
88
8
88
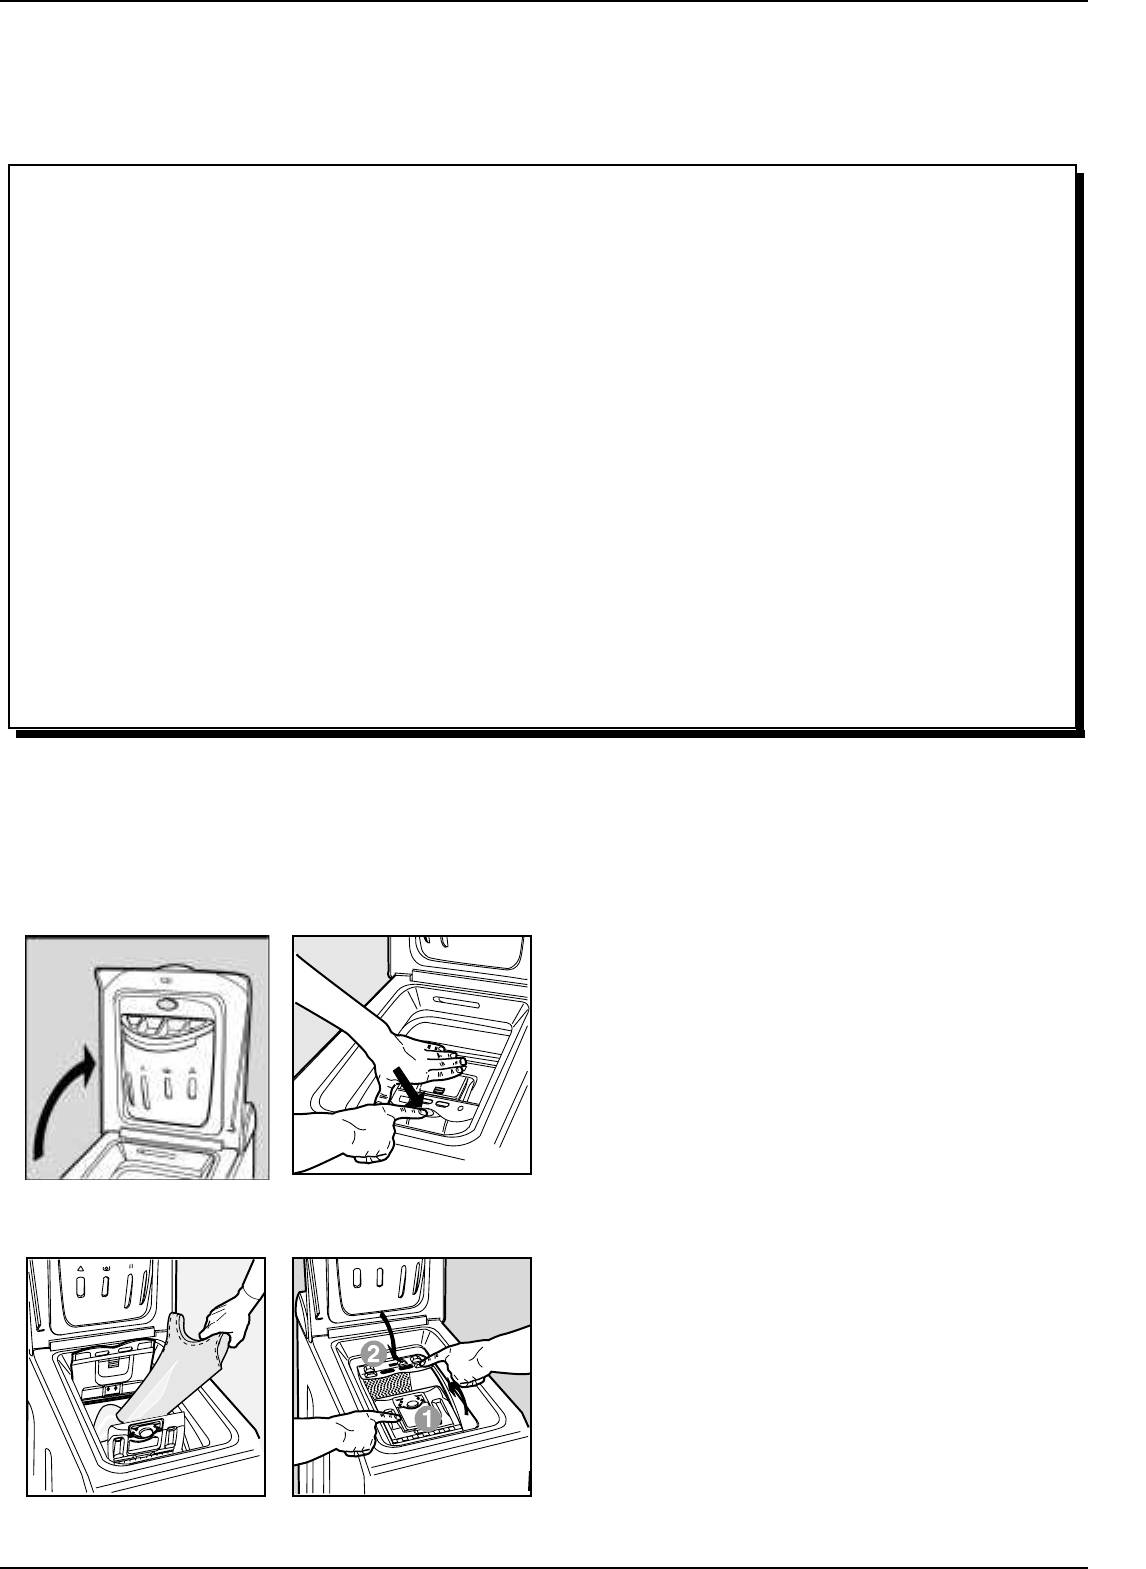
When detergents and water are not enough…
How to get rid of some special stains
How to get rid of some special stainsHow to get rid of some special stains
How to get rid of some special stainsHow to get rid of some special stains
— Red wine. Leave to soak with detergent, rinse and treat with acetic acid or citric acid, then rinse. Treat any residue with
bleach.
— Blood. Fresh stains should be treated immediately with cold water. In the event of dry blood stains, leave to soak overnight
with a special detergent and then rub with soapy water.
— Dry grease stains. Moisten with turpentine, dab the stains with your fingertips and a cotton cloth, after placing the
garment on a soft surface.
— Rust. Oxysalt (can be found in a chemists) hot molten, or a cold anti-rust product. Old stains may have already damaged
the fabric: risk of holes
— Mould stains Treat with bleach, rinse thoroughly (only white and coloured garments resistant to chlorine).
— Oil paint. Moisten with detergent petrol, dab the stains after placing the garment on top of a soft cloth, then treat
repeatedly with the detergent.
— Ink and biro. Dab with cotton soaked in methyl alcohol or alcohol at 90°.
— Tar. Dab with fresh butter, rub in turpentine then wash immediately.
— Wax. Scrape away, then run a hot iron between two sheets of absorbent paper. Then rub in cotton with turpentine or
methyl alcohol.
— Chewing gum. Rub in nail polish remover and wipe with a clean rag.
— Mould. Cotton and white linen should be placed in a solution of 5 parts water, one bleach and a spoon of vinegar, then
washed immediately. For other white fabrics, use hydrogen peroxide at 10 volumes and wash immediately.
— Lipstick. Dab with ether on wool or cotton. Use trichlorethylene for silk.
— Nail polish. Place a sheet of absorbent paper on the side of the stain, wet it with nail polish remover, shifting the garment
as the sheet gradually changes colour.
— Grass. Dab with a wad of cotton soaked in methyl alcohol.
For a safe wash cycle
How to open and shut the drumHow to open and shut the drum
How to open and shut the drumHow to open and shut the drum
How to open and shut the drum
A) OPENING (Fig. 1).A) OPENING (Fig. 1).
A) OPENING (Fig. 1).A) OPENING (Fig. 1).
A) OPENING (Fig. 1). Lift the external lid and open it completely.
B) Then open the drum using both hands as shown in Fig. 2:B) Then open the drum using both hands as shown in Fig. 2:
B) Then open the drum using both hands as shown in Fig. 2:B) Then open the drum using both hands as shown in Fig. 2:
B) Then open the drum using both hands as shown in Fig. 2:
— press the button indicated by the arrow in Fig. 2 lightly downwards,
with one hand firmly resting on the doors to prevent them from
suddenly opening and hurting your fingers;- therefore follow the
appliance doors along as these unhook and open easily.
Fig. 1
Fig. 1
Fig. 2
Fig. 2
C) LOC) LO
C) LOC) LO
C) LO
ADING
ADING ADING
ADING ADING
THE THE
THE
THE THE
WW
WW
W
ASHING MAASHING MA
ASHING MAASHING MA
ASHING MA
CHINE.
CHINE.CHINE.
CHINE.CHINE.
(Fig. (Fig.
(Fig. (Fig.
(Fig.
3). 3).
3). 3).
3).
D) SHUTTING. (Fig. 4).D) SHUTTING. (Fig. 4).
D) SHUTTING. (Fig. 4).D) SHUTTING. (Fig. 4).
D) SHUTTING. (Fig. 4).
— close the drum fully by first shutting the front door followed by the
rear one;
— then ensure the hooks on the front door are perfectly housed
within the seat of the rear door;
— after the hooks have clicked into position, press both doors lightly
downwards to make sure they do not come loose;
— finally shut the external lid.
Fig. 3
Fig. 4
9 Instructions for installation and use
99
99
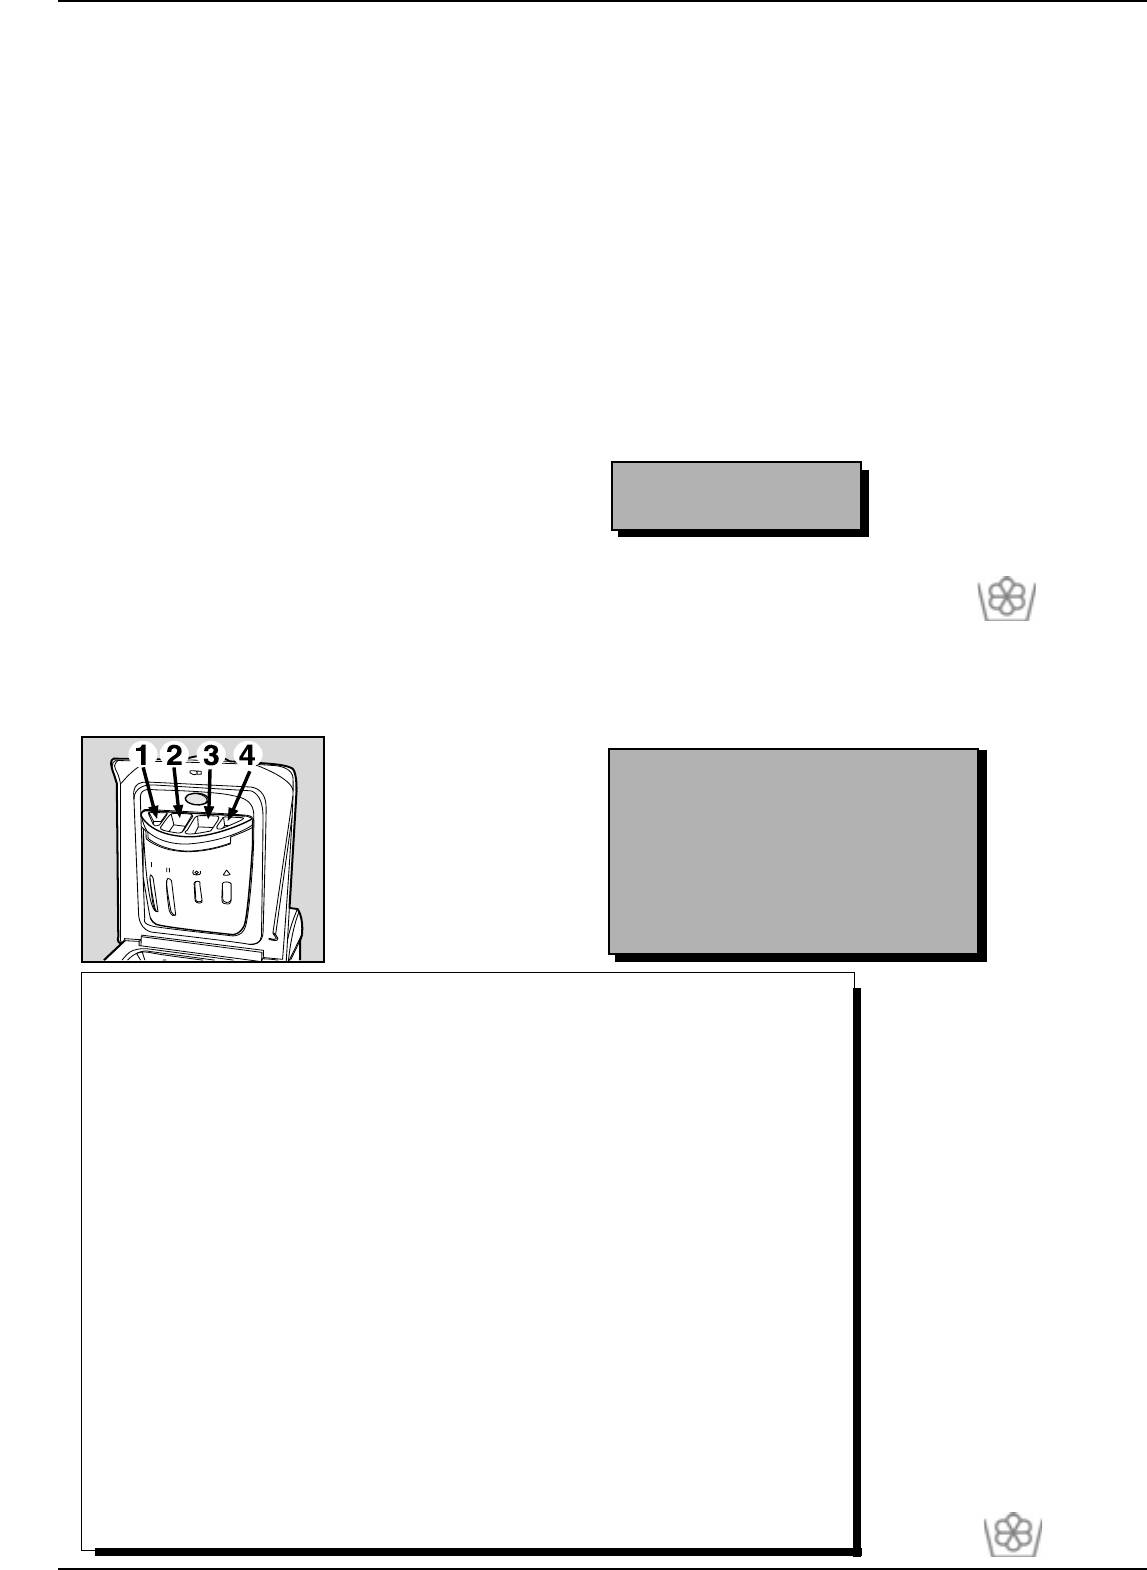
It’s important for a good wash
The secrets of the deter
The secrets of the deterThe secrets of the deter
The secrets of the deterThe secrets of the deter
gg
g
gg
ent dispenser
ent dispenserent dispenser
ent dispenserent dispenser
The first secret: the detergent dispenser is in a handy position underneath the appliance door.
You should add detergent and
the wash in each pro-gramme.
Pre-wash, bleach and fabric
Pre-wash, bleach and fabricPre-wash, bleach and fabric
Pre-wash, bleach and fabricPre-wash, bleach and fabric
any additives following the
Liquid detergent is to be
Liquid detergent is to beLiquid detergent is to be
Liquid detergent is to beLiquid detergent is to be
dosage recommended by the
poured in just a few secondspoured in just a few seconds
poured in just a few secondspoured in just a few seconds
poured in just a few seconds
softenersoftener
softenersoftener
softener
manufacturers: generally, all
before starting the washbefore starting the wash
before starting the wash
before starting the washbefore starting the wash
Should it be necessary to
N.B.:N.B.:
N.B.:
N.B.:N.B.:
the indications you need are
cycle.
cycle.cycle.
cycle.cycle.
bleach, set the special
1) Concentrated bleach must1) Concentrated bleach must
1) Concentrated bleach must
1) Concentrated bleach must1) Concentrated bleach must
on the box.
Remember that liquid de-
Remember that liquid de-Remember that liquid de-
Remember that liquid de-Remember that liquid de-
programmes and pour the
be diluted in all cases.be diluted in all cases.
be diluted in all cases.
be diluted in all cases.be diluted in all cases.
Doses vary
Doses vary Doses vary
Doses vary Doses vary
according toaccording to
according toaccording to
according to
tergent is particularly sui-tergent is particularly sui-
tergent is particularly sui-tergent is particularly sui-
tergent is particularly sui-
bleach into compartment
4 4
4 4
4
2) For concentrated2) For concentrated
2) For concentrated
2) For concentrated2) For concentrated
wash load, the waterwash load, the water
wash load, the waterwash load, the water
wash load, the water
table for wash cycles of up totable for wash cycles of up to
table for wash cycles of up totable for wash cycles of up to
table for wash cycles of up to
of the detergent dispenser.
detergents (in powder or
detergents (in powder ordetergents (in powder or
detergents (in powder ordetergents (in powder or
hardness and how soiled thehardness and how soiled the
hardness and how soiled thehardness and how soiled the
hardness and how soiled the
60 degrees and those not60 degrees and those not
60 degrees and those not60 degrees and those not
60 degrees and those not
When you pour the bleach in,
liquid), use a programme
liquid), use a programmeliquid), use a programme
liquid), use a programmeliquid), use a programme
washing is. Do not exceed.washing is. Do not exceed.
washing is. Do not exceed.washing is. Do not exceed.
washing is. Do not exceed.
requiring pre-washing.requiring pre-washing.
requiring pre-washing.
requiring pre-washing.requiring pre-washing.
take care not to exceed the
without pre-washing.
without pre-washing.without pre-washing.
without pre-washing.without pre-washing.
More detergent does notMore detergent does not
More detergent does notMore detergent does not
More detergent does not
Liquid or powder detergents
“max” level indicated.
“max”“max”
“max”“max”
3) For detergents contained3) For detergents contained
3) For detergents contained
3) For detergents contained3) For detergents contained
necessarily mean greaternecessarily mean greater
necessarily mean greaternecessarily mean greater
necessarily mean greater
are sold together with special
The use of bleach excludes
The use of bleach excludesThe use of bleach excludes
The use of bleach excludesThe use of bleach excludes
in a ball or in tablets, do not
in a ball or in tablets, do notin a ball or in tablets, do not
in a ball or in tablets, do notin a ball or in tablets, do not
wash efficienc
wash efficiencwash efficienc
wash efficiencwash efficienc
yy
y
yy
,
,,
,,
on the
on the on the
on the on the
containers that are to be placed
the possibility of running a
the possibility of running athe possibility of running a
the possibility of running athe possibility of running a
run a pre-wash.
run a pre-wash.run a pre-wash.
run a pre-wash.run a pre-wash.
contrary…
contrary…contrary…
contrary…contrary…
directly inside the washing
pre-wash.
pre-wash.pre-wash.
pre-wash.pre-wash.
Experience will help you select
machine drum, according to
the right dosage almost
the instructions found on the
T
TT
TT
raditional b
raditional braditional b
raditional braditional b
leacleac
leacleac
leac
h can onl
h can onlh can onl
h can onlh can onl
yy
y
yy
automatically: it will become
detergent box.
be used on sturdy white
be used on sturdy whitebe used on sturdy white
be used on sturdy whitebe used on sturdy white
your secret.
Never use hand wash
fabrics, whereas delicate
fabrics, whereas delicatefabrics, whereas delicate
fabrics, whereas delicatefabrics, whereas delicate
When pouring in the softener
detergent, because it may form
bleach can be used for
bleach can be used forbleach can be used for
bleach can be used forbleach can be used for
in compartment
3, avoid
33
33
too much foam, which could
coloured fabrics and
coloured fabrics andcoloured fabrics and
coloured fabrics andcoloured fabrics and
Fabric Softener AdditionFabric Softener Addition
Fabric Softener AdditionFabric Softener Addition
Fabric Softener Addition
exceeding the “max” level
damage the washing machine.
synthetics. You cannot
synthetics.synthetics.
synthetics.synthetics.
Fabric softener makes your
indicated.
One last secret: when washing
bleach with the “Silk” program
washing softer and decreases
The washing machine auto-
with cold water, always reduce
me and with the “Special
the electrostatic load of synthetic
matically adds the softener to
the amount of detergent you
Programmes” (see page 6).
fibres.
use: it dissolves less easily in
Fabric softe-
cold water than in hot water, so
Degrees of water hardness
ners can be
part of it would be wasted.
used for towel-
Level -Feature German French
ling fabrics,
°dH °T.H
knitwear,
In compartment 1:
Detergent forDetergent for
Detergent for
Detergent forDetergent for
0— 7 0-15
pre-wash (powder)
pre-wash (powder)pre-wash (powder)
pre-wash (powder)pre-wash (powder)
1 — Soft
curtains, etc.
8-14 16-25
In compartment 2:
Detergent for
Detergent forDetergent for
Detergent forDetergent for
2 — Medium
Pour the fabric
the wash cycle (powder and liquid)the wash cycle (powder and liquid)
the wash cycle (powder and liquid)the wash cycle (powder and liquid)
the wash cycle (powder and liquid)
3 — Hard
15-21 26-37
softener into
In compartment 3:
Fabric softener
Fabric softenerFabric softener
Fabric softenerFabric softener
4 — Very hard
more than
21
more than
37
compartment 3
of the dispen-
In compartment 4:
Bleach
BleachBleach
BleachBleach
ser following
A guide to running your
the manufacturer’s instructions.
Cutting costs efficiently
household appliances cheaply
The fabric softener is
while respecting the environment.
automatically inserted into the
FULL LOAD
machine during the last rinse.
The best way to save on energy, water, detergent and time is to use your washing machine,
At the end of the wash
washing a full recommended load.
programme, some water will be
A full load instead of two half loads allows you to SAVE up to 50% of energy.
left in compartment 3. This is
used for the inlet of denser fabric
USE LESS DETERGENT IF: you are washing few garments, the washing is only soiled
softeners into the machine, i.e.
lightly, foam forms during washing or the water is not very hard, or soft even (please see
to dilute the more concentrated
small table above with the degrees of water hardness). To find out how hard the water in
your area is, contact your local Water Works.
softeners.
Should more than a normal
IS PRE-WASHING STRICTLY NECESSARY?
amount of water remain in
Only for extremely soiled garments.
compartment 3, this means the
Programming a wash WITHOUT pre-washing for lightly soiled or medium soiled garments
emptying device is blocked,
allows you to SAVE on detergent, time, water and between 5 and 15% of energy.
thus interrupting the suction
effect of the device.
IS WASHING WITH HOT WATER STRICTLY NECESSARY?
Treating stains with a stain remover or soaking garments with dry stains in water before
For cleaning instructions, see
washing can reduce the need to programme a wash using hot water.
page 13. Never pour fabric
Use a wash programme at 60° to SAVE up to 50% of energy.
softeners together with starch
into the dispenser, as the
BEFORE USING A DRYING CYCLE …
Select a high speed spin cycle, where the spin speed can be adjusted, if the washing should
overflow system could get
be dried in a tumble-dryer. A reduced water content in the washing allows you to SAVE
clogged.
both time and energy in the drying programme.
Instructions for installation and use
1010
1010
10
Troubleshooting
Bef
BefBef
BefBef
ore calling,
ore calling,ore calling,
ore calling,ore calling,
read the f
read the f read the f
read the f read the f
ollo
olloollo
olloollo
wing
wingwing
wingwing
Your washing machine could fail to work. In most cases, the problems arising can be easily solved without having to
call for a technician. Before calling for assistance, always check these points.
The washing machineThe washing machine
The washing machineThe washing machine
The washing machine
washing machine cannot
fails to start.
fails to start.fails to start.
fails to start.fails to start.
work if the door is open or
not shut properly.
Is the plug correctly
Is the plug correctly Is the plug correctly
Is the plug correctly Is the plug correctly
inserted in the socket?inserted in the socket?
inserted in the socket? It
inserted in the socket?inserted in the socket?
Is the ON/OFF button Is the ON/OFF button
Is the ON/OFF button Is the ON/OFF button
Is the ON/OFF button
could have been moved
pressed?pressed?
pressed?pressed?
pressed?
whilst cleaning.
If it is, then a programmed
start has been set.
Is there electricity in the
Is there electricity in the Is there electricity in the
Is there electricity in the Is there electricity in the
house?house?
house?house?
house?
Is the programmed start
Is the programmed startIs the programmed start
Is the programmed startIs the programmed start
A circuit breaker could have
knob, on those models
knob, on those modelsknob, on those models
knob, on those modelsknob, on those models
gone off, perhaps because
concerned, in the correctconcerned, in the correct
concerned, in the correct
concerned, in the correctconcerned, in the correct
too many appliances are on
position?position?
position?position?
position?
at the same time. Or
perhaps because of a
Is the water tap turned on?
Is the water tap turned on? Is the water tap turned on?
Is the water tap turned on? Is the water tap turned on?
general power failure in
For safety reasons, if the
your entire area.
washing machine does not
load water, it cannot start a
Is the appliance door shutIs the appliance door shut
Is the appliance door shut
Is the appliance door shutIs the appliance door shut
wash cycle.
properly?
properly?properly?
properly?properly?
For safety reasons, the
?
RIGHT RIGHT
RIGHT RIGHT
RIGHT
WRONG
The washing machineThe washing machine
The washing machine
The washing machineThe washing machine
The washing machine
The washing machineThe washing machine
The washing machineThe washing machine
fails to load waterfails to load water
fails to load water
fails to load waterfails to load water
.
..
..
continuously loadscontinuously loads
continuously loadscontinuously loads
continuously loads
Turning off the water
Leave the washing machine
tap after each wash
plugged in while cleaning.
and unloads waterand unloads water
and unloads waterand unloads water
and unloads water
.
..
..
limits the use of the
Even during maintenance,
Is the tap correctly Is the tap correctly
Is the tap correctly
Is the tap correctly Is the tap correctly
washing machine’s
the appliance should always
attached to the pipe?attached to the pipe?
attached to the pipe?attached to the pipe?
attached to the pipe?
Is the drain hoseIs the drain hose
Is the drain hoseIs the drain hose
Is the drain hose
hydraulic system and
be unplugged.
positioned too low?positioned too low?
positioned too low? It must
positioned too low?positioned too low?
eliminate leakage
Is there a water shortage?
Is there a water shortage?Is there a water shortage?
Is there a water shortage?Is there a water shortage?
be installed at a height
risks when no-one is
Use solvents and aggres-
There could be work in
ranging from 60 to 100 cm.
at home.
sive abrasives.
Never use solvents or
progress in your building or
Try to only leave the
abrasives to clean the
street.
Is the hose’
Is the hose’Is the hose’
Is the hose’Is the hose’
s mouth
s mouths mouth
s mouths mouth
appliance in use
external and rubber parts
Is there enough pressure?Is there enough pressure?
Is there enough pressure?Is there enough pressure?
Is there enough pressure?
immersed in water?immersed in water?
immersed in water?
immersed in water?immersed in water?
unattended if the place
of the washing machine.
The autoclave may be
where it is located is
malfunctioning.
Does the wall drainage
Does the wall drainageDoes the wall drainage
Does the wall drainageDoes the wall drainage
equipped with a floor
Neglect the detergent
Is the tap filter clean?Is the tap filter clean?
Is the tap filter clean?Is the tap filter clean?
Is the tap filter clean? If the
system have a breathersystem have a breather
system have a breathersystem have a breather
system have a breather
drain.
dispenser.
water is very calcareous, or
pipe? pipe?
pipe? If the problem
pipe? pipe?
It is removable and can
Always leave all
if work has recently been
persists even after these
easily be cleaned by leaving
appliance doors ajar.
carried out on the water
checks, turn off the water
it under running water.
piping, the tap filter could be
tap, switch the appliance off
This will avoid the
formation of bad
and call for assistance.
Go on holiday without
clogged with particles and
odours.
thinking about it.
debris.
If you live on an upper floor
Before leaving, always
Is the rubber hose bent?
Is the rubber hose bent?Is the rubber hose bent?
Is the rubber hose bent?Is the rubber hose bent?
of your building, there may
Clean the appliance’s
make sure that the washing
The tract of the rubber hose
be a problem with your
exteriors delicately.
machine is unplugged and
bringing water to the
drain trap.
To clean the exteriors
that the water tap is turned
washing machine must be
To solve this problem, a
and the rubber parts of
off.
as straight as possible.
special valve must be
the appliance, always
Make sure it is not
installed.
use a cloth dipped in
squashed or bent.
lukewarm soapy water.
11 Instructions for installation and use
11 11
11 11
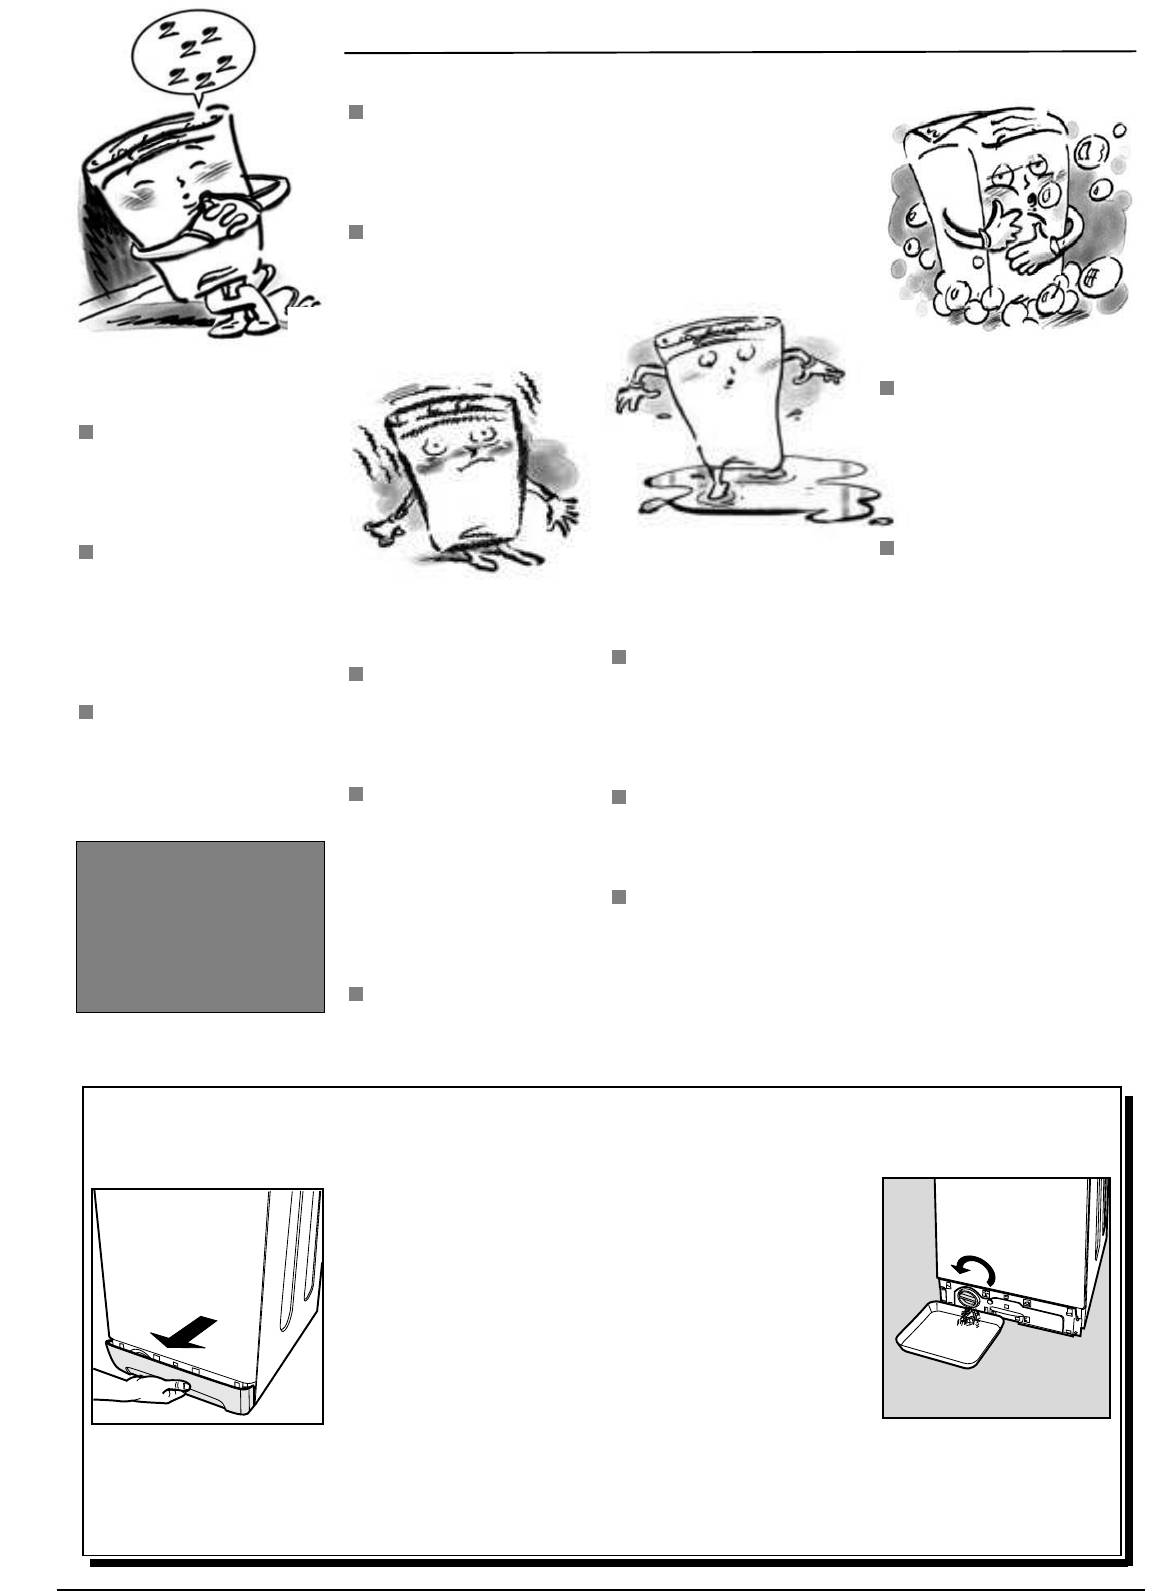
Is the rubber hose bent?
Is the rubber hose bent?Is the rubber hose bent?
Is the rubber hose bent?Is the rubber hose bent?
should not be leaning
The tract of the drain hose
against any sanitary fixtures
must be as straight as
and must have some free
possible. Make sure it is not
space around it. If it is
squashed or bent.
placed on a fitted carpet
floor, ensure that there is
Is the washing macIs the washing mac
Is the washing mac
Is the washing macIs the washing mac
hine’hine’
hine’
hine’hine’
ss
ss
s
enough room for air to
drain duct clogged? Is
drain duct clogged? drain duct clogged?
drain duct clogged? drain duct clogged?
circulate between the
there an extension on the
appliance feet and the
drain hose? If so, is it
carpet.
positioned incorrectly,
blocking the water flow?
TT
TT
T
oo m
oo moo m
oo moo m
ucuc
uc
ucuc
h fh f
h f
h fh f
oam.
oam.oam.
oam.oam.
The washing machine
The washing machineThe washing machine
The washing machineThe washing machine
does not drain or spin.
does not drain or spin.does not drain or spin.
does not drain or spin.does not drain or spin.
Is the detergent suitable
Is the detergent suitableIs the detergent suitable
Is the detergent suitableIs the detergent suitable
for washing-machine
for washing-machinefor washing-machine
for washing-machinefor washing-machine
Does the selectedDoes the selected
Does the selectedDoes the selected
Does the selected
use?use?
use? Make sure that it
use?use?
programme foresee waterprogramme foresee water
programme foresee water
programme foresee waterprogramme foresee water
bears the definition «for
draining? Some wash
draining?draining?
draining?draining?
washing-machines» or
cycles require enabling the
«hand and machine wash»,
draining manually.
or the like.
Has the Has the
Has the Has the
Has the
“Anti-crease”
“Anti-crease”“Anti-crease”
“Anti-crease”“Anti-crease”
Is the correct amount
Is the correct amountIs the correct amount
Is the correct amountIs the correct amount
function — in those
function — in thosefunction — in those
function — in thosefunction — in those
being used?being used?
being used? An excessive
being used?being used?
The washing machine
The washing machineThe washing machine
The washing machineThe washing machine
appliances where it is
appliances where it isappliances where it is
appliances where it isappliances where it is
The washing machineThe washing machine
The washing machineThe washing machine
The washing machine
amount of detergent,
foreseen — been enabled?foreseen — been enabled?
foreseen — been enabled?foreseen — been enabled?
foreseen — been enabled?
vibrates too much
vibrates too muchvibrates too much
vibrates too muchvibrates too much
besides producing too
leaks.leaks.
leaks.
leaks.leaks.
This function requires
during the spin cycle.
during the spin cycle.during the spin cycle.
during the spin cycle.during the spin cycle.
much foam, does not
enabling the draining
guarantee a more effective
Is the metal ring of the inletIs the metal ring of the inlet
Is the metal ring of the inletIs the metal ring of the inlet
Is the metal ring of the inlet
manually.
wash, and causes scaling
Has the internal floating
Has the internal floatingHas the internal floating
Has the internal floatingHas the internal floating
hose properly attached?
hose properly attached?hose properly attached?
hose properly attached?hose properly attached?
in the internal parts of the
unit been correctly
unit been correctlyunit been correctly
unit been correctlyunit been correctly
Turn off the tap, unplug the
Is the drain pump clogged?Is the drain pump clogged?
Is the drain pump clogged?Is the drain pump clogged?
Is the drain pump clogged?
appliance.
unblocked during
unblocked duringunblocked during
unblocked duringunblocked during
appliance and try tightening
To check it, turn off the tap,
installation? installation?
installation? See page 2
installation? installation?
its attachment without
If, despite all checks, the
unplug the washing
on installation procedures.
forcing it.
washing machine fails to
machine and follow the
function and the problem
instructions on page 12, or
Has the washing machineHas the washing machine
Has the washing machineHas the washing machine
Has the washing machine
Is the detergent dispenserIs the detergent dispenser
Is the detergent dispenser
Is the detergent dispenserIs the detergent dispenser
persists, call your nearest
call for technical assistance.
been levelled correctly?
been levelled correctly?been levelled correctly?
been levelled correctly?been levelled correctly?
obstructed? Try extracting
obstructed? obstructed?
obstructed? obstructed?
authorised Customer Service
The levelling of the
it and washing it under tap
Centre, providing the following
appliance should be
Always get
water.
information:
checked periodically. In
— the type of malfunctioning
— the type of malfunctioning— the type of malfunctioning
— the type of malfunctioning— the type of malfunctioning
assistance from
time, the appliance could
Is the drain hose well
Is the drain hose wellIs the drain hose well
Is the drain hose wellIs the drain hose well
— the model type no.— the model type no.
— the model type no.— the model type no.
— the model type no.
authorised
move imperceptibly. Adjust
attac
attacattac
attacattac
hed? Turn off the tap,
hed?hed?
hed?hed?
(Model……. )
(Model……. ) (Model……. )
(Model……. ) (Model……. )
the feet and check them
technicians and
unplug the appliance and
— the serial number (S/N …..)— the serial number (S/N …..)
— the serial number (S/N …..)— the serial number (S/N …..)
— the serial number (S/N …..)
with a level.
try tightening its attachment.
These indications can be found
always insist on
on the data plate situated on
original spare parts
Has it got enough roomHas it got enough room
Has it got enough room
Has it got enough roomHas it got enough room
the back of the washing
ar
arar
arar
ound it? The appliance
ound it?ound it?
ound it?ound it?
machine front base. (fig. 1)
When in need, check the pump and the rubber hose.
When in need, check the pump and the rubber hose.When in need, check the pump and the rubber hose.
When in need, check the pump and the rubber hose.When in need, check the pump and the rubber hose.
The washing machine comes equipped with a self-cleaning pump that does not require any cleaning or maintenance. Small objects
may accidentally fall into the pump: coins, hair clips, loose buttons and other small items. To avoid possible damage, they are
withheld in an accessible pre-chamber, situated at the lower end of the pump.
To access this pre-chamber, just remove the panel covering the
bottom of the washing machine (fig. 1); then lift the cover rotating it
anti-clockwise (fig. 2) and check its contents accurately.
The rubber hose
Check the rubber hose at least once a year. If you see any cracks,
replace it immediately. When you use your washing machine, water
pressure is very strong and a cracked hose could easily split open.
Fig. 1
Fig. 1
Fig. 2
Warning: make sure that the wash cycle has come to a full stop and unplug the appliance before removing the lid as well as before any
type of maintenance procedure. It is normal to find that a little water comes out after removing the lid. When replacing the panel, make
sure you insert the hooks situated at the bottom of the washing machine in the right slots before pushing it back against the appliance.
Instructions for installation and use
1212
12
1212
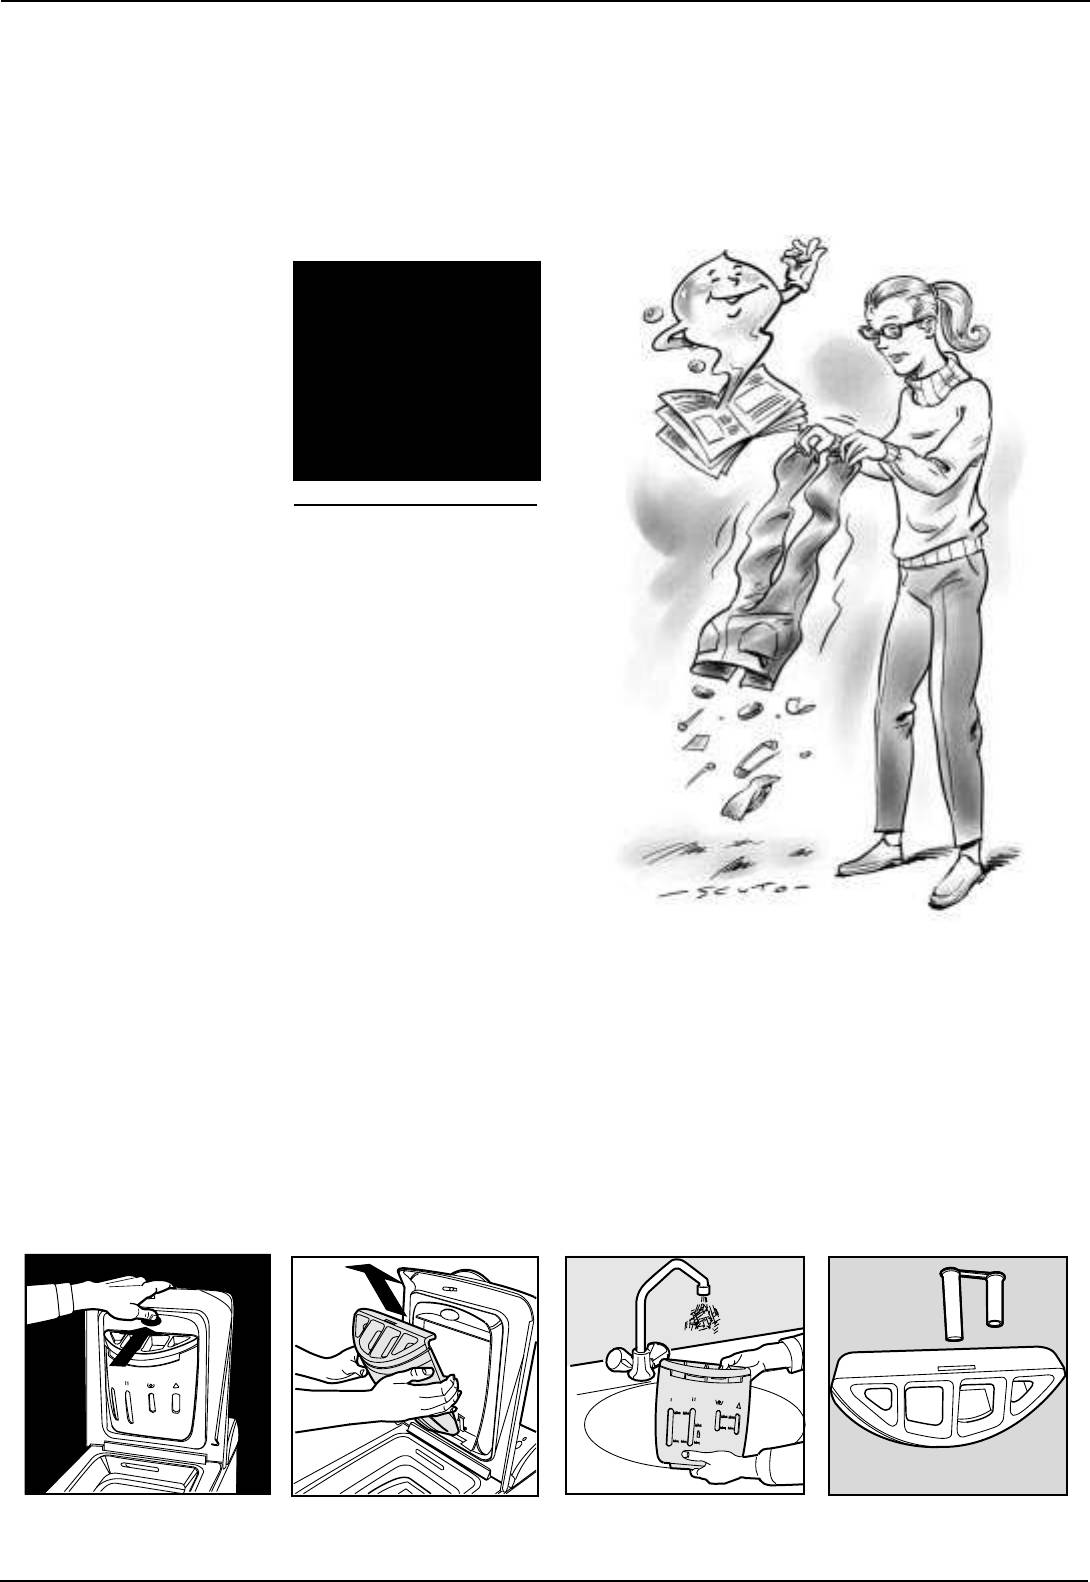
Easy Care and Maintenance
T
TT
TT
reat it well and it’ ll be yreat it well and it’ ll be y
reat it well and it’ ll be yreat it well and it’ ll be y
reat it well and it’ ll be y
our
ourour
ourour
Your washing machine is a reliable companion in life and on
friend f
friend ffriend f
friend ffriend f
ore
oreore
oreore
verver
verver
ver
the job. It is just as important for you to keep it in shape.
Your washing machine is
designed to last a lifetime
It is important to wash
without any problems. A few
the detergent dispenser
simple steps help keep it in
regularly.
shape and last longer.
To prevent dried washing
powder from
Firstly, you must turn off the
accumulating, place the
water tap after each wash:
dispenser under running
the constant pressure of water
water for a few minutes.
could warp a few of the
component parts.
In addition, by doing so, you
will avoid the risk of leaks when
Never exaggerate with
no-one is at home.
detergent doses.
If the water in your area is too
Normal detergents already
hard, use a deliming product
contain deliming agents. Only
(water is hard if it often leaves
if the water is particularly hard,
whitish stains around taps or
that is, rich in lime content, do
drains, especially of bath tubs.
we recommend the use of a
For more accurate information
specific product at every wash.
as to the type of water in your
A periodical wash cycle with a
system, call the local water
dose of a deliming product,
works or a local plumber).
without detergents or
Pockets must always be
washing, may prove useful.
emptied by removing even
Never use too much detergent
coins, pins, badges and any
or additives because this
other hard object.
could cause an excess
The washing machine exterior
amount of foam, scaling and
should be cleaned with a cloth
possible damage to the
dipped in lukewarm soapy
component parts of your
water.
washing machine.
Do not forget to empty all pockets:
small metallic objects can cause damage to your
washing machines drum during the spin cycle.
Ho
HoHo
HoHo
w to cw to c
w to cw to c
w to c
lean the deterlean the deter
lean the deterlean the deter
lean the deter
g
gg
gg
ent dispenser
ent dispenserent dispenser
ent dispenserent dispenser
Disassembly:Disassembly:
Disassembly:
Disassembly:Disassembly:
Cleaning:
Cleaning:Cleaning:
Cleaning:Cleaning:
Reassembly:Reassembly:
Reassembly:
Reassembly:Reassembly:
Press lightly on the large but-
Then clean the dispenser under a tap (fig. 3) using an old tooth-
Do not forget to reinsert the
ton on the front of the detergent
brush and, once the pair of siphons inserted in the top of com-
pair of siphons into the special
dispenser and pull it upwards
partments 1 and 2 (fig. 4) have been pulled out, check whether
housings and then to replace
(fig. 1).
the same are not clogged and then rinse them.
the dispenser into its seat,
clicking it into place (fig. 4, 2
and 1).
Fig. 1
Fig. 2
Fig. 3
Fig. 4
13 Instructions for installation and use
1313
1313
We take care of your loads
Electronic ABC balancing of
Electronic ABC balancing ofElectronic ABC balancing of
Electronic ABC balancing ofElectronic ABC balancing of
your spin cycle
your spin cycleyour spin cycle
your spin cycleyour spin cycle
Warning
This appliance is equipped
In special load conditions,
In these conditions, two
with an electronic auto-
these revolutions may not be
different things may happen:
balancing device (
Auto
sufficient to distribute the
Balance Control)
that
weight inside the drum evenly
enables the spin cycle to be
(if there are towel bathrobes,
— the ABC system “accepts” the
— the ABC system deems this
run at high speed only with
blankets and sheets inside it
imbalance, but reduces
imbalance to be beyond the
well-distributed wash loads.
that have formed a “ball”, etc.).
the spin speed. In this
acceptability threshold and
An unbalanced wash load
case, the clothes will come
excludes the spin cycle. In
would in fact seriously
out wetter than usual;
this case, take out the
damage the appliance.
washing, unroll the
garments and put them all
Before each spin cycle phase,
back into the appliance and
the ABC auto-balancing
set the spin cycle
system makes the drum
programme.
perform repeated revolutions,
both clockwise and anticlock-
In both cases, it is not a matter
wise, in order to distribute the
of poor appliance quality, but
garments inside it uniformly
raher one of the more
and then to start the spin cycle
advanced features it has to
off gently.
protet it from breakages,
vibrations, movements on the
floor or other inconveniences.
Technical features
Model
AT 84
Dimensions
wid th cm 4 0
height cm 85
depth cm 60
Capacity
from 1 to 5 kg
Electric
voltage 230 Volts 50Hz
connections
maximum absorbed power 2100 W
Water connections
maximum pressure 1 Mpa (10 bar)
minimum pressure 0.05 Mpa (0.5 bar)
drum cap a city 42 litre s
Spin speed/min
up to 800 r.p.m.
TT
T
TT
ecec
ec
ecec
hnical fhnical f
hnical fhnical f
hnical f
eatureseatures
eatureseatures
eatures
Controlling
run with a load of 5.0 kg, programme 3, 60° C
programmes in
accordance with
IEC Norm 456
This appliance conforms with the following European Community Directives:
— 73/23/EEC of 19/02/73 (Low Voltage) and subsequent modifications
— 89/336/EEC of 03/05/89 (Electromagnetic Compatibility) and subsequent modifications
The manufacturer reserves the right to make any modifications whatsoever, at any time and without notice, to the appliance or any of its accesso-
ries that may be deemed necessary for technical or commercial requirements.
Instructions for installation and use
14
14 14
14 14
Merloni Elettrodomestici
Viale Aristide Merloni 47
60044 Fabriano
Italie
Tel +39 0732 6611
Fax +39 0732 662501
www.merloni.com
12/2002 — 195 033 153 03 — XEROX BUSINESS SERVICES — DOCUTECH
Les secrets
AT 84
des tissus
Mode
F
Des conseils pour mieux laver
dinstallation et demploi
Classe A à
40°C
Le premier lave-linge
qui lave parfaitement
à 40°C
Cachemire
Gold
Le premier lave-linge
recommandé par
The Woolmark
Company
Lave-linge top loader
sûr
et facile à utiliser
Guide rapide
Découvrez ci-dessous les 12 sujets qui seront développés
dans les pages de ce manuel. Lisez, apprenez, amusez-
vous: vous découvrirez un tas de petits secrets pour laver
mieux, avec moins defforts tout en augmentant la
longévité de votre lave-linge. Et surtout, en toute
sécurité .
1. Installation et déménagement (page 2)
Pour un bon fonctionnement du lave-linge, lopération la plus impor-
tante après sa livraison ou après un déménagement, est sans aucun
doute son installation. Vérifiez toujours:
1. si linstallation électrique est conforme.
2. si les tuyaux darrivée et de vidange de leau sont bien raccordés
correctement. Ne jamais utiliser des tuyaux usés.
3. si le lave-linge est bien de niveau. Cest important: pour la
longévité de votre lave-linge et pour la qualité de votre lavage.
4. que toutes les vis de fixation du tambour, situées à l’arrière
du lave-linge, ont bien été enlevées.
7. Conseils utiles pour ne pas vous tromper (page
2. Sécurité pour vous et vos enfants (page 3)
Autrefois, on suivait les bons conseils de grand-mère — et les matières
Vous y trouverez tous les conseils indispensables à votre sécurité et à
synthétiques nexistaient pas: il était donc facile de laver. Aujourdhui,
celle de votre famille. Cest ce quil y a de plus important.
cest votre lave-linge qui vous donne de bons conseils et vous permet
même de laver laine et cachemire aussi bien quune blanchisseuse.
3. Comment charger votre lave-linge et le mettre
en service (page 4)
8.
Comment fermer le tambour (page 9)
Triez correctement votre linge: cest une opération importante dont
la réussite de votre lessive dépend entièrement. Apprenez tous les
Pour un lavage en toute sécurité ouvrez et fermez bien les portes.
trucs et tous les secrets pour bien trier votre lessive: les couleurs, les
textiles, la tendance à produire des peluches, voilà quels sont les
critères les plus importants.
9. Le tiroir à produits lessiviels (page 10)
4. Bien maîtriser le bandeau de commandes
(page 5 — 6)
Comment utiliser le tiroir à produits lessiviels et le bac à eau de Javel.
Le bandeau de commandes de votre lave-linge est très simple.
Quelques commandes essentielles pour choisir les types de lavage,
10. Problèmes et solutions (pages 11 et 12)
du plus énergique, pour laver une combinaison de mécanicien,
jusquau plus délicat pour le cachemire. Apprenez à vous en servir,
vous laverez mieux et prolongerez la durée de vie de votre lave-linge.
Avant dappeler un technicien, lisez ces pages: de nombreux problèmes
Cest facile.
peuvent trouver une solution immédiate. Si vous narrivez pas à les
résoudre, appelez alors le numéro de votre SAV et en un rien de temps
la panne sera réparée.
5. Guide des programmes de lavage
(page 6)
11. Soin et entretien (page 13)
Un tableau facile à consulter pour cerner dun seul coup doeil tous les
programmes, les températures, les produits lessiviels et additionnels.
Votre lave-linge estun ami: quelques petites attentions suffisent pour
Utilisez le bon et vous obtiendrez de meilleurs résultats en économisant
quelle vous rende la pareille en fidélité et dévotion.
du temps, de leau et de lélectricité, jour après jour.
Chouchoutez-la, elle lavera pour vous pendant des années et des
années.
6. Guide pour comprendre les étiquettes et les
symboles Ariston (pages 7-8)
12. Caractéristiques techniques (page 14)
Les symboles reportés sur les étiquettes des vêtements sont très
Vous y trouverez les caractéristiques techniques de votre lave-linge:
faciles à comprendre et importants quant à la réussite du lavage. Ce
sigle du modèle, spécifications électriques et hydrauliques,
guide vous aidera à vous y retrouver parmi les températures
dimensions, capacité, vitesse dessorage et conformité aux normes
conseillées, les types de lavage et de repassage.
et aux directives italiennes et européennes.
1
Mode dinstallation et demploi
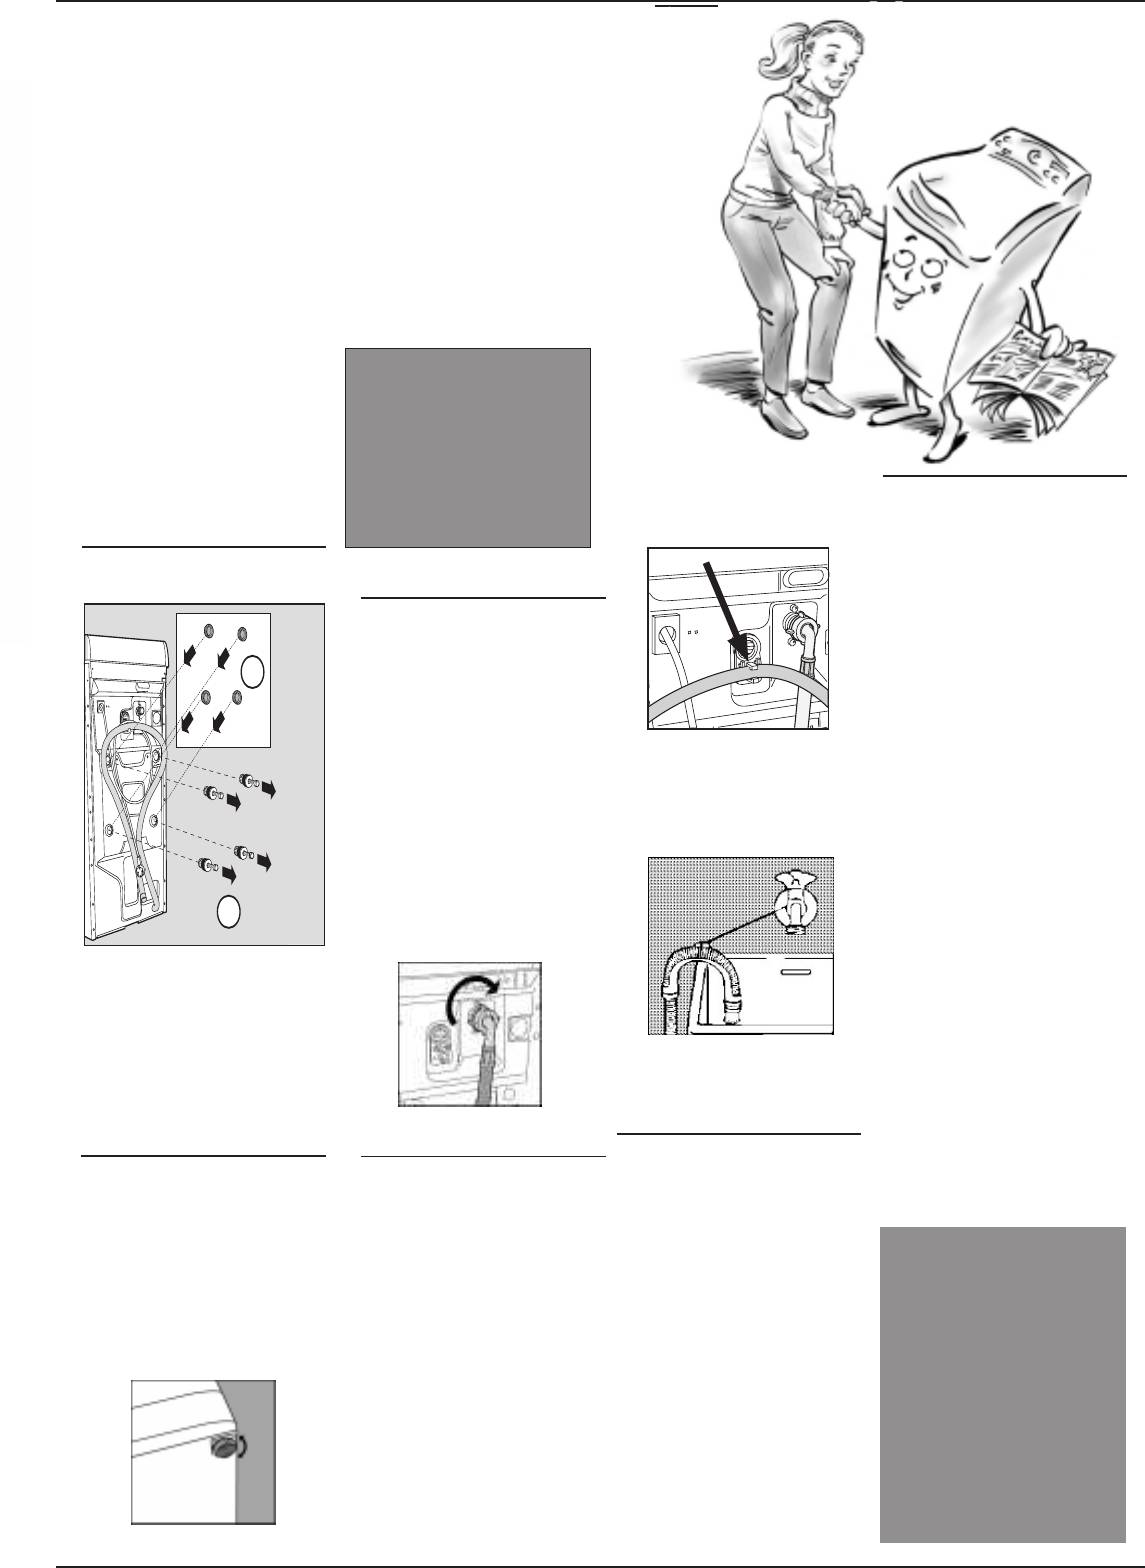
M
Installation et déménagement
Quand votre lave-
linge arrive
Que votre lave-linge soit neuf ou que vous veniez juste de
déménager, son bon fonctionnement dépend en grande partie
de son installation.
A
près avoir déballé l’appareil,
vérifiez s’il est en bon état. En cas de
Conservez les vis de
doute, faites appel à un professionnel
blocage et les cales. En cas
du secteur. Pour permettre son
de déménagement vous
transport, l’in-térieur du lave-
pourrez vous en resservir
linge a été blo-qué à l’aide de
pour bloquer les pièces
quatre vis et de caoutchoucs sur
internes du lave-linge et le
Le crochet à utiliser si le tuyau
le pan- neau arrière de la
protéger ainsi contre les
débouche à moins de 60 cm de
machine.
chocs pendant son
Branchement
haut.
transport.
électrique
Avant de brancher la machine à la
Déblocage: enlever les
prise de courant, contrôlez que:
4 vis!
1) la prise de courant est conforme
Raccordement à la
aux normes et que sa charge
prise d’eau
électrique est bien apte à
La pression de l’eau doit être
supporter la puissance maximum
2
comprise entre les valeurs indiquées
de la machine figurant sur la
sur la plaquette fixée à l’arrière de
plaquette des caractéri-stiques;
l’appareil. Raccordez le tuyau
2) la tension d’alimentation est bien
d’arrivée que vous trouvez, démonté,
comprise entre les valeurs
à l’intérieur du tambour à une prise
Si le tuyau évacue dans la baignoire
figurant sur la plaquette des
d’eau froide à embout fileté 3/4 gaz.
ou dans le lavabo, appliquez le
caractéri-stiques;
Si les tuyauteries de l’eau sont neuves
support en plastique et attachez-le
3) la prise est bien compati- ble avec
ou inutilisées depuis longtemps,
au robinet.
la fiche de la machine. En
faites couler l’eau jusqu’à ce qu’elle
cas d’incompatibilité, n’utilisez
soit limpide et sans impuretés avant
pas d’adaptateurs mais remplacez
de raccorder. Raccordez le tuyau à
la prise ou la fiche;
la machine, au niveau de la prise
4) votre installation électrique dispo-
1
d’eau prévue en haut, à droite.
se bien d’une «mise à la terre».
5) une fois la machine branchée,
Avant de brancher votre lave-lin-
elle ne s’appuie pas sur le câble
ge, enlevez les vis, le caoutchouc
d’alimentation.
et la cale (conservez bien toutes
Attention !
ces pièces) et bouchez les trous
Le constructeur et le vendeur déclinent
à l’aide des cache-trous en plas-
toute responsabilité et aucune garantie
tique fournis avec l’appareil.
Le guide pour le vindange en
ne sera due en cas de modification
Attention: en cas de réutilisa-
baignoire ou lavabo.
tion, les vis plus courtes doivent
apportée au raccordement prévu par
Prise d’eau à monter en haut à
être montées dessus.
l’usine, de mauvais raccordement
droite.
Ne le laissez jamais
électrique, de modification électrique,
Mise à niveau
Raccordement du tuyau
tremper dans l’eau.
Pour bien fonctionner, il est important
mécanique ou hydraulique subis par
de vidange
L’utilisation de rallonges est
que votre lave-linge soit bien posé à
Un crochet situé à l’arrière de la
absolument déconseillée. Si vous ne
la machine.
plat. Pour bien le niveler, il suffit
machine, en haut, vous permet
pouvez vraiment pas vous en passer,
d’agir sur ses pieds; son angle
Attention!
éventuellement de fixer le tuyau de
il faut qu’elle ait le même diamètre
d’inclinaison , mesuré sur le plan de
Nous déclinons toute
vidange. Introduisez l’autre extrémité
que le tuyau original et moins de
travail, ne doit pas depasser 2°. Si
responsabilité en cas
dans un conduit d’évacuation mura-
150 cm de long. En cas d’évacuation
vous avez de la moquette,
de non respect des
attention à ce que la ventilation
le ou bien accrochez-le à l’évier ou à
murale, faites vérifier son efficacité
normes énumérées ci-
ne soit pas bouchée au niveau de
la baignoire en évitant de l’écraser
par un professionnel agréé. Si vous
dessus.
la zone dappui.
ou de trop le plier. Il faut absolument
habitez en étage dans un immeuble,
qu’il débouche entre 60 et 100 cm de
Ne laissez pas les
il peut y avoir des phénomènes de
enfants jouer avec les
haut.
siphonnement qui font que votre
sachets plastique, le
Si vous êtes obligé de fixer
lave-linge prend et évacue l’eau
polystyrène expansé,
l’extrémité à moins de 60 cm au-
continuellement.
les vis et les autres
dessus du sol, il faut que vous fixiez
Pour supprimer cet inconvé-nient ,
éléments demballage,
le tuyau au crochet susmentionné
vous pouvez trouver dans le
ils pourraient être
prévu dans le panneau arrière de la
commerce des valves spéciales anti-
dangereux.
Les pieds avant sont réglables
machine.
siphonnement.
Mode dinstallation et demploi
2
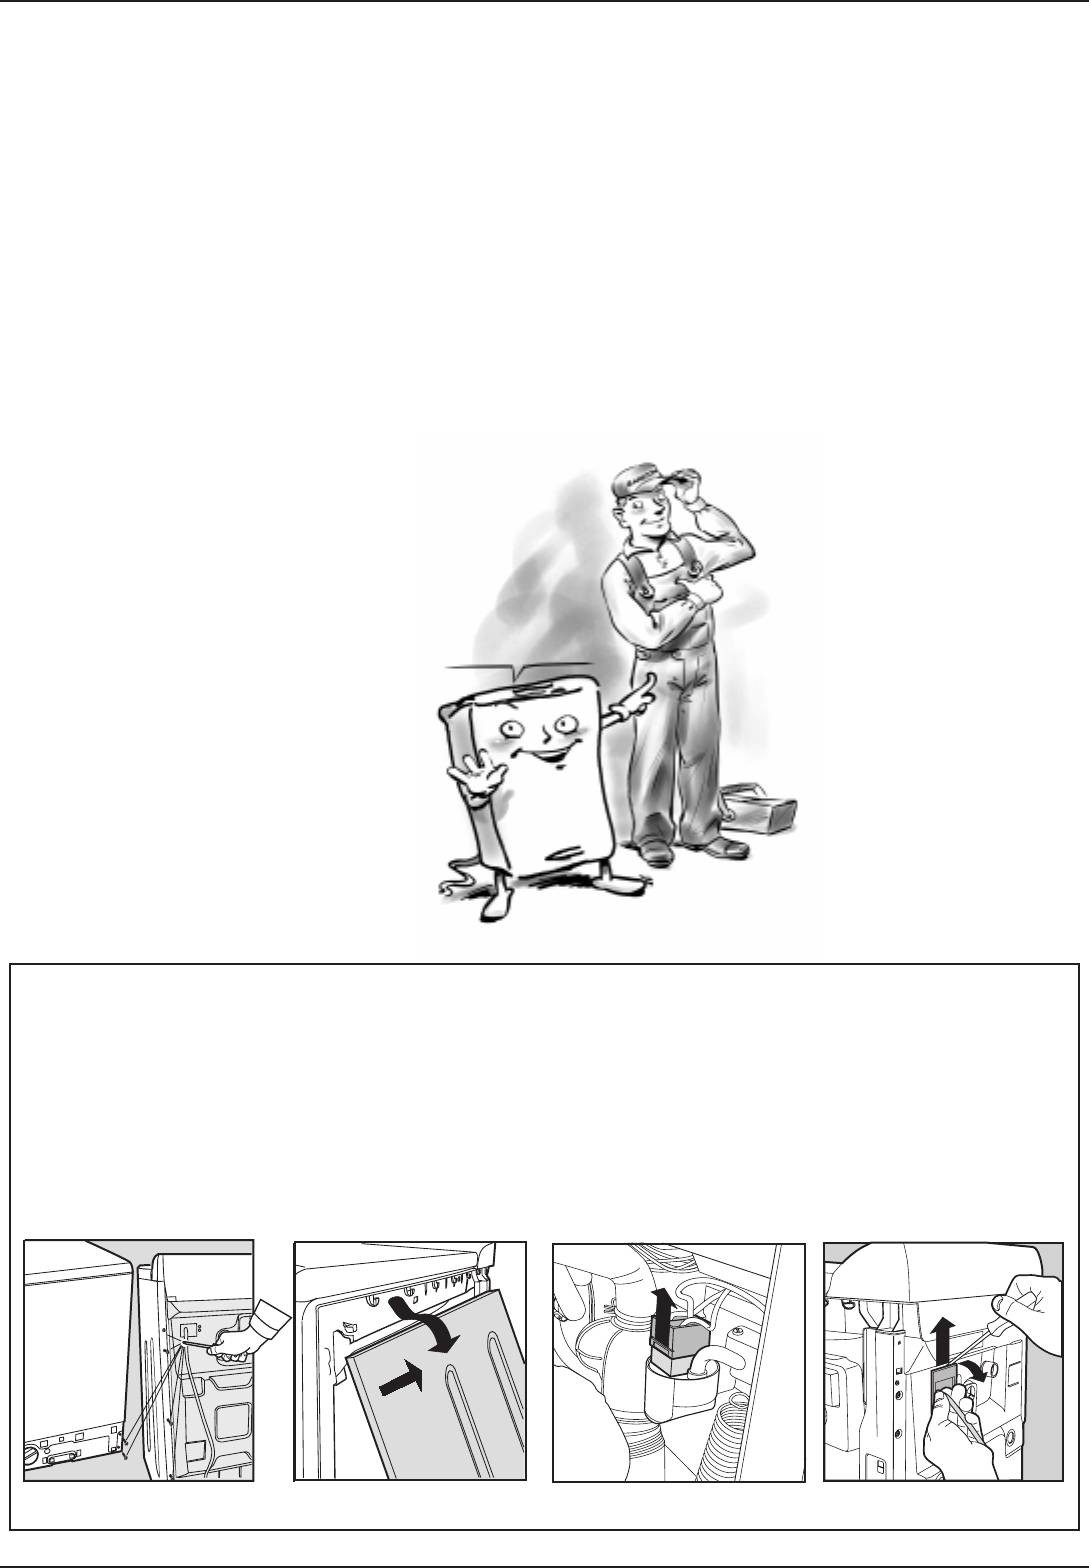
Ce qui compte par dessus tout
Votre sécurité et celle de
votre lave-linge a été fabriqué selon les normes
internationales de sécurité les plus sévères. Pour
vos enfants
vous protéger ainsi que votre famille.
Lisez attentivement ces conseils
5. Ne touchez jamais la
de la machine; nutilisez
la prise murale: cest
ainsi que toutes les informations
machine pieds nus ou bien
jamais de lessive pour
extrêmement dangereux..
contenues dans ce mode d’emploi:
les mains ou les pieds
lavage à la main sa mousse
9. En cours de fonctionnement,
ils vous fourniront no n seulement
mouillés ou humides.
abondante pourrait
ne touchez pas à leau
des renseignements utiles mais
6. Nutilisez ni rallonges ni
endommager les parties
évacuée, elle peut atteindre
aussi des conseils importants sur
prises multiples, dange-
internes de la machine.
des températures très
la sécurité, l’utilisation et
reuses surtout dans des
8. Ne tirez jamais sur le
élevées. Gardez vos enfants
l’entretien.
endroits humides. Le câble
câble ni sur le lave-linge
à bonne distance. Ne forcez
1. Margherita ne doit pas
dalimentation ne doit être ni
pour débrancher la fiche de
jamais pour ouvrir les
être installée dehors,
plié ni écrasé.
portes vous risqueriez
même à labri, car il est très
7. Nouvrez pas le tiroir à
dendommager le méca-
dangereux de la laisser
produits lessiviels pen-
nisme de sécurité prévu pour
exposée à la pluie et aux
dant le fonctionnement
prévenir les ouvertures
orages.
accidentelles.
2. Elle ne doit être utilisée
10. En cas de panne, fermez
que par des adultes et
avant tout le robinet de
exclusivement pour laver du
Jexige un professionnel
leau et débranchez la
linge selon les instructions
qualifié et agréé
fiche de la prise murale;
reportées dans ce mode
et des pièces de rechange
nessayez en aucun cas
demploi.
originales garanties
daccéder aux mécanismes
Ariston!
3. Deux ou trois personnes sont
internes pour la réparer.
nécessaires pour la
11. Cet appareil est destiné
déplacer en faisant très
à un usage domestique.
attention. Ne jamais la
Aucune garantie ne sera due
déplacer seul car la
en cas dusage industriel
machine est très lourde
(Hôtels, Restaurants, Blan-
ou utilisez un engin de
chisseries, etc.) qui en com-
manutention (diable).
promet les caractéristiques
4. Avant dintroduire votre
de construction dorigine.
linge, contrôlez si le
tambour est bien vide.
Comment changer le câble d’alimentation
Comment changer le câble d’alimentationComment changer le câble d’alimentation
Comment changer le câble d’alimentationComment changer le câble d’alimentation
Le câble d’alimentation est un
2. Déposez la base, dévissez
4. Dévissez les 2 vis extérieures
Pour le remplacer, nous vous
câble spécial qui n’est dispo-
d’abord les 2 vis de droite en bas
qui fixent le filtre et, à l’aide d’un
conseillons de faire appel à un
nible qu’auprès des SAV auto-
puis les 6 vis de gauche à l’ar-
tournevis (voir fig. 4), dégagez-
spécialiste du secteur qui devra
risés.
rière, déposez le panneau latéral
le du panneau arrière en le tirant
respecter les normes applica-
en l’inclinant légèrement vers
vers le haut.
bles en l’espèce.
Pour le remplacer, procédez comme
vous pour le dégager. (fig. 1 et
suit :
2).
5. Après avoir monté le nouveau
1. Contrôlez que le lave-linge
câble, raccordez le connecteur en
est bien éteint et que la fiche est
3. Sortez le connecteur pour dé-
vérifiant que le crochet de sécu-
bien débranchée.
connectez le filtre antiparasite
rité tienne bien.
(fig. 3).
Fig. 1
Fig. 2
Fig. 3
Fig. 4
3
Mode dinstallation et demploi
Оглавление
Аннотации для Стиральной Машиной Ariston AT 84 в формате PDF
Топ 10 инструкций
Другие инструкции
Перейти к контенту
Стиральные машины Ariston
- Размер инструкции: 3.06 Мб
- Формат файла: pdf
Если вы потеряли инструкцию от стиральной машины Ariston AT 84, можете скачать файл для просмотра на компьютере или печати.
Инструкция для стиральной машины Ariston AT 84 на русском языке. В руководстве описаны возможности и полезные функции, а также правила эксплуатации. Перед использованием внимательно ознакомьтесь с инструкцией.
Чтобы не читать всю инструкцию вы можете выполнить поиск по содержимому внутри инструкции и быстро найти необходимую информацию. Рекомендации по использованию помогут увеличить срок службы стиральной машины Ariston AT 84. Если у вас появилась проблема, то найдите раздел с описанием неисправностей и способами их решения. В нем указаны типичные поломки и способы их решения.
-
Инструкции по эксплуатации
1
Ariston AT 84 инструкция по эксплуатации
(80 страниц)
- Языки:Русский
-
Тип:
PDF -
Размер:
3.46 MB -
Описание:
Стиральная машина
Просмотр
На NoDevice можно скачать инструкцию по эксплуатации для Ariston AT 84. Руководство пользователя необходимо для ознакомления с правилами установки и эксплуатации Ariston AT 84. Инструкции по использованию помогут правильно настроить Ariston AT 84, исправить ошибки и выявить неполадки.