
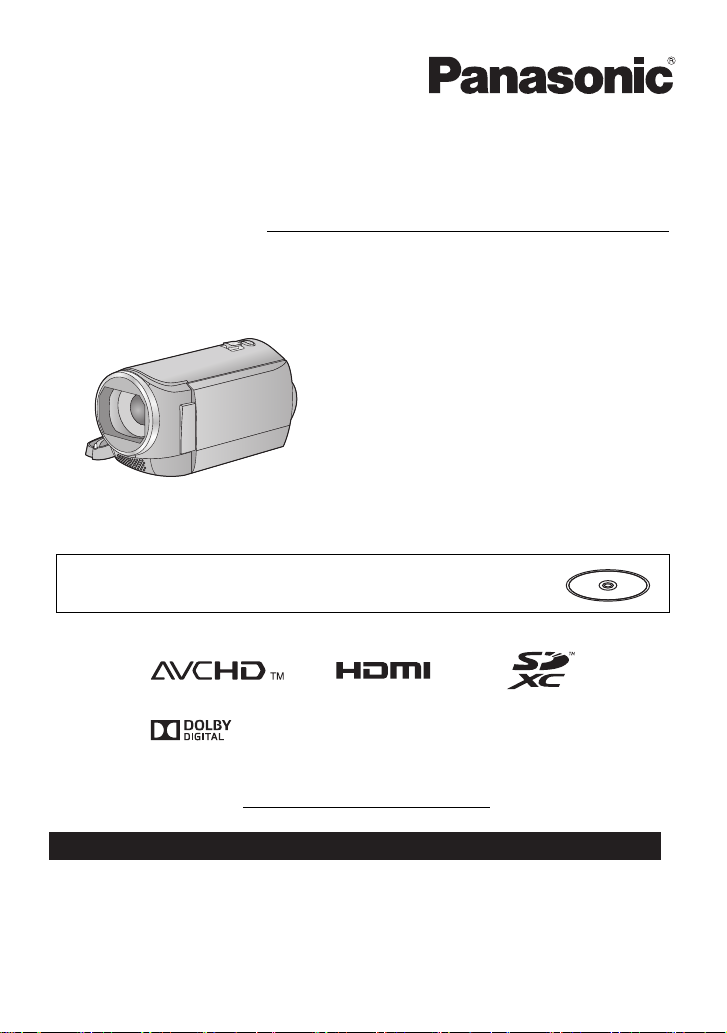
Основная инструкция по эксплуатации HD Видеокамера Номер мод…
Hc-v130ee, Основная инструкция по эксплуатации, Hd видеокамера Чат поддержки
- Изображение
- Текст
Основная инструкция по
эксплуатации
HD Видеокамера
Номер модели
HC-V130EE
Перед использованием этого изделия, пожалуйста, внимательно прочитайте данные
инструкции и сохраните это руководство для дальнейшего использования.
В данном документе объясняются основные операции устройства. Более
подробное описание приводится в “Инструкция по эксплуатации
(в формате PDF)”, которая содержится на прилагаемом диске CD-ROM.
SQT0044
until
2014/2/1
HC-V130_EE_SQT0044_rus.book 1 ページ 2013年12月13日 金曜日 午後1時42分

2
SQT0044 (RUS)
∫ Об аккумуляторах
∫ Идентификационная
маркировка изделия
Информация для вашей
безопасности
ПРЕДУПРЕЖДЕНИЕ:
Для уменьшения риска пожара,
поражения электрическим током или
повреждения изделия,
≥ Берегите устройство от воздействия
дождя, влажности, капель и брызг.
≥ Не ставьте на это устройство емкости с
водой, например, вазы.
≥ Рекомендуется пользоваться только
рекомендуемыми принадлежностями.
≥ Не снимайте крышки.
≥ Не ремонтируйте устройство
самостоятельно. Доверьте
обслуживание квалифицированному
персоналу.
ПРЕДОСТЕРЕЖЕНИЕ!
Для уменьшения риска пожара,
поражения электрическим током или
повреждения изделия,
≥ Не устанавливайте и не помещайте
данное устройство в книжный или
встроенный шкаф, или в иное
ограниченное пространство.
Убедитесь, что для устройства имеется
достаточная вентиляция.
≥ Не закрывайте вентиляционные
отверстия устройства газетами,
скатертями, шторами и подобными
предметами.
≥ Не помещайте источники открытого огня,
такие как горящие свечи, на устройство.
Сетевая вилка является устройством
отключения.
Размещайте данную камеру таким
образом, чтобы можно было
незамедлительно отключить сетевую
вилку от штепсельной розетки.
Предупреждение
Риск пожара, взрыва и ожогов.
Запрещается разбирать, нагревать
свыше 60 oC или сжигать.
ВНИМАНИЕ
≥ При неправильной установке
аккумуляторной батареи имеется риск
взрыва. Замену аккумуляторной
батареи производите с использованием
батареи типа, рекомендованного
изготовителем.
≥ Если вы собираетесь утилизировать
аккумуляторную батарею, узнайте в
местных органах власти или у дилера,
как следует поступать с отходами
такого типа.
Изделие
Расположение
HD Видеокамера
Крепление
аккумулятора
Адаптер
переменного тока
Низ
HC-V130_EE_SQT0044_rus.book 2 ページ 2013年12月13日 金曜日 午後1時42分

3
(RUS) SQT0044
-Если вы увидите такой символ-
∫ На что необходимо обратить
внимание при использовании
Храните данное устройство как можно
дальше от источников электромагнитного
излучения (например, микроволновых
печей, телевизоров, видеоигр и т.д.).
≥ При использовании данного устройства,
размещенного на телевизоре или вблизи него,
снимки и/или звуки данного устройства могут
искажаться под действием электромагнитных волн.
≥ Не пользуйтесь данным устройством вблизи сотовых
телефонов, так как это может привести к помехам,
отрицательно влияющим на снимки и/или звук.
≥ Снятые данные могут повреждаться или
изображения могут искажаться сильными
магнитными полями, создаваемыми динамиками или
крупными двигателями.
≥ Электромагнитное излучение, создаваемое
микропроцессорами, может отрицательно влиять на
данное устройство, вызывая искажение изображений
и/или звука.
≥ Если на данное устройство негативно влияет
электромагнитное оборудование, и данное
устройство прекращает нормальную работу,
выключите его, извлеките аккумулятор или отключите
адаптер переменного тока. Затем снова вставьте
аккумулятор или подключите адаптер переменного
тока и включите данное устройство.
Не используйте данное устройство возле
радиопередатчиков или высоковольтных
линий.
≥ Если вы производите съемку возле
радиопередатчиков или высоковольтных
линий, на записанные изображения и/или
звук могут накладываться помехи.
О подключении к телевизору
≥ Не используйте другие кабели AV, кроме
поставляемого в комплекте.
≥ Всегда используйте фирменный
мини-кабель Panasonic HDMI
(RP-CDHM15, RP-CDHM30:
дополнительно).
О подключении к ПК
≥ Не используйте другие кабели USB, кроме
входящего в комплект поставки.
∫ Сведения о форматах записи
видеоизображения
Можно выбрать форматы записи AVCHD,
iFrame или MP4 для записи видео данной
камерой.
AVCHD:
Подходит для просмотра на экране
телевизора высокой четкости или для
сохранения на диск.
iFrame:
Данный формат записи позволяет
воспроизводить и редактировать файлы на
компьютере Mac (iMovie и т. д).
≥ Не совместимо с видео, записанным в
формате AVCHD.
MP4:
Данный формат записи позволяет
воспроизводить и редактировать файлы на
ПК.
≥ Не совместимо с видео, записанным в
формате AVCHD.
Информация по обращению с
отходами для стран, не входящих
в Европейский Союз
Действие этого символа
распространяется только
на Европейский Союз.
Если Вы собираетесь
выбросить данный
продукт, узнайте в
местных органах власти
или у дилера, как следует
поступать с отходами
такого типа.
HC-V130_EE_SQT0044_rus.book 3 ページ 2013年12月13日 金曜日 午後1時42分

4
SQT0044 (RUS)
∫ Ответственность за
записанное содержание
Panasonic не несет ответственности за
прямые либо косвенные повреждения,
вызванные любого рода проблемами,
приводящие к потере записанного или
редактируемого содержимого, а также не
дает гарантий на какое-либо содержимое,
если запись или редактирование не
выполняются надлежащим образом.
Аналогично, вышесказанное применимо
также в случае любого ремонта камеры.
∫ Информация о конденсации
(когда затуманивается
объектив или монитор ЖКД)
Конденсация возникает в случае смены
температуры или влажности, например когда
камера переносится с улицы или из
холодного помещения в теплое. Будьте
осторожны, так как конденсация может
вызвать помутнение, заплесневение или
неисправность объектива или монитора ЖКД.
Если камера вносится в помещение с другой
температурой, конденсации можно избежать,
если оставить камеру примерно на час в
помещении, чтобы температура камеры
сравнялась с температурой внутри этого
помещения. (При большой разнице температур
положите камеру в пластиковый пакет или
пакет из подобного материала, удалите воздух
из пакета и плотно закройте пакет.)
В случае возникновения конденсации выньте
аккумулятор и/или сетевой адаптер и
оставьте камеру в таком виде примерно на
час. Когда температура устройства
сравняется с температурой окружающего
воздуха, запотевание исчезнет само собой.
∫ Карты, которые можно
использовать с данным
устройством
Карты памяти SD, SDHC и SDXC
≥ Карты памяти емкостью 4 ГБ или более
без логотипа SDHC или карты памяти
емкостью 48 ГБ или более без логотипа
SDXC не основаны на технических
характеристиках карт памяти SD.
≥ Более подробная информация о картах
SD приведена нас странице 11.
∫ В настоящей инструкции по
эксплуатации
≥ Карта памяти SD, карта памяти SDHC и
карта памяти SDXC обозначены в
документе как “карта SD”.
≥ В данной инструкции по эксплуатации
функции, которые можно использовать
для записи/воспроизведения видео,
обозначаются
.
≥ В данной инструкции по эксплуатации
функции, которые можно использовать
для записи/воспроизведения
фотоснимков, обозначаются
.
≥ Сцены, записанные в формате 1080/50i:
“сцены AVCHD”
≥ Страницы для справки обозначаются
стрелкой, например: l 00
HC-V130_EE_SQT0044_rus.book 4 ページ 2013年12月13日 金曜日 午後1時42分

5
(RUS) SQT0044
Информация для вашей
безопасности …………………………………….2
Принадлежности ……………………………….6
Подготовка
Питание ……………………………………………..7
Как вставлять/извлекать
аккумулятор ………………………………… 7
Зарядка аккумулятора …………………. 8
Время зарядки и записи……………… 10
Запись на карту ………………………………. 11
Карты, которые можно
использовать с данным
устройством ………………………………. 11
Как вставлять/извлекать
карту SD ……………………………………. 11
Включение/выключение камеры …….12
Установка даты и времени ………………12
Основные сведения
Интеллектуальный автоматический
режим ………………………………………………13
Съемка фильмов …………………………….13
Фотосъемка……………………………………..14
Использование
масштабирования ……………………………14
Воспроизведение видео/
стоп-кадров ……………………………………..15
Просмотр видео/снимков на ТВ ….. 16
Использование экрана меню …………..17
Выбор языка ……………………………… 17
Форматирование ……………………….. 17
Прочее
Технические характеристики …………..18
Об авторском праве ………………………..20
Оглавление
∫ Как открыть инструкцию по эксплуатации (в формате PDF)
Если вставить диск CD-ROM и открыть на нем [INDEX.pdf], отобразится содержание
инструкции по эксплуатации. Нажмите на название документа инструкции по
эксплуатации, который нужно открыть.
≥ Для просмотра файла PDF необходима программа Adobe Reader. Загрузите ее с
домашней страницы Adobe Systems Incorporated.
HC-V130_EE_SQT0044_rus.book 5 ページ 2013年12月13日 金曜日 午後1時42分

6
SQT0044 (RUS)
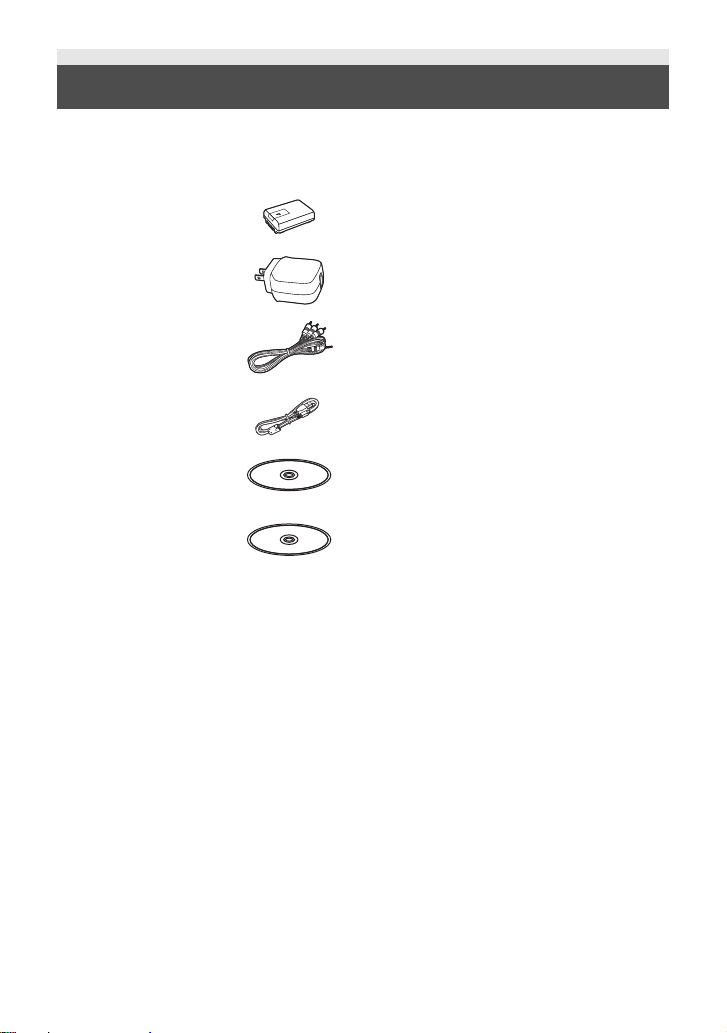
Перед началом использования проверьте комплектацию.
Храните дополнительные принадлежности в недоступном для детей месте во избежание
проглатывания.
Номера изделий верны по состоянию на декабрь 2013 г. Они могут изменяться.
Некоторые дополнительные аксессуары
могут отсутствовать в определенных
странах.
* Чтобы использовать LED-лампу для
видеокамеры/VW-LED1E, требуется
направляющий адаптер/VW-SK12E.
Принадлежности
Блок аккумулятора
VW-VBY100
Адаптер переменного
тока
VSK0784
AV кабель
K2KYYYY00223
USB кабель
K2KYYYY00225
CD-ROM
Программное
обеспечение
CD-ROM
Инструкция по
эксплуатации
SFM0007
Дополнительные
принадлежности
Зарядное устройство (VW-BC10E)
Блок аккумулятора (литий/VW-VBY100)
Блок аккумулятора (литий/VW-VBT190)
Блок аккумулятора (литий/VW-VBT380)
Кабель мини HDMI (RP-CDHM15,
RP-CDHM30)
Адаптер для присоединения аксессуаров
(VW-SK12E)
Комплект вспомогательного оборудования
(VW-ACT190E)
LED-лампа для видеокамеры (VW-LED1E)
*
Крепление на присоске (VW-SCA100)
Крепление для видеокамеры (на руль)
(RP-CMC10E)
HC-V130_EE_SQT0044_rus.book 6 ページ 2013年12月13日 金曜日 午後1時42分

7
(RUS) SQT0044
∫ Сведения об аккумуляторах, которые можно использовать для
данной камеры
Данную камеру можно использовать с аккумулятором типа VW-VBY100/VW-VBT190/VW-VBT380.
Как вставлять/извлекать аккумулятор
≥ Нажмите кнопку питания для выключения камеры. (
l 12)
Установите аккумулятор, вставив его в направлении, показанном на рисунке.
Подготовка
Питание
Выяснилось, что на некоторых рынках в продаже появились поддельные
аккумуляторные блоки, которые очень похожи на оригинальные. Некоторые из этих
блоков не имеют надлежащей встроенной защиты, отвечающей требованиям
соответствующих стандартов безопасности. Возможно, эти аккумуляторы пожаро- и
взрывоопасны. Пожалуйста, имейте в виду, что мы не несем никакой ответственности
за несчастные случаи или отказ оборудования в результате использования
поддельных аккумуляторов. Чтобы гарантировать использование безопасной
продукции, мы рекомендуем оригинальные аккумуляторные блоки Panasonic.
Как извлечь аккумулятор
Удерживайте кнопку питания до тех пор, пока не
погаснет индикатор состояния. Затем извлеките
аккумулятор, придерживая камеру, чтобы уберечь
ее от падения.
Сдвиньте рычажок извлечения аккумулятора в
направлении, указанном стрелкой, и извлеките
аккумулятор после его разблокировки.
ャモヵヵ
A
Крепление аккумулятора
Вставьте аккумулятор до
щелчка и блокировки.
HC-V130_EE_SQT0044_rus.book 7 ページ 2013年12月13日 金曜日 午後1時42分

8
SQT0044 (RUS)
Зарядка аккумулятора
∫ Зарядка с помощью сетевого адаптера.
При подключенном адаптере переменного тока камера находится в режиме ожидания.
Первичная цепь всегда “работает”, если адаптер переменного тока подключен к
электрической розетке.
Важная информация:
≥ Сетевой адаптер и кабель USB предназначены для использования только с этой
камерой. Не используйте их с другим оборудованием. Также не используйте с этой
камерой сетевые адаптеры и кабели USB от другого оборудования.
≥ При включенном питании зарядка аккумулятора невозможна. Нажмите кнопку
питания для выключения питания. (l 12)
≥ Рекомендуется заряжать аккумулятор при температуре от 10 oC до 30 oC.
(Температура аккумулятора должна быть такой же.)
∫ Подключение к электрической розетке
Если включить устройство во время соединения с адаптером переменного тока, можно
пользоваться устройством, используя питание от сетевой розетки.
Используйте вместе с аккумуляторной батареей при записи в течение длительного времени с
подключенным адаптером переменного тока.
Это даст возможность продолжать запись даже в случае отключения электропитания или
случайного извлечения сетевого адаптера из электрической розетки.
Камера продается с незаряженным аккумулятором. Полностью зарядите
аккумулятор, прежде чем использовать камеру в первый раз.
A
Гнездо USB
B
К электрической розетке
≥ Вставьте штекеры максимально до
упора.
1
Откройте ЖКД монитор.
2
Подключите кабель USB к
сетевому адаптеру.
≥ Убедитесь в том, что штекерная часть
сетевого адаптера не ослабла и не
сместилась.
3
Вставьте сетевой адаптер в
сетевую розетку.
4
Подключите кабель USB к камере.
≥ Индикатор состояния C будет мигать
красным светом с интервалом прибл. в
2 секунды (включается прибл. на 1 секунду,
выключается прибл. на 1 секунду),
показывая, что зарядка началась.
Она выключится по окончании зарядки.
HC-V130_EE_SQT0044_rus.book 8 ページ 2013年12月13日 金曜日 午後1時42分

9
(RUS) SQT0044
∫ Подключение к персональному компьютеру и зарядка.
Зарядка камера при отсутствии сетевого адаптера.
A
Кабель USB (входит в комплект
поставки)
≥ Вставьте штекеры максимально до упора.
≥ Нажмите на кнопку питания и выключите
питание. (l 12)
≥ Не используйте любые другие адаптеры переменного тока, за исключением входящего в
комплект.
≥ Рекомендуется использовать аккумуляторы Panasonic (
l 7).
≥ При использовании других аккумуляторов мы не можем гарантировать качество изделия.
≥ Не нагревайте и не подвергайте воздействию огня.
≥ Не оставляйте аккумулятор(-ы) в автомобиле в месте, подверженном воздействию прямых
солнечных лучей, в течение длительного периода при закрытых окнах и дверях.
≥ Если камеру не предполагается использовать продолжительное время, в целях
безопасности отсоедините кабель USB.
≥ Зарядка может оказаться невозможной в зависимости от операционной среды
используемого ПК (например, ПК, выполненного по заказу).
≥ Зарядка прекращается при выключении питания ПК или его переводе в
энергосберегающий режим. Зарядка возобновляется при повторном включении питания ПК
или отмене энергосберегающего режима.
≥ Камера заряжается при подключении к рекордеру дисков Blu-ray или DVD-рекордеру
Panasonic с помощью кабеля USB, даже если питание выключено.
≥ Перезаряжаемая батарейка может перезаряжаться около 500 раз.
1
Включите питание ПК.
2
Подключите кабель USB.
≥ Индикатор состояния B будет мигать
красным светом с интервалом прибл. в
2 секунды (включается прибл. на 1 секунду,
выключается прибл. на 1 секунду),
показывая, что зарядка началась.
Она выключится по окончании зарядки.
≥ Не используйте никакие другие кабели
USB кроме того, который входит в
комплект. (С другими USB кабелями
работа не гарантируется.)
≥ Всегда подключайте камеру
непосредственно к ПК.
≥ Зарядка невозможна, если индикатор
состояния мигает или не светится вообще.
Осуществляйте зарядку с помощью
адаптера переменного тока. (l 
≥ Зарядка может продлиться в 2 или 3 раза
дольше, чем при использовании
адаптера переменного тока.
HC-V130_EE_SQT0044_rus.book 9 ページ 2013年12月13日 金曜日 午後1時42分

10
SQT0044 (RUS)
Время зарядки и записи
∫ Время зарядки/записи
≥ Температура: 25 oC/влажность: 60%RH
≥ В скобках указано время зарядки, когда данное устройство подключено к ПК, устройству
записи дисков Blu-ray производства Panasonic, или устройству записи DVD.
≥ Данные временные значения приблизительны.
≥ Указываемое время зарядки приводится для полностью разряженного аккумулятора.
Время зарядки и время записи может изменяться в зависимости от условий
эксплуатации, например высокой/низкой температуры.
≥ Фактическое время записи относится ко времени записи, когда многократно запускается/
останавливается запись, происходит включение/выключение камеры, движется рычаг
трансфокатора и т. д.
∫ Индикация емкости аккумулятора
Индикатор заряда аккумулятора отображается на мониторе ЖКД.
≥ Отображение меняется по мере уменьшения заряда аккумулятора.
#
#
#
#
При разрядке аккумулятора индикатор
мигает красным светом. Зарядите
аккумулятор или замените его полностью заряженным.
Номер модели
аккумулятора
[Напряжение/
емкость (Минимум)]
Время
зарядки
Формат
записи
Режим
записи
Максимальное
непрерывное
время записи
Фактическое
время
записи
Поставляемый в
комплекте
аккумулятор/
VW-VBY100
(поставляется
отдельно)
[3,6 В/970 мАч]
2 ч 20 мин.
(3 ч 10 мин.)
AVCHD
[HA], [HG],
[HE]
1 ч 15 мин.
40 мин.
iFrame
—
1 ч 25 мин.
50 мин.
MP4
—
1 ч 30 мин.
HC-V130_EE_SQT0044_rus.book 10 ページ 2013年12月13日 金曜日 午後1時42分

12:09
ВИДЕОКАМЕРА Panasonic HC-V130. ОБЗОР. Тест видео.
05:39
Panasonic HC-V130 Test Video
04:47
Test Panasonic HC-V130 Day and night.
05:44
Тест видеокамеры Panasonic HC-V130
06:09
Увеличение ёмкости аккумулятора видеокамеры Panasonic hc- v130
05:07
Анбоксинг камера Panasonic HC-V130
Нажмите на кнопку для помощи
View the manual for the Panasonic HC-V130 here, for free. This user manual comes under the category camcorders and has been rated by 3 people with an average of a 8.1. This manual is available in the following languages: English. Do you have a question about the Panasonic HC-V130?
Ask your question here
Panasonic HC-V130 specifications
Below you will find the product specifications and the manual specifications of the Panasonic HC-V130.
Internal storage capacity
— GB
Focus adjustment
Auto/Manual
White balance
Auto, Cloudy, Indoor, Sunny
General
| Brand | Panasonic |
| Model | HC-V130 | HC-V130EP-K |
| Product | camcorder |
| Language | English |
| Filetype | User manual (PDF) |
Image sensor
| Sensor type | BSI |
| Total megapixels | 2.51 MP |
| Optical sensor size | 1/5.8 « |
| Effective megapixels (image) | 2.12 MP |
| Effective megapixels (movie) | 2.12 MP |
Lens system
| Optical zoom | 38 x |
| Digital zoom | 2500 x |
| Image stabilizer | Yes |
| Interchangeable lens | — |
| Focal length range | 2.35 — 89.3 mm |
| Focal length (35mm film equivalent) | 32.9 — 1646 mm |
| Minimum aperture number | 1.8 |
Storage
| Internal storage capacity | — GB |
| Camcorder media type | Memory card |
| Compatible memory cards | SD, SDHC, SDXC |
| Disc types supported | No |
| Camcorder tape type | No |
| Camera file system | DCF, Exif 2.2 |
Focusing
| Focus adjustment | Auto/Manual |
White balance
| White balance | Auto, Cloudy, Indoor, Sunny |
Flash
| Built-in flash | No |
| Built-in light | No |
| Shoe mounting point | No |
Shutter
| Camera shutter speed | 0.000125 — 0.04 s |
| Shutter speed (video) | 0.000125 — 0.04 s |
Display
| Display diagonal | 2.7 « |
| Built-in display | Yes |
| Display | LCD |
| Display resolution (numeric) | 230400 pixels |
Viewfinder
| Viewfinder type | Not available |
Camera
| Camcorder type | Handheld camcorder |
| Supported aspect ratios | 16:9 |
| Minimum illumination | 1 lx |
| On Screen Display (OSD) | Yes |
| 3D | — |
| Geotagging | No |
| GPS (satellite) | No |
Design
| Product colour | Black |
| LED indicators | Yes |
Video
| Maximum video resolution | 1920 x 1080 pixels |
| Video resolutions | 640 x 360,960 x 540,1920 x 1080 pixels |
| Video formats supported | AVCHD, MP4 |
| HD type | Full HD |
Still image
| Maximum image resolution | 3968 x 2232 pixels |
| Image formats supported | JPG |
Audio
| Audio system | Dolby Digital |
| Built-in microphone | Yes |
| Built-in speaker(s) | Yes |
| Audio formats supported | AAC, MP4 |
Ports & interfaces
| PictBridge | No |
| Component video (YPbPr/YCbCr) out | 0 |
| HDMI | Yes |
| S-Video out | No |
| USB 2.0 ports quantity | 1 |
| Composite video out | 1 |
| Headphone outputs | 0 |
| USB 3.2 Gen 1 (3.1 Gen 1) Type-A ports quantity | 0 |
Battery
| Battery technology | — |
| Battery life (max) | — h |
| Battery capacity | 970 mAh |
| Battery voltage | 3.6 V |
Weight & dimensions
| Width | 53 mm |
| Depth | 114 mm |
| Height | 60 mm |
| Weight | 181 g |
Packaging content
| Bundled software | HD Writer LE 2.1 |
| Cables included | AV, USB |
| AC adapter included | Yes |
show more
Frequently asked questions
Can’t find the answer to your question in the manual? You may find the answer to your question in the FAQs about the Panasonic HC-V130 below.
What is the weight of the Panasonic HC-V130?
The Panasonic HC-V130 has a weight of 181 g.
What is the height of the Panasonic HC-V130?
The Panasonic HC-V130 has a height of 60 mm.
What is the width of the Panasonic HC-V130?
The Panasonic HC-V130 has a width of 53 mm.
What is the depth of the Panasonic HC-V130?
The Panasonic HC-V130 has a depth of 114 mm.
What is the screen size of the Panasonic HC-V130?
The screen size of the Panasonic HC-V130 is 2.7 «.
How much storage capacity does the Panasonic HC-V130 have?
The Panasonic HC-V130 has — GB storage capacity.
What does the abbreviation ‘MP’ stand for?
MP stands for MegaPixels.
What is a megapixel?
The number of megapixels denotes how many pixels there are in the sensor. 1 megapixel equals 1 million pixels. The more pixels, the higher the potential image quality.
Is the manual of the Panasonic HC-V130 available in English?
Yes, the manual of the Panasonic HC-V130 is available in English .
Is your question not listed? Ask your question here
Basic Owner’s Manual
High Definition Video Camera
Model No. HC-V130P
Please read these instructions carefully before using this product, and save this manual for future
use.
This document explains basic operations of the unit. For more detailed
explanation, please refer to “Owner’s manual (PDF format)” which is
recorded in the enclosed CD-ROM.
Register online at www.panasonic.com/register (U.S. customers only)
If you have any questions, visit : www.panasonic.com/support
SQT0034

Dear Customer,
Thank you for choosing Panasonic!
You have purchased one of the most
sophisticated and reliable products on the
market today. Used properly, we’re sure it
will bring you and your family years of
enjoyment. Please take time to fill in the
information on the right.
The serial number is on the tag located on
the back of your camera. Be sure to retain
this manual as your convenient camera
information source.
Date of Purchase
Dealer Purchased From
Dealer Address
Dealer Phone No.
Model No.
Serial No.
Safety Precautions
WARNING:
To reduce the risk of fire, electric shock or product damage,
≥ Do not expose this unit to rain, moisture, dripping or splashing.
≥ Do not place objects filled with liquids, such as vases, on this unit.
≥ Use only the recommended accessories.
≥ Do not remove covers.
≥ Do not repair this unit by yourself. Refer servicing to qualified service personnel.
CAUTION!
To reduce the risk of fire, electric shock or product damage,
≥ Do not install or place this unit in a bookcase, built-in cabinet or in another confined space.
Ensure this unit is well ventilated.
≥ Do not obstruct this unit’s ventilation openings with newspapers, tablecloths, curtains, and
similar items.
≥ Do not place sources of naked flames, such as lighted candles, on this unit.
2
SQT0034
The power plug is the disconnecting device. Install this unit so that the power plug can be
U.S.A. CONSUMERS: ATTENTION:
A lithium ion battery that is recyclable powers the product
you have purchased. Please call 1-800-8-BATTERY for
information on how to recycle this battery.
unplugged from the socket outlet immediately.
∫ Concerning the battery
Battery pack (Lithium ion battery pack)
≥ Use the specified unit to recharge the battery pack.
≥ Do not use the battery pack with equipment other than the specified unit.
≥ Do not get dirt, sand, liquids, or other foreign matter on the terminals.
≥ Do not touch the plug terminals (i and j) with metal objects.
≥ Do not disassemble, remodel, heat or throw into fire.
If any electrolyte should come into contact with your hands or clothes, wash it off thoroughly with
water.
If any electrolyte should come into contact with your eyes, never rub the eyes. Rinse eyes
thoroughly with water, and then consult a doctor.
Warning
Risk of fire, explosion and burns. Do not disassemble, heat above 60 oC (140 oF) or incinerate.
CAUTION
≥ Danger of explosion if battery is incorrectly replaced. Replace only with the type
recommended by the manufacturer.
≥ When disposing of the batteries, please contact your local authorities or dealer and ask for the
correct method of disposal.
∫ Product Identification Marking
Product Location
High Definition Video Camera Battery holder
AC adaptor Bottom
SQT0034
3
FCC Note:
This equipment has been tested and found to comply with the limits for a Class B digital device,
pursuant to Part 15 of the FCC Rules. These limits are designed to provide reasonable protection
against harmful interference in a residential installation. This equipment generates, uses, and can
radiate radio frequency energy and, if not installed and used in accordance with the instructions,
may cause harmful interference to radio communications. However, there is no guarantee that
interference will not occur in a particular installation. If this equipment does cause harmful
interference to radio or television reception, which can be determined by turning the equipment off
and on, the user is encouraged to try to correct the interference by one or more of the following
measures:
≥ Reorient or relocate the receiving antenna.
≥ Increase the separation between the equipment and receiver.
≥ Connect the equipment into an outlet on a circuit different from that to which the receiver is
connected.
≥ Consult the dealer or an experienced radio/TV technician for help.
FCC Caution: To assure continued compliance, follow the attached installation
Any changes or modifications not expressly approved by the party responsible for compliance
could void the user ’s authority to operate this equipment.
Declaration of Conformity
Trade Name: Panasonic
Model No.: HC-V130P
Responsible Party: Panasonic Corporation of North America
Support Contact: http://www.panasonic.com/contactinfo
This device complies with Part 15 of the FCC Rules. Operation is subject to the following two
conditions: (1) This device may not cause harmful interference, and (2) this device must accept
any interference received, including interference that may cause undesired operation.
HC-V130P
Conforms to UL STD 60065
instructions and use only shielded interface cables with ferrite
core when connecting to computer or peripheral devices.
Two Riverfront Plaza, Newark, NJ 07102-5490
AC adaptor
This AC adaptor operates on AC between 110 V and 240 V.
But
≥ In the U.S.A. and Canada, the AC adaptor must be connected to a 120 V AC power supply only.
≥ When connecting to an AC supply outside of the U.S.A. or Canada, use a plug adaptor to suit
the AC outlet configuration.
4
SQT0034

IMPORTANT SAFETY
INSTRUCTIONS
Read these operating instructions carefully before using the unit. Follow the safety instructions on
the unit and the applicable safety instructions listed below. Keep these operating instructions handy
for future reference.
1) Read these instructions.
2) Keep these instructions.
3) Heed all warnings.
4) Follow all instructions.
5) Do not use this apparatus near water.
6) Clean only with dry cloth.
7) Do not block any ventilation openings.
Install in accordance with the
manufacturer’s instructions.
Do not install near any heat sources such
as radiators, heat registers, stoves, or
other apparatus (including amplifiers) that
produce heat.
9) Do not defeat the safety purpose of the
polarized or grounding-type plug. A
polarized plug has two blades with one
wider than the other. A grounding-type plug
has two blades and a third grounding
prong. The wide blade or the third prong
are provided for your safety. If the provided
plug does not fit into your outlet, consult an
electrician for replacement of the obsolete
outlet.
10) Protect the power cord from being walked
on or pinched particularly at plugs,
convenience receptacles, and the point
where they exit from the apparatus.
11) Only use attachments/accessories
specified by the manufacturer.
12) Use only with the
cart, stand, tripod,
bracket, or table
specified by the
manufacturer, or
sold with the
apparatus. When a
cart is used, use caution when moving the
cart/apparatus combination to avoid injury
from tip-over.
13) Unplug this apparatus during lightning
storms or when unused for long periods of
time.
14) Refer all servicing to qualified service
personnel. Servicing is required when the
apparatus has been damaged in any way,
such as power-supply cord or plug is
damaged, liquid has been spilled or objects
have fallen into the apparatus, the
apparatus has been exposed to rain or
moisture, does not operate normally, or has
been dropped.
SQT0034
5
-If you see this symbol-
Information on Disposal in other
Countries outside the European
Union
This symbol is only valid
in the European Union.
If you wish to discard
this product, please
contact your local
authorities or dealer and
ask for the correct
method of disposal.
∫ Cautions for use
Keep this unit as far away as possible from
electromagnetic equipment (such as
microwave ovens, TVs, video games etc.).
≥
If you use this unit on top of or near a TV, the
pictures and/or sound on this unit may be
disrupted by electromagnetic wave radiation.
≥ Do not use this unit near cell phones because
doing so may result in noise adversely
affecting the pictures and/or sound.
≥ Recorded data may be damaged, or pictures
may be distorted, by strong magnetic fields
created by speakers or large motors.
≥
Electromagnetic wave radiation generated by
microprocessors may adversely affect this unit,
disturbing the pictures and/or sound.
≥
If this unit is adversely affected by
electromagnetic equipment and stops
functioning properly, turn this unit off and
remove the battery or disconnect AC adaptor.
Then reinsert the battery or reconnect AC
adaptor and turn this unit on.
Do not use this unit near radio transmitters
or high-voltage lines.
≥ If you record near radio transmitters or
high-voltage lines, the recorded pictures and/
or sound may be adversely affected.
About connecting to a TV
≥ Do not use any other AV cables except the
supplied one.
≥ Always use a genuine Panasonic HDMI mini
cable (RP-CDHM15, RP-CDHM30: optional).
About connecting to a PC
≥ Do not use any other USB cables except the
supplied one.
∫ About the recording format for
recording motion pictures
You can select from AVCHD, iFrame or MP4
recording formats to record motion pictures
using this unit.
AVCHD:
It is suitable for viewing on a high-definition TV
or for saving to disc.
iFrame:
This is a recording format suitable for playing
back or editing on Mac (iMovie etc.).
≥ It is not compatible with motion pictures
recorded in AVCHD format.
MP4:
This is a recording format suitable for playing
back or editing on a PC.
≥ It is not compatible with motion pictures
recorded in AVCHD format.
∫ Indemnity about recorded
content
Panasonic does not accept any responsibility
for damages directly or indirectly due to any
type of problems that result in loss of recording
or edited content, and does not guarantee any
content if recording or editing does not work
properly. Likewise, the above also applies in a
case where any type of repair is made to the
unit.
6
SQT0034

∫ About Condensation (When
the lens or the LCD monitor is
fogged up)
Condensation occurs when there is a change in
temperature or humidity, such as when the unit
is taken from outside or a cold room to a warm
room. Please be careful, as it may cause the
lens or LCD monitor to become soiled, moldy,
or damaged.
When taking the unit to a place which has a
different temperature, if the unit is accustomed
to the room temperature of the destination for
about one hour, condensation can be
prevented. (When the difference in temperature
is severe, place the unit in a plastic bag or the
like, remove air from the bag, and seal the bag.)
When condensation has occurred, remove the
battery and/or the AC adapter and leave the
unit like that for about one hour. When the unit
becomes accustomed to the surrounding
temperature, fogginess will disappear naturally.
∫ Cards that you can use with
this unit
SD Memory Card, SDHC Memory Card and
SDXC Memory Card
≥ 4 GB or more Memory Cards that do not have
the SDHC logo or 48 GB or more Memory
Cards that do not have the SDXC logo are
not based on SD Memory Card
Specifications.
≥ Refer to page 14 for more details on SD
cards.
∫ For the purposes of this
owner’s manual
≥ SD Memory Card, SDHC Memory Card and
SDXC Memory Card are referred to as the
“SD card”.
≥ Functions that can be used for motion picture
recording/motion picture playback are
indicated by in this owner’s manual.
≥ Functions that can be used for still picture
recording/still picture playback are indicated
by in this owner’s manual.
≥ Scene(s) recorded in 1080/60i: “AVCHD
scene(s)”
≥ Pages for reference are indicated by an
arrow, for example: l 00
SQT0034
7

Contents
∫ How to open the Owner’s Manual (PDF format)
When you insert the CD-ROM and open the [INDEX.pdf] in the CD-ROM, the Owner’s Manual
list will be displayed. Click the document name of the Owner’s Manual you would like to open.
≥ Adobe Reader is required to view the PDF file. Please download it from the homepage of
Adobe Systems Incorporated.
Accessories……………………………………………. 9
Preparation
Power supply………………………………………… 10
Inserting/removing the battery …………… 10
Charging the battery ………………………… 11
Charging and recording time …………….. 13
Recording to a card ………………………………. 14
Cards that you can use with this unit ….. 14
Inserting/removing an SD card ………….. 14
Turning the unit on/off …………………………… 15
Setting date and time…………………………….. 15
Basic
Intelligent Auto Mode ……………………………. 16
Recording motion pictures ……………………. 16
Recording still pictures …………………………. 17
Using the Zoom …………………………………….. 17
Motion picture/Still picture playback ……… 18
Watching Video/Pictures on your TV ….. 19
Using the menu screen …………………………. 20
Language selection …………………………. 20
Formatting ……………………………………… 20
Others
About copyright ……………………………………. 21
Specifications……………………………………….. 22
Optional accessories …………………………….. 24
Accessory Order Form …………………….. 25
Limited Warranty
(ONLY FOR U.S.A. AND PUERTO RICO)…. 26
8
SQT0034
Accessories
Check the accessories before using this unit.
Keep the accessories out of reach of children to prevent swallowing.
Product numbers correct as of Dec. 2013. These may be subject to change.
Battery pack
VW-VBY100
AC adaptor
VSK0784
AV c abl e
K2KYYYY00223
USB cable
K2KYYYY00225
CD-ROM
Software
CD-ROM
Owner’s manual
SFM0005
SQT0034
9
Loading…
Operating Instructions High Definition Video Camera
Model No. HC-V130
Please read these instructions carefully before using this product, and save this manual for future use.
until 2014/2/1
SQT0053
HC-V130_EB_EP_GC_SQT0053_mst.book 1
HC-V130_EB_EP_GC_SQT0053_mst.book 2
About the recording format for recording motion pictures
You can select from AVCHD, iFrame or MP4 recording formats to record motion pictures using this unit. (l 41) AVCHD: It is suitable for viewing on a high-definition TV or for saving to disc. iFrame: This is a recording format suitable for playing back or editing on Mac (iMovie etc.). It is not compatible with motion pictures
recorded in AVCHD format. MP4: This is a recording format suitable for playing back or editing on a PC. It is not compatible with motion pictures
recorded in AVCHD format.
Indemnity about recorded content
Panasonic does not accept any responsibility for damages directly or indirectly due to any type of problems that result in loss of recording or edited content, and does not guarantee any content if recording or editing does not work properly. Likewise, the above also applies in a case where any type of repair is made to the unit.
About Condensation (When the lens or the LCD monitor is fogged up)
Condensation occurs when there is a change in temperature or humidity, such as when the unit is taken from outside or a cold room to a warm room. Please be careful, as it may cause the lens or LCD monitor to become soiled, moldy, or damaged. When taking the unit to a place which has a different temperature, if the unit is accustomed to the room temperature of the destination for about one hour, condensation can be prevented. (When the difference in temperature is severe, place the unit in a plastic bag or the like, remove air from the bag, and seal the bag.) When condensation has occurred, remove the battery and/or the AC adapter and leave the unit like that for about one hour. When the unit becomes accustomed to the surrounding temperature, fogginess will disappear naturally.
Cards that you can use with this unit
SD Memory Card, SDHC Memory Card and SDXC Memory Card 4 GB or more Memory Cards that do not have
the SDHC logo or 48 GB or more Memory Cards that do not have the SDXC logo are not based on SD Memory Card Specifications.
Refer to page 13 for more details on SD cards.
Read this first
HC-V130_EB_EP_GC_SQT0053_mst.book 3
For the purposes of these operating instructions
SD Memory Card, SDHC Memory Card and SDXC Memory Card are referred to as the SD card.
Functions that can be used for motion picture recording/motion picture playback are indicated by in these operating instructions.
Functions that can be used for still picture recording/still picture playback are indicated by in these operating instructions.
Scene(s) recorded in 1080/50i: AVCHD scene(s)
Pages for reference are indicated by an arrow, for example: l 00
HC-V130_EB_EP_GC_SQT0053_mst.book 4
Read this first ………………………………………….2
Preparation Names and Functions of Main Parts …………6 Power supply………………………………………….. 9
Inserting/removing the battery …………….. 9 Charging the battery ………………………… 10 Charging and recording time …………….. 12
Recording to a card ………………………………. 13 Cards that you can use with this unit ….. 13 Inserting/removing an SD card ………….. 14
Turning the unit on/off…………………………… 15 Selecting a mode …………………………………..16 Setting date and time……………………………..17
Basic Before recording ……………………………………18 Recording motion pictures …………………….19 Recording still pictures ………………………….21 Intelligent Auto Mode ……………………………. 22 Motion picture/Still picture playback ………24 Using the menu screen ………………………….26 Using the Setup Menu …………………………… 27
Advanced (Recording) Using the Zoom…………………………………….. 35 Recording functions of operation icons …..36
Operation icons ………………………………. 36 Recording functions of menus ………………. 39 Manual recording …………………………………..47
White Balance ………………………………… 48 Manual shutter speed/Iris adjustment…. 49 Recording with Manual Focus …………… 50
Advanced (Playback) Playback Operations………………………………51
Motion picture playback using operation icon …………………………………. 51 Creating still picture from motion picture …………………………………. 52 Repeat playback ……………………………… 52 Resuming the previous playback ……….. 52 Zooming in on a still picture during playback (Playback zoom) ………. 53
Various playback functions…………………….54 Playing back motion pictures/ still pictures by date …………………………. 54 Changing the playback settings and playing back the slide show ………………. 55
Deleting scenes/still pictures………………….56 Dividing a scene (AVCHD)………………… 58 Dividing a scene to partially delete (iFrame, MP4) …………………………………. 59 Protecting scenes/still pictures…………… 60
Watching Video/Pictures on your TV ………61 Connecting with a HDMI mini cable ……. 63
Playback using VIERA Link…………………….64
Copy/Dubbing Dubbing with a Blu-ray disc recorder, video devices, etc. …………………………………66 Using the Eye-Fi card………………………….70
Contents
HC-V130_EB_EP_GC_SQT0053_mst.book 5
With a PC What you can do with a PC …………………….73
End User License Agreement……………. 75 Operating environment ………………………….77 Installation …………………………………………….80 Connecting to a PC……………………………….. 81
About the PC display ……………………….. 83 Starting HD Writer LE 2.1 ………………………. 84
Reading the operating instructions of the software applications ………………. 84
If using Mac ………………………………………….. 85
Others Indications …………………………………………….86 Messages……………………………………………… 88
About recovery ……………………………….. 88 Troubleshooting……………………………………. 89 Cautions for use……………………………………. 93 About copyright ……………………………………. 96 Recording modes/ approximate recordable time…………………. 97 Approximate number of recordable pictures……………………………….. 98 Optional accessories……………………………..99
HC-V130_EB_EP_GC_SQT0053_mst.book 6
1 Speaker 2 USB terminal [ ] (l 66, 81) 3 Intelligent auto/Manual button
[iA/MANUAL] (l 22, 47) 4 Delete button [ ] (l 56) 5 Power button [ ] (l 15) 6 HDMI mini connector [HDMI]
(l 61) 7 A/V connector [A/V]
(l 61, 69) 8 Battery release lever [BATT] (l 9)
9 Lens cover opening/closing switch When not using the unit, close the lens cover to protect the lens. Slide the opening/closing switch to open/
close the cover.
10 Lens cover 11 Lens 12 Internal stereo microphones
Preparation
Names and Functions of Main Parts
A/V
1
3 4 5
86 7
2
9
11
12
10
HC-V130_EB_EP_GC_SQT0053_mst.book 7
13 Menu button [MENU] (l 26) 14 Mode switch (l 16) 15 Status indicator (l 15) 16 Recording start/stop button (l 19) 17 Cursor button (l 24, 26, 36) Use the cursor button to select the recording
functions and playback operations, and to operate the menu screen.
In these operating instructions, the cursor button is denoted as shown below or as 3/ 4/2/1. Example: For pressing the (down) button
18 Enter button [ENTER] (l 24, 26, 36) 19 LCD monitor (l 18)
It can open up to 90o.
It can rotate up to 180o A towards the lens or 90o B towards the opposite direction.
20 Battery holder (l 9)
21 SD card cover (l 14) 22 Tripod receptacle Attaching a tripod with a screw length of
5.5 mm or more may damage the unit. 23 Access lamp [ACCESS] (l 14) 24 Card slot (l 14)
or Press 4
1413 15 16
20191817
22
23
24
21
HC-V130_EB_EP_GC_SQT0053_mst.book 8
25 Photoshot button [ ] (l 21) 26 Zoom lever [W/T] (In Recording Mode)
(l 35) Thumbnail display switch [ / ]/ Volume lever [sVOLr] (In Playback Mode) (l 25)
27 Grip belt Adjust the length of the grip belt so that it fits your hand.
1 Flip the belt. 2 Adjust the length. 3 Replace the belt.
2625
27
HC-V130_EB_EP_GC_SQT0053_mst.book 9
About batteries that you can use with this unit The battery that can be used with this unit is VW-VBY100/VW-VBT190/VW-VBT380.
Inserting/removing the battery Press the power button to turn off the unit. (l 15) Install the battery by inserting it in the direction shown in the figure.
Preparation
Power supply
It has been found that counterfeit battery packs which look very similar to the genuine product are made available to purchase in some markets. Some of these battery packs are not adequately protected with internal protection to meet the requirements of appropriate safety standards. There is a possibility that these battery packs may lead to fire or explosion. Please be advised that we are not liable for any accident or failure occurring as a result of use of a counterfeit battery pack. To ensure that safe products are used we would recommend that a genuine Panasonic battery pack is used.
Removing the battery Be sure to hold down the power button until the status indicator goes off. Then remove the battery while supporting the unit to prevent it from dropping. Move the battery release lever in the direction indicated by the arrow and remove the battery when unlocked.
Insert the battery until it clicks and locks.
HC-V130_EB_EP_GC_SQT0053_mst.book 10
Charging the battery
Charging with an AC adaptor. The unit is in the standby condition when the AC adaptor is connected. The primary circuit is always live as long as the AC adaptor is connected to an electrical outlet. Important: The AC adaptor and USB cable are for use with this unit only. Do not use them with other
equipment. Similarly, do not use AC adaptors and USB cables from other equipment with this unit.
The battery cannot be charged when the power is on. Press the power button to turn off the power. (l 15)
It is recommended to charge the battery in a temperature between 10 oC and 30 oC. (The battery temperature should also be the same.)
A USB terminal B To the AC outlet Insert the plugs as far as they will go.
1 Open the LCD monitor.
2 Connect the USB cable to the AC adaptor. Check that the plug portion of the AC adaptor is not loose or misaligned.
3 Plug the AC adaptor into the AC outlet.
4 Connect the USB cable to the unit. The status indicator C will flash red with approx. 2 seconds period (off for approx. 1 second, on for
approx. 1 second), indicating that charging has begun. It will turn off when the charging is completed.
Connecting to the AC outlet If you turn on the unit while connecting with the AC adaptor, you can use the unit with power supplied from the outlet. When recording for a long time, keep the AC adaptor connected and use it together with the battery. This allows you to continue the recording even if a power failure occurs or the AC adaptor is unplugged from the AC outlet by accident.
When this unit is purchased, the battery is not charged. Charge the battery fully before using this unit for the first time.
HC-V130_EB_EP_GC_SQT0053_mst.book 11
Connecting to a PC and charging. Charge the unit if you do not have the AC adaptor handy.
A USB cable (supplied) Insert the plugs as far as they will go. Press the power button and turn the unit off. (l 15)
1 Turn the power of the PC on.
2 Connect the USB cable The status indicator B will flash red with approx. 2 seconds period (off for approx. 1 second, on for
approx. 1 second), indicating that charging has begun. It will turn off when the charging is completed.
Do not use any other USB cables except the supplied one. (Operation is not guaranteed with any other USB cables.)
Always connect directly to a PC. You cannot charge when the status indicator flashes rapidly, or when it does not light at all.
Charge using the AC adaptor. (l 10) It will take 2 or 3 times longer to charge compared to when using the AC adaptor.
If the status indicator flashes at a particularly fast or slow rate, refer to page 95. We recommend using Panasonic batteries (l 9). If you use other batteries, we cannot guarantee the quality of this product. Do not heat or expose to flame. Do not leave the battery(ies) in a car exposed to direct sunlight for a long period of time with
doors and windows closed. If you do not intend to use the unit for an extended period, disconnect the USB cable from the unit
for safety. Charging may not be possible depending on the operating environment of the PC being used
(such as custom-made PC). Charging will stop when turning the power of the PC off or forcing it into sleep mode. Charging will
start again when turning the power of the PC on again, or waking from sleep mode. When connected to a PC, an error message may be displayed at the top of the PC screen. For
more details, refer to page 91. The unit will be charged if it is connected to a Panasonic Blu-ray disc recorder or DVD recorder
with a USB cable, even if the unit is turned off.
HC-V130_EB_EP_GC_SQT0053_mst.book 12
Charging and recording time Charging/Recording time Temperature: 25 oC/humidity: 60%RH Time in the parenthesis is charging time when this unit is connected to a PC, Panasonic Blu-ray
disc recorder, or DVD recorder.
These times are approximations. The indicated charging time is for when the battery has been discharged completely.
Charging time and recordable time vary depending on the usage conditions such as high/ low temperature.
The actual recordable time refers to the recordable time when repeatedly starting/stopping recording, turning the unit on/off, moving the zoom lever etc.
The batteries heat up after use or charging. This is not a malfunction.
Battery model number [Voltage/Capacity
(minimum)]
Charging time
Recording format
Recording mode
Maximum continuously recordable
time
Actual recordable
time
Supplied battery/VW- VBY100 (optional) [3.6 V/970 mAh]
2 h 20 min (3 h 10 min)
AVCHD [HA], [HG], [HE] 1 h 15 min 40 min
iFrame — 1 h 25 min 50 min
MP4 — 1 h 30 min
VW-VBT190 (optional) [3.6 V/1940 mAh]
2 h 50 min (5 h 20 min)
AVCHD [HA], [HG] 2 h 30 min 1 h 15 min
[HE] 2 h 35 min 1 h 20 min
iFrame — 2 h 55 min 1 h 30 min
MP4 — 3 h 1 h 35 min
VW-VBT380 (optional) [3.6 V/3880 mAh]
4 h 45 min (9 h 45 min)
AVCHD
[HA] 5 h 5 min
2 h 35 min
[HG] 2 h 40 min
[HE] 5 h 10 min
iFrame — 6 h 3 h 5 min
MP4 — 6 h 10 min 3 h 10 min
Battery capacity indication The display changes as the battery capacity reduces. # # # #
If the battery discharges, then will flashes red.
HC-V130_EB_EP_GC_SQT0053_mst.book 13
The unit can record still pictures or motion pictures to an SD card. To record to an SD card, read the following.
Cards that you can use with this unit Use SD cards conforming to Class 4 or higher of the SD Speed Class Rating* for motion picture recording.
* SD Speed Class Rating is the speed standard regarding continuous writing. Check via the label on the card, etc.
Please check the latest information on the support website below. http://panasonic.jp/support/global/cs/e_cam (This website is in English only.) When using an SDHC Memory Card/SDXC Memory Card with other equipment, check the
equipment is compatible with these Memory Cards. An Eye-Fi X2 series SD card is required to use functions related to Eye-Fi. (l 70) We do not guarantee the operation of SD cards other than the ones above. Further, SD cards
with a capacity of less than 32 MB cannot be used for motion picture recording. 4 GB or more Memory Cards that do not have the SDHC logo or 48 GB or more Memory Cards
that do not have the SDXC logo are not based on SD Memory Card Specifications. When the write-protect switch A on SD card is locked, no recording, deletion
or editing will be possible on the card. Keep the Memory Card out of reach of children to prevent swallowing.
Preparation
Recording to a card
Card type Capacity SD Memory Card 512 MB/1 GB/2 GB
SDHC Memory Card 4 GB/6 GB/8 GB/12 GB/16 GB/24 GB/32 GB
SDXC Memory Card 48 GB/64 GB
e.g.:
32
HC-V130_EB_EP_GC_SQT0053_mst.book 14
Inserting/removing an SD card
Caution: Check that the access lamp has gone off.
1 Open the SD card cover and insert (remove) the SD card into (from) the card slot B.
Face the label side C in the direction shown in the illustration and press it straight in as far as it will go.
Press the centre of the SD card and then pull it straight out.
2 Securely close the SD card cover. Securely close it until it clicks.
Do not touch the terminals on the back of the SD card.
Do not apply strong shocks, bend, or drop the SD card.
Electrical noise, static electricity or the failure of this unit or the SD card may damage or erase the data stored on the SD card.
When the card access lamp is lit, do not: j Remove the SD card j Turn the unit off j Insert and remove the USB cable j Expose the unit to vibrations or shock Performing the above while the lamp is on may result in damage to data/SD card or this unit.
Do not expose the terminals of the SD card to water, dirt or dust.
Do not place SD cards in the following areas: j In direct sunlight j In very dusty or humid areas j Near a heater j Locations susceptible to significant
difference in temperature (condensation can occur.)
j Where static electricity or electromagnetic waves occur
To protect SD cards, return them to their cases when you are not using them.
About disposing of or giving away the SD card. (l 95)
When using an SD card not from Panasonic, or one previously used on other equipment, for the first time on this unit, format the SD card. (l 32) When the SD card is formatted, all of the recorded data is deleted. Once the data is deleted, it cannot be restored.
Access lamp [ACCESS] A When this unit is accessing the SD card,
the access lamp lights up.
HC-V130_EB_EP_GC_SQT0053_mst.book 15
You can turn the unit on and off using the power button or by opening and closing the LCD monitor.
Open the LCD monitor and press the power button to turn on the unit.
A The status indicator lights on.
Unit is turned on when the LCD monitor is opened, and unit is turned off when it is closed. During normal use, opening and closing of the LCD monitor can be conveniently used to turn the unit on/off. The unit will not turn off while recording motion pictures even if the LCD monitor is closed. In the following cases, opening the LCD monitor does not turn on the unit. Press the power button
to turn on the unit. j When the unit is originally purchased j When you have turned off the unit using the power button
Preparation
Turning the unit on/off
Turning the unit on and off with the power button
Turning the unit on and off with the LCD monitor
To turn off the unit Hold down the power button until the status indicator goes off.
HC-V130_EB_EP_GC_SQT0053_mst.book 16
Operate the mode switch to change the mode to or .
Preparation
Selecting a mode
Recording Mode (l 19, 21)
Playback Mode (l 24, 51)
HC-V130_EB_EP_GC_SQT0053_mst.book 17
The clock is not set at the time of purchase. Make sure to set the clock.
Change the mode to .
1 Select the menu. (l 26)
2 Select the date or time using 2/1 and set the desired value using 3/4. A Displaying the World time setting
(l 27): [HOME]/ [DESTINATION]
The year can be set between 2000 and 2039.
3 Press the ENTER button. A message prompting for World Time setting
may be displayed. Perform the World Time setting by pressing the ENTER button. (l 27) Press the MENU button to complete the setting.
When the unit is turned on for the first time, a message asking you to set the date and time will appear. Select [YES] and perform Steps 2 to 3 to set the date and time.
The date and time function is driven by a built-in lithium battery. If the time display becomes [- -], the built-in lithium battery needs to be charged.To recharge the
built-in lithium battery, connect the AC adaptor or attach the battery to this unit. The battery is still being recharged even if the unit is off. Leave the unit as it is for approx. 24 hours and the battery will maintain the date and time for approx. 4 months.
Preparation
Setting date and time
: [SETUP] # [CLOCK SET]
HC-V130_EB_EP_GC_SQT0053_mst.book 18
Basic camera positioning
1 Hold the unit with both hands. 2 Put your hand through the grip belt. When recording, make sure your footing is stable and there is no danger of colliding with another
person or object. When you are outdoors, record pictures with the sunlight behind you. If the subject is backlit, it will
become dark in the recording. Keep your arms near your body and separate your legs for better balance. Do not cover the microphones with your hand etc.
Basic motion picture recording The unit should normally be held steady when recording. If you move the unit when recording, do so slowly, maintaining a constant speed. The zoom operation is useful for recording subjects you cannot get close to, but overuse of zoom
in and zoom out can make the resulting motion picture less enjoyable to watch.
Recording yourself Rotate the LCD monitor towards the lens side. The image is horizontally flipped as if you see a mirror image.
(However, the image recorded is the same as a normal recording.) Only some indications will appear on the screen. When appears,
return the direction of the LCD monitor to normal position and check the warning/alarm indication.
Basic
Before recording
HC-V130_EB_EP_GC_SQT0053_mst.book 19
Open the lens cover before turning on the unit. (l 6)
1 Change the mode to and open the LCD monitor.
2 Press the recording start/stop button to start recording.
A When you begin recording, ; changes to .
3 Press the recording start/stop button again to pause recording.
About the screen indications in the motion picture recording
Basic
Recording motion pictures
Recording format/Recording mode
R 1h20m Approximate remaining recordable time When the remaining time is less than
1 minute, R 0h00m flashes red.
0h00m00s
Recording time elapsed h is an abbreviation for hour, m for
minute and s for second. Each time the unit is put into recording
pause, the counter display will be reset to 0h00m00s.
0h00m00s R 1h20m
HC-V130_EB_EP_GC_SQT0053_mst.book 20
To change the recording format, change the [REC FORMAT] or [REC MODE]. (l 40, 41) The images recorded between pressing the recording start/stop button to start recording and
pressing it again to pause recording become one scene. When you record with the [REC FORMAT] set to [iFrame] or [MP4], the scenes longer than approximately 20 minutes will be automatically divided. (Recording will continue.)
(Maximum recordable scenes on a single SD card)
Maximum number of recordable scenes and maximum number of different dates will be less than above table when there are iFrame or MP4 scenes and still pictures recorded on an SD card.
While recording is in progress, the recording will not stop even if the LCD monitor is closed. Please refer to page 97 for details about approximate recordable time.
Recording formats [AVCHD] [iFrame]/[MP4] Recordable scenes Approx. 3900 Approx. 89100
Different dates (l 54) Approx. 900 Approx. 900
HC-V130_EB_EP_GC_SQT0053_mst.book 21
Open the lens cover before turning on the unit. (l 6)
1 Change the mode to and open the LCD monitor.
2 Press the button.
The still picture operating display ( ) will turn red while recording still pictures.
About the screen indications in Still Picture Recording
During motion picture recording or when set to PRE-REC, you cannot record still pictures. Using a tripod is recommended when recording still pictures in dark places because the shutter
speed becomes slow. The edges of still pictures recorded on this unit with a 16:9 aspect ratio may be cut at printing.
Check the printer or photo studio before printing. Maximum number of recordable pictures that can be displayed is 9999. If the number of
recordable pictures exceeds 9999, R 9999+ is displayed. The number will not change when the picture is taken until the number of recordable pictures is 9999 or less.
The recording time may be long depending on the recording condition.
Basic
Recording still pictures
Size of still pictures (l 46)
R3000 Remaining number of still pictures Flashes in red when [0] appears.
Still picture operation indicator (l 87) R30008.9 M
8.9 M
HC-V130_EB_EP_GC_SQT0053_mst.book 22
The following modes (appropriate for the condition) are set just by pointing the unit to what you want to record.
Depending on the recording conditions, the unit may not enter the desired mode. In the Portrait, Spotlight and Low light mode, the face will be surrounded by white frame when
detected. In the Portrait mode, a subject that is bigger and close to centre of the screen will be surrounded by an orange frame. (l 45)
Faces cannot be detected depending on the recording conditions, such as when faces are of certain sizes or at certain tilts or when digital zoom is used.
Basic
Intelligent Auto Mode
Mode Effect Portrait Faces are detected and focused automatically, and the brightness
is adjusted so it is recorded clearly.
Scenery The whole landscape will be recorded vividly without whiting out the background sky, which may be very bright.
Spotlight Very bright object is recorded clearly.
Low light It can record very clearly even in a dark room or twilight.
Normal In modes other than those described above, the contrast is adjusted to give a clear picture.
Intelligent auto/Manual button Press this button to switch Intelligent Auto Mode/Manual Mode (l 47).
/MANUAL
HC-V130_EB_EP_GC_SQT0053_mst.book 23
Intelligent Auto Mode When switching to Intelligent Auto Mode, the Auto White Balance and Auto Focus operate and automatically adjust the colour balance and focusing. Depending on the brightness of the subject, etc., the aperture and shutter speed are automatically adjusted for optimum brightness. Colour balance and focus may not be adjusted automatically depending on light sources or
scenes. If so, manually adjust these settings. (l 48, 50)
Automatic White Balance The illustration shows the range over which Automatic White Balance functions. 1) The effective range of Automatic White Balance adjustment
on this unit 2) Blue sky 3) Cloudy sky (rain) 4) Sunlight 5) White fluorescent lamp 6) Halogen light bulb 7) Incandescent light bulb Sunrise or sunset 9) Candlelight If the Automatic White Balance is not functioning normally, adjust the White Balance manually. (l 48)
Auto Focus The unit focuses automatically. Auto Focus does not work correctly in the following situations.
Record pictures in the Manual Focus Mode. (l 50) j Recording distant and close-up objects at the same time j Recording a subject behind dirty or dusty window j Recording a subject that is surrounded by objects with glossy surfaces or by highly reflective
objects
4)
5)
6)
7)
10 000K 9 000K 8 000K 7 000K 6 000K
5 000K
4 000K
3 000K
2 000K
2)
1)
3)
9)
HC-V130_EB_EP_GC_SQT0053_mst.book 24
1 Change the mode to .
2 Select the play mode select icon A using 3/4/2 and press the ENTER button.
This can also be set from the menu. [VIDEO SETUP] or [PHOTO SETUP] # [MEDIA, VIDEO/PICTURE]
3 Select still picture B or motion picture C to playback using 3/4/2/1 and press the ENTER button.
If you press the MENU button, or select motion picture/still picture and press the ENTER button, the setting is complete.
When a motion picture item is selected, an icon will appear on the thumbnail display. ( , , )
4 Select the scene or the still picture to be played back using 3/4/2/1, then press the ENTER button.
When you select / and press the ENTER button, the next (previous) page is displayed.
5 Select the operation icon using 3/4/2/1.
D Operation icon
Press the ENTER button to display/not display the operation icon.
Basic
Motion picture/Still picture playback
15.11.2014 0h00m15 s
15.11.2014 0h00m15 s
0h00m00s
HC-V130_EB_EP_GC_SQT0053_mst.book 25
* When pressed two times, the fast forward/fast rewind speed increases. (The screen display changes / .)
Change the thumbnail display While the thumbnail is displayed, the thumbnail display changes in the following order if the zoom lever is operated to side or side. 20 scenes () 9 scenes () 1 scene 9 scenes display returns if the unit is turned off or the mode is
changed.
Speaker volume adjustment Operate the volume lever to adjust the speaker volume during motion picture playback.
Sound will be heard only during normal playback. If pause play is continued for 5 minutes, the screen returns to the thumbnails. The elapsed time for playback indication will be reset to 0h00m00s for each scene.
Motion picture playback Still picture playback 1/;: Playback/Pause 6: Rewind playback* 5: Fast forward playback* : Stops the playback and shows the
thumbnails.
1/;: Slide show (playback of the still pictures in numerical order) start/ pause.
2;: Plays back the previous picture. ;1: Plays back the next picture. : Stops the playback and shows the
thumbnails.
Towards r: Increases the volume
Towards s: Decreases the volume
Motion picture compatibility This unit is based on AVCHD format/MPEG-4 AVC file format. Even if the devices used have compatible standards, when playback of motion pictures
recorded using another device is performed using this unit, or when motion pictures recorded using this unit is played back in another device, playback may not proceed normally, or may not be possible. ( is displayed for motion pictures that cannot be played back with this unit) Please check compatibility in the operating instruction of your device.
MP4 motion pictures that can be played back on this unit are limited to those recorded using this unit.
Still picture compatibility This unit is compliant with the unified standard DCF (Design rule for Camera File system)
established by JEITA (Japan Electronics and Information Technology Industries Association). The file format of still pictures supported by this unit is JPEG. (Not all JPEG formatted files
will be played back.) This unit may degrade or not play back still pictures recorded or created on other products
and other products may degrade or not play back still pictures recorded on this unit.
HC-V130_EB_EP_GC_SQT0053_mst.book 26
1 Press the MENU button.
2 Press 3/4/2/1 to select the top menu A, then press the ENTER button.
3 Select the submenu B using 3/4 and press 1 or press the ENTER button.
4 Select the desired item using 3/4/2/1, and press the ENTER button to set.
To get back to the previous screen Press 2 of the cursor button.
To exit the menu screen Press the MENU button.
About the information display Descriptions of the selected submenus and items displayed in Steps 3 and 4 are displayed.
About the operation icons / :
Select and press the ENTER button to switch page.
: Select and press the ENTER button to return to previous screen.
Basic
Using the menu screen
HC-V130_EB_EP_GC_SQT0053_mst.book 27
Set the display method for the screen information display.
Please refer to page 62.
Please refer to page 17.
It is possible to display and record the time at the travel destination by selecting your home region and the travel destination. Change the mode to . 1 Select the menu.
If the clock is not set, adjust the clock to the current time. (l 17) When the [HOME] (your home region) is not set, the message appears. Press the ENTER button
and proceed to Step 3. 2 (Only when setting your home region)
Select [HOME] using 2/1 and press the ENTER button. 3 (Only when setting your home
region) Select your home region using 2/1 and press the ENTER button.
Press 3 to set daylight saving time. is displayed and the summer
time setting is turned on, the time difference between the current time and GMT will be set forward by 1 hour. Press 3 again to return to the normal time setting. If you set [Link