

- Безопасные способы оплаты
- Официальная гарантия
Наличие в магазинах
Интернет-магазин —
в наличии
Санкт-Петербург —
отсутствует
Москва —
отсутствует
Доставка на дом и в ПВЗ29 апреля — 01 мая
Самовывоз из магазинов 29 апреля — 01 мая
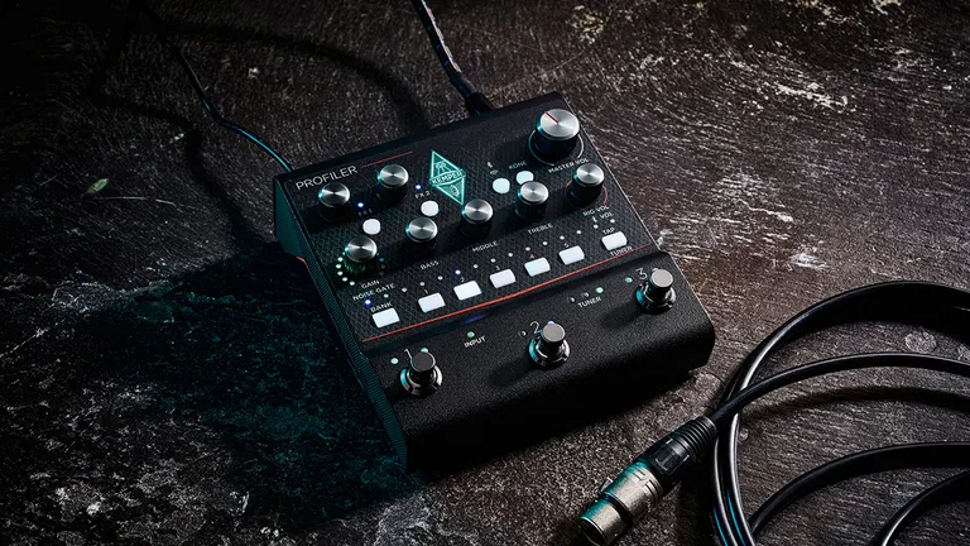
Kemper Profiler Stage – напольный цифровой гитарный процессор, предназначенный для использования гитаристами и бас-гитаристами в студии или турах. Это устройство «два в одном», сочетающее в себе моделирующий усилитель и процессор эффектов Amplifier с напольным контроллером Remote. Процессор позволяет моделировать звучание любых гитарных усилителей, передавая все нюансы и технические детали. Кроме того, встроены уже готовые профили множества популярных и узнаваемых моделей.
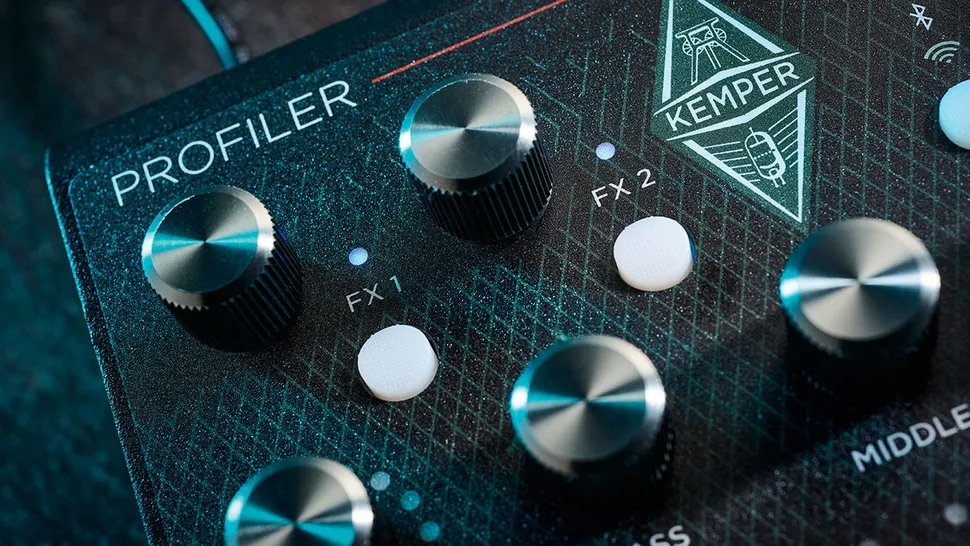
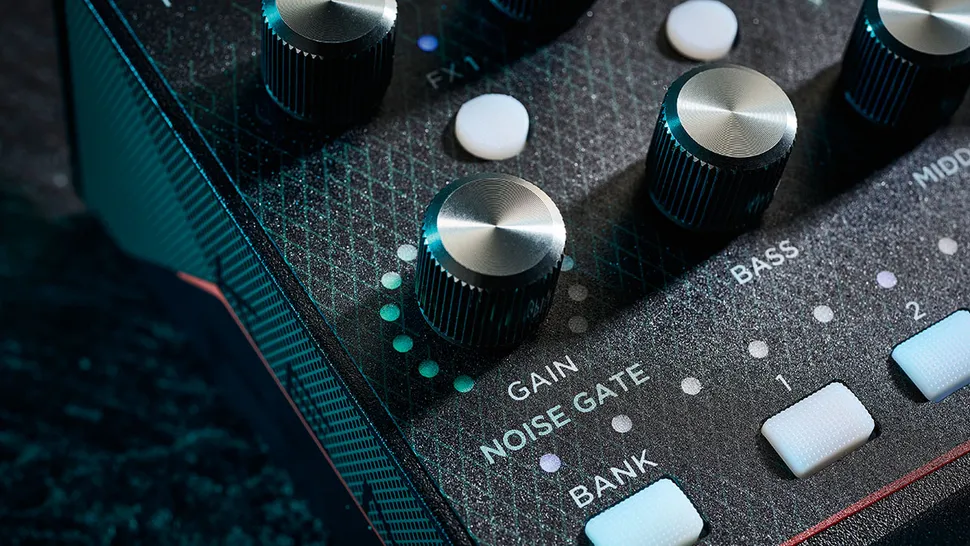
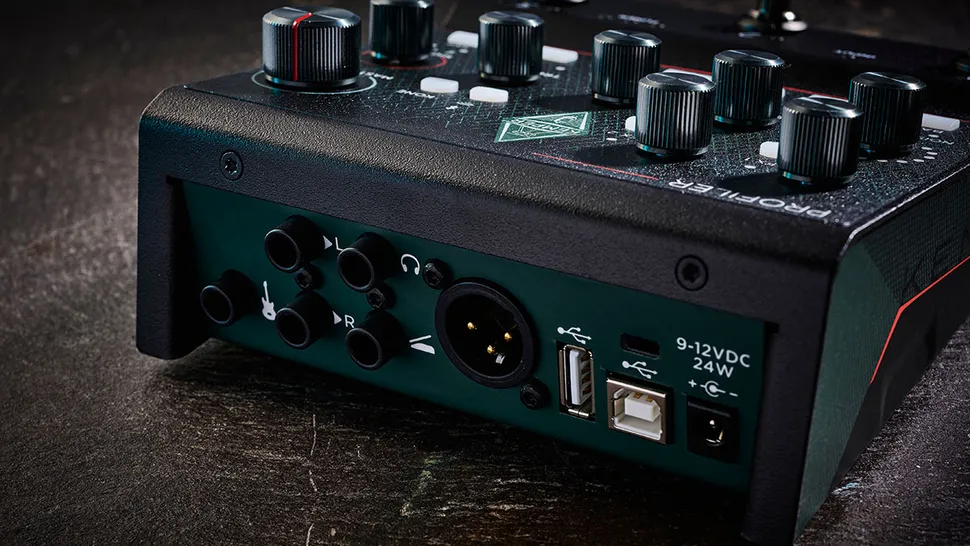
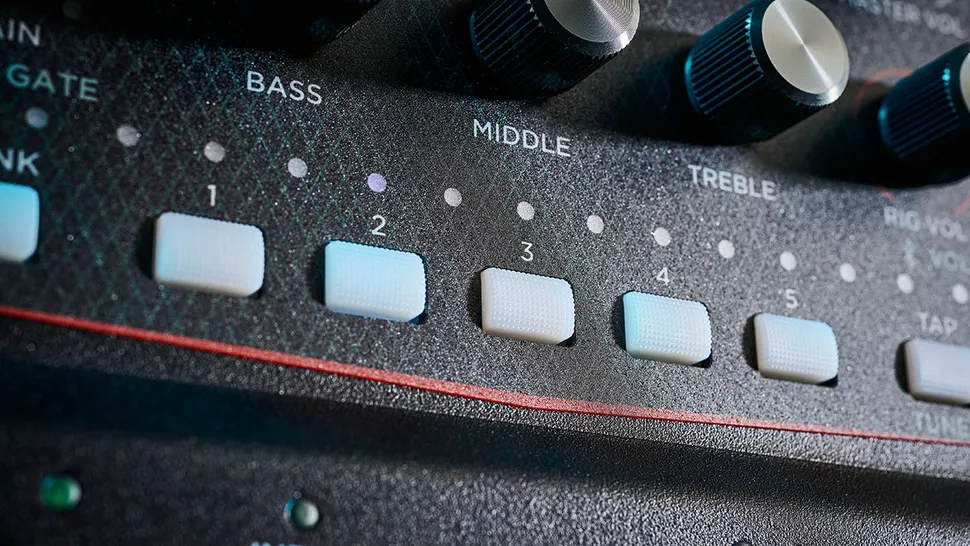
На передней панели расположены органы управления банками памяти с эффектами и усилителями, а также четыре кнопки для назначения эффектов и пять кнопок для контроля лупера, тюнера и темпа. Для кнопок предусмотрена подсветка. Встроен крупный монохромный экран с четким отображением при любом угле обзора и освещении. На задней панели находятся разъемы: два стереовыхода на мониторы для полного частотного контроля, две стереопетли эффектов для подсоединения внешних педалей, четыре входа под внешние педали экспрессии. Есть и вход/выход MIDI, вход/выход S/PDIF, порты USB-A и USB-B.
Особенности Profiler Stage:
- моделирование любых комбинаций гитарных усилителей;
- большой и яркий монохромный экран;
- подсветка кнопок;
- широкие коммутационные возможности.
Драйверы:
Скачать с официального сайта производителя
- Kemper
- Гитары Kemper
- Гитарные и басовые процессоры Kemper
Файлы для скачивания
- Инструкция для Kemper Profiler Stage (PDF 4 Мб 614 Кб)
Технические характеристики Profiler Stage:
- тип: цифровой гитарный процессор;
- аналоговые входы: небалансные 1/4 дюйма TS, динамический диапазон более 108 дБ, импеданс: регулируемый 22 кОм-1 Мом;
- аналоговый возврат: балансные 1/4 дюйма TRS с ground lift, динамический диапазон: 105 дБ, импеданс: 100 кОм;
- главный аналоговый выход L и R; балансные XLR, небалансные 1/4 дюйма TS с ground lift, максимальный выходной уровень: XLR +15 дБн, TS +15 дБн;
- мониторный аналоговый выход L и R: небалансные 1/4 дюйма TS с ground lift, максимальный выходной уровень: +15 дБн;
- аналоговый посыл 1 + 2: небалансные 1/4 дюйма TS с ground lift, максимальный выходной уровень: +15 дБн, выходной динамический диапазон: более 108 дБ;
- выход на наушники: стерео TRS 3,5 мм, 32-600 Ом, 330 мВт при 32 Ом, 220 мВт при 600 Ом;
- MIDI вход/выход/Thru: 5-контактный разъем DIN;
- переключение/педаль: 1/4 дюйма TRS, каждый для моно/стереопереключателя или педали экспрессии (импеданс минимум 10 кОм, максимум 100 кОм);
- USB: USB 2.0, USB-A и USB-B;
- цифровой вход/выход S/PDIF: 44,1/48/88,2/96 кГц (24 бита) с разъемами RCA phone на коаксиальном кабеле (мастер или ведомый);
- питание: 100-230 В AC до 0,5 А, 50-60 Гц;
- размер: 85x470x260 мм;
- вес: 4,6 кг.
Профессионально записанные профили очень аутентичны и дополнены качественными эффектами.
Помня о пользователях педалбордов, компания Kemper уменьшила размеры своего компактного проигрывателя Profiler Player.
Ориентированный на любителей и профессионалов, но, возможно, лучше всего подходящий для уже существующих пользователей Kemper, он, на наш взгляд, является хорошим соотношением цены и качества и заслуживает внимания.
Плюсы
- Впечатляющие, аутентичные тона реальных усилителей.
- Тоны охватывают широкий спектр музыкальных жанров.
- Высококачественные эффекты.
- Широкий динамический диапазон.
- Супернизкий уровень шума.
- Надежное качество сборки.
Минусы
- Первоначально элементы управления вызывают недоумение у тех, кто не является пользователем Kemper.
- Нет графического текстового дисплея.
- Нет встроенной петли эффектов.
- Многоцветные светодиоды могут быть проблемой для дальтоников.
- Необычно высокий ток питания ограничивает выбор сторонних источников питания.
Можно с уверенностью сказать, что появление усилителя Kemper Profiler в 2011 году стало революционным событием на нише цифрового моделирования усилителей. До этого момента мы были счастливы принимать программное и аппаратное обеспечение, которое нам предоставляли производители, и использовать его с разной степенью успеха.
Радикальный подход Кристофа Кемпера заключался в том, что он использовал свое фирменное программное обеспечение для извлечения ДНК звука любого усилителя и сохранения его в виде уникальной модели (профиля), которую затем можно было настраивать с помощью эквалайзера, эффектов и так далее.
С самого начала Kemper вызвал полярные мнения — были игроки, которые понимали его, и те, кто не понимал, — но со временем важное программное обеспечение было значительно доработано и улучшено.
Таким образом, Kemper не отстает от конкурентов и продолжает оставаться актуальной, предлагая новые концепции, такие как Liquid Profiles, и новые мощные продукты, включая напольную панель Profiler Stage и Kabinet. Кроме того, программное обеспечение Kemper Rig Manager было распространено на мобильные устройства под управлением Android и iOS.
Теперь появилось еще одно аппаратное дополнение, которое будет особенно интересно пользователям педалбордов, — Profiler Player. Как следует из названия, это компактный кемпер, который сосредоточен на воспроизведении ваших любимых композиций из многих тысяч существующих ригов Kemper в пределах ограничений четырех слотов для эффектов.
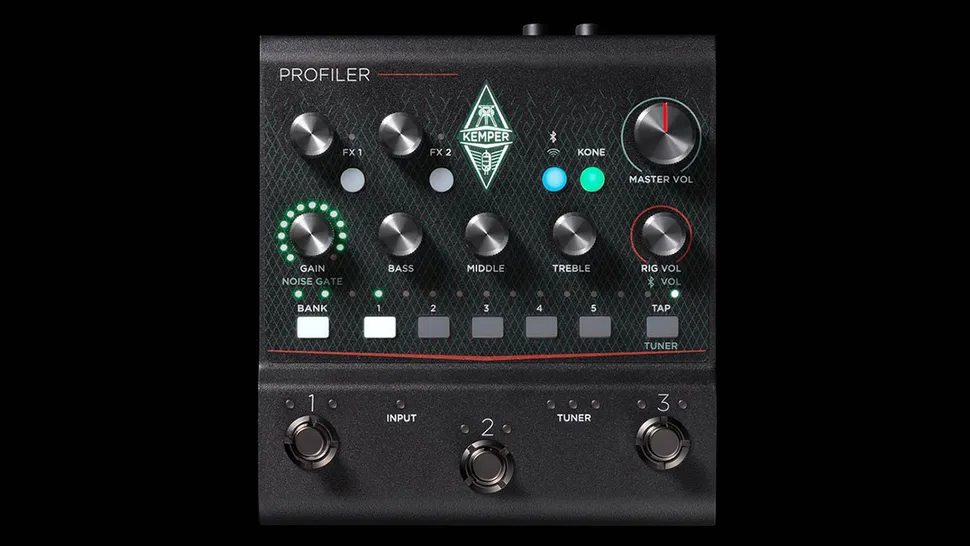
Прочная, готовая к использованию на сцене конструкция похожа на Profiler Stage, но имеет стальной корпус, окрашенный в графитовый цвет, и зеленые/серые накладки. Складная конструкция сложна, но отлично выполнена, с аккуратной перфорированной панелью на нижней стороне для вентиляции.
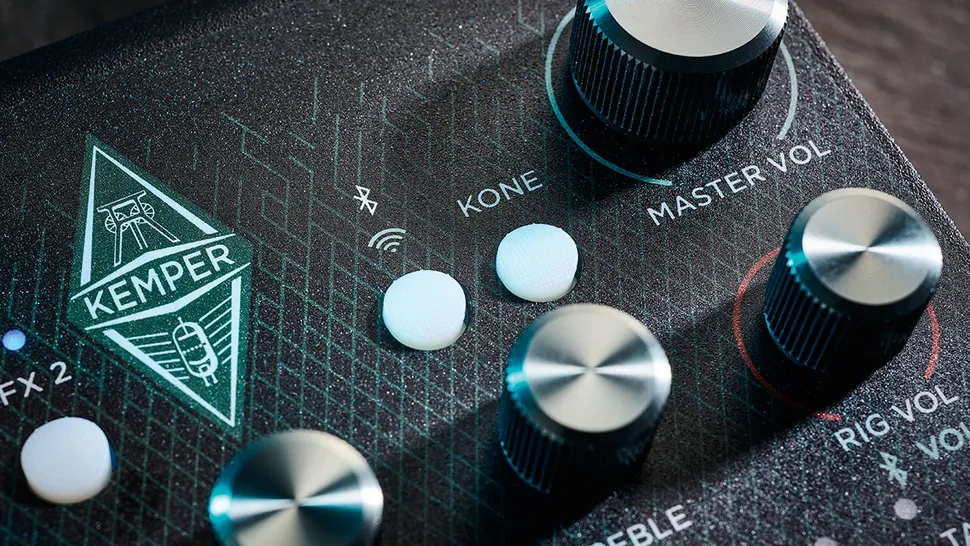
На верхней панели расположены поворотные регуляторы со встроенными кнопочными переключателями для FX, Master Volume, Gain, Bass, Middle и Treble, а также уровня Rig Volume. Кнопочные переключатели с подсветкой позволяют выбирать и редактировать различные функции, включая функции Bluetooth и Wi-Fi, а также три назначаемых педальных переключателя для тяжелых условий эксплуатации.
На задней панели устройства расположены все необходимые разъемы: один входной разъем для инструмента, стереопара выходных разъемов, разъем для педали экспрессии и гнездо для наушников, а также один балансный разъем XLR.
Есть два USB-разъема: тип A, который используется для обновления прошивки и резервного копирования, и тип B для USB-записи, MIDI и подключения к настольному Rig Manager.
Наконец, в крайней правой части задней панели находится гнездо для внешнего источника питания постоянного тока и слот для замка Кенсингтона. Profiler Player выглядит соответствующе, а за привлекательной внешней оболочкой скрывается надежная конструкция, готовая к профессиональной жизни на педалборде.
Ощущения и звук
Мы опробовали Profiler Player с нашими обычными Les Paul и Strat, подключенными к бюджетному гитарному аудиоинтерфейсу для ПК, используя USB и балансные XLR-выходы. Ожидание включения Kemper длится около 12 секунд, при этом светодиодные индикаторы банка и патча загораются белым цветом, образуя лестницу прогресса. После завершения процесса загрузки светодиоды меняются, указывая на то, что Kemper находится в активном режиме и готов к работе.
Предварительно загруженные звуки Rig в основном очень впечатляют, охватывая широкий спектр тонов гитарных усилителей с американским и британским влиянием. Они хорошо вписываются в живые и записанные миксы, как правило, практически без подстройки. Эффекты варьируются от очень хороших до превосходных, среди которых выделяются эмулятор вращающегося динамика и некоторые ревербераторы зала.
Текстового дисплея нет, поэтому с первого взгляда можно понять, о чем говорят различные разноцветные светодиоды Profiler Player. Для получения подробной информации необходимо подключить Profiler Player к приложению Rig Manager от Kemper либо через USB, либо через встроенный в плеер интерфейс Wi-Fi.
Подключение смартфона происходит быстро и легко, обеспечивая мгновенный контроль и обратную связь, хотя из-за небольшого экрана приходится пролистывать и простукивать экран. На большом настольном мониторе все гораздо проще.
К этому моменту должно быть понятно, что доскональное чтение 165-страничного руководства — не вариант; справедливости ради стоит отметить, что по мере того, как вы привыкаете к работе Kemper, рабочие процессы становятся логичными и упрощаются с практикой.
Profiler Player может хранить 50 ригов в 10 банках по пять штук, при этом разноцветные светодиоды меняют цвет на красный, зеленый, фиолетовый, синий и желтый, чтобы вы знали, в каком банке находитесь. Три педальных переключателя могут быть настроены на работу в различных режимах. Однако наиболее удобным является режим по умолчанию: две крайние кнопки переключают риги и банки, а центральная кнопка включает и выключает эффекты.
Большинство поворотных регуляторов имеют дополнительные функции, доступные при нажатии на них; например, нажатие на регулятор Gain приводит в действие входной шумовой гейт. Шумовой гейт Profile Player отлично справляется со своей задачей, позволяя легко подавить лишний гул при использовании одиночных катушек в хайгейн-патче. Он также хорошо воспринимает внешние педали, хотя в нем нет встроенной петли.
Вывод
Все больше людей говорят, что цифровые технологии наконец-то достигли совершеннолетия в области гитарного усилителя. Профессионально записанные профили, загруженные в Kemper’s Profiler Player, отличаются высокой аутентичностью и дополнены качественными эффектами.
Из коробки можно найти что-то подходящее для любого жанра — от акустического фолка до джаза, от кантри до классического рока и всех разновидностей металла, которые только можно придумать. Если вы все еще не можете найти ничего подходящего, то всегда можете просмотреть тысячи ригов Kemper, доступных в Интернете, в рамках ограничения Profile Player четырьмя модулями эффектов, два до и два после усилителя Rig.
В студии, с Rig Manager, выведенным на широкоформатный дисплей, это мощный инструмент, которым очень приятно пользоваться.
Компактные размеры Profiler Player позволяют разместить его на большинстве педалбордов, но обратите внимание на блок питания, который при включении должен выдавать внушительные 2,5 ампера, что значительно сужает выбор блоков питания сторонних производителей. Отсутствие у Player дисплея и использование разноцветных светодиодов также означает, что он, возможно, не совсем подходит для живого использования.
Однако в студии, с Rig Manager, подключенным к широкоформатному дисплею, это мощный инструмент, которым очень приятно пользоваться. Ориентированный на любителей и профессионалов, но, возможно, лучше всего подходящий для уже существующих пользователей Kemper, он, на наш взгляд, является хорошим соотношением цены и качества и заслуживает внимания.
Технические характеристики
- ЦЕНА: $698
- ПРОИЗВОДСТВО: Германия
- ТИП: Цифровой моделирующий предусилитель
- РАЗМЕРЫ: 145 (ш) x 166 (г) x 68 мм (в)
- ВЕС (кг/фунт): 1.1/2.4
- КОРПУС: Сталь
- ПОДКЛЮЧЕНИЯ: Одиночный инструментальный вход, стереофонический небалансный выходной разъем, стереофонический разъем для наушников, разъем для педали экспрессии, монофонический балансный разъем XLR. Разъем USB-A для резервного копирования и обновления прошивки, разъем USB-B для подключения к настольному ПК Rig Manager, MIDI и записи
- КАНАЛЫ: 50 ригов Kemper, организованных в 10 банков по 5, 136 встроенных эффектов
- РЕГУЛЯТОРЫ: Усиление, низкие, средние, высокие частоты, громкость установки, мастер-громкость, уровень FX1, уровень FX2. 6x кнопок выбора и сохранения банка, кнопка тапа/тюнера, кнопки выбора/редактирования FX1 и FX2, кнопка управления Bluetooth Wi-Fi, кнопка выбора Kemper Kone
- ФУТСВИТЧ: 3x встроенных педальных переключателя с пользовательским назначением
- ДОПОЛНИТЕЛЬНЫЕ ФУНКЦИИ: Потоковая передача звука по Bluetooth, подключение по Wi-Fi или USB к Kemper Rig Manager, запись звука по USB, встроенный тюнер. Слот для замка безопасности Kensington
- ПИТАНИЕ: 9-12 В постоянного тока от внешнего адаптера (в комплекте). NB: Для начального запуска требуется ток не менее 2 500 мА.
- ОПЦИИ: педаль экспрессии Mission EP1-KP, оптимизированная для Kemper, — $138; кабинет Kemper с питанием — $489
- ВАРИАНТЫ КОМПЛЕКТАЦИИ: Полноразмерная напольная панель Kemper Profiler Stage с полным набором функций стоит 1599 долларов США


PROFILER STAGE™
QUICKSTART
IN ENGLISH

4 PROFILER STAGE QUICKSTART
LEGAL NOTICE
This manual, as well as the software and hardware described in it, is furnished under license and may be used or
copied only in accordance with the terms of such license. The content of this manual is furnished for informational
use only, is subject to change without notice and should not be construed as a commitment by Kemper GmbH.
Kemper GmbH assumes no responsibility or liability for any errors or inaccuracies that may appear in this book.
Except as permitted by such license, no part of this publication may be reproduced, stored in a retrieval system, or
transmitted in any form or by any means, electronic, mechanical, recording, by smoke signals or otherwise without
the prior written permission of Kemper GmbH.
KEMPER™, PROFILER™, PROFILING™, PROFILE™, PROFILER PowerHead™, PROFILER PowerRack™, PROFILER
Stage™, PROFILER Remote™, KEMPER Rig Exchange™, KEMPER Rig Manager™, PURE CABINET™ and CabDriver™ are
trademarks of Kemper GmbH. All features and specifications are subject to change without notice. (Rev. April 2019).
© Copyright 2019 Kemper GmbH. All rights reserved.
www.kemper-amps.com

TABLE OF CONTENT
Okay, so what did I just buy? ……………………………………………………………………………………………………………………….7
Getting Started ……………………………………………………………………………………………………………………………………………….7
Making Connections …………………………………………………………………………………………………………………………………….. 8
Switching Rigs ……………………………………………………………………………………………………………………………………………….. 9
Editing and Storing Rigs ……………………………………………………………………………………………………………………………..10
Noise Gate ………………………………………………………………………………………………………………………………………………………10
Adding Eects ……………………………………………………………………………………………………………………………………………….11
Toggling Eects on/o with Eect Buttons ………………………………………………………………………………………….. 12
Tuner ……………………………………………………………………………………………………………………………………………………………….. 13
Volume Pedal ………………………………………………………………………………………………………………………………………………… 14
Wah Pedal ………………………………………………………………………………………………………………………………………………………14
5PROFILER STAGE QUICKSTART
Morph Pedal ………………………………………………………………………………………………………………………………………………….. 15
More Fun with Pedals …………………………………………………………………………………………………………………………………..16
Lock Function ………………………………………………………………………………………………………………………………………………..17
Monitoring with Guitar Cabinet ………………………………………………………………………………………………………………… 17
Keeping your PROFILER Up To Date with Rig Manager …………………………………………………………………….. 19
Documentation and Video Tutorials ……………………………………………………………………………………………………….. 22
Support and User Forum …………………………………………………………………………………………………………………………… 23
Important Safety Instructions …………………………………………………………………………………………………………………..24
Compliance Statement ……………………………………………………………………………………………………………………………….25

6 PROFILER STAGE QUICKSTART

OKAY, SO WHAT DID I JUST BUY?
First of all, thank you for choosing the KEMPER PROFILER Stage™. We have no doubt that once you realize
everything it can do, you will be as thrilled with it as we are. Our ultimate goal is to provide a complete solution for
your guitar-playing needs, which is why we choose not to restrict you to a predefined set of digital amp models. As
a result, KEMPER™ have created the first digital guitar amp that allows you to make a PROFILE™ of your own guitar
amp. You can also load a PROFILE of other guitarists’ amplifiers — and not just a simulation, but their exact digital
sound and feel!
GETTING STARTED
This chapter takes you through the first steps. It focuses on the most typical setups and applications. It covers
making connections, tuning the guitar, selecting sounds, editing sounds, adding eects, and how to control volume
and eects via pedals.
7PROFILER STAGE QUICKSTART
The PROFILER™ is also a great companion for bass players — its incredible versatility has helped convince many
professional players to make the switch as it allows them to tailor their individual sound. Please refer to the chapter
“Special features and useful hints for bass players” in our Main Manual, which provides a summary of information
relevant to bass players. Electronic copies of all manuals can be downloaded at:
www.kemper-amps.com/downloads

8 PROFILER STAGE QUICKSTART
MAKING CONNECTIONS
Connect your guitar to the INPUT on the left side of the rear panel.
If you want to use headphones, plug them into the HEADPHONE
output in the middle of the rear panel.
If you are going to play through a mixing desk, computer audio
interface or powered monitor speakers, then connect the MAIN
OUTPUTS (either XLR or TS) to the inputs of the receiving device.
Don’t forget to connect the power cable to a power outlet. Don’t
be concerned about voltage — the PROFILER adapts automatically!
Power the unit on by pressing the On/O Button in the upper left
corner of the front panel. Wait until the unit completes the boot
sequence, at which point the home screen of the Browser Mode
will appear.
Play your guitar.
Control the volume of the PROFILER with the MASTER VOLUME
knob in the middle of the unit.

SWITCHING RIGS
The PROFILER comes with numerous guitar amp setups, including
eects. These are called “Rigs”, and the library of Rigs stored on
your PROFILER is called the “Rig pool”.
The BROWSE knob at the top middle of the unit is used to browse
the Rig pool.
A window will open with the list of Rigs to browse through. After a
short time, the selected Rig will load, the window will disappear
automatically, and the home screen will reappear.
The foot switches marked as 1-5 (Rig Buttons) and Up/Down
provide another option for browsing the Rig pool.
All Rigs
Browse Rigs 45 of 108
Mark 5 MK4
Mark 5 Var Crunch
Mark 5 Var IIC+
Mark 5 Xtreme
MR Jubilee Austin
Nitro 2015 A
Nitro 2015 B
Nitro 2015 Pre
DeleteSorted by Name
Autoload
Author
FastRedPonyCar
Date
2014-04-06 09:21:19
Amp/Cab
MadRyan Jubilee
MadRyan Jubilee
9PROFILER STAGE QUICKSTART
By default, the Rigs in the pool are organized in alphabetic order.
Other options may come in handy. For instance, use the
“Sorted by…” soft button and select “By Gain” to sort the Rigs
according to the level of distortion they produce.
All Rigs Store Snapshot
Sorting
By Name
By Author
By Date
Nitro 2015 B
By Amp/Cab
By Gain
Bass Middle Treble Presence
EQNitro 2015 A DLYLOOP REV
FastRedPonyCar
Guitar Rig

10 PROFILER STAGE QUICKSTART
Intensity
~4-6
INPUT Section [Page 1/2]
5.0
Noise Gate
0.0dB
Clean Sense
0.0dB
Distortion Sense
Front Input
Input Source
EDITING AND STORING RIGS
You can tweak the current Rig and store any changes you want to
keep. For instance, if you want to boost Treble, turn the
corresponding soft knob on the home screen.
If you want to store the edited Rig, press STORE. A dialog will
open with the following options:
» “Replace” updates the original Rig without changing its name.
» “Store As” saves a new Rig with a dierent name (the original
Rig remains untouched).
» “Rename” updates and renames the current Rig.
NOISE GATE
All Rigs
Sorted by Name
Nitro 2015 B
Bass Middle Treble Presence
TYPE
STORE
All Rigs
Sorted by Name
REDO PAGE
Nitro 2015 B
Bass Middle Tr eble Presence
EQNitro 2015 A DLYLOOP REV
FastRedPonyCar
Guitar Rig
Store Snapshot
EQNitro 2015 A DLYLOOP REV
FastRedPonyCar
Guitar Rig
Store Snapshot
BROWSE
EXIT
In order to adjust the input Noise Gate intensity, press the INPUT
button and adjust the corresponding soft knob below the display.
Set the volume of your guitar all the way up and put your palm
on the strings so that they are muted. Next, increase the Noise
Gate intensity until the hum and noise produced by your guitar
disappears (usually happens in the range of 4 — 6).

For metal sounds, we recommend adding one of the special noise
gate stomps, which are explained in the Main Manual. There is also
a tutorial video dedicated to the noise gates available on:
www.kemper-amps.com/video
ADDING EFFECTS
The PROFILER features eight eects modules. Four are located
before the amplifier module (pre), and four are located after it
(post). Modules A, B, C and D are pre amplifier and X, MOD, DLY
and REV are post amplifier.
» Hold the button of an empty eect module for a moment to
bring it into focus — e.g. module D.
» Turn the BROWSE knob to select one of the pre-installed
eect presets.
Quad Harmonic
Wah Wah
Wah Low Pass
Wah High Pass
Delete Preset<— Category
Cae
Cry
Dlp Hendrix
Ibz Wh Ten
Category Type Preset
Delay
Wah
Shaper
Distortion
11PROFILER STAGE QUICKSTART
Autoload Auto Type
» Press to return to the home screen. Hold the button of
module D again to return to the edited module.
» Press the button of an eect module to activate or deactivate
the eect.
» Don’t forget to store the edited Rig!

12 PROFILER STAGE QUICKSTART
TOGGLING EFFECTS ON/OFF WITH
EFFECT BUTTONS
The PROFILER Stage oers four dedicated Eect Buttons (I to IIII)
to activate eect modules. Each can toggle a single module or a
combination of modules.
To assign (or unassign) one of the eect modules to an Eect
Button:
» Press and hold the button of the relevant eect module on
your PROFILER.
» Press the Eect button on your Remote.
» Release both buttons.
These Eect Button assignments are specific to each Rig, so you
must store the Rig to keep the changes you’ve made.

TUNER
You can check your guitar’s tuning at any time by watching the
three TUNER LEDs close to the TUNER button.
Press the TUNER button to activate Tuner Mode.
Enable “Mute Signal” via the corresponding soft button, if you
prefer the guitar input to be muted whenever Tuner Mode is
activated.
13PROFILER STAGE QUICKSTART

14 PROFILER STAGE QUICKSTART
VOLUME PEDAL
So-called “expression pedals”, which are optimized for digital devices like the PROFILER, should be used for all pedal
functions.
Connect your expression pedal to the PEDAL 1 input socket on the rear side of the PROFILER Stage. You will be able
to control volume right away.
The functionality of the Volume Pedal, for example whether it is placed pre or post the amplifier, can even vary by
Rig. Please find more information in a dedicated chapter about the Volume Pedal in the Main Manual.
When you bring your Volume Pedal down to heel position, the Tuner activates automatically, and you can tune your
guitar silently. This feature is optional and can be deselected in the Tuner Mode.
WAH PEDAL
Connect the expression pedal to PEDAL 2 input of your PROFILER Stage. From now on, this pedal will control the
expression of an eect. For instance, the position of your wah eect, or the pitch of pedal-pitch eects, and also
Morphing, which we will introduce in the next paragraph.
To complete this setup, you first need to dial up a wah eect in your current Rig. Now, bring an eect module into
focus as described in the above paragraph Adding Eects. Search for a wah preset by turning the BROWSE knob and
load it. The new eect will instantly respond to the pedal.

MORPH PEDAL
Morphing allows you to change any number of continuous
parameters like Gain level, Delay Mix or Delay Feedback
simultaneously — all with a single expression pedal. Moving
the pedal is equivalent to turning all those knobs at the same
time to move between one sound and another. We distinguish
between these two sounds with the terms “Base Sound” and
“Morph Sound”. Here’s a simple application:
The expression pedal used to control wah eects (as described in
the previous paragraph) is already primed to control Morphing as
well.
First, move the pedal to heel position. Turn the GAIN knob to
select the intended level for your Base Sound.
Move the pedal to toe position. Turn the GAIN knob and select the
intended level for your Morph Sound.
15PROFILER STAGE QUICKSTART
Now, your Morph Pedal changes the gain continuously between
the values associated with the Base and the Morph Sounds.
To continue, add the next continuous parameter you’d like to
morph. Don’t forget to store the Rig to keep all the changes you’ve
made.

16 PROFILER STAGE QUICKSTART
Morphing is explained in detail in the Main Manual plus there are
also Video Tutorials dedicated to this subject available on:
www.kemper-amps.com/video
MORE FUN WITH PEDALS
Here a few tips related to linking and checking pedal controllers:
Press the PEDALS button to access several pages of global
settings. These are settings that don’t vary by Rig. Use the
<PAG E> buttons to navigate through these pages.
WahPedal > Vol. MorphPedal > WahWahPedal > Pitch MorphPedal > Pitch
Morph (CC11)
[Page 5/18]
0
Morph Pedal0Wah Pedal
Wah (CC01)
Volume (CC07)
Pitch (CC04)
Volume Pedal0Pitch Pedal
127
System Settings
Pedal Links
Locate the “Pedal Links” page. This page helps you ensure that
all your pedals are set up properly. It shows the “levels” of all
pedal controllers. Moving a pedal results in a change of the
corresponding pedal controller(s) on screen. No movement on
screen means that there is an issue with either the cable, the
controller assignment of the pedal, or the pedal itself.
Details on the assignments can be found in the Main Manual and a
Video Tutorial available on:
www.kemper-amps.com

LOCK FUNCTION
Certain aspects of a Rig can be locked to prevent them changing
when you load another Rig. Find a Rig which features a wah eect,
then select the wah while holding the LOCK button. Now, load a
completely dierent Rig. As you can see, the wah stays at the
exact position. To unlock a module, hold LOCK and select it.
To display which modules are currently in a locked state, hold the
LOCK button. Any locked modules will remain lit.
MONITORING WITH GUITAR CABINET
This paragraph is for those who want to use an external power
amp to drive a guitar cabinet. Please be aware that, generally
speaking, the sound of a guitar cabinet is dierent compared to
that of a full-range cabinet, PA, or headphones.
17PROFILER STAGE QUICKSTART
Use a TS cable to connect the upper MONITOR OUTPUT with the
inputs of your external power amp. For stereo use two TS cables
connected to both MONITOR OUTPUTS.
You are using a physical guitar cabinet as your personal monitor.
This means you need to disable the cabinet simulation for the
signal feeding the internal power amp and your physical guitar
cabinet. You do this by pressing OUTPUT.

18 PROFILER STAGE QUICKSTART
Use the <PAGE> buttons to navigate to the “Output Source” page
and then activate “Monitor Cab O ” with the corresponding soft
button above the display.
If you are using two guitar cabinets, select “Master Stereo” instead
of “Master Mono” as source of the MONITOR OUTPUT.
Use the MASTER VOLUME knob on the front panel to control your
volume.
If you’re on stage or in a studio, you won’t require a microphone to
pick up your sound, so you should connect the mixing desk to the
MAIN OUTPUTS XLR outs.
Main Out -12 dB Monitor Cab O
OUTPUT Section [Page 1/6]
Output Source
Master Stereo
Main Output
Master Mono
Monitor Output
Git+Processing
Direct Output
Master Stereo
SPDIF Output
In such a scenario, you should unlink the Main Output Volume from
Master Volume, so that you are able to control your Monitor
Volume independently from the level sent to the mixing desk.
OUTPUT Section [Page 2/6]
Output Volumes
-12.0dB
Main Volume
Monitor Volume
-12.0dB
-12.0db
Direct Volume
Headphone LinkMonitor Out Link Direct Out LinkMain Out Link
-12.0db
Headphone Vol.

KEEPING YOUR PROFILER UP TO DATE WITH
RIG MANAGER
Rig Manager™ is a free software companion for your PROFILER. The application helps you to:
» Get access to more than 14 000 free Rigs and dozens of additional high-quality Rig Packs.
» Sort, arrange and preview Rigs, Presets and Performances.
» Update your PROFILER operating system with the latest software and feature additions.
» Browse all manuals.
OPERATING SYSTEM UPDATES
Digital technology makes it easy to keep your purchase up to date and acquire new, free features over time. Think of
it like having better tubes beamed into your trusty vintage amp.
19PROFILER STAGE QUICKSTART
In order to download the latest and greatest version, you must first create a user account. Once this is done, there are
two methods to update your PROFILER: If a computer and internet connection is in reach, use Rig Manager to keep
your amp up to date. In all other cases, copy the updates to a USB memory stick and plug it into your PROFILER.
CREATING A KEMPER USER ACCOUNT
» Point your internet browser to www.kemper-amps.com/start and select “Sign Up”.
» Click on “Not a member yet? Sign Up” and fill in the required fields.
» Make sure you register your PROFILER at the same time, as this way you get access to software updates and
more. You need the serial number to register, which can be found on a sticker on the underside of the product.

20 PROFILER STAGE QUICKSTART
» Shortly after registration, you’ll receive a confirmation e-mail from us. Use the confirmation link in this e-mail to
activate your user account. If you should need further assistance, contact our support team here:
www.kemper-amps.com/contact
» Once the account is activated, you can download updates, additional Rigs and also participate in discussions on
our private user forum:
www.kemper-amps.com/forum
DOWNLOAD RIG MANAGER AND OTHER UPDATES
» Point your browser to www.kemper-amps.com/start
» Log into our website.
» Choose “Updates”, proceed to the download section and
select the category “Rig Manager”. Choose the version for your
computer and download the installer.
» Extract the installer and run it, following the onscreen
instructions.
» Open Rig Manager and follow the onscreen instructions.
The username and password required are identical to the
credentials used on our website. Use the option “Test your
Login Credentials” to verify that your account can be accessed.

SOFTWARE UPDATE VIA RIG MANAGER
To update your PROFILER with the latest software available,
simply connect it to your computer using a standard USB cable as
illustrated below.
Open Rig Manager and make sure that your PROFILER is switched
on. If software updates are available, Rig Manager will ask you for
permission to install them after a couple of minutes. The whole
procedure might take some time, initially.
SOFTWARE UPDATE VIA USB MEMORY STICK
» This update method requires you to prepare an empty USB memory stick, download software, and copy it over
to the stick.
» Connect the USB memory stick to your PROFILER.
21PROFILER STAGE QUICKSTART
» If the USB stick is already formatted, the top row of the display will show “USB Stick”. Press the corresponding
soft button, select and execute “Format USB Stick”. Once completed, you will be notified.
» If the USB stick is not formatted, the PROFILER will show “Are you sure? USB stick needs to be formatted”.
Acknowledge the dialog with “Yes” and follow the onscreen instructions.
» Point your internet browser to: www.kemper-amps.com/start, choose “Updates”, proceed to the downloads
section and select the category “Operating System Updates”. Download the update and open the archive. Copy
the file “kaos.bin” from the archive to the “OS Updates” folder on your USB stick. Make sure that you read the
enclosed ReadMe as well as the Addendum Manual.
» Plug the USB stick into your PROFILER and an update dialog will appear shortly after. Acknowledge the update
and follow the onscreen instructions.

22 PROFILER STAGE QUICKSTART
For any critical application we recommend using the latest release version. The Main Manual contains more about the
advantages and disadvantages of software beta versions.
DOCUMENTATION AND VIDEO TUTORIALS
We hope you will find operating the PROFILER straightforward, but if you need more information please check out
our manuals.
If you want to create a PROFILE of a tube amplifier yourself or want to learn more about specific parameters in
the eects or the amplifier PROFILE, if your intended technical setup is not that common, or you are interested in
technical specifications, the Main Manual covers all these subjects in detail. It is updated with any major new software
release. The Main Manual is available on our download page in several languages.
www.kemper-amps.com/downloads
Each major software revision comes with an Addendum Manual. This manual is for users who are already familiar with
the PROFILER and just want to know what changes and enhancements are in the latest software update.
Also, check out our web page. We are constantly extending our list of Video Tutorials on:
www.kemper-amps.com/video

SUPPORT AND USER FORUM
Even though we do our best to address everything you need to know in these manuals and videos, we would like to
invite you to contact our support team at any time using the contact form on our website:
www.kemper-amps.com/contact
For those of you who would like to discuss ideas and questions with other users, we would like to invite you to our
online forum which can be found here:
www.kemper-amps.com/forum
23PROFILER STAGE QUICKSTART

24 PROFILER STAGE QUICKSTART
IMPORTANT SAFETY INSTRUCTIONS
Read these instructions. Keep these instructions. Heed all warnings. Follow all instructions.
» Do not use this apparatus near water. Clean only with dry cloth.
» Do not block any ventilation openings. Install in accordance with the manufacturer’s instructions. Do not install
near any heat sources such as radiators, heat registers, stoves, or other apparatus (including amplifiers) that
produce heat.
» Do not defeat the safety purpose of the polarized or grounding-type plug. A polarized plug has two blades with
one wider than the other. A grounding type plug has two blades and a third grounding prong. The wide blade
or the third prong are provided for your safety. If the provided plug does not fit into your outlet, consult an
electrician for replacement of the obsolete outlet.
» Protect the power cord from being walked on or pinched particularly at plugs, convenience receptacles, and the
point where they exit from the apparatus.
» Only use attachments and accessories specified by the manufacturer.
» Unplug this apparatus during lightning storms or when unused for long periods of time.
» Refer all servicing to qualified service personnel. Servicing is required when the apparatus has been damaged
in any way, such as power-supply cord or plug is damaged, liquid has been spilled or objects have fallen into the
apparatus, the apparatus has been exposed to rain or moisture, does not operate normally, or has been dropped.
» The apparatus shall not be exposed to drippings or splashing and no objects filled with liquids (such as vases)
shall be placed on the apparatus. Warning! To reduce the risk of fire or electric shock, do not expose this
apparatus to rain or moisture.
» The apparatus should be connected to a properly grounded
(earthed) outlet. Ensure that under any circumstance, the
power plug can be easily reached.
Kemper GmbH KEMPER PROFILER
Tested To Comply with
FCC Standards
FOR HOME OR OFFICE USE
» The apparatus is not for outdoor use.

COMPLIANCE STATEMENT
KEMPER PROFILER Stage complies with the following standards regulating interference and EMC: FCC Verification
procedure – 47CFR §15.101
Other Class B digital devices and peripherals: EN 55032 + EN55035
RADIO AND TELEVISION INTERFERENCE
This equipment has been tested and found to comply with the limits for a Class B digital device, pursuant to Part 15
of the FCC Rules.
SUMMARY OF COMPLIANCE WITH NATIONAL DIFFERENCES
List of countries addressed: Compliance with the National requirements of the CENELEC countries as given in CB
Bulletin was also confirmed. (CENELEC= Belgium, Bulgaria, Denmark, Germany, Estonia, Finland, France, Greece,
Ireland, Iceland, Italy, Latvia, Lithuania, Luxembourg, Malta, the Netherlands, Norway, Austria, Poland, Portugal,
Romania, Sweden, Switzerland, Slovakia , Slovenia, Spain, the Czech Republic, Hungary, the United Kingdom and
Cyprus). The national dierences for USA, Canada, Australia/New Zealand and Korea as given in CB Bulletin have
been checked. The requirements of the following countries have also been checked and found to include no national
dierences: Malaysia, South Africa, Ukraine, China, Thailand, Kazakhstan and Russia.
25PROFILER STAGE QUICKSTART
DECLARATION OF CONFORMITY
We, Kemper GmbH, Königswall 16-18, 45657 Recklinghausen Germany, Tel: +49 (2361) 9376824, declare under our
sole responsibility that the product PROFILER Stage complies with Part 15 of FCC Rules. Operation is subject to the
following two conditions:
(1) this device may not cause harmful interference.

26 PROFILER STAGE QUICKSTART
(2) this device must accept any interference received, including interference that may cause undesired operation.
COMMUNICATION STATEMENT
NOTE: This equipment has been tested and found to comply with the limits for a Class B digital device, pursuant to
Part 15 of the FCC Rules. These limits are designed to provide reasonable protection against harmful interference in
a residential installation. This equipment generates, uses, and can radiate radio frequency energy and, if not installed
and used in accordance with the instructions, may cause harmful interference to radio communications. However,
there is no guarantee that interference will not occur in a particular installation. If this equipment does cause harmful
interference to radio or television reception, which can be determined by turning the equipment o and on, the user
is encouraged to try and correct the interference by one or more of the following measures:
Reorient or locate the receiving antenna. Increase the separation between the equipment and receiver. Connect the
equipment into an outlet on a circuit dierent from that to which the receiver is connected. Consult the dealer or
an experienced radio/TV technician for help. Any modifications to the unit, unless expressly approved by Kemper
GmbH, could void the user’s authority to operate the equipment.

PROFILER STAGE™
SCHNELLSTART
IN DEUTSCH

28 PROFILER STAGE QUICKSTART
RECHTLICHE HINWEISE
Dieses Handbuch sowie alle in dieser Publikation genannten Hard- und Software-Produkte obliegen einem speziellen
Lizenzvertrag. Diese Vertragsbestimmungen wurden bei der Erstellung dieses Handbuchs eingehalten. Der Inhalt
dieses Handbuchs ist rein informell und kann zu jeder Zeit, ohne Vorankündigung von der Kemper GmbH geändert
werden. Die Kemper GmbH haftet nicht für inhaltliche Fehler. Ohne schriftliche Genehmigung der Kemper GmbH
ist es nicht zulässig, diese Publikation oder Teile davon zu reproduzieren und/oder in schriftlicher und/oder
elektronischer Form zu veröentlichen noch anderweitig zugänglich zu machen.
KEMPER™, PROFILER™, PROFILING™, PROFILE™, PROFILER PowerHead™, PROFILER PowerRack™, PROFILER
Stage™, PROFILER Remote™, KEMPER Rig Exchange™, KEMPER Rig Manager™, PURE CABINET™ und CabDriver™
sind eingetragene Warenzeichen der Kemper GmbH. Änderungen der technischen Daten und Funktionen ohne
vorherige Ankündigung vorbehalten. (Rev. April 2019)
© Copyright 2019 Kemper GmbH. Alle Rechte vorbehalten.
www.kemper-amps.com

TABLE OF CONTENT
Was ist eigentlich ein PROFILER? ……………………………………………………………………………………………………………. 31
Erste Schritte …………………………………………………………………………………………………………………………………………………31
Anschließen ………………………………………………………………………………………………………………………………………………….. 32
Rigs wechseln ……………………………………………………………………………………………………………………………………………….33
Rigs verändern und speichern ………………………………………………………………………………………………………………….34
Noise Gate …………………………………………………………………………………………………………………………………………………….. 35
Eekte hinzufügen ………………………………………………………………………………………………………………………………………36
An- und Abschalten von Eekten mittels der Fußtaster …………………………………………………………………… 37
Tuner ………………………………………………………………………………………………………………………………………………………………. 38
Volumenpedal ……………………………………………………………………………………………………………………………………………….39
Wah-Pedal …………………………………………………………………………………………………………………………………………………….. 39
29PROFILER STAGE QUICKSTART
Morph-Pedal ………………………………………………………………………………………………………………………………………………… 40
Noch mehr Spaß mit Pedalen…………………………………………………………………………………………………………………….41
Lock-Funktion ………………………………………………………………………………………………………………………………………………42
Abhören über eine Gitarrenbox ……………………………………………………………………………………………………………….. 42
Den PROFILER mit Rig Manager auf dem neusten Stand halten …………………………………………………… 44
Dokumentation und Video-Tutorials ………………………………………………………………………………………………………..47
Support und User-Forum …………………………………………………………………………………………………………………………..48
Wichtige Sicherheitshinweise ……………………………………………………………………………………………………………………49
Erklärung zur Einhaltung von Bestimmungen …………………………………………………………………………………….. 50

30 PROFILER STAGE QUICKSTART
Loading…
Kemper Profiler Stage – напольный цифровой гитарный процессор, предназначенный для использования гитаристами и бас-гитаристами в студии или турах.
Это устройство «два в одном», сочетающее в себе моделирующий усилитель и процессор эффектов Amplifier с напольным контроллером Remote. Процессор позволяет моделировать звучание любых гитарных усилителей, передавая все нюансы и технические детали. Кроме того, встроены уже готовые профили множества популярных и узнаваемых моделей.
На передней панели расположены органы управления банками памяти с эффектами и усилителями, а также четыре кнопки для назначения эффектов и пять кнопок для контроля лупера, тюнера и темпа. Для кнопок предусмотрена подсветка. Встроен крупный монохромный экран с четким отображением при любом угле обзора и освещении. На задней панели находятся разъемы: два стереовыхода на мониторы для полного частотного контроля, две стереопетли эффектов для подсоединения внешних педалей, четыре входа под внешние педали экспрессии. Есть и вход/выход MIDI, вход/выход S/PDIF, порты USB-A и USB-B.
Особенности Profiler Stage:
- моделирование любых комбинаций гитарных усилителей;
- большой и яркий монохромный экран;
- подсветка кнопок;
- широкие коммутационные возможности.
Характеристики:
Технические характеристики Profiler Stage:
- тип: цифровой гитарный процессор;
- аналоговые входы: небалансные 1/4 дюйма TS, динамический диапазон более 108 дБ, импеданс: регулируемый 22 кОм-1 Мом;
- аналоговый возврат: балансные 1/4 дюйма TRS с ground lift, динамический диапазон: 105 дБ, импеданс: 100 кОм;
- главный аналоговый выход L и R; балансные XLR, небалансные 1/4 дюйма TS с ground lift, максимальный выходной уровень: XLR +15 дБн, TS +15 дБн;
- мониторный аналоговый выход L и R: небалансные 1/4 дюйма TS с ground lift, максимальный выходной уровень: +15 дБн;
- аналоговый посыл 1 + 2: небалансные 1/4 дюйма TS с ground lift, максимальный выходной уровень: +15 дБн, выходной динамический диапазон: более 108 дБ;
- выход на наушники: стерео TRS 3,5 мм, 32-600 Ом, 330 мВт при 32 Ом, 220 мВт при 600 Ом;
- MIDI вход/выход/Thru: 5-контактный разъем DIN;
- переключение/педаль: 1/4 дюйма TRS, каждый для моно/стереопереключателя или педали экспрессии (импеданс минимум 10 кОм, максимум 100 кОм);
- USB: USB 2.0, USB-A и USB-B;
- цифровой вход/выход S/PDIF: 44,1/48/88,2/96 кГц (24 бита) с разъемами RCA phone на коаксиальном кабеле (мастер или ведомый);
- питание: 100-230 В AC до 0,5 А, 50-60 Гц;
- размер: 85x470x260 мм;
- вес: 4,6 кг.
Характеристики
Тип товара
Гитарные процессоры эффектов
148 630 р. предложить свою цену
Код товара: 38750
Гарантия: 12 месяцев
Статус:
38750
НОВИНКА!
Напольный моделирующий усилитель и процессор эффектов
Kemper Profiler Stage
24 июля 2019 года немецкая компания Kemper представляет своей широкой публике новинку — уникальный симбиоз флагманского моделирующего усилителя и процессора эффектов Profiler и напольного контроллера Remote — Kemper Profiler Stage. 2 в 1. И никаких компромиссов. Модель Stage обладает полным спектром звуковых и функциональных возможностей Profiler с таким же полным функционалом контроллера Remote. Данное сочетание и воплощение в Profiler Stage — это именно то, чего ждали многие гитаристы и желали заиметь в свой риг. И Kemper осуществляет это желание!
Основные особенности устройства
|
Технология Profiler Уникальная запатентованная технология Profiler позволяет Вашему Кемперу снимать максимально точный слепок с любой гитарной головы, запоминая мелчайшие нюансы и технические детали звучания усилителя. Вы будто проникаете в саму схему прибора и делаете цифровую копию в банк памяти своего Profiler. |
|
|
Функционал Remote Форм-фактор напольного устройства по типу стандартных гитарных педалей и процессоров эффектов наиболее универсален: такие устройства прекрасно проявляют себя не только в студии, но и в условиях гастролей, где большую роль играет размер и удобство транспортировки. |
|
|
Дисплей Отдельно хотелось бы отметить дисплей новинки июля 2019 года от компании Kemper. Дело в том, что новая модель Kemper Profiler Stage удостоилась того же монохромного дисплея, что и её старшие собратья. В то время, как многие компании-конкуренты во всю используют красочные сенсорные экраны, данное решение Kemper для многих может показаться как минимум странным. Однако, немецкая компания ловко парирует вопросы по выбору в пользу яркого монохрома тем неоспоримым фактом, что данный дисплей, во-первых, прекрасно проявляет себя при любом освещении, будь то солнечный день с большим количеством света или тёмный ночной клуб, а во-вторых, обладает устойчиво чётким отображением информации при любом угле обзора. Немецкая скрупулёзность и расчётливость в деле! |
|
|
Коммутация и расширение функционала Кроме рассмотренного выше богатейшего внутреннего и внешнего функционала передней панели, Profiler Stage предлагает внушительную базу для расширения своего потенциала, представленную коммутационными возможностями на задней панели. А именно:
|
Особенности устройства с сайта производителя
- Kemper’s flagship modeling amplifier, now with integrated remote
- Three operating modes: Browser, Performer, and Profiler
- Pre-loaded with hundreds of the most requested guitar/bass rigs
- Thousands of free rigs available within the Rig Exchange cloud
- Dedicated stomps for Rig cycling, Performance stepping, and Stomp toggling
- Bright display holds up to indoor/outdoor stage environment
- Loaded with digital and analog I/O
- Stereo FX loop for integration with your stereo FX pedals
- MIDI I/O allow for remote switching
- 1/4″ footswitch and expression pedal inputs unlock even great hands-free performance control