
Читайте наши статьи
Эксплуатация кофемашины в зимний период
Что происходит с кофемашиной при длительном нахождении в помещении с низкой температурой? Перевозили кофемашину в багажнике — что теперь от неё ожидать?

Скидка на ремонт кофемашины
Получите 20% скидку на ремонт или обслуживание вашей кофемашины, а также при заказе кофе «Coffee-Everyday» у нас.

Уход за кофемашиной: рекомендации и советы
Как увеличить срок экслуатации вашей кофемашины или кофеварки? Как влияет качество воды на долговечность системы? Как правильно определить момент обсуживания?
Выезд мастера по Москве и ближайшим городам Подмосковья
Все инструкции для кофемашин Bosch вы можете скачать бесплатно в формате (.pdf). Если вы пытались устранить неисправность по книжке и ничего не получилось, то позвоните в нашу мастерскую. Все цены и другую информацию по ремонту кофемашин Bosch вы найдете на нашем сайте.
Если у кофемашины Bosch произошел сбой в работе, то на дисплее загорится код ошибки или предупреждение о мелкой неисправности. Это позволяет ориентировочно понять причину неполадки.
| Error 1 | Вышел из строя термодатчик (NTC-датчик) на пароблоке, необходимо обратиться в сервисный центр. |
| Error 2 | NTC-датчик находится за пределами диапазона измерений температуры. Кофемашина охладилась до температуры ниже +5°С или NTC-датчик вышел из строя. |
| Error 5 | Вышел из строя термодатчик (NTC-датчик) на термоблоке. |
| Error 8 | Ошибка редуктора (привода) кофемашины, не удалось инициализировать заварочный блок (ЦЗУ), поршень ЦЗУ не может быть перемещен в верхнее положение. |
| Brewing unit missing | Центральное заварное устройство кофемашины отсутствует или заблокировано. |
| Fill up pipe-system | Воздушная пробка в системе. |
| Empty trays | Заполнен поддон отработанного кофе (жмыха). |
| Add beans | Закончилось кофе. Засыпьте кофейные зерна в контейнер для зерен кофемашины. |
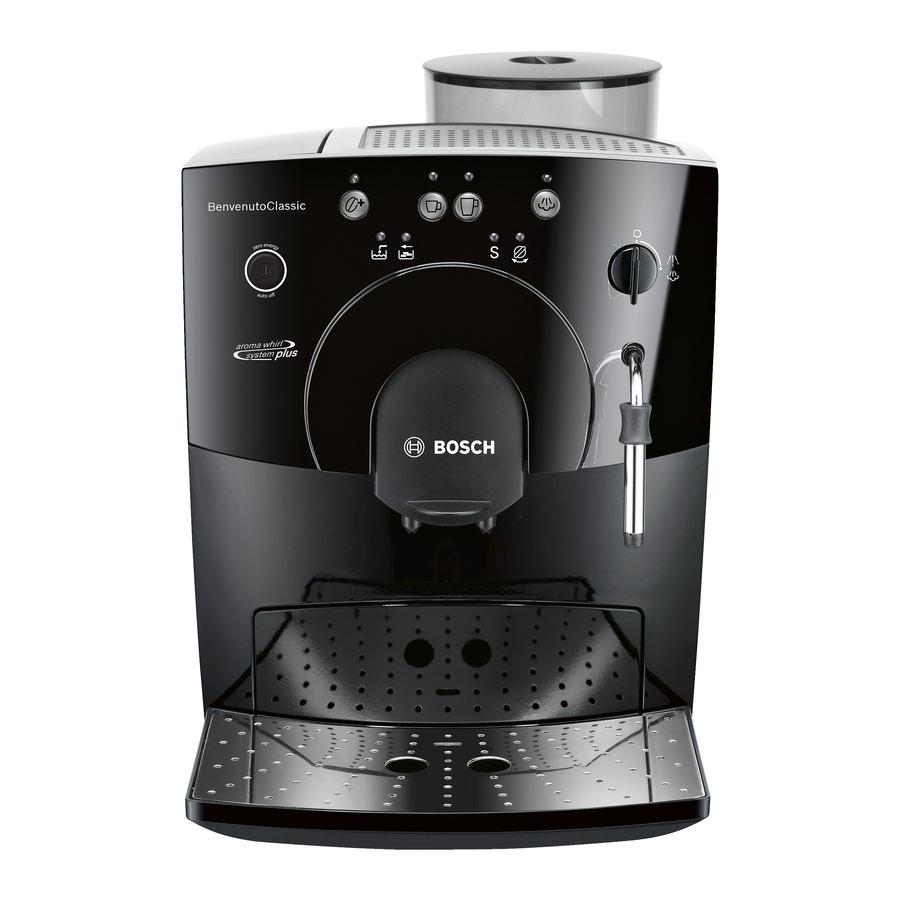
View the manual for the Bosch Benvenuto Classic TCA5401 here, for free. This user manual comes under the category coffee makers and has been rated by 18 people with an average of a 8.2. This manual is available in the following languages: English. Do you have a question about the Bosch Benvenuto Classic TCA5401?
Ask your question here
Bosch Benvenuto Classic TCA5401 specifications
Below you will find the product specifications and the manual specifications of the Bosch Benvenuto Classic TCA5401.
The Bosch Benvenuto Classic TCA5401 is a coffee maker that delivers reliable and efficient performance with its state-of-the-art features. Designed to brew delicious coffee in a matter of minutes, this coffee maker is perfect for those who love a good cup of coffee without having to wait too long. Equipped with a powerful 1600 watt motor, it ensures fast heating and efficient brewing.
The coffee maker is equipped with a conical grinder that grinds the beans evenly, ensuring that the coffee has a consistent taste and aroma. With its aroma protection lid, the coffee beans remain fresh and fragrant. The TCA5401 also features an intuitive control panel that simplifies the brewing process, allowing users to adjust the settings according to their preferences.
The water tank has a capacity of 1.5 liters, making it suitable for small to medium sized households. Cleaning the machine is also a breeze, as it comes with a removable brewing unit and a water filter that removes impurities. The TCA5401 is also designed to be energy-efficient, with an automatic shut-off feature that saves power when not in use.
Overall, the Bosch Benvenuto Classic TCA5401 is a reliable and efficient coffee maker that delivers delicious coffee in a matter of minutes. With its intuitive control panel, powerful motor, and easy-to-clean design, it is a great investment for any coffee lover.
General
| Brand | Bosch |
| Model | Benvenuto Classic TCA5401 |
| Product | coffee maker |
| Language | English |
| Filetype | User manual (PDF) |
Frequently asked questions
Can’t find the answer to your question in the manual? You may find the answer to your question in the FAQs about the Bosch Benvenuto Classic TCA5401 below.
What is the best way to descale my coffee maker?
To descale the coffee maker, it is recommended to use a liquid descaling agent which is labelled as suitable for coffee machines.
How often should I descale my coffee maker?
How often a coffee machine needs to be descaled depends on how often it is used and the hardness of the water.
If hard water is used it is recommended to descale once a month, if soft water is used once a quarter is sufficient.
What does the grind say about the taste of the coffee?
How the coffee beans are ground strongly influences the taste of the coffee. If the coffee beans are very finely ground you will have a stronger taste and if the grind is coarser you will have a milder taste.
What is espresso?
Espresso is a small amount of concentrated coffee.
How long can I keep coffee beans?
The best-before date can be found on the packaging of the coffee beans. This best-before date applies as long as the bag is closed.
What is the best way to store coffee?
It is recommended to store coffee in an airtight and clean container.
Is the manual of the Bosch Benvenuto Classic TCA5401 available in English?
Yes, the manual of the Bosch Benvenuto Classic TCA5401 is available in English .
Is your question not listed? Ask your question here
Bosch TCA5309 Series Benvenuto Classic Manual
Safety instructions
Please read these instructions carefully and keep for future reference!
This fully automatic espresso machine is designed for preparation of small amounts of coffee for domestic use or for use in non-commercial, householdlike environments, such as staff kitchens in shops, offices, agricultural and other small businesses or for use by guests at bed-and-breakfast establishments, small hotels and similar residential facilities.
Risk of electric shock!
Connect and operate the appliance only in accordance with the specifications on the rating label.
Do not use if either the power cord or the appliance is damaged.
Use indoors at room temperature only.
This appliance is not intended for use by persons (including children) with reduced physical, sensory or mental capabilities, or lack of experience and knowledge, unless they have been given supervision or instruction concerning use of the appliance by a person responsible for their safety.
Keep children away from the appliance. Children should be supervised to ensure that they do not play with the appliance. In the event of malfunction, unplug the appliance immediately.
To avoid potential hazards, repairs such as replacing a damaged cord should only be performed by our service personnel.
Never immerse the appliance or power cord in water.
Do not reach into the grinding unit.
Use the appliance only in frost free rooms.
Risk of scalding!
The nozzle for hot water and steam 8 gets very hot. Hold the nozzle 8 by the plastic part only, not by the metal parts. When steam or hot water is released, the nozzle 8 may initially sputter.
Overview


- Power switch (on/off) auto off
- Coffee strength button
- Coffee dispensing button
- Coffee dispensing button
- Steam generation button
- Hot water / steam dial
- LED display
- Add water
- Empty tray
- Run service programme S
- Turn dial
- Nozzle (for hot water / steam)
- Plastic mounting
- Sleeve
- Nozzle tip
- Height- adjustable coffee outlet
- Lid for water tank
- Removable water tank
- Bean container with aroma cover
- Cleaning tablet duct
- Cup shelf (warming function)
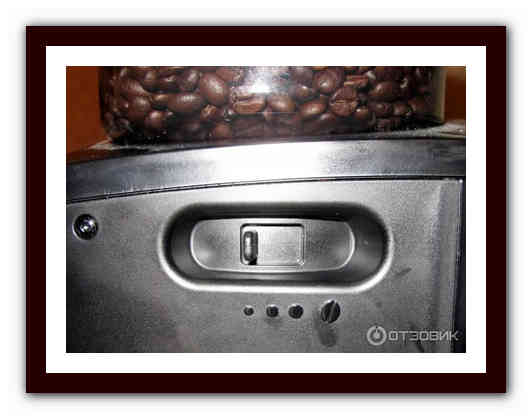
- Sliding switch for adjusting grind
- Grate
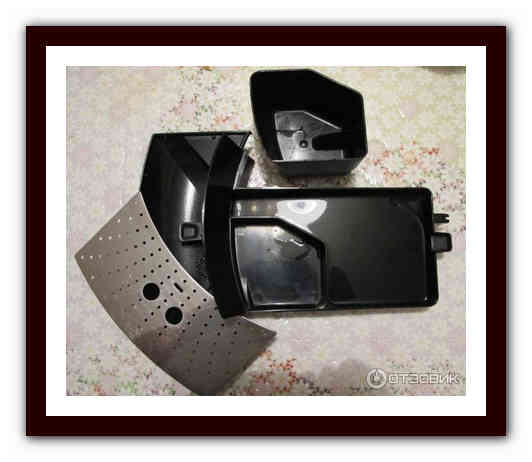
- Coffee grounds tray
- Residual water tray
- Float
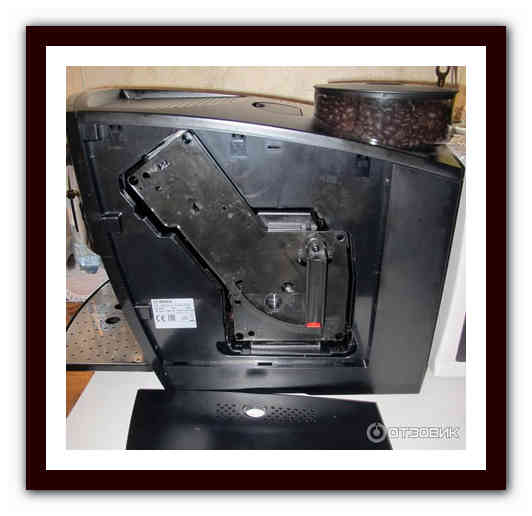
- Cord storage compartment
- Doors to brewing unit
- Brewing unit
- Button (red)
- Handle
Before using for the first time
General
Fill the water tank with fresh, uncarbonated water only, and if possible, use only beans for fully automatic coffee and espresso machines. Do not use coffee beans that have been glazed, caramelized or treated with other additives containing sugar, since they will block the grinding unit. This appliance can be adjusted for use with different water hardness values (see «Set ting the water hardness»).
Switching on the appliance
- Place the appliance on a flat, water resistant surface.
- Pull enough of the power cord out of the storage compartment and plug it into the electrical socket.
- Remove and rinse the water tank 11 and fill it with fresh cold water. Do not fill above the «max» mark.
- Replace the water tank 11 and push it firmly down into place.
- Fill the bean container with coffee beans.
- Make sure that the hot water / steam dial 6 is at «O«.
- Press the power switch 1 auto off to switch on the appliance.
Filling the system
When switched on for the first time, the water pipes in the appliance must be filled.
The appliance is ready for use as soon as both LEDs light up.
Controls
Power switch auto off
The auto off power switch can be used to turn the power supply on or off. After switching on the power supply, the appliance heats up, rinses and is then ready for use. The dispensing buttons 3 and 4 both light up. The appliance does not rinse if it is still warm when switched on.
If the appliance is not manually switched off, it will switch off automatically after approx. 10 minutes after the last dispens ing operation and then rinse. The pre set switch off time can be changed (see section «Automatic Switch Off auto off»). The appliance will not rinse if:
- there was no coffee drawn after switching on the machine.
- steam was drawn shortly before switching off the machine.
- only hot water or steam were drawn.
Coffee strength button
By pressing the button , the coffee strength can be set:
LED does not light = Normal setting
LED lights = Strong setting
LED flashing = Bean container empty
Dispensing button Small coffee
With this button, a small cup (approx. 40ml) of coffee can be dispensed.
- Press the button 3 . The LED will start to flash. The coffee is ground, brewed and poured into the cup. Both LEDs light up as soon as the process is finished.
The beverage size can be changed (see section «Changing volume dispensed»).
Dispensing button Large coffee
With this button, a large cup F Large coffee (approx. 125ml) of coffee can be dispensed.
- Press the button 4 . The LED will start to flash. The coffee is ground, brewed and poured into the cup. Both LEDs light up as soon as the process is finished.
The beverage size can be changed (see section «Changing volume dispensed»)
Steam generation button
The steam button generates steam for foaming or warming.
Steam dispensing dial
Hot water or steam can be dispensed by turning the dial to or . To dispense steam, the steam generation button must be pressed first (see «Steam for foam ing milk»).
LED display
The various LEDs indicate the following:
| on | The water tank is empty and needs to be filled |
| on | Trays full: Empty and replace them |
| flashing | Trays missing: Reinsert them |
| S on | Run the service programme (see «Service programme») |
| S flashing | Service programme in operation |
| on | Turn dial to |
| flashing | Turn dial to «O« |
Settings and displays
Setting the water hardness
It is important that the water hardness be set correctly, so that the appliance indicates accurately when the descaling programme should be run. The factory setting is a water hardness of 4.
You can check the water hardness by asking your local water supplier.
| Degree | Water hardness | |
| German (° dH) | French (° fH) | |
| 1 | 1 7 | 1 13 |
| 2 | 8 15 | 14 27 |
| 3 | 16 23 | 28 42 |
| 4 | 24 30 | 43 54 |
The appliance must be ready for use.
If a water filter (optional extra Order No. 461732) is used, the water hardness should be set to 1.
Note: If no button is pressed within 90 s econds, the appliance switches to stand by mode without saving the new settings. In this case, the previous water hardness setting is retained.
The appliance must be rinsed when a filter is first used and after changing the filter.
- Fill the tank with water up to the «0,5 l» mark.
- Place a suitable container (approx. «0,5 l») under the nozzle 8.
- Set the dial 6 to .
- When water stops coming out of the nozzle 8, set the dial back to «O«.
- Fill the water tank and the water pipes
(see «Switching on the appliance / Filling the system»).
Adjusting the grinding unit
Sliding switch 15 adjusts the degree of grinding, from coarse to fine.
Adjust the grinding unit only while it is running! Otherwise the appliance may be damaged.
Tip: For dark roast coffee beans, choose a coarser grind; for light roast beans, select a finer grind.
Automatic switch-off auto off
The pre set automatic switch off time of approx. 10 minutes can be changed.
- To do this, press and hold the dispensing button 3 and the button 5 at the same time for at least 5 seconds. The LEDs that light up, 7a, b, c and d ( , , S, ), represent the switch off time set.
By pressing the button 5 the switch-off time can be selected: the switch LED 7a ( ) lights up
= Appliance switches off after approx. 10 minutes.
LED 7a and 7b ( , )
= Appliance switches off after approx. 30 minutes.
LED 7a, 7b and 7c ( , , S ) light up
= Appliance switches off after approx. 1 hour.
LED 7a, 7b, 7c and 7d ( , , S, )
= Appliance switches off after approx. 4 hours.
Pressing button 2 saves the s election.
Setting the temperature
This fully automatic coffee machine allows the user to change the temperature of the coffee.
- To do this, press and hold the dispensing buttons 3 and 4 at the same time for at least 5 seconds. The LEDs that light up, 7a, b and c ( , , S ), represent the temperature set. By pressing the button 5 , the temperature can now be selected:
LED 7a ( ) lights up
= Low temperature
LED 7a and 7b ( , ) light up
= Medium temperature.
LED 7a, 7b and 7c ( , , S ) light up
= High temperature.
Pressing button 2 saves the selection.
Float
The float 19 in the water tray 18 showswhen the tray needs emptying.
- If the float 19 is clearly visible, empty the water tray 18.
Using coffee beans
This fully automatic espresso / coffee machine grinds beans freshly for each brew. If possible, use only beans for fully automatic coffee and espresso machines.
Deep freeze or store in a cool place in sealed, airtight containers. Coffee beans can be ground while frozen.
Fill the water tank with fresh water every day. The tank must always contain sufficient water for operating the appliance. Do not allow it to become empty.
Tip: Pre warm cups, especially small, thick espresso cups, by placing on the cup shelf 14 or rinsing with hot water.
The appliance must be ready for use.
It is possible to dispense the same amount of coffee a second time.
Note: The second cup is brewed using the previously ground coffee.
Changing volume dispensed
The pre set quantities for dispensing button 3 (approx. 40ml) and dispensing button 4 (approx. 125 ml) can be changed.
Reset: The appliance must be ready for use.
The standard factory settings have now been reactivated.
Preparing hot water
The appliance must be ready for use.
This function allows water to be heated for a cup of tea, for example.
The nozzle gets very hot. Do not touch the metal parts.
- Place an appropriate cup under the nozzle 8.
- Push the sleeve on the nozzle 8 all the way down.
- Turn the dial 6 to .
Risk of scalding
When the dial is set to , the nozzle may sputter a little. Do not touch the nozzle 8 or point it at anyone.
- End the process by turning the dial 6 back to «O«.
Steam for foaming milk
The appliance must be ready for use. You can foam the milk first and add the coffee on top, or foam the milk separately and pour it into the coffee.
The nozzle gets very hot. Do not touch the metal parts.
- Push the sleeve on the nozzle 8 all the way down.
- Fill the cup approximately 1/3 full of milk.
- Press the steam button . The LED will start to flash.
The appliance will heat up for approx. 20 seconds.
- Immerse the nozzle 8 deep into the milk, but do not let it touch the bottom of the cup.
- As soon as the LED J lights up, turn the rotary button 6 to .
Risk of scalding
When the dial 6 is set to , the nozzle 8 may sputter. Escaping steam is very hot and may cause liquids to sputter. Do not touch the nozzle 8 or point it at anyone.
Note: When the nozzle 8 has cooled down, clean immediately. Dried residue is difficult to remove.
Tip: If possible, use cold low fat (1,5% fat) milk.
Steam for heating drinks
The nozzle gets very hot. Do not touch the metal parts.
The appliance must be ready for use.
- Push the sleeve on the nozzle 8 all the way up.
- Press the steam button . The LED will start to flash.
The appliance will now heat up for approx. 20 seconds.
Risk of scalding
When the dial 6 is set to , the nozzle 8 may sputter a little. Escaping steam is very hot and may cause liquid to sputter. Do not touch the nozzle 8 or point it at anyone.
- End the process by turning the dial 6 back to «O».
To generate more steam, press the steam butto again and repeat the whole process.
Note: When the nozzle 8 has cooled down, clean immediately. Dried residue is difficult to remove.
Maintenance and daily cleaning
Risk of electric shock!
Unplug the appliance before cleaning it.
Never immerse the appliance in water.
Do not use a steam cleaner.
- Wipe the outside of the appliance with a damp cloth. Do not use scouring agents.
- Always remove any limescale, coffee, milk or descaling fluid residue immedi ately. Such residue can cause corrosion.
- Wash all removable parts by hand only.
- Rinse out the water tank 11 with water only.
- Remove, empty and clean the trays for coffee grounds 17 and residual water 18.
- Wipe out the inside of the appliance (tray holders).
- Open the door to the brewing unit 21 and remove any coffee residues. Close the door.
Note: If the appliance is cold when switched on, or if it is switched off after dispensing coffee, it rinses automatically; in other words the system cleans itself.
Nozzle for hot water / steam
- Unscrew the nozzle 8 from the steam pipe.
- Dismantle all parts.
- Clean with a caustic cleaning solution and a soft brush. Clean the tip of the nozzle 8c with a blunt needle.
- Thoroughly rinse and dry all parts.
Brewing unit
The brewing unit can be removed for cleaning.
- Switch off the appliance using the power switch 1 auto off.
- Open the door 21 to the brewing unit 22.
- Hold the red button 22a down and push the handle 22b up until you hear it engage.
- Grasp the brewing unit 22 by the handle, remove carefully, and rinse under running water. Do not use cleaning agents. Do not place in the dishwasher.
- Vacuum the inside of the appliance, or clean it with a damp cloth.
- Reinsert the brewing unit 22 all the way into the appliance.
- Hold the red button 22a down and push the handle 22b down as far as it goes, until you hear it engage. The brewing unit is now secure.
- Close the door of the brewing unit.
Service programme
Combined cleaning and descaling process
If the S LED lights up while the appliance is on, the service programme must be run immediately to clean and descale the appli ance. If the service programme is not run as instructed, the appliance may be damaged.
Specially developed descaling (Order No. 310967) and cleaning agents (Order No. 310575) can be obtained from our customer service department.
Each time you run the service programme, follow the instructions for using the cleaning and descaling agents.
Never interrupt the service programme!
Do not drink the liquids!
Never use vinegar or vinegar based products!
Never put descaling tablets or other des caling materials into the duct for cleaning tablets!
The S LED flashes while the service pro gramme is running (approx. 40 minutes).
If there is a filter in the water tank, it must be removed before the service programme is run.
Starting the service programme
The appliance must be ready for use.
The S LED starts to flash and the appliance rinses the coffee dispenser through twice.
- Empty and reinsert the grounds tray 17.
The LEDs for button and «Add water» light up.
- Place one cleaning tablet in the duct 13.
- Fill the water tank with lukewarm water, add descaling agent and dissolve com pletely (total liquid 0,5 litres)
or
pour prepared descaling mixture into the water tank (total liquid 0,5 litres). - Press the steam button process begins. Duration approx. 10 min . The descaling utes. The descaling solution flows into the water tray 18.
The LED lights up.
- Place a suitable container (approx. 0,5 litres) under the nozzle 8.
- Set the dial 6 to . The descaling process begins. Duration approx. 5 min utes. The descaling solution flows into the container.
The LED lights up
- Empty and reinsert the grounds tray 17.
The steam button LED lights up.
- Empty and clean the water tank 11, fill with fresh water up to the «max» mark and reinsert.
- Place a suitable container (approx.0,5 litres) under the nozzle 8.
- Press the steam button . The cleaning process begins. Water flows into the container.
The LED flashes.
- Turn the dial 6 to «O». The cleaning process begins. Duration approx. 10 minutes. Liquid flows into the coffee grounds tray 17 inside the appliance, then out through the coffee outlet.
The LED lights up.
- Empty, clean and reinsert the trays 17 and 18.
The appliance starts to heat up and is ready for use once the LEDs for dispensing buttons 3 and 4 light up.
If the service programme is interrupted, e.g. due to a power cut, it is vital that the appliance be rinsed before it is used again.
The appliance must be ready for use.
The and steam button LEDs flash.
- Rinse the water tank 11 thoroughly and fill with fresh water.
- Press the steam button is rinsed and liquid flows into the tray.
The LED lights up.
- Hold a cup under the nozzle 8 and turn the dial 6 to . Water runs into the cup.
The LED flashes.
- Turn the dial 6 back to «O».
The appliance rinses and is ready for use again.
Anti-freeze
In order to avoid damage through cold during transportation and storage, the appli ance must be emptied completely first.
The appliance must be ready for use.
Disposal
This appliance is labelled in accordance with the European Directive 2002/96/EG relating to waste electrical and electronic equipment – WEEE. The directive provides the framework for the EU wide take back and disposal of end of life appliances.
Please ask your specialist retailer about current disposal facilities.
Guarantee
The guarantee conditions for this appliance are as defined by our representative in the country in which it is sold. Details regarding these conditions can be obtained from the dealer from whom the appliance was pur chased. The bill of sale or receipt must be produced when making any claim under the terms of this guarantee.
Right of modification reserved.
Troubleshooting
| Problem | Possible cause | Solution |
| No hot water or steam discharge. | Nozzle 8 is blocked. | Clean nozzle 8. |
| Foam insufficient or too runny. | Sleeve b on nozzle 8 not in correct position. | Push down sleeve b on nozzle 8. |
| Milk not suitable for foaming. | Use cold low fat (1,5% fat) milk. | |
| Coffee dispensing slows to a trickle. | Coffee is ground too fine. | Adjust the grinding unit to a coarser setting. |
| Coffee not dispensed. | Water tank not filled or not correctly positioned. | Fill water tank and make sure it is in the right posi tion. If necessary, fill water pipes (see «Switching on the appliance»). |
| Coffee has no «crema» (creamy foam). | Unsuitable type of coffee. Beans no longer fresh. | Change type of coffee used. Use fresh beans. |
| Degree of grinding inappro priate for beans. | Optimize degree of grinding. | |
| Grinding unit does not grind the beans. | Beans are not falling into the grinding unit (beans too oily). | Gently tap the bean container. |
| Grinding unit makes a loud noise. | Foreign objects in the grind ing unit (e.g. grit, which can be found even in superior types of coffee). | Call the hotline. |
| LED S and button flash alternately. | The brewing unit 22 is missing, or is not properly inserted or secured. | Insert and secure the brewing unit 22. |
| If you are unable to solve the problem, please call the hotline. You will find the telephone numbers at the back of these instructions. |
Documents / Resources
Download manual
Here you can download full pdf version of manual, it may contain additional safety instructions, warranty information, FCC rules, etc.
Download Bosch TCA5309 Series Benvenuto Classic Manual
Кофемашина BOSCH TCA 5201 BENVENUTO classic piano.
BOSCH TCA 5201 BENVENUTO аннотация, отзывы, свойства
TCA 5201 BENVENUTO classic piano свойства
Кофемашина BOSCH TCA 5201 отзывы
Достоинства:
- очень прекрасный дизайн, отлично впишется в интерьер,
- не занимает много места,
- варит очень смачный кофе и капуччино,
- отлично взбивает пенку,
- работает стремительно и отменно,
- высококачественный капуччинатор,
- отменная стоимость, дешевая машинка,
- высококачественный пластик аппарата,
- просто умывается,
- огромные комфортные емкости для кофе,
- регулировка помола, количества и крепости кофе,
- неплохой экспрессо,
- имеет программку самоочистки.
Недочеты:
- малость гулкая при помоле кофе, его изготовлении и самоочистке.
Кофемашина BOSCH TCA 5201 BENVENUTO отзывы составлены на базе 49 отзывов юзеров в Yandex Маркет.
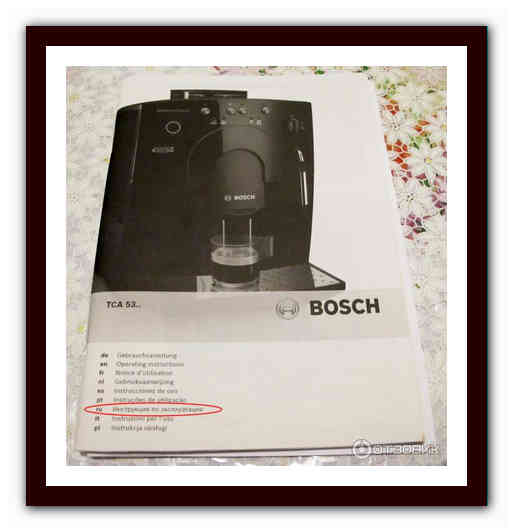
BOSCH TCA 5201 аннотация. Как скачать аннотацию?
TCA 5201 аннотация просто скачивается, сначала странички перед Вами будет таблица:
Жмите правой кнопкой на изображении PDF, после этого отыскиваете в перечне «Сохранить как», дальше сохраняете на Вашем ПК кофемашина BOSCH TCA 5201 аннотация на российском языке, к примеру:
И последний шаг, выбираете папку, в какой желаете сохранить кофемашина BOSCH TCA 5201 аннотация, к примеру на десктопе:
Возлагаем надежды, у вас вышло отыскать аннотация к кофеварке BOSCH, скачать и удачно ею пользоваться. Хотим Для вас приятного использования вашей техникой. Отыскать управление к другим видам техники компании BOSCH, вам доступна ровная ссылка для скачки tca 5201 benvenuto classic piano управление юзера на российском языке.
Bosch TCA 5201 Benvenuto Classic Piano.


Аннотации и файлы
Чтоб ознакомиться с аннотацией изберите файл в перечне, который вы желаете скачать, нажмите на кнопку Загрузить и вы перейдете на страничку, где нужно будет ввести код с рисунки. При правильном ответе на месте рисунки появится кнопка для получения файла.
Если в поле с файлом есть кнопка Просмотр, это означает, что можно просмотреть аннотацию онлайн, без необходимости закачивать ее на компьютер.
В случае если материал по вашему не полный либо нужна дополнительная информация по этому устройству, к примеру драйвер, дополнительные файлы к примеру, прошивка либо микропрограмма, то вы сможете задать вопрос модераторм и участникам нашего общества, которые постараются оперативно отреагировать на ваш вопрос.
Также вы сможете просмотривать аннотации на собственном устройстве Android
Свойства
Общие свойства: Наибольшее давление — 15
Функции: Интегрированная мельница — да
Питание: Мощность номинальная — 1400
BOSCH TCA 5309 Benvenuto Classic аннотация по эксплуатации онлайн , страничка 14.
Аннотация BOSCH TCA 5309 Benvenuto Classic для устройства кофемашина содержит странички на российском языке.
Перейти на страничку загрузки файла этой аннотации: Скачать PDF
Robert Bosch Hausgerate GmbH
Пуск сервисной программки
Устройство должен быть готов к
? Освободите и опять установите на
нажатыми более 5 секунд.
мигать, и устройство
промывку со сливом воды через
устройство подачи кофе.
17 и установите его
на прежнее место.
Загораются светодиодные индикаторы
? Загрузите в шахту
13 одну чистящую
? Заполните емкость для воды чуток
теплой водой, добавьте средство для
удаления накипи и стопроцентно раство
рите его в воде (общий объем воды
залейте в емкость для воды готовую
смесь для удаления накипи (общий
объем воды 0,5 литра).
удалять накипь. Продолжительность процесса:
около 10 минут. Жидкость для удаления
накипи перетекает в поддон
Сияет светодиодный индикатор
? Подставьте под насадку
большой и высочайший сосуд (приблизительно
? Установите поворотный регулятор
процесс удаления накипи в течение
приблизительно 5 минут. Жидкость для удале
ния накипи перетекает в сосуд.
Сияет светодиодный индикатор
17 и установите его
на прежнее место.
Сияет светодиодный индикатор
? Освободите емкость для воды
стите ее, заполните водой до отметки
«max» и опять установите на место.
? Поставьте под насадку
большой сосуд (приблизительно 0,5 литра).
промывку, вода перетекает в сосуд.
? Установите поворотный регулятор
6 в положение «O», сейчас устройство
Отзыв: Автоматическая кофемашина Bosch Benvenuto Classic Piano TCA 5309 , Отменная и не дорогая кофемашина (по сопоставлению с другими). +видео.
Здрасти. Желаю поведать для вас про восхитительную кофемашину Bosch TCA 5309.

Купила я её примерно 6 месяцев вспять, в подарок супругу на день рождение. Он очень издавна желал кофе машину, как он гласил: Желаю магии, встать днем, надавить на кнопку и готов для тебя свежесваренный, благоуханный кофе! Скажу сходу, я НЕ кофеман, потому ранее не понимала эту тягу к кофе, которую испытывали мои родственники (мать, супруг, брат), но когда появилась эта кофе машина, я просто не смогла устоять, запах кофе (его дух) стоит по всей квартире и даже на лестничной клеточке, он так зазывает и манит, что даже словами тяжело передать.
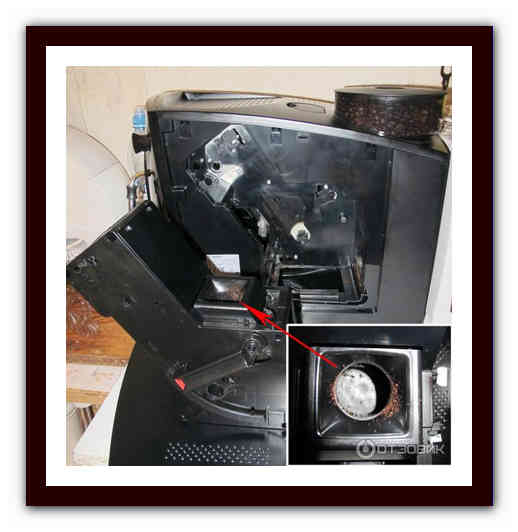
Для изготовления кофе употребляются кофейные зерна, кофе машина сама их перемалывает, прессует в пилюлю и заваривает для вас кофе.
Рядом с емкостью для кофе, есть маленькое отверстие в которую опускается пилюля для чистки кофе машины, когда на приборной панеле загораются индикаторы, символизирующие о том, что пора выслать агрегат на промывку, вы загружаете туда пилюлю, а в емкость для воды наливаете жидкость от накипи (я заместо воды растворяю в воде обыденную лимоновую кислоту, соотношение 1 ст. ложка на 0.5 литра воды) и следуете подсказкам в аннотации по эксплуатайции, она кстати, на российском языке и очень подробная, хотя и не всегда понятная.
С левой стороны, находится емкость для воды, всего вмещает в себя 1800 мл, но уходит эта вода стремительно, т. к. машина сама умывается при включении и умывается перед выключением. Если вы запамятовали долить воды в емкость и кофе машина засосала воздух, не стоит пугаться, просто налейте воды, поверните рычаг для подачи пара либо воды и малость подождите пока через капучинатор выйдет воздух (поначалу польется вода, позже выйдет воздух и опять польется вода). Емкость для воды при желании можно достать и помыть. Кофе машина отключается сама через 10 мин., но время отключения тоже можно запрограммировать, выставить выключение через 5 минут либо отключить совершенно.

Вода во время промывки соединяется в нижний лоток (по мере заполнения в лоточке подымается красноватый язычок), туда же скидывается использованный кофе, что очень комфортно, достал лоточек слил воду, выкинул кофе, и можешь опять воспользоваться. О степени заполнения лоточка для использованного кофе говорит кнопка на приборной панеле.

А с правой стороны, находится святая святых! Там происходит чудо! Там, из кофейных зернышек создается кофейная пилюля, греется вода, которая под давлением проходит через кофейную пилюлю и заваривается кофе! И на все это уходит примерно 20 секунд. (Фантастика, расскажи мне об этом 15 годов назад ни за что бы не поверила).
Степень помола кофе регулируется сзади, всего 3 положения. Большой помол, средний помол и маленький помол.
А вот крепость кофе, регулируется на приборной панеле.
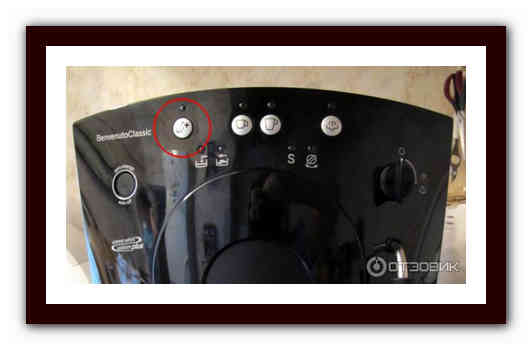
Там же есть 2 кнопки, с помощью которых наливают кофе, малая и большая чашечка. Объём чашечки можно запрограмировать, для этого необходимо надавить кнопку изготовления кофе и держать её (не отпуская) до посинения (шучу), держать её пока она перемалывает, готовит и наливает для вас кофе, и отпускаете её только тогда, когда ваша чашечка заполнилась до нужного объема. За ранее настроенные значения кофе: малая чашечка , 40 мл., можно прирастить до 125 мл., большая чашечка , 125 мл., можно прирастить до 220 мл. Скажу сходу, что капучинатором мы воспользовались от силы раза 2 не больше, по моему воззрению пенка взбивается не довольно пышноватая, хотя может быть я просто не умею её взбивать.
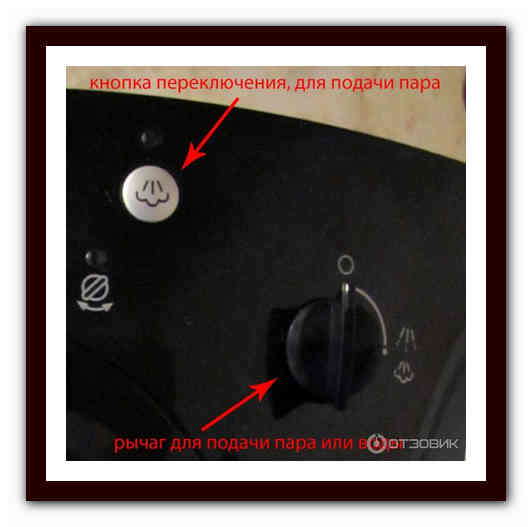
Что бы налить жаркой воды, необходимо просто повернуть ручку подачи пара/воды до упора на право, а вот если для вас необходимо взбить молоко в пышную пенку, необходимо надавить на кнопку пара (что бы она загорелась) и только после чего повернуть ручку до упора на право. Я несколько раз запамятовал надавить на кнопку пара и моё молоко смешивалось с водой, заместо того что бы взбиться в густую пенку.
В целом, эта машинка очень полюбилась моим родственникам, сама я кофе пью очень изредка, а вот супруг, мать и брат на деньку раз по 5-7 кипятят для себя кофе, мне даже кажется, что запах кофе уже впитался в стенки нашей квартиры.
За пол года использования машинка никогда нас не подвела, из минусов она очень шумновата, если сидишь в комнате то отлично слышно как она врубается, умывается, готовит кофе, все эти деяния активно сопровождаются какими то звуками. Аннотация не совершенно понятна, приходится некие ответы на вопросы находить в вебе, что для такового производителя неприемлимо (хотя, может быть, это издержки перевода).
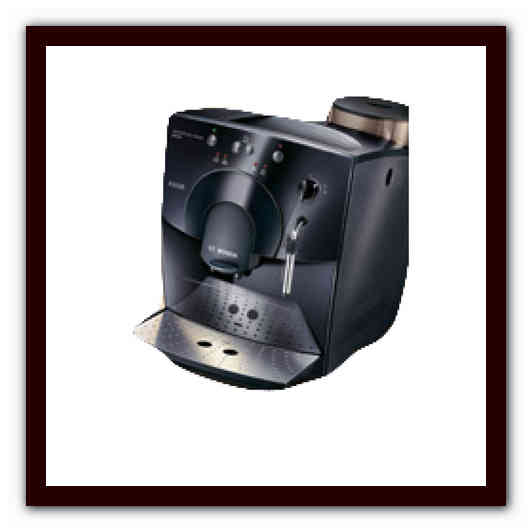
Автоматическая кофемашина Bosch TCA 5201 benvenuto classic piano.
- Производитель: Bosch (Бош)
- Код продукта: TCA 5201
Цвет: темный глянцевый. Мощность: 1400 Вт Термоблок с помпой: 15 бар Разработка динамического процесса варки с подготовительным смачиванием кофейного порошка «Aroma whirl system plus». Создание , Португалия. Гарантия , 1 год.
Цвет: темный глянцевый Мощность: 1400 Вт Термоблок с помпой: 15 бар Разработка динамического процесса варки с подготовительным смачиванием кофейного порошка «Aroma whirl system plus» «Single portion cleaning» – промывание подводящих трубок перед изготовлением порции кофе Бункер для кофейных зернышек емкостью 250 г. Подача жаркого пара, жаркой воды Регулировка степени помола Регулировка крепости кофе (2 степени) Программирование размера порции Эспрессо-камера изменяемого размера (8 либо 12 г. кофейного порошка) Функция обогрева чашек Режимом экономии электроэнергии calc?n?clean — одна универсальная программка для очистки и удаления накипи Съемный резервуар для воды 1,8 л Размеры устройства (В x Ш х Г): 34 х 26 х 45 см