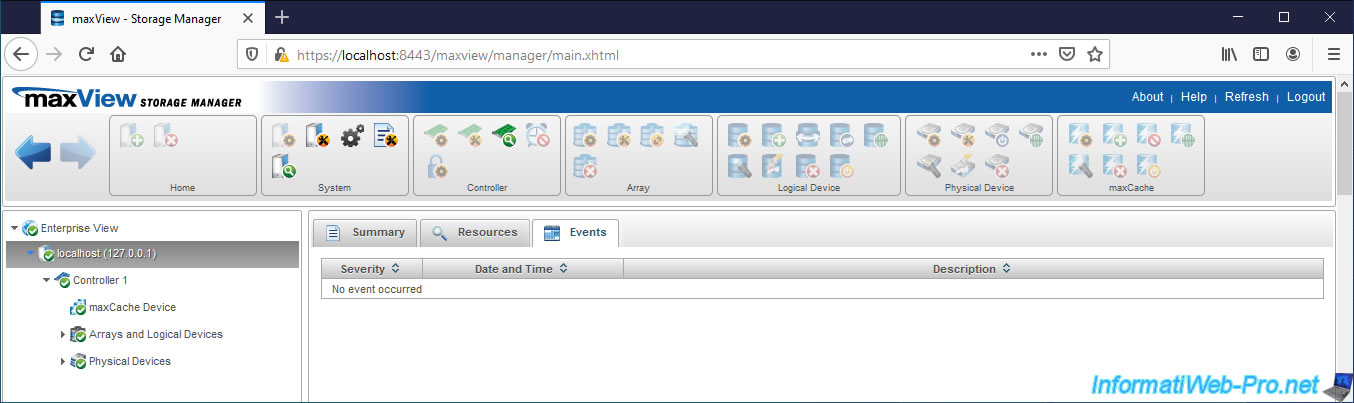
В рамках данной статьи будет рассмотрена утилита управления контроллерами фирмы Adaptec, а также будет рассказано ка настроить с помощью нее HotSpare.
RAID-контроллеры фирмы Adaptec зарекомендовали как достаточно надежное аппаратное решение для организации RAID-массивов.
Для управления и контроля состояния массива после установления системы, рекомендуется установить утилиту управления maxView storage manager. Управление производится посредством веб-интерфейса.
Дистрибутивы утилиты доступны под различные операционные системы, также присутсвует возможность удаленного подключения к контроллеру Adaptec.
Установка maxView на примере CentOS 6.
Дистрибутив данной утилиты можно скачать на официальном сайте, например, для контроллера серии 8405, он доступен по ссылке.
Выбрать раздел Storage Manager, согласиться с лицензионным соглашением и перейти к скачиванию.
Через консоль Linux можно скачать командой wget:
wget http://download.adaptec.com/raid/storage_manager/msm_linux_x64_v2_03_22476.tgz
Затем распаковать:
tar zxvf msm_linux_x64_v2_03_22476.tgz
Перейти в директорию manager (появится после распаковки в директории со скачанным архивом):
cd manager
И запустить на установку пакет, сдучае с CentOS запускать необходимо пакет StorMan-2.03-22476.x86_64.rpm, командой
rpm -ivh StorMan-2.03-22476.x86_64.rpm
Ответить на задаваемые при установе вопросы, в частности указать порт для службы CMI.
После установки веб-интерфейс будет доступен по адресу:
https://server_ip:8443/maxview/manager/login.xhtml

В качестве логина/пароля необходимо использовать администраторскую учетку сервера.
Настройка HotSpare
После авторизации в утилите видна страница с общей сводкой по контроллерам, находящимся на мониторинге. Также в виде диаграммы показано соотношение дисков в рейде и свободных дисков.

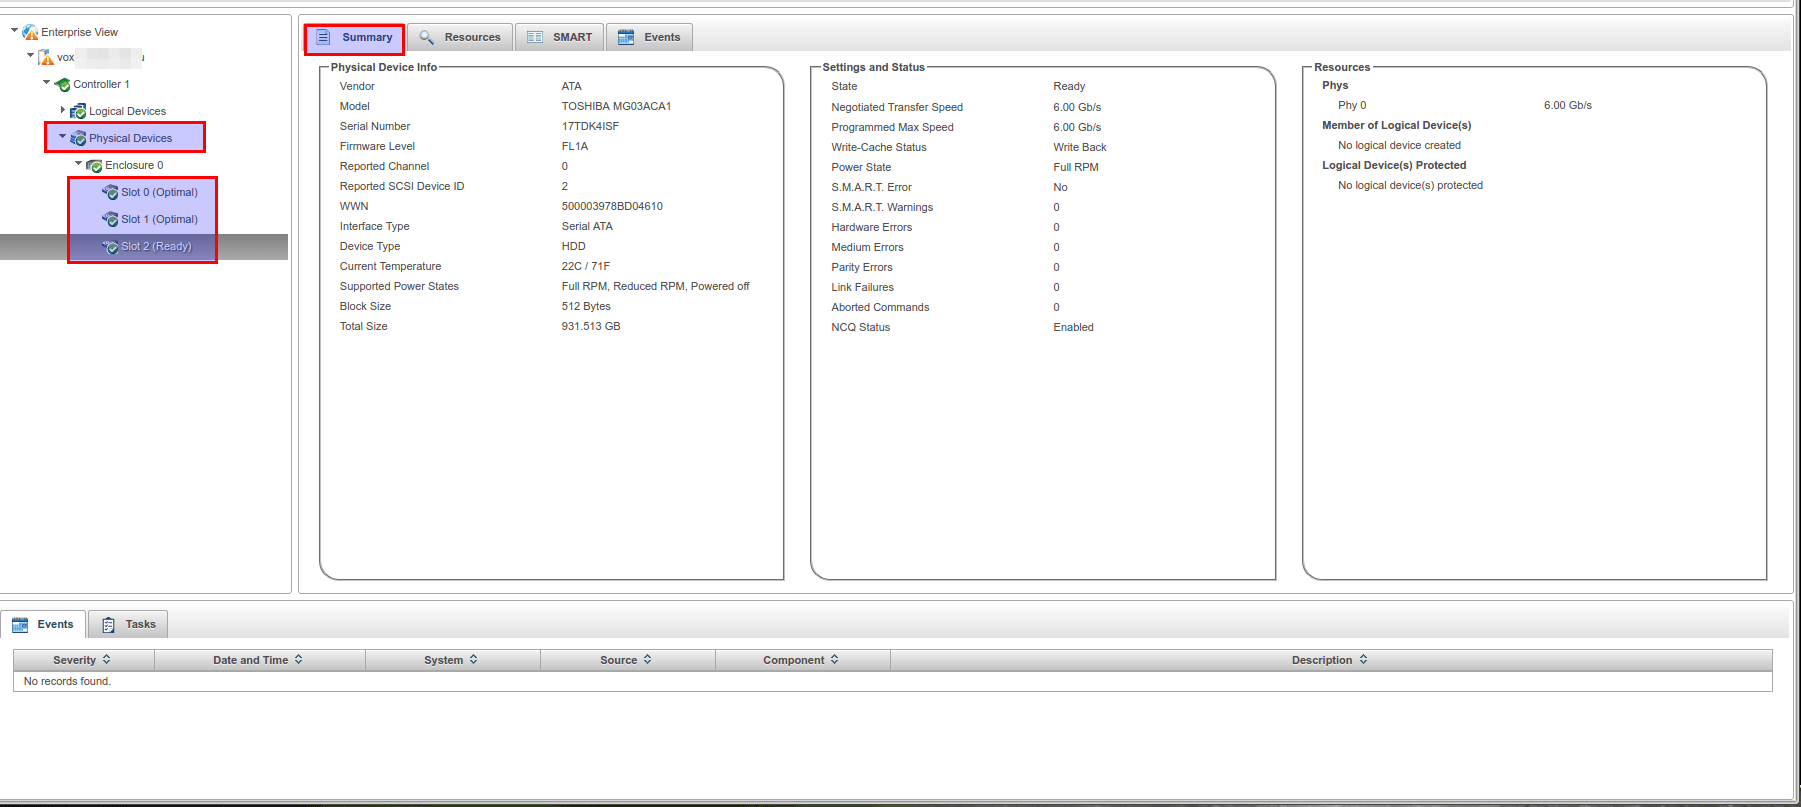
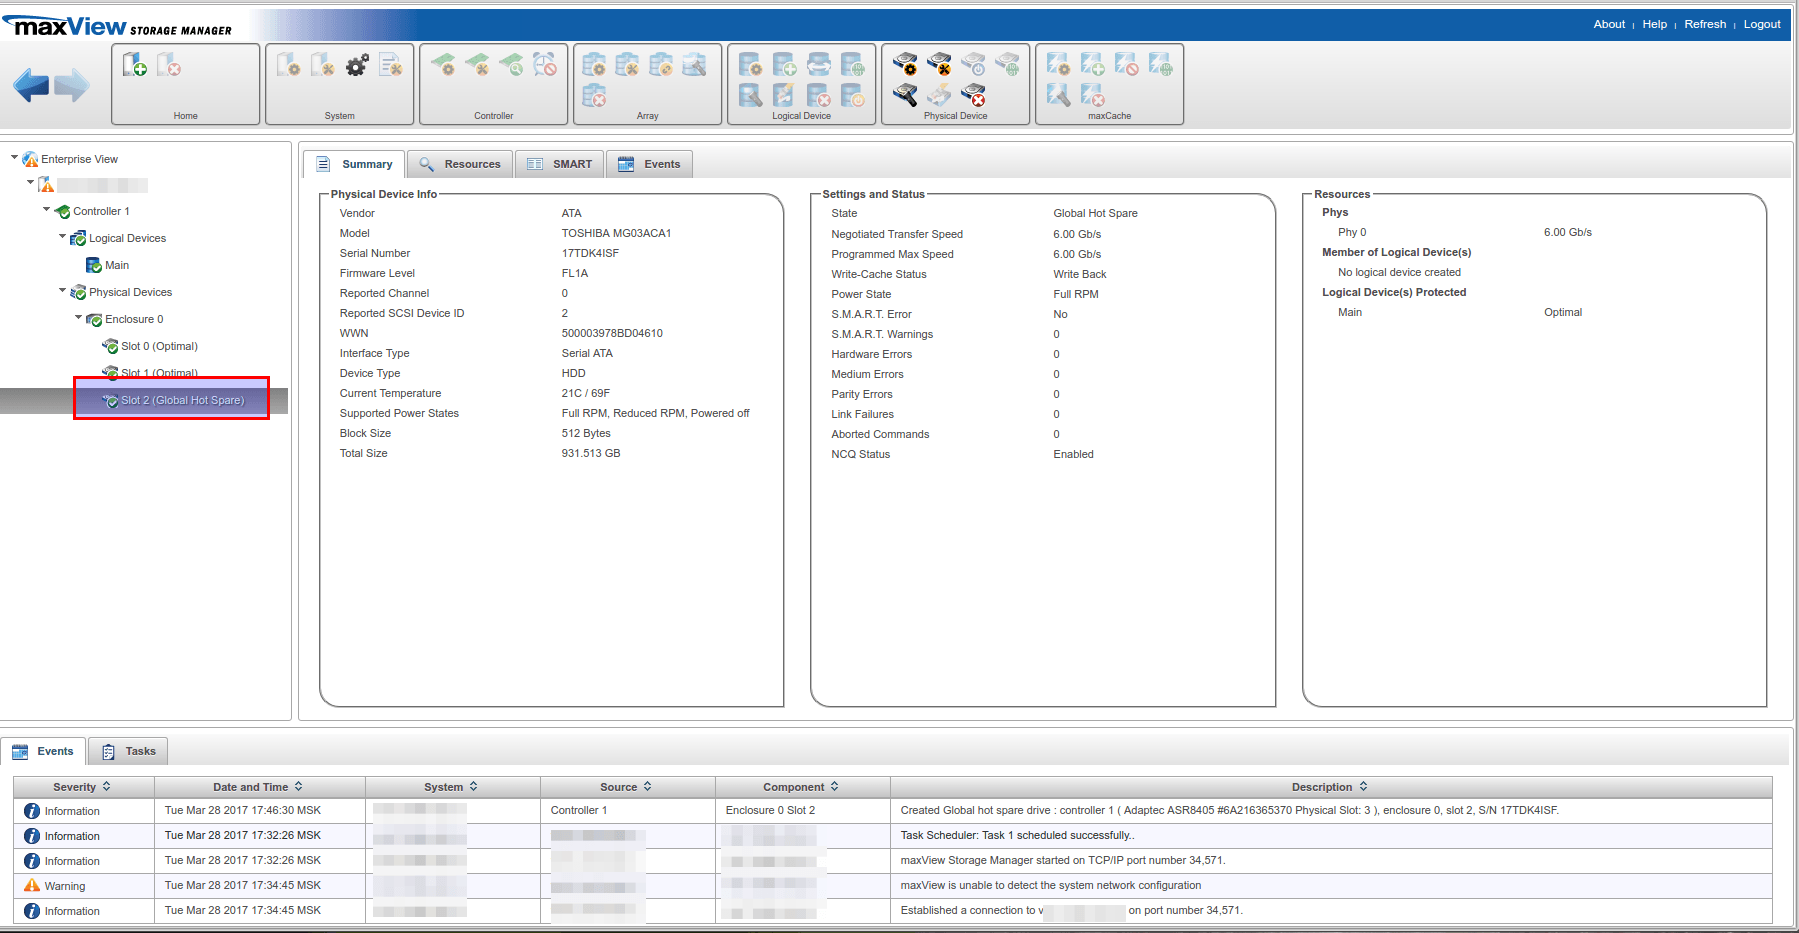
При переходе в раздел Physical Devices, выбрав устройство можно увидеть слоты (Slot), по сути подключенные на данный момент к контроллеру жесткие диски. Слоты в статусе Ready (на скриншоте это Slot 2), означает, что данный диск не находится ни в одном массиве и не настроен как HotSpare. Также на основной странице можно увидеть различную информацию по выбранному жесткому диску.
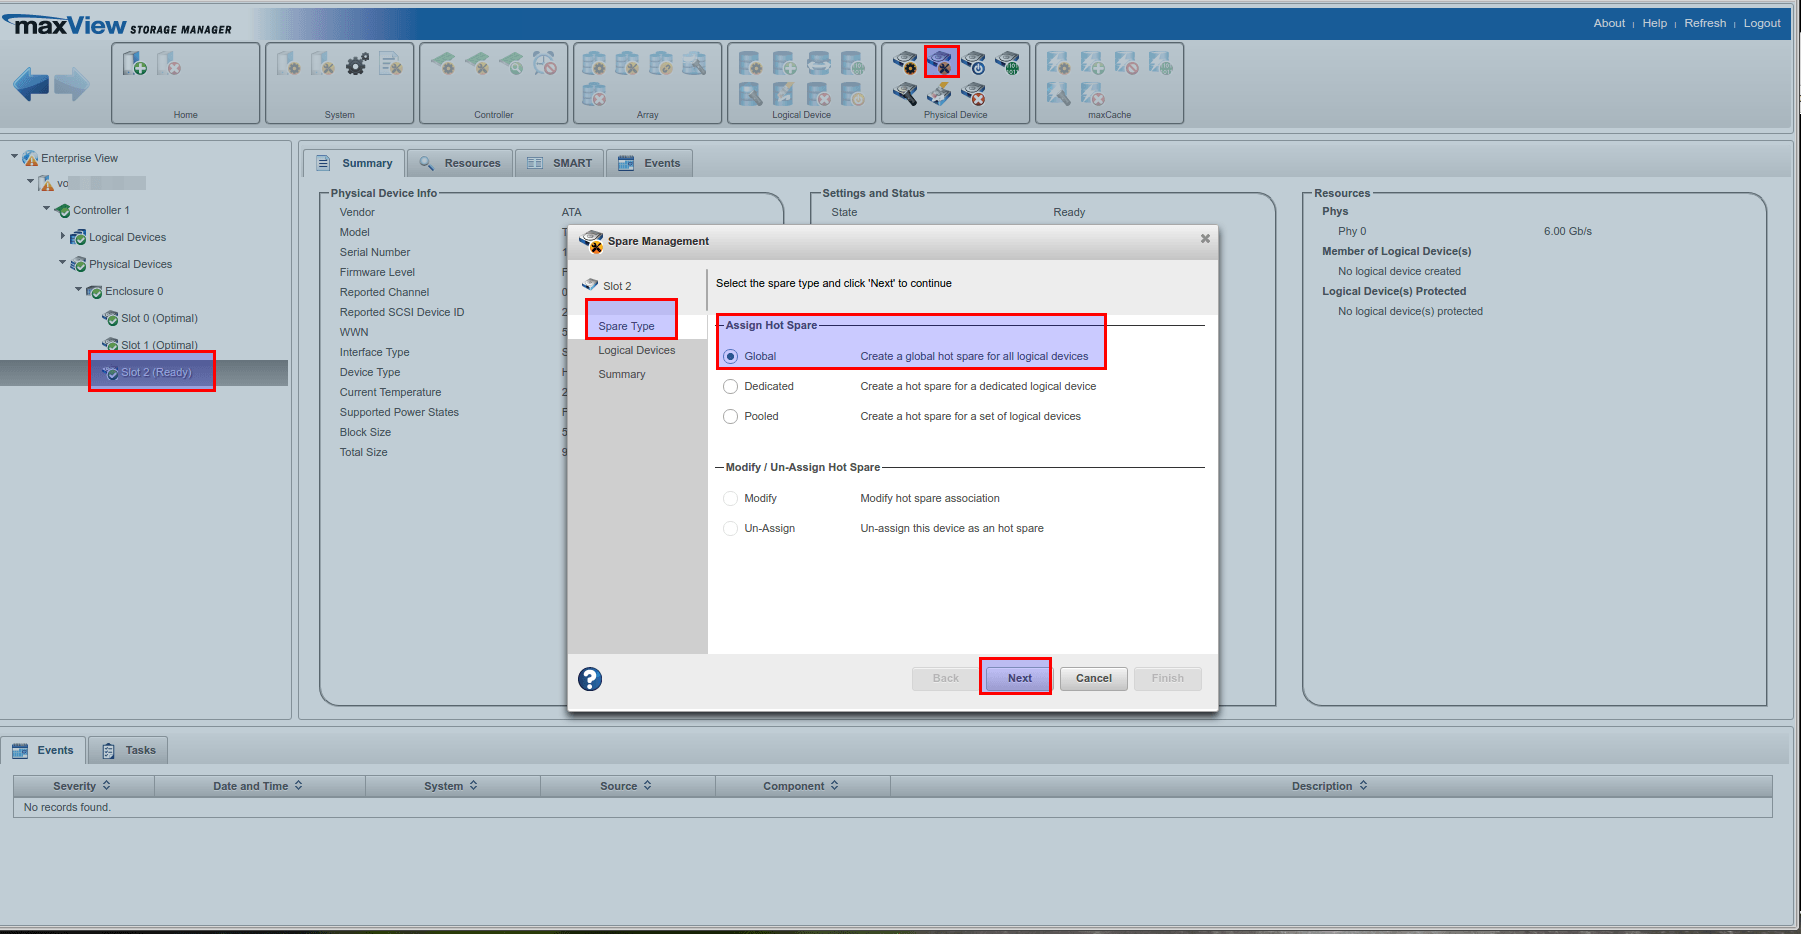
Для добавления диска в HotSpare необходимо выбрать соответствующий слот и в разделе Physical Device верхнего меню выбрать Spare Managment. Откроется окно управления spare-устройствами. На первом шаге необходимо выбрать тип Hot Spare. Всего их три:
— Global — назначает диск резервным для всех логических устройств
— Dedicated — назначает диск резервным для одного выбранного логического устройства
— Pooled — назначает диск резервным для выбранного количества логических устройств
В данном примере использован тип Global. Также на данной вкладке можно редактировать HotSpare — пункт Modify, а также убрать диск из HotSpare — Un-asign.
Второй шаг — выбор логического устройства, которое необходимо резервировать, в случае с настройками по типу Global и одним рейд массивом, пропускается — сразу перекидывает на третий шаг: суммарная информация (проверка что корректный массив резервируется) и завершение настройки HotSpare. Для завершения необходимо нажать кнопку Finish.

Если увидели сообщение Assign hot spare operation successful, значит все прошло успешно.
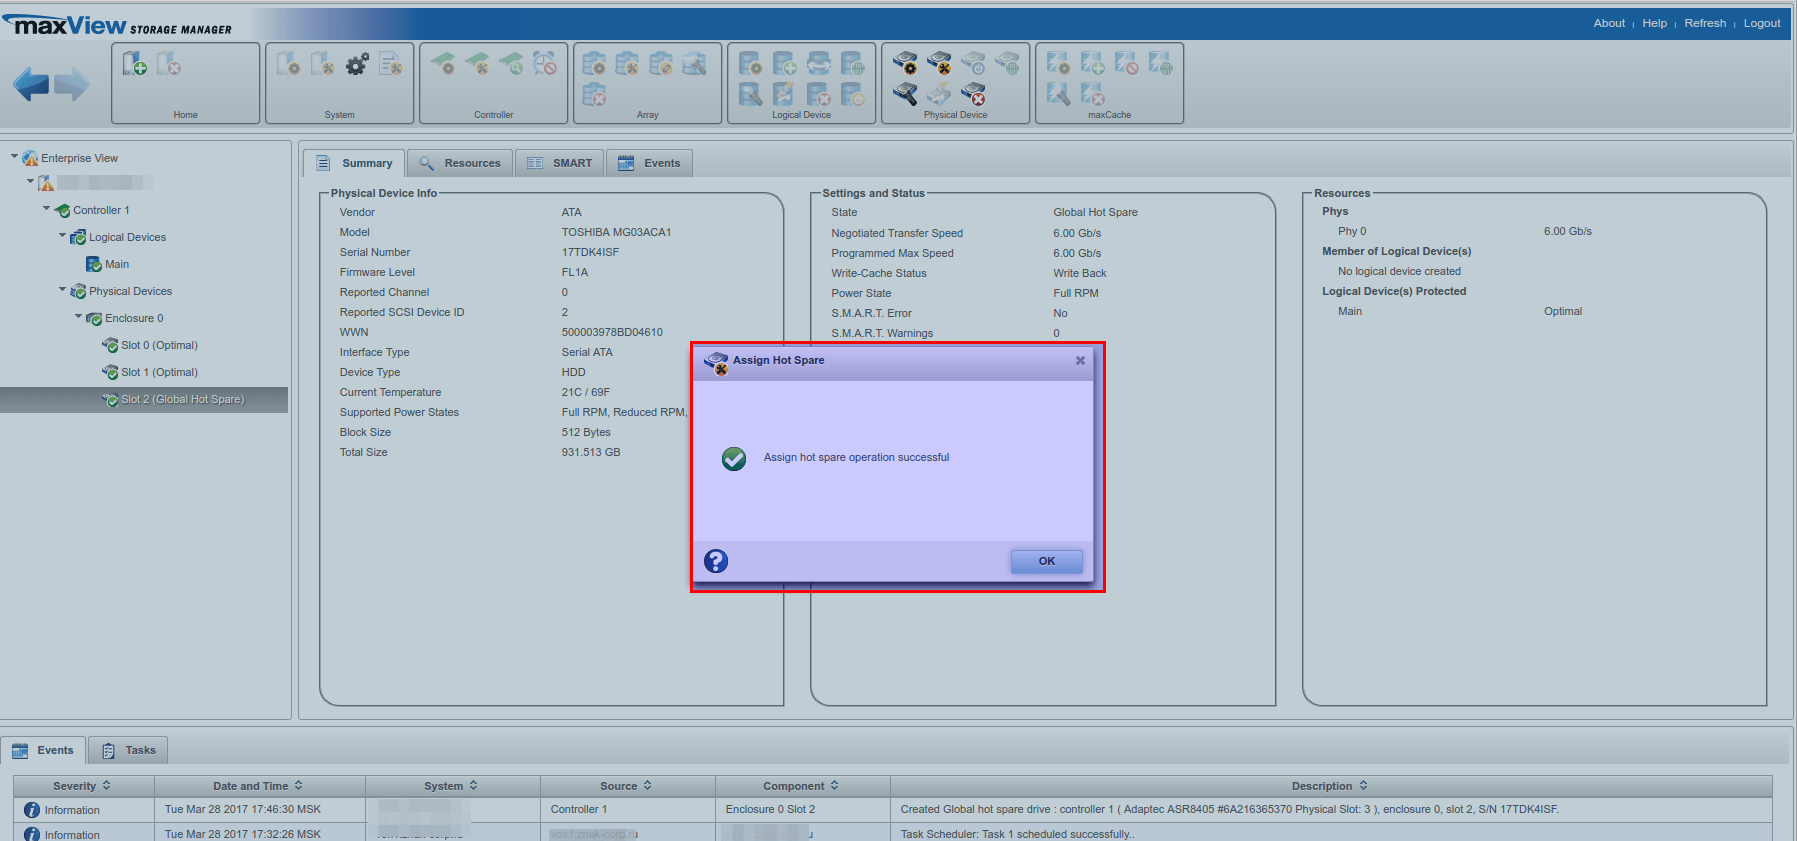
Обозначение резервирующего слота также изменится c ready на указание типа hot spare.
Тем, кто использует в своей работе рэйд-контроллеры Adaptec и систему виртуализации VMware vSphere, наверняка известно, что организовать удобное управление и мониторинг состояния рэйд-контроллера, логических и физических дисков, является делом далеко не очевидным и нетривиальным. В этой статье я решил описать свой опыт в настройке мониторинга и управления рэйд-контроллером Adaptec в среде VMware. Описанные в статье действия производились с использованием »древнего» контроллера Adaptec 5805 и VMware vSphere 5.5.
Проблема заключалась в том, что состояние рэйд-контроллера и управление им было доступно только в утилите контроллера, доступной из БИОС. В VCenter, на вкладке Hardware Status никакой информации о рэйде доступно не было.
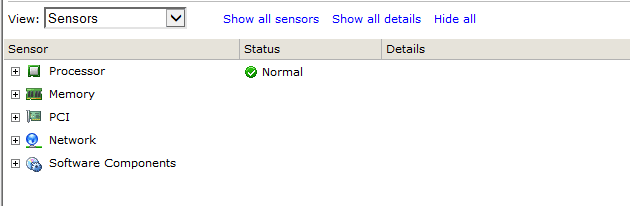
Согласитесь, не очень здорово узнавать о неисправности диска только по писку сервера. Поэтому будем дружить Adaptec с VMware.
Собственно, причина проблемы в том, что в дистрибутиве ESXi отсутствуют драйвера и другие компоненты, необходимые для управления рэйд-контроллером.
Установка необходимых компонентов.
Скачать нужные компоненты для Adaptec можно здесь. Выбирайте нужную модель адаптера и операционную систему.
Для установки подключаемся к хосту ESXi по SSH. Копируем нужные файлы на хост(нужны будут vmware-esxi-drivers-scsi-aacraid-your-version.x86_64.vib, vmware-esx-provider-arcconf.vib, vmware-esx-provider-arc-cim-provider.vib).
Настраиваем уровень разрешений для установки софта(PartnerSupported или CommunitySupported).
|
esxcli software acceptance set —level=CommunitySupported |
Устанавливаем драйвер
|
esxcli software vib install —v /vmfs/volumes/your_path/vmware—esxi—drivers—scsi—aacraid—your—version.x86_64.vib |
Устанавливаем утилиту arcconf(CLI) и cim-provider(для удаленного взаимодействия)
Предварительно можно проверить наличие предыдущих версий
|
esxcli software vib list | grep arcconf esxcli software vib list | grep arc—cim—provider |
Если найдутся — удаляем
|
esxcli software vib remove —n arcconf esxcli software vib remove —n arc—cim—provider |
Ставим arcconf
|
esxcli software vib install —no—sig—check —v /vmfs/volumes/your_path/vmware—esx—provider—arcconf.vib |
и cim-provider
|
esxcli software vib install —no—sig—check —v /vmfs/volumes/your_path/vmware—esx—provider—arc—cim—provider.vib |
Перезагружаем хост. Теперь на вкладке Hardware Status будет отображаться статус нашего хранилища.
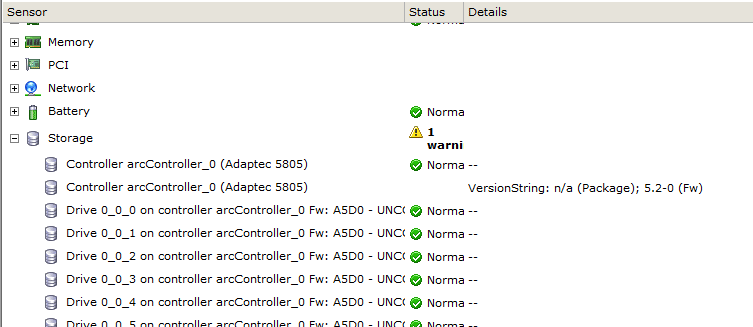
Управление рэйд-контроллером Adaptec.
Для управления рэйд контроллером Adaptec предлагает утилиту командной строки arcconf и графическую утилиту Maxview Storage Manager(ранее Adaptec Storage Manager). Для управления контроллером нужно установить Maxview Storage Manager и(или) arcconf на гостевую! ОС виртуальной машины, расположенной на хосте, где установлен рэйд-контроллер. Скопируйте файл setup_maxview_gos_x64.exe или x86.exe, если используете Windows в качестве гостевой ОС. Запустите установщик и следуйте указаниям мастера. Введите следующие данные:
- Host IP Address (ESXi or XenServer host)
- Web Server Port: 8443
- Host user name (default: root)
- Operating system password/password confirmation
Запустите Maxview Storage Manager и введите для логина учетные данные от хоста ESXi.
Подключиться можно и с другого компьютера по IP-адресу или имени ВМ, на которой установили maxview storage manager:
https://ip-address:8443/maxview/manager/login.xhtml
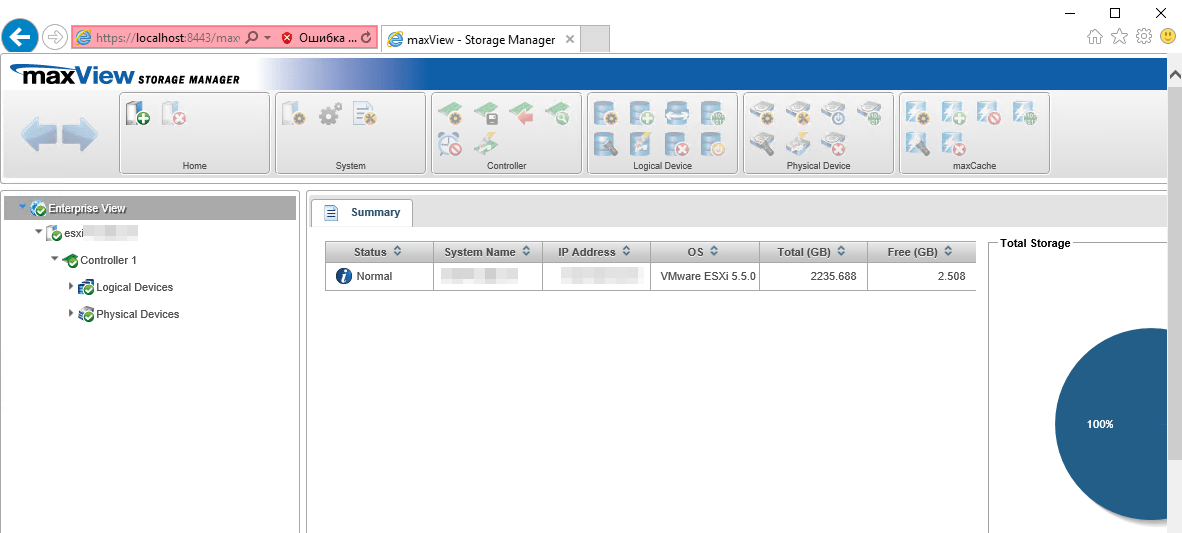
После этого вы попадете в меню программы и сможете управлять рэйд-контроллером.
Несколько слов об arcconf.
После установки можно запускать утилиту из консоли CMD или Powershell, запущенных от имени администратора.
Запуск без параметров выведет список доступных команд. Вот несколько полезных из них:
arcconf getconfig 1 — выводит информацию о конфигурации контроллера 1;
arcconf getconfig 1 ld — выводит информацию о логических дисках;
arcconf getconfig 1 pd — выводит информацию о физических дисках;
arcconf rescan 1 — сканирует доступные диски контроллера 1;
arcconf getstatus 1 — показывает фоновые операции(например, ребилд);
Подробная инструкция по использованию arcconf доступна здесь.
Ну и, напоследок, еще об одной «плюшке» для VMware от Adaptec, а именно maxView Plugin for vSphere Web Client. Это плагин, позволяющий отслеживать состояние рэйда в веб-клиенте VMware. К сожалению, управлять рэйд-контроллером через этот плагин нельзя, но, тем не менее, он есть. Установка производится только на ВМ с windows версией VCenter Server путем запуска файла setup_maxView_VWC_Plugin_x64.exe
После установки перезагрузите машину с вцентром.
После перезагрузки в веб-клиенте будет доступен этот плагин.
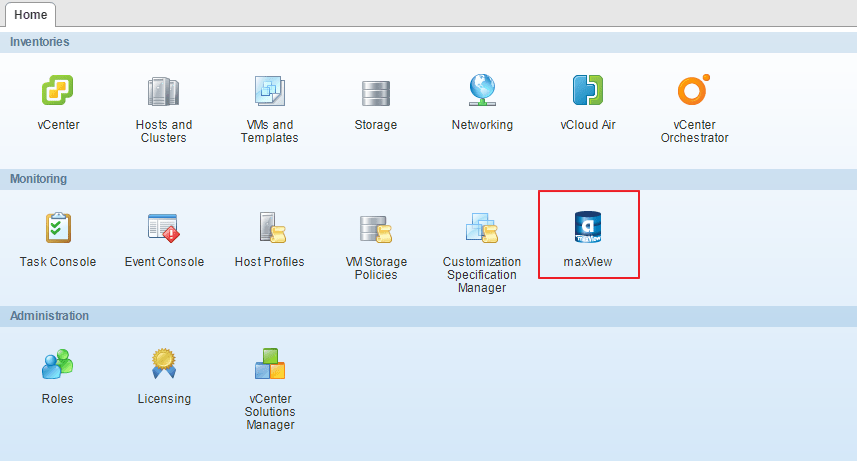
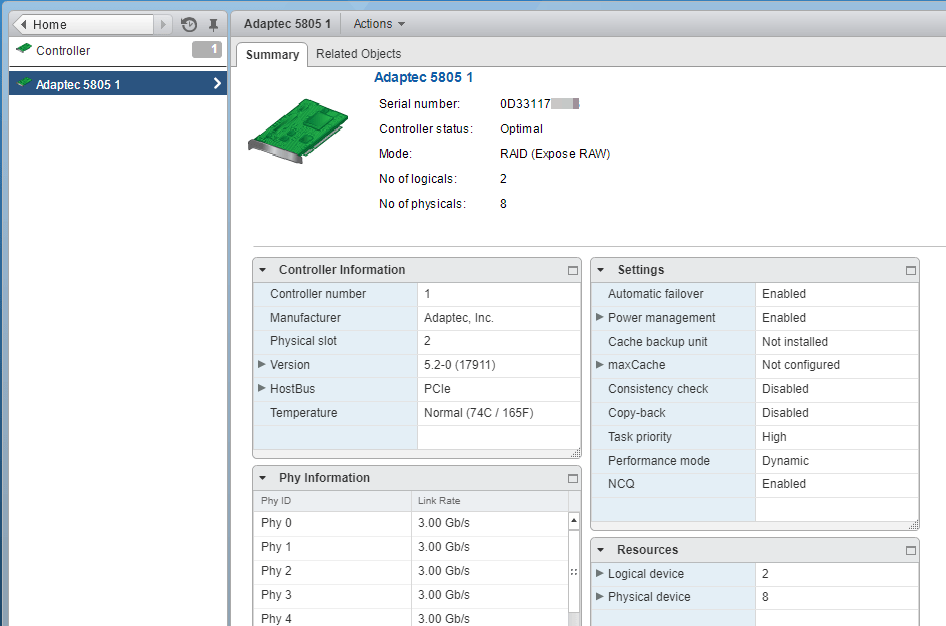
Вот так выглядит страница плагина:
На этом, наверное, можно закончить. Надеюсь, кому-то статья будет полезна при установлении »дружеских отношений» между vmware и рэйд-контроллером Adaptec.
В рамках данной статьи будет рассмотрена утилита управления контроллерами фирмы Adaptec, а также будет рассказано ка настроить с помощью нее HotSpare.
RAID-контроллеры фирмы Adaptec зарекомендовали как достаточно надежное аппаратное решение для организации RAID-массивов.

Для управления и контроля состояния массива после установления системы, рекомендуется установить утилиту управления maxView storage manager. Управление производится посредством веб-интерфейса.
Дистрибутивы утилиты доступны под различные операционные системы, также присутсвует возможность удаленного подключения к контроллеру Adaptec.
Установка maxView на примере CentOS 6.
Дистрибутив данной утилиты можно скачать на официальном сайте, например, для контроллера серии 8405, он доступен по ссылке.
Выбрать раздел Storage Manager, согласиться с лицензионным соглашением и перейти к скачиванию.
Через консоль Linux можно скачать командой wget:
wget http://download.adaptec.com/raid/storage_manager/msm_linux_x64_v2_03_22476.tgz
Затем распаковать:
tar zxvf msm_linux_x64_v2_03_22476.tgz
Перейти в директорию manager (появится после распаковки в директории со скачанным архивом):
cd manager
И запустить на установку пакет, сдучае с CentOS запускать необходимо пакет StorMan-2.03-22476.x86_64.rpm, командой
rpm -ivh StorMan-2.03-22476.x86_64.rpm
Ответить на задаваемые при установе вопросы, в частности указать порт для службы CMI.
После установки веб-интерфейс будет доступен по адресу:
https://server_ip:8443/maxview/manager/login.xhtml

В качестве логина/пароля необходимо использовать администраторскую учетку сервера.
Настройка HotSpare
После авторизации в утилите видна страница с общей сводкой по контроллерам, находящимся на мониторинге. Также в виде диаграммы показано соотношение дисков в рейде и свободных дисков.

При переходе в раздел Physical Devices, выбрав устройство можно увидеть слоты (Slot), по сути подключенные на данный момент к контроллеру жесткие диски. Слоты в статусе Ready (на скриншоте это Slot 2), означает, что данный диск не находится ни в одном массиве и не настроен как HotSpare. Также на основной странице можно увидеть различную информацию по выбранному жесткому диску.

Для добавления диска в HotSpare необходимо выбрать соответствующий слот и в разделе Physical Device верхнего меню выбрать Spare Managment. Откроется окно управления spare-устройствами. На первом шаге необходимо выбрать тип Hot Spare. Всего их три:
— Global — назначает диск резервным для всех логических устройств
— Dedicated — назначает диск резервным для одного выбранного логического устройства
— Pooled — назначает диск резервным для выбранного количества логических устройств
В данном примере использован тип Global. Также на данной вкладке можно редактировать HotSpare — пункт Modify, а также убрать диск из HotSpare — Un-asign.

Второй шаг — выбор логического устройства, которое необходимо резервировать, в случае с настройками по типу Global и одним рейд массивом, пропускается — сразу перекидывает на третий шаг: суммарная информация (проверка что корректный массив резервируется) и завершение настройки HotSpare. Для завершения необходимо нажать кнопку Finish.

Если увидели сообщение Assign hot spare operation successful, значит все прошло успешно.

Обозначение резервирующего слота также изменится c ready на указание типа hot spare.

Обновлено 16.06.2017
Всем добрый день, продолжаем нашу эпопею с raid контроллером Adaptec 8885, мы с вами остановились на том, что произвели установку VMware ESXI 5.5 на данный рейд контроллер. Почитать можно об этом вот тут (Установка esxi на Adaptec Raid 8885). Следующим этапом, является настроить удобное программное обеспечение, для мониторинга и управления raid массивом и самим контроллером, чем мы и займемся, на все про все мы затратим, около 10-15 минут.
Установка maxView Storage Manager в VMware ESXI 5.5
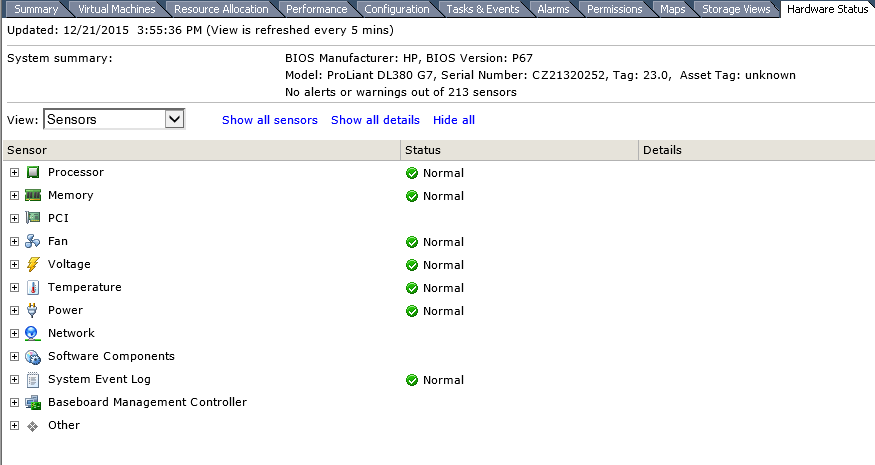
Как видите если зайти на вкладку Hardware у нужного хоста в vCenter, то вы не увидите, информацию о дисках или контроллерах, а ведь надо же.
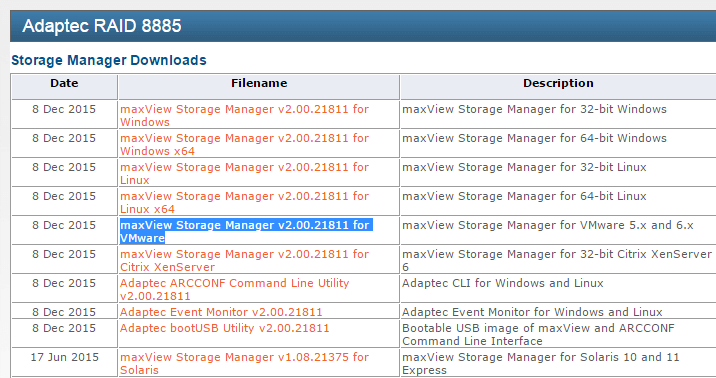
И так на борту у нас ESXi и нам нужно в нем производить мониторинг состояния жестких дисков или ssd дисков. Для этого есть утилита maxView Storage Manager. Давайте ее скачаем. Переходим на сайт производителя, и скачиваем нужную версию, на момент написания статьи это maxView Storage Manager v2.00.21811 for VMware, сам дистрибутив весит порядка 630 мегабайт, очень толстый.Раньше когда был Adaptec CIM Provider, он весил пару мегабайт, но работал через Java, а тут все в браузере, ладно посмотрим.
Когда вышла седьмая серия контроллеров, то была сделана новая утилита maxView в замену Adaptec Storage Manager, так же она еще поддерживает старые контроллеры 6 версии. По сути утилита так же нужна для управления raid и его настройками, но уже работает через веб браузер. Утилита содержит вот такие компоненты:
- CIMOM (CIM Object Manager) для взаимодействия с контроллером
- Web server
- Agent
Установка подразумевает, что у вас есть включенный esxi ssh доступ, далее конектитесь к серверу, я использую утилиту mRemoteNG, очень удобная и позволяет делать много окон в одном большом, советую. Вам в начале нужно проверить есть ли нужный драйвер в системе, делается это командой:
esxcli software vib list | grep aacraid
В идеале вы должны получить вот такой ответ, если у вас его нет то вам нужно его скачать и поставить, где скачать драйвера adaptec я уже писал. Установка аналогична, той, что будет ниже для CIM Object Manager пакета.

Порядок установки maxview storage manager
В начале при любом раскладе нужно перевести хост виртуализации в режим обслуживания, maintenance mode. Затем если драйвера нет, то ставим его и перезагружаемся. Далее копируем из скачанного архива файлы vmware-esx-provider-arcconf.vib и vmware-esx-provider-arc-cim-provider.vib. Как скопировать файл в esxi читаемс. Кладем файлы в папку tmp.
Тепрь нужно проверить нет ли предыдущих версий данных пакетов
esxcli software vib list | grep arc
Если нет, то ко. Если есть то удаляем командой
esxcli software vib remove -n arcconf
esxcli software vib remove -n arc-cim-provider
после удаления перезагружаемся.
Останавливаем агента CIM watchdog
/etc/init.d/./sfcbd-watchdog stop
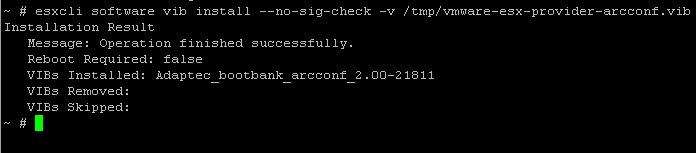
Все начинаем установку, первого компонента который нам поможет запустить мониторинг raid массива
esxcli software vib install —no-sig-check -v /tmp/vmware-esx-provider-arcconf.vib
Installation Result
Message: Operation finished successfully.
Reboot Required: false
VIBs Installed: Adaptec_bootbank_arcconf_2.00-21811
VIBs Removed:
VIBs Skipped:
и ставим второй компонент.
esxcli software vib install —no-sig-check -v /tmp/vmware-esx-provider-arc-cim-provider.vib
Installation Result
Message: The update completed successfully, but the system needs to be rebooted for the changes to be effective.
Reboot Required: true
VIBs Installed: Adaptec_bootbank_arc-cim-provider_2.00-21811
Все перезагружаем хост командой reboot.
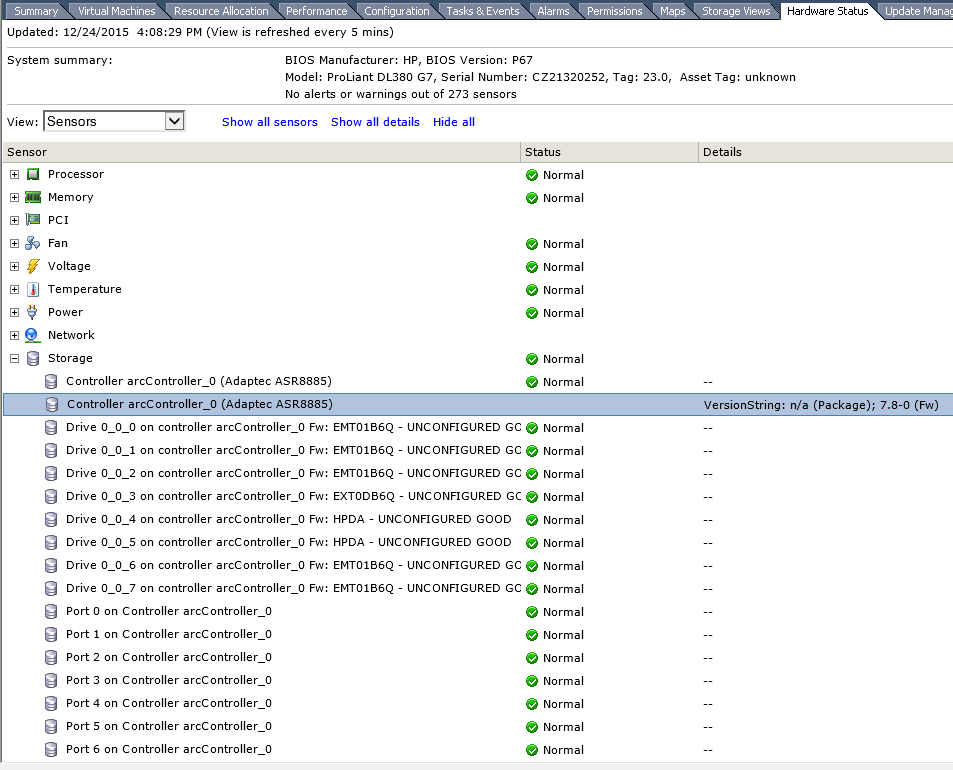
В итоге вы должны получить вот такой вид на вкладке hardware, как видите появилась вкладка Storage со всеми дисками.
Как бы все, но не тут то было. Давайте теперь более подробно ознакомимся со схемой работы. Внутри хоста ставим драйвер и CIM провайдера, а вот maxView Storage Manager Agent and Apache Tomcat уже ставятся на виртуальной машине, которая должна лежать на данном хосте, вот такая матрешка. В виртуальной машине должна быть ос linux или Windows, как 32 так и 64 бита. Я честно не знаю зачем Adaptec сделали такую схему с maxview storage manager, раньше с 5 версией Adaptec Raid controller например 5805, было проще хоть и работало все через java.
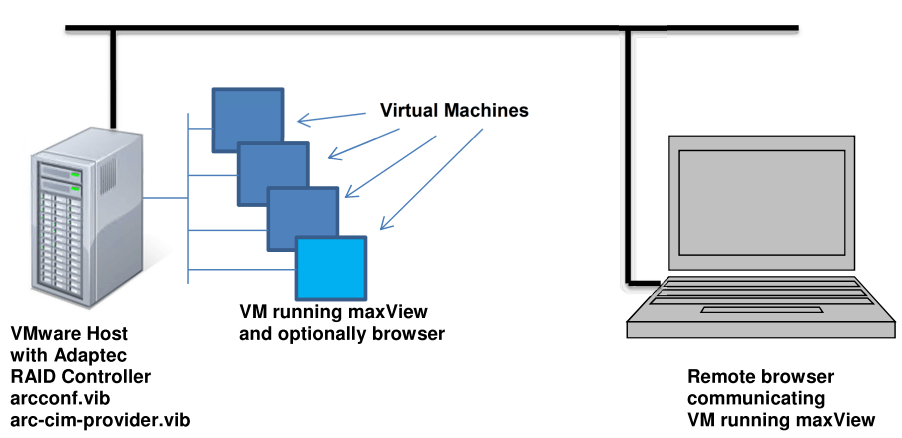
В качестве гостевой операционной системы в виртуальной машине я выбираю Windows Server 2012 R2, где я буду ставить maxView Storage Manager, иначе мы не сможем мониторить и менять настройки у raid adaptec 8885. И так я выложил все дистрибутивы на яндекс диск, и с него вы можете скачать maxView Storage Manager 2.00.00.21811. Запускаем его у вас откроется мастер установки утилиты.
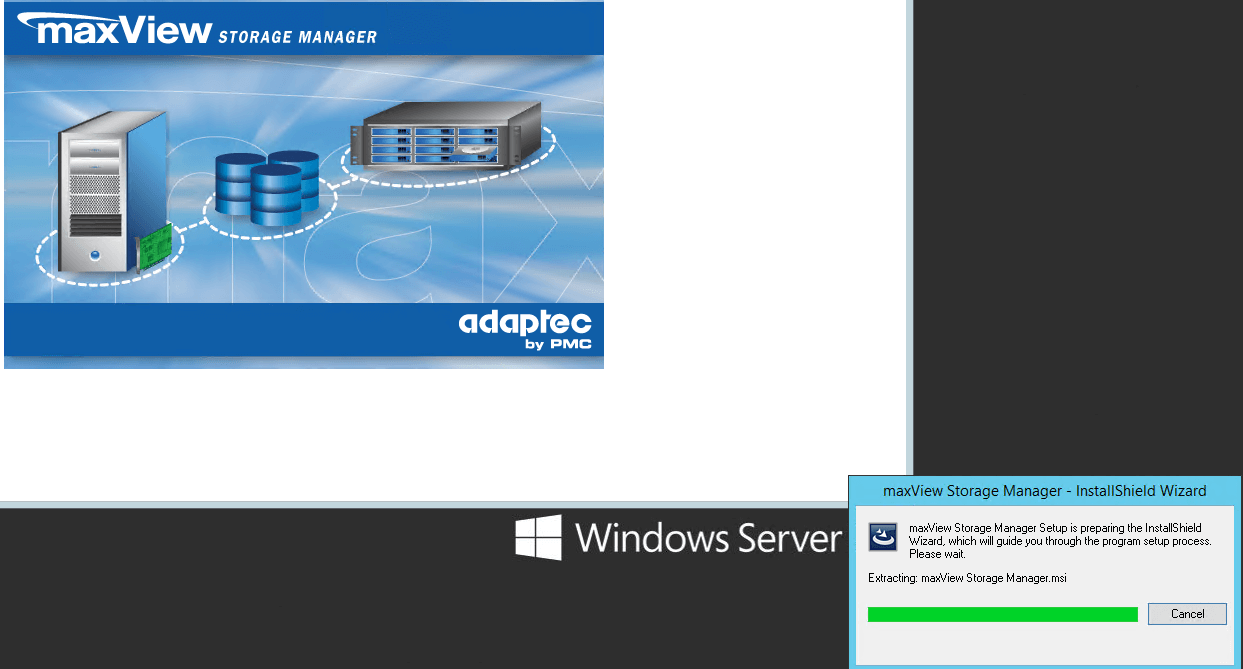
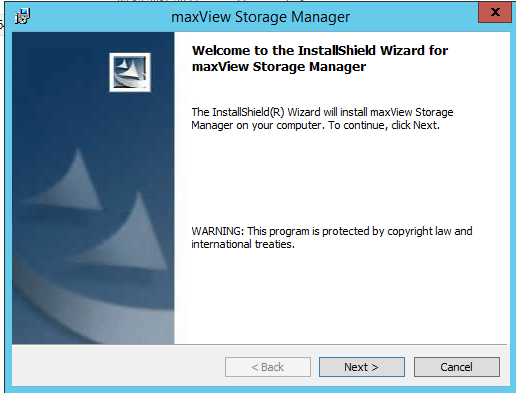
Жмем next.
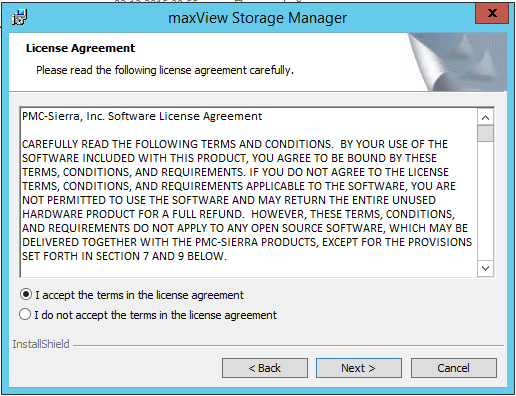
Соглашаемся с лицензионным соглашением и жмем next.
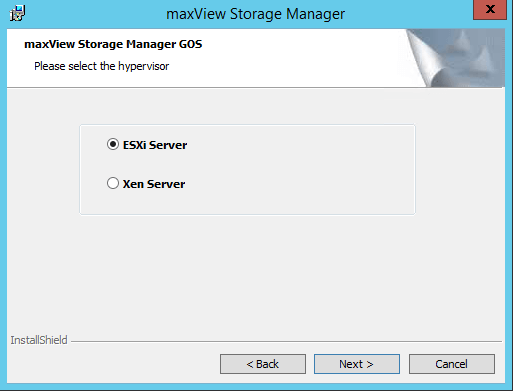
На следующем шаге вас спросят, что вы хотите мониторить, какой гипервизор, выбираем ESXi Server, next.
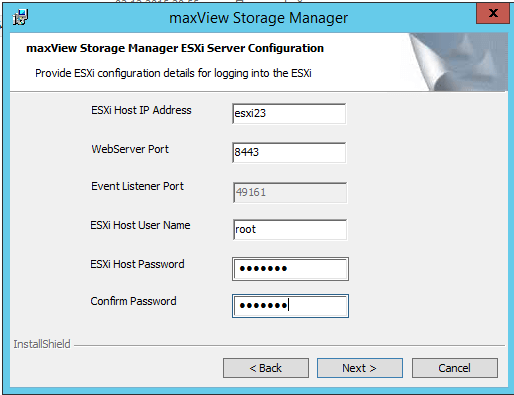
Указываем параметры:
- ESXI Jost ip Address > адрес хоста виртуализации
- ESXI Host Password > пароль к нему, по умолчанию будет использоваться логин root.
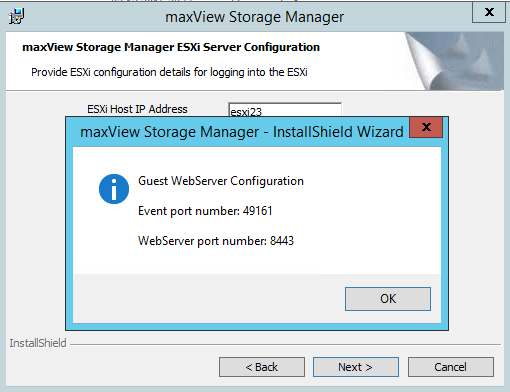
Вас предупредят о выбранных портах для управления Adaptec controller (49161 и 8443, не забудьте их открыть на ос)
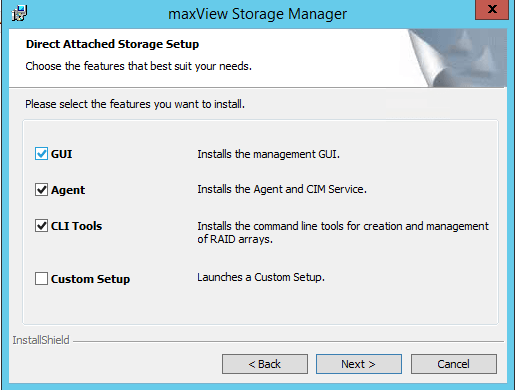
Выставляем компоненты установки, первые два обязательные.
install
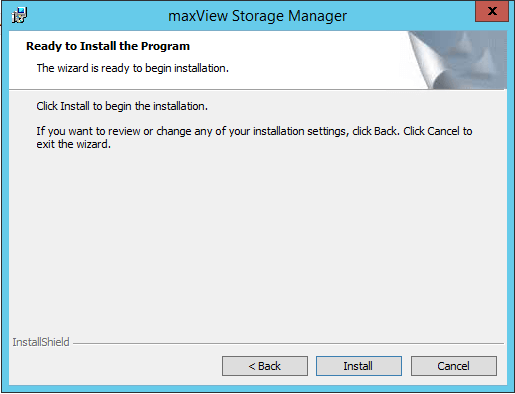
В итоге у вас появится вот такой значок, для локального запуска утилиты, жмем Finish. На этом установка закончена. Далее вам нужно обратиться по адресу
если локально, по сути щелкнув по ярлыку у вас этот адрес и будет запускаться
https://localhost:8443/maxview/manager/login.xhtml
либо если удаленно
https://адрес виртуальной машины:8443/maxview/manager/login.xhtml
Еще у меня в браузере не работало, перезагрузил виртуальную машину все залетало
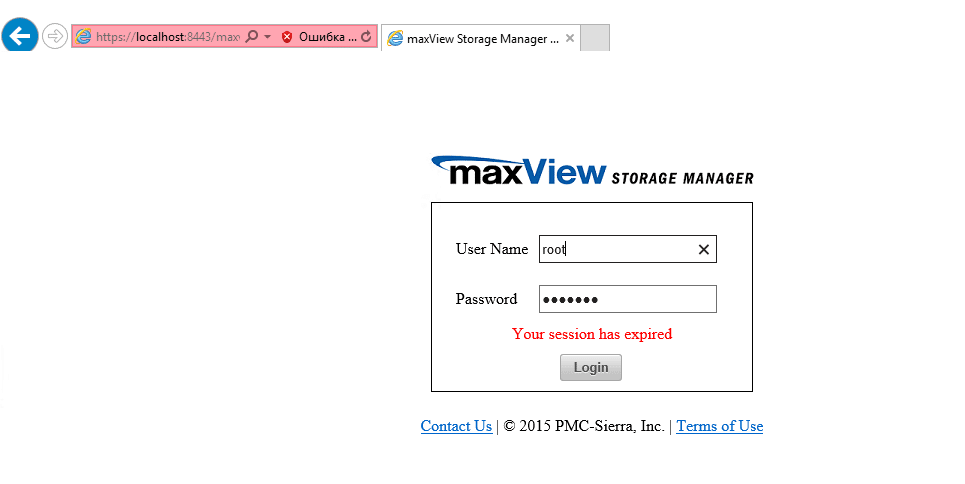
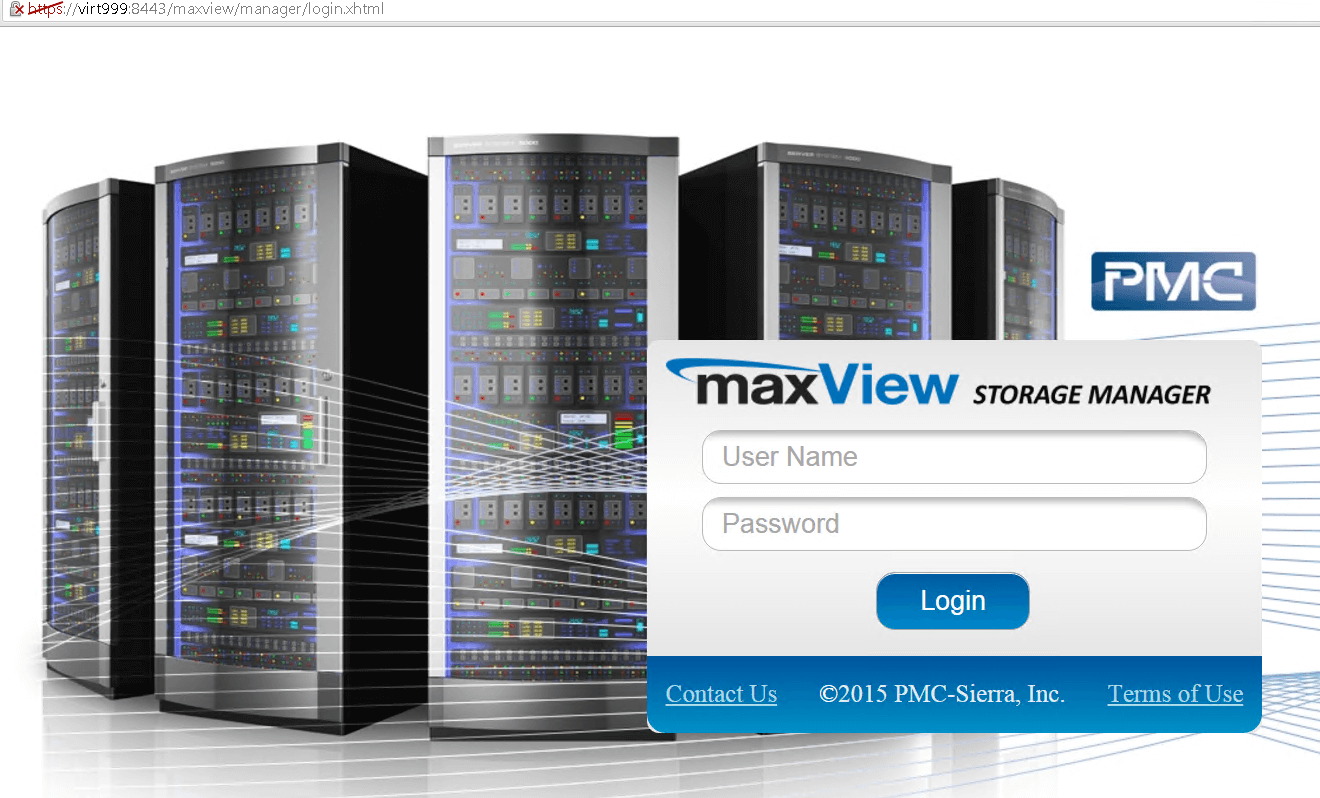
В идеале у вас должно появиться вот такое окно входа.
Материал сайта pyatilistnik.org
Рэйд-контроллер Adaptec. Дружим с vmware.
Тем, кто использует в своей работе рэйд-контроллеры Adaptec и систему виртуализации VMware vSphere, наверняка известно, что организовать удобное управление и мониторинг состояния рэйд-контроллера, логических и физических дисков, является делом далеко не очевидным и нетривиальным. В этой статье я решил описать свой опыт в настройке мониторинга и управления рэйд-контроллером Adaptec в среде VMware. Описанные в статье действия производились с использованием »древнего» контроллера Adaptec 5805 и VMware vSphere 5.5.
Проблема заключалась в том, что состояние рэйд-контроллера и управление им было доступно только в утилите контроллера, доступной из БИОС. В VCenter, на вкладке Hardware Status никакой информации о рэйде доступно не было.
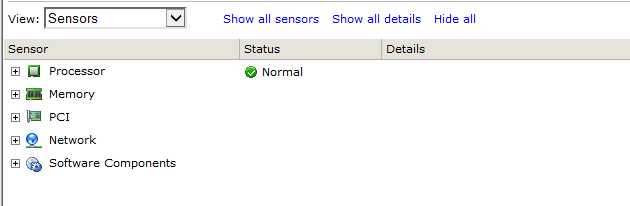
Согласитесь, не очень здорово узнавать о неисправности диска только по писку сервера. Поэтому будем дружить Adaptec с VMware.
Собственно, причина проблемы в том, что в дистрибутиве ESXi отсутствуют драйвера и другие компоненты, необходимые для управления рэйд-контроллером.
Установка необходимых компонентов.
Скачать нужные компоненты для Adaptec можно здесь. Выбирайте нужную модель адаптера и операционную систему.
Для установки подключаемся к хосту ESXi по SSH. Копируем нужные файлы на хост(нужны будут vmware-esxi-drivers-scsi-aacraid-your-version.x86_64.vib, vmware-esx-provider-arcconf.vib, vmware-esx-provider-arc-cim-provider.vib).
Настраиваем уровень разрешений для установки софта(PartnerSupported или CommunitySupported).
|
esxcli software acceptance set —level=CommunitySupported |
Устанавливаем драйвер
|
esxcli software vib install —v /vmfs/volumes/your_path/vmware—esxi—drivers—scsi—aacraid—your—version.x86_64.vib |
Устанавливаем утилиту arcconf(CLI) и cim-provider(для удаленного взаимодействия)
Предварительно можно проверить наличие предыдущих версий
|
esxcli software vib list | grep arcconf esxcli software vib list | grep arc—cim—provider |
Если найдутся — удаляем
|
esxcli software vib remove —n arcconf esxcli software vib remove —n arc—cim—provider |
Ставим arcconf
|
esxcli software vib install —no—sig—check —v /vmfs/volumes/your_path/vmware—esx—provider—arcconf.vib |
и cim-provider
|
esxcli software vib install —no—sig—check —v /vmfs/volumes/your_path/vmware—esx—provider—arc—cim—provider.vib |
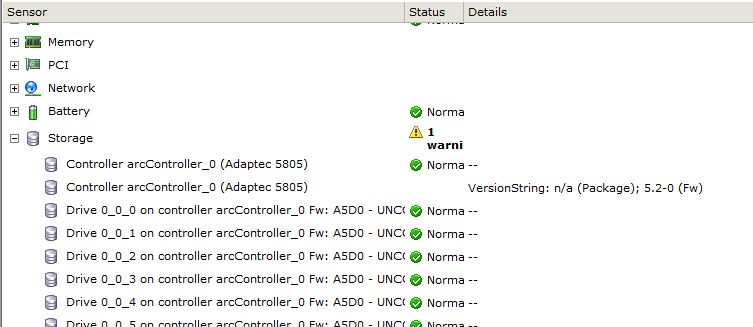
Перезагружаем хост. Теперь на вкладке Hardware Status будет отображаться статус нашего хранилища.
Управление рэйд-контроллером Adaptec.
Для управления рэйд контроллером Adaptec предлагает утилиту командной строки arcconf и графическую утилиту Maxview Storage Manager(ранее Adaptec Storage Manager). Для управления контроллером нужно установить Maxview Storage Manager и(или) arcconf на гостевую! ОС виртуальной машины, расположенной на хосте, где установлен рэйд-контроллер. Скопируйте файл setup_maxview_gos_x64.exe или x86.exe, если используете Windows в качестве гостевой ОС. Запустите установщик и следуйте указаниям мастера. Введите следующие данные:
- Host IP Address (ESXi or XenServer host)
- Web Server Port: 8443
- Host user name (default: root)
- Operating system password/password confirmation
Запустите Maxview Storage Manager и введите для логина учетные данные от хоста ESXi.
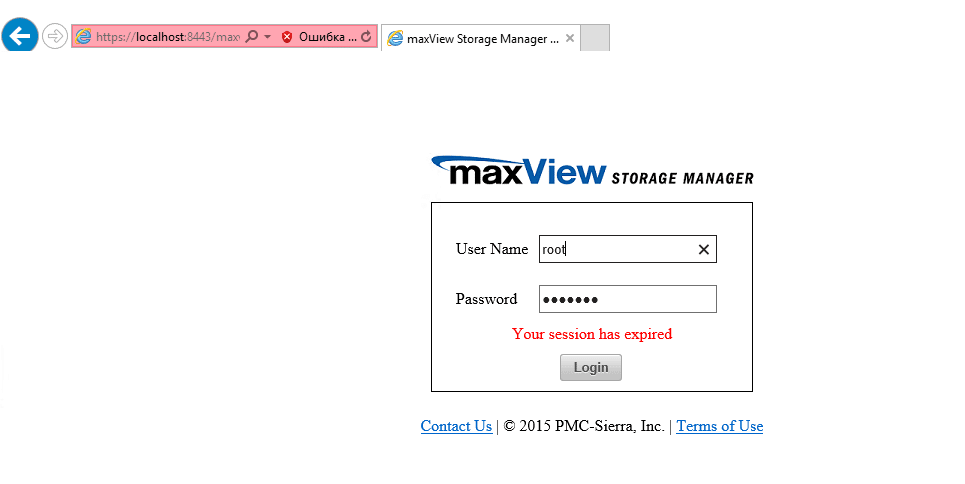
Подключиться можно и с другого компьютера по IP-адресу или имени ВМ, на которой установили maxview storage manager:
https://ip-address:8443/maxview/manager/login.xhtml
После этого вы попадете в меню программы и сможете управлять рэйд-контроллером.
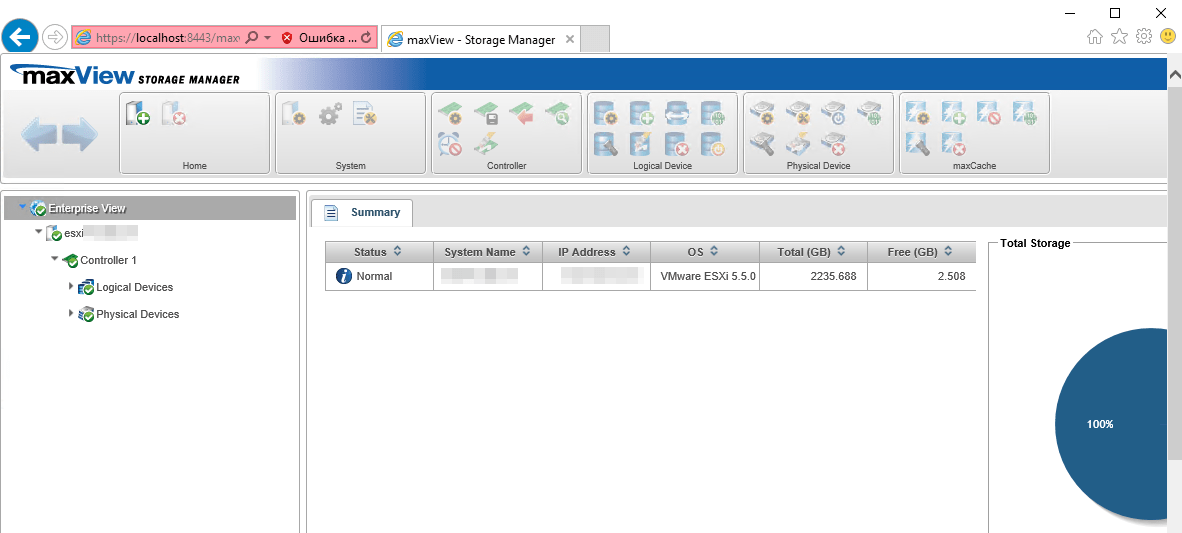
Несколько слов об arcconf.
После установки можно запускать утилиту из консоли CMD или Powershell, запущенных от имени администратора.
Запуск без параметров выведет список доступных команд. Вот несколько полезных из них:
arcconf getconfig 1 — выводит информацию о конфигурации контроллера 1;
arcconf getconfig 1 ld — выводит информацию о логических дисках;
arcconf getconfig 1 pd — выводит информацию о физических дисках;
arcconf rescan 1 — сканирует доступные диски контроллера 1;
arcconf getstatus 1 — показывает фоновые операции(например, ребилд);
Подробная инструкция по использованию arcconf доступна здесь.
Ну и, напоследок, еще об одной «плюшке» для VMware от Adaptec, а именно maxView Plugin for vSphere Web Client. Это плагин, позволяющий отслеживать состояние рэйда в веб-клиенте VMware. К сожалению, управлять рэйд-контроллером через этот плагин нельзя, но, тем не менее, он есть. Установка производится только на ВМ с windows версией VCenter Server путем запуска файла setup_maxView_VWC_Plugin_x64.exe
После установки перезагрузите машину с вцентром.
После перезагрузки в веб-клиенте будет доступен этот плагин.
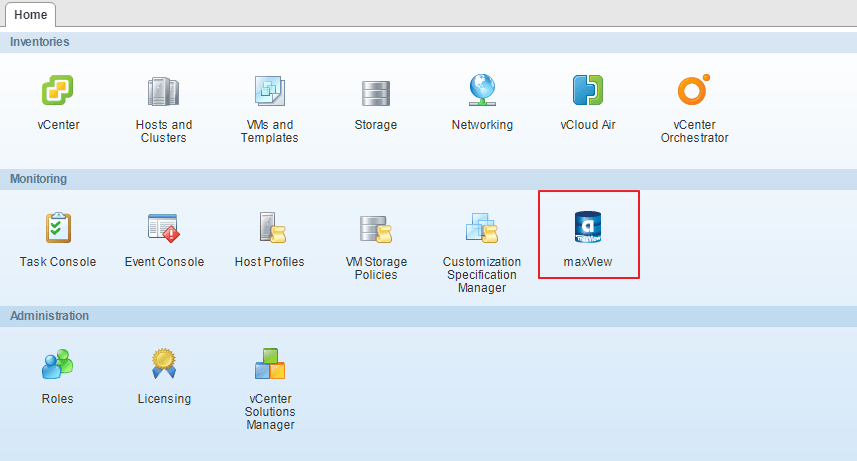
Вот так выглядит страница плагина:
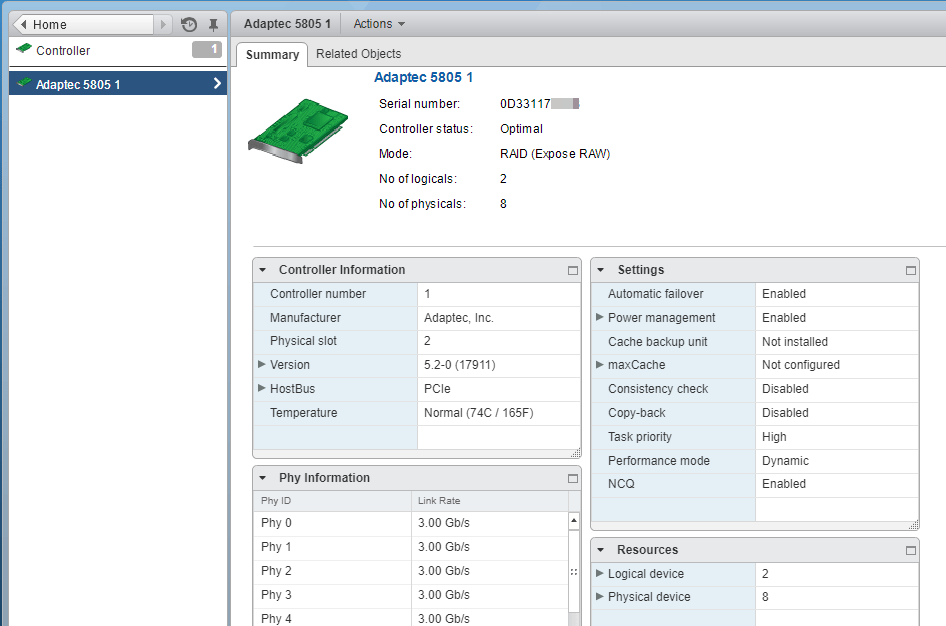
На этом, наверное, можно закончить. Надеюсь, кому-то статья будет полезна при установлении »дружеских отношений» между vmware и рэйд-контроллером Adaptec.
На чтение 6 мин. Опубликовано 15.12.2019
Содержание
- суббота, 27 февраля 2010 г.
- Краткая инструкция по начальной настройке RA >
- Страница скачивания руководства по обслуживанию Adaptec Storage Manager
суббота, 27 февраля 2010 г.
Краткая инструкция по начальной настройке RA >
Честно подсмотрено здесь и отправлено в мемориз:
Ниже представлена краткая инструкция по настройке RAID-контроллеров Adaptec (серии 3xxx, 5xxx). Все указанные действия нужно выполнять до установки операционной системы, когда на жестких дисках нет никаких нужных данных.
Во время старта сервера, при инициализации RAID-контроллера будет выведено приглашение нажать Ctrl-A для того, чтобы войти в BIOS контроллера. Через некоторое время после нажатия Ctrl-A, Вы попадете в утилиту управления контроллером, где и сможете осуществить все дальнейшие действия по настройке.
В первую очередь, нужно проинициализировать диски (все данные на них будут утеряны!) — в меню Array Configuration Utility -> Initialize Drives пробелом выбираете все диски и нажимаете Enter.
После этого можно приступать к созданию массивов. Обсуждения выбора уровня RAID, а также размеров логических дисков выходит за рамки данного документа — это должно быть сделано в момент планирования конфигурации.
Для создания RAID-массива следует выбрать пункт меню Array Configuration Utility -> Create Arrays, выбрать (пробелом) диски, которые Вы планируете включить в массив, и нажать Enter. В следующем меню нужно будет выбрать уровень RAID (Array Type); название массива (Array Label); размер массива (Array Size); размер страйпа (Stripe Size) — в данном случае рекомендуется оставить значение, предлагаемое по умолчанию; кэширование при чтении (Read Caching) — рекомендуется Yes; кэширование записи (Write Caching) — рекомендуется Enable when protected by battery; способ создания массива (Create RAID via) — рекомедуется выбрать режим Clear, хотя это потребуется длительного (особенно в случае с SATA дисками большого объема) ожидания создания массива, зато Вы будете избавлены от целого ряда других возможных проблем.
Если был выбран режим создания массива Clear, начнется процедура создания массива. Посмотреть текущий статус можно в меню Manage Arrays и нажав Enter на массиве — необходимо дождаться статуса Optimal (пока не окончился процесс создания массива в строке статуса будет написано Clearing: xx%).
Если Вы создали несколько массивов, то загрузочным будет самый первый из них (в списке Manage Arrays), поэтому, если требуется выбрать другой массив для установки ОС, нужно установить курсор на этом массиве и нажать Ctrl-B, после подтверждения загрузочный массив изменится.
Назначить Hot-Spare диск(и) можно также в меню Manage Arrays, нажав Ctrl-G — будет выведен список свободных дисков, из него пробелом можно назначить Hot-Spare диски (один или несколько). Затем нужно подтвердить сделанный выбор, нажав Enter. Пояснение: Spare диск не входит в состав ни одного RAID-массива, но в случае поломки какого-либо диска в массиве, автоматически займет его место (кроме случая RAID-0).
После этого можно выйти из BIOS контроллера (Esc) и сервер будет автоматически перезагружен.
Теперь можно начинать устанавливать на сервер операционную систему. Для установки Вам скорее всего потребуются драйверы (возможно, их потребуется записать на дискету). Драйверы можно взять с прилагаемого диска, но рекомендуется скачать последнюю версию с сайта Adaptec: (выбрав имеющийся контроллер и соответствующую ОС). Дальнейшие инструкции по установке драйвера следует искать в документации на используемую ОС.
После установки ОС настоятельно рекомендуется установить Adaptec Storage Manager (ASM). Это графическое приложение служит для мониторинга и модификации настроек RA >
Страница скачивания руководства по обслуживанию Adaptec Storage Manager
Размер: 2,98 MB
Добавлено: 2013-04-21 19:01:38
Количество страниц: 191
Скачивание руководства по обслуживанию Adaptec Storage Manager должно начаться в течении нескольких секунд. Если загрузка не началась автоматически в течение 10 секунд, нажмите на Прямая ссылка. Если у Вас остаются проблемы со скачиванием инструкции Adaptec Storage Manager, свяжитесь с нами, используя формуляр для сообщения об ошибках.;
В рамках данной статьи будет рассмотрена утилита управления контроллерами фирмы Adaptec, а также будет рассказано ка настроить с помощью нее HotSpare.
RAID-контроллеры фирмы Adaptec зарекомендовали как достаточно надежное аппаратное решение для организации RAID-массивов.
Для управления и контроля состояния массива после установления системы, рекомендуется установить утилиту управления maxView storage manager. Управление производится посредством веб-интерфейса.
Дистрибутивы утилиты доступны под различные операционные системы, также присутсвует возможность удаленного подключения к контроллеру Adaptec.
Установка maxView на примере CentOS 6.
Дистрибутив данной утилиты можно скачать на официальном сайте, например, для контроллера серии 8405, он доступен по ссылке.
Выбрать раздел Storage Manager, согласиться с лицензионным соглашением и перейти к скачиванию.
Через консоль Linux можно скачать командой wget:
tar zxvf msm_linux_x64_v2_03_22476.tgz
Перейти в директорию manager (появится после распаковки в директории со скачанным архивом):
И запустить на установку пакет, сдучае с CentOS запускать необходимо пакет StorMan-2.03-22476.x86_64.rpm, командой
rpm -ivh StorMan-2.03-22476.x86_64.rpm
Ответить на задаваемые при установе вопросы, в частности указать порт для службы CMI.
После установки веб-интерфейс будет доступен по адресу:
В качестве логина/пароля необходимо использовать администраторскую учетку сервера.
После авторизации в утилите видна страница с общей сводкой по контроллерам, находящимся на мониторинге. Также в виде диаграммы показано соотношение дисков в рейде и свободных дисков.
При переходе в раздел Physical Devices, выбрав устройство можно увидеть слоты (Slot), по сути подключенные на данный момент к контроллеру жесткие диски. Слоты в статусе Ready (на скриншоте это Slot 2), означает, что данный диск не находится ни в одном массиве и не настроен как HotSpare. Также на основной странице можно увидеть различную информацию по выбранному жесткому диску.
Для добавления диска в HotSpare необходимо выбрать соответствующий слот и в разделе Physical Device верхнего меню выбрать Spare Managment. Откроется окно управления spare-устройствами. На первом шаге необходимо выбрать тип Hot Spare. Всего их три:
– Global — назначает диск резервным для всех логических устройств
– Dedicated — назначает диск резервным для одного выбранного логического устройства
– Pooled — назначает диск резервным для выбранного количества логических устройств
В данном примере использован тип Global. Также на данной вкладке можно редактировать HotSpare — пункт Modify, а также убрать диск из HotSpare — Un-asign.
Второй шаг — выбор логического устройства, которое необходимо резервировать, в случае с настройками по типу Global и одним рейд массивом, пропускается — сразу перекидывает на третий шаг: суммарная информация (проверка что корректный массив резервируется) и завершение настройки HotSpare. Для завершения необходимо нажать кнопку Finish.
Если увидели сообщение Assign hot spare operation successful, значит все прошло успешно.
Обозначение резервирующего слота также изменится c ready на указание типа hot spare.
maxView Storage Manager позволяет легко просматривать, контролировать и настраивать все хранилища в вашей системе, основанные на RAID-контроллерах Adaptec®. Единый инструмент позволяет централизованно управлять хранилищами с прямым подключением (DAS) и сетевыми хранилищами. Кроме того, Adaptec Intelligent Power Management позволяет управлять расширенными пулами кэширования для существующих томов через кэширование maxCache на SSD, а также энергопотреблением хранилищ. Удобный графический интерфейс пользователя (GUI) имеет единый дизайн и принципы работы для всех линеек продукции Adaptec и во всех поддерживаемых операционных системах, включая Windows, Linux, VMWare и Solaris.
Adaptec maxView имеет тот же интерфейс и может использоваться как локально, так и удаленно во всех поддерживаемых операционных системах и платформах. Мощная система контекстно-зависимой интерактивной справки обеспечивает простоту использования. Система Adaptec® Remote Management Services встроена в распространенные решения сторонних поставщиков, поэтому maxView можно использовать для удаленного управления этими решениями, например сервером хранилищ, NAS или целевыми устройствами iSCSI. Подробнее maxView ЧаВО
Графический веб-интерфейс пользователя
- Новое оформление Инфраструктура подключаемых модулей с
- следующих браузеров:
Microsoft Internet Explorer, Mozilla FireFox, Google Chrome и Safari (в т.ч. для планшетов) - Поддержка VMWare (4.1, 5.x)
Поддержка отраслевых стандартов – SNIA и SMI-S
- Обеспечивает интеграцию с клиентскими программами сторонних разработчиков
- (SMI-S) IBM Tivoli, консоль MS Hyper V, HP Storage Essentials Сертифицировано на
- соответствие SNIA и SMI-S (CTP), а также VMWare CIMpat
Расширенный кэш в StorLib
- Генерирует события изменений в управляющей информации Быстрый отклик на
- запросы управления Уменьшает количество команд, передаваемых на контроллер
maxView входит в комплект следующих продуктов Microsemi Adaptec® :
|
|
|
-
Page 1
Storage Manager User’s Guide CDP-00278-02-A Rev. A Issue: December 4, 2012… -
Page 2
For a complete list of PMC-Sierra’s trademarks and registered trademarks, visit: http://www.pmc-sierra.com/legal/. Other product and company names mentioned herein may be the trademarks of their respective owners. Proprietary and Confidential to PMC-Sierra, Inc. Document No.: CDP-00278-02-A Rev. A, Issue:… -
Page 3
Storage Manager User’s Guide Revision History Issue Issue Date Details of Change December 4, Adaptec maxView Storage Manager Version 1.1 2012 Proprietary and Confidential to PMC-Sierra, Inc. Document No.: CDP-00278-02-A Rev. A, Issue:… -
Page 4: Table Of Contents
Checking System Status from the Main Window………………32 Revealing More Device Information ………………….33 Getting Help…………………………34 Logging Out of maxView Storage Manager………………..34 5 Building Your Storage Space……………………..35 Overview…………………………35 Choosing a Management System…………………….35 ‘Local’ or ‘Remote’?…………………….35 Proprietary and Confidential to PMC-Sierra, Inc. Document No.: CDP-00278-02-A Rev. A, Issue:…
-
Page 5
Deleting the maxCache Container………………..65 Changing the maxCache Settings for a Logical Drive……………65 Changing the maxCache Settings for a Controller…………….66 Using maxCache with Adaptec Series 6 Controllers…………….66 Maintaining an Energy-Efficient Storage Space………………..67 Setting Power Management Options for a Logical Drive…………..68 Setting Power Management Options for a Controller…………..69 Disabling Power Management for a Logical Drive…………….70… -
Page 6
Creating a Server Template File…………………103 Duplicating the Server Template………………..103 Managing Remote Systems……………………105 Adding Remote Systems with the Wizard………………105 Manually Adding a Remote System………………..105 Removing a Remote System………………….106 Changing the Auto-Discovery Settings……………….107 Proprietary and Confidential to PMC-Sierra, Inc. Document No.: CDP-00278-02-A Rev. A, Issue:… -
Page 7
RAID 10 Logical Drives……………………..118 RAID 5 Logical Drives……………………..119 RAID 5EE Logical Drives……………………..120 RAID 50 Logical Drive……………………..121 RAID 6 Logical Drives……………………..122 RAID 60 Logical Drives……………………..122 Appendix B Icons At-a-Glance……………………..123 Proprietary and Confidential to PMC-Sierra, Inc. Document No.: CDP-00278-02-A Rev. A, Issue:… -
Page 8: Adaptec By Pmc Product Support
Storage Manager User’s Guide Adaptec by PMC Product Support If you have questions about installing or using your Adaptec by PMC product, check this document first—you will find answers to most of your questions. If you need further assistance, use the support options listed below.
-
Page 9
Storage Manager User’s Guide Information Technique et d’assistance en Français • Visitez notre site Web à l’adresse www.adaptec.com/fr-fr. • Rechercher dans le base de connaissances Adaptec (ASK) ask-fr.adaptec.com pour des articles, conseils de dépannage et les questions fréquemment posées pour votre produit. -
Page 10: Software License Agreement
Section 4. This license does not grant you any rights to distribute or disclose such database or data. Proprietary and Confidential to PMC-Sierra, Inc. Document No.: CDP-00278-02-A Rev. A, Issue:…
-
Page 11
All rights in the Software not specifically granted in this Agreement are reserved by PMC-Sierra. Should you have any questions concerning this license, contact: PMC-Sierra, Inc. Legal Department 1380 Bordeaux Drive Proprietary and Confidential to PMC-Sierra, Inc. Document No.: CDP-00278-02-A Rev. A, Issue:… -
Page 12
Storage Manager User’s Guide Sunnyvale, CA 94089 (408) 239-8000 Proprietary and Confidential to PMC-Sierra, Inc. Document No.: CDP-00278-02-A Rev. A, Issue:… -
Page 13: About This Guide
Adaptec maxView Storage Manager™ is a browser-based software application that helps you build a storage space using Adaptec RAID controllers, disk drives, and enclosures, and then manage your stored data, whether you have a single RAID controller installed in a server or multiple RAID controllers, servers, and enclosures.
-
Page 14: How To Find More Information
• Enclosure (also known as a storage enclosure or disk enclosure) How to Find More Information You can find more information about your Adaptec RAID controller, management software, and utilities by referring to these documents, located on the Adaptec Installation DVD: •…
-
Page 15: Introduction To Maxview Storage Manager
Storage Manager is a browser-based software application that helps you build a storage space for your data, using Adaptec RAID controllers, disk drives, Solid State Drives (SSDs), and enclosures. With maxView Storage Manager, you can group disk drives into logical drives and build in redundancy to protect your data and improve system performance.
-
Page 16: About The Maxview Storage Manager Agent
RAID controllers in your system and notify the maxView Storage Manager Agent. The standards-based SMI-S provider enables your Adaptec RAID controller to be managed with any standard CIM client. (For more information, contact your Adaptec support representative.) The maxView Storage Manager CIM Server is installed automatically with maxView Storage Manager and the maxView Storage Manager Agent.
-
Page 17: System Requirements
∘ Solaris 10, Solaris 11 Express ∘ VMware ESXi 5.1, VMware ESX 4.1 Classic For the latest on operating system version support check the readme on your Adaptec Installation DVD or visit the Support area of the Adaptec Web Site at www.adaptec.com Note: maxView Storage Manager can also be used before an operating system is installed.
-
Page 18: Typical Storage Space Configurations
Storage Manager Network connection Customer Data RAID 50 RAID 50 Server with Adaptec RAID controller running Storage enclosure with maxView Storage Manager Agent disk drives installed Proprietary and Confidential to PMC-Sierra, Inc. Document No.: CDP-00278-02-A Rev. A, Issue:…
-
Page 19: Continuing To Grow Your Storage Space
Server running maxView RAID 6 Storage Manager Agent RAID 6 RAID 6 System running maxView Server running maxView Storage enclosures with Storage Manager Storage Manager Agent disk drives installed Proprietary and Confidential to PMC-Sierra, Inc. Document No.: CDP-00278-02-A Rev. A, Issue:…
-
Page 20: Installing Maxview Storage Manager
3. Click Next to begin the installation, click I accept…, then click Next. 4. Add the following configuration settings: a) CIM Server Port: 5988. b) Web Server Port: 8443. c) User Name default: Administrator d) Operating system password. Proprietary and Confidential to PMC-Sierra, Inc. Document No.: CDP-00278-02-A Rev. A, Issue:…
-
Page 21: Installing On Red Hat, Cent Os, Suse, Or Fedora Linux
Note: The installation includes a 32-bit and 64-bit installation package. 1. Insert the Adaptec Installation DVD. The Installation DVD mounts automatically. If it doesn’t, manually mount it. 2. Change to the manager directory. Proprietary and Confidential to PMC-Sierra, Inc. Document No.: CDP-00278-02-A Rev. A, Issue:…
-
Page 22: Installing On Debian Or Ubuntu Linux
1. Insert the Adaptec Installation DVD. The Installation DVD mounts automatically. If it doesn’t, manually mount it. mount -F hsfs -o ro/dev/dsk/c1t0d0s2/mnt 2. Install maxView Storage Manager. pkgadd -d/<mount point>/maxview/solaris_x86/manager/StorMan.pkg Proprietary and Confidential to PMC-Sierra, Inc. Document No.: CDP-00278-02-A Rev. A, Issue:…
-
Page 23: Installing On Vmware Esx 4.1
Enter your password. Enter the CIM Server HTTP Port: [default:5988] 3. Eject or unmount the Adaptec Installation DVD. Refer to your operating system documentation for detailed instructions. When the installation is complete you receive a confirmation message and the maxView Storage Manager icon is placed on your desktop.
-
Page 24: Installing On Vmware Esxi 5.X
When the package is installed, you receive the message «Reboot Required: false.» 12. Reboot the system. 13. Continue with Installing on a VMware Guest OS on page 25. Proprietary and Confidential to PMC-Sierra, Inc. Document No.: CDP-00278-02-A Rev. A, Issue:…
-
Page 25: Installing On A Vmware Guest Os
Check the system BIOS to see if the CD drive is listed first in the boot order. For more information, see your system’s documentation. 1. Insert the Adaptec Installation DVD into your DVD drive, then restart your system. 2. When prompted, select the language you want, then press Enter.
-
Page 26: Uninstalling Maxview Storage Manager
When the uninstall process is complete, you receive a confirmation message and the maxView icon is removed from your desktop. Uninstalling from Solaris This section describes how to uninstall maxView Storage Manager from systems running Solaris. 1. Type the command pkgrm StorMan Proprietary and Confidential to PMC-Sierra, Inc. Document No.: CDP-00278-02-A Rev. A, Issue:…
-
Page 27: Uninstalling From Vmware Esx 4.1
-n arcsmis 6. Restart operations: /etc/init.d/./sfcbd-watchdog start To verify that maxView Storage Manager was uninstalled, repeat step 2. If no results are shown, the software was uninstalled. Proprietary and Confidential to PMC-Sierra, Inc. Document No.: CDP-00278-02-A Rev. A, Issue:…
-
Page 28: Exploring Maxview Storage Manager
The left panel shows always the Enterprise View. The bottom panel shows the Event Log and Task Log. The right panel shows the Storage Dashboard and Chart View. Different information appears in the right panel depending on which component is selected in the Enterprise View. Proprietary and Confidential to PMC-Sierra, Inc. Document No.: CDP-00278-02-A Rev. A, Issue:…
-
Page 29: The Enterprise View
62 for more on maxCache). In the figure below, a controller is expanded in the Enterprise View, revealing the physical and logical devices associated with that controller. Proprietary and Confidential to PMC-Sierra, Inc. Document No.: CDP-00278-02-A Rev. A, Issue:…
-
Page 30: What Do The Enterprise View Icons Mean
A green checkmark in the Enterprise View means that the component is healthy with no problems or issues. For more information, see Identifying a Failed or Failing Component on page 110. Proprietary and Confidential to PMC-Sierra, Inc. Document No.: CDP-00278-02-A Rev. A, Issue:…
-
Page 31: The Ribbon
SSDs. It also provides a chart view of free and used space in your system. Tabs provide quick access to component information Chart view of free and used space in your system Proprietary and Confidential to PMC-Sierra, Inc. Document No.: CDP-00278-02-A Rev. A, Issue:…
-
Page 32: Checking System Status From The Main Window
Storage Dashboard (see Monitoring Enclosure Status on page 92). For more information about checking status from the main window, see Monitoring Status and Activity on page 88. Proprietary and Confidential to PMC-Sierra, Inc. Document No.: CDP-00278-02-A Rev. A, Issue:…
-
Page 33: Revealing More Device Information
(if any) logical drive it belongs to. Two disk drives plus a hot spare comprise the selected logical drive The maxCache Container is comprised of three SSDs Proprietary and Confidential to PMC-Sierra, Inc. Document No.: CDP-00278-02-A Rev. A, Issue:…
-
Page 34: Getting Help
2. Click the Logout button at the upper-right corner of the main window: Click here to log out You are logged out of maxView Storage Manager and the main window is closed. Proprietary and Confidential to PMC-Sierra, Inc. Document No.: CDP-00278-02-A Rev. A, Issue:…
-
Page 35: Building Your Storage Space
B (local system), system A is a remote system. For the purposes of this guide, the ‘local system’ is the management system. Proprietary and Confidential to PMC-Sierra, Inc. Document No.: CDP-00278-02-A Rev. A, Issue:…
-
Page 36: Logging In On The Local System
For more information about the maxView Storage Manager Agent, CIM server, and Web server, see About maxView Storage Manager on page 15. Proprietary and Confidential to PMC-Sierra, Inc. Document No.: CDP-00278-02-A Rev. A, Issue:…
-
Page 37: Windows
To start (or stop) the Agent on Solaris, enter these commands: 1. Start the CIM server: Options Description Start service svcadm enable stor_cimserver Stop service svcadm disable stor_cimserver Check status svcs -l stor_cimserver 2. Start the Agent: Proprietary and Confidential to PMC-Sierra, Inc. Document No.: CDP-00278-02-A Rev. A, Issue:…
-
Page 38: Logging Into Remote Systems From The Local System
Storage Manager Agent. 2. Select the systems you want to add to the Enterprise View, then enter the systems’ login credentials (username/password) in the space provided. Proprietary and Confidential to PMC-Sierra, Inc. Document No.: CDP-00278-02-A Rev. A, Issue:…
-
Page 39: Creating Logical Drives
1. In the Enterprise View, select a system, then select a controller on that system. 2. On the ribbon, in the Logical Disk group, click Create Logical Drive. 3. When the wizard opens, ensure that Express Configuration is selected, then click Next. Proprietary and Confidential to PMC-Sierra, Inc. Document No.: CDP-00278-02-A Rev. A, Issue:…
-
Page 40
Storage Manager builds the logical drive(s). Use the Event Log and Task Log to track build progress. 6. Repeat Steps for each controller in your storage space. 7. Partition and format your logical drives. See Partitioning and Formatting Your Logical Drives on page Proprietary and Confidential to PMC-Sierra, Inc. Document No.: CDP-00278-02-A Rev. A, Issue:… -
Page 41: Custom Configuration
4. Select a RAID level, then click Next. Note: Not all RAID levels are supported by all controllers. For example, RAID 5EE and JBODs are supported on Adaptec Series 6 controllers only. Proprietary and Confidential to PMC-Sierra, Inc. Document No.: CDP-00278-02-A Rev. A, Issue:…
-
Page 42
• Enter a name for the logical drive. Names can include any combination of letters and numbers, but cannot include spaces. • Set a smaller logical drive size (by default, a new logical drive uses all available disk space). Proprietary and Confidential to PMC-Sierra, Inc. Document No.: CDP-00278-02-A Rev. A, Issue:… -
Page 43
12. Partition and format your logical drives. See Partitioning and Formatting Your Logical Drives on page 44 for more information. Proprietary and Confidential to PMC-Sierra, Inc. Document No.: CDP-00278-02-A Rev. A, Issue:… -
Page 44: Partitioning And Formatting Your Logical Drives
Refer to your operating system documentation for more information. Creating Logical Drives on Other Systems in Your Storage Space If you installed maxView Storage Manager and Adaptec RAID controllers on more than one system, continue building your storage space as follows: •…
-
Page 45: Protecting Your Data
In addition to the standard (RAID 0, RAID 1, RAID 5, RAID 10, RAID 50) and enhanced (RAID 1E, RAID 6, RAID 60) RAID levels, controllers with the Adaptec Advanced Data Protection Suite include additional methods of protecting the data on your storage space.
-
Page 46: Assigning A Dedicated Hot Spare Or Pool Hot Spare
2. On the ribbon, in the Physical Disk group, click Assign Spare. The Assign Spare wizard opens. 3. Select Assign as a Dedicated Spare, then click Next. Proprietary and Confidential to PMC-Sierra, Inc. Document No.: CDP-00278-02-A Rev. A, Issue:…
-
Page 47: Deleting A Global Hot Spare
• Remove the ‘hot spare’ designation from a disk drive that is no longer being used as a hot spare. (When a hot spare is built into a logical drive after a disk drive failure, it retains its ‘hot spare’ Proprietary and Confidential to PMC-Sierra, Inc. Document No.: CDP-00278-02-A Rev. A, Issue:…
-
Page 48: Removing Or Deleting A Dedicated Hot Spare
2. On the ribbon, in the Physical Disk group, click Unassign Spare. The Unassign Spare window opens. 3. Select the logical drive from which to remove or delete the dedicated spare, then click Unassign. Proprietary and Confidential to PMC-Sierra, Inc. Document No.: CDP-00278-02-A Rev. A, Issue:…
-
Page 49: Enabling Copyback
2. On the ribbon, in the Controller group, click Set Properties. The Set Properties window opens. 3. Click the Data Protect tab. 4. In the Copyback drop-down list, select , then click Apply. Enabled Disabled Proprietary and Confidential to PMC-Sierra, Inc. Document No.: CDP-00278-02-A Rev. A, Issue:…
-
Page 50: Enabling Automatic Failover
2. On the ribbon, in the Controller group, click Set Properties. The Set Properties window opens. 3. Click the Data Protect tab. 4. In the Failover drop-down list, select , then click Apply. Enabled Disabled Proprietary and Confidential to PMC-Sierra, Inc. Document No.: CDP-00278-02-A Rev. A, Issue:…
-
Page 51
Storage Manager User’s Guide Proprietary and Confidential to PMC-Sierra, Inc. Document No.: CDP-00278-02-A Rev. A, Issue:… -
Page 52: Modifying Your Storage Space
This section provides additional scenarios for creating and modifying logical drives. It explains how to create hybrid RAID drives; optimize logical drive performance; use maxView Storage Manager’s power management features; and how to use Adaptec maxCache ™ to leverage the performance capabilities of the Solid State Drives (SSDs) in your system.
-
Page 53: Including Different-Sized Disk Drives In A Logical Drive
RAID 5 logical drive includes two disk drives of one size and one of another. RAID5 with different size disks. No segment is larger than smallest disk drive (111GB, in this example). Proprietary and Confidential to PMC-Sierra, Inc. Document No.: CDP-00278-02-A Rev. A, Issue:…
-
Page 54: Creating A Logical Drive Using Available Segments
4. In the RAID Level panel, select RAID 1 or RAID 10, then click Next. 5. Select the hard drives and SSDs that you want to use in the hybrid RAID drive. Proprietary and Confidential to PMC-Sierra, Inc. Document No.: CDP-00278-02-A Rev. A, Issue:…
-
Page 55: Fine-Tuning Logical Drives
3. In the Logical Device Name field, type the new name, then click OK. maxView Storage Manager updates the logical drive name and displays the new name in the Enterprise View. Proprietary and Confidential to PMC-Sierra, Inc. Document No.: CDP-00278-02-A Rev. A, Issue:…
-
Page 56: Changing The Read Cache Setting
• Enabled (write-back) when protected by battery/ZMM—Similar to Enabled (write-back), but used when the controller is protected by a zero-maintenance cache protection module. For more information about zero-maintenance cache protection, see the Adaptec RAID Controller Installation and User’s Guide. Note: (RAID 10, 50, and 60 only) All logical drives comprising a RAID 10/50/60 logical device must have the same write cache setting—either all write-through or all…
-
Page 57: Changing The Stripe Size
R5 Sequential writes (all request sizes) applications, such as data R5 Web server entry or retrieval applications. R6 Web server R10 Sequential writes R10 Web server SATA: R0 Sequential reads (all request sizes) Proprietary and Confidential to PMC-Sierra, Inc. Document No.: CDP-00278-02-A Rev. A, Issue:…
-
Page 58: Verifying Logical Drives
If your controller doesn’t support background consistency check, we highly recommend that you verify your logical drives weekly, following the instructions in Verifying and Fixing a Logical Drive on page 59. Proprietary and Confidential to PMC-Sierra, Inc. Document No.: CDP-00278-02-A Rev. A, Issue:…
-
Page 59: Verifying And Fixing A Logical Drive
Storage Dashboard, click Properties.) To enable or disable background consistency check: 1. In the Enterprise View, select a controller. 2. On the ribbon, in the Controller group, click Set Properties. Proprietary and Confidential to PMC-Sierra, Inc. Document No.: CDP-00278-02-A Rev. A, Issue:…
-
Page 60: Increasing The Capacity Of A Logical Drive
8. Click Next. 9. Review the logical drive settings. To make changes, click Back. 10. Click Finish. The logical drive is expanded and its capacity increased to the new size. Proprietary and Confidential to PMC-Sierra, Inc. Document No.: CDP-00278-02-A Rev. A, Issue:…
-
Page 61: Changing The Raid Level Of A Logical Drive
8. Review the logical drive settings. To make changes, click Back. 9. Click Finish. The logical drive is reconfigured with the selected disks and migrates to the new RAID level. Proprietary and Confidential to PMC-Sierra, Inc. Document No.: CDP-00278-02-A Rev. A, Issue:…
-
Page 62: Erasing A Logical Drive
Container. The data remains on the maxCache Container until it is full or some other «hotter» data replaces it. The data is then flushed from the cache and written back to the logical drives in your storage space. Proprietary and Confidential to PMC-Sierra, Inc. Document No.: CDP-00278-02-A Rev. A, Issue:…
-
Page 63: Creating A Maxcache Container
Storage Manager User’s Guide Note: Adaptec Series 6 controllers support read caching only, and do not use the maxCache Container. For more information, see Using maxCache with Adaptec Series 6 Controllers on page 66. You can add maxCache to your storage space only if you have one or more compatible Solid State Drives installed on the RAID controllers in your system.
-
Page 64: Setting The Maxcache Flush And Fetch Rate
2. In the Enterprise View, select the maxCache Container you want to verify and fix. 3. On the ribbon, in the maxCache group, click Verify. The Verify maxCache window opens. 4. Choose a verification option: Proprietary and Confidential to PMC-Sierra, Inc. Document No.: CDP-00278-02-A Rev. A, Issue:…
-
Page 65: Deleting The Maxcache Container
1. In the Enterprise View, select a controller, then select a logical drive on that controller. 2. On the ribbon, in the Logical Disk group, click Set Properties. 3. When the Set Properties window opens, click the maxCache tab. Proprietary and Confidential to PMC-Sierra, Inc. Document No.: CDP-00278-02-A Rev. A, Issue:…
-
Page 66: Changing The Maxcache Settings For A Controller
3. Click OK. Using maxCache with Adaptec Series 6 Controllers Adaptec Series 6 (and other legacy) controllers support maxCache read caching only. On a Series 6 controller with maxCache read caching enabled, the system copies frequently read «hot» data to an SSD cache pool, called the maxCache device.
-
Page 67: Maintaining An Energy-Efficient Storage Space
65. To configure the maxCache device: 1. In the Enterprise View, select a system, then select an Adaptec Series 6 controller on that system. 2. On the ribbon, in the maxCache group, click Create maxCache. The maxCache Device Configuration window opens.
-
Page 68: Setting Power Management Options For A Logical Drive
The Set Properties window opens. 3. Click the Power tab. 4. In the Power Settings drop-down list, select Enabled 5. Select a value for each timer from the drop-down lists: Proprietary and Confidential to PMC-Sierra, Inc. Document No.: CDP-00278-02-A Rev. A, Issue:…
-
Page 69: Setting Power Management Options For A Controller
The time zone does not adjust automatically for daylight savings time. To compensate, you must adjust the stay awake period manually, either in the BIOS or with maxView Storage Manager. For more information, see the Adaptec RAID Controller Installation and User’s Guide.
-
Page 70: Disabling Power Management For A Logical Drive
2. On the ribbon, in the Logical Disk group, click Set Properties. The Set Properties window opens. 3. Click the Power tab. 4. In the Power Settings drop-down list, select Disabled 5. Click OK. Proprietary and Confidential to PMC-Sierra, Inc. Document No.: CDP-00278-02-A Rev. A, Issue:…
-
Page 71: Working With Scheduled Tasks
«finish» button varies, depending on the task type.) Do not click finish! 2. Click Schedule. The schedule window opens. Note: The schedule window is the same for all tasks, except for the title text on the title bar. Proprietary and Confidential to PMC-Sierra, Inc. Document No.: CDP-00278-02-A Rev. A, Issue:…
-
Page 72: Monitoring Tasks
The Status column shows the current condition of each task: • Scheduled—The task is scheduled to be completed at a future date and time. • Running—The task is running and currently in progress. Proprietary and Confidential to PMC-Sierra, Inc. Document No.: CDP-00278-02-A Rev. A, Issue:…
-
Page 73: What If A Task Misses Its Start Time
To modify a scheduled task: 1. In the Task Log, single-click the task you want to modify. 2. When the Task Log Detail window opens, click Modify. Proprietary and Confidential to PMC-Sierra, Inc. Document No.: CDP-00278-02-A Rev. A, Issue:…
-
Page 74: Deleting A Task
2. When the Task Log Detail window opens, click Delete. 3. Click Yes to confirm the deletion. The task is deleted and its entry is removed from the Task Log. Proprietary and Confidential to PMC-Sierra, Inc. Document No.: CDP-00278-02-A Rev. A, Issue:…
-
Page 75: Maintaining Physical Devices
To Locate… Select… A disk drive Disk Drive icon: All disk drives included in a Logical Drive icon: logical drive All SSDs in the maxCache maxCache Container icon: Container Proprietary and Confidential to PMC-Sierra, Inc. Document No.: CDP-00278-02-A Rev. A, Issue:…
-
Page 76: Locating A Disk Drive
The Locate LD window opens and displays a list of the physical disks associated with the logical drive. 3. Click the Locate button (on the Locate LD window). Proprietary and Confidential to PMC-Sierra, Inc. Document No.: CDP-00278-02-A Rev. A, Issue:…
-
Page 77: Locating Ssds In The Maxcache Container
2. On the ribbon, in the maxCache group, click Locate. The Locate maxCache window opens, displaying a list of the SSDs comprising the maxCache Container. 3. Click the Locate button (on the Locate maxCache window). Proprietary and Confidential to PMC-Sierra, Inc. Document No.: CDP-00278-02-A Rev. A, Issue:…
-
Page 78: Working With Failed Or Failing Disk Drives
Before you can remove a disk drive, you should set it to a failed state to protect your data. You cannot use maxView Storage Manager to set the drive state to Failed. You must use the Adaptec RAID Controller Configuration command line utility (ARCCONF), to change the drive state. First, use the Storage Dashboard…
-
Page 79: Initializing And Erasing Disk Drives
2. On the ribbon, in the Physical Disk group, click Secure Erase. The Secure Erase PD window opens. 3. Click Erase to erase the disk drive; click Cancel to cancel the action. Proprietary and Confidential to PMC-Sierra, Inc. Document No.: CDP-00278-02-A Rev. A, Issue:…
-
Page 80: Verifying And Fixing A Disk Drive
1. In the Enterprise View, select a controller then, in the Physical Devices tree, select a disk drive. 2. On the ribbon, in the Physical Disk group, click Set Properties. Proprietary and Confidential to PMC-Sierra, Inc. Document No.: CDP-00278-02-A Rev. A, Issue:…
-
Page 81: Working With Controllers
Caution: If you disable the alarm, no audible signal will sound when an error occurs on the controller. To disable a controller’s alarm: 1. In the Enterprise View, select a controller. 2. On the ribbon, in the Controller group, click Set Properties. Proprietary and Confidential to PMC-Sierra, Inc. Document No.: CDP-00278-02-A Rev. A, Issue:…
-
Page 82: Rescanning A Controller
To enable or disable NCQ for the drives on a controller: 1. In the Enterprise View, select a controller. 2. On the ribbon, in the Controller group, click Set Properties. Proprietary and Confidential to PMC-Sierra, Inc. Document No.: CDP-00278-02-A Rev. A, Issue:…
-
Page 83: Working With System Alarms
The maxView Storage Manager Agent Settings window opens. The alarm settings are circled in the next figure. 3. Edit the alarm settings, as needed. You can disable the system alarm by deselecting Sound Alarm. Proprietary and Confidential to PMC-Sierra, Inc. Document No.: CDP-00278-02-A Rev. A, Issue:…
-
Page 84: Updating Controller And Disk Drive Firmware
87 Before You Begin Before you begin, download the latest firmware images from the Adaptec Web site at www.adaptec.com, or from your vendor’s support site on the World Wide Web. Controller images come in sets of one or more files and have a .ufi file extension.
-
Page 85
(the button label may be different on your browser), then click Upload. 5. When the file name appears in the Uploaded F/W File(s) list, click Next. 6. Select the controllers you want to update, then click Next. Proprietary and Confidential to PMC-Sierra, Inc. Document No.: CDP-00278-02-A Rev. A, Issue:… -
Page 86
Caution: Do not power down the controller(s) while the update is in progress! 8. When the update is complete, click OK. Restart the server to activate the new firmware image. Proprietary and Confidential to PMC-Sierra, Inc. Document No.: CDP-00278-02-A Rev. A, Issue:… -
Page 87: Updating The Disk Drive Firmware
Caution: Do not power down the controller(s) while the update is in progress! 8. When the update is complete, click OK. Restart the server to activate the new firmware image. Proprietary and Confidential to PMC-Sierra, Inc. Document No.: CDP-00278-02-A Rev. A, Issue:…
-
Page 88: Monitoring Status And Activity
I/O statistics. Proprietary and Confidential to PMC-Sierra, Inc. Document No.: CDP-00278-02-A Rev. A, Issue:…
-
Page 89: Viewing Activity Status In The Event Log
A disk drive is being rebuilt. A controller is not responding to an enclosure. Error A controller has failed. A logical drive has failed. A disk drive or hot spare has failed. Proprietary and Confidential to PMC-Sierra, Inc. Document No.: CDP-00278-02-A Rev. A, Issue:…
-
Page 90: Viewing Task Status In The Task Log
Viewing Activity Status in the Event Log on page 89). Note: For information about Chart View, on the right side of the Storage Dashboard, Viewing Storage Space Usage in Chart View on page 93. Proprietary and Confidential to PMC-Sierra, Inc. Document No.: CDP-00278-02-A Rev. A, Issue:…
-
Page 91
Drive state (Ready, Optimal, Hot Spare) SMART Statistics Channel number and device ID Cache settings, power management status, and transfer speed Drive segment allocation SMART statistics (see Viewing SMART Statistics on page 92) Proprietary and Confidential to PMC-Sierra, Inc. Document No.: CDP-00278-02-A Rev. A, Issue:… -
Page 92: Monitoring Enclosure Status
SMART tab on the Storage Dashboard. For SSDs, the statistics include wear-level and longevity indicators, as shown in next figure. Refer to your drive vendor’s data sheet for a description of individual report items. SSD wear-level and longevity indicators Proprietary and Confidential to PMC-Sierra, Inc. Document No.: CDP-00278-02-A Rev. A, Issue:…
-
Page 93: Viewing Storage Space Usage In Chart View
Before you begin, note this information: • The address of your Simple Mail Transfer Protocol (SMTP) server (host name and domain, or TCP/IP address) Proprietary and Confidential to PMC-Sierra, Inc. Document No.: CDP-00278-02-A Rev. A, Issue:…
-
Page 94
Use Secure Mail Server, then enter the SMTP server’s login credentials (username/password) in the space provided. 6. On the System Settings window, click the Email tab. The Email Notifications Manager opens. Proprietary and Confidential to PMC-Sierra, Inc. Document No.: CDP-00278-02-A Rev. A, Issue:… -
Page 95
Do the Event Status Icons Mean? on page 89.) Repeat this step to add more email recipients. Each recipient appears in the Email Notifications Manager, as shown below: Proprietary and Confidential to PMC-Sierra, Inc. Document No.: CDP-00278-02-A Rev. A, Issue:… -
Page 96: Sending A Test Message
4. Select one or more email addresses to send a test message to. To select all addresses, click the check box at the top of the list, as shown in the figure below. Proprietary and Confidential to PMC-Sierra, Inc. Document No.: CDP-00278-02-A Rev. A, Issue:…
-
Page 97: Modifying Recipient Information Or Removing A Recipient
Add Email. When the Add Email window opens, change the information as required, then click OK. The modified information appears in Email Notifications Manager. 6. Click OK to close the Email Notifications Manager and save the changes. Proprietary and Confidential to PMC-Sierra, Inc. Document No.: CDP-00278-02-A Rev. A, Issue:…
-
Page 98: Modifying Email Server Settings
The Email Notifications Manager opens. 4. In the Event Email Template section, enter a subject line for the email notification, then enter a notification message. 5. Click OK to save the template. Proprietary and Confidential to PMC-Sierra, Inc. Document No.: CDP-00278-02-A Rev. A, Issue:…
-
Page 99: Broadcasting Alerts About Status And Activity
1. In the Enterprise View, select a system, then select a controller. 2. On the ribbon, in the Controller group, click Set Properties. The Set Properties window opens. 3. In the Advanced Statistics drop-down list, select Enabled Proprietary and Confidential to PMC-Sierra, Inc. Document No.: CDP-00278-02-A Rev. A, Issue:…
-
Page 100: Viewing Advanced Statistics
(on the left) and the maxCache statistics for a logical drive, including cache hits and misses and a histogram of cache hit distribution. Proprietary and Confidential to PMC-Sierra, Inc. Document No.: CDP-00278-02-A Rev. A, Issue:…
-
Page 101: Resetting The Statistics Counters
2. On the ribbon, in the Controller group, click Set Properties. The Set Properties window opens. 3. Click the Reset Now button, then click Apply. The statistics counters are reset. Proprietary and Confidential to PMC-Sierra, Inc. Document No.: CDP-00278-02-A Rev. A, Issue:…
-
Page 102: Changing An Operating System’s Event Log Setting
3. In the Save Events to OS Log drop-down list, select the type of events that you want to log, then click OK. 4. Restart maxView Storage Manager to apply the new setting. Proprietary and Confidential to PMC-Sierra, Inc. Document No.: CDP-00278-02-A Rev. A, Issue:…
-
Page 103: Managing Your Storage Space
When you are ready to duplicate the server template on other systems in your storage space, you can restore the controller(s) on those systems from the server template file. Keep in mind that: Proprietary and Confidential to PMC-Sierra, Inc. Document No.: CDP-00278-02-A Rev. A, Issue:…
-
Page 104
To force deployment of just the logical drives Drives 5. To retain the slot information for enclosures, click Use Slot ID. 6. Click Restore. maxView Storage Manager duplicates the controller configuration on the new controller. Proprietary and Confidential to PMC-Sierra, Inc. Document No.: CDP-00278-02-A Rev. A, Issue:… -
Page 105: Managing Remote Systems
You can add a remote system manually if auto-discovery fails to find the system on your network. To manually add a remote system: 1. On the ribbon, in the Home group, click Add System. Proprietary and Confidential to PMC-Sierra, Inc. Document No.: CDP-00278-02-A Rev. A, Issue:…
-
Page 106: Removing A Remote System
The Delete System window opens. 2. Select the system(s) you want to remove. To select all systems in the list, click the checkbox at the top of the window. Proprietary and Confidential to PMC-Sierra, Inc. Document No.: CDP-00278-02-A Rev. A, Issue:…
-
Page 107: Changing The Auto-Discovery Settings
2. On the ribbon, in the System group, click System Settings. The maxView Storage Manager Agent Settings window opens for that system. The auto-discovery settings appear at the bottom: Proprietary and Confidential to PMC-Sierra, Inc. Document No.: CDP-00278-02-A Rev. A, Issue:…
-
Page 108: Clearing The Controller Configuration
1. In the Enterprise View, select a system, then select a controller on that system. 2. On the ribbon, in the Controller group, click Clear Configuration. A message window opens, warning that this operation destroys your data. Proprietary and Confidential to PMC-Sierra, Inc. Document No.: CDP-00278-02-A Rev. A, Issue:…
-
Page 109: Changing The Agent Base Port Setting
The Agent Settings window opens. In the figure below, the base port setting is circled in blue. 3. Enter the new base port, then click OK. 4. Restart the Agent. Proprietary and Confidential to PMC-Sierra, Inc. Document No.: CDP-00278-02-A Rev. A, Issue:…
-
Page 110: Solving Problems
…and a physical device in Slot 2 in Enclosure 0. Click Slot 2 to check the device status on the Storage Dashboard and continue tracing the fault to its source..a disk drive failure. Proprietary and Confidential to PMC-Sierra, Inc. Document No.: CDP-00278-02-A Rev. A, Issue:…
-
Page 111: Recovering From A Disk Drive Failure
If copyback is enabled, data is moved back to its original location once the controller detects that the failed drive has been replaced. See Enabling Copyback on page 49 for more information. Proprietary and Confidential to PMC-Sierra, Inc. Document No.: CDP-00278-02-A Rev. A, Issue:…
-
Page 112: Disk Drive Failure In A Raid 0 Logical Drive
Step 3. You may need to try several different disk drive orders (called the “stripe order”) before you can recover the data.. Note: On the Summary panel, uninitialized logical drives have an “Impacted” status. Proprietary and Confidential to PMC-Sierra, Inc. Document No.: CDP-00278-02-A Rev. A, Issue:…
-
Page 113: Rebuilding Logical Drives
3. The controller detects the reinserted (or new) disk drive and begins to rebuild the logical drive. Creating a Support Archive File Your Adaptec by PMC support representative might ask you to create a configuration and status information archive file to help diagnose a problem with your system.
-
Page 114: Appendix A Selecting The Best Raid Level
This section provides a comparison of all the RAID levels supported by maxView Storage Manager, and provides a basic overview of each to help you select the best level of protection for your storage system. Proprietary and Confidential to PMC-Sierra, Inc. Document No.: CDP-00278-02-A Rev. A, Issue:…
-
Page 115: Comparing Raid Levels
If a disk drive is not part of any logical drive, the entire disk is an available segment. Proprietary and Confidential to PMC-Sierra, Inc. Document No.: CDP-00278-02-A Rev. A, Issue:…
-
Page 116: Non-Redundant Logical Drives (Raid 0)
If the RAID 1 logical drive is built from different- sized disk drives, the free space, drive segment size is the size of the smaller disk drive, as shown in this figure. Proprietary and Confidential to PMC-Sierra, Inc. Document No.: CDP-00278-02-A Rev. A, Issue:…
-
Page 117: Raid 1 Enhanced Logical Drives
Disk Drive 2 400 GB Disk Drive 2 Disk Drive 3 400 GB Disk Drive 3 Disk Drives in Logical Drive RAID 1E Logical Drive = 600 GB Proprietary and Confidential to PMC-Sierra, Inc. Document No.: CDP-00278-02-A Rev. A, Issue:…
-
Page 118: Raid 10 Logical Drives
Disk Drive 4 . . . Disk Drive 4 400 GB Unused Space = 150 GB RAID 10 Logical Drive = 500 GB Disk Drives in Logical Drive Proprietary and Confidential to PMC-Sierra, Inc. Document No.: CDP-00278-02-A Rev. A, Issue:…
-
Page 119: Raid 5 Logical Drives
. . . Disk Drive 4 Disk Drive 4 400 GB Unused Space = 150 GB RAID 5 Logical Drive = 750 GB plus Parity Disk Drives in Logical Drive Proprietary and Confidential to PMC-Sierra, Inc. Document No.: CDP-00278-02-A Rev. A, Issue:…
-
Page 120: Raid 5Ee Logical Drives
Unused Space = 150 GB Based on the drive segment sizes used: Disk Drives in Logical Drive RAID 5EE Logical Drive = 500 GB plus parity and hot spare Proprietary and Confidential to PMC-Sierra, Inc. Document No.: CDP-00278-02-A Rev. A, Issue:…
-
Page 121: Raid 50 Logical Drive
Space = 150 GB Drive 1 Drive 2 Drive 3 250 GB 250 GB 250 GB Drive 4 Drive 5 Drive 6 400 GB 400 GB 400 GB Proprietary and Confidential to PMC-Sierra, Inc. Document No.: CDP-00278-02-A Rev. A, Issue:…
-
Page 122: Raid 6 Logical Drives
6 logical drives, and stripes stored data and two sets of parity data across all disk drives in both RAID 6 logical drives. Two sets of parity data provide enhanced data protection, and striping improves performance. RAID 60 logical drives also provide high data transfer speeds. Proprietary and Confidential to PMC-Sierra, Inc. Document No.: CDP-00278-02-A Rev. A, Issue:…
-
Page 123: Appendix B Icons At-A-Glance
Controller rescan Silence alarm Clear configuration Ribbon Logical Disk Icons Icon Description Logical disk with gear Logical disk create Logical disk expand Logical disk verify Logical disk locate Proprietary and Confidential to PMC-Sierra, Inc. Document No.: CDP-00278-02-A Rev. A, Issue:…
-
Page 124
Enterprise View Icons Icon Description Enterprise View Local or remote system Controller Enclosure Logical disk Proprietary and Confidential to PMC-Sierra, Inc. Document No.: CDP-00278-02-A Rev. A, Issue:… -
Page 125
Enterprise View System Icons Icon Description System OK System error System missing System no access System warning Enterprise View Connector Icons Icon Description Connector OK Connector failed Connector missing Proprietary and Confidential to PMC-Sierra, Inc. Document No.: CDP-00278-02-A Rev. A, Issue:… -
Page 126
Physical disks OK Physical disks failure Physical disks missing Physical disks warning Enterprise View MaxCache Container Icons Icon Description maxCache container error maxCache container missing maxCache container OK Proprietary and Confidential to PMC-Sierra, Inc. Document No.: CDP-00278-02-A Rev. A, Issue:… -
Page 127
Storage Manager User’s Guide Icon Description maxCache container warning Tab Icons Icon Description Summary Properties Resources Events Task Dialog Box Icons Icon Description E-mail notification Chart Proprietary and Confidential to PMC-Sierra, Inc. Document No.: CDP-00278-02-A Rev. A, Issue:… -
Page 128
39 segments in logical drives 52, 54, 62 updating firmware 84 within logical drives 42 drives 75 identifying 75 cards, See controllers locating 75 CIM server 16, 20 Proprietary and Confidential to PMC-Sierra, Inc. Document No.: CDP-00278-02-A Rev. A, Issue:… -
Page 129
58, 59 disk drive segments 52, 54, 62, 115 enabling background consistency check 58, 59 expanding 54, 57, 60, 62 fine-tuning 43, 55, 64 formatting 40, 43, 44 Proprietary and Confidential to PMC-Sierra, Inc. Document No.: CDP-00278-02-A Rev. A, Issue:… -
Page 130
Container 63, 64, 65 coherency check 64, 65 deleting 65 Flush and Fetch rate 64 online help 34 selecting a RAID level 63 operating system event log 102 Proprietary and Confidential to PMC-Sierra, Inc. Document No.: CDP-00278-02-A Rev. A, Issue:… -
Page 131
Rescan 82 modifying 73 Save support archive 113 monitoring 72 Ribbon 29 recurring 71 scheduling 71, 73 temperature status 32, 91, 92 terminology 13 Scheduled (task status) 72 Proprietary and Confidential to PMC-Sierra, Inc. Document No.: CDP-00278-02-A Rev. A, Issue:… -
Page 132
58, 59 starting the Agent 37 verifying and fixing physical drives 80 write cache 56 verifying logical drives 58 write-back 56 automatic verification 58 write-through 56 background verification 58 Proprietary and Confidential to PMC-Sierra, Inc. Document No.: CDP-00278-02-A Rev. A, Issue:… -
Page 133
PMC-Sierra, Inc. 1380 Bordeaux Drive Sunnyvale, CA 94089 USA © Copyright PMC-Sierra, Inc. 2012 All rights reserved. Adaptec and the Adaptec by PMC logo are trademarks of PMC-Sierra, Inc. Part Number: CDP-00278-02-A Rev A JPB 03/11…
To manage your Microsemi Adaptec SmartRAID controller, as well as its RAID volumes and logical disks, you can use its BIOS accessible via the keyboard shortcut «CTRL + A» (or «CTRL + Q» on an AZERTY keyboard) at start up of your computer.
However, you can also download the «maxView Storage Manager» 4 or 3 software from the official Microsemi website to manage all of this through a simple web browser.
- Download maxView Storage Manager 3
- Install maxView Storage Manager 4 / 3
- Web interface : maxView Storage Manager
- Logging in to maxView Storage Manager
- Enterprise View
- Information about the computer / server (localhost)
- Information about your Microsemi Adaptec controller
- Information about maxCache devices
- Information about your hard drive arrays and logical drives
- Information about a hard drives array
- Information about a logical device
- Information about the physical hard drives connected to your Microsemi controller
- Discovering the maxView Storage Manager ribbon
- Home
- System
- Controller
- Array
- Logical Device
- Physical Device
- maxCache
1. Download maxView Storage Manager 3
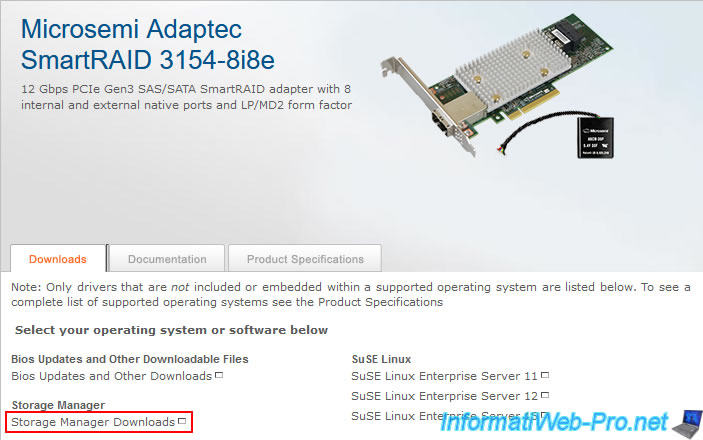
To download the latest version of maxView Storage Manager 4 or 3 compatible with your Microsemi Adaptec SmartRAID controller, go to your Microsemi Adaptec SmartRAID controller page on the Microsemi official website and go to the «Downloads» tab of this page. In our case, we have a Microsemi Adaptec SmartRAID 3154-8i8e controller.
At the top of this tab, you will find a «Storage Manager Downloads» link. Click on it.
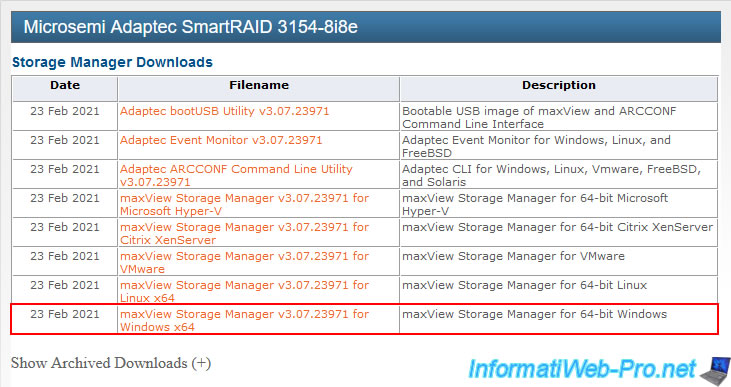
As you can see, maxView is available for Windows (at the very bottom of the list), as well as for other operating systems, such as : Linux, VMware, Citrix XenServer, …
Click on the «maxView Storage Manager v3 …. for Windows x64» link.
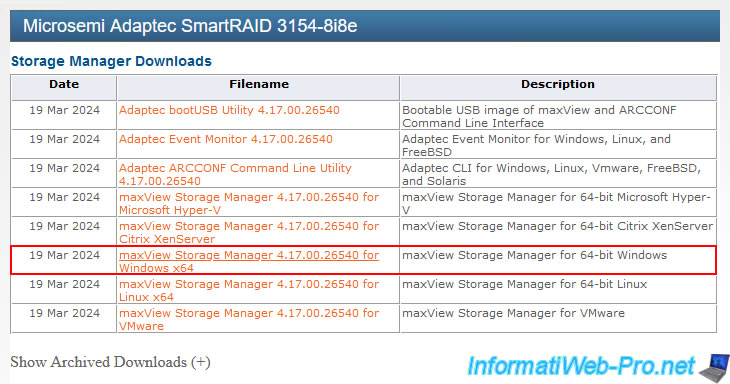
Update: in 2024, maxView Storage Manager is available in version 4 for our Adaptec SmartRAID controller (as you can see below).
As expected, your Microsemi Adaptec SmartRAID controller appears in the list of compatible products.
In our case, the Microsemi Adaptec SmartRAID 3154-8i8e controller.
Click on the «Download Now» button, accept the contract that will be offered to you and click on the proposed download button.
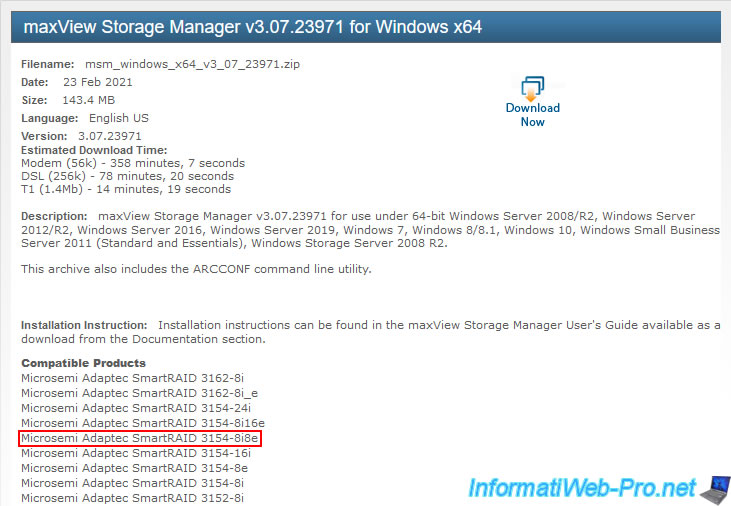
The same goes for version 4. But, version 4 requires at least Windows 10.
If you have an older version of Windows, then download an older version of maxView Storage Manager.
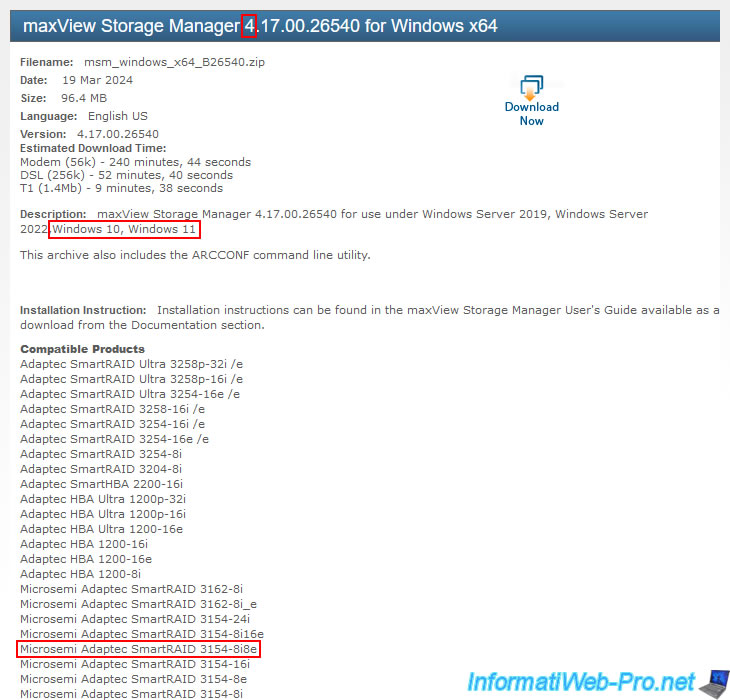
Once downloaded, you will have a compressed file like this : msm_windows_x64_v3_07_23971.zip.
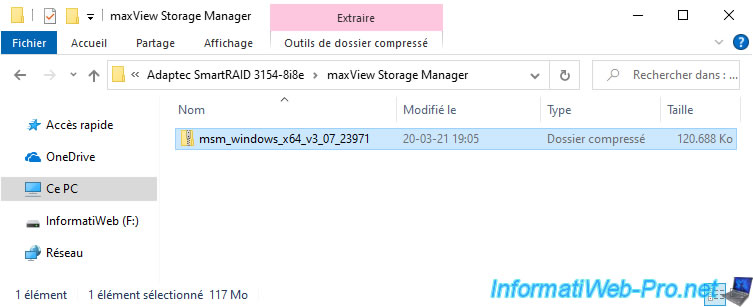
For version 4, the download name is «maxView Storage Manager 4.17.00.26540 for Windows x64» in our case, but the file name no longer contains the version of the downloaded software.
In our case, the downloaded file for version 4 is «msm_windows_x64_B26540.zip».
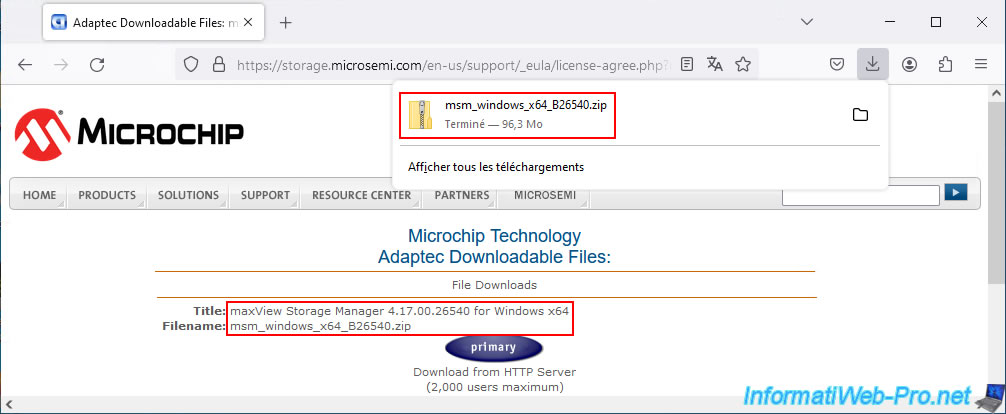
2. Install maxView Storage Manager 4 / 3
To install maxView Storage Manager 4 or 3, unzip the downloaded «msm_windows_x64_…zip» file.
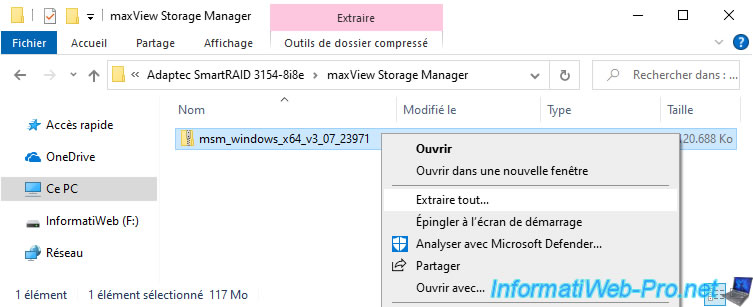
In the extracted folder, you will find 2 folders :
- cmdline : contains command line tools, including the ARCCONF program
- manager : contains the maxView Storage Manager 3 installation file
Note: since version 4, the maxView Storage Manager installation file «setup_asm_x64.exe» is located at the root of this folder «msm_windows_x64_…zip».
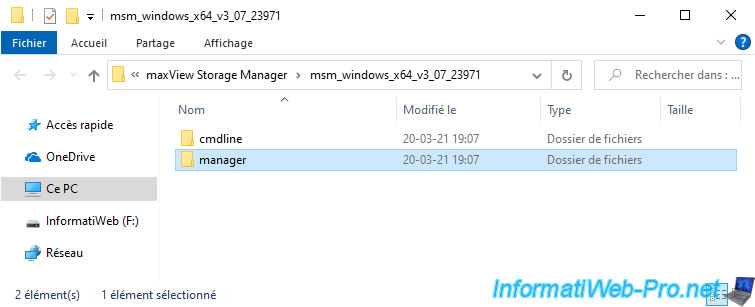
Open the «manager» folder and run the «setup_asm_x64.exe» file there.
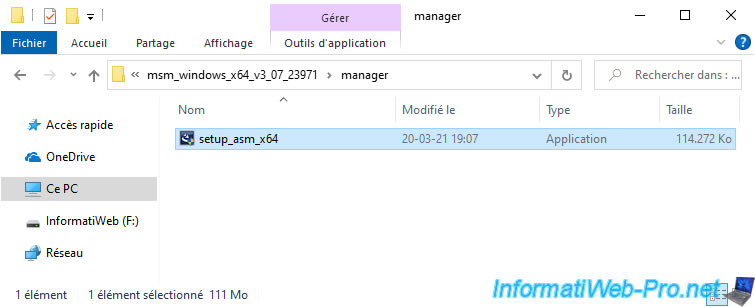
The Microsemi maxView Storage Manager logo appears.
And a «maxView Storage Manager — InstallShield Wizard» window appears.
The maxView Storage Manager installation wizard appears.
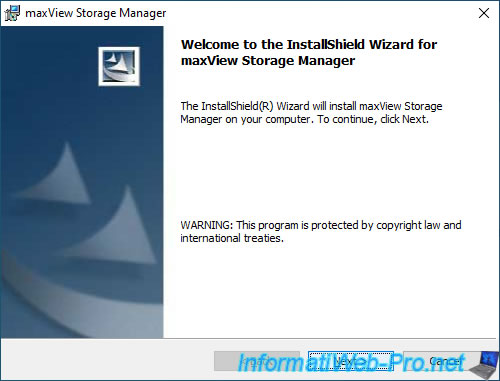
As you can see, the web interface will be available by default on port 8443.
For the «Standalone Mode» box, this corresponds to the «LocalHost Mode» box which was present on older versions of maxView Storage Manager and allows you to disable remote access to the maxView Storage Manager web interface.
It will therefore be accessible only on the local computer via the address «https://localhost:8443/» (therefore on the local IP address : 127.0.0.1).
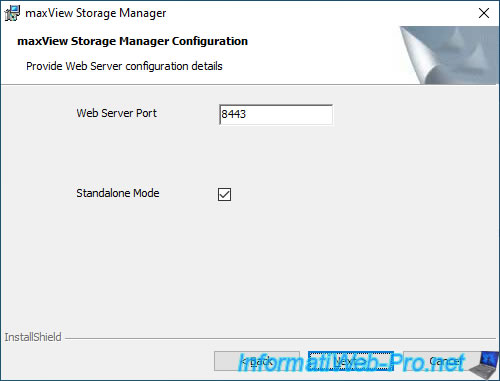
Since version 4, you will also see the options:
- Redfish Server Port: which is the server used to retrieve information from your SmartRAID controller, its arrays, … and to which maxView Storage Manager connects.
The default port is : 8081. - Desktop Web Application: allows you to install maxView Storage Manager in desktop web application mode.
If you choose this mode, no services will be installed and remote access will be disabled. You will therefore not be able to see your Adaptec SmartRAID controller information from another computer on your network.
In addition, the «maxView Storage Manager» web interface will only be accessible with the «https://localhost:8443/» address when you launch the application using the shortcut that will be created on your desktop.
Source : maxView™ Storage Manager User Guide for Adaptec® Smart Storage Controllers — 3 Installing on Windows — Microchip.
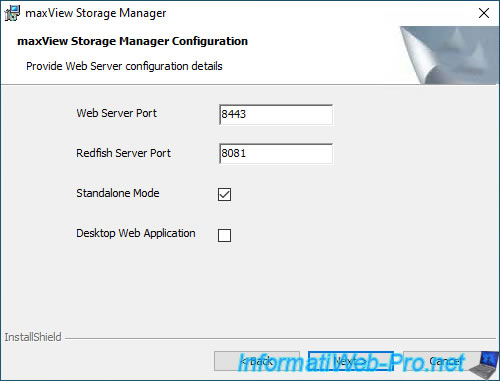
The web port is : 8443.
For version 3 of maxView Storage Manager, you will be able to install :
- GUI : the management graphical interface (maxView Storage Manager)
- CLI Tools : command line tools for creating and managing RAID volumes
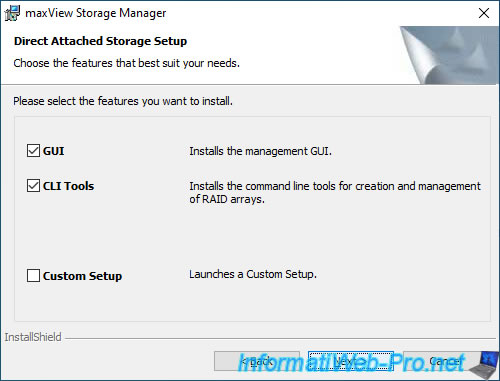
Again, for version 4, you will see the «Redfish Server» option appear.
Which will install the service of the same name.
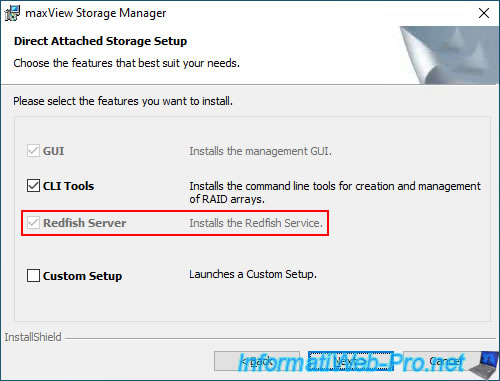
Click on : Install.
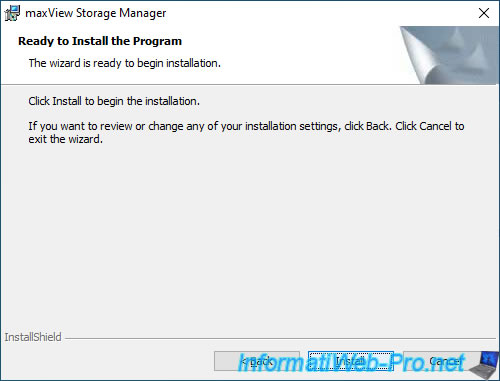
Wait while the maxView Storage Manager is installed.
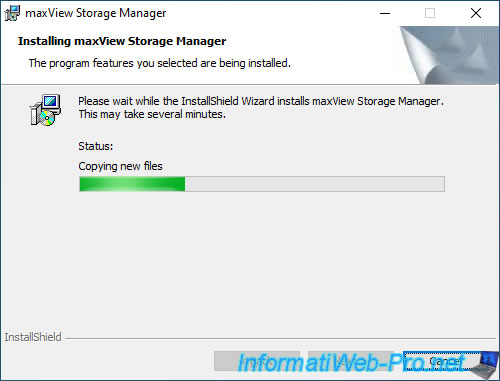
maxView Storage Manager is installed.
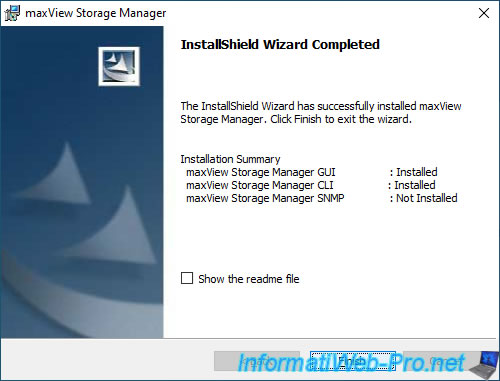
For version 4, the Redfish server will also have been installed.
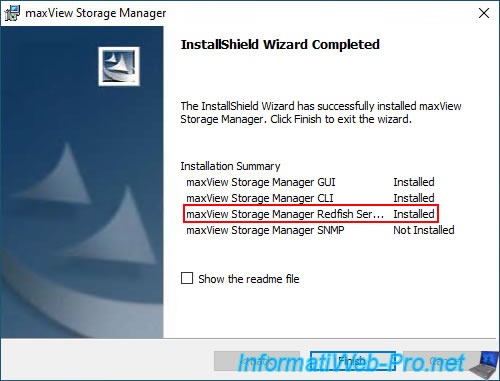
3.1. Logging in to maxView Storage Manager
Once maxView Storage Manager is installed, you will find a «maxView Storage Manager» shortcut.
Double click on it.
Your web browser will open and connect to the «https://localhost:8443/maxview/manager/login.xhtml» address.
To secure the connection, maxView Storage Manager uses a SSL certificate, but this is self-signed because it’s generated free of charge during its installation.
Hence the warning that your web browser displays.
With Mozilla Firefox, you can ignore this warning by clicking on : Advanced.
Then, click on : Accept the Risk and Continue.
To log in to maxView Storage Manager, you will need to provide a username and password.
The identifiers to use are those of the Windows accounts present on the computer where maxView is installed.
Note that your Windows account must be password protected in order for you to log into maxView Storage Manager with this account.
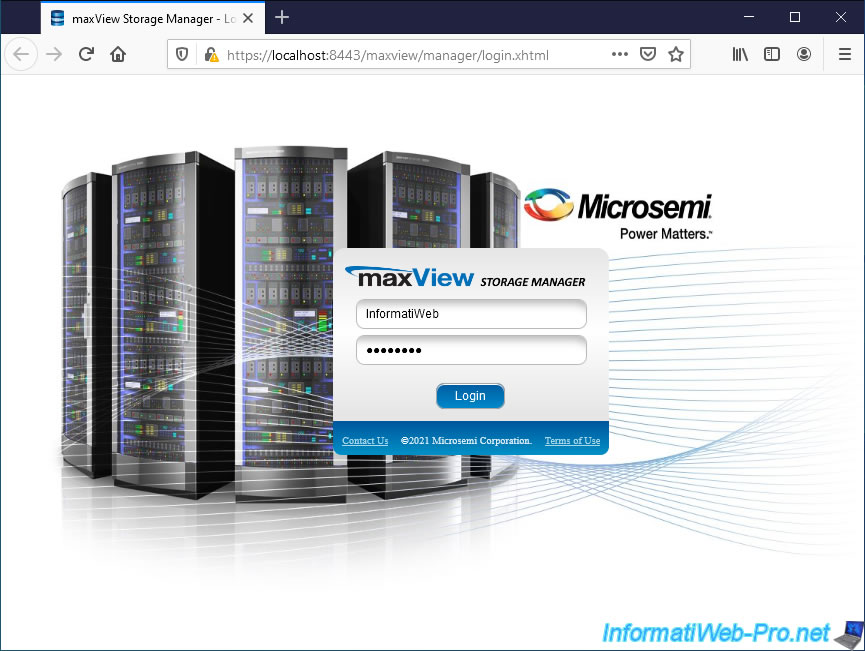
3.2. Enterprise View
The root node of maxView Storage Manager is called «Enterprise View» and allows you to list all the computers / servers available on your network.
By default, you only have one.
At the bottom of the page, you will always find the latest events triggered by your Microsemi Adaptec SmartRAID controller.
In our case, you can see that parity initialization is in progress in the background on our Adaptec SmartRAID 3154-8i8e MSCC controller.
Note that if you checked the «Standalone Mode» box when installing maxView Storage Manager, your computer will appear as «localhost».
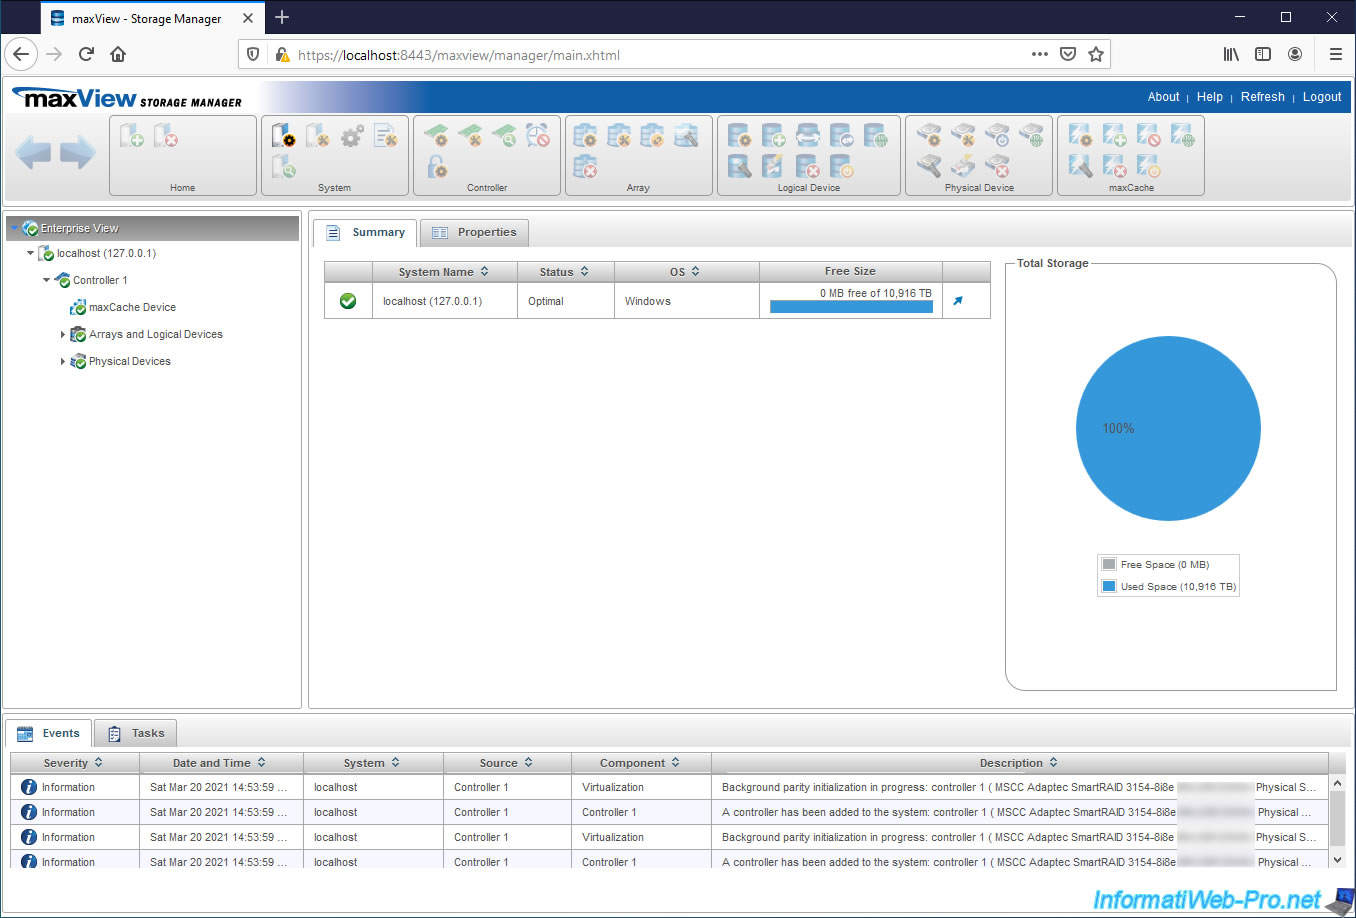
Regarding the global properties, you will find :
- system information about the type of event to be saved : errors, warnings and informations
- the status of the sound alarm
- the status of the Auto Discovery and its refresh interval
- SMTP settings to automatically send email notifications about the status of your Microsemi Adaptec SmartRAID controller
- the settings for the web server used by maxView : port used (8443 by default), if the https (Secure Protocol) is used and on which IP address the server is listening (127.0.0.1 if the Standalone mode was enabled during the installation of maxView)
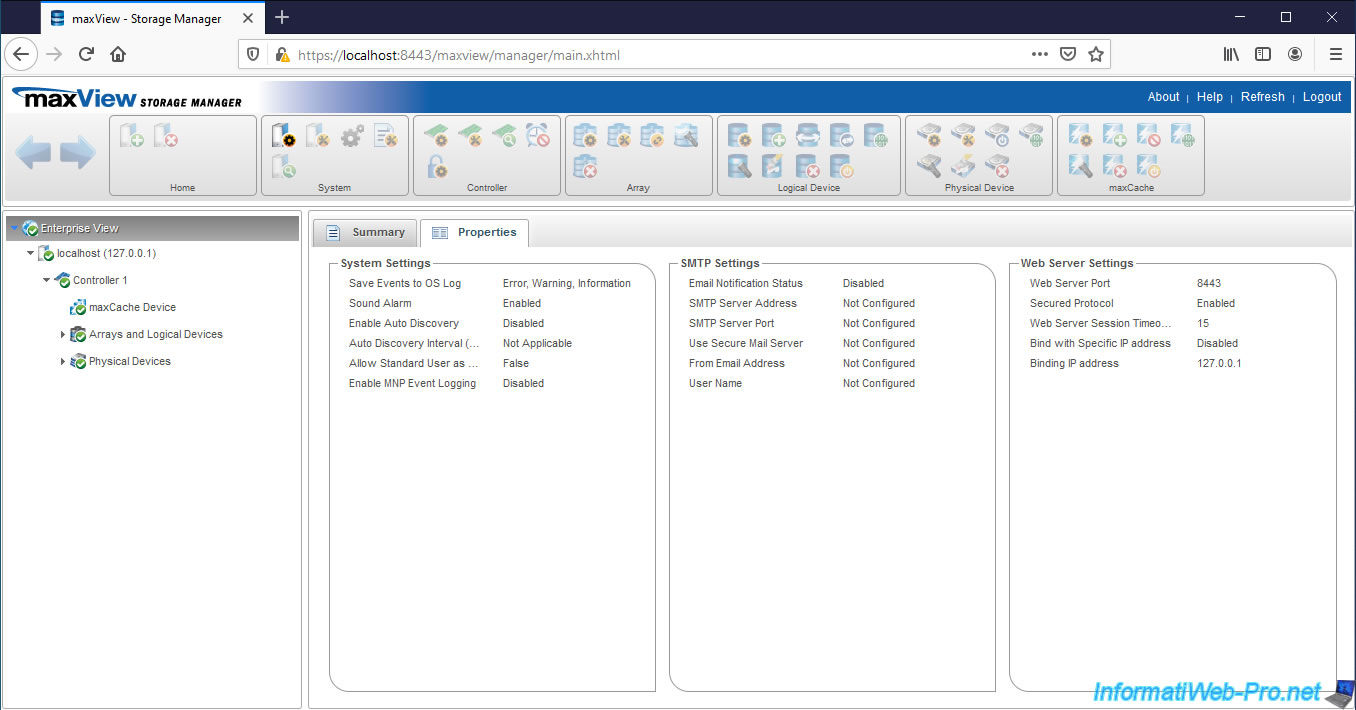
3.3. Information about the computer / server (localhost)
If you checked the «Standalone Mode» box when installing maxView Storage Manager, your computer / server will appear as «localhost (127.0.0.1)».
In the «Summary» tab, you will find a summary with the status of your different Microsemi controllers, the free space and the total space available on them.
In the «System Info» section, you can find out :
- Status : his status. Optimal = no problem detected.
- System Name : the name of the computer / server when you access maxView Storage Manager remotely or «localhost» if maxView Storage Manager has been installed in Standalone mode
- IP Address : the local IP address (LAN) of the computer / server where maxView Storage Manager is installed or «127.0.0.1» if maxView Storage Manager has been installed in Standalone mode
- OS Type : the type of operating system installed on this computer / server. Ex : Windows, Linux, …
- Number of SAS Controller : the number of SAS controllers detected
- Management Protocol : the Redfish protocol corresponds to an instance of Nodejs and allows you to manage your controllers, monitor them and provide notifications about it to maxView Storage Manager
- Port : port used for the Redfish protocol shown above
- Redfish Server Version : the version of the Redfish server. In our case : 3.07.00 (23971)
- Standalone Mode : whether the standalone mode is enabled or not (Disabled)
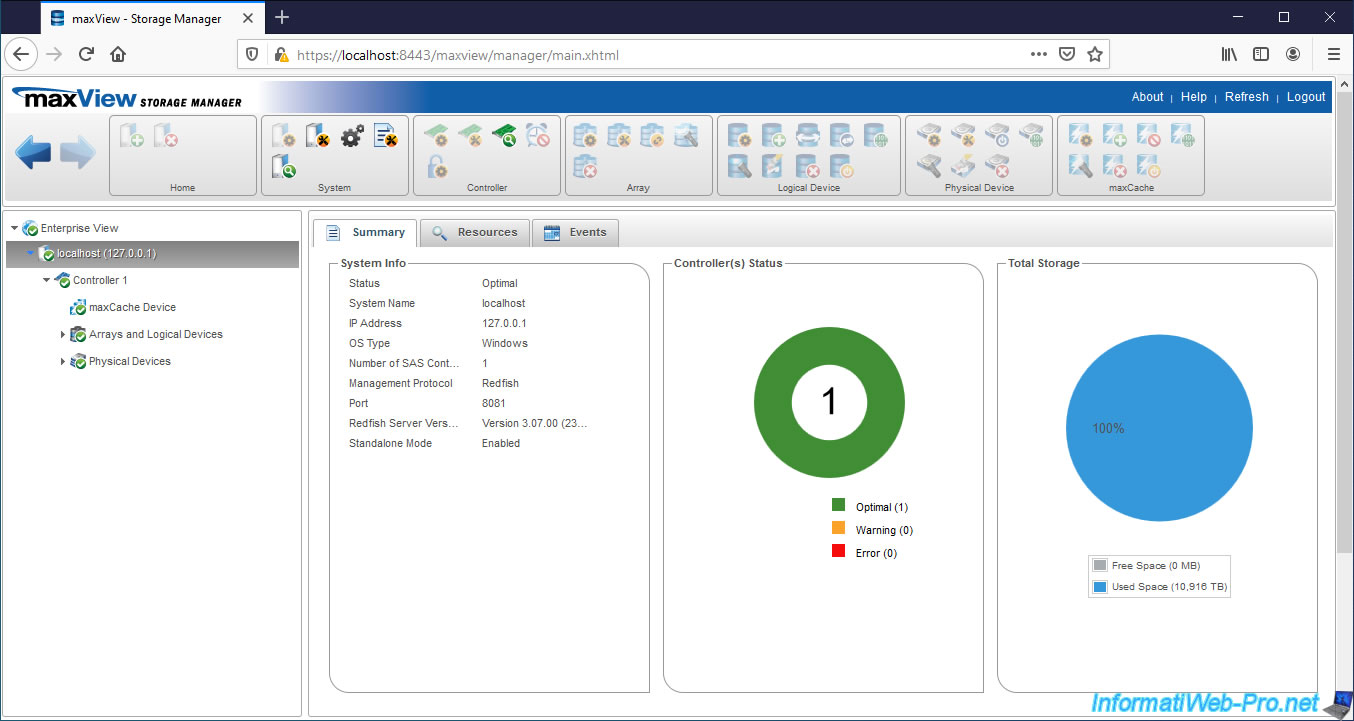
Dans l’onglet «Resources», vous trouverez la liste de vos contrôleurs Microsemi Adaptec.
Dans notre cas, nous avons 1 seul contrôleur «MSCC Adaptec SmartRAID 3154-8i8e», dont :
- the status is : Optimal
- the firmware version is : 1.60
- the version of the driver installed on Windows is : 106.270.0.1043 Build QA
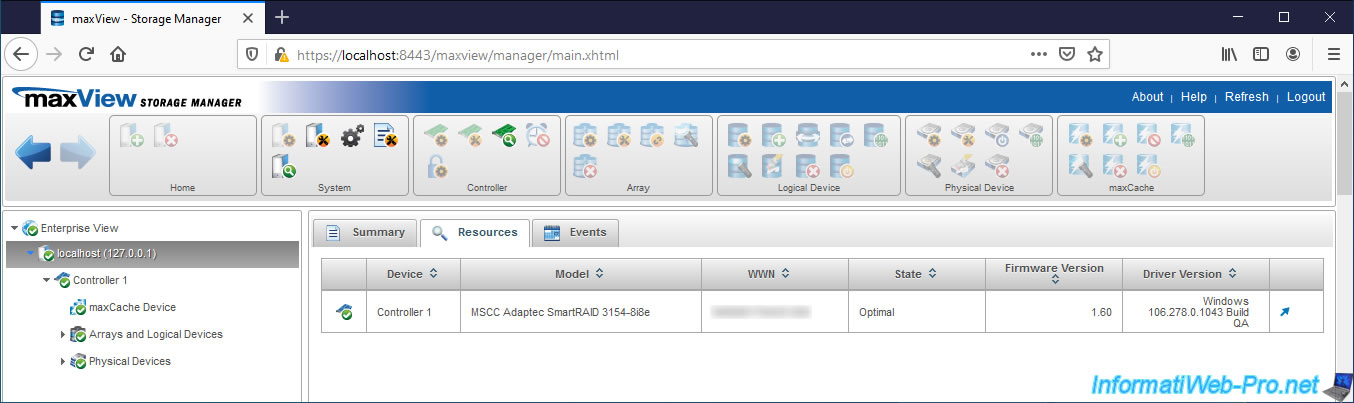
In the «Events» tab, you will find all the events that have occurred on the controllers present in your computer / server.