
MF244dw / MF232w / MF231
Руководство пользователя
USRMA-1413-00 2016-09 ru
Copyright CANON INC. 2016
Важные указания по технике безопасности
189L-000
В этой главе обсуждаются правила техники безопасности, которым следует придерживаться во избежание
травм пользователей устройства и др. лиц, а также повреждения техники. Перед использованием устройства
ознакомьтесь с этой главой и придерживайтесь инструкций для надлежащей эксплуатации устройства. Не
выполняйте каких-либо действий, описание которых отсутствует в настоящем руководстве. Canon не несет
ответственность за любые повреждения, возникшие вследствие осуществления действий, не указанных в
настоящем руководстве, ненадлежащего использования устройства или проведения ремонтных работ и
внесения изменений третьими лицами и организациями, не являющимися представителями Canon или не
имеющих авторизацию компании Canon.
Важные указания по технике безопасности
2
Установка
189L-001
Для безопасной и удобной эксплуатации устройства следует внимательно ознакомиться с приведенными ниже
мерами предосторожности и установить устройство в приемлемом для него месте.
Не устанавливайте устройство в месте с высоким риском возгорания или
поражения электрическим током.
●
Место, где будут закрыты вентиляционные отверстия
(слишком близко к стенам, кроватям, коврам или похожим объектам).
●
Влажное или запыленное помещение.
●
Место, подверженное воздействию прямого солнечного света, или на открытом воздухе.
●
Место, подверженное воздействию высоких температур.
●
Место вблизи открытого огня.
●
Рядом со спиртом, растворителями и другими легковоспламеняющимися веществами.
Прочие предупреждения
●
Не подсоединяйте к данному аппарату несертифицированные кабели. Несоблюдение этого
требования может привести к пожару или поражению электрическим током.
●
Не помещайте на аппарат браслеты и другие металлические предметы или емкости с водой. Контакт
посторонних веществ с электрическими компонентами внутри устройства может стать причиной
возгорания или поражения электрическим током.
●
При установке и удалении дополнительных аксессуаров убедитесь, что устройство выключено,
отсоедините штепсель шнура питания и отключите от устройства все интерфейсные кабели и шнур
питания. В противном случае шнур питания и интерфейсные кабели можно повредить, что может
стать причиной пожара или удара электротоком.
●
Не используйте данный аппарат рядом с любым медицинским оборудованием. Радиоволны,
излучаемые данным устройством, могут создавать помехи для работы медицинского оборудования,
что может привести к сбою оборудования и несчастному случаю с тяжкими последствиями.
●
Если в устройство попадают инородные вещества, отключите шнур питания от электрической
розетки и обратитесь к местному уполномоченному дилеру Canon.
Не устанавливайте устройство в указанных ниже
местах.
Устройство может упасть, что приведет к травме.
●
Неустойчивая поверхность
●
Место, подверженное вибрации.
Важные указания по технике безопасности
3
Прочие меры предосторожности
●
При перемещении данного устройства следуйте инструкциям, приведенным в настоящем
руководстве. При неправильном перемещении устройство может упасть, что приведет к травме.
●
При установке устройства избегайте защемления рук между устройством и полом или стенами, а
также между лотками для бумаги. Это может привести к травмам.
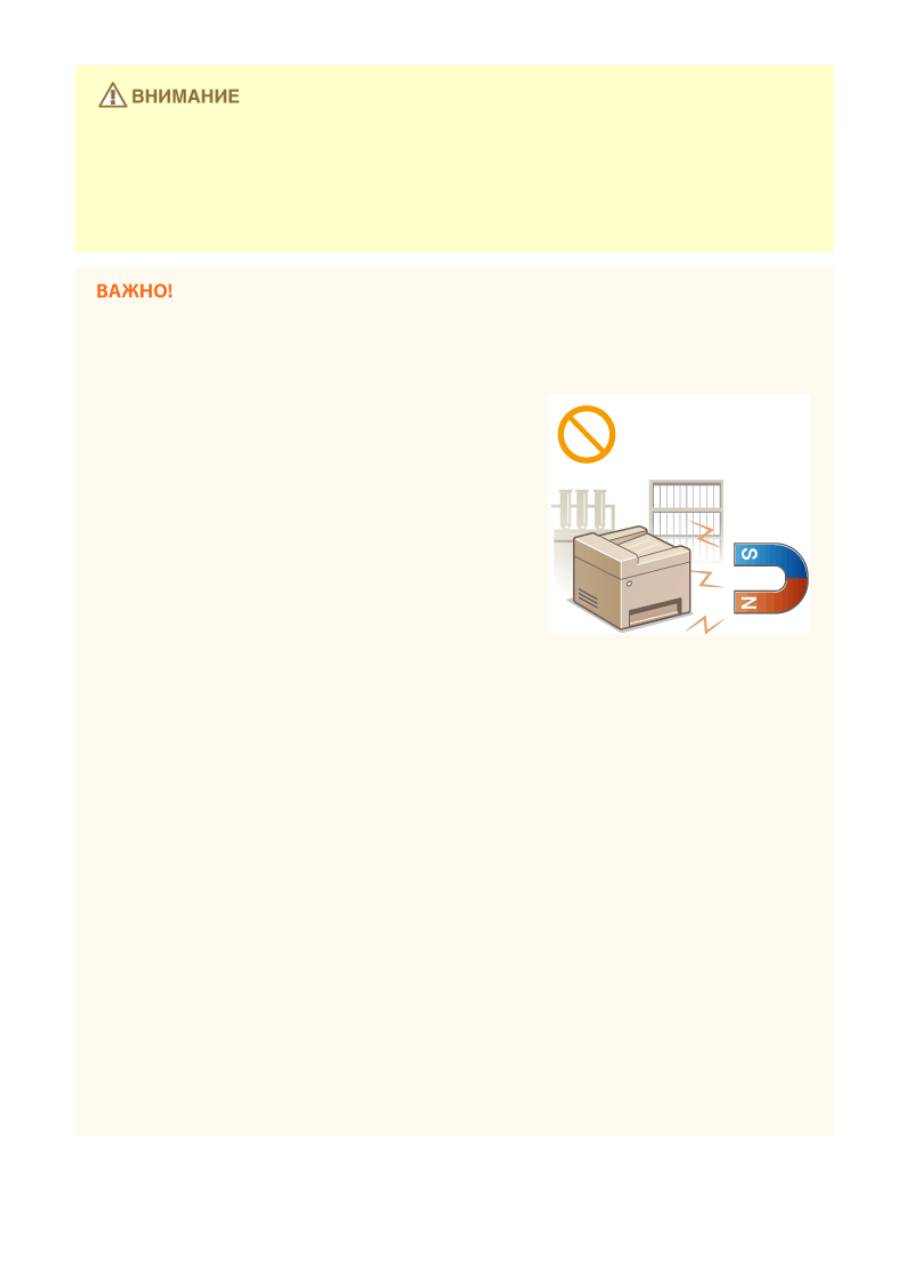
Не устанавливайте устройство в указанных ниже местах, так как это может
привести к травме.
●
Место, подверженное резким перепадам температуры или
влажности
●
Места вблизи оборудования, создающего магнитные или
электромагнитные волны
●
Лаборатория или место, где происходят химические
реакции
●
Место, подверженное воздействию коррозионно-активных
или токсичных газов
●
Место, которое может деформироваться под действием
веса устройства или где устройство может осесть (ковер и
т. п.)
Избегайте мест установки с плохой вентиляцией.
Во время использования это устройство генерирует озон в малых объемах. Несмотря на различную
восприимчивость к озону его количество не является опасным. Наличие озона может стать ощутимым в
течение длительного использования, особенно в плохо проветриваемых помещениях. Рекомендуется
обеспечить надлежащую вентиляцию помещения, где работает устройство, c целью поддержания
благоприятной для работы среды. Также следует избегать мест, в которых люди наиболее подвержены
воздействию выбросов устройства.
Не устанавливайте устройство в месте с повышенной конденсацией
При интенсивном обогреве помещения, в котором установлено устройство, а также в случаях
перемещения устройства из среды с более прохладным или сухим воздухом в помещения с более
высокой температурой или повышенным уровнем влажности, внутри устройства могут образоваться
капли воды (конденсат). Использование устройства в подобных условиях может привести к замятию
бумаги, плохому качеству печати или повреждению устройства. Перед использованием устройство
должно не менее двух часов адаптироваться к окружающей температуре и влажности.
При использовании беспроводной локальной сети (MF244dw/MF232w)
●
Устанавливайте устройство на расстоянии не более 50 м от беспроводного LAN-роутера.
●
Не устанавливайте устройство в месте, где другие объекты могут препятствовать связи. Мощность
сигнала может значительно падать при прохождении через стены или полы.
●
Размещайте устройство как можно дальше от цифровых беспроводных телефонов, микроволновых
печей и другого оборудования, являющегося источником радиоволн.
На высоте 3 000 м над уровнем моря и выше
Устройства с жестким диском могут работать неправильно на высоте около 3 000 метров и больше над
уровнем моря.
Важные указания по технике безопасности
4
Нажмите на кнопку для помощи
Характеристики, спецификации
Особенности:
Apple AirPrint,
Размер упаковки (ДхШхВ), см:
52 x 50 x 42 см, вес 14.22 кг
Ссылка на сайт производителя:
www.canon.com
Производитель:
CANON Inc.
Страна производства:
КОРЕЯ, РЕСПУБЛИКА
Инструкция к Лазерному МФУ Canon i-SENSYS MF232w

MF244dw / MF232w / MF231
Руководство пользователя
USRMA-1413-00 2017-05 ru
Copyright CANON INC. 2017

Содержание
Важные указания по технике безопасности
…………………………………………………………. 2
Установка
……………………………………………………………………………………………………………………………………………. 3
Источник питания
………………………………………………………………………………………………………………………………… 5
Обращение
………………………………………………………………………………………………………………………………………….. 6
Техническое обслуживание и осмотры
…………………………………………………………………………………………………… 8
Расходные материалы
………………………………………………………………………………………………………………………….. 9
Основные операции
……………………………………………………………………………………………………………… 13
Компоненты и их функции
………………………………………………………………………………………………………………….. 15
Передняя сторона
…………………………………………………………………………………………………………………………… 16
Задняя сторона
………………………………………………………………………………………………………………………………. 18
Внутренние детали
…………………………………………………………………………………………………………………………. 20
Отверстие для ручной подачи
…………………………………………………………………………………………………………… 21
Лоток для бумаги
……………………………………………………………………………………………………………………………. 22
Панель управления
…………………………………………………………………………………………………………………………. 23
Дисплей
…………………………………………………………………………………………………………………………………… 30
Использование панели управления
……………………………………………………………………………………………………… 34
Ввод текста
……………………………………………………………………………………………………………………………………. 36
Размещение документов
…………………………………………………………………………………………………………………….. 39
Загрузка бумаги
…………………………………………………………………………………………………………………………………. 43
Загрузка бумаги в лоток
…………………………………………………………………………………………………………………… 45
Загрузка бумаги в отверстие для ручной подачи
…………………………………………………………………………………… 48
Загрузка конвертов
…………………………………………………………………………………………………………………………. 50
Загрузка уже отпечатанной бумаги
…………………………………………………………………………………………………….. 52
Определение формата и типа бумаги
………………………………………………………………………………………………….. 54
Регистрация специального формата бумаги
……………………………………………………………………………………. 56
Переход в бесшумный режим
………………………………………………………………………………………………………………. 58
Переход в спящий режим
……………………………………………………………………………………………………………………. 60
Установка времени автоматического выключения
………………………………………………………………………………… 62
Копирование
………………………………………………………………………………………………………………………………. 64
Основные операции копирования
………………………………………………………………………………………………………… 66
Отмена копирования
………………………………………………………………………………………………………………………….. 68
Различные настройки копирования
……………………………………………………………………………………………………… 70
Увеличение или уменьшение
……………………………………………………………………………………………………………. 71
Выбор типа документа
…………………………………………………………………………………………………………………….. 72
Настройка плотности
………………………………………………………………………………………………………………………. 73
Настройка резкости
…………………………………………………………………………………………………………………………. 74
Двустороннее копирование (MF244dw)
……………………………………………………………………………………………….. 76
Копирование нескольких документов на одном листе (2 на 1/4 на 1)
…………………………………………………………. 78
Использование клавиши [Paper Save Copy] (MF244dw/MF231)
…………………………………………………………………… 80
I

Копирование обеих сторон удостоверения личности на одной странице
…………………………………………………… 82
Сортировка копий по страницам
……………………………………………………………………………………………………….. 84
Изменение параметров по умолчанию
……………………………………………………………………………………………….. 85
Использование аппарата в качестве принтера
……………………………………………….. 87
Печать с компьютера
………………………………………………………………………………………………………………………….. 88
Печать документа
…………………………………………………………………………………………………………………………… 89
Отмена печати
……………………………………………………………………………………………………………………………….. 93
Проверка состояния печати
………………………………………………………………………………………………………………. 96
Различные параметры печати
…………………………………………………………………………………………………………… 97
Увеличение или уменьшение
………………………………………………………………………………………………………. 99
Включение односторонней и двухсторонней печати (MF244dw)
………………………………………………………… 101
Сортировка распечаток по страницам
…………………………………………………………………………………………. 103
Печать нескольких страниц на одном листе
………………………………………………………………………………….. 105
Печать плакатов
……………………………………………………………………………………………………………………… 107
Печать буклетов (MF244dw)
……………………………………………………………………………………………………….. 109
Печать кромок
………………………………………………………………………………………………………………………… 111
Печать дат и номеров страниц
…………………………………………………………………………………………………… 112
Печать водяных знаков
…………………………………………………………………………………………………………….. 114
Выбор типа документа
……………………………………………………………………………………………………………… 116
Экономия тонера
…………………………………………………………………………………………………………………….. 118
Объединение и печать нескольких документов
…………………………………………………………………………….. 120
Настройка параметров печати под потребности пользователя
………………………………………………………………. 124
Регистрация комбинаций часто используемых настроек печати
……………………………………………………….. 125
Изменение параметров по умолчанию
………………………………………………………………………………………… 127
Использование устройства в качестве сканера
…………………………………………….. 130
Подготовка к использованию аппарата в качестве сканера (MF244dw/MF232w)
……………………………………….. 132
Сканирование на аппарате
………………………………………………………………………………………………………………… 133
Сканирование с помощью клавиши [Scan -> PC]
………………………………………………………………………………….. 136
Сканирование на компьютере
……………………………………………………………………………………………………………. 140
Сканирование с помощью приложения
…………………………………………………………………………………………….. 141
Настройки параметров сканирования в ScanGear MF
……………………………………………………………………………. 143
Удобное использование с мобильным устройством (MF244dw/
MF232w)
………………………………………………………………………………………………………………………………………… 145
Подключение к мобильному устройству
……………………………………………………………………………………………… 146
Прямое соединение (режим точки доступа)
………………………………………………………………………………………… 147
Оптимальное использование возможностей аппарата с помощью приложений
……………………………………… 150
Использование AirPrint
………………………………………………………………………………………………………………….. 151
Печать с помощью AirPrint
………………………………………………………………………………………………………… 156
Сканирование с помощью AirPrint
………………………………………………………………………………………………. 159
Если не удается воспользоваться функцией AirPrint
………………………………………………………………………… 161
Использование Виртуального принтера Google
………………………………………………………………………………….. 162
Удаленное управление аппаратом
……………………………………………………………………………………………………… 166
II

Сеть (MF244dw/MF232w)
……………………………………………………………………………………………………. 168
Подключение к сети
…………………………………………………………………………………………………………………………. 169
Выбор проводной или беспроводной локальной сети
………………………………………………………………………….. 171
Подключение к проводной локальной сети
……………………………………………………………………………………….. 172
Подключение к беспроводной локальной сети
……………………………………………………………………………………. 173
Настройка подключения с помощью функции WPS (режим нажатия кнопки)
……………………………………….. 175
Настройка подключения с помощью функции WPS (режим PIN-кода)
…………………………………………………. 178
Настройка подключения путем выбора беспроводного маршрутизатора
……………………………………………. 181
Настройка подключения путем детального задания параметров
………………………………………………………. 184
Проверка SSID и ключа сети
………………………………………………………………………………………………………. 188
Настройка IP-адреса
………………………………………………………………………………………………………………………. 191
Настройка адреса IPv4
………………………………………………………………………………………………………………. 192
Настройка адресов IPv6
…………………………………………………………………………………………………………….. 195
Просмотр параметров сети
………………………………………………………………………………………………………………… 199
Настройка аппарата для печати с помощью компьютера
……………………………………………………………………… 202
Настройка протоколов печати и функций WSD
……………………………………………………………………………………. 203
Настройка портов принтера
……………………………………………………………………………………………………………. 206
Настройка сервера печати
……………………………………………………………………………………………………………… 209
Настройка аппарата для сетевой среды
………………………………………………………………………………………………. 213
Настройка параметров Ethernet
……………………………………………………………………………………………………….. 214
Изменение максимального блока передачи
……………………………………………………………………………………….. 216
Настройка времени ожидания при подключении к сети
……………………………………………………………………….. 217
Настройка DNS
……………………………………………………………………………………………………………………………… 218
Настройка SNTP
……………………………………………………………………………………………………………………………. 222
Мониторинг и контроль аппарата с помощью SNMP
……………………………………………………………………………. 224
Безопасность
……………………………………………………………………………………………………………………………. 230
Защита аппарата от несанкционированного доступа
……………………………………………………………………………. 231
Предотвращение несанкционированного доступа
………………………………………………………………………………. 232
Настройка прав доступа
…………………………………………………………………………………………………………………. 234
Настройка PIN-кода администратора системы
……………………………………………………………………………….. 235
Настройка PIN-кода для Удаленного ИП (MF244dw/MF232w)
……………………………………………………………… 237
Ограничение связи посредством брандмауэров (MF244dw/MF232w)
……………………………………………………….. 239
Указание IP-адресов по правилам брандмауэра
…………………………………………………………………………….. 240
Указание MAC-адресов по правилам брандмауэра
…………………………………………………………………………. 244
Изменение номеров портов (MF244dw/MF232w)
………………………………………………………………………………….. 247
Настройка прокси (MF244dw/MF232w)
……………………………………………………………………………………………….. 249
Ограничение функций аппарата (MF244dw/MF232w)
…………………………………………………………………………….. 251
Отключение соединения HTTP
…………………………………………………………………………………………………………. 252
Отключение Удаленного ИП
……………………………………………………………………………………………………………. 253
Реализация функций надежной защиты (MF244dw/MF232w)
………………………………………………………………….. 254
Включение функции шифрованной связи TLS для Удаленного ИП
…………………………………………………………… 255
Настройка аутентификации IEEE 802.1X
……………………………………………………………………………………………… 258
Настройка параметров для пар ключей и цифровых сертификатов
…………………………………………………………. 263
III

Создание пар ключей
……………………………………………………………………………………………………………….. 265
Использование пар ключей и цифровых сертификатов, выданных центром сертификации (СА)
………………. 272
Проверка пары ключей и цифровых сертификатов
………………………………………………………………………… 276
Использование Удаленного ИП (MF244dw/MF232w)
…………………………………….. 279
Запуск Удаленного ИП
………………………………………………………………………………………………………………………. 280
Экраны Удаленного ИП
……………………………………………………………………………………………………………………… 282
Управление документами и проверка состояния аппарата
……………………………………………………………………. 285
Настройка параметров меню с помощью Удаленного ИП
………………………………………………………………………. 289
Список меню настройки
………………………………………………………………………………………………….. 292
Прямое соединение (MF244dw/MF232w)
……………………………………………………………………………………………….. 293
Настройки сети (MF244dw/MF232w)
…………………………………………………………………………………………………….. 294
Вывод отчетов
…………………………………………………………………………………………………………………………………. 304
Настройки
……………………………………………………………………………………………………………………………………….. 308
Настройки таймера
………………………………………………………………………………………………………………………….. 312
Общие настройки (MF244dw)
……………………………………………………………………………………………………………… 317
Настройки копирования
……………………………………………………………………………………………………………………. 319
Настройки сканирования
………………………………………………………………………………………………………………….. 321
Настройки принтера
…………………………………………………………………………………………………………………………. 323
Настройка/Обслуживание
…………………………………………………………………………………………………………………. 334
Настройки управления системой
……………………………………………………………………………………………………….. 340
Устранение неполадок
……………………………………………………………………………………………………… 349
Устранение замятия бумаги
………………………………………………………………………………………………………………. 351
Если появляется сообщение об ошибке
……………………………………………………………………………………………….. 357
Распространенные проблемы
…………………………………………………………………………………………………………….. 365
Проблемы, связанные с установкой и настройкой
……………………………………………………………………………….. 366
Проблемы при копировании/печати
………………………………………………………………………………………………… 370
Печать выполняется неправильно
……………………………………………………………………………………………………… 373
Неудовлетворительные результаты печати
………………………………………………………………………………………… 375
Скручивание или заламывание бумаги
……………………………………………………………………………………………… 381
Бумага подается неправильно
…………………………………………………………………………………………………………. 383
Если проблему не удается устранить
…………………………………………………………………………………………………… 385
Обслуживание
………………………………………………………………………………………………………………………… 387
Очистка аппарата
…………………………………………………………………………………………………………………………….. 388
Корпус
………………………………………………………………………………………………………………………………………… 389
Стекло экспонирования
…………………………………………………………………………………………………………………. 390
Податчик (MF244dw)
………………………………………………………………………………………………………………………. 393
Узел фиксации
……………………………………………………………………………………………………………………………… 394
Внутренняя часть аппарата
…………………………………………………………………………………………………………….. 395
Замена картриджей с тонером
…………………………………………………………………………………………………………… 397
Перед заменой картриджа с тонером
………………………………………………………………………………………………… 399
IV

Процедура замены картриджей с тонером
…………………………………………………………………………………………. 401
Перемещение аппарата
…………………………………………………………………………………………………………………….. 404
Просмотр значения счетчика
…………………………………………………………………………………………………………….. 406
Инициализация настроек
………………………………………………………………………………………………………………….. 407
Инициализация меню
……………………………………………………………………………………………………………………. 408
Инициализируйте счетчик отчета Eco (MF244dw/MF232w)
……………………………………………………………………… 410
Инициализация всех данных/параметров
………………………………………………………………………………………….. 411
Приложение
……………………………………………………………………………………………………………………………… 413
Программное обеспечение сторонних производителей (MF244dw/MF232w)
…………………………………………….. 414
Ключевые моменты функций
…………………………………………………………………………………………………………….. 415
Забота об окружающей среде и экономия средств
……………………………………………………………………………….. 416
Повышение производительности
…………………………………………………………………………………………………….. 418
Применение в мире цифровых технологий
………………………………………………………………………………………… 420
Другие функции
……………………………………………………………………………………………………………………………. 422
Технические характеристики
…………………………………………………………………………………………………………….. 424
Технические характеристики аппарата
……………………………………………………………………………………………… 425
Технические характеристики беспроводной локальной сети (MF244dw/MF232w)
……………………………………….. 427
Тип документа
……………………………………………………………………………………………………………………………… 428
Область сканирования
……………………………………………………………………………………………………………… 429
Бумага
………………………………………………………………………………………………………………………………………… 430
Технические характеристики копирования
………………………………………………………………………………………… 432
Технические характеристики сканера
……………………………………………………………………………………………….. 433
Технические характеристики принтера
……………………………………………………………………………………………… 434
Расходные материалы
………………………………………………………………………………………………………………………. 435
Руководства, входящие в комплект поставки устройства
……………………………………………………………………… 436
Использование Руководство пользователя
…………………………………………………………………………………………. 437
Макет экрана Руководство пользователя
…………………………………………………………………………………………… 438
Просмотр Руководство пользователя
………………………………………………………………………………………………… 442
Другое
…………………………………………………………………………………………………………………………………………….. 443
Основные операции в среде Windows
……………………………………………………………………………………………….. 444
Примечание
………………………………………………………………………………………………………………………………… 453
V

Важные указания по технике
безопасности
Важные указания по технике безопасности
……………………………………………………………………. 2
Установка
………………………………………………………………………………………………………………………………………….. 3
Источник питания
…………………………………………………………………………………………………………………………….. 5
Обращение
……………………………………………………………………………………………………………………………………….. 6
Техническое обслуживание и осмотры
…………………………………………………………………………………………….. 8
Расходные материалы
………………………………………………………………………………………………………………………. 9
Важные указания по технике безопасности
1

Важные указания по технике безопасности
189L-000
В этой главе обсуждаются правила техники безопасности, которым следует придерживаться во избежание
травм пользователей устройства и др. лиц, а также повреждения техники. Перед использованием устройства
ознакомьтесь с этой главой и придерживайтесь инструкций для надлежащей эксплуатации устройства. Не
выполняйте каких-либо действий, описание которых отсутствует в настоящем руководстве. Canon не несет
ответственность за любые повреждения, возникшие вследствие осуществления действий, не указанных в
настоящем руководстве, ненадлежащего использования устройства или проведения ремонтных работ и
внесения изменений третьими лицами и организациями, не являющимися представителями Canon или не
имеющих авторизацию компании Canon.
Важные указания по технике безопасности
2

Установка
189L-001
Для безопасной и удобной эксплуатации устройства следует внимательно ознакомиться с приведенными ниже
мерами предосторожности и установить устройство в приемлемом для него месте.
Не устанавливайте устройство в месте с высоким риском возгорания или
поражения электрическим током.
●
Место, где будут закрыты вентиляционные отверстия
(слишком близко к стенам, кроватям, коврам или похожим объектам).
●
Влажное или запыленное помещение.
●
Место, подверженное воздействию прямого солнечного света, или на открытом воздухе.
●
Место, подверженное воздействию высоких температур.
●
Место вблизи открытого огня.
●
Рядом со спиртом, растворителями и другими легковоспламеняющимися веществами.
Прочие предупреждения
●
Не подсоединяйте к данному аппарату несертифицированные кабели. Несоблюдение этого
требования может привести к пожару или поражению электрическим током.
●
Не помещайте на аппарат браслеты и другие металлические предметы или емкости с водой. Контакт
посторонних веществ с электрическими компонентами внутри устройства может стать причиной
возгорания или поражения электрическим током.
●
При установке и удалении дополнительных аксессуаров убедитесь, что устройство выключено,
отсоедините штепсель шнура питания и отключите от устройства все интерфейсные кабели и шнур
питания. В противном случае шнур питания и интерфейсные кабели можно повредить, что может
стать причиной пожара или удара электротоком.
●
Не используйте данный аппарат рядом с любым медицинским оборудованием. Радиоволны,
излучаемые данным устройством, могут создавать помехи для работы медицинского оборудования,
что может привести к сбою оборудования и несчастному случаю с тяжкими последствиями.
●
Если в устройство попадают инородные вещества, отключите шнур питания от электрической
розетки и обратитесь к местному уполномоченному дилеру Canon.
Не устанавливайте устройство в указанных ниже
местах.
Устройство может упасть, что приведет к травме.
●
Неустойчивая поверхность
●
Место, подверженное вибрации.
Важные указания по технике безопасности
3
Прочие меры предосторожности
●
При перемещении данного устройства следуйте инструкциям, приведенным в настоящем
руководстве. При неправильном перемещении устройство может упасть, что приведет к травме.
●
При установке устройства избегайте защемления рук между устройством и полом или стенами, а
также между лотками для бумаги. Это может привести к травмам.
Не устанавливайте устройство в указанных ниже местах, так как это может
привести к травме.
●
Место, подверженное резким перепадам температуры или
влажности
●
Места вблизи оборудования, создающего магнитные или
электромагнитные волны
●
Лаборатория или место, где происходят химические
реакции
●
Место, подверженное воздействию коррозионно-активных
или токсичных газов
●
Место, которое может деформироваться под действием
веса устройства или где устройство может осесть (ковер и
т. п.)
Избегайте мест установки с плохой вентиляцией.
Во время использования это устройство генерирует озон в малых объемах. Несмотря на различную
восприимчивость к озону его количество не является опасным. Наличие озона может стать ощутимым в
течение длительного использования, особенно в плохо проветриваемых помещениях. Рекомендуется
обеспечить надлежащую вентиляцию помещения, где работает устройство, c целью поддержания
благоприятной для работы среды. Также следует избегать мест, в которых люди наиболее подвержены
воздействию выбросов устройства.
Не устанавливайте устройство в месте с повышенной конденсацией
При интенсивном обогреве помещения, в котором установлено устройство, а также в случаях
перемещения устройства из среды с более прохладным или сухим воздухом в помещения с более
высокой температурой или повышенным уровнем влажности, внутри устройства могут образоваться
капли воды (конденсат). Использование устройства в подобных условиях может привести к замятию
бумаги, плохому качеству печати или повреждению устройства. Перед использованием устройство
должно не менее двух часов адаптироваться к окружающей температуре и влажности.
При использовании беспроводной локальной сети (MF244dw/MF232w)
●
Устанавливайте устройство на расстоянии не более 50 м от беспроводного LAN-роутера.
●
Не устанавливайте устройство в месте, где другие объекты могут препятствовать связи. Мощность
сигнала может значительно падать при прохождении через стены или полы.
●
Размещайте устройство как можно дальше от цифровых беспроводных телефонов, микроволновых
печей и другого оборудования, являющегося источником радиоволн.
На высоте 3 000 м над уровнем моря и выше
Устройства с жестким диском могут работать неправильно на высоте около 3 000 метров и больше над
уровнем моря.
Важные указания по технике безопасности
4
Источник питания
189L-002
Это устройство поддерживает напряжение 220–240 В и частоту электрического тока 50/60 Гц.
●
Используйте только тот источник питания, который отвечает требованиям к напряжению.
Несоблюдение этого правила может стать причиной возгорания или поражения электрическим
током.
●
Не используйте другие шнуры питания, кроме шнура, входящего в комплект принтера, так как это
может стать причиной возгорания или поражения электрическим током.
●
Предоставленный шнур питания предназначен для подключения данного устройства. Не используйте
его для подключения прочих устройств.
●
Не изменяйте, не тяните, не сгибайте и не деформируйте каким-либо иным ведущим к поломке
способом шнур питания. Не ставьте тяжелые предметы на шнур питания. Повреждение шнура
питания может привести к пожару или поражению электрическим током.
●
Не вставляйте штепсель шнура питания в розетку и не извлекайте его мокрыми руками — это может
привести к поражению электрическим током.
●
Не используйте удлинительные шнуры или удлинители с несколькими розетками с данным
устройством. Несоблюдение этого требования может привести к пожару или поражению
электрическим током.
●
Не сворачивайте шнур питания, не завязывайте его в узел, так как это может привести к пожару или
поражению электрическим током.
●
Вставляйте штепсель шнура питания в розетку сети переменного тока полностью. Несоблюдение
этого правила может стать причиной возгорания или поражения электрическим током.
●
Полностью отсоединяйте штепсель шнура питания от розетки сети переменного тока во время грозы.
Невыполнение этого правила может стать причиной возгорания, поражения электрическим током
или повреждения устройства.
Установите данный аппарат возле сетевой розетки и оставьте достаточно места вокруг вилки питания,
чтобы ее можно было легко отсоединить в экстренном случае.
При подключении электропитания
●
Не подключайте устройство к источнику бесперебойного питания.
●
Если устройство подключается в розетку сети переменного тока с несколькими гнездами, не
используйте другие гнезда для подключения прочих устройств.
●
Не подключайте шнур питания к вспомогательной розетке на компьютере.
Прочие меры предосторожности
Электрические помехи могут привести к неполадкам в работе устройства или потере данных.
Важные указания по технике безопасности
5
Обращение
189L-003
●
Незамедлительно отсоедините шнур питания от розетки и
обратитесь к уполномоченному дилеру Canon, если
устройство издает необычный шум, выделяет
непривычный запах или дым или чрезмерно нагревается.
Продолжение эксплуатации может стать причиной
возгорания или поражения электрическим током.
●
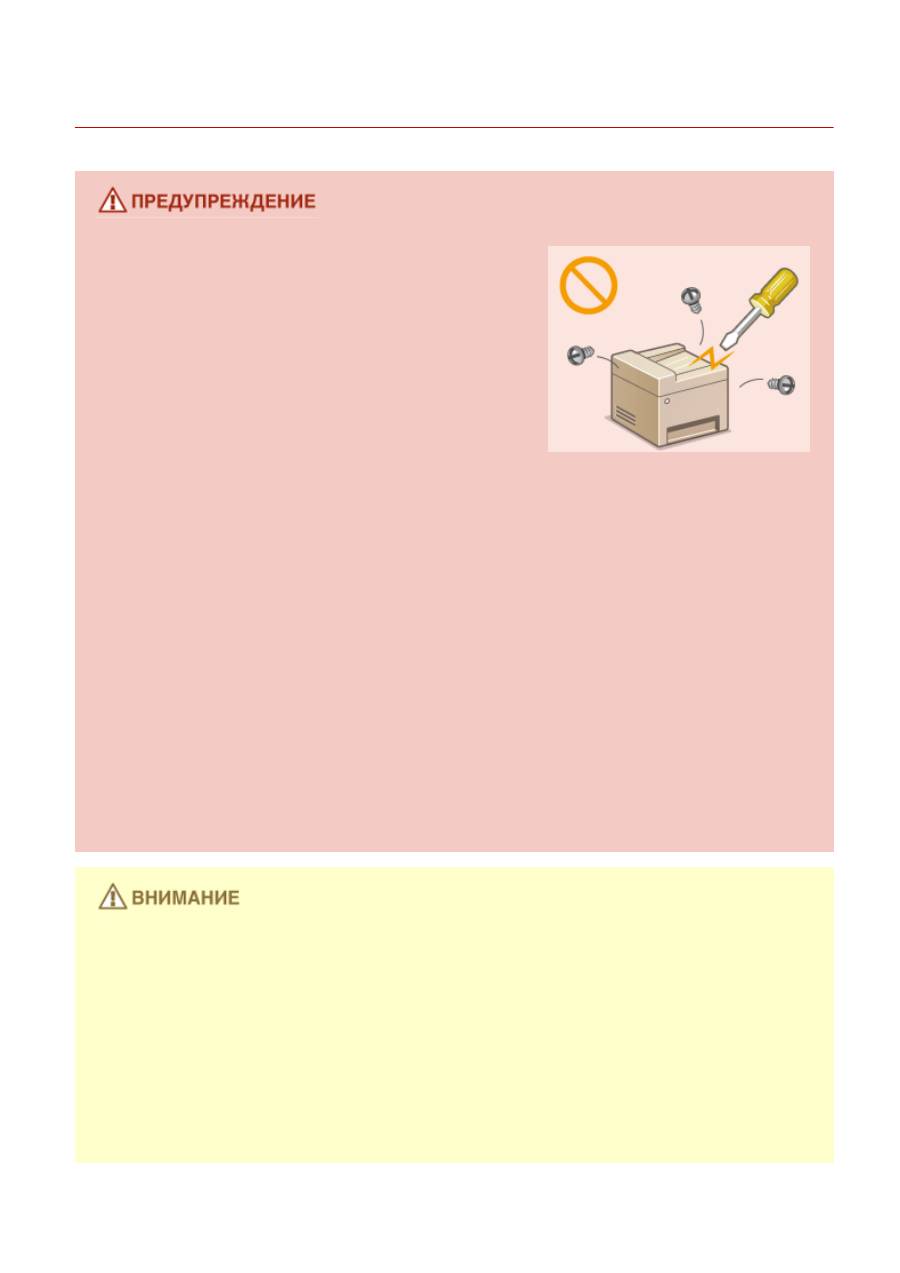
Не разбирайте аппарат и не пытайтесь что-либо изменить в
его устройстве. Некоторые компоненты внутри устройства
сильно нагреваются или находятся под высоким
напряжением, что может стать причиной возгорания или
поражения электрическим током.
●
Размещайте устройство так, чтобы шнур питания и другие кабели, а также внутренние и
электрические компоненты находились вне досягаемости детей. Невыполнение этого условия может
привести к несчастным случаям.
●
Не распыляйте вблизи устройства легковоспламеняющиеся вещества. Контакт
легковоспламеняющихся веществ с электрическими компонентами внутри устройства может
привести к возгоранию или поражению электрическим током.
●
При перемещении устройства обязательно выключите переключатели питания и компьютера, затем
отсоедините штепсель шнура питания и интерфейсные кабели. В противном случае возможно
повреждение шнура питания или интерфейсных кабелей, что может привести к возгоранию или
поражению электрическим током.
●
Подсоединяя или отсоединяя кабель USB, когда штепсель кабеля питания вставлен в розетку сети
переменного тока, не прикасайтесь к металлической части гнезда, так как это может привести к
поражению электрическим током.
При использовании кардиостимулятора
Устройство создает слабое магнитное поле. Если вы используете кардиостимулятор и чувствуете
некоторые нарушения его работы, отойдите от устройства и немедленно обратитесь к врачу.
●
Не кладите на устройство тяжелые предметы, так как они могут упасть и привести к травме.
●
В целях безопасности выньте шнур питания из розетки, если устройство долгое время не будет
использоваться.
●
Будьте осторожны при открытии и закрытии крышек, чтобы не травмировать руки.
●
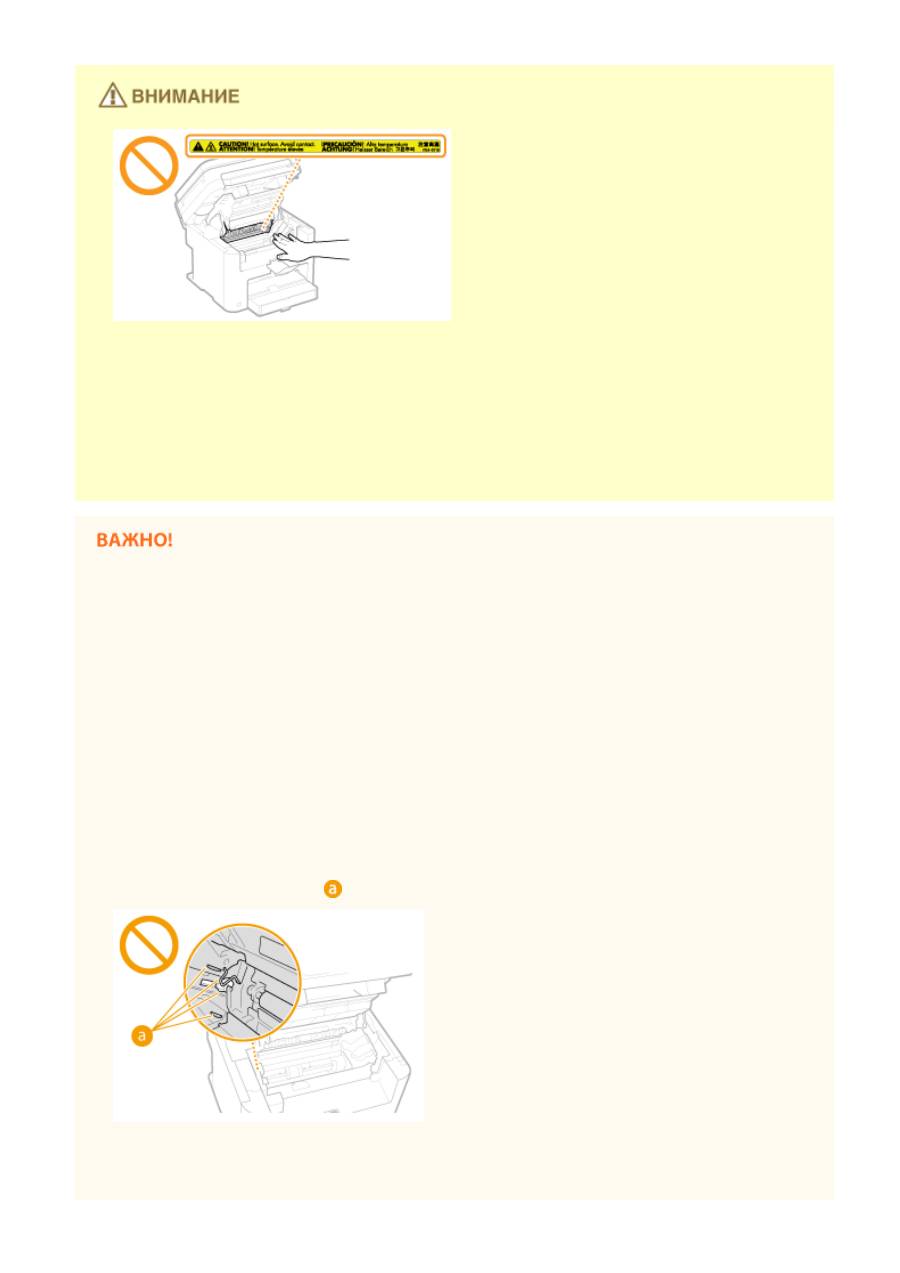
Избегайте контакта рук и одежды с валиками в области вывода. Попадание рук или одежды между
валиками может привести к получению травмы.
●
В процессе и сразу же после работы внутренние компоненты и область вокруг выводного лотка
устройства очень горячие. Не прикасайтесь к этим областям, чтобы не получить ожоги. Кроме того,
отпечатанная бумага сразу после вывода может быть горячей, поэтому обращайтесь с ней аккуратно.
В противном случае можно получить ожоги.
Важные указания по технике безопасности
6
●
Если при копировании на стекле для документов размещена тяжелая книга, не давите на устройство
подачи или на стекло для документов с силой. Это может привести к повреждению стекла
экспонирования и травмам.
●
Следите за тем, чтобы не уронить на стекло экспонирования тяжелый предмет, например словарь.
Это может привести к повреждению стекла экспонирования и травмам.
Лазерное излучение
●
Проникновение лазерного излучения наружу и его контакт с глазами может нанести ущерб зрению.
При транспортировке устройства
Для предотвращения повреждения устройства во время транспортировки выполните следующее.
●
Извлеките картриджи с тонером.
●
Надежно упакуйте устройство в оригинальную коробку с упаковочными материалами.
Если беспокоит уровень шума
●
Если шум работы устройства беспокоит (в зависимости от условий эксплуатации и режима работы), то
рекомендуется установить устройство в месте, отличном от офиса.
Прочие меры предосторожности
●
Следуйте указаниям на наклейке с предупреждением, прикрепленной к устройству.
●
Избегайте тряски и ударов по устройству.
●
Не открывайте и не закрывайте дверцы, крышки и прочие компоненты с применением силы. Это
может привести к повреждению устройства.
●
Не прикасайтесь к контактам (
). Это может привести к повреждению устройства.
●
Не выключайте устройство в процессе печати. Не открывайте и не закрывайте крышку, а также не
загружайте и не вынимайте бумагу в процессе печати. В противном случае может произойти замятие
бумаги.
Важные указания по технике безопасности
7
Техническое обслуживание и осмотры
189L-004
Выполняйте периодическую очистку устройства. При накоплении пыли устройство может работать
ненадлежащим образом. Во время очистки придерживайтесь следующих правил. При возникновении
неполадок в работе см. раздел
Устранение неполадок(P. 349)
. Если проблему невозможно устранить
самостоятельно и устройство необходимо осмотреть, ознакомьтесь с разделом
Если проблему не удается
устранить(P. 385)
.
●
Перед очисткой отключите питание и отсоедините шнур питания от розетки переменного тока.
Несоблюдение этого правила может стать причиной возгорания или поражения электрическим
током.
●
Периодически отсоединяйте шнур питания и очищайте штепсель сухой тканью для удаления пыли и
грязи. Накопившаяся пыль может поглощать влагу из воздуха, что может вызвать воспламенение при
контакте с электричеством.
●
Для очистки аппарата используйте влажную хорошо отжатую ткань. Смачивать ткань для очистки
необходимо только в воде. Не используйте спирт, бензин, растворители краски и другие
легковоспламеняющиеся вещества. Не используйте бумажные салфетки и полотенца. Если эти
вещества вступят в контакт с электрическими узлами внутри устройства, они могут привести к
возникновению статического электричества, или возгоранию, или поражению электрическим током.
●
Регулярно проверяйте отсутствие повреждений шнура питания и штепселя. Проверяйте отсутствие
коррозии, механической деформации, царапин, трещин или чрезмерного нагревания аппарата.
Использование оборудования, техническое обслуживание которого проводится
неудовлетворительно, может привести к пожару или поражению электрическим током.
●
Некоторые компоненты внутри аппарата сильно нагреваются или находятся под высоким
напряжением. Контакт с этими компонентами может привести к ожогам. Не прикасайтесь к частям
аппарата, не перечисленным в данном руководстве.
●
При загрузке бумаги или извлечении застрявшей бумаги или документов будьте осторожны, чтобы не
порезать руки о края бумаги.
При извлечении застрявшей бумаги или замене картриджа с тонером избегайте попадания тонера на
руки или одежду. При попадании тонера на руки или одежду немедленно промойте их холодной водой.
Важные указания по технике безопасности
8
Расходные материалы
189L-005
●
Не бросайте отработанные картриджи с тонером в открытый огонь. Кроме того, не храните
картриджи с тонером и бумагу вблизи открытого огня. Это может вызвать возгорание тонера и
привести к ожогам или пожару.
●
При случайном рассыпании тонера осторожно соберите частички тонера или сотрите их мягкой
влажной тканью таким образом, не вдыхая его. Запрещается использовать для очистки
просыпанного тонера пылесос, не оснащенный специальным приспособлением для защиты от
взрыва пыли. В противном случае возможно повреждение пылесоса или взрыв пыли, вызванный
статическим разрядом.
При использовании кардиостимулятора
Картриджи с тонером создают слабое магнитное поле. Если вы используете кардиостимулятор и
чувствуете нарушения в его работе, отойдите от картриджей с тонером и немедленно обратитесь к
врачу.
●
Примите все меры предосторожности, чтобы не вдыхать тонер. Если вы вдохнули тонер, немедленно
обратитесь к врачу.
●
Примите все меры предосторожности, чтобы тонер не попал в глаза и рот. При попадании тонера в
глаза или рот немедленно промойте их холодной водой и обратитесь к врачу.
●
Примите все меры предосторожности, чтобы тонер не касался вашей кожи. В противном случае
смойте его холодной водой с использованием мыла. При появлении раздражения на коже
немедленно обратитесь к врачу.
●
Храните картриджи с тонером и другие расходные материалы в местах, недоступных для детей. В
случае проглатывания тонера немедленно обратитесь к врачу или в токсикологический центр.
●
Не разбирайте картридж с тонером и не пытайтесь что-либо изменить в его устройстве. Это может
привести к рассеиванию тонера.
●
Полностью извлеките защитную ленту из картриджа с тонером, не применяя силу. В противном
случае это может привести к рассеиванию тонера.
Обработка картриджа с тонером
●
Возьмите картридж с тонером как показано на рисунке. Не ставьте его вертикально и не
переворачивайте его вверх дном.
Важные указания по технике безопасности
9
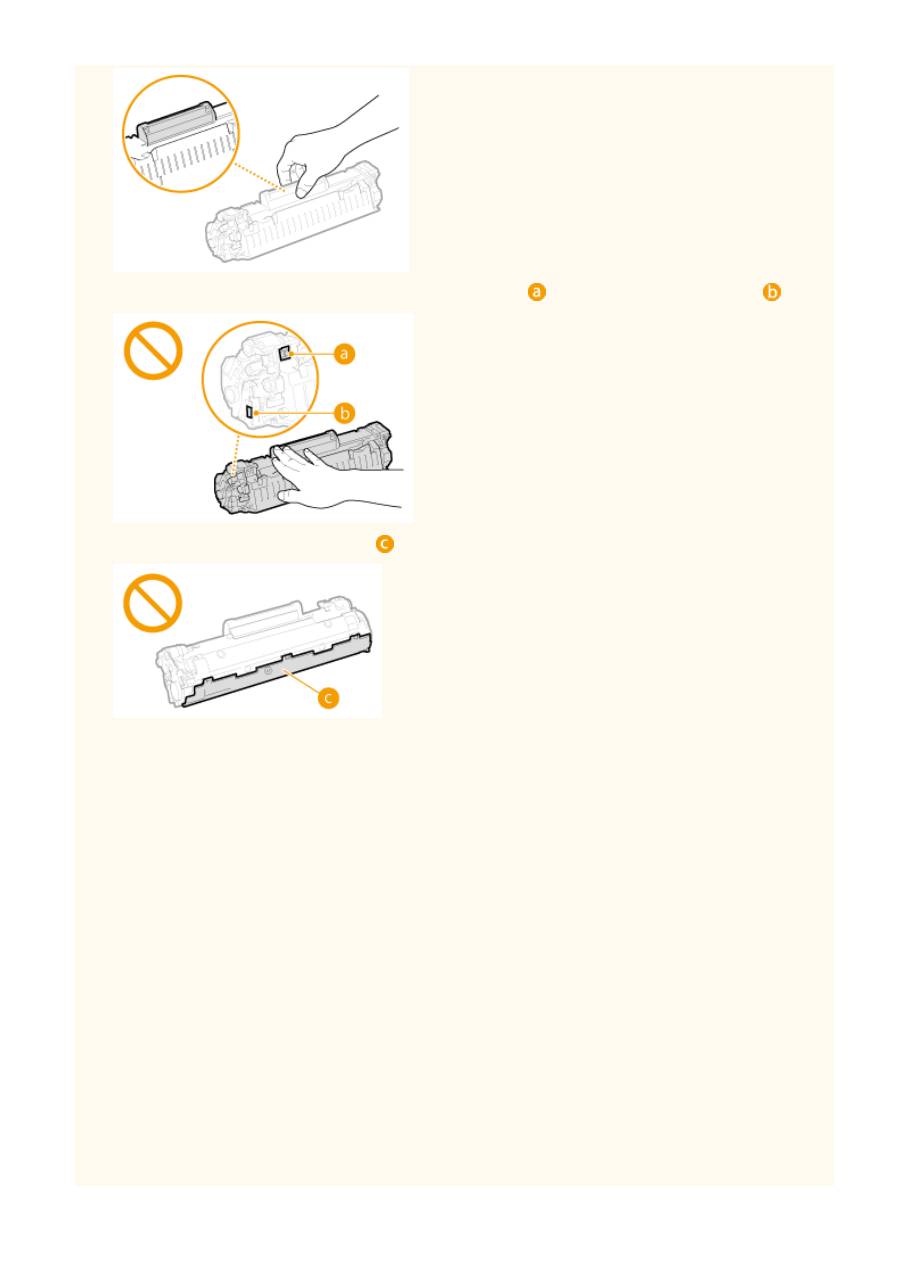
●
Не прикасайтесь к устройству памяти картриджа с тонером (
) и к электрическим контактам (
).
●
Не царапайте поверхность барабана (
) и не допускайте воздействия света на него.
●
Не извлекайте картридж с тонером из устройства или защитной упаковки без необходимости.
●
Картридж с тонером является магнитным продуктом. Не храните его рядом с гибкими дисками,
жесткими дисками и другими устройствами, на которые могут повлиять магнитные свойства
картриджа. Невыполнение этого условия может привести к потере данных.
Хранение картриджа с тонером
●
Для обеспечения безопасного и надлежащего использования храните в следующей среде.
Диапазон температур хранения: 0–35 °C
Диапазон влажности при хранении: от 35 до 85 % относительной влажности (без конденсации)
*
●
Храните картридж не открывая упаковки, откройте ее только перед самым использованием.
●
При извлечении картриджа с тонером из устройства поместите извлеченный картридж в исходный
защитный пакет или оберните его толстой тканью.
●
Не храните картридж в вертикальном или перевернутом состоянии. Это приведет к отвердеванию
тонера, и его исходная консистенция может не восстановиться даже после встряхивания.
*
Даже при хранении в пределах допустимого диапазона влажности капли воды (конденсат) могут образовываться
внутри картриджа при разнице температур внутри и снаружи картриджа с тонером. Конденсация оказывает
негативное воздействие на качество картриджей с тонером.
Не храните картридж с тонером в перечисленных ниже местах:
●
Вблизи открытого огня;
●
В местах, подверженных воздействию прямого солнечного света или другого яркого света, более пяти
минут;
Важные указания по технике безопасности
10

●
При повышенной концентрации солей в воздухе;
●
В местах, подверженных воздействию разъедающих газов (аэрозоли и аммиак);
●
Под воздействием высоких температур и повышенной влажности;
●
В местах с резкими перепадами температуры и влажности, приводящими к возникновению
конденсата;
●
Вблизи скоплений пыли;
●
В местах, доступных для детей;
Избегайте использования поддельных картриджей с тонером
В продаже встречаются картриджи с тонером, являющиеся подделками картриджей Canon.
Использование поддельных картриджей может привести к ухудшению качества печати или работы
устройства. Компания Canon не несет ответственности за какие-либо неполадки, несчастные случаи или
ущерб, являющиеся результатом использования поддельного картриджа с тонером.
Дополнительные сведения см. на веб-странице canon.com/counterfeit.
Ожидаемое время поступления запасных частей и картриджей с тонером
Запасные части и картриджи с тонером для устройства будут в продаже в течение минимум семи (7) лет
после снятия с производства данной модели устройства.
Упаковочные материалы картриджа тонера
●
Сохраните защитный пакет картриджа с тонером. Они понадобятся при транспортировке этого
устройства.
●
Количество, форма и размещение упаковочных материалов могут изменяться без предварительного
уведомления.
●
Утилизируйте защитную ленту в соответствии с местными правилами и нормами.
При утилизации использованного картриджа с тонером
Поместите картридж в защитный пакет, чтобы предотвратить просыпание тонера, а затем утилизируйте
картридж с тонером в соответствии с местными законами.
Важные указания по технике безопасности
11
Оглавление
Аннотации для Лазерного МФУ Canon i-SENSYS MF232w в формате PDF
Топ 10 инструкций
Другие инструкции

MF244dw / MF232w / MF231
Руководство пользователя
USRMA-1413-00 2016-09 ru Copyright CANON INC. 2016

Содержание
Важные указания по т
Установка ……………………………………………………………………………………………………………………………………………. 3
Источник питания ………………………………………………………………………………………………………………………………… 5
Обращение ………………………………………………………………………………………………………………………………………….. 6
Техническое обслуживание и осмотры …………………………………………………………………………………………………… 8
Расходные материалы ………………………………………………………………………………………………………………………….. 9
ехнике безопасности …………………………………………………………. 2
Основные операции ……………………………………………………………………………………………………………… 13
Компоненты и их функции ………………………………………………………………………………………………………………….. 15
Передняя сторона …………………………………………………………………………………………………………………………… 16
Задняя сторона ………………………………………………………………………………………………………………………………. 18
Внутренние детали …………………………………………………………………………………………………………………………. 20
Отверстие для ручной подачи …………………………………………………………………………………………………………… 21
Лоток для бумаги ……………………………………………………………………………………………………………………………. 22
Панель управления …………………………………………………………………………………………………………………………. 23
Дисплей …………………………………………………………………………………………………………………………………… 30
Использование панели управления ……………………………………………………………………………………………………… 34
Ввод текста ……………………………………………………………………………………………………………………………………. 36
Размещение документов …………………………………………………………………………………………………………………….. 39
Загрузка бумаги …………………………………………………………………………………………………………………………………. 43
Загрузка бумаги в лоток …………………………………………………………………………………………………………………… 45
Загрузка бумаги в отверстие для ручной подачи …………………………………………………………………………………… 48
Загрузка конвертов …………………………………………………………………………………………………………………………. 50
Загрузка уже отпечатанной бумаги …………………………………………………………………………………………………….. 52
Определение формата и типа бумаги ………………………………………………………………………………………………….. 54
Регистрация специального формата бумаги ……………………………………………………………………………………. 56
Переход в бесшумный режим ………………………………………………………………………………………………………………. 58
Переход в спящий режим ……………………………………………………………………………………………………………………. 60
Установка времени автоматического выключения ………………………………………………………………………………… 62
Копирование ………………………………………………………………………………………………………………………………. 64
Основные операции копирования ………………………………………………………………………………………………………… 66
Отмена копирования ………………………………………………………………………………………………………………………….. 68
Различные настройки копирования ……………………………………………………………………………………………………… 70
Увеличение или уменьшение ……………………………………………………………………………………………………………. 71
Выбор типа документа …………………………………………………………………………………………………………………….. 72
Настройка плотности ………………………………………………………………………………………………………………………. 73
Настройка резкости …………………………………………………………………………………………………………………………. 74
Двустороннее копирование (MF244dw) ……………………………………………………………………………………………….. 76
Копирование нескольких документов на одном листе (2 на 1/4 на 1) …………………………………………………………. 78
Использование клавиши [Paper Save Copy] (MF244dw/MF231) …………………………………………………………………… 80
I

Копирование обеих сторон удостоверения личности на одной странице
Сортировка копий по страницам ……………………………………………………………………………………………………….. 84
Изменение параметров по умолчанию ……………………………………………………………………………………………….. 85
…………………………………………………… 82
Использование аппарата в качестве принтера ……………………………………………….. 87
Печать с компьютера ………………………………………………………………………………………………………………………….. 88
Печать документа …………………………………………………………………………………………………………………………… 89
Отмена печати ……………………………………………………………………………………………………………………………….. 93
Проверка состояния печати ………………………………………………………………………………………………………………. 96
Различные параметры печати …………………………………………………………………………………………………………… 97
Увеличение или уменьшение ………………………………………………………………………………………………………. 99
Включение односторонней и двухсторонней печати (MF244dw) ………………………………………………………… 101
Сортировка распечаток по страницам …………………………………………………………………………………………. 103
Печать нескольких страниц на одном листе ………………………………………………………………………………….. 105
Печать плакатов ……………………………………………………………………………………………………………………… 107
Печать буклетов (MF244dw) ……………………………………………………………………………………………………….. 109
Печать кромок ………………………………………………………………………………………………………………………… 111
Печать дат и номеров страниц …………………………………………………………………………………………………… 112
Печать водяных знаков …………………………………………………………………………………………………………….. 114
Выбор типа документа ……………………………………………………………………………………………………………… 116
Экономия тонера …………………………………………………………………………………………………………………….. 118
Объединение и печать нескольких документов …………………………………………………………………………….. 120
Настройка параметров печати под потребности пользователя ………………………………………………………………. 124
Регистрация комбинаций часто используемых настроек печати ……………………………………………………….. 125
Изменение параметров по умолчанию ………………………………………………………………………………………… 127
Использование устройства в качестве сканера …………………………………………….. 130
Подготовка к использованию аппарата в качестве сканера (MF244dw/MF232w) ……………………………………….. 132
Сканирование на аппарате ………………………………………………………………………………………………………………… 133
Сканирование с помощью клавиши [Scan -> PC] ………………………………………………………………………………….. 136
Сканирование на компьютере ……………………………………………………………………………………………………………. 140
Сканирование с помощью приложения …………………………………………………………………………………………….. 141
Настройки параметров сканирования в ScanGear MF ……………………………………………………………………………. 143
Удобное использование с мобильным устройством (MF244dw/
MF232w) ………………………………………………………………………………………………………………………………………… 145
Подключение к мобильному устройству ……………………………………………………………………………………………… 146
Прямое соединение (режим точки доступа) ………………………………………………………………………………………… 147
Оптимальное использование возможностей аппарата с помощью приложений ……………………………………… 150
Использование AirPrint ………………………………………………………………………………………………………………….. 151
Печать с помощью AirPrint ………………………………………………………………………………………………………… 156
Сканирование с помощью AirPrint ………………………………………………………………………………………………. 159
Если не удается воспользоваться функцией AirPrint ………………………………………………………………………… 161
Использование Виртуального принтера Google ………………………………………………………………………………….. 162
Удаленное управление аппаратом ……………………………………………………………………………………………………… 166
II

Сеть (MF244dw/MF232w) ……………………………………………………………………………………………………. 168
Подключение к сети …………………………………………………………………………………………………………………………. 169
Выбор проводной или беспроводной локальной сети ………………………………………………………………………….. 171
Подключение к проводной локальной сети ……………………………………………………………………………………….. 172
Подключение к беспроводной локальной сети ……………………………………………………………………………………. 173
Настройка подключения с помощью функции WPS (режим нажатия кнопки) ……………………………………….. 175
Настройка подключения с помощью функции WPS (режим PIN-кода) …………………………………………………. 178
Настройка подключения путем выбора беспроводного маршрутизатора ……………………………………………. 181
Настройка подключения путем детального задания параметров ………………………………………………………. 184
Проверка SSID и ключа сети ………………………………………………………………………………………………………. 188
Настройка IP-адреса ………………………………………………………………………………………………………………………. 191
Настройка адреса IPv4 ………………………………………………………………………………………………………………. 192
Настройка адресов IPv6 …………………………………………………………………………………………………………….. 195
Просмотр параметров сети ………………………………………………………………………………………………………………… 199
Настройка аппарата для печати с помощью компьютера ……………………………………………………………………… 202
Настройка протоколов печати и функций WSD ……………………………………………………………………………………. 203
Настройка портов принтера ……………………………………………………………………………………………………………. 206
Настройка сервера печати ……………………………………………………………………………………………………………… 209
Настройка аппарата для сетевой среды ………………………………………………………………………………………………. 213
Настройка параметров Ethernet ……………………………………………………………………………………………………….. 214
Изменение максимального блока передачи ……………………………………………………………………………………….. 216
Настройка времени ожидания при подключении к сети ……………………………………………………………………….. 217
Настройка DNS ……………………………………………………………………………………………………………………………… 218
Настройка SNTP ……………………………………………………………………………………………………………………………. 222
Мониторинг и контроль аппарата с помощью SNMP ……………………………………………………………………………. 224
Безопасность ……………………………………………………………………………………………………………………………. 230
Защита аппарата от несанкционированного доступа ……………………………………………………………………………. 231
Предотвращение несанкционированного доступа ………………………………………………………………………………. 232
Настройка прав доступа …………………………………………………………………………………………………………………. 234
Настройка PIN-кода администратора системы ……………………………………………………………………………….. 235
Настройка PIN-кода для Удаленного ИП (MF244dw/MF232w) ……………………………………………………………… 237
Ограничение связи посредством брандмауэров (MF244dw/MF232w) ……………………………………………………….. 239
Указание IP-адресов по правилам брандмауэра …………………………………………………………………………….. 240
Указание MAC-адресов по правилам брандмауэра …………………………………………………………………………. 244
Изменение номеров портов (MF244dw/MF232w) ………………………………………………………………………………….. 247
Настройка прокси (MF244dw/MF232w) ……………………………………………………………………………………………….. 249
Ограничение функций аппарата (MF244dw/MF232w) …………………………………………………………………………….. 251
Отключение соединения HTTP …………………………………………………………………………………………………………. 252
Отключение Удаленного ИП ……………………………………………………………………………………………………………. 253
Реализация функций надежной защиты (MF244dw/MF232w) ………………………………………………………………….. 254
Включение функции шифрованной связи TLS для Удаленного ИП …………………………………………………………… 255
Настройка аутентификации IEEE 802.1X ……………………………………………………………………………………………… 258
Настройка параметров для пар ключей и цифровых сертификатов …………………………………………………………. 263
III

Создание пар ключей ………………………………………………………………………………………………………………..
Использование пар ключей и цифровых сертификатов, выданных центром сертификации (СА) ………………. 272
Проверка пары ключей и цифровых сертификатов ………………………………………………………………………… 276
265
Использование Удаленного ИП (MF244dw/MF232w) …………………………………….. 279
Запуск Удаленного ИП ………………………………………………………………………………………………………………………. 280
Экраны Удаленного ИП ……………………………………………………………………………………………………………………… 282
Управление документами и проверка состояния аппарата ……………………………………………………………………. 285
Настройка параметров меню с помощью Удаленного ИП ………………………………………………………………………. 289
Список меню настройки ………………………………………………………………………………………………….. 292
Прямое соединение (MF244dw/MF232w) ……………………………………………………………………………………………….. 293
Настройки сети (MF244dw/MF232w) …………………………………………………………………………………………………….. 294
Вывод отчетов …………………………………………………………………………………………………………………………………. 305
Настройки ……………………………………………………………………………………………………………………………………….. 308
Настройки таймера ………………………………………………………………………………………………………………………….. 312
Общие настройки (MF244dw) ……………………………………………………………………………………………………………… 317
Настройки копирования ……………………………………………………………………………………………………………………. 319
Настройки сканирования ………………………………………………………………………………………………………………….. 321
Настройки принтера …………………………………………………………………………………………………………………………. 323
Настройка/Обслуживание …………………………………………………………………………………………………………………. 334
Настройки управления системой ……………………………………………………………………………………………………….. 340
Устранение неполадок ……………………………………………………………………………………………………… 349
Устранение замятия бумаги ………………………………………………………………………………………………………………. 351
Если появляется сообщение об ошибке ……………………………………………………………………………………………….. 357
Распространенные проблемы …………………………………………………………………………………………………………….. 365
Проблемы, связанные с установкой и настройкой ……………………………………………………………………………….. 366
Проблемы при копировании/печати ………………………………………………………………………………………………… 370
Печать выполняется неправильно ……………………………………………………………………………………………………… 373
Неудовлетворительные результаты печати ………………………………………………………………………………………… 375
Скручивание или заламывание бумаги ……………………………………………………………………………………………… 381
Бумага подается неправильно …………………………………………………………………………………………………………. 383
Если проблему не удается устранить …………………………………………………………………………………………………… 385
Обслуживание ………………………………………………………………………………………………………………………… 387
Очистка аппарата …………………………………………………………………………………………………………………………….. 388
Корпус ………………………………………………………………………………………………………………………………………… 389
Стекло экспонирования …………………………………………………………………………………………………………………. 390
Податчик (MF244dw) ………………………………………………………………………………………………………………………. 393
Узел фиксации ……………………………………………………………………………………………………………………………… 394
Внутренняя часть аппарата …………………………………………………………………………………………………………….. 395
Замена картриджей с тонером …………………………………………………………………………………………………………… 397
Перед заменой картриджа с тонером ………………………………………………………………………………………………… 399
IV

Процедура замены картриджей с тонером ………………………………………………………………………………………….
Перемещение аппарата …………………………………………………………………………………………………………………….. 404
Просмотр значения счетчика …………………………………………………………………………………………………………….. 406
Инициализация настроек ………………………………………………………………………………………………………………….. 407
Инициализация меню ……………………………………………………………………………………………………………………. 408
Инициализируйте счетчик отчета Eco (MF244dw/MF232w) ……………………………………………………………………… 410
Инициализация всех данных/параметров ………………………………………………………………………………………….. 411
401
Приложение ……………………………………………………………………………………………………………………………… 413
Программное обеспечение сторонних производителей (MF244dw/MF232w) …………………………………………….. 414
Ключевые моменты функций …………………………………………………………………………………………………………….. 415
Забота об окружающей среде и экономия средств ……………………………………………………………………………….. 416
Повышение производительности …………………………………………………………………………………………………….. 418
Применение в мире цифровых технологий ………………………………………………………………………………………… 420
Другие функции ……………………………………………………………………………………………………………………………. 422
Технические характеристики …………………………………………………………………………………………………………….. 424
Технические характеристики аппарата ……………………………………………………………………………………………… 425
Технические характеристики беспроводной локальной сети (MF244dw/MF232w) ……………………………………….. 427
Тип документа ……………………………………………………………………………………………………………………………… 428
Область сканирования ……………………………………………………………………………………………………………… 429
Бумага ………………………………………………………………………………………………………………………………………… 430
Технические характеристики копирования ………………………………………………………………………………………… 432
Технические характеристики сканера ……………………………………………………………………………………………….. 433
Технические характеристики принтера ……………………………………………………………………………………………… 434
Расходные материалы ………………………………………………………………………………………………………………………. 435
Руководства, входящие в комплект поставки устройства ……………………………………………………………………… 436
Использование Руководство пользователя …………………………………………………………………………………………. 437
Макет экрана Руководство пользователя …………………………………………………………………………………………… 438
Просмотр Руководство пользователя ………………………………………………………………………………………………… 442
Параметры дисплея, настраиваемые вручную ……………………………………………………………………………………. 443
Другое …………………………………………………………………………………………………………………………………………….. 444
Основные операции в среде Windows ……………………………………………………………………………………………….. 445
Примечание ………………………………………………………………………………………………………………………………… 454
V

Важные указания по технике безопасности
Важные указания по технике
безопасности
Важные указания по технике безопасности …………………………………………………………………….
Установка ………………………………………………………………………………………………………………………………………….. 3
Источник питания …………………………………………………………………………………………………………………………….. 5
Обращение ……………………………………………………………………………………………………………………………………….. 6
Техническое обслуживание и осмотры …………………………………………………………………………………………….. 8
Расходные материалы ………………………………………………………………………………………………………………………. 9
2
1

Важные указания по технике безопасности
Важные указания по технике безопасности
189L-000
В э
той главе обсуждаются правила техники безопасности, которым следует придерживаться во избежание
травм пользователей устройства и др. лиц, а также повреждения техники. Перед использованием устройства
ознакомьтесь с этой главой и придерживайтесь инструкций для надлежащей эксплуатации устройства. Не
выполняйте каких-либо действий, описание которых отсутствует в настоящем руководстве. Canon не несет
ответственность за любые повреждения, возникшие вследствие осуществления действий, не указанных в
настоящем руководстве, ненадлежащего использования устройства или проведения ремонтных работ и
внесения изменений третьими лицами и организациями, не являющимися представителями Canon или не
имеющих авторизацию компании Canon.
2

Установка
Важные указания по технике безопасности
189L-001
Для безопасной и у
мерами предосторожности и установить устройство в приемлемом для него месте.
добной эксплуатации устройства следует внимательно ознакомиться с приведенными ниже
Не устанавливайте устройство в месте с высоким риском возгорания или
пораж
● Место, где будут закрыты вентиляционные отверстия
● Влажное или запыленное помещение.
● Место, подверженное воздействию прямого солнечного света, или на открытом воздухе.
● Место, подверженное воздействию высоких температур.
● Место вблизи открытого огня.
● Рядом со спиртом, растворителями и другими легковоспламеняющимися веществами.
ения электрическим током.
(слишком близко к стенам, кроватям, коврам или похожим объектам).
Прочие предупреждения
● Не подсоединяйте к данному аппарату несертифицированные кабели. Несоблюдение этого
требования может привести к пожару или поражению электрическим током.
● Не помещайте на аппарат браслеты и другие металлические предметы или емкости с водой. Контакт
посторонних веществ с электрическими компонентами внутри устройства может стать причиной
возгорания или поражения электрическим током.
● При установке и удалении дополнительных аксессуаров убедитесь, что устройство выключено,
отсоедините штепсель шнура питания и отключите от устройства все интерфейсные кабели и шнур
питания. В противном случае шнур питания и интерфейсные кабели можно повредить, что может
стать причиной пожара или удара электротоком.
● Не используйте данный аппарат рядом с любым медицинским оборудованием. Радиоволны,
излучаемые данным устройством, могут создавать помехи для работы медицинского оборудования,
что может привести к сбою оборудования и несчастному случаю с тяжкими последствиями.
● Если в устройство попадают инородные вещества, отключите шнур питания от электрической
розетки и обратитесь к местному уполномоченному дилеру Canon.
Не устанавливайте устройство в указанных ниже
местах.
стройство может упасть, что приведет к травме.
У
● Неустойчивая поверхность
● Место, подверженное вибрации.
3

Важные указания по технике безопасности
Прочие меры предосторожности
● При перемещении данног
руководстве. При неправильном перемещении устройство может упасть, что приведет к травме.
● При установке устройства избегайте защемления рук между устройством и полом или стенами, а
также между лотками для бумаги. Это может привести к травмам.
о устройства следуйте инструкциям, приведенным в настоящем
Не устанавливайте устройство в указанных ниже местах, так как это может
привести к травме.
● Мест
● Места вблизи оборудования, создающего магнитные или
● Лаборатория или место, где происходят химические
● Место, подверженное воздействию коррозионно-активных
● Место, которое может деформироваться под действием
о, подверженное резким перепадам температуры или
влажности
электромагнитные волны
реакции
или токсичных газов
веса устройства или где устройство может осесть (ковер и
т. п.)
Избегайте мест установки с плохой вентиляцией.
Во время использования э
восприимчивость к озону его количество не является опасным. Наличие озона может стать ощутимым в
течение длительного использования, особенно в плохо проветриваемых помещениях. Рекомендуется
обеспечить надлежащую вентиляцию помещения, где работает устройство, c целью поддержания
благоприятной для работы среды. Также следует избегать мест, в которых люди наиболее подвержены
воздействию выбросов устройства.
то устройство генерирует озон в малых объемах. Несмотря на различную
Не устанавливайте устройство в месте с повышенной конденсацией
При интенсивном обогреве помещения, в котором установлено устройство, а также в случаях
перемещения устройства из среды с более прохладным или сухим воздухом в помещения с более
высокой температурой или повышенным уровнем влажности, внутри устройства могут образоваться
капли воды (конденсат). Использование устройства в подобных условиях может привести к замятию
бумаги, плохому качеству печати или повреждению устройства. Перед использованием устройство
должно не менее двух часов адаптироваться к окружающей температуре и влажности.
При использовании беспроводной локальной сети (MF244dw/MF232w)
● Устанавливайте устройство на расстоянии не более 50 м от беспроводного LAN-роутера.
● Не устанавливайте устройство в месте, где другие объекты могут препятствовать связи. Мощность
сигнала может значительно падать при прохождении через стены или полы.
● Размещайте устройство как можно дальше от цифровых беспроводных телефонов, микроволновых
печей и другого оборудования, являющегося источником радиоволн.
На высоте 3 000 м над уровнем моря и выше
Устройства с жестким диском могут работать неправильно на высоте около 3 000 метров и больше над
уровнем моря.
4

Важные указания по технике безопасности
Источник питания
Эт
о устройство поддерживает напряжение 220–240 В и частоту электрического тока 50/60 Гц.
189L-002
● Используйт
Несоблюдение этого правила может стать причиной возгорания или поражения электрическим
током.
● Не используйте другие шнуры питания, кроме шнура, входящего в комплект принтера, так как это
может стать причиной возгорания или поражения электрическим током.
● Предоставленный шнур питания предназначен для подключения данного устройства. Не используйте
его для подключения прочих устройств.
● Не изменяйте, не тяните, не сгибайте и не деформируйте каким-либо иным ведущим к поломке
способом шнур питания. Не ставьте тяжелые предметы на шнур питания. Повреждение шнура
питания может привести к пожару или поражению электрическим током.
● Не вставляйте штепсель шнура питания в розетку и не извлекайте его мокрыми руками — это может
привести к поражению электрическим током.
● Не используйте удлинительные шнуры или удлинители с несколькими розетками с данным
устройством. Несоблюдение этого требования может привести к пожару или поражению
электрическим током.
● Не сворачивайте шнур питания, не завязывайте его в узел, так как это может привести к пожару или
поражению электрическим током.
● Вставляйте штепсель шнура питания в розетку сети переменного тока полностью. Несоблюдение
этого правила может стать причиной возгорания или поражения электрическим током.
● Полностью отсоединяйте штепсель шнура питания от розетки сети переменного тока во время грозы.
Невыполнение этого правила может стать причиной возгорания, поражения электрическим током
или повреждения устройства.
е только тот источник питания, который отвечает требованиям к напряжению.
Установите данный аппарат возле сетевой розетки и оставьте достаточно места вокруг вилки питания,
чт
обы ее можно было легко отсоединить в экстренном случае.
При подключении электропитания
● Не подклю
● Если устройство подключается в розетку сети переменного тока с несколькими гнездами, не
используйте другие гнезда для подключения прочих устройств.
● Не подключайте шнур питания к вспомогательной розетке на компьютере.
чайте устройство к источнику бесперебойного питания.
Прочие меры предосторожности
Электрические помехи могут привести к неполадкам в работе устройства или потере данных.
5

Обращение
Важные указания по технике безопасности
189L-003
● Незамедлит
обратитесь к уполномоченному дилеру Canon, если
устройство издает необычный шум, выделяет
непривычный запах или дым или чрезмерно нагревается.
Продолжение эксплуатации может стать причиной
возгорания или поражения электрическим током.
● Не разбирайте аппарат и не пытайтесь что-либо изменить в
его устройстве. Некоторые компоненты внутри устройства
сильно нагреваются или находятся под высоким
напряжением, что может стать причиной возгорания или
поражения электрическим током.
● Размещайт
электрические компоненты находились вне досягаемости детей. Невыполнение этого условия может
привести к несчастным случаям.
● Не распыляйте вблизи устройства легковоспламеняющиеся вещества. Контакт
легковоспламеняющихся веществ с электрическими компонентами внутри устройства может
привести к возгоранию или поражению электрическим током.
● При перемещении устройства обязательно выключите переключатели питания и компьютера, затем
отсоедините штепсель шнура питания и интерфейсные кабели. В противном случае возможно
повреждение шнура питания или интерфейсных кабелей, что может привести к возгоранию или
поражению электрическим током.
ельно отсоедините шнур питания от розетки и
е устройство так, чтобы шнур питания и другие кабели, а также внутренние и
● Подсоединяя или отсоединяя кабель USB, когда штепсель кабеля питания вставлен в розетку сети
переменного тока, не прикасайтесь к металлической части гнезда, так как это может привести к
поражению электрическим током.
При использовании кардиостимулятора
У
стройство создает слабое магнитное поле. Если вы используете кардиостимулятор и чувствуете
некоторые нарушения его работы, отойдите от устройства и немедленно обратитесь к врачу.
● Не кладит
● В целях безопасности выньте шнур питания из розетки, если устройство долгое время не будет
использоваться.
● Будьте осторожны при открытии и закрытии крышек, чтобы не травмировать руки.
● Избегайте контакта рук и одежды с валиками в области вывода. Попадание рук или одежды между
валиками может привести к получению травмы.
● В процессе и сразу же после работы внутренние компоненты и область вокруг выводного лотка
устройства очень горячие. Не прикасайтесь к этим областям, чтобы не получить ожоги. Кроме того,
отпечатанная бумага сразу после вывода может быть горячей, поэтому обращайтесь с ней аккуратно.
В противном случае можно получить ожоги.
е на устройство тяжелые предметы, так как они могут упасть и привести к травме.
6

Важные указания по технике безопасности
● Если при к
подачи или на стекло для документов с силой. Это может привести к повреждению стекла
экспонирования и травмам.
● Следите за тем, чтобы не уронить на стекло экспонирования тяжелый предмет, например словарь.
Это может привести к повреждению стекла экспонирования и травмам.
опировании на стекле для документов размещена тяжелая книга, не давите на устройство
Лазерное излучение
● Проникновение лазерного излучения наружу и его контакт с глазами может нанести ущерб зрению.
При транспортировке устройства
Для предо
● Извлеките картриджи с тонером.
● Надежно упакуйте устройство в оригинальную коробку с упаковочными материалами.
твращения повреждения устройства во время транспортировки выполните следующее.
Если беспокоит уровень шума
● Если шум работы устройства беспокоит (в зависимости от условий эксплуатации и режима работы), то
рекомендуется установить устройство в месте, отличном от офиса.
Прочие меры предосторожности
● Следуйте указаниям на наклейке с предупреждением, прикрепленной к устройству.
● Избегайте тряски и ударов по устройству.
● Не открывайте и не закрывайте дверцы, крышки и прочие компоненты с применением силы. Это
может привести к повреждению устройства.
● Не прикасайтесь к контактам (
● Не выклю
загружайте и не вынимайте бумагу в процессе печати. В противном случае может произойти замятие
бумаги.
чайте устройство в процессе печати. Не открывайте и не закрывайте крышку, а также не
). Это может привести к повреждению устройства.
7

Важные указания по технике безопасности
Техническое обслуживание и осмотры
189L-004
Выполняйт
ненадлежащим образом. Во время очистки придерживайтесь следующих правил. При возникновении
неполадок в работе см. раздел
самостоятельно и устройство необходимо осмотреть, ознакомьтесь с разделом
устранить(P
● Перед о
● Периодически отсоединяйте шнур питания и очищайте штепсель сухой тканью для удаления пыли и
● Для очистки аппарата используйте влажную хорошо отжатую ткань. Смачивать ткань для очистки
● Регулярно проверяйте отсутствие повреждений шнура питания и штепселя. Проверяйте отсутствие
е периодическую очистку устройства. При накоплении пыли устройство может работать
Устранение неполадок(P. 349) . Если проблему невозмо
Если проблему не удается
. 385) .
чисткой отключите питание и отсоедините шнур питания от розетки переменного тока.
Несоблюдение этого правила может стать причиной возгорания или поражения электрическим
током.
грязи. Накопившаяся пыль может поглощать влагу из воздуха, что может вызвать воспламенение при
контакте с электричеством.
необходимо только в воде. Не используйте спирт, бензин, растворители краски и другие
легковоспламеняющиеся вещества. Не используйте бумажные салфетки и полотенца. Если эти
вещества вступят в контакт с электрическими узлами внутри устройства, они могут привести к
возникновению статического электричества, или возгоранию, или поражению электрическим током.
коррозии, механической деформации, царапин, трещин или чрезмерного нагревания аппарата.
Использование оборудования, техническое обслуживание которого проводится
неудовлетворительно, может привести к пожару или поражению электрическим током.
жно устранить
● Нек
оторые компоненты внутри аппарата сильно нагреваются или находятся под высоким
напряжением. Контакт с этими компонентами может привести к ожогам. Не прикасайтесь к частям
аппарата, не перечисленным в данном руководстве.
● При загрузке бумаги или устранении замятия будьте осторожны, чтобы не порезать руки о края
бумаги.
При извлечении застрявшей бумаги или замене картриджа с тонером избегайте попадания тонера на
уки или одежду. При попадании тонера на руки или одежду немедленно промойте их холодной водой.
р
Под действием горячей воды тонер может пристать к поверхности так, что его невозможно будет
удалить.
8

Важные указания по технике безопасности
Расходные материалы
189L-005
● Не бросайт
картриджи с тонером и бумагу вблизи открытого огня. Это может вызвать возгорание тонера и
привести к ожогам или пожару.
● При случайном рассыпании тонера осторожно соберите частички тонера или сотрите их мягкой
влажной тканью таким образом, не вдыхая его. Запрещается использовать для очистки
просыпанного тонера пылесос, не оснащенный специальным приспособлением для защиты от
взрыва пыли. В противном случае возможно повреждение пылесоса или взрыв пыли, вызванный
статическим разрядом.
е отработанные картриджи с тонером в открытый огонь. Кроме того, не храните
При использовании кардиостимулятора
Картриджи с тонером создают слабое магнитное поле. Если вы используете кардиостимулятор и
чувствуете нарушения в его работе, отойдите от картриджей с тонером и немедленно обратитесь к
врачу.
● Примит
обратитесь к врачу.
● Примите все меры предосторожности, чтобы тонер не попал в глаза и рот. При попадании тонера в
глаза или рот немедленно промойте их холодной водой и обратитесь к врачу.
е все меры предосторожности, чтобы не вдыхать тонер. Если вы вдохнули тонер, немедленно
● Примите все меры предосторожности, чтобы тонер не касался вашей кожи. В противном случае
смойте его холодной водой с использованием мыла. При появлении раздражения на коже
немедленно обратитесь к врачу.
● Храните картриджи с тонером и другие расходные материалы в местах, недоступных для детей. В
случае проглатывания тонера немедленно обратитесь к врачу или в токсикологический центр.
● Не разбирайте картридж с тонером и не пытайтесь что-либо изменить в его устройстве. Это может
привести к рассеиванию тонера.
● Полностью извлеките защитную ленту из картриджа с тонером, не применяя силу. В противном
случае это может привести к рассеиванию тонера.
Обработка картриджа с тонером
● Возьмит
переворачивайте его вверх дном.
е картридж с тонером как показано на рисунке. Не ставьте его вертикально и не
9

Важные указания по технике безопасности
● Не прикасайт
● Не царапайт
есь к устройству памяти картриджа с тонером (
е поверхность барабана (
) и не допускайте воздействия света на него.
) и к электрическим контактам ( ).
● Не извлекайт
е картридж с тонером из устройства или защитной упаковки без необходимости.
● Картридж с тонером является магнитным продуктом. Не храните его рядом с гибкими дисками,
жесткими дисками и другими устройствами, на которые могут повлиять магнитные свойства
картриджа. Невыполнение этого условия может привести к потере данных.
Хранение картриджа с тонером
● Для обеспечения безопасного и надлежащего использования храните в следующей среде.
Диапазон температур хранения: 0–35 °C
Диапазон влажности при хранении: от 35 до 85 % относительной влажности (без конденсации)
*
● Храните картридж не открывая упаковки, откройте ее только перед самым использованием.
● При извлечении картриджа с тонером из устройства поместите извлеченный картридж в исходный
защитный пакет или оберните его толстой тканью.
● Не храните картридж в вертикальном или перевернутом состоянии. Это приведет к отвердеванию
тонера, и его исходная консистенция может не восстановиться даже после встряхивания.
*
Даже при хранении в пределах допустимого диапазона влажности капли воды (конденсат) могут образовываться
внутри картриджа при разнице температур внутри и снаружи картриджа с тонером. Конденсация оказывает
негативное воздействие на качество картриджей с тонером.
Не храните картридж с тонером в перечисленных ниже местах:
● Вблизи открытого огня;
● В местах, подверженных воздействию прямого солнечного света или другого яркого света, более пяти
минут;
10

Важные указания по технике безопасности
● При повышенной к
● В местах, подверженных воздействию разъедающих газов (аэрозоли и аммиак);
● Под воздействием высоких температур и повышенной влажности;
● В местах с резкими перепадами температуры и влажности, приводящими к возникновению
конденсата;
● Вблизи скоплений пыли;
● В местах, доступных для детей;
онцентрации солей в воздухе;
Избегайте использования поддельных картриджей с тонером
В продаже встречаются картриджи с тонером, являющиеся подделками картриджей Canon.
Использование поддельных картриджей может привести к ухудшению качества печати или работы
устройства. Компания Canon не несет ответственности за какие-либо неполадки, несчастные случаи или
ущерб, являющиеся результатом использования поддельного картриджа с тонером.
Дополнительные сведения см. на веб-странице canon.com/counterfeit.
Ожидаемое время поступления запасных частей и картриджей с тонером
Запасные части и картриджи с тонером для устройства будут в продаже в течение минимум семи (7) лет
после снятия с производства данной модели устройства.
Упаковочные материалы картриджа тонера
● Сохраните защитный пакет картриджа с тонером. Они понадобятся при транспортировке этого
устройства.
● Количество, форма и размещение упаковочных материалов могут изменяться без предварительного
уведомления.
● Утилизируйте защитную ленту в соответствии с местными правилами и нормами.
При утилизации использованного картриджа с тонером
Поместите картридж в защитный пакет, чтобы предотвратить просыпание тонера, а затем утилизируйте
картридж с тонером в соответствии с местными законами.
11

Основные операции
Основные операции
Основные операции ……………………………………………………………………………………………………………………
Компоненты и их функции ……………………………………………………………………………………………………………… 15
Передняя сторона ……………………………………………………………………………………………………………………….. 16
Задняя сторона …………………………………………………………………………………………………………………………… 18
Внутренние детали ……………………………………………………………………………………………………………………… 20
Отверстие для ручной подачи ……………………………………………………………………………………………………… 21
Лоток для бумаги ………………………………………………………………………………………………………………………… 22
Панель управления …………………………………………………………………………………………………………………….. 23
Дисплей ……………………………………………………………………………………………………………………………….. 30
Использование панели управления ……………………………………………………………………………………………….. 34
Ввод текста …………………………………………………………………………………………………………………………………. 36
Размещение документов ………………………………………………………………………………………………………………… 39
Загрузка бумаги ……………………………………………………………………………………………………………………………… 43
Загрузка бумаги в лоток ………………………………………………………………………………………………………………. 45
Загрузка бумаги в отверстие для ручной подачи …………………………………………………………………………… 48
Загрузка конвертов ……………………………………………………………………………………………………………………… 50
Загрузка уже отпечатанной бумаги ………………………………………………………………………………………………. 52
13
Определение формата и типа бумаги …………………………………………………………………………………………… 54
Регистрация специального формата бумаги …………………………………………………………………………… 56
Переход в бесшумный режим …………………………………………………………………………………………………………. 58
Переход в спящий режим ……………………………………………………………………………………………………………….. 60
Установка времени автоматического выключения ……………………………………………………………………….. 62
12

Основные операции
Основные операции
В э
той главе описываются основные операции, такие как использование панели управления или загрузка
бумаги и документов, которые часто выполняются для использования функций аппарата.
◼ Компоненты и их функции
В этом разделе описываются внешние и внутренние компоненты устройства и их функции, а также
объясняется использование клавиш на панели управления и чтение информации на дисплее.
и их ф
ункции(P. 15)
Компоненты
189L-006
◼ Использование панели управления
том разделе приводится описание действий при переключении дисплея и выборе элементов.
В э
Использование панели управления(P. 34)
◼ Размещение документ
В этом разделе описан порядок размещения документов на стекле экспонирования или в податчике.
Размещение документов(P. 39)
ов
◼ Загр
В этом разделе описывается загрузка бумаги в лоток и отверстие для ручной подачи.
бумаги(P
узка бумаги
. 43)
13
Загрузка

Основные операции
◼ Перех
В этом разделе описывается процедура запуска бесшумного (тихого) режима с целью снижения уровня шума,
издаваемого устройством в ходе работы.
◼ Перех
В этом разделе описан порядок настройки спящего режима.
од в бесшумный режим
Переход в бесшумный режим(P. 58)
од в спящий режим
Переход в спящий режим(P. 60)
становка времени автоматического выключения
◼ У
В данном разделе приводится информация о том, как включить настройку <Время автоотключения>.
Установка времени автоматического выключения(P. 62)
14

Основные операции
Компоненты и их функции
189L-007
В э
том разделе описаны компоненты устройства (внешние, внутренние компоненты, а также компоненты на
передней и задней стороне) и их функции. Помимо описания компонентов устройства, используемых для таких
основных операций, как размещение документов, загрузка бумаги и замена картриджей с тонером, в этом
разделе также описываются клавиши на панели управления и дисплее. Ознакомьтесь с этим разделом, чтобы
получить сведения о надлежащем использовании устройства.
Передняя сторона(P. 16)
Задняя сторона(P. 18)
Внутренние детали(P. 20)
Отверстие для ручной подачи(P. 21)
Лоток для бумаги(P. 22)
Панель управления(P. 23)
15

Передняя сторона
MF244dw
Основные операции
189L-008
MF232w/MF231
Лоток податчика документов (MF244dw)
Откройт
е, чтобы загрузить исходный документ в податчик.
Размещение документов(P. 39)
Податчик (MF244dw)
Авт
оматически подает документы в устройство для сканирования. Если в податчик загружены два и
более листов, документы сканируются последовательно.
Размещение документов(P. 39)
Панель управления
На панели управления размещены клавиши, такие как цифровые клавиши, клавиша [Пуск], дисплей и
индикат
указать нужные параметры. Вы можете переместить ее вверх или вниз для удобства в управлении.
Панель управления(P. 23) Дисплей(P. 30)
оры состояния. На панели управления можно выполнить любую доступную операцию и
16

Основные операции
Выводной лоток
Напечатанная бумага помещает
ся в выводной лоток.
Ручки для перемещения
При перемещении устройства дер
житесь за ручки.
Перемещение аппарата(P. 404)
Переключатель питания
Служит для вклю
подождите как минимум 10 секунд, прежде чем включить его снова.
чения и выключения питания. Чтобы перезапустить устройство, отключите его и
Стопор бумаги
твращает дальнейшее движение бумаги на выходе.
Предо
Отверстие для ручной подачи
Загр
ужайте бумагу в отверстие для ручной подачи, если необходимо временно использовать тип
бумаги, отличающийся от загруженного в лоток для бумаги.
р
учной подачи(P. 48)
Загрузка бумаги в отверстие для
Кассета для бумаги
узите тип бумаги, который часто используется, в лоток для бумаги.
Загр
ток(P. 45)
ло
Загрузка бумаги в
Область сканирования (MF244dw)
Документы, загр
последующего сканирования.
уженные в податчик, автоматически передаются в область сканирования для
Стекло экспонирования
Поместит
экспонирования можно помещать толстые или переплетенные документы (например, книги), которые
нельзя загрузить в податчик.
е сюда документы для копирования или сканирования. У модели MF244dw на стекло
Размещение документов(P. 39)
Вентиляционные отверстия (MF244dw)
Воздух, нах
Обратите внимание, что размещение объектов перед вентиляционными отверстиями препятствует
вентиляции.
одящийся внутри устройства, выводится наружу для охлаждения внутренних компонентов.
Установка(P. 3)
Крышка стекла экспонирования (MF232w/MF231)
Откройт
документов(P. 39)
е крышку, чтобы поместить документы на стекло экспонирования.
Размещение
17

Задняя сторона
MF244dw
MF232w/MF231
Основные операции
189L-009
Табличка с техническими данными
На э
той табличке показан серийный номер, необходимый при предоставлении запросов об
устройстве.
Если проблему не удается устранить(P. 385)
Задняя крышка (MF244dw)
Откройт
е заднюю крышку для устранения замятия бумаги.
Устранение замятия бумаги(P. 351)
USB-порт
Служит для подсоединения кабеля USB
подключения см. в разделе Начало работы.
устройства(P. 436)
для подключения устройства к компьютеру. Описание шагов
Руководства, входящие в комплект поставки
Порт локальной сети (MF244dw/MF232w)
Подсоединит
локальной сети и т. д. Описание шагов подключения см. в разделе Начало работы.
одящие в комплект поставки устройства(P. 436)
вх
е кабель локальной сети при подключении устройства к проводному маршрутизатору
Руководства,
18

Основные операции
Гнездо питания
Служит для подклю
Руководства, входящие в комплект поставки устройства(P. 436)
чения шнура питания. Описание шагов подключения см. в разделе Начало работы.
19

Внутренние детали
Основные операции
189L-00A
Панель управления
Поднимит
Процедура замены картриджей с тонером(P. 401) Устранение замятия бумаги(P. 351)
е эту панель для замены картриджа с тонером или устранения замятия бумаги.
Крышка тонера
Откройт
замены кар
е эту крышку для замены картриджа с тонером или устранения замятия бумаги.
триджей с тонером(P. 401)
Направляющая выхода бумаги
Откройт
СЫЛКИ
С
Процедура замены картриджей с тонером(P. 401)
е эту направляющую для устранения замятия бумаги.
Процедура
Устранение замятия бумаги(P. 351)
Устранение замятия бумаги(P. 351)
20

Основные операции
Отверстие для ручной подачи
189L-00C
Крышка отверстия для ручной подачи
Откройт
е эту крышку для загрузки бумаги в отверстие для ручной подачи.
Направляющие для бумаги
Отрегу
чтобы бумага подавалась в устройство без перекосов.
ССЫЛКИ
Загрузка бумаги в отверстие для ручной подачи(P. 48)
лируйте направляющие для бумаги в точном соответствии с шириной загруженных листов,
21

Лоток для бумаги
Пылезащитная крышка
Откройт
е эту крышку для загрузки бумаги в лоток для бумаги.
Основные операции
189L-00E
Направляющие для бумаги
Отрегу
чтобы бумага подавалась в аппарат без перекосов.
ССЫЛКИ
Загрузка бумаги в лоток(P. 45)
лируйте направляющие для бумаги в точном соответствии с шириной загруженных листов,
22

Панель управления
MF244dw/MF231(P. 23)
MF232w(P. 26)
◼
Основные операции
189L-00F
Клавиша [Меню]
Нажмит
<Настройки>.
е для определения большинства параметров аппарата, таких как <Настройки таймера> или
Список меню настройки(P. 292)
Клавиша [COPY/SCAN]
Служит для переклю
чения режимов копирования и сканирования.
23

Основные операции
Клавиша [Копирование ИД-карты]
Нажмит
идентификационной карточки в натуральную величину на одной стороне страницы.
обеих ст
е для перехода в режим для копирования обеих сторон водительских прав или любой другой
Копирование
орон удостоверения личности на одной странице(P. 82)
Дисплей
От
ображает экраны операций и состояния, относящиеся к копированию и прочим функциям, а также
экраны состояния устройства и сведений об ошибках. Кроме того, экран используется при
определении параметров устройства.
управления(P
. 34)
Дисплей(P. 30) Использование панели
Клавиша [Сброс]
Нажмит
е для отмены параметров и восстановления ранее указанных параметров.
Клавиша [ ]
● При определении параметров нажмит
● При вводе текста нажмите эту клавишу для перемещения курсора влево.
● Нажмите эту клавишу для уменьшения значения таких параметров, как плотность при
сканировании, копировании и т. д.
е эту клавишу для возврата к предыдущему экрану.
Клавиша [ ]
● При
● При изменении значений параметров нажмите эту клавишу для увеличения значения.
определении параметров нажмите эту клавишу для выбора элемента, расположенного над
текущим элементом.
Клавиша [ ]
● При определении параметров нажмит
● При вводе текста нажмите эту клавишу для перемещения курсора вправо.
● Нажмите эту клавишу для увеличения значения таких параметров, как плотность при
сканировании, копировании и т. д.
е эту клавишу для перехода к следующему экрану.
Клавиша [ ]
● При определении параметров нажмите эту клавишу для выбора элемента, расположенного под
текущим элементом.
● При изменении значений параметров нажмите эту клавишу для уменьшения значения.
Клавиша [Стереть]
Нажмит
е для удаления введенных значений и текста.
Клавиша [Назад]
Служит для возврата к предыдущему экрану
то параметры не применяются и выполняется возврат на предыдущий экран.
. Если нажать эту клавишу при определении параметров,
24
Loading…

MF244dw / MF232w / MF231
User‘s Guide
USRMA-1398-00 2016-10 en Copyright CANON INC. 2016

Contents
Important Safety Instructions …………………………………………………………………………………………….. 2
Installation …………………………………………………………………………………………………………………………………………… 3
Power Supply ………………………………………………………………………………………………………………………………………… 5
Handling ………………………………………………………………………………………………………………………………………………. 6
Maintenance and Inspections …………………………………………………………………………………………………………………… 8
Consumables ………………………………………………………………………………………………………………………………………… 9
Basic Operations ………………………………………………………………………………………………………………………… 13
Parts and Their Functions ………………………………………………………………………………………………………………………. 15
Front Side ………………………………………………………………………………………………………………………………………. 16
Back Side ……………………………………………………………………………………………………………………………………….. 18
Interior ………………………………………………………………………………………………………………………………………….. 20
Manual Feed Slot ……………………………………………………………………………………………………………………………… 21
Paper Drawer ………………………………………………………………………………………………………………………………….. 22
Operation Panel ………………………………………………………………………………………………………………………………. 23
Display …………………………………………………………………………………………………………………………………….. 30
Using the Operation Panel ……………………………………………………………………………………………………………………… 33
Entering Text …………………………………………………………………………………………………………………………………… 35
Placing Documents ………………………………………………………………………………………………………………………………. 38
Loading Paper ……………………………………………………………………………………………………………………………………… 42
Loading Paper in the Paper Drawer ……………………………………………………………………………………………………….. 44
Loading Paper in the Manual Feed Slot …………………………………………………………………………………………………… 47
Loading Envelopes ……………………………………………………………………………………………………………………………. 49
Loading Preprinted Paper …………………………………………………………………………………………………………………… 51
Specifying Paper Size and Type …………………………………………………………………………………………………………….. 53
Registering a Custom Paper Size …………………………………………………………………………………………………….. 55
Entering Quiet Mode …………………………………………………………………………………………………………………………….. 57
Entering Sleep Mode …………………………………………………………………………………………………………………………….. 59
Setting Auto Shutdown Time ………………………………………………………………………………………………………………….. 61
Copying ……………………………………………………………………………………………………………………………………………. 63
Basic Copy Operations …………………………………………………………………………………………………………………………… 65
Canceling Copies ………………………………………………………………………………………………………………………………….. 67
Various Copy Settings ……………………………………………………………………………………………………………………………. 69
Enlarging or Reducing ……………………………………………………………………………………………………………………….. 70
Selecting Document Type …………………………………………………………………………………………………………………… 71
Adjusting Density …………………………………………………………………………………………………………………………….. 72
Adjusting Sharpness …………………………………………………………………………………………………………………………. 73
2-Sided Copying (MF244dw) ………………………………………………………………………………………………………………… 75
Copying Multiple Documents onto One Sheet (2 on 1/4 on 1) ……………………………………………………………………….. 77
Using the [Paper Save Copy] Key (MF244dw / MF231) …………………………………………………………………………………. 79
I

Copying Both Sides of an ID Card onto One Page ………………………………………………………………………………………. 81
Collating Copies by Page ……………………………………………………………………………………………………………………. 82
Changing Default Settings ………………………………………………………………………………………………………………….. 83
Using the Machine as a Printer …………………………………………………………………………………………. 85
Printing from a Computer ……………………………………………………………………………………………………………………… 86
Printing a Document …………………………………………………………………………………………………………………………. 87
Canceling Prints ………………………………………………………………………………………………………………………………. 91
Checking the Printing Status ……………………………………………………………………………………………………………….. 94
Various Print Settings ………………………………………………………………………………………………………………………… 95
Enlarging or Reducing ………………………………………………………………………………………………………………….. 97
Switching 1-Sided and 2-Sided Printing (MF244dw) ………………………………………………………………………………. 99
Collating Printouts by Page ………………………………………………………………………………………………………….. 101
Printing Multiple Pages onto One Sheet ………………………………………………………………………………………….. 103
Printing Posters ………………………………………………………………………………………………………………………… 105
Printing Booklet (MF244dw) …………………………………………………………………………………………………………. 107
Printing Borders ……………………………………………………………………………………………………………………….. 109
Printing Dates and Page Numbers …………………………………………………………………………………………………. 110
Printing Watermarks ………………………………………………………………………………………………………………….. 112
Selecting Document Type ……………………………………………………………………………………………………………. 114
Saving Toner ……………………………………………………………………………………………………………………………. 116
Combining and Printing Multiple Documents ……………………………………………………………………………………. 118
Conguring Print Settings to Your Needs ………………………………………………………………………………………………. 122
Registering Combinations of Frequently Used Print Settings …………………………………………………………………. 123
Changing Default Settings …………………………………………………………………………………………………………… 125
Using the Machine as a Scanner ……………………………………………………………………………………… 128
Preparing to Use the Machine as a Scanner (MF244dw / MF232w) …………………………………………………………………. 129
Scanning from the Machine ………………………………………………………………………………………………………………….. 130
Scanning Using the [Scan -> PC] Key ……………………………………………………………………………………………………. 133
Scanning from a Computer …………………………………………………………………………………………………………………… 137
Scanning Using an Application …………………………………………………………………………………………………………… 138
Conguring Scan Settings in ScanGear MF …………………………………………………………………………………………….. 140
Can Be Used Conveniently with a Mobile Device (MF244dw / MF232w) …… 142
Connecting to a Mobile Device ………………………………………………………………………………………………………………. 143
Make Direct Connection (Access Point Mode) …………………………………………………………………………………………. 144
Making the Best Use of the Machine by Utilizing Applications ……………………………………………………………………… 147
Using AirPrint ………………………………………………………………………………………………………………………………… 148
Printing with AirPrint …………………………………………………………………………………………………………………. 153
Scanning with AirPrint ………………………………………………………………………………………………………………… 156
If AirPrint Cannot Be Used …………………………………………………………………………………………………………… 158
Using Google Cloud Print …………………………………………………………………………………………………………………. 159
Managing the Machine Remotely ………………………………………………………………………………………………………….. 163
II

Network (MF244dw / MF232w) …………………………………………………………………………………………. 165
Connecting to a Network …………………………………………………………………………………………………………………….. 166
Selecting Wired LAN or Wireless LAN …………………………………………………………………………………………………… 168
Connecting to a Wired LAN ……………………………………………………………………………………………………………….. 169
Connecting to a Wireless LAN …………………………………………………………………………………………………………….. 170
Setting Up Connection Using WPS Push Button Mode …………………………………………………………………………. 172
Setting Up Connection Using WPS PIN Code Mode …………………………………………………………………………….. 174
Setting Up Connection by Selecting a Wireless Router …………………………………………………………………………. 177
Setting Up Connection by Specifying Detailed Settings ………………………………………………………………………… 180
Checking the SSID and Network Key ………………………………………………………………………………………………. 184
Setting IP Addresses ……………………………………………………………………………………………………………………….. 187
Setting IPv4 Address ………………………………………………………………………………………………………………….. 188
Setting IPv6 Addresses ……………………………………………………………………………………………………………….. 191
Viewing Network Settings ……………………………………………………………………………………………………………………. 194
Conguring the Machine for Printing from a Computer ……………………………………………………………………………… 197
Conguring Printing Protocols and WSD Functions ………………………………………………………………………………….. 198
Conguring Printer Ports ………………………………………………………………………………………………………………….. 201
Setting Up Print Server …………………………………………………………………………………………………………………….. 204
Conguring the Machine for Your Network Environment …………………………………………………………………………… 207
Conguring Ethernet Settings ……………………………………………………………………………………………………………. 208
Changing the Maximum Transmission Unit ……………………………………………………………………………………………. 210
Setting a Wait Time for Connecting to a Network …………………………………………………………………………………….. 211
Conguring DNS ……………………………………………………………………………………………………………………………. 212
Conguring SNTP …………………………………………………………………………………………………………………………… 216
Monitoring and Controlling the Machine with SNMP ………………………………………………………………………………… 218
Security ………………………………………………………………………………………………………………………………………….. 224
Protecting the Machine from Unauthorized Access …………………………………………………………………………………… 225
Preventing Unauthorized Access ………………………………………………………………………………………………………… 226
Setting Access Privileges …………………………………………………………………………………………………………………… 228
Setting the System Manager PIN …………………………………………………………………………………………………… 229
Setting a Remote UI PIN (MF244dw / MF232w) ………………………………………………………………………………….. 231
Restricting Communication by Using Firewalls (MF244dw / MF232w) …………………………………………………………….. 233
Specifying IP Addresses for Firewall Rules ………………………………………………………………………………………… 234
Specifying MAC Addresses for Firewall Rules …………………………………………………………………………………….. 238
Changing Port Numbers (MF244dw / MF232w) ……………………………………………………………………………………….. 241
Setting a Proxy (MF244dw / MF232w) …………………………………………………………………………………………………… 243
Restricting the Machine’s Functions (MF244dw / MF232w) ………………………………………………………………………….. 245
Disabling HTTP Communication …………………………………………………………………………………………………………. 246
Disabling Remote UI ……………………………………………………………………………………………………………………….. 247
Implementing Robust Security Features (MF244dw / MF232w) …………………………………………………………………….. 248
Enabling TLS Encrypted Communication for the Remote UI ……………………………………………………………………….. 249
Conguring IEEE 802.1X Authentication ………………………………………………………………………………………………… 252
Conguring Settings for Key Pairs and Digital Certicates ………………………………………………………………………….. 257
III

Generating Key Pairs ………………………………………………………………………………………………………………….. 259
Using CA-issued Key Pairs and Digital Certicates ………………………………………………………………………………. 266
Verifying Key Pairs and Digital Certicates ……………………………………………………………………………………….. 269
Using Remote UI (MF244dw / MF232w) ……………………………………………………………………….. 272
Starting Remote UI …………………………………………………………………………………………………………………………….. 273
Remote UI Screens ……………………………………………………………………………………………………………………………… 275
Managing Documents and Checking the Machine Status ……………………………………………………………………………. 278
Setting Up Menu Options from Remote UI ………………………………………………………………………………………………. 282
Setting Menu List …………………………………………………………………………………………………………………….. 285
Direct Connection (MF244dw / MF232w) ………………………………………………………………………………………………….. 286
Network Settings (MF244dw / MF232w) …………………………………………………………………………………………………… 287
Output Reports ………………………………………………………………………………………………………………………………….. 297
Preferences ………………………………………………………………………………………………………………………………………. 300
Timer Settings …………………………………………………………………………………………………………………………………… 303
Common Settings (MF244dw) ……………………………………………………………………………………………………………….. 308
Copy Settings …………………………………………………………………………………………………………………………………….. 310
Scan Settings …………………………………………………………………………………………………………………………………….. 312
Printer Settings …………………………………………………………………………………………………………………………………. 314
Adjustment/Maintenance ……………………………………………………………………………………………………………………. 324
System Management Settings ………………………………………………………………………………………………………………. 330
Troubleshooting ……………………………………………………………………………………………………………………….. 339
Clearing Jams …………………………………………………………………………………………………………………………………….. 341
When an Error Message Appears …………………………………………………………………………………………………………… 347
Common Problems ……………………………………………………………………………………………………………………………… 355
Installation/Settings Problems …………………………………………………………………………………………………………… 356
Copy/Printing Problems …………………………………………………………………………………………………………………… 360
When You Cannot Print Properly ……………………………………………………………………………………………………………. 363
Printing Results Are Not Satisfactory ……………………………………………………………………………………………………. 365
Paper Creases or Curls …………………………………………………………………………………………………………………….. 370
Paper Is Fed Incorrectly ……………………………………………………………………………………………………………………. 372
When a Problem Cannot Be Solved …………………………………………………………………………………………………………. 374
Maintenance ………………………………………………………………………………………………………………………………. 376
Cleaning the Machine …………………………………………………………………………………………………………………………. 377
Exterior ……………………………………………………………………………………………………………………………………….. 378
Platen Glass ………………………………………………………………………………………………………………………………….. 379
Feeder (MF244dw) ………………………………………………………………………………………………………………………….. 382
Fixing Assembly …………………………………………………………………………………………………………………………….. 383
Machine Interior …………………………………………………………………………………………………………………………….. 384
Replacing Toner Cartridges ………………………………………………………………………………………………………………….. 386
Before Replacing the Toner Cartridge ………………………………………………………………………………………………….. 388
IV

How to Replace Toner Cartridges ………………………………………………………………………………………………………… 390
Relocating the Machine ……………………………………………………………………………………………………………………….. 393
Viewing the Counter Value …………………………………………………………………………………………………………………… 395
Initializing Settings …………………………………………………………………………………………………………………………….. 396
Initializing Menu …………………………………………………………………………………………………………………………….. 397
Initialize Eco Report Counter (MF244dw / MF232w) ………………………………………………………………………………….. 399
Initializing All Data/Settings ………………………………………………………………………………………………………………. 400
Appendix ……………………………………………………………………………………………………………………………………….. 402
Third Party Software (MF244dw / MF232w) ………………………………………………………………………………………………. 403
Feature Highlights ……………………………………………………………………………………………………………………………… 404
Going Green and Saving Money …………………………………………………………………………………………………………. 405
Improving Eciency ……………………………………………………………………………………………………………………….. 407
Going Digital …………………………………………………………………………………………………………………………………. 409
So Much More ……………………………………………………………………………………………………………………………….. 411
Specications ……………………………………………………………………………………………………………………………………. 413
Machine Specications …………………………………………………………………………………………………………………….. 414
Wireless LAN Specications (MF244dw / MF232w) ……………………………………………………………………………………. 416
Document Type ……………………………………………………………………………………………………………………………… 417
Scan Area ……………………………………………………………………………………………………………………………….. 418
Paper ………………………………………………………………………………………………………………………………………….. 419
Copy Specications …………………………………………………………………………………………………………………………. 421
Scanner Specications ……………………………………………………………………………………………………………………… 422
Printer Specications ………………………………………………………………………………………………………………………. 423
Consumables …………………………………………………………………………………………………………………………………….. 424
Manuals Included with the Machine ………………………………………………………………………………………………………. 425
Using User’s Guide ……………………………………………………………………………………………………………………………… 426
Screen Layout of User’s Guide ……………………………………………………………………………………………………………. 427
Viewing User’s Guide ………………………………………………………………………………………………………………………. 431
Manual Display Settings …………………………………………………………………………………………………………………… 432
Others ……………………………………………………………………………………………………………………………………………… 433
Basic Windows Operations ………………………………………………………………………………………………………………… 434
Notice …………………………………………………………………………………………………………………………………………. 443
V

Important Safety Instructions
Important Safety Instructions ……………………………………………………………………………………………………. 2
Installation ………………………………………………………………………………………………………………………………………… 3
Power Supply ……………………………………………………………………………………………………………………………………… 5
Handling …………………………………………………………………………………………………………………………………………….. 6
Maintenance and Inspections ……………………………………………………………………………………………………………… 8
Consumables ………………………………………………………………………………………………………………………………………. 9
Important Safety Instructions
1

Important Safety Instructions
15A8-000
The content described in this chapter is for the prevention of damage to property and injury to users of the machine
and others. Before using this machine, read this chapter and follow the instructions to properly use this machine. Do
not perform any operations not described in this manual. Canon will not be responsible for any damages resulting
from use not described in this manual, improper use, or repair/changes not performed by Canon or a third party
authorized by Canon.
Important Safety Instructions
2
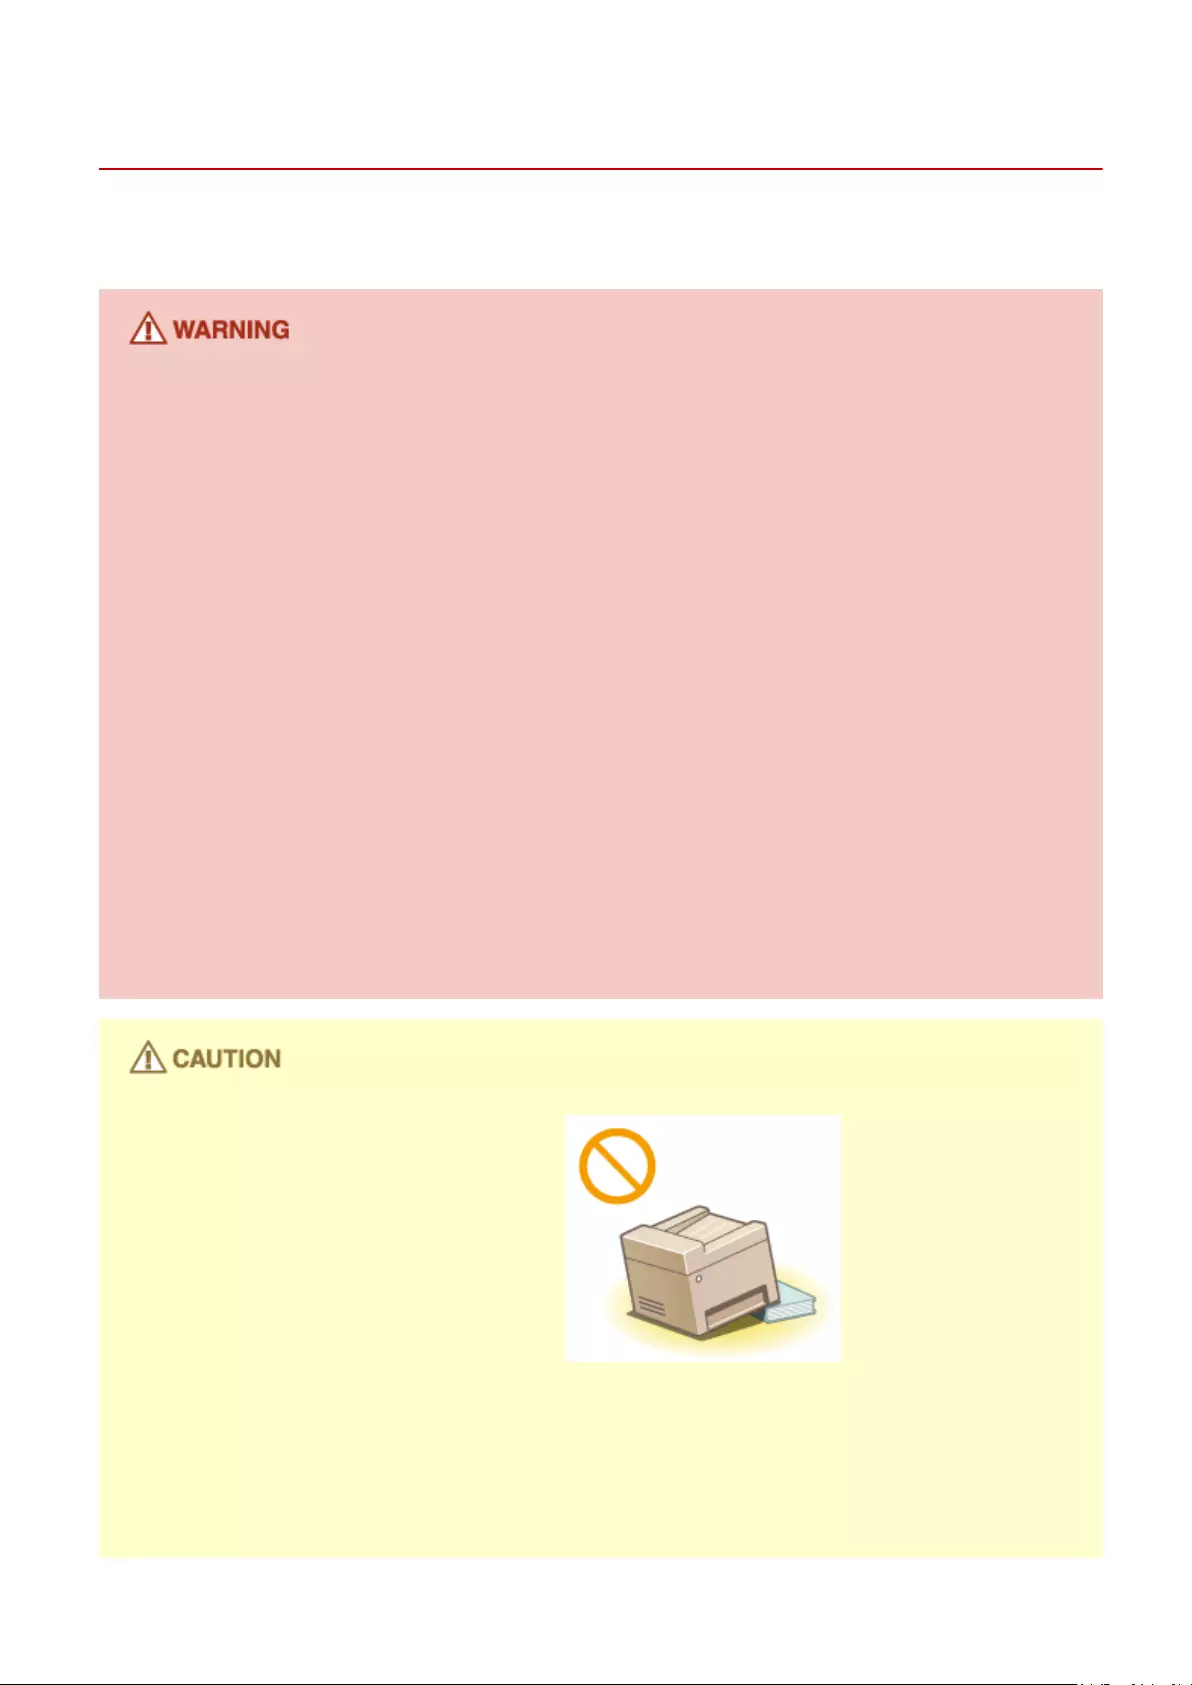
Installation
15A8-001
To use this machine safely and comfortably, carefully read the following precautions and install the machine in an
appropriate location.
Do not install in a location that may result in a re or electrical shock
●A location where the ventilation slots are blocked
(too close to walls, beds, rugs, or similar objects)
●A damp or dusty location
●A location exposed to direct sunlight or outdoors
●A location subject to high temperatures
●A location exposed to open ames
●Near alcohol, paint thinners or other ammable substances
Other warnings
●Do not connect unapproved cables to this machine. Doing so may result in a re or electrical shock.
●Do not place necklaces and other metal objects or containers lled with liquid on the machine. If foreign
substances come in contact with electrical parts inside the machine, it may result in a re or electrical shock.
●When installing and removing the optional accessories, be sure to turn OFF the power, unplug the power
plug, and then disconnect all the interface cables and power cord from the machine. Otherwise, the power
cord or interface cables may be damaged, resulting in a re or electrical shock.
●Do not use near any medical equipment. Radiowaves emitted from this machine may interfere with medical
equipment, which may cause a malfunction and result in serious accidents.
●If any foreign substance falls into this machine, unplug the power plug from the AC power outlet and
contact your local authorized Canon dealer.
Do not install in the following locations
The machine may drop or fall, resulting in injury.
●Unstable location
●Location exposed to vibrations
Other cautions
●When carrying this machine, follow the instructions in this manual. If carried improperly, it may fall, resulting
in injury.
●When installing this machine, be careful not to get your hands caught between the machine and the oor or
walls, or between the paper drawers. Doing so may result in injury.
Important Safety Instructions
3

Do not install in the following locations that may result in damage
●A location subject to dramatic changes in temperature or
humidity
●A location near equipment that generates magnetic or
electromagnetic waves
●A laboratory or location where chemical reactions occur
●A location exposed to corrosive or toxic gases
●A location that may warp from the weight of the machine or
where the machine is liable to sink (a carpet, etc.)
Avoid poorly ventilated locations
This machine generates a slight amount of ozone, etc. during normal use. Although sensitivity to ozone, etc.
may vary, this amount is not harmful. Ozone, etc. may be more noticeable during extended use or long
production runs, especially in poorly ventilated rooms. It is recommended that the room where the machine
operates be appropriately ventilated to maintain a comfortable working environment. Also avoid locations
where people would be exposed to emissions from the machine.
Do not install in a location where condensation occurs
Water droplets (condensation) may form inside the machine when the room where the machine is installed is
heated rapidly, and when the machine is moved from a cool or dry location to a hot or humid location. Using
the machine under these conditions may result in paper jams, poor print quality, or damage to the machine. Let
the machine adjust to the ambient temperature and humidity for at least 2 hours before use.
When using wireless LAN (MF244dw / MF232w)
●Set the machine at a distance of 50 m or less from the wireless LAN router.
●Do not set machine in a location where any object blocks communication. The signal may be degraded when
passing through walls or oors.
●Keep the machine as far as possible from digital cordless phones, microwave ovens, or other equipment that
emit radio waves.
In altitudes of above sea level 3,000 m or higher
Machines with a hard disk may not operate properly when used at high altitudes of about 3,000 meters above
sea level, or higher.
Important Safety Instructions
4
Power Supply
15A8-002
This machine is compatible with voltages of 220 to 240 V, and electrical frequency of 50/60 Hz.
●Use only a power supply that meets the specied voltage requirements. Failure to do so may result in a re
or electrical shock.
●Do not use power cords other than the one provided, as this may result in a re or electrical shock.
●The provided power cord is intended for use with this machine. Do not connect the power cord to other
devices.
●Do not modify, pull, forcibly bend, or perform any other act that may damage the power cord. Do not place
heavy objects on the power cord. Damaging the power cord may result in a re or electrical shock.
●Do not plug in or unplug the power plug with wet hands, as this may result in an electrical shock.
●Do not use extension cords or multi-plug power strips with the machine. Doing so may result in a re or
electrical shock.
●Do not wrap the power cord or tie it in a knot, as this may result in a re or electrical shock.
●Insert the power plug completely into the AC power outlet. Failure to do so may result in a re or electrical
shock.
●Remove the power plug completely from the AC power outlet during a thunder storm. Failure to do so may
result in a re, electrical shock, or damage to the machine.
Install this machine near the power outlet and leave sucient space around the power plug so that it can be
unplugged easily in an emergency.
When connecting power
●Do not connect the machine to an uninterruptible power source.
●If plugging this machine into an AC power outlet with multiple sockets, do not use the remaining sockets to
connect other devices.
●Do not connect the power cord into the auxiliary outlet on a computer.
Other precautions
Electrical noise may cause this machine to malfunction or lose data.
Important Safety Instructions
5

Handling
15A8-003
●Immediately unplug the power plug from the AC power outlet
and contact an authorized Canon dealer if the machine makes
an unusual noise, emits an unusual smell, or emits smoke or
excessive heat. Continued use may result in a re or electrical
shock.
●Do not disassemble or modify this machine. There are high-
voltage and high-temperature components inside the machine
which may result in a re or electrical shock.
●Place the machine where children will not come in contact with the power cord and other cables or internal
and electrical parts. Failure to do so may result in unexpected accidents.
●Do not use ammable sprays near this machine. If ammable substances come into contact with electrical
parts inside this machine, it may result in a re or electrical shock.
●When moving this machine, be sure to turn OFF the power of this machine and your computer, and then
unplug the power plug and interface cables. Failure to do so may damage the power cord or interface
cables, resulting in a re or electrical shock.
●When plugging or unplugging a USB cable when the power plug is plugged into an AC power outlet, do not
touch the metal part of the connector, as this may result in an electrical shock.
If you are using a cardiac pacemaker
This machine generates a low level magnetic ux. If you use a cardiac pacemaker and feel abnormalities, please
move away from this machine and consult your physician immediately.
●Do not place heavy objects on this machine as they may fall, resulting in injury.
●For your safety, please unplug the power cord if the machine will not be used for a long period of time.
●Use caution when opening and closing covers to avoid injury to your hands.
●Keep hands and clothing away from the rollers in the output area. If the rollers catch your hands or clothing,
this may result in personal injury.
●The inside of the machine and the output slot are very hot during and immediately after use. Avoid contact
with these areas to prevent burns. Also, printed paper may be hot immediately after being output, so use
caution when handling it. Failure to do so may result in burns.
Important Safety Instructions
6

●When copying with a thick book placed on the platen glass, do not press the feeder or the platen glass cover
forcefully. Doing so may damage the platen glass and result in injury.
●Be careful not to drop a heavy object, such as a dictionary, on the platen glass. Doing so may damage the
platen glass and result in injury.
Laser beam
●If the laser beam should escape and enter your eyes, exposure may cause damage to your eyes.
When transporting the machine
To prevent damage to the machine during transport, perform the following.
●Remove the toner cartridges.
●Securely pack the machine in the original box with packing materials.
If the operating noise concerns you
●Depending on the use environment and operating mode, if the operating noise is of concern, it is
recommended that the machine be Installed in a place other than the oce.
Other precautions
●Follow the instructions in the caution label attached to this machine.
●Avoid shaking or applying shock to this machine.
●Do not forcibly open and close doors, covers, and other parts. Doing so may result in damage to the
machine.
●Do not touch the contacts ( ). Doing so may result in damage to the machine.
●Do not turn OFF the machine during printing. Also, do not open and close the cover and do not remove or
insert paper during printing. Doing so can cause paper jams.
Important Safety Instructions
7
Maintenance and Inspections
15A8-004
Clean this machine periodically. If dust accumulates, the machine may not operate properly. When cleaning, be sure to
observe the following. If a problem occurs during operation, see Troubleshooting(P. 339) . If the problem cannot be
resolved or you feel the machine requires an inspection, see When a Problem Cannot Be Solved(P. 374) .
●Before cleaning, turn OFF the power and unplug the power plug from the AC power outlet. Failure to do so
may result in a re or electrical shock.
●Unplug the power plug periodically and clean with a dry cloth to remove dust and grime. Accumulated dust
may absorb humidity in the air and may result in a re if it comes into contact with electricity.
●Use a damp, well wrung-out cloth to clean the machine. Dampen cleaning cloths with water only. Do not use
alcohol, benzenes, paint thinners, or other ammable substances. Do not use tissue paper or paper towels.
If these substances come into contact with electrical parts inside the machine, they may generate static
electricity or result in a re or electrical shock.
●Check the power cord and plug periodically for damage. Check the machine for rust, dents, scratches,
cracks, or excessive heat generation. Use of poorly-maintained equipment may result in a re or electrical
shock.
●The inside of the machine has high-temperature and high-voltage components. Touching these components
may result in burns. Do not touch any part of the machine that is not indicated in the manual.
●When loading paper or removing jammed paper, be careful not to cut your hands with the edges of the
paper.
When removing jammed paper or replacing toner cartridges, be careful not to get any toner on your hands or
clothing. If toner gets on your hands or clothing, wash them immediately with cold water. Washing with warm
water can cause toner to adhere and be impossible to remove.
Important Safety Instructions
8

Consumables
15A8-005
●Do not dispose of used toner cartridges in open ames. Also, do not store toner cartridges or paper in a
location exposed to open ames. This may cause the toner to ignite, and result in burns or re.
●If you accidentally spill or scatter toner, carefully gather the toner particles together or wipe them up with a
soft, damp cloth in a way that prevents inhalation. Never use a vacuum cleaner that does not have
safeguards against dust explosions to clean up spilled toner. Doing so may cause a malfunction in the
vacuum cleaner, or result in a dust explosion due to static discharge.
If you are using a cardiac pacemaker
Toner cartridges generate a low level magnetic ux. If you use a cardiac pacemaker and feel abnormalities,
please move away from toner cartridges and consult your physician immediately.
●Use caution not to inhale any toner. If you should inhale toner, consult a physician immediately.
●Use caution so that toner does not get into your eyes or mouth. If toner should get into your eyes or mouth,
immediately wash with cold water and consult a physician.
●Use caution so that toner does not come into contact with your skin. If it should, wash with soap and cold
water. If there is any irritation on your skin, consult a physician immediately.
●Keep the toner cartridges and other consumables out of the reach of small children. If toner is ingested,
consult a physician or poison control center immediately.
●Do not disassemble or modify the toner cartridge. Doing so may cause the toner to scatter.
●Remove the sealing tape of the toner cartridge completely without using excessive force. Doing otherwise
may cause the toner to scatter.
Handling the toner cartridge
●Hold the toner cartridge correctly as shown. Do not stand it up or turn it upside-down.
●Do not touch the toner cartridge memory ( ) or the electrical contacts ( ).
Important Safety Instructions
9

●Do not scratch the drum surface ( ) or expose it to light.
●Do not remove the toner cartridge from this machine or from the protective bag unnecessarily.
●The toner cartridge is a magnetic product. Keep it away from oppy disks, disk drives, and other devices that
can be affected by magnetism. Failure to do so may result in data loss.
Storing the toner cartridge
●Store in the following environment to ensure safe and satisfactory use.
Storage temperature range: 0 to 35°C
Storage humidity range: 35 to 85% RH (relative humidity/no condensation)*
●Store without opening until the toner cartridge is to be used.
●When removing the toner cartridge from this machine for storage, place the removed toner cartridge into
the original protective bag or wrap it with a thick cloth.
●When storing the toner cartridge, do not store it upright or upside down. The toner will solidify and may not
return to its original condition even if it is shaken.
* Even within the storable humidity range, water droplets (condensation) may develop inside the toner cartridge if there is a
difference of temperature inside and outside the toner cartridge. Condensation will adversely affect the print quality of
toner cartridges.
Do not store the toner cartridge in the following locations
●Locations exposed to open ames
●Locations exposed to direct sunlight or bright light for ve minutes or more
●Locations exposed to excessive salty air
●Locations where there are corrosive gases (i.e. aerosol sprays and ammonia)
●Locations subject to high temperature and high humidity
●Locations subject to dramatic changes in temperature and humidity where condensation may easily occur
●Locations with a large amount of dust
●Locations within the reach of children
Be careful of counterfeit toner cartridges
Please be aware that there are counterfeit Canon toner cartridges in the marketplace. Use of counterfeit toner
cartridge may result in poor print quality or machine performance. Canon is not responsible for any
malfunction, accident or damage caused by the use of counterfeit toner cartridge.
For more information, see canon.com/counterfeit.
Important Safety Instructions
10

Availability period of repairing parts and toner cartridges
The repairing parts and toner cartridges for the machine will be available for at least seven (7) years after
production of this machine model has been discontinued.
Toner cartridge packing materials
●Save the protective bag for the toner cartridge. They are required when transporting this machine.
●The packing materials may be changed in form or placement, or may be added or removed without notice.
●Dispose of the removed sealing tape according to local regulations.
When disposing of a used toner cartridge
Place the toner container into its protective bag to prevent the toner from scattering, and then dispose of the
toner cartridge according to local regulations.
Important Safety Instructions
11

Basic Operations
Basic Operations …………………………………………………………………………………………………………………………….. 13
Parts and Their Functions ………………………………………………………………………………………………………………….. 15
Front Side ……………………………………………………………………………………………………………………………………. 16
Back Side …………………………………………………………………………………………………………………………………….. 18
Interior ……………………………………………………………………………………………………………………………………….. 20
Manual Feed Slot ………………………………………………………………………………………………………………………….. 21
Paper Drawer ………………………………………………………………………………………………………………………………. 22
Operation Panel ……………………………………………………………………………………………………………………………. 23
Display ………………………………………………………………………………………………………………………………….. 30
Using the Operation Panel …………………………………………………………………………………………………………………. 33
Entering Text ……………………………………………………………………………………………………………………………….. 35
Placing Documents ……………………………………………………………………………………………………………………………. 38
Loading Paper …………………………………………………………………………………………………………………………………… 42
Loading Paper in the Paper Drawer …………………………………………………………………………………………………. 44
Loading Paper in the Manual Feed Slot ……………………………………………………………………………………………. 47
Loading Envelopes ………………………………………………………………………………………………………………………… 49
Loading Preprinted Paper ………………………………………………………………………………………………………………. 51
Specifying Paper Size and Type ……………………………………………………………………………………………………….. 53
Registering a Custom Paper Size ………………………………………………………………………………………………. 55
Entering Quiet Mode …………………………………………………………………………………………………………………………. 57
Entering Sleep Mode …………………………………………………………………………………………………………………………. 59
Setting Auto Shutdown Time ……………………………………………………………………………………………………………… 61
Basic Operations
12

Basic Operations
15A8-006
This chapter describes basic operations, such as how to use the operation panel or how to load the paper and
documents, that are frequently performed to use the functions of the machine.
◼Parts and Their Functions
This section describes the exterior and interior parts of the machine and their functions, as well as how to use the keys
on the operation panel and how to view the display. Parts and Their Functions(P. 15)
◼Using the Operation Panel
This section describes how to toggle the display and select items. Using the Operation Panel(P. 33)
◼Placing Documents
This section describes how to place documents on the platen glass and in the feeder. Placing Documents(P. 38)
◼Loading Paper
This section describes how to load the paper into the paper drawer and manual feed slot. Loading Paper(P. 42)
Basic Operations
13

◼Entering Quiet Mode
This section describes how to place the machine in quiet mode to reduce operation sound. Entering Quiet
Mode(P. 57)
◼Entering Sleep Mode
This section describes how to set the sleep mode. Entering Sleep Mode(P. 59)
◼Setting Auto Shutdown Time
This section describes how to enable the <Auto Shutdown Time> setting. Setting Auto Shutdown Time(P. 61)
Basic Operations
14

Parts and Their Functions
15A8-007
This section describes the parts of the machine (exterior, front and back side, and interior) and how they function. In
addition to describing the parts of the machine used for such basic operations as placing documents, loading paper,
and replacing the toner cartridges, this section also describes the keys on the operation panel and display. Read this
section for tips on how to use the machine properly.
Front Side(P. 16)
Back Side(P. 18)
Interior(P. 20)
Manual Feed Slot(P. 21)
Paper Drawer(P. 22)
Operation Panel(P. 23)
Basic Operations
15

Front Side
15A8-008
MF244dw
MF232w / MF231
Document feeder tray (MF244dw)
Open to load an original in the feeder. Placing Documents(P. 38)
Feeder (MF244dw)
Automatically feeds documents into the machine for scanning. When two or more sheets are loaded in the
feeder, documents can be scanned continuously. Placing Documents(P. 38)
Operation panel
The operation panel consists of keys such as the numeric keys and [Start] key, a display, and status indicators.
You can perform all the operations and specify settings from the operation panel. You can move it up or
down so it is easier to operate. Operation Panel(P. 23) Display(P. 30)
Basic Operations
16

Output tray
Printed paper is output to the output tray.
Lift handles
Hold the lift handles when carrying the machine. Relocating the Machine(P. 393)
Power switch
Turns the power ON or OFF. To restart the machine, turn OFF the machine, wait for at least 10 seconds, and
turn it back ON.
Paper stopper
Prevents paper that has been output after printing from falling.
Manual feed slot
Load the paper into the manual feed slot when you want to temporarily use a type of paper different from
that which is loaded in the paper drawer. Loading Paper in the Manual Feed Slot(P. 47)
Paper drawer
Load the type of paper you frequently use into the paper drawer. Loading Paper in the Paper
Drawer(P. 44)
Scanning area (MF244dw)
Documents loaded in the feeder are automatically fed to the scanning area for scanning.
Platen glass
Place documents to copy or scan here. For MF244dw, use the platen glass to place thick or bound documents
such as books when they cannot be loaded in the feeder. Placing Documents(P. 38)
Ventilation slots (MF244dw)
Air from inside the machine is vented out to cool down the inside of the machine. Note that placing objects in
front of the ventilation slots prevents ventilation. Installation(P. 3)
Platen glass cover (MF232w / MF231)
Open to place documents on the platen glass. Placing Documents(P. 38)
Basic Operations
17
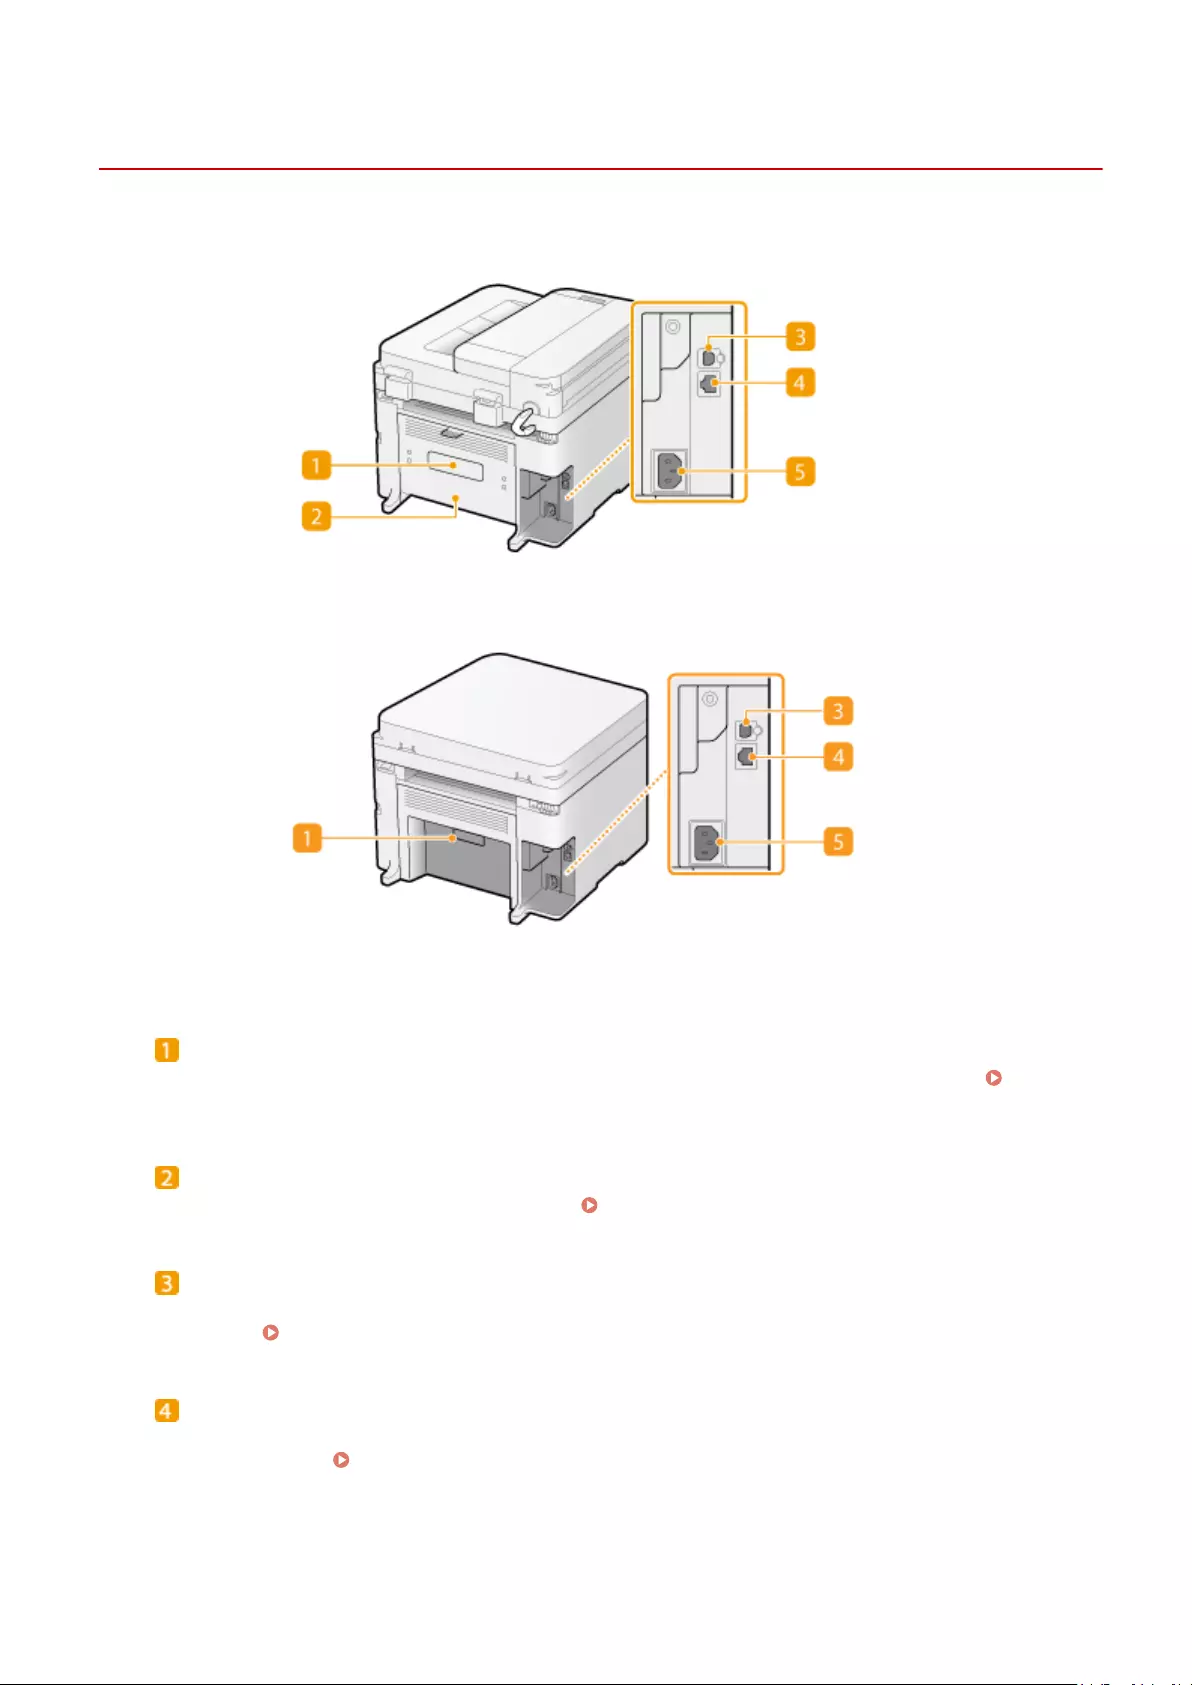
Back Side
15A8-009
MF244dw
MF232w / MF231
Rating label
The label shows the serial number, which is needed when making inquiries about the machine. When a
Problem Cannot Be Solved(P. 374)
Rear cover (MF244dw)
Open the rear cover when clearing paper jams. Clearing Jams(P. 341)
USB port
Connect a USB cable when connecting the machine and a computer. For connection steps, see «Getting
Started». Manuals Included with the Machine(P. 425)
LAN port (MF244dw / MF232w)
Connect a LAN cable when connecting the machine to a wired LAN router, etc. For connection steps, see
«Getting Started». Manuals Included with the Machine(P. 425)
Basic Operations
18

Power socket
Connect the power cord. For connection steps, see «Getting Started». Manuals Included with the
Machine(P. 425)
Basic Operations
19

Interior
15A8-00A
Operation panel
Lift this panel to replace the toner cartridges or clear paper jams. How to Replace Toner
Cartridges(P. 390) Clearing Jams(P. 341)
Toner cover
Open this cover to replace the toner cartridges or clear paper jams. How to Replace Toner
Cartridges(P. 390) Clearing Jams(P. 341)
Paper exit guide
Open this guide to clear paper jams. Clearing Jams(P. 341)
LINKS
How to Replace Toner Cartridges(P. 390)
Basic Operations
20
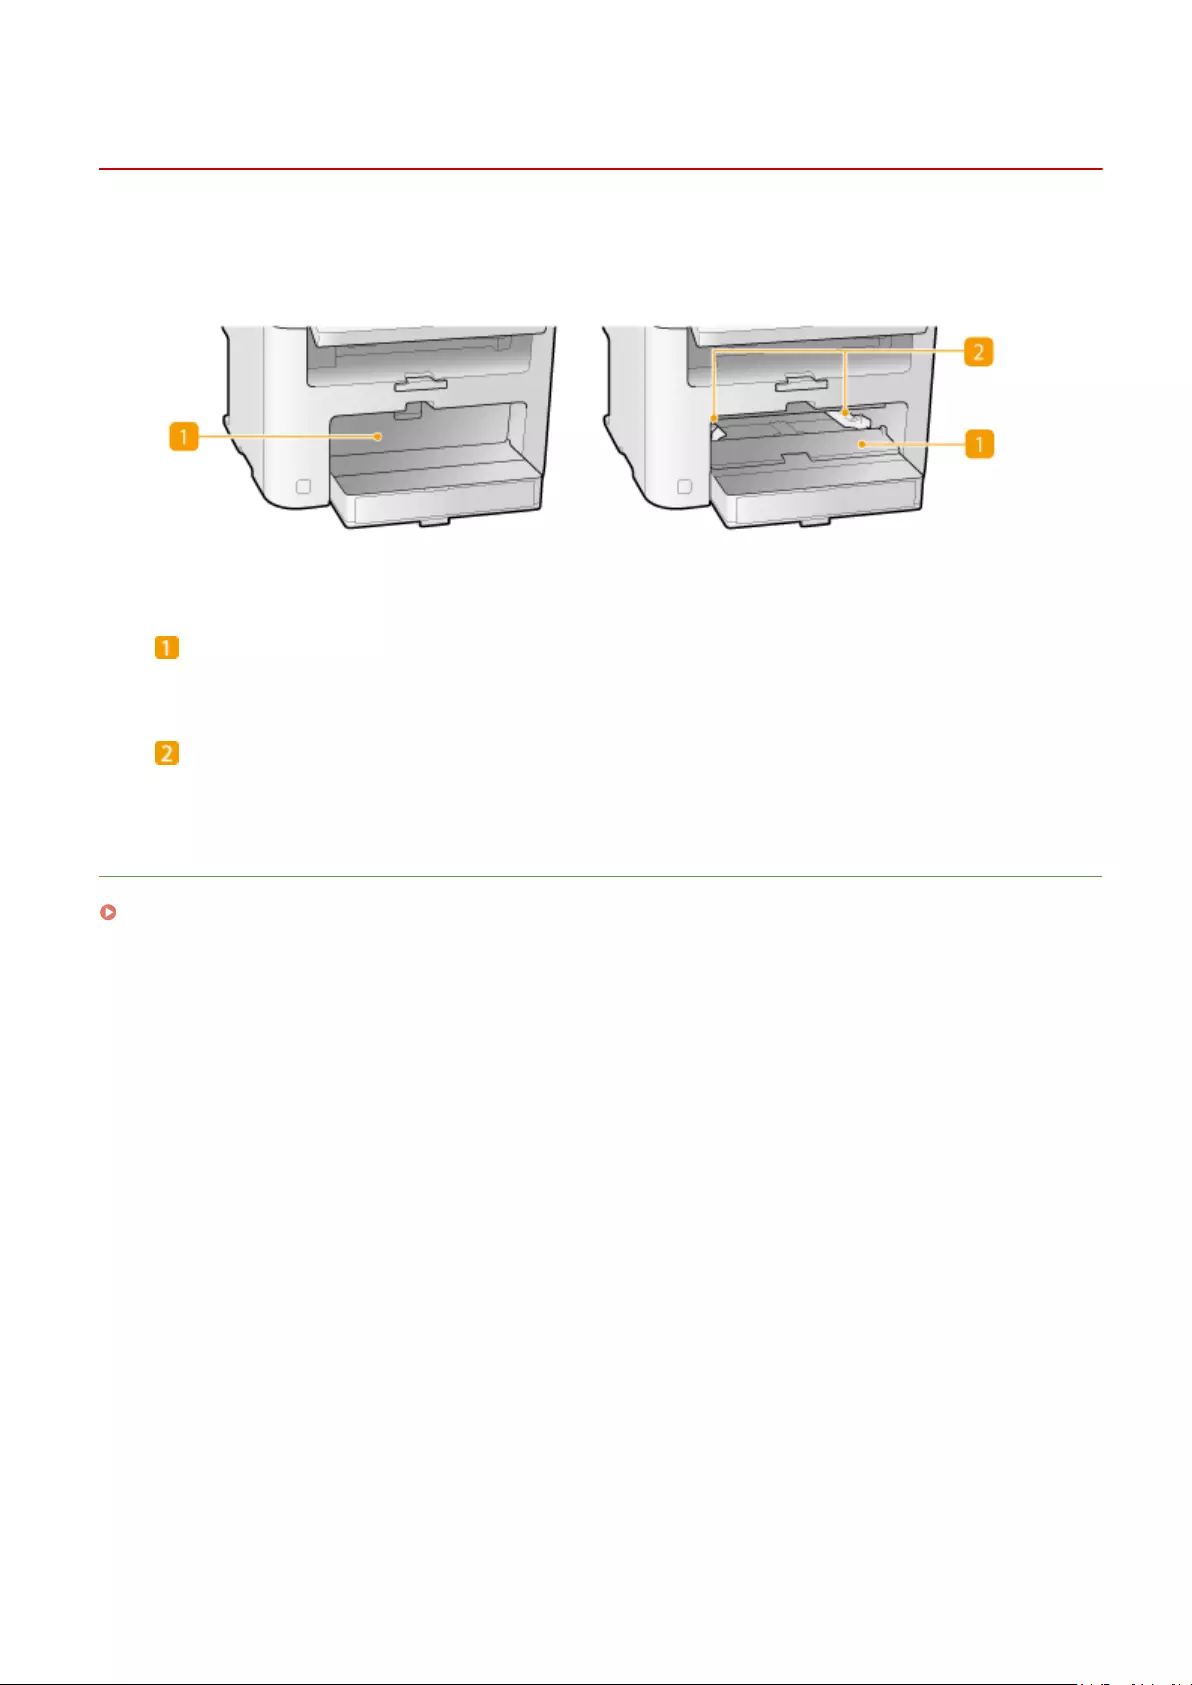
Manual Feed Slot
15A8-00C
Manual feed cover
Open this slot to load paper in the manual feed slot.
Paper guides
Adjust the paper guides to exactly the width of the loaded paper to ensure that paper is fed straight into the
machine.
LINKS
Loading Paper in the Manual Feed Slot(P. 47)
Basic Operations
21

Paper Drawer
15A8-00E
Dust cover
Open this cover to load paper in the paper drawer.
Paper guides
Adjust the paper guides to exactly the size of the loaded paper to ensure that paper is fed straight into the
machine.
LINKS
Loading Paper in the Paper Drawer(P. 44)
Basic Operations
22

Operation Panel
15A8-00F
MF244dw / MF231(P. 23)
MF232w(P. 26)
◼
[Menu] key
Press to start specifying many of the settings for the machine, such as <Timer Settings> or <Preferences>.
Setting Menu List(P. 285)
[COPY/SCAN] key
Press to switch the mode to copy or scan.
Basic Operations
23

[ID Card Copy] key
Press to enter a mode for copying the front and back sides of a driver‘s license or other ID card onto the
same side of a page at actual size. Copying Both Sides of an ID Card onto One Page(P. 81)
Display
Displays the operation and status screens for copying and other functions, as well as the status of the
machine and error information. Also, view the screen when specifying the settings of the machine.
Display(P. 30) Using the Operation Panel(P. 33)
[Reset] key
Press to cancel the settings and restore the previously specied settings.
[ ] key
●When specifying settings, press to return to the previous screen.
●When entering text, press to move the cursor to the left.
●Press to decrease a setting value such as density for scanning, copying, etc.
[ ] key
●When specifying settings, press to select the item above the currently selected item.
●When changing setting values, press to increase a value.
[ ] key
●When specifying settings, press to proceed to the next screen.
●When entering text, press to move the cursor to the right.
●Press to increase a setting value such as density for scanning, copying, etc.
[ ] key
●When specifying settings, press to select the item below the currently selected item.
●When changing setting values, press to decrease a value.
[Clear] key
Press to delete the entered numbers and text.
[Back] key
Press to return to the previous screen. If you press this key when specifying settings, for example, the
settings are not applied and the display returns to the previous screen.
[OK] key
Press to apply settings or specied details.
Basic Operations
24

[Status Monitor] key
Press to check the status of printing or copy to view the usage history. You can also check the status of the
machine, such as the paper size and the amount remaining in the toner cartridges, or whether any errors
occurred. Display(P. 30)
[Paper Setting] key
Press to select the paper you want to use, or to set the size and type of paper loaded in the paper source.
Specifying Paper Size and Type(P. 53)
Numeric keys ([0]-[9] keys)
Press to enter numbers and text. Entering Text(P. 35)
[Stop] key
Press to cancel copying, scanning, and other operations.
[Energy Saver] key
Press to put the machine into sleep mode. The key lights up green when the machine is in sleep mode. Press
the key again to exit sleep mode. Entering Sleep Mode(P. 59)
[Scan -> PC] key
Press to send the scanned documents to the registered computer. Scanning Using the [Scan -> PC]
Key(P. 133)
[Paper Save Copy] key
Press to put the machine into paper save copy mode for copying multiple document pages reduced on a
single sheet. Using the [Paper Save Copy] Key (MF244dw / MF231)(P. 79)
[Quiet Mode] key
Press to put the machine into quiet mode. While in quiet mode this key is lit in green. Press the key again to
exit quiet mode. Entering Quiet Mode(P. 57)
[Error] indicator
Blinks or lights up when an error such as a paper jam occurs.
Wi-Fi indicator (MF244dw)
Lights up when the machine is connected to wireless LAN.
[Processing/Data] indicator
Blinks while operations such as sending or printing are being performed. Lights up when there are
documents waiting to be processed.
[Start] key
Press to scan or copy documents.
Basic Operations
25

[#] key
Press to enter symbols such as «@» or «/».
[*] key
Press to switch the type of text that is entered.
◼
[Menu] key
Press to start specifying many of the settings for the machine, such as <Timer Settings> or <Preferences>.
Setting Menu List(P. 285)
[COPY/SCAN] key
Press to switch the mode to copy or scan.
Basic Operations
26

[ID Card Copy] key
Press to enter a mode for copying the front and back sides of a driver‘s license or other ID card onto the
same side of a page at actual size. Copying Both Sides of an ID Card onto One Page(P. 81)
Display
Displays the operation and status screens for copying and other functions, as well as the status of the
machine and error information. Also, view the screen when specifying the settings of the machine.
Display(P. 30) Using the Operation Panel(P. 33)
[Reset] key
Press to cancel the settings and restore the previously specied settings.
[ ] key
●When specifying settings, press to return to the previous screen.
●When entering text, press to move the cursor to the left.
●Press to decrease a setting value such as density for scanning, copying, etc.
[ ] key
●When specifying settings, press to select the item above the currently selected item.
●When changing setting values, press to increase a value.
[ ] key
●When specifying settings, press to proceed to the next screen.
●When entering text, press to move the cursor to the right.
●Press to increase a setting value such as density for scanning, copying, etc.
[ ] key
●When specifying settings, press to select the item below the currently selected item.
●When changing setting values, press to decrease a value.
[Clear] key
Press to delete the entered numbers and text.
[Back] key
Press to return to the previous screen. If you press this key when specifying settings, for example, the
settings are not applied and the display returns to the previous screen.
[OK] key
Press to apply settings or specied details.
Basic Operations
27

[Status Monitor] key
Press to check the status of printing or copy to view the usage history. You can also check the status of the
machine, such as the paper size and the amount remaining in the toner cartridges, or whether any errors
occurred. Display(P. 30)
[Paper Setting] key
Press to select the paper you want to use, or to set the size and type of paper loaded in the paper source.
Specifying Paper Size and Type(P. 53)
Numeric keys ([0]-[9] keys)
Press to enter numbers and text. Entering Text(P. 35)
[Stop] key
Press to cancel copying, scanning, and other operations.
[Energy Saver] key
Press to put the machine into sleep mode. The key lights up green when the machine is in sleep mode. Press
the key again to exit sleep mode. Entering Sleep Mode(P. 59)
[Scan -> PC1]/[Scan -> PC2] key
Press to send the scanned documents to the registered computer for each key. Scanning Using the [Scan
-> PC] Key(P. 133)
[Quiet Mode] key
Press to put the machine into quiet mode. While in quiet mode this key is lit in green. Press the key again to
exit quiet mode. Entering Quiet Mode(P. 57)
[Error] indicator
Blinks or lights up when an error such as a paper jam occurs.
Wi-Fi indicator
Lights up when the machine is connected to wireless LAN.
[Processing/Data] indicator
Blinks while operations such as sending or printing are being performed. Lights up when there are
documents waiting to be processed.
[Start] key
Press to scan or copy documents.
[#] key
Press to enter symbols such as «@» or «/».
Basic Operations
28

[*] key
Press to switch the type of text that is entered.
LINKS
Using the Operation Panel(P. 33)
Basic Operations
29

Display
15A8-00H
The display shows the screens for copying, scanning, and other functions, as well as the screens for specifying settings
for these functions. You can also check information such as error messages and communication status on the display.
Main Screen
When you press (COPY/SCAN) the main screen for the selected function is displayed. The copy main
screen is shown below as an example.
Basic Copy Operations(P. 65)
Using the Machine as a Scanner(P. 128)
<Paper Settings> Screen
When you press (Paper Setting) to select the paper to copy or print on, the <Paper Settings> screen is
displayed. Select the paper on the screen. Also, for example, you can press this key to change the paper settings
when you load a paper size that is different from the previously loaded paper size. Note that the paper setting
must be correctly specied so that the paper is fed properly.
Selecting Paper Tray
Use to select the paper for each tray. Specifying Paper Size and Type(P. 53)
<Select Frequently Used Paper Sizes>
You can set the machine to display only frequently used paper sizes in the selection screen.
<Menu> Screen
When you press , the <Menu> screen is displayed. On this screen, you can start specifying general machine
settings such as <Preferences> or <Timer Settings>, as well as many of the settings for each function, such as
copy and scan.
Basic Operations
30

Setting Menu List(P. 285)
<Status Monitor> Screen
When you press , a screen is displayed that enables you to check the status of documents that are being
printed or copied, as well as the status of the machine (amount remaining in the toner cartridge, etc.) and the
network setting information such as the IP address of the machine.
<Error Information/Notication>
Displays the details of any errors that occurred. When an Error Message Appears(P. 347)
<Device Information>
Displays the status of the machine, such as the paper size or the amount remaining in the toner cartridges.
<Paper Information>
Displays the paper size specied in each paper source.
<Cartridge Level>
Displays the amount remaining in the toner cartridges. Other internal parts may reach the end of their
lifetime before the toner runs out.
<Check Counter>
Displays the totals for printouts. Viewing the Counter Value(P. 395)
Basic Operations
31

Status of copy/print jobs
Displays the current status of the selected item. The <Copy Job Status> screen is shown below as an example.
<Network Information> (MF244dw / MF232w)
Displays the network settings such as the IP address of the machine and status such as the condition of
wireless LAN communications.
Viewing Network Settings(P. 194)
When a Message Is Displayed
Messages are displayed at the top of the screen in situations such as when end of toner cartridge lifetime is
reached or when a cover is left open. The display alternates between showing the normal screen and the
message.
When an Error Message Appears(P. 347)
When an Error Occurs
In some cases when an error occurs, instructions on how to respond to the error are displayed. Follow the on-
screen instructions to solve the problem. The screen displayed when a paper jam occurs is shown below as an
example ( When an Error Message Appears(P. 347) ).
LINKS
Using the Operation Panel(P. 33)
Basic Operations
32
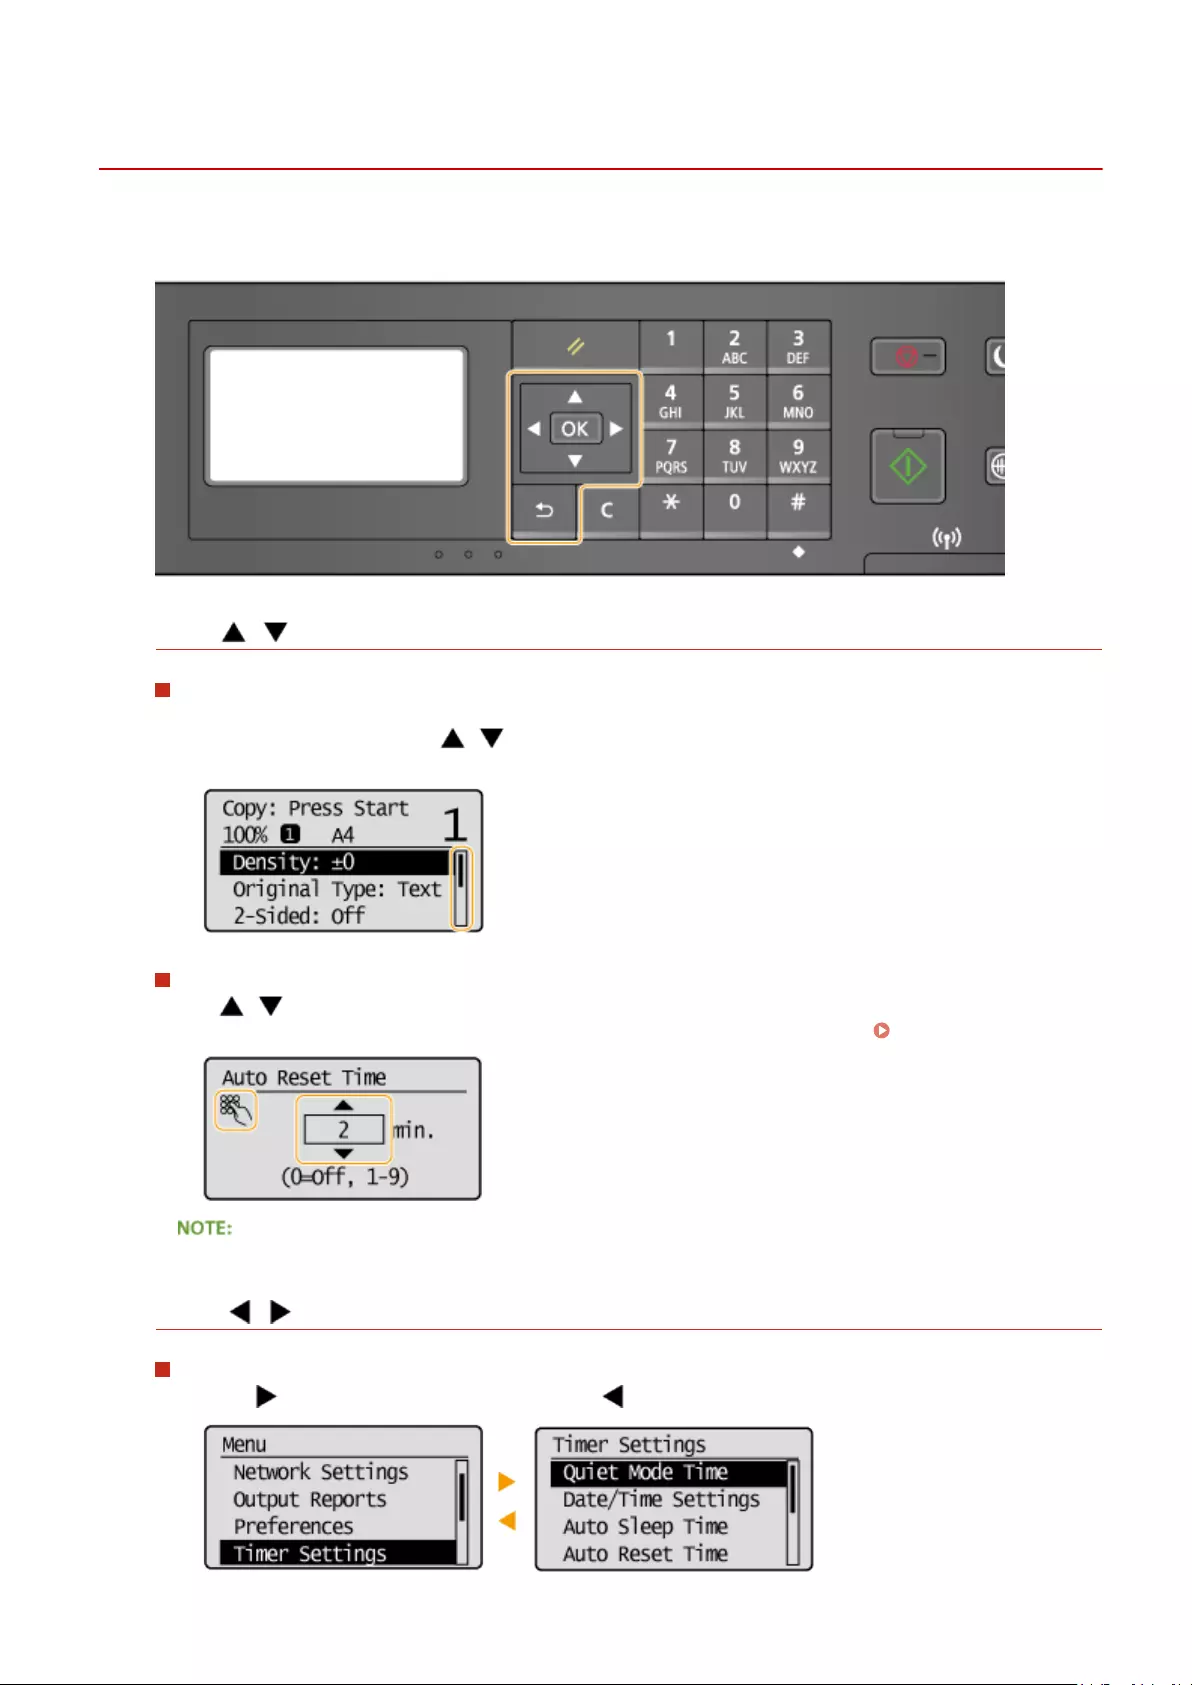
Using the Operation Panel
15A8-00J
Use the keys shown below to specify settings and adjust values.
Using /
Scrolling the screen
The scroll bar is displayed on the right side of the screen when not all of the information ts on one screen. If
the scroll bar is displayed, use / to scroll up or down. The text and background colors of an item are
inverted when it is selected.
Changing a setting value
Use / when entering numbers. You can also enter the value directly using the numeric keys when the
numeric key icon is displayed in the top-left corner of the screen, as shown below. Entering Text(P. 35)
The numbers in parentheses beneath the value input eld indicate the range of possible values.
Using /
Proceeding to next screen/Returning to previous screen
Press to proceed to the next screen. Press to return to the previous screen.
Basic Operations
33

You can also proceed to the next screen by pressing , and return to the previous screen by pressing
.
Adjusting a setting value
Use / when adjusting the value on a scale.
Using
Press to apply a setting.
Using the Numeric Keys
Use the numeric keys when entering text and numbers. Entering Text(P. 35)
●You can change a variety of display-related settings, such as the scrolling speed or display language:
Display Settings(P. 300)
●To change the screen that is automatically displayed when the machine remains idle for a specied length of
time:
Function After Auto Reset(P. 306)
Basic Operations
34
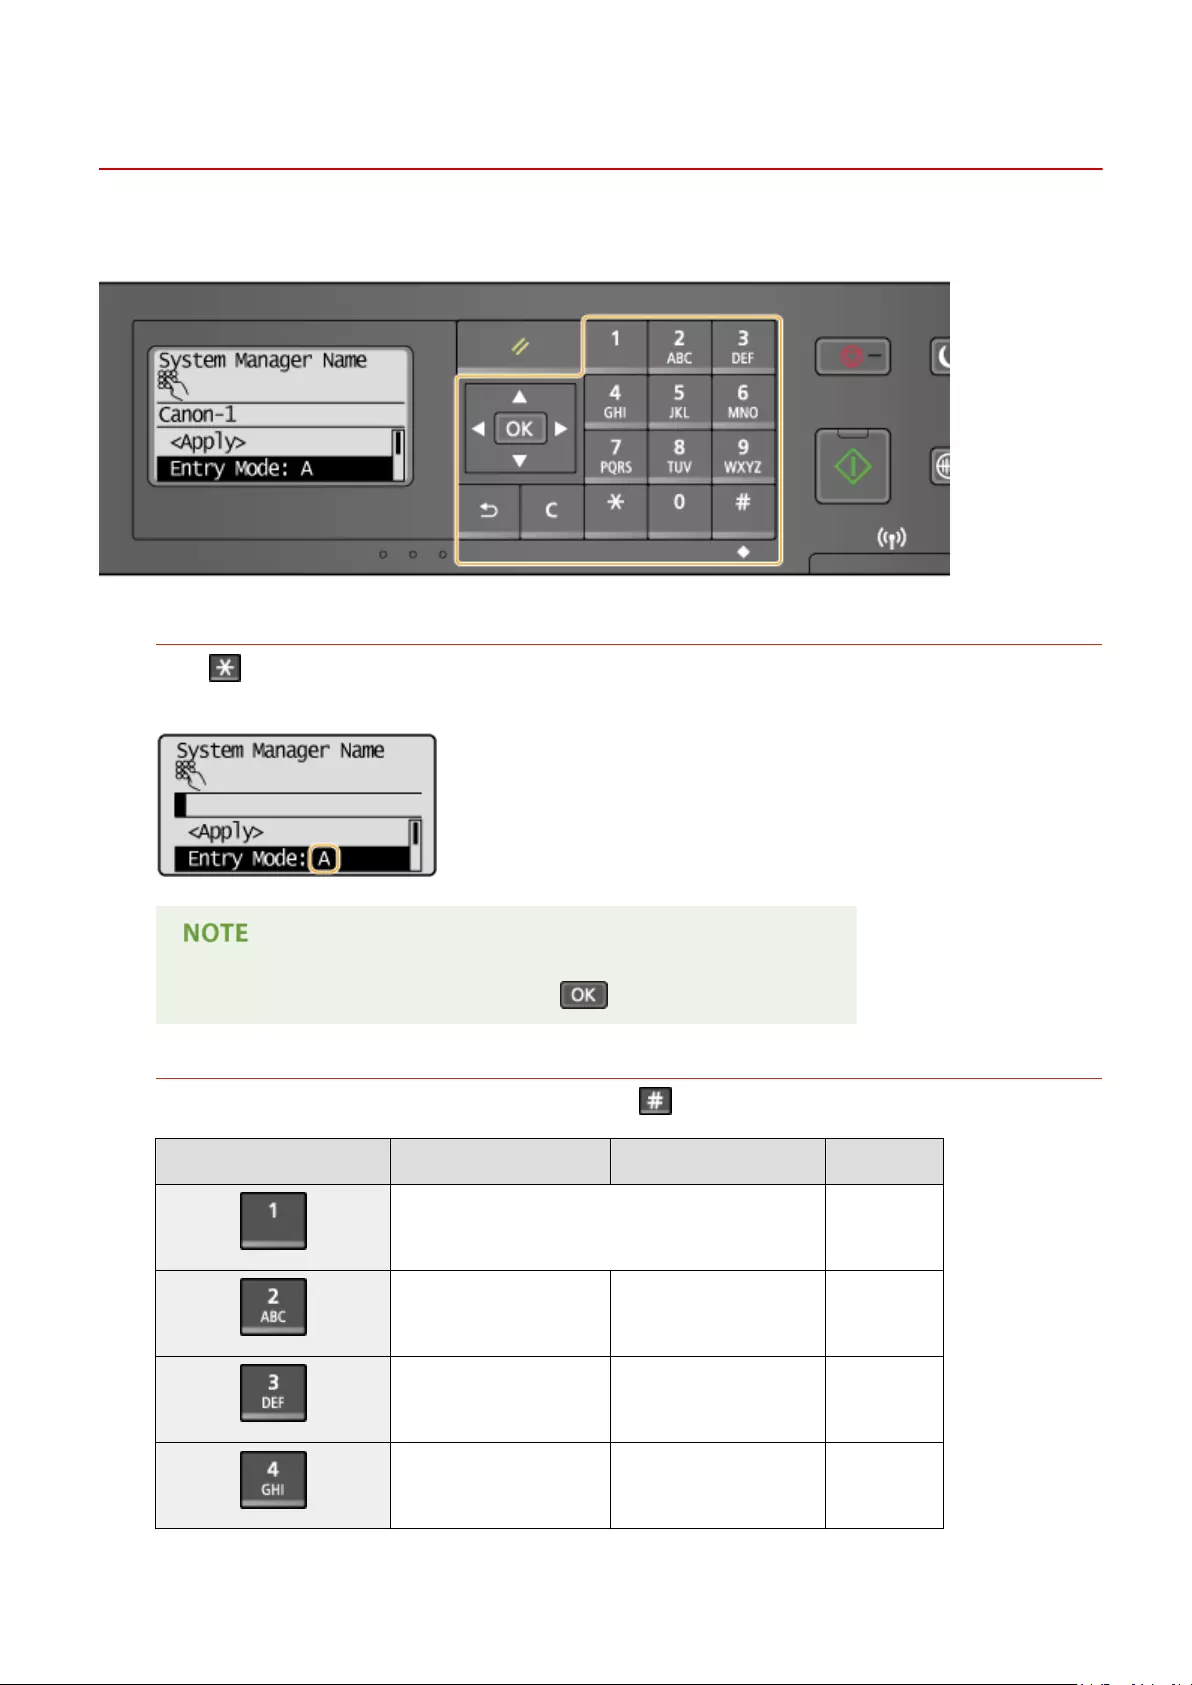
Entering Text
15A8-00K
Use the numeric keys to enter text and values.
Switching the Type of Text
Press to switch the type of text that is entered. The currently selected type of text is indicated by the «A»,
«a», or «12» of <Entry Mode>.
You can also select <Entry Mode> and press to switch the type of text.
Types of Text That Can Be Entered
The text that can be entered using the numeric keys and are listed below.
Key A a 12
@ . — _ / 1
ABC abc 2
DEF def 3
GHI ghi 4
Basic Operations
35
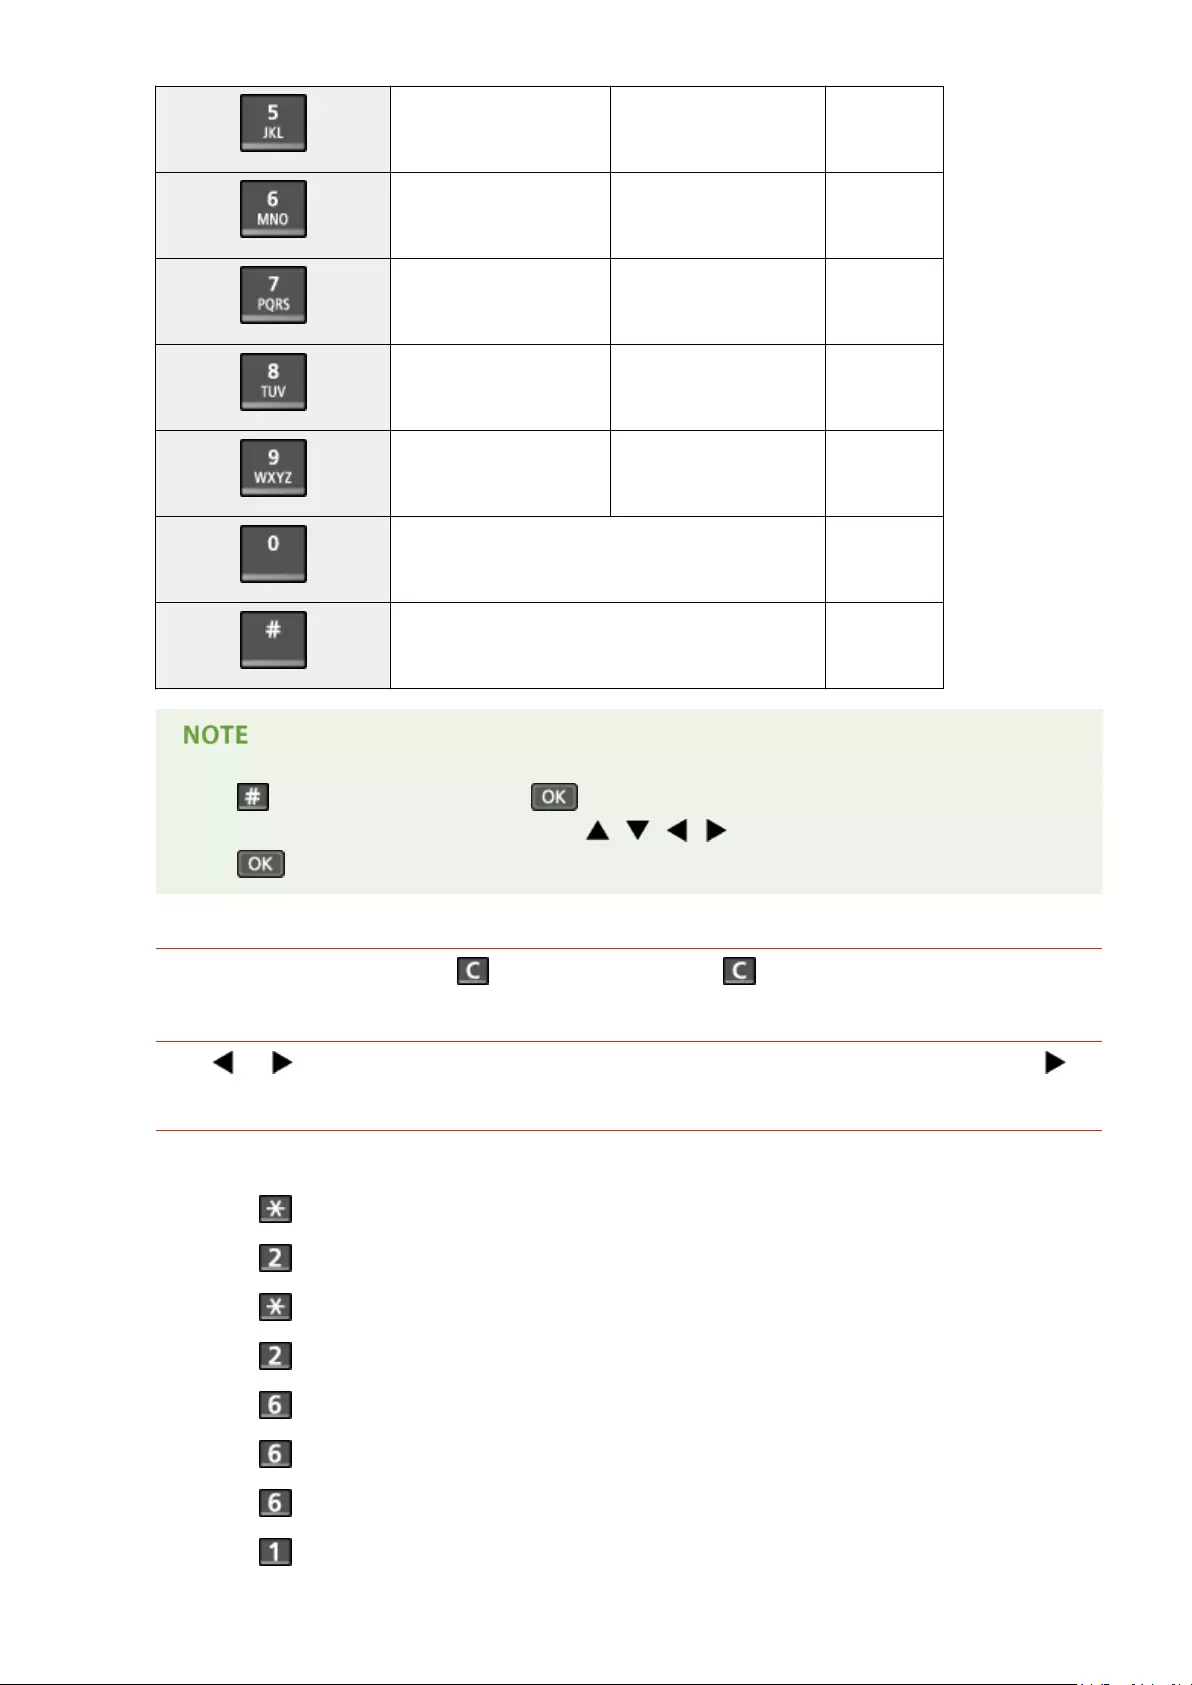
JKL jkl 5
MNO mno 6
PQRS pqrs 7
TUV tuv 8
WXYZ wxyz 9
(Not available) 0
(space) — . * # ! » , ; : ^ ` _ = / | ‘ ? $ @ % & + \ ~ ( ) [ ] { } < > (Not available)
Press or select <Symbol> and press when the type of text that is entered is <A> or <a> to
display a screen for selecting symbols. Use the / / / keys to select the symbol to enter, and
press .
Deleting Text
One character is deleted each time is pressed. Press and hold to delete all of the entered text.
Moving the Cursor (Entering a Space)
Press or to move the cursor. To enter a space, move the cursor to the end of the text, and press .
Example of Entering Text and Numbers
Example: «Canon-1»
1Press repeatedly until <A> is selected.
2Press repeatedly until the letter «C» is selected.
3Press repeatedly until <a> is selected.
4Press repeatedly until the letter «a» is selected.
5Press repeatedly until the letter «n» is selected.
6Press repeatedly until the letter «o» is selected.
7Press repeatedly until the letter «n» is selected.
8Press repeatedly until the symbol «-» is selected.
Basic Operations
36

9Press repeatedly until <12> is selected.
10 Press .
11 Press / to highlight <Apply>, and then press .
Basic Operations
37

Placing Documents
15A8-00L
Place documents on the platen glass or in the feeder (MF244dw). Use the platen glass when scanning thick or bound
documents such as books. You can load two or more sheets of documents in the feeder so that they can be scanned
continuously. For information about the types of documents that can be placed on the platen glass or in the feeder,
and information about the scannable area of a document, see Document Type(P. 417) or Scan Area(P. 418) .
Placing Documents on the Platen Glass(P. 38)
Placing Documents in the Feeder (MF244dw)(P. 39)
Use documents that are completely dry
When placing documents, make sure that any glue, ink, or correction uid on the documents has completely
dried.
To avoid paper jams (MF244dw)
Do not place the following types of documents in the feeder as this may cause paper jams:
●Wrinkled or creased paper
●Carbon paper or carbon-backed paper
●Curled or rolled paper
●Coated paper
●Torn paper
●Onion skin or thin paper
●Stapled or clipped documents
●Paper printed by a thermal transfer printer
●Transparencies
To scan documents more accurately (MF244dw)
Documents placed in the feeder are scanned while being fed into the machine. On the other hand, documents
placed on the platen glass remain in a xed position while they are scanned. To ensure more accurate scanning
results, placing documents on the platen glass is recommended.
To scan tracing paper or transparencies (MF244dw)
To scan transparent documents (for example, tracing paper or transparencies), place them on the platen glass.
Placing Documents on the Platen Glass
1Open the feeder or the platen glass cover.
Basic Operations
38

2Place the document face down on the platen glass.
●Align the corner of the document with the top-left corner of the platen glass.
To scan transparent documents (for example, tracing paper or transparencies), cover them with plain white
paper.
3Gently close the feeder or the platen glass cover.
●The machine is ready to scan the document.
●When scanning is complete, remove the document from the platen glass.
Placing Documents in the Feeder (MF244dw)
1Open the document feeder tray.
Basic Operations
39

2Spread the document guides apart.
●Slide the document guides outward until they are slightly farther apart than the actual document width.
3Fan the document stack and align the edges.
●Fan the document stack in small batches, and align the edges by lightly tapping the stack on a at surface a
few times.
4Place the document(s) face up in the feeder.
●Make sure that the document stack does not exceed the load limit guide ( ).
●Do not load documents of various sizes at the same time.
●Up to 35 sheets can be loaded at a time. If 35 or more sheets are loaded, scanning may stop or a paper
jam may occur.
5Align the document guides against the edges of the document.
●Slide the document guides inward until they are aligned securely against the edges of the document.
Basic Operations
40

●The machine is ready to scan the document.
Align the document guides securely against the edges of the document
Document guides that are too loose or too tight can cause misfeeds or paper jam.
While documents are being scanned
Do not add or remove documents.
When scanning is complete
Remove the scanned documents from beneath the feeder to prevent paper jams.
Basic Operations
41
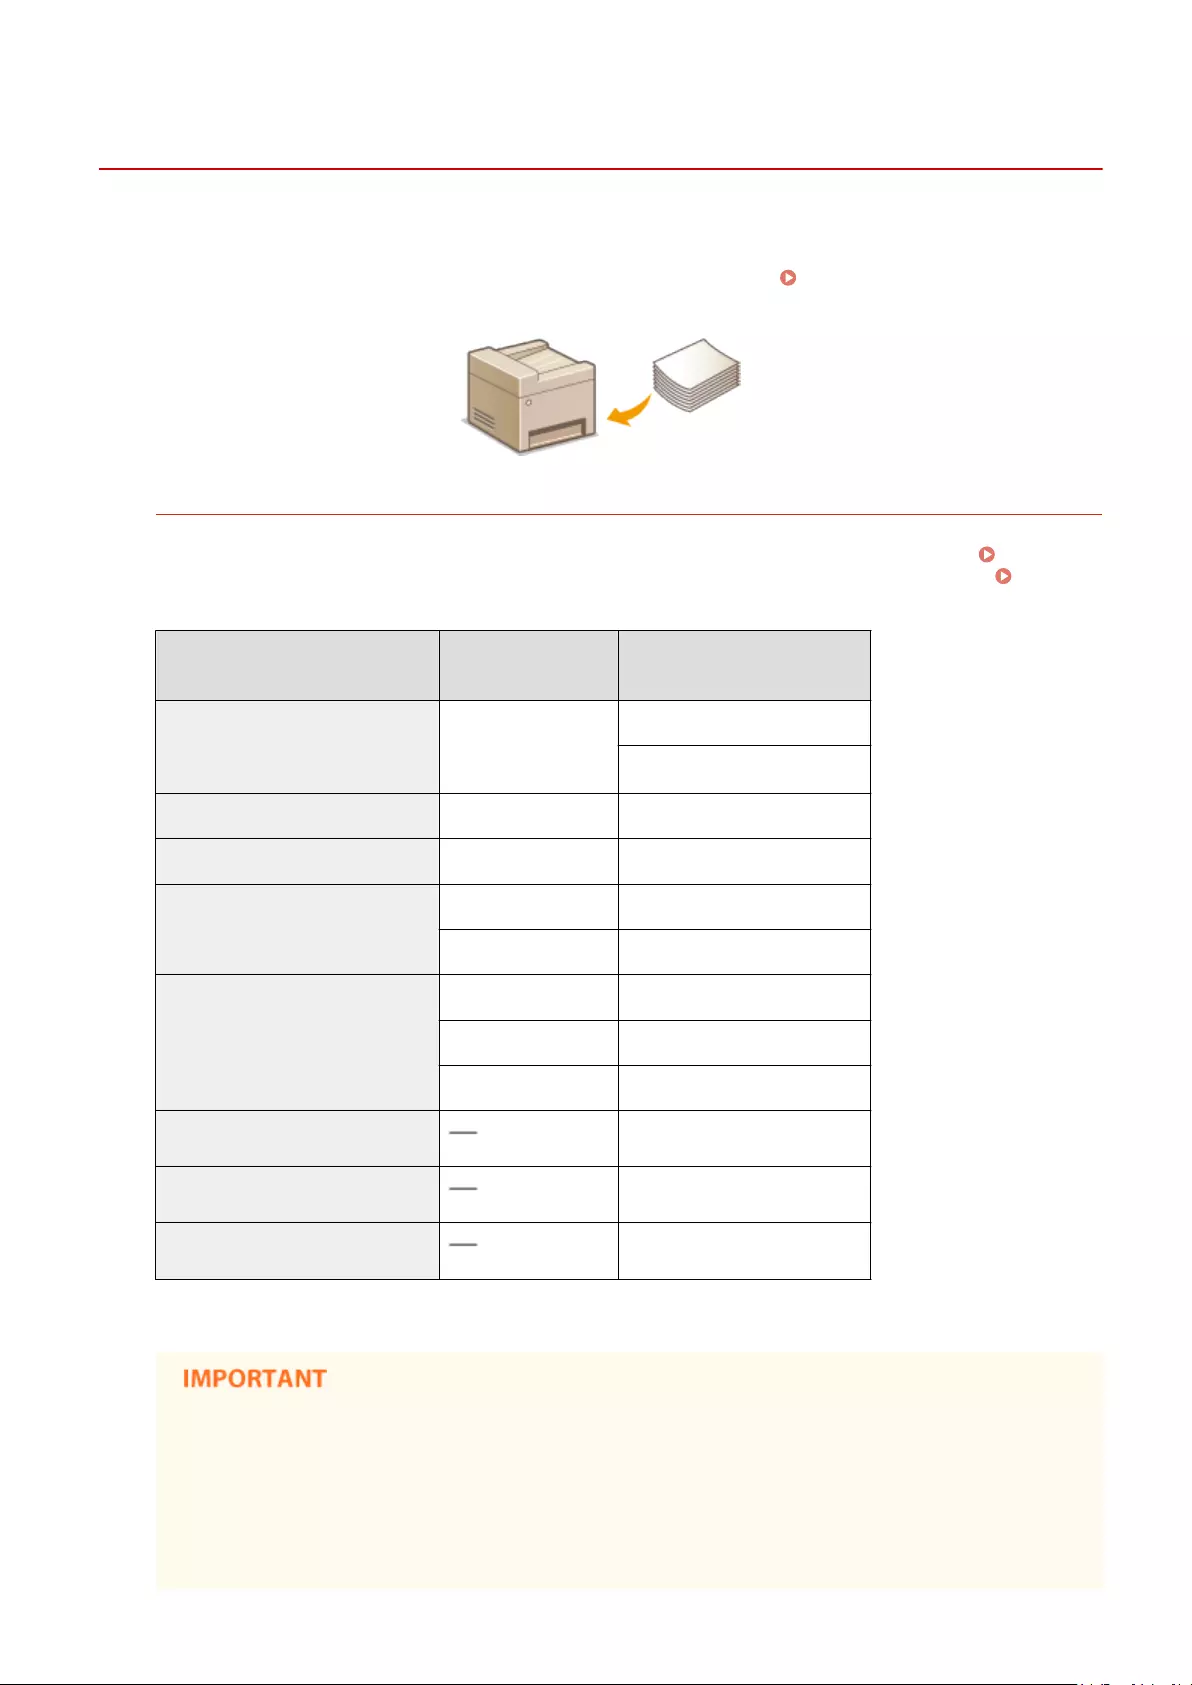
Loading Paper
15A8-00R
You can load the paper into the paper drawer or manual feed slot. Load the paper you usually use into the paper
drawer. The paper drawer is convenient when using large amounts of paper. Use the manual feed slot when you
temporarily use size or type of paper that is not loaded in the paper drawer. See Paper(P. 419) for available paper
sizes.
Paper Type and Setting for the Machine
See the table below to specify the paper settings according to the type and weight of the paper to load into the
paper source. For more information about how to specify the paper settings on the machine, see Specifying
Paper Size and Type(P. 53) . For the amount of paper that can be loaded in each paper source, see
Paper(P. 419) .
Paper Type Paper Weight Paper Setting
on the Machine
Plain paper 60 to 89 g/m²
<Plain (60-89 g/m²)>
<Plain L (60-89 g/m²)>*
Recycled paper 60 to 89 g/m² <Recycled (60-89 g/m²)>
Color paper 60 to 89 g/m² <Color (60-89 g/m²)>
Heavy paper
90 to 120 g/m² <Heavy 1 (90-120 g/m²)>
121 to 163 g/m² <Heavy 2 (121-163 g/m²)>
Bond paper
60 to 90 g/m² <Bond 1 (60-90 g/m²)>
91 to 120 g/m² <Bond 2 (91-120 g/m²)>
121 to 163 g/m² <Bond 3 (121-163 g/m²)>
Envelope <Envelope>
Label <Labels>
Index card <Index Card>
* If set to <Plain (60-89 g/m²)> and that printout is curled, specify <Plain L (60-89 g/m²)> and print again.
Do not use the following types of paper:
●Wrinkled or creased paper
●Curled or rolled paper
●Torn paper
●Damp paper
Basic Operations
42

●Very thin paper
●Paper printed by a thermal transfer printer
●Highly textured paper
●Glossy paper
Paper handling and storage
●Store the paper on a at surface.
●Keep the paper wrapped in its original package to protect the paper from moisture or dryness.
●Do not store the paper in such a way that may cause it to curl or fold.
●Do not store the paper vertically or stack too much paper.
●Do not store the paper in direct sunlight, or in a place subject to high humidity, dryness, or drastic
changes in temperature or humidity.
When printing on paper that has absorbed moisture
Steam may emit from the paper output area, or water droplets may form on the back side of the
operation panel or around the paper output area. There is nothing unusual about any of these
occurrences, which occur when the heat generated from xing toner on the paper causes moisture in the
paper to evaporate (most likely to occur at low room temperatures).
LINKS
Registering a Custom Paper Size(P. 55)
Basic Operations
43

Loading Paper in the Paper Drawer
15A8-00S
Load the paper that you usually use in the paper drawer. When you want to print on paper that is not loaded in the
paper drawer, load the paper in the manual feed slot. Loading Paper in the Manual Feed Slot(P. 47)
Make sure to load paper in portrait orientation
Paper cannot be loaded in landscape orientation. Make sure to load the paper in portrait orientation.
1Lift the dust cover.
2Slide the paper guides apart.
Size abbreviations on the paper guides
The abbreviations on the paper guides in the paper drawer indicate paper sizes as follows:
●LGL: Legal
●LTR: Letter
●STMT: Statement
Basic Operations
44

●EXEC: Executive
3Insert the paper into the paper drawer until the paper stops.
●Load the paper in portrait orientation (with the short edge toward the machine), with the print side face up.
Paper cannot be loaded in landscape orientation.
●Fan the paper stack well, and tap it on a at surface to align the edges.
●When you insert the paper with <Notify to Check Paper Settings> set to <On>, a conrmation screen is
displayed. Notify to Check Paper Settings(P. 301)
Do not exceed the load limit guide when loading paper
Make sure that the paper stack does not exceed the load limit guide ( ). Loading too much paper can cause
paper jams.
When loading envelopes or paper with a logo, see Loading Envelopes(P. 49) or Loading Preprinted
Paper(P. 51) .
4Align the paper guides against the edges of the paper.
●Move the paper guides in so they are exactly the width of the paper.
Align the paper guides securely against the edges of the paper
Paper guides that are too loose or too tight can cause misfeeds or paper jams.
Basic Operations
45

5Lower the dust cover.
When Legal size paper is loaded
The paper guides at the rear edge of the paper will be extended. Open the dust cover extension, then lower
the dust cover.
6Pull out the paper stopper to open.
»Continue to Specifying Paper Size and Type(P. 53)
When changing the paper size or type
The factory default settings for paper size and type are <A4> and <Plain (60-89 g/m²)>, respectively. If you
load a different size or type of paper into the machine, make sure to change the settings. If you do not
change the settings, the machine cannot print properly.
Printing on the Back Side of Printed Paper (Manual 2-Sided Printing)
You can print on the back side of printed paper. Flatten any curls on the printed paper and insert it into the
manual feed slot ( Loading Paper in the Manual Feed Slot(P. 47) ), with the side to print face up (previously
printed side face down).
●Load one sheet at a time per each print.
●You can use only the paper printed with this machine.
●You cannot print on the side that has previously been printed on.
●If you are using A5 paper, the reverse side may not be printed correctly.
LINKS
Paper(P. 419)
Basic Operations
46

Loading Paper in the Manual Feed Slot
15A8-00U
When you want to print on paper that is not loaded in the paper drawer, load the paper in the manual feed slot. Load
the paper that you usually use in the paper drawer. Loading Paper in the Paper Drawer(P. 44)
Make sure to load paper in portrait orientation
Paper cannot be loaded in landscape orientation. Make sure to load the paper in portrait orientation.
1Open the manual feed cover.
2Spread the paper guides apart.
●Slide the paper guides outward.
3Insert the paper into the manual feed slot until the paper stops.
●Load the paper in portrait orientation (with the short edge toward the machine), with the print side face up.
Paper cannot be loaded in landscape orientation.
●When you insert the paper with <Notify to Check Paper Settings> set to <On>, a conrmation screen is
displayed. Notify to Check Paper Settings(P. 301)
Basic Operations
47
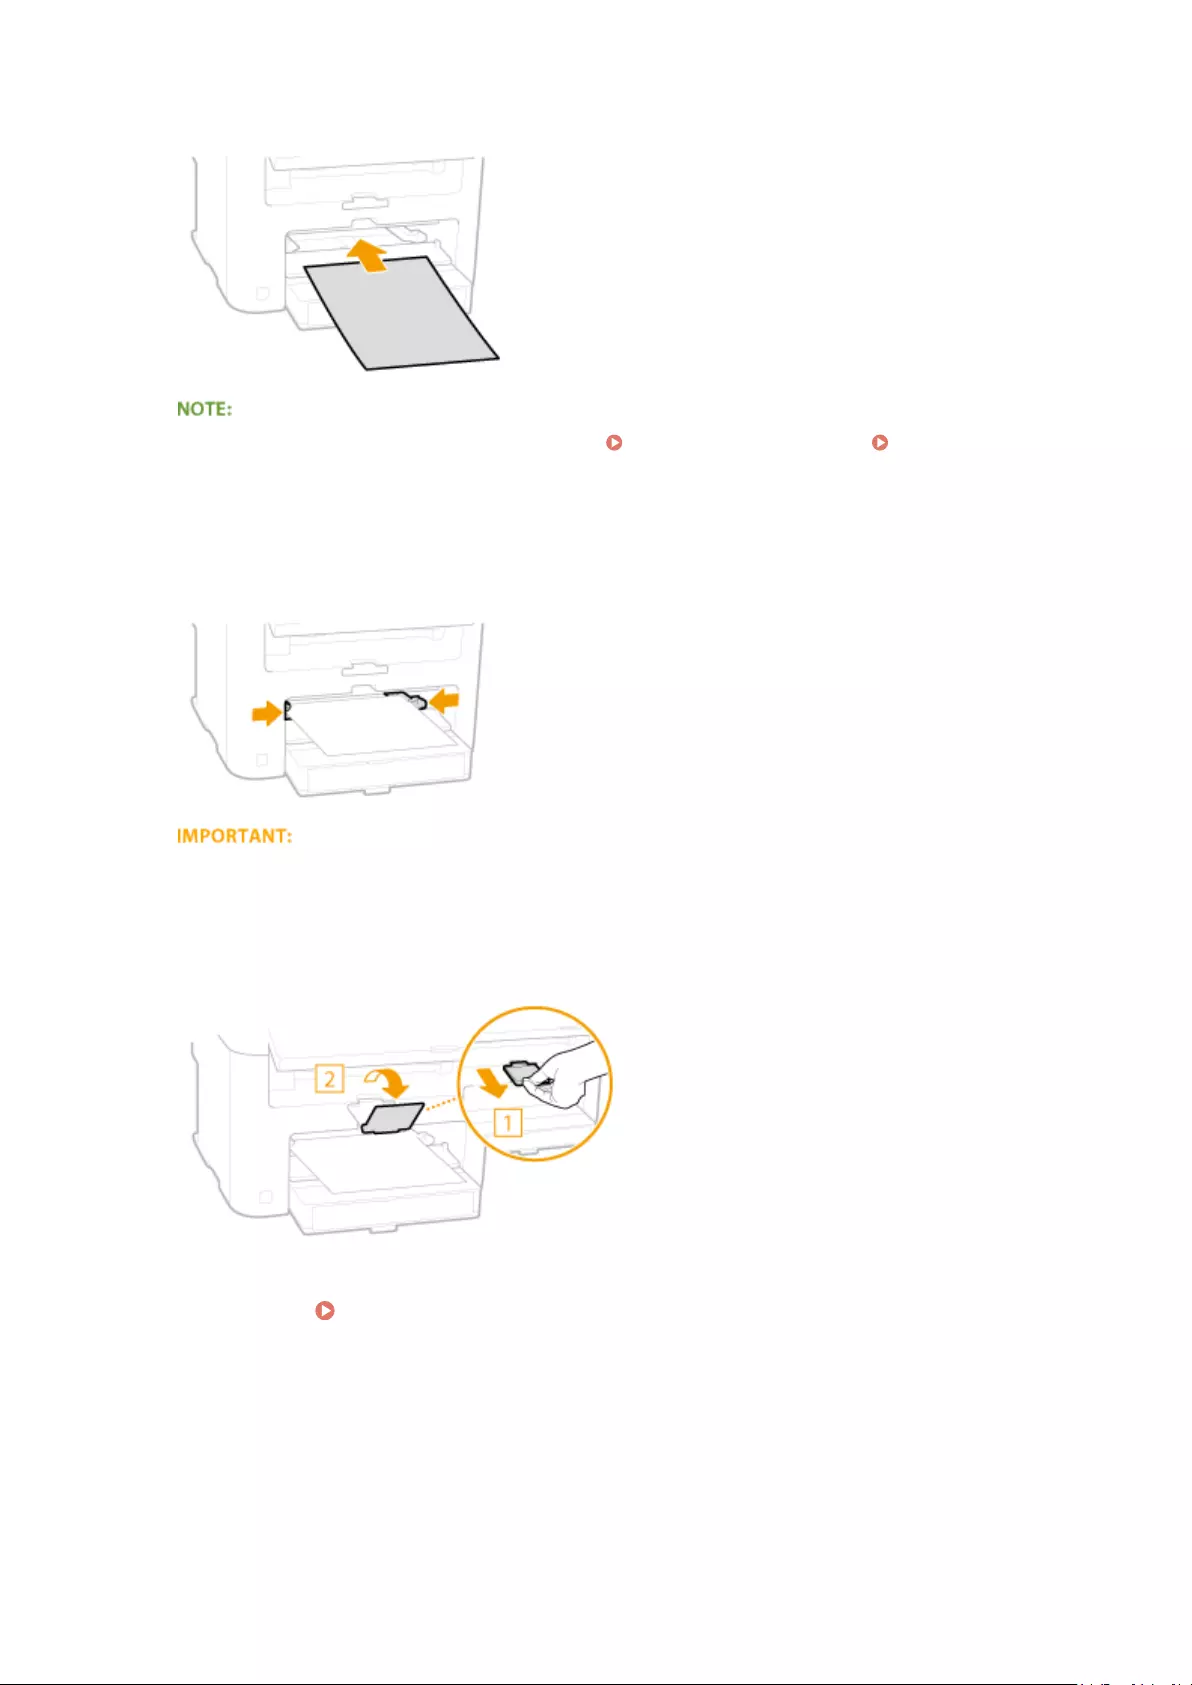
When loading envelopes or paper with a logo, see Loading Envelopes(P. 49) or Loading Preprinted
Paper(P. 51) .
4Align the paper guides against the edges of the paper.
●Slide the paper guides inward until they are aligned securely against the edges of the paper.
Align the paper guides securely against the edges of the paper
Paper guides that are too loose or too tight can cause misfeeds or paper jams.
5Pull out the paper stopper to open.
Continue to Specifying Paper Size and Type(P. 53)
Basic Operations
48

Loading Envelopes
15A8-00W
Make sure to atten any curls on envelopes before loading them. Also pay attention to the orientation of envelopes
and which side is face up.
Before Loading Envelopes(P. 49)
Loaded Orientation(P. 50)
This section describes how to load envelopes in the orientation you want, as well as procedures that you need
to complete before loading envelopes. For a description of the general procedure for loading envelopes in the
paper drawer or manual feed slot, see Loading Paper in the Paper Drawer(P. 44) or Loading Paper in
the Manual Feed Slot(P. 47) .
Before Loading Envelopes
Follow the procedure below to prepare the envelopes before loading.
Only one envelope at a time can be loaded in the manual feed slot. Follow steps 1 to 4 in the procedure below
to prepare the envelope for loading.
1Close the ap of each envelope.
2Flatten them to release any remaining air, and make sure that the edges are pressed
tightly.
3Loosen any stiff corners of the envelopes and atten any curls.
Basic Operations
49

4Align the edges of the envelope on a at surface.
Loaded Orientation
Load the envelopes in portrait orientation, short edge rst, with the non-glued side (front side) face up.
Load envelopes in the same orientation for both the paper drawer and manual feed slot.
Load the envelopes so that their aps are at the left.
Basic Operations
50
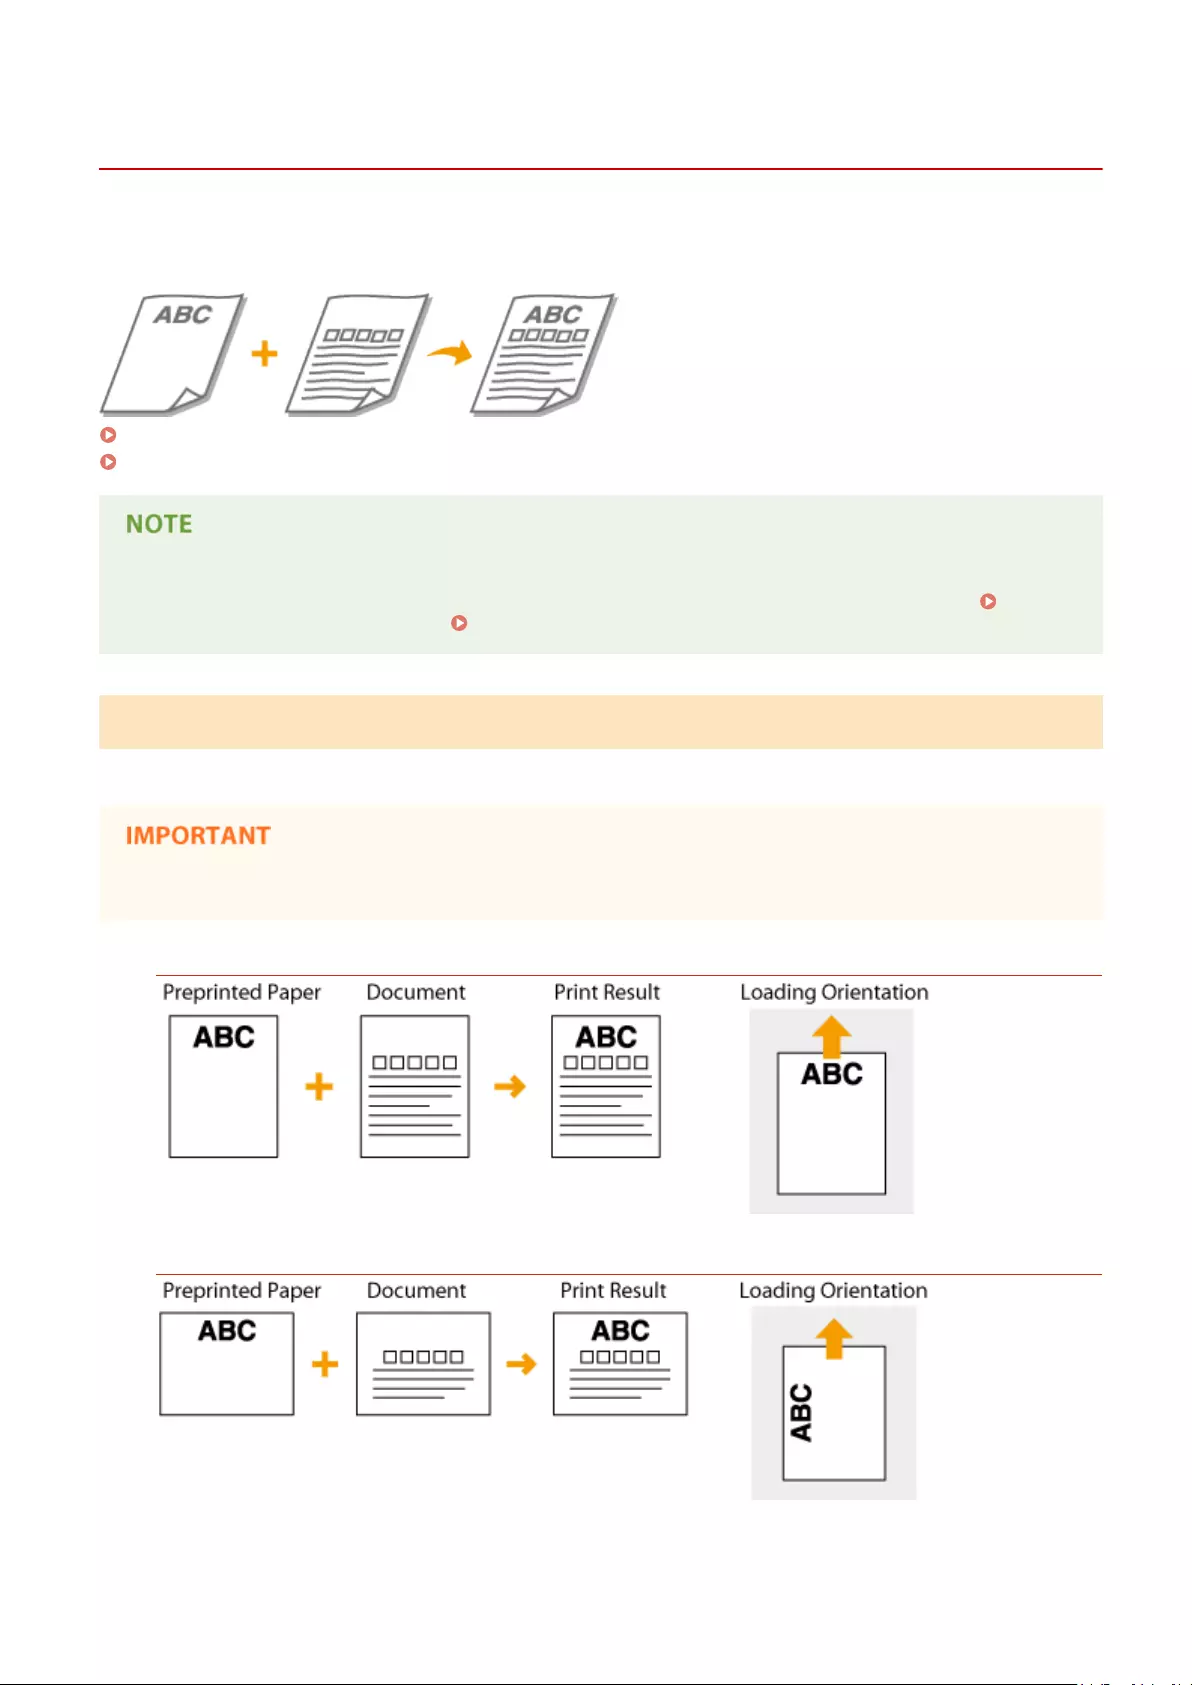
Loading Preprinted Paper
15A8-00X
When you use paper that has been preprinted with a logo, pay attention to the orientation of the paper when loading.
Load the paper properly so that printing is performed on the correct side of the paper with a logo.
Making 1-Sided Printouts on Paper with Logos(P. 51)
Making 2-Sided Printouts on Paper with Logos (MF244dw)(P. 52)
This section mainly describes how to load preprinted paper with the proper facing and orientation. For a
description of the general procedure for loading paper in the paper drawer or manual feed slot, see Loading
Paper in the Paper Drawer(P. 44) or Loading Paper in the Manual Feed Slot(P. 47) .
Making 1-Sided Printouts on Paper with Logos
Load the paper with the logo side (the side to print the document) face up.
Load only one sheet of paper in the manual feed slot each time you print.
Printing on Paper with Logos in Portrait Orientation
Printing on Paper with Logos in Landscape Orientation
Basic Operations
51

Making 2-Sided Printouts on Paper with Logos (MF244dw)
Load the paper with the front logo side (the side to print the rst page of the document) face down.
Printing on Paper with Logos in Portrait Orientation
Printing on Paper with Logos in Landscape Orientation
The <Switch Paper Feed Method> setting (MF244dw)
When you print on preprinted paper, you need to change the facing of the paper to load each time you perform
1-sided and 2-sided printing. However, if <Switch Paper Feed Method> is set to <Print Side Priority>, the facing
that you use for loading preprinted paper for 2-sided printing (logo side face down) can also be used for 1-sided
printing. This setting is especially useful if you frequently perform both 1-sided and 2-sided printing. Switch
Paper Feed Method(P. 308)
Basic Operations
52

Specifying Paper Size and Type
15A8-00Y
You must specify the paper size and type settings to match the paper that is loaded. Make sure to change the paper
settings when you load the paper that is different from the previously loaded paper.
If the setting does not match the size and type of loaded paper, a paper jam or printing error may occur.
1Press (Paper Setting).
2Use / to select <MP Tray> or <Drawer 1>, and press .
3Select the loaded paper size, and press .
●If the loaded paper size is not displayed, use / to select <Other Sizes>, and press .
4Select the loaded paper type, and press .
When a frequently used paper size is known
You can set the machine to display only frequently used paper sizes in the selection screen.
1Press (Paper Setting).
2Select <Select Frequently Used Paper Sizes>, and press .
3Select <Multi-Purpose Tray> or <Drawer 1>, and press .
Basic Operations
53

4Select a frequently used paper size and press to checkmark it.
Uncheckmarked paper sizes are displayed in the <Paper Size (Other Sz.)> screen.
5Select <Apply>, and press .
LINKS
Loading Paper in the Paper Drawer(P. 44)
Paper(P. 419)
Basic Operations
54
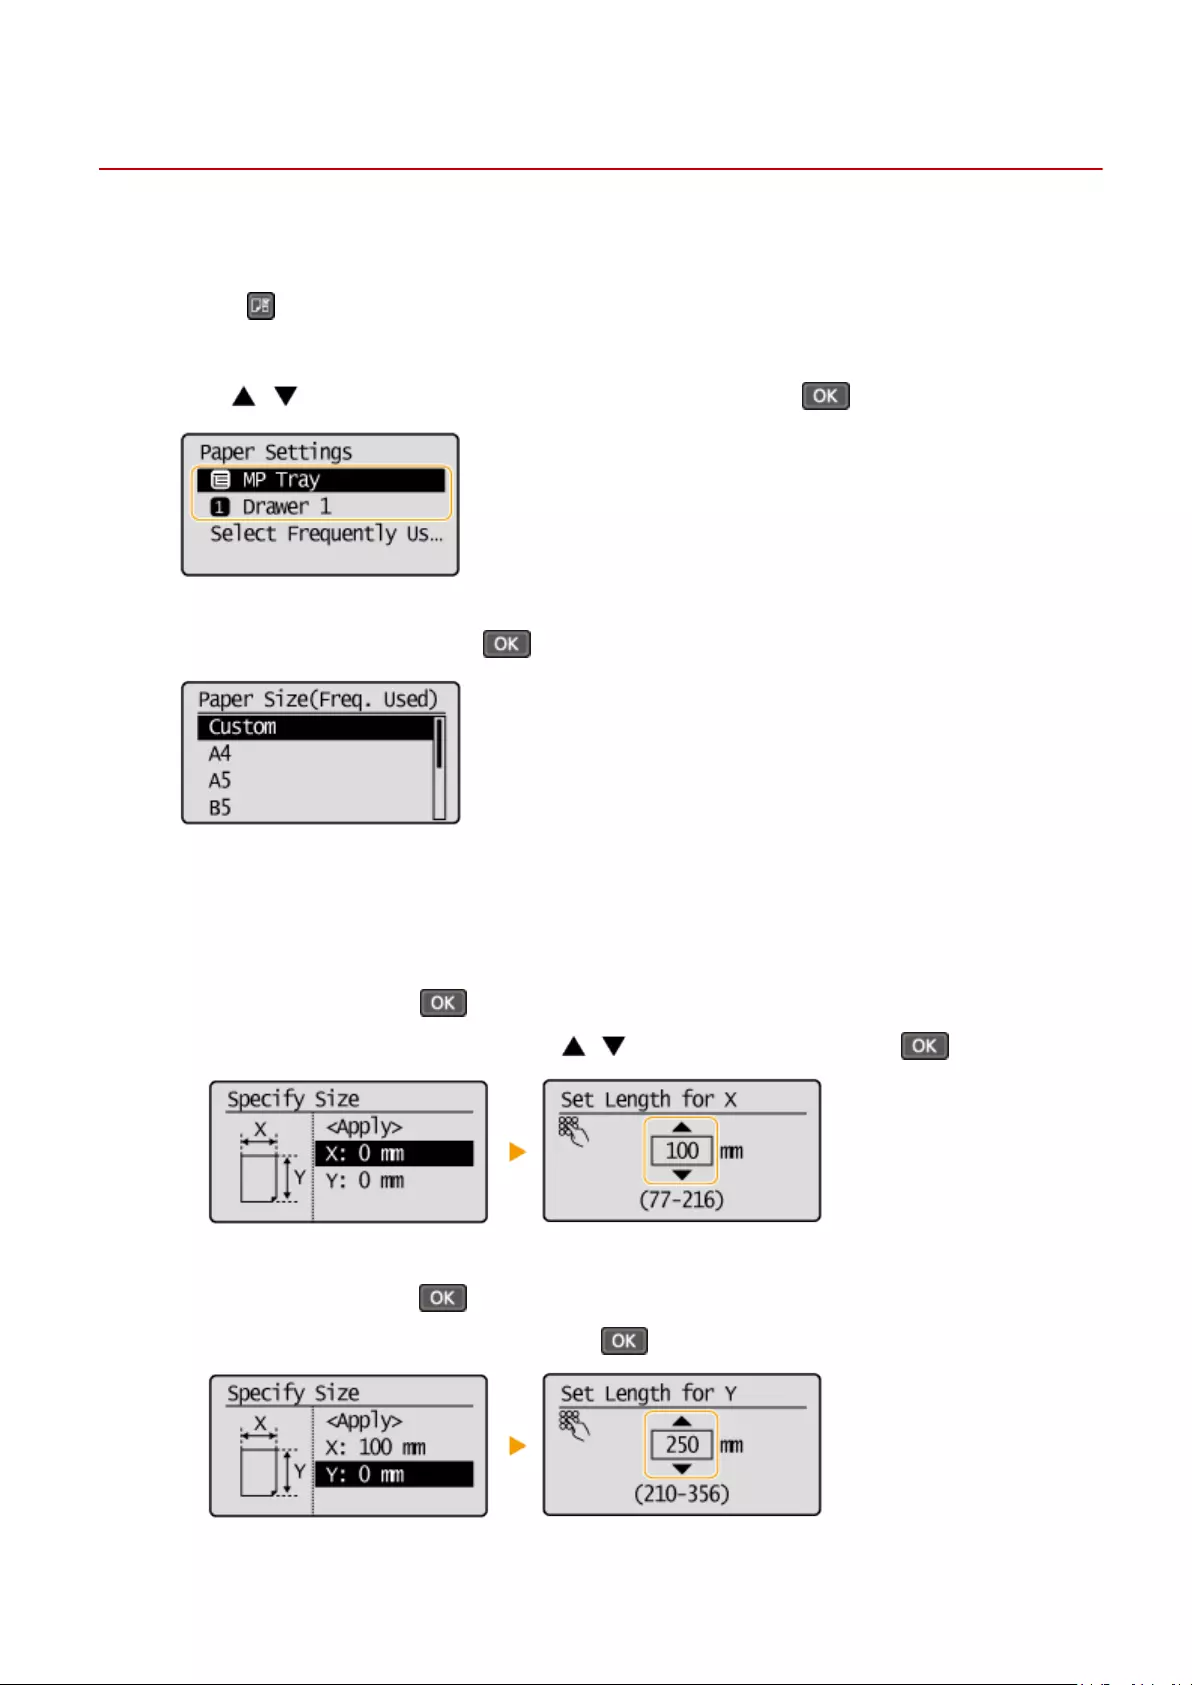
Registering a Custom Paper Size
15A8-010
You can register one frequently used custom paper size each for the paper drawer and manual feed slot.
1Press (Paper Setting).
2Use / to select <MP Tray> or <Drawer 1>, and press .
3Select <Custom>, and press .
4Specify the paper size.
1Specify the length of the <X> (shorter) side.
●Select <X>, and press .
●Input the length of the <X> side using / or the numeric keys, and press .
2Specify the length of the <Y> (longer) side.
●Select <Y>, and press .
●Input the length of the <Y> side, and press .
Basic Operations
55

3Select <Apply>, and press .
5Select the paper type, and press .
LINKS
Loading Paper in the Paper Drawer(P. 44)
Loading Paper in the Manual Feed Slot(P. 47)
Basic Operations
56
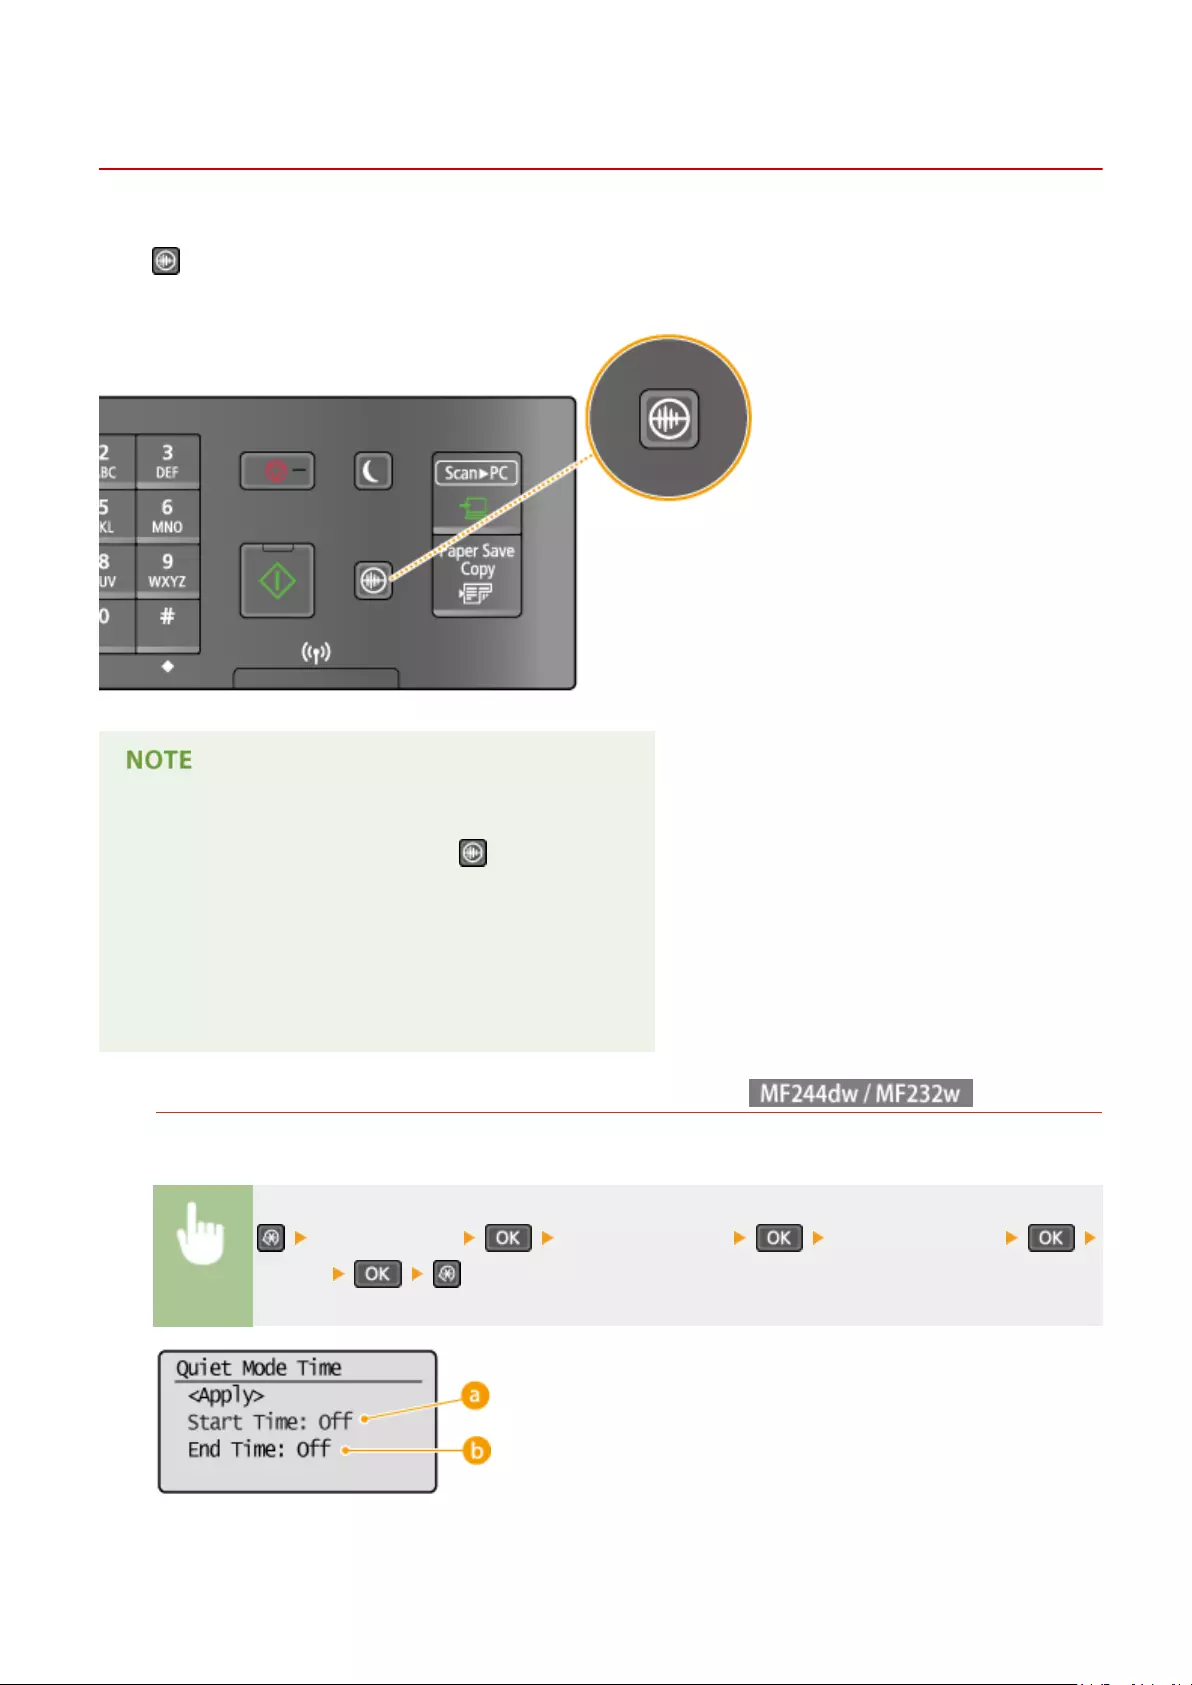
Entering Quiet Mode
15A8-011
The quiet mode function reduces the operation sound of the machine. For example, when using the machine at night,
press on the operation panel. With only this operation, you can easily minimize operation sound. You can also
specify a time for the machine to automatically enter quiet mode.
When in quiet mode
When the machine enters quiet mode, lights up green.
When quiet mode is enabled
The operation of functions becomes slower.
When the machine cannot enter quiet mode
●The machine is in Special Printing Mode
●A particular paper size or paper type is specied
Specifying a time for the machine to enter quiet mode
You can specify a time for the machine to enter or exit quiet mode automatically. For example, this is useful
when wanting to reduce operation noise only for late-night operation.
<Timer Settings> <Quiet Mode Time> Specify each setting
<Apply>
Basic Operations
57

<Start Time>
Specify a time for entering quiet mode. To set, select <On> then specify the time.
<End Time>
Specify a time for exiting quiet mode. To set, select <On> then specify the time.
Exiting Quiet Mode
Press to exit quiet mode.
Basic Operations
58

Entering Sleep Mode
15A8-012
The sleep mode function reduces the amount of power consumed by the machine by disabling power ow to the
operation panel. If no operations will be performed on the machine for a while, such as during a lunch break, you can
save power simply by pressing on the operation panel. You can also use the Auto Sleep Time setting to
automatically put the machine into sleep mode if it remains idle for a specied length of time.
When in sleep mode
When the machine enters sleep mode, lights up green.
Situations in which the machine does not enter sleep mode
●When the machine is in operation
●When the [Processing/Data] indicator is lit up or blinking
●When documents are placed in the feeder
●When the machine is performing an operation such as adjustment or cleaning
●When a paper jam occurs
●When the menu screen is displayed
●When an error message is displayed on the screen (There are some exceptions. The machine sometimes
enters sleep mode when error messages are displayed.)
●When the machine is waiting for a wireless LAN connection or Direct Connection
When You Want to Set the Auto Sleep Timer
The factory default settings for the amount of time that elapses before the machine enters auto sleep mode are
listed below. We recommend using the factory default settings to save the most power. If you want to change
the amount of time that elapses before the machine enters auto sleep mode, follow the procedure below.
●1 minute (setting range is 1 to 30 minutes)
<Timer Settings> <Auto Sleep Time> Set the amount of time that
elapses before the machine automatically enters sleep mode
Basic Operations
59

Exiting Sleep Mode
Press . You can also press any key other than to exit sleep mode.
Basic Operations
60

Setting Auto Shutdown Time
15A8-013
By enabling this setting, you can set the machine to automatically shut down. The machine automatically turns OFF
after the specied period of idle time has elapsed since entering the sleep mode. You can cut electric power
consumption at night and on holidays if you forget to turn OFF the machine.
<Timer Settings> <Auto Shutdown Time> Set the time
period
NOTE
●The default setting is 4 hours.
●MF244dw / MF232w users: If any setting of the [Timer Settings] is changed from the Remote UI while
the machine is in the sleep mode, the timer for the <Auto Shutdown Time> setting is reset to the
beginning. The machine automatically shuts down after the specied period of idle time has elapsed
since the timer was reset.
Basic Operations
61

Copying
Copying ……………………………………………………………………………………………………………………………………………… 63
Basic Copy Operations ………………………………………………………………………………………………………………………. 65
Canceling Copies ………………………………………………………………………………………………………………………………. 67
Various Copy Settings ……………………………………………………………………………………………………………………….. 69
Enlarging or Reducing …………………………………………………………………………………………………………………… 70
Selecting Document Type ………………………………………………………………………………………………………………. 71
Adjusting Density …………………………………………………………………………………………………………………………. 72
Adjusting Sharpness ……………………………………………………………………………………………………………………… 73
2-Sided Copying (MF244dw) …………………………………………………………………………………………………………… 75
Copying Multiple Documents onto One Sheet (2 on 1/4 on 1) ………………………………………………………………. 77
Using the [Paper Save Copy] Key (MF244dw / MF231) ………………………………………………………………………… 79
Copying Both Sides of an ID Card onto One Page ………………………………………………………………………………. 81
Collating Copies by Page ……………………………………………………………………………………………………………….. 82
Changing Default Settings ……………………………………………………………………………………………………………… 83
Copying
62
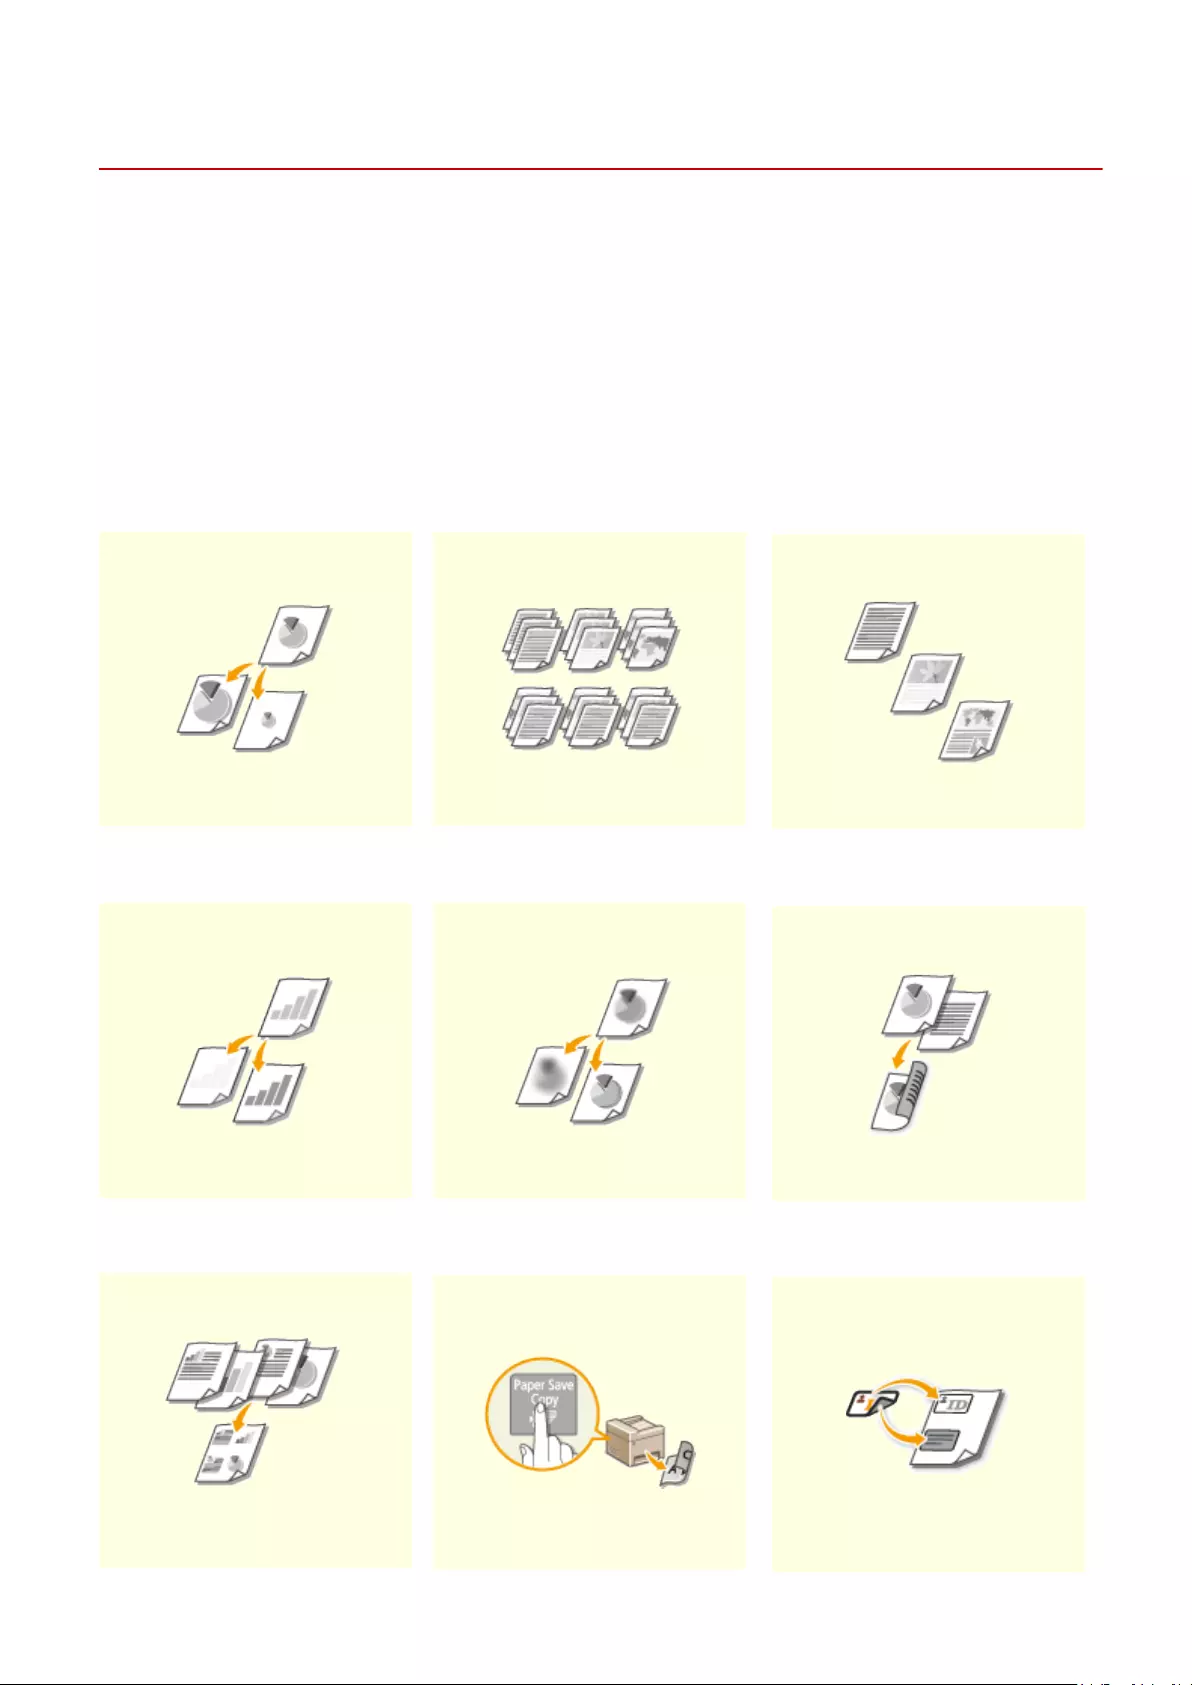
Copying
15A8-014
This chapter describes basic copy operations and various other useful copy functions, such as copying several pages
onto a single sheet.
◼Using Basic Operations
Basic Copy Operations(P. 65)
Canceling Copies(P. 67)
◼Using Copy Settings to Suit Your Needs
Enlarging or Reducing(P. 70) Collating Copies by Page(P. 82) Selecting Document
Type(P. 71)
Adjusting Density(P. 72) Adjusting Sharpness(P. 73) 2-Sided Copying (MF244dw)
(P. 75)
Copying
63

Copying Multiple Documents
onto One Sheet (2 on 1/4 on 1)
(P. 77)
Using the [Paper Save Copy]
Key (MF244dw / MF231)(P. 79)
Copying Both Sides of an ID
Card onto One Page(P. 81)
◼Simplifying Your Frequent Copy Operations
Changing Default Settings(P. 83)
Copying
64

Basic Copy Operations
15A8-015
1Place the document(s). Placing Documents(P. 38)
2Press (COPY/SCAN) to switch to the Copy mode screen.
3Enter the number of copies using the numeric keys.
●Enter a quantity from 1 to 999.
●Press to cancel the entered quantity.
4Specify the copy settings as necessary.
●Use / to select the settings. Various Copy Settings(P. 69)
5Press .
●Copying starts.
●If you want to cancel copying, press <Yes> . Canceling Copies(P. 67)
When placing documents in the feeder in step 1 (MF244dw)
The document is automatically scanned.
Copying
65
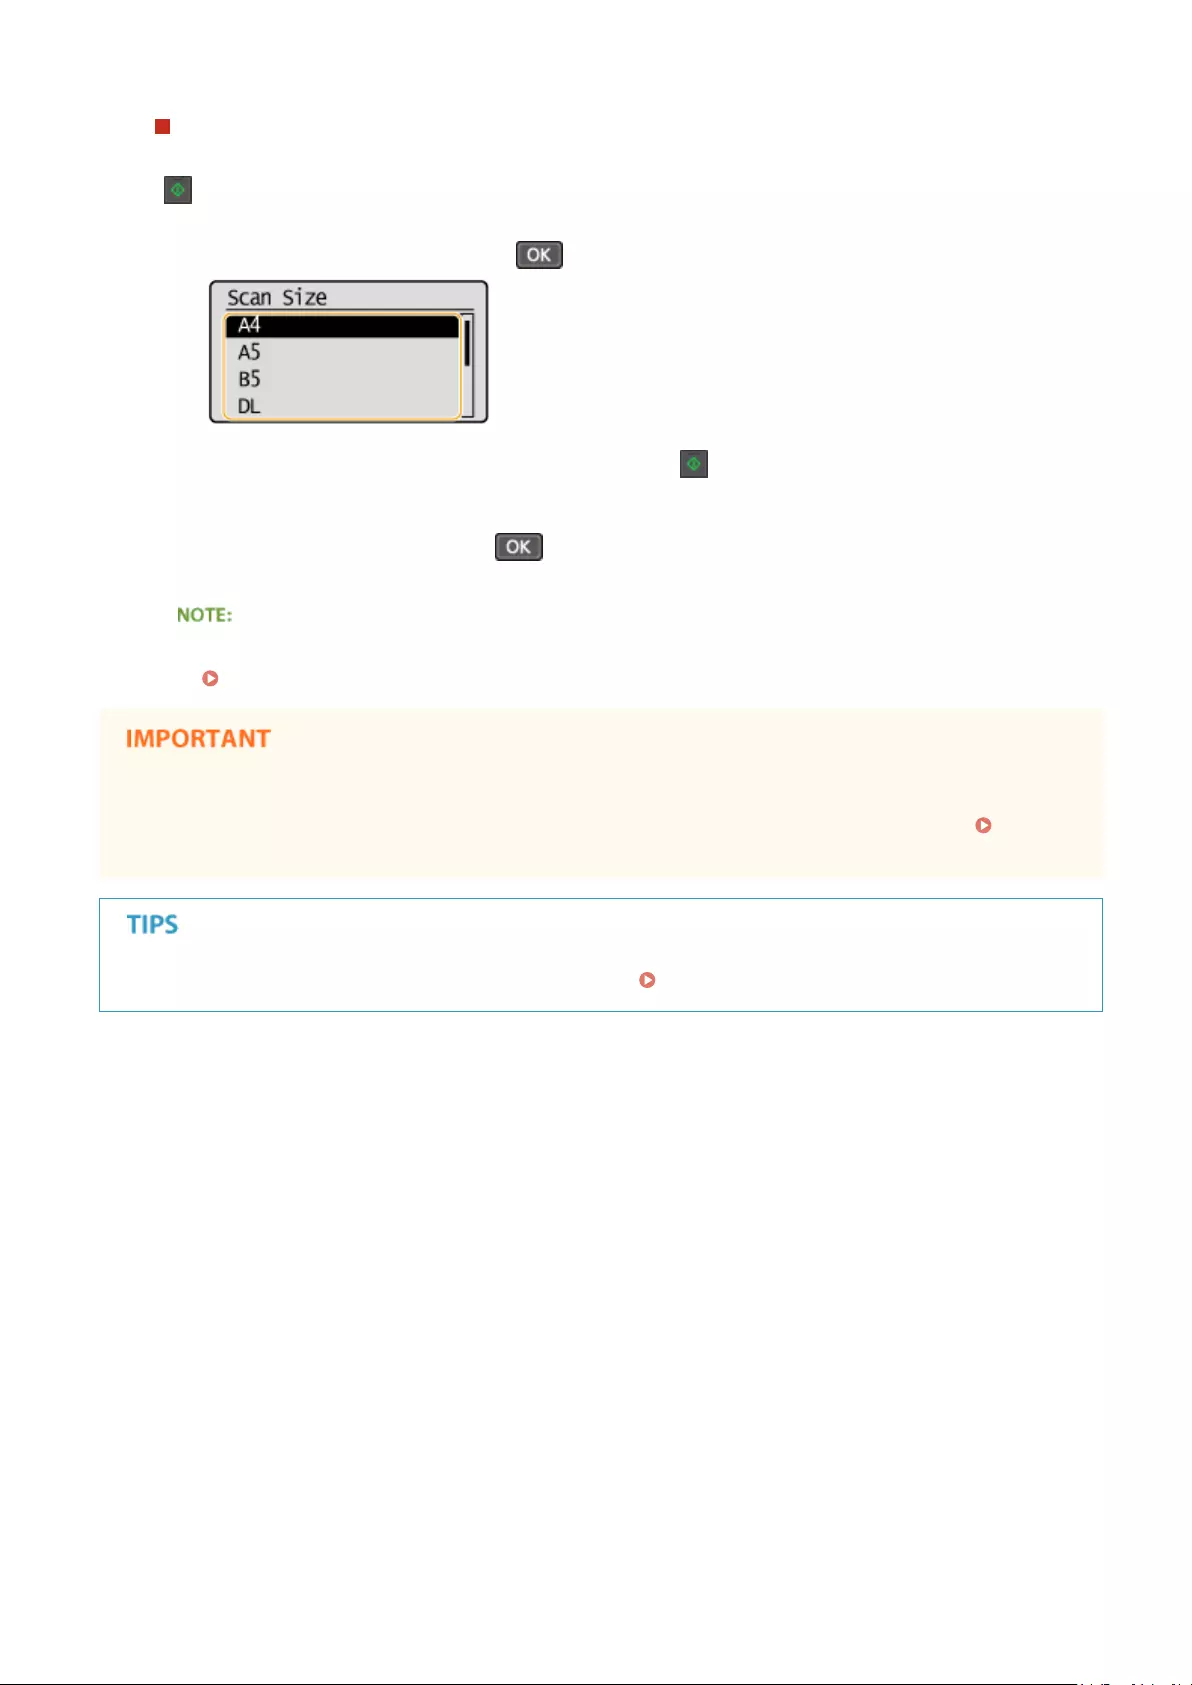
When placing documents on the platen glass in step 1
Depending on the copy settings you made, a screen for selecting the document size is displayed after you press
[ ]. Follow the procedure below.
1Select the document size, and press .
2Place the next document on the platen glass, and press .
●Repeat this step until you nish scanning the entire document.
3Select <Start Copying>, and press .
When the <Size/Settings Mismatch> message appears.
When an Error Message Appears(P. 347)
When copying documents with text or images that extend to the edges of the page
The edges of the document might not be copied. For more information about the scan margins, see Scan
Area(P. 418) .
If you always want to make copies with the same settings: Changing Default Settings(P. 83)
Copying
66

Canceling Copies
15A8-016
If you want to cancel copying immediately after pressing , select <Cancel> and press , or press on the
operation panel. You can also cancel copying after checking the copy status.
◼Canceling in the Screen That is Displayed While Copying
<Cancel> <Yes>
◼Press to Cancel
<Yes>
◼Use to Cancel
<Copy Job Status> <Cancel> <Yes>
Copying
67

<Cancel>
Cancels copying.
Copy details
The number of copies, settings, and other details are displayed. If you only want to check the details without
canceling copying, press to return to the copy main screen.
LINKS
Basic Copy Operations(P. 65)
Copying
68

Various Copy Settings
15A8-017
A variety of settings are available to suit your needs, such as when you want to save paper or make your documents
easier to read.
Enlarging or Reducing(P. 70) Selecting Document
Type(P. 71)
Adjusting Density(P. 72)
Adjusting Sharpness(P. 73) 2-Sided Copying (MF244dw)
(P. 75)
Copying Multiple Documents
onto One Sheet (2 on 1/4 on 1)
(P. 77)
Using the [Paper Save Copy]
Key (MF244dw / MF231)(P. 79)
Copying Both Sides of an ID
Card onto One Page(P. 81)
Collating Copies by Page(P. 82)
Copying
69

Enlarging or Reducing
15A8-018
You can enlarge or reduce copies by using a preset copy ratio such as <A5->A4>, or
by setting a custom copy ratio in increments of 1%.
(COPY/SCAN) <Copy Ratio> Select the copy ratio
<Custom Ratio>
Use / or the numeric keys to enter the copy ratio, and press . You can set any copy ratio from
25% to 400% in 1% increments.
Preset copy ratio
Select a copy ratio.
LINKS
Basic Copy Operations(P. 65)
Copying
70
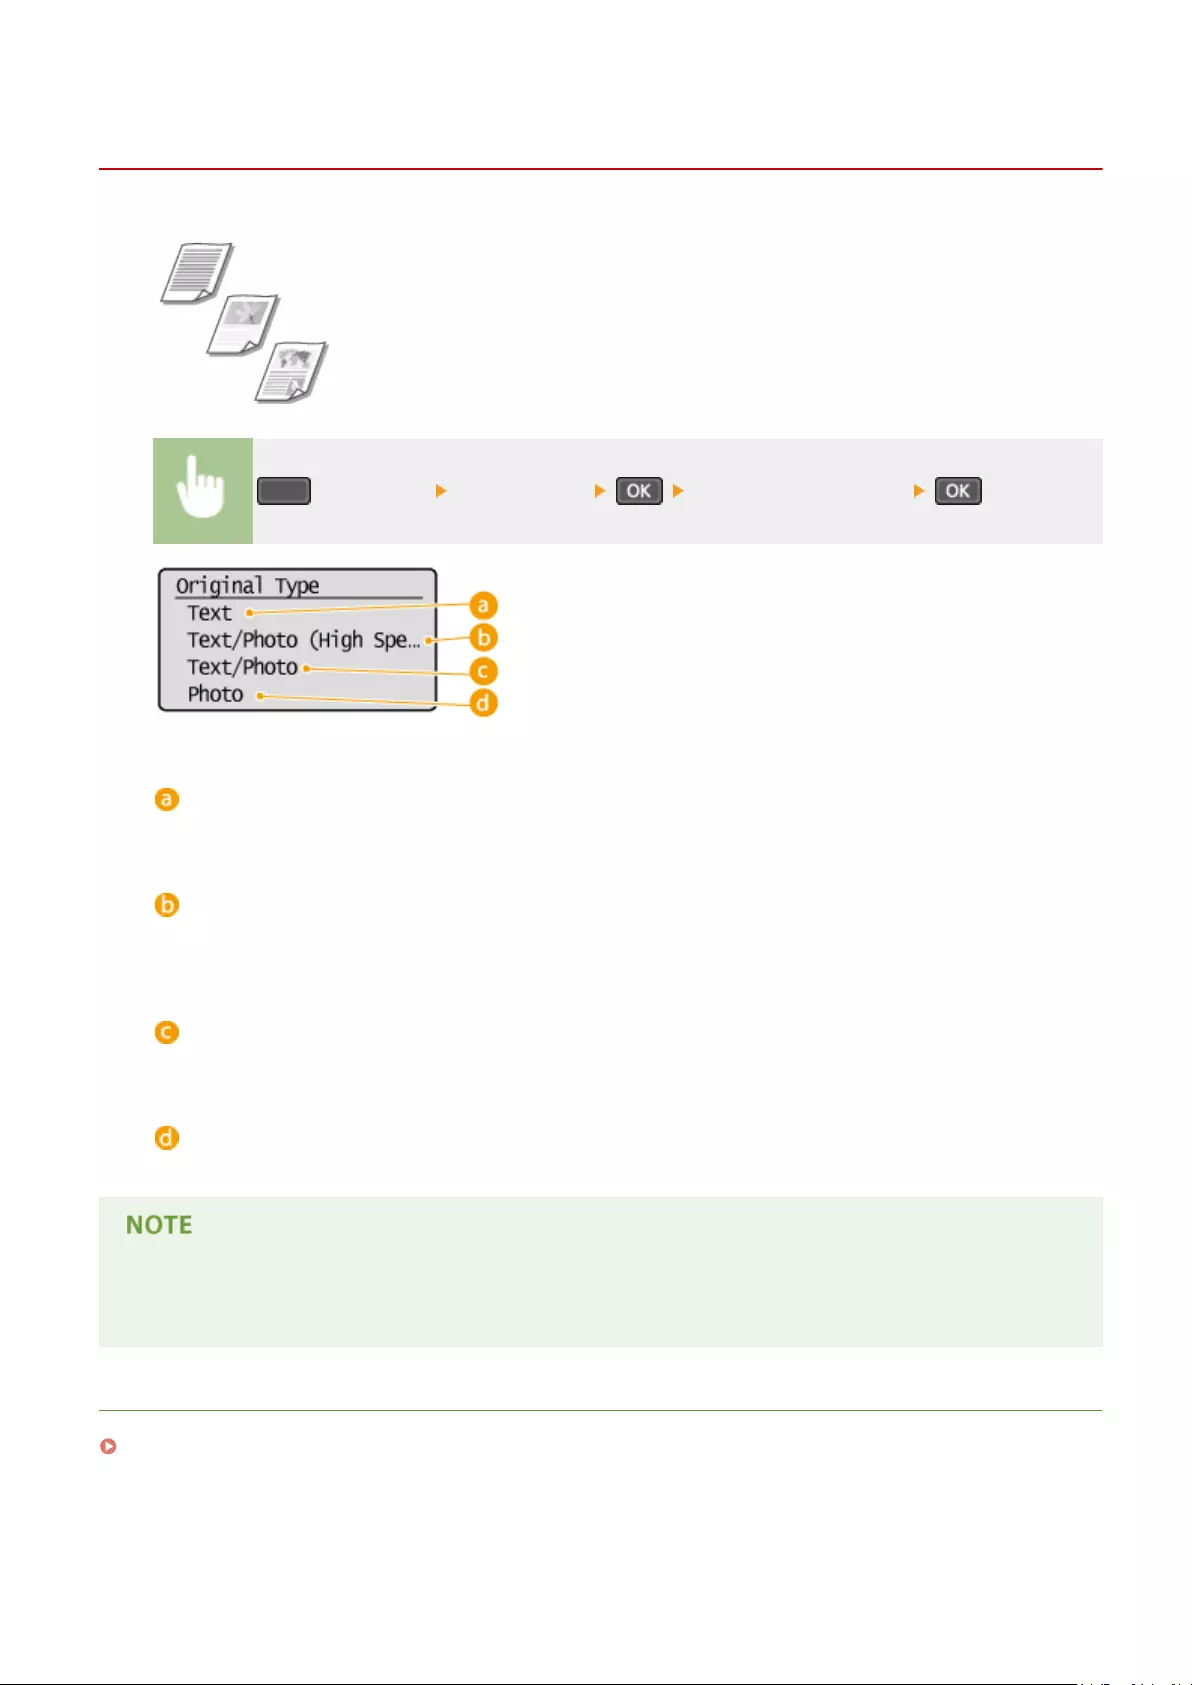
Selecting Document Type
15A8-019
You can select the optical image quality for the copy depending on the document
type, such as text-only documents, documents with charts and graphs, or magazine
photos.
(COPY/SCAN) <Original Type> Select the document type
<Text>
Suitable when copying documents that only contain text.
<Text/Photo (High Speed)>
Suitable when copying documents that contain both text and photos. Priority is given to speed over image
quality.
<Text/Photo>
Suitable when copying documents that contain both text and photos.
<Photo>
Suitable when copying documents that contain printed photos, such as magazines or pamphlets.
If <Text/Photo (High Speed)>, <Text/Photo>, or <Photo> is selected and <Density> is set to <Auto Density>, it
changes to Manual Density.
LINKS
Basic Copy Operations(P. 65)
Copying
71
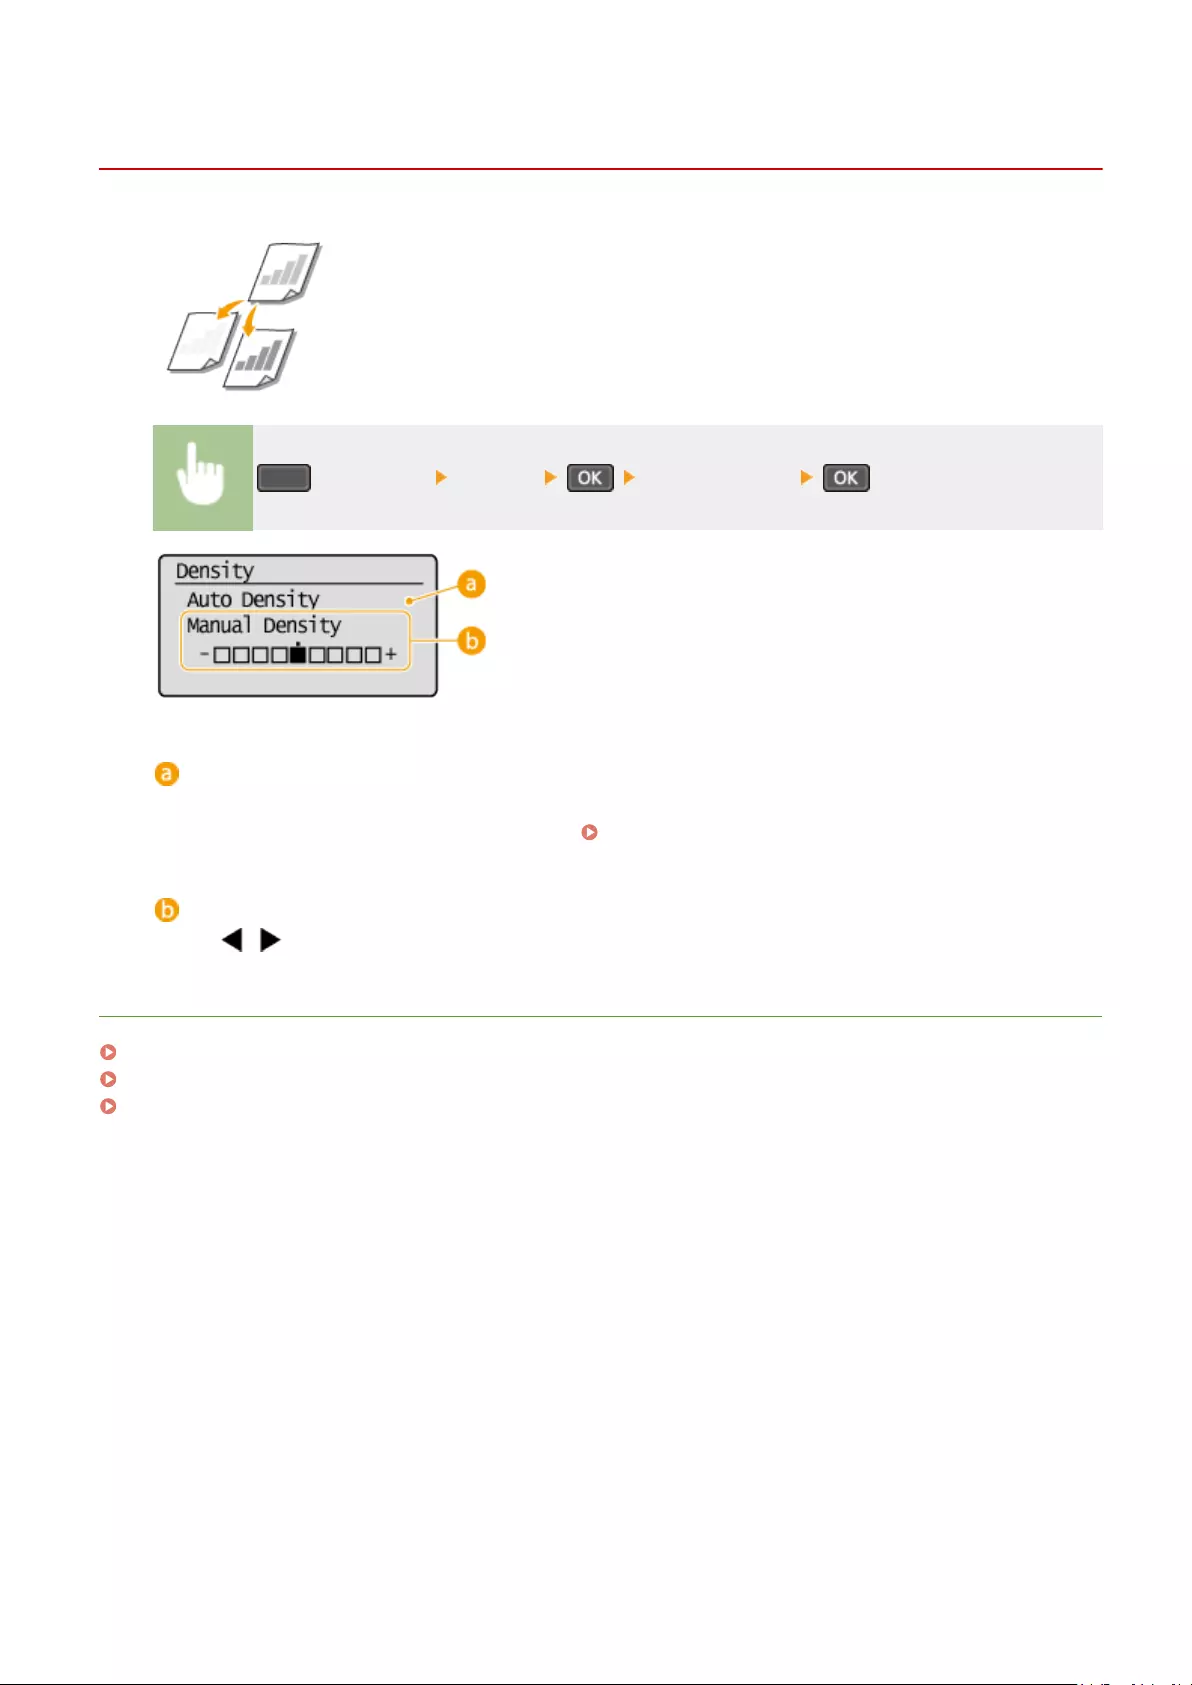
Adjusting Density
15A8-01A
You can adjust the density of the copy if the text or images in a document are too
light or dark. You can also automatically set an optimal density for a document.
(COPY/SCAN) <Density> Adjust the density
<Auto Density>
An optimal density for the document is automatically set.
<Original Type> is automatically set to <Text>. ( Selecting Document Type(P. 71) )
<Manual Density>
Use / to adjust the density.
LINKS
Basic Copy Operations(P. 65)
Adjusting Sharpness(P. 73)
Correct Density(P. 311)
Copying
72

Adjusting Sharpness
15A8-01C
You can adjust sharpness of the copied image. Increase the sharpness to sharpen
blurred text and lines, or decrease the sharpness to improve the appearance of
magazine photos.
(COPY/SCAN) <Sharpness> Adjust the sharpness
<->: Press
Decreases the sharpness, resulting in a softer image.
Example: If you want to improve the appearance of magazine photos
<+>: Press
Increases the image sharpness.
Example: If you want to sharpen text and lines written in pencil
Copying
73

LINKS
Basic Copy Operations(P. 65)
Adjusting Density(P. 72)
Copying
74

2-Sided Copying
15A8-01E
You can copy two pages of a document on both sides of the paper.
●<2-Sided> may not be available with some sizes and types of paper.
Paper(P. 419)
●<2-Sided> is not available when using <Paper Save Copy> or <ID Card Copy>.
Using enables you to combine 2-sided copying and <2 on 1>/<4 on 1>: Using the [Paper Save
Copy] Key (MF244dw / MF231)(P. 79)
(COPY/SCAN) <2-Sided> Select the type of 2-sided copying
Types of 2-sided copying
The illustration below shows the types of 2-sided copying.
1-Sided->2-Sided
<Original/Finishing Type>
Specify if you want to change the binding, such as when copying book-type documents in calendar-type
format.
1-Sided->2-Sided
●If you want to copy portrait-oriented documents in calendar-type format (short-edge binding)
Copying
75

<Original/Finishing Type> <1->2-Sided> <Portrait> <Calendar
Type>
●If you want to copy landscape-oriented documents in book-type format (short-edge binding)
<Original/Finishing Type> <1->2-Sided> <Landscape> <Book
Type>
LINKS
Basic Copy Operations(P. 65)
Copying Multiple Documents onto One Sheet (2 on 1/4 on 1)(P. 77)
Using the [Paper Save Copy] Key (MF244dw / MF231)(P. 79)
Copying
76
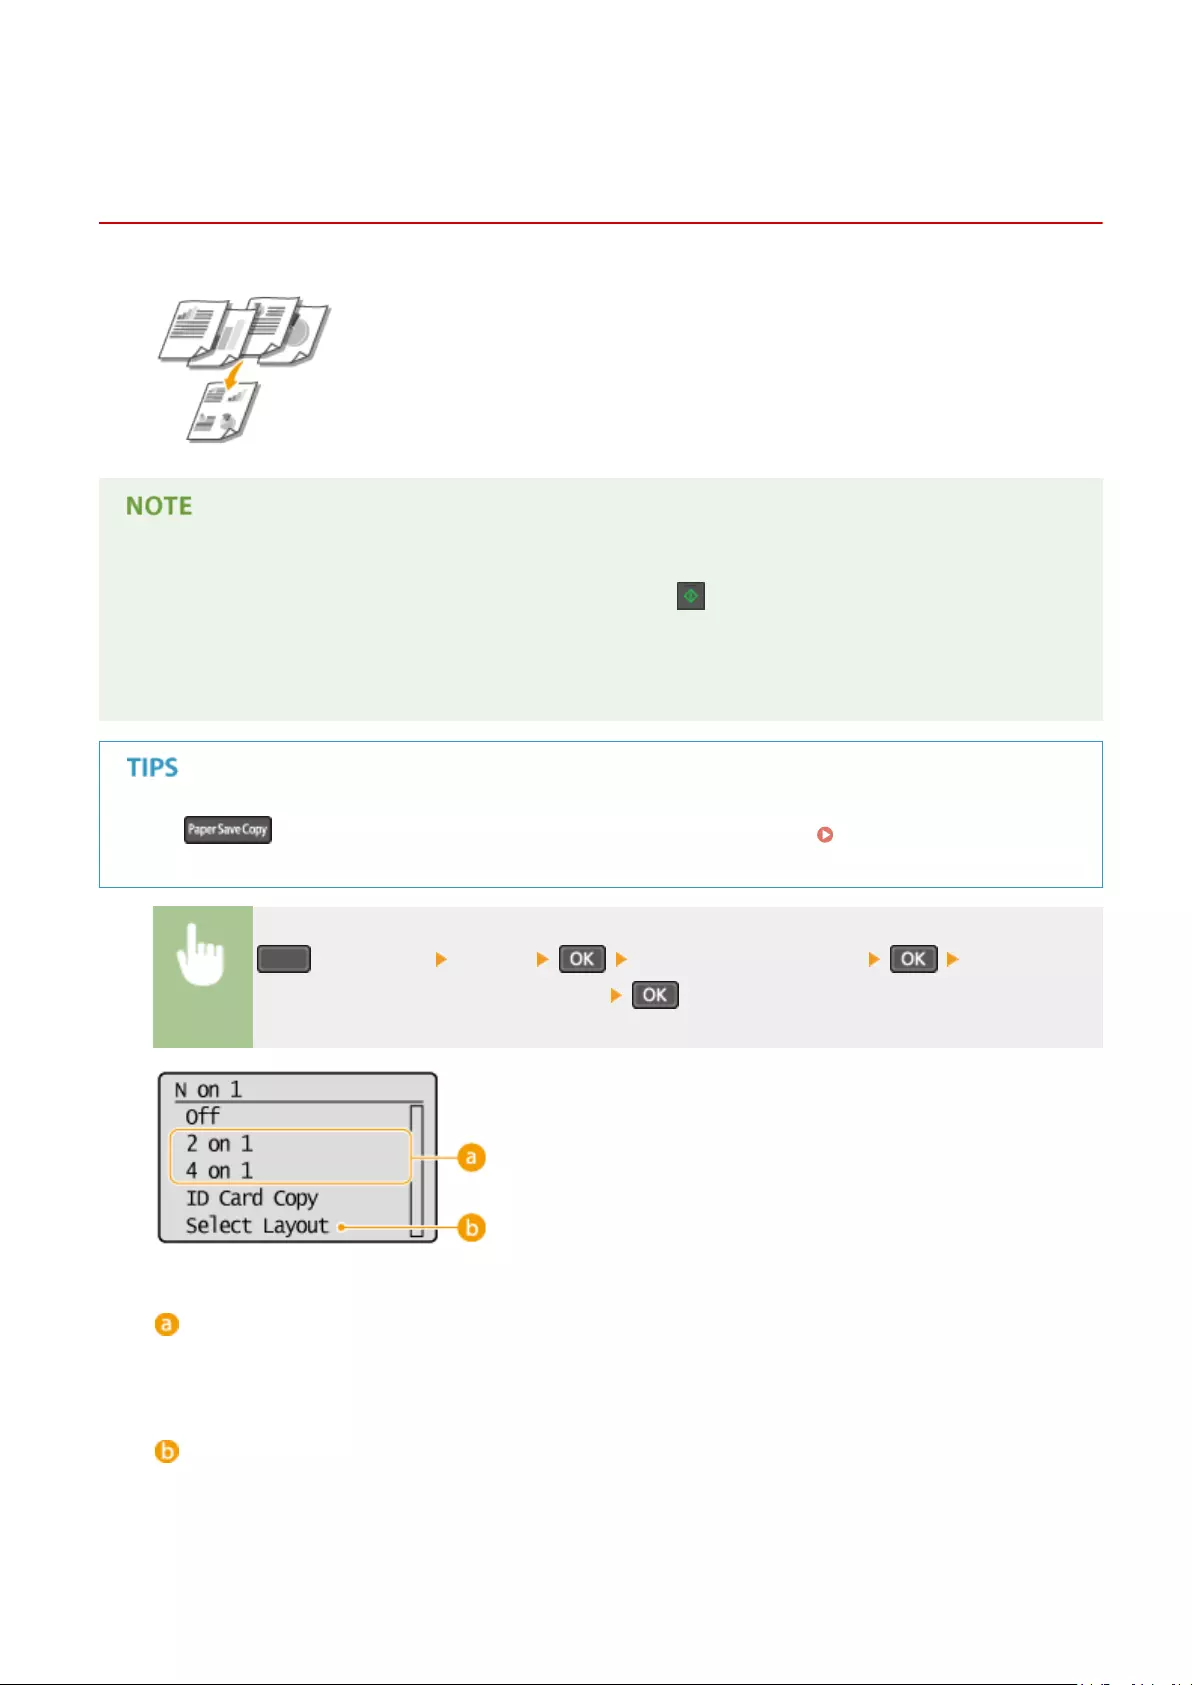
Copying Multiple Documents onto One Sheet (2 on 1/4
on 1)
15A8-01F
You can copy two or four documents onto a single sheet at a reduced size. This
decreases the number of pages, enabling you to save paper.
●Using <2 on 1>/<4 on 1> reduces the copy ratio automatically (the copy ratio is displayed on the screen). You
can increase or further reduce the copy ratio before pressing , but the edges of the document might not
be copied if you increase it.
●<2 on 1>/<4 on 1> is not available when using <Paper Save Copy> or <ID Card Copy>.
●When you copy multiple documents onto one page, margins may be created in the copied image.
Using enables you to combine 2-sided copying and <2 on 1>/<4 on 1> Using the [Paper Save
Copy] Key (MF244dw / MF231)(P. 79)
(COPY/SCAN) <N on 1> Select <2 on 1> or <4 on 1> Select the
document size on the <Scan Size> screen
<2 on 1>/<4 on 1>
Select <2 on 1> to copy two pages of documents onto a single sheet, or select <4 on 1> to copy four pages of
documents onto a single sheet.
<Select Layout>
Specify how to arrange the documents on the page.
Copying
77

LINKS
Basic Copy Operations(P. 65)
2-Sided Copying (MF244dw)(P. 75)
Using the [Paper Save Copy] Key (MF244dw / MF231)(P. 79)
Copying
78
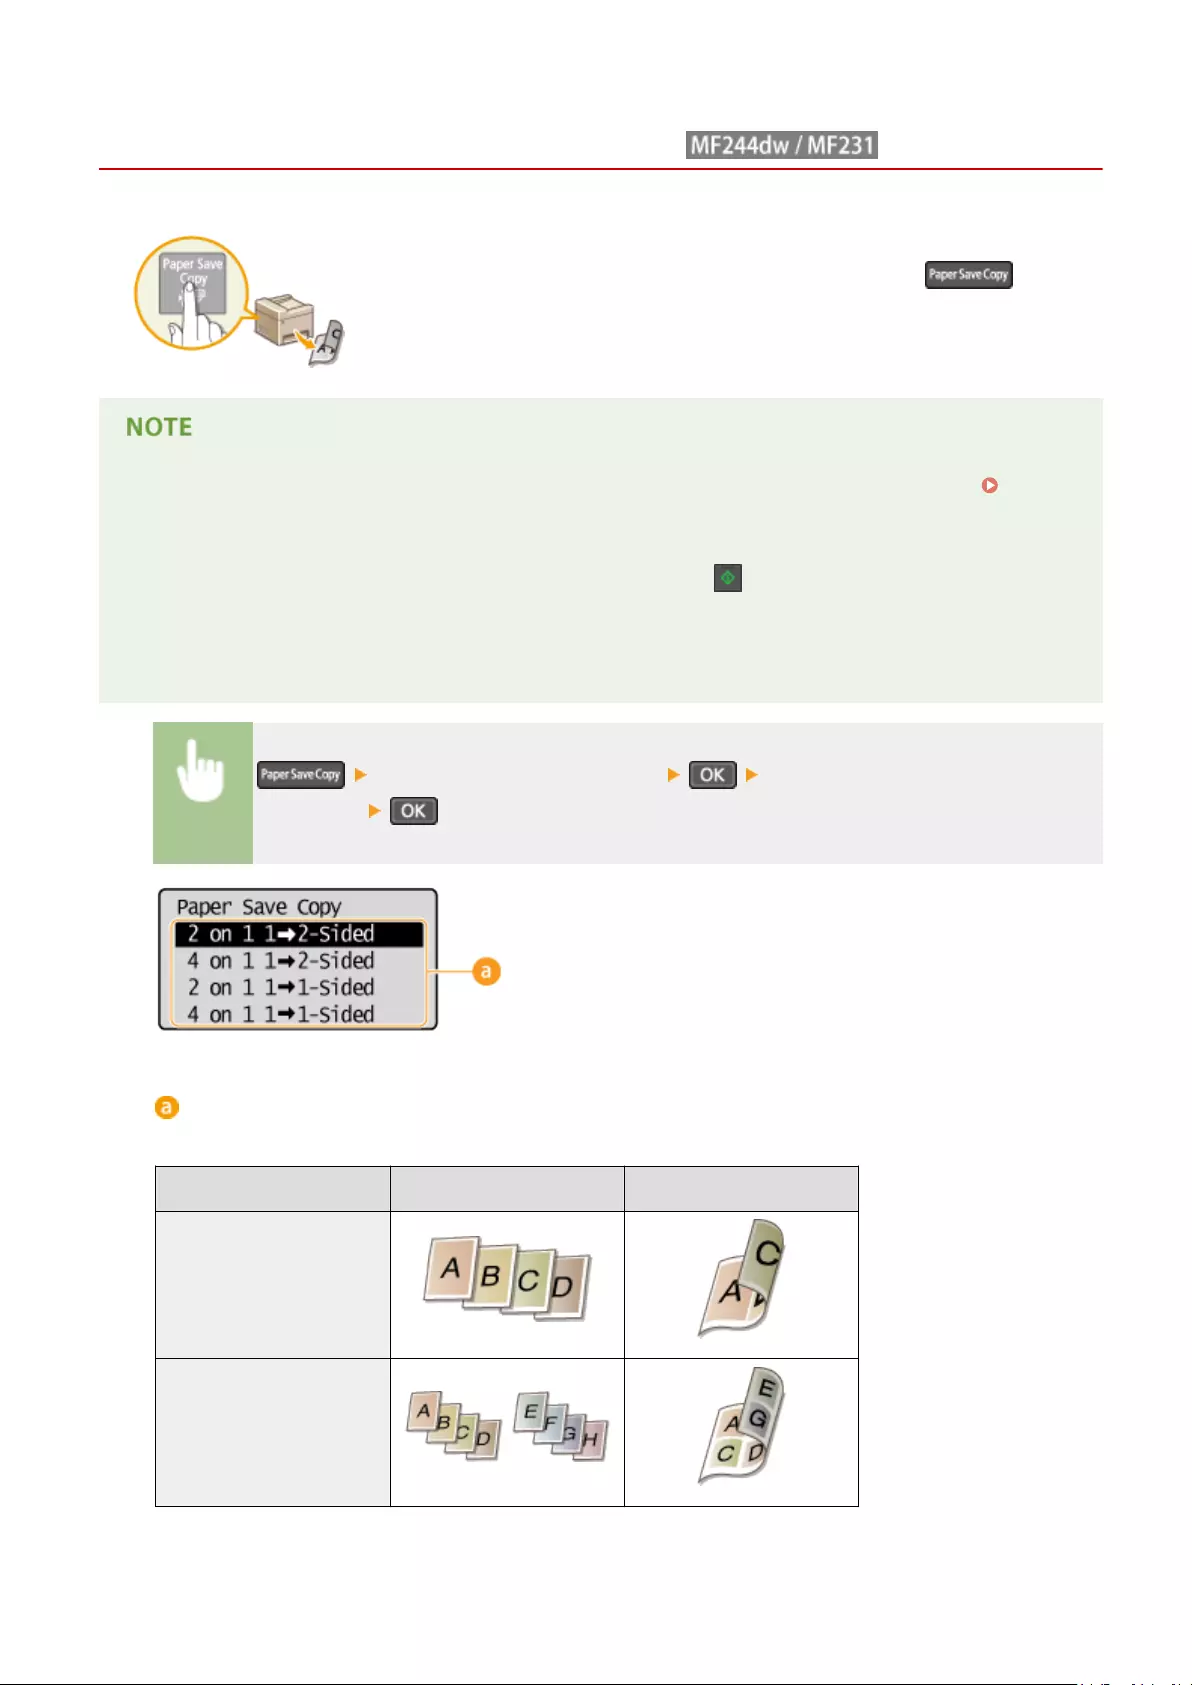
Using the [Paper Save Copy] Key
15A8-01H
You can use <2 on 1>/<4 on 1> to copy multiple documents onto a single sheet, and
<2-Sided> to copy the document onto both sides of a page. Using , which
combines these functions, makes it easier to save paper than when using the
functions separately.
●The 2-sided <Paper Save Copy> settings may not be available with some sizes and types of paper.
Paper(P. 419)
●Using <Paper Save Copy> reduces the copy ratio automatically (the copy ratio is displayed on the screen).
You can increase or further reduce the copy ratio before pressing , but the edges of the document might
not be copied if you increase it.
●<Paper Save Copy> is not available when using <2-Sided>, <2 on 1>/<4 on 1> or <ID Card Copy>.
●When you copy multiple documents onto one page, margins may be created in the copied image.
Select the paper save copy setting Select the document size on the <Scan
Size> screen
Paper save copy settings
Select one of four setting combinations.
Original (Portrait) Copy
<2 on 1 1->2-Sided>*
<4 on 1 1->2-Sided>*
Copying
79

<2 on 1 1->1-Sided>
<4 on 1 1->1-Sided>
* MF244dw Only
LINKS
Basic Copy Operations(P. 65)
2-Sided Copying (MF244dw)(P. 75)
Copying Multiple Documents onto One Sheet (2 on 1/4 on 1)(P. 77)
Copying
80

Copying Both Sides of an ID Card onto One Page
15A8-01J
You can use <ID Card Copy> to copy the front and back sides of a card onto the same side of
a page. This function is useful when copying a driver’s license or ID card.
●All regular paper sizes can be used except Letter (Government), Legal (Government), and Envelope.
●<Copy Ratio> is automatically set to <Copy Ratio: 100% (1:1)>.
●<ID Card Copy> is not available when using <Paper Save Copy>, <2-Sided>, or <2 on 1>/<4 on 1>.
Place the card (ID Card Copy) Turn the card over
How to place the card
●When the <Size/Settings Mismatch> message appears. When an Error Message Appears(P. 347)
LINKS
Basic Copy Operations(P. 65)
Copying
81

Collating Copies by Page
15A8-01K
When preparing multiple copies of multi-page documents, set <Collate> to <On> to
collate copies in sequential page order. This function is useful when preparing handouts
for meetings or presentations.
(COPY/SCAN) <Collate> <On>
<Off>
The copies are grouped by page and not collated. For example, if you are making three copies of a ve-page
document, the printouts will be arranged in the following page order: 1, 1, 1, 2, 2, 2, 3, 3, 3, 4, 4, 4, 5, 5, 5.
<On>
The copies are grouped into complete sets in sequential page order. For example, if you are making three
copies of a ve-page document, the printouts will be arranged in the following page order: 1, 2, 3, 4, 5, 1, 2, 3,
4, 5, 1, 2, 3, 4, 5.
LINKS
Basic Copy Operations(P. 65)
Copying
82

Changing Default Settings
15A8-01L
The default settings are the settings that are displayed whenever you turn ON the machine, or when you press . If
you change these default settings to match the operations that you perform frequently, you can eliminate the need to
congure the same settings every time you make copies.
<Copy Settings> <Change Default Settings> Select the
setting Change the default value of the selected item <Apply>
Settings
Select the item you want to set, and change the default value.
LINKS
Basic Copy Operations(P. 65)
Various Copy Settings(P. 69)
Copy Settings(P. 310)
Copying
83

Using the Machine as a Printer
Using the Machine as a Printer …………………………………………………………………………………………………. 85
Printing from a Computer ………………………………………………………………………………………………………………….. 86
Printing a Document …………………………………………………………………………………………………………………….. 87
Canceling Prints ……………………………………………………………………………………………………………………………. 91
Checking the Printing Status ………………………………………………………………………………………………………….. 94
Various Print Settings ……………………………………………………………………………………………………………………. 95
Enlarging or Reducing …………………………………………………………………………………………………………….. 97
Switching 1-Sided and 2-Sided Printing (MF244dw) ……………………………………………………………………… 99
Collating Printouts by Page …………………………………………………………………………………………………….. 101
Printing Multiple Pages onto One Sheet …………………………………………………………………………………… 103
Printing Posters ……………………………………………………………………………………………………………………. 105
Printing Booklet (MF244dw) ……………………………………………………………………………………………………. 107
Printing Borders …………………………………………………………………………………………………………………… 109
Printing Dates and Page Numbers …………………………………………………………………………………………… 110
Printing Watermarks ……………………………………………………………………………………………………………… 112
Selecting Document Type ………………………………………………………………………………………………………. 114
Saving Toner ………………………………………………………………………………………………………………………… 116
Combining and Printing Multiple Documents ……………………………………………………………………………. 118
Conguring Print Settings to Your Needs ……………………………………………………………………………………….. 122
Registering Combinations of Frequently Used Print Settings ……………………………………………………….. 123
Changing Default Settings ……………………………………………………………………………………………………… 125
Using the Machine as a Printer
84

Using the Machine as a Printer
15A8-01R
There are many ways to use the machine as a printer. You can print documents on your computer by using the printer
driver, or print from mobile devices. Make full use of the print functions to suit your needs.
◼Printing from a Computer
You can print a document made on your computer by using the printer driver. Printing from a Computer(P. 86)
Printing from Mobile Devices
●Linking mobile devices such as smartphones or tablets to this machine provides a quick and easy way to
print photos and web pages. The machine also supports Google Cloud Print™.
Can Be Used Conveniently with a Mobile Device (MF244dw / MF232w)(P. 142)
Using Google Cloud Print(P. 159)
Using the Machine as a Printer
85

Printing from a Computer
15A8-01S
You can print a document made with an application on your computer by using the printer driver. There are useful
settings on the printer driver such as enlarging/reducing and 2-sided printing, that enable you to print your
documents in various ways. Before you can use this function, you need to complete some procedures, such as
installing the printer driver on your computer. For more information, see «MF Driver Installation Guide.»
About the Printer Driver Help
Clicking [Help] on the printer driver screen displays the Help screen. On this screen, you can see the detailed
descriptions that are not in the User’s Guide.
●If you are a Mac OS user, see Printer Driver’s User’s Guide for installing the printer drivers and Printer
Driver’s Help for using print functions.
●Depending on the operating system and the type or version of the printer driver you are using, the printer
driver screens in this manual may differ from your screens.
●If you are using the MF244dw, you can use the PCL6 printer driver as well as the UFRII LT printer driver. The
available print settings vary depending on the printer driver. For more information, click [Help] on each
printer driver screen.
Using the Machine as a Printer
86

Printing a Document
15A8-01U
This section describes how to print a document on your computer by using the printer driver.
Paper settings on the machine
●Normally, it is necessary to specify the paper size and type for the paper loaded in each paper source before
proceeding to printing. Specifying Paper Size and Type(P. 53)
1Open a document in an application and display the print dialog box.
●How to display the print dialog box differs for each application. For more information, see the instruction
manual for the application you are using.
2Select the printer driver for this machine, and click [Preferences] or [Properties].
●The screen that is displayed differs depending on the application you are using.
3Specify the paper size.
[Page Size]
Select the size of a document made in the application.
Using the Machine as a Printer
87

[Output Size]
Select the size of paper on which the document will be actually printed. If the selected size differs from the
one specied in [Page Size], the document is printed enlarged/reduced automatically according to the
selected size. Enlarging or Reducing(P. 97)
Clickable UI
●You can easily specify the page layout, binding position, etc. intuitively on the preview image. For more
information, click [Help] on the printer driver screen.
4In the [Page Setup] tab, select the paper type.
●Set [Paper Type] according to the type of paper to be used in the printing. Loading Paper(P. 42)
5Specify other print settings as necessary. Various Print Settings(P. 95)
●You can register the settings you specied in this step as a «prole» and use the prole whenever you
print. You can eliminate the need to specify the same settings every time you print. Registering
Combinations of Frequently Used Print Settings(P. 123)
6Click [OK].
Using the Machine as a Printer
88

7Click [Print] or [OK].
➠Printing starts. On some applications, a screen like shown below appears.
●To cancel printing, click [Cancel] when the screen shown above is displayed. After the screen disappears
or if the screen is not displayed, you can cancel printing in other ways. Canceling Prints(P. 91)
When printing from the Windows Store app in Windows 8/10/Server 2012
Display the charms on the right side of the screen and use the procedure shown below.
Windows 8/Server 2012
Tap or click [Devices] the printer driver for this machine [Print].
Windows 8.1/Server 2012 R2
Tap or click [Devices] [Print] the printer driver for this machine [Print].
Windows 10
Select [Print] in the application menu.
●If you print using this method, only a limited number of print settings are available.
●If the message [The printer requires your attention. Go to the desktop to take care of it.] is displayed, go to
the desktop and follow the instructions in the displayed dialog box. This message appears when the
machine is set to display the user name during printing and similar instances.
LINKS
Using the Machine as a Printer
89

Managing Documents and Checking the Machine Status(P. 278)
Using the Machine as a Printer
90
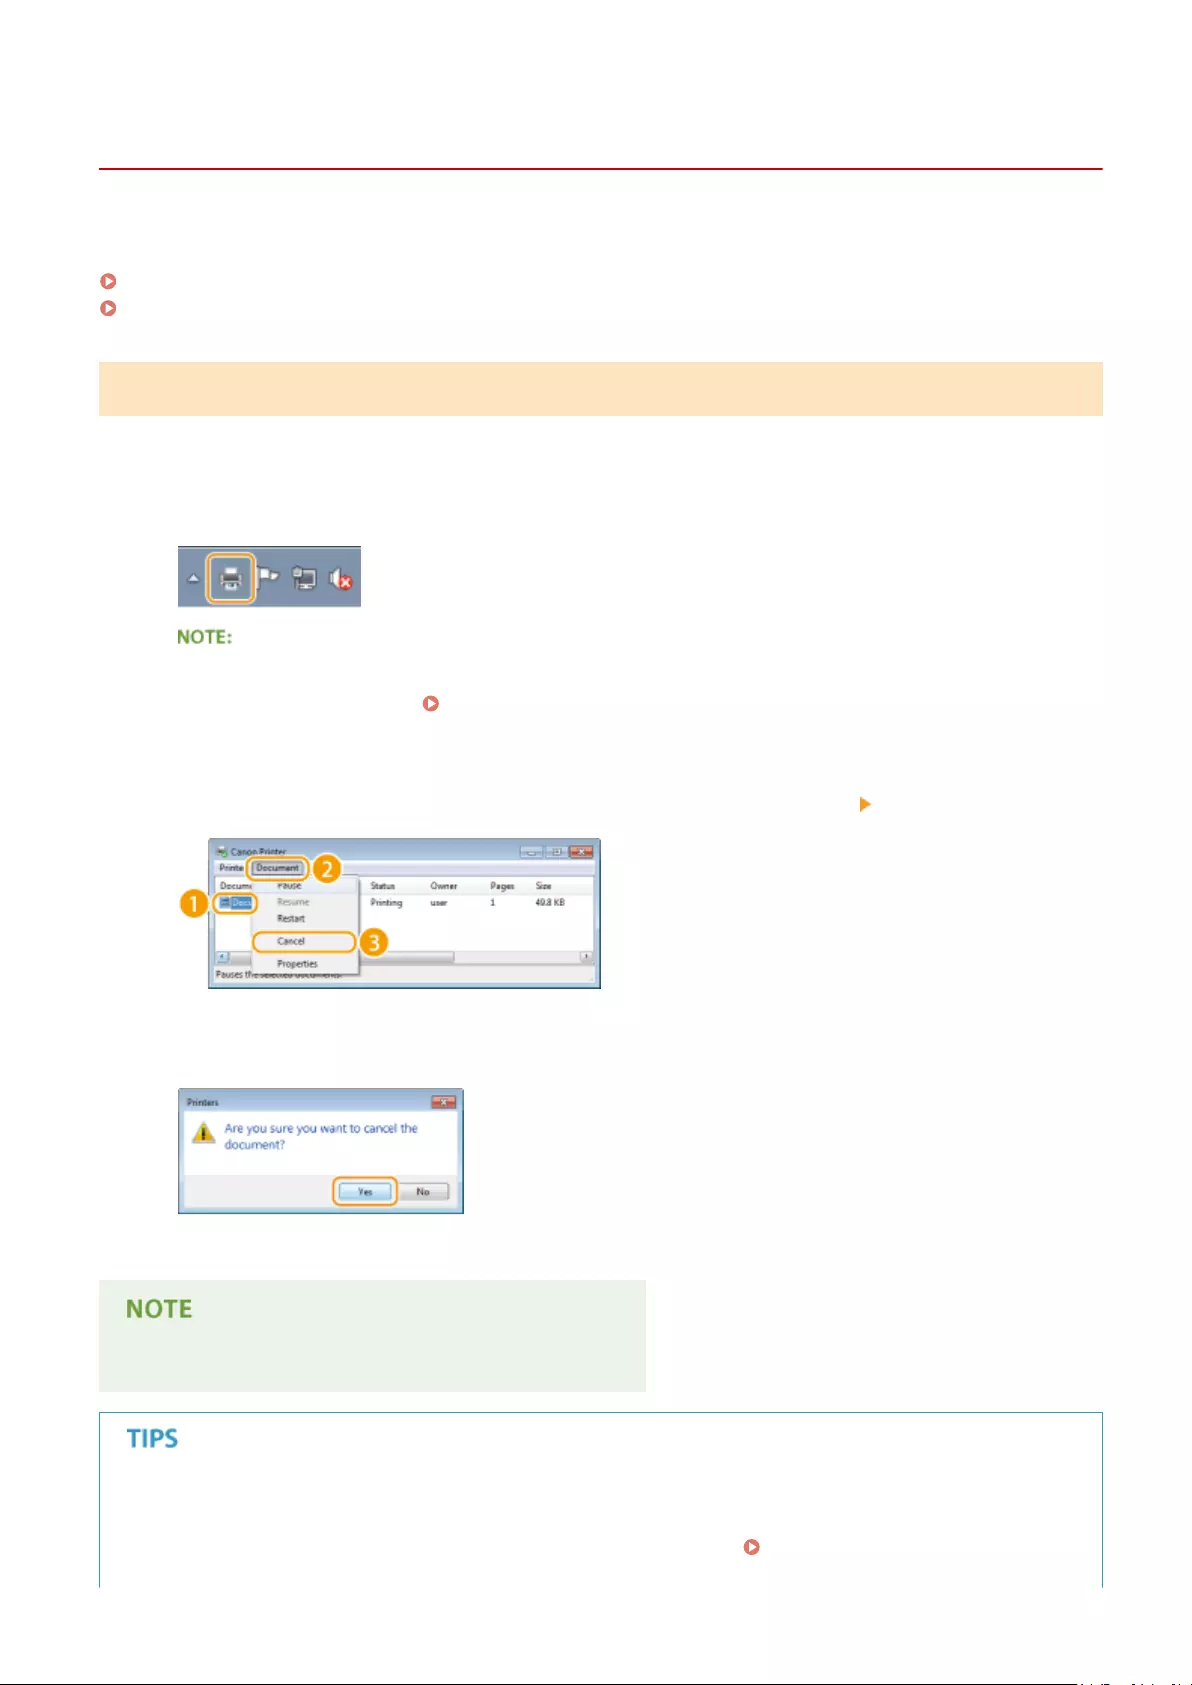
Canceling Prints
15A8-01W
You can cancel printing from your computer or on the operation panel of the machine.
From a Computer(P. 91)
From the Operation Panel(P. 92)
From a Computer
You can cancel printing from the printer icon displayed on the system tray on the desktop.
1Double-click the printer icon.
When the printer icon is not displayed
●Open the printer folder ( Displaying the Printer Folder(P. 434) ), right-click the printer driver icon for
this machine, and click [See what’s printing] (or double-click the icon of the printer driver for the machine).
2Select the document you want to cancel, and click [Document] [Cancel].
3Click [Yes].
➠Printing of the selected document is canceled.
●Several pages may be output after you cancel printing.
Canceling from the Remote UI
●You can cancel printing from the [Job Status] page on the Remote UI: Checking Current Status of Print
Documents(P. 278)
Using the Machine as a Printer
91

Canceling from an application
●On some applications, a screen like shown below appears. You can cancel printing by clicking [Cancel].
From the Operation Panel
Cancel printing using or .
◼Press to Cancel
<Yes>
If the Screen Displays a List of Documents When is Pressed
Select cancel job <Yes>
◼Check the Print Job Status before Canceling
<Print Job Status> Select the document on the <Print Job Status> screen
<Cancel> <Yes>
Using the Machine as a Printer
92

●Several pages may be output after you cancel printing.
LINKS
Printing a Document(P. 87)
Checking the Printing Status(P. 94)
Using the Machine as a Printer
93
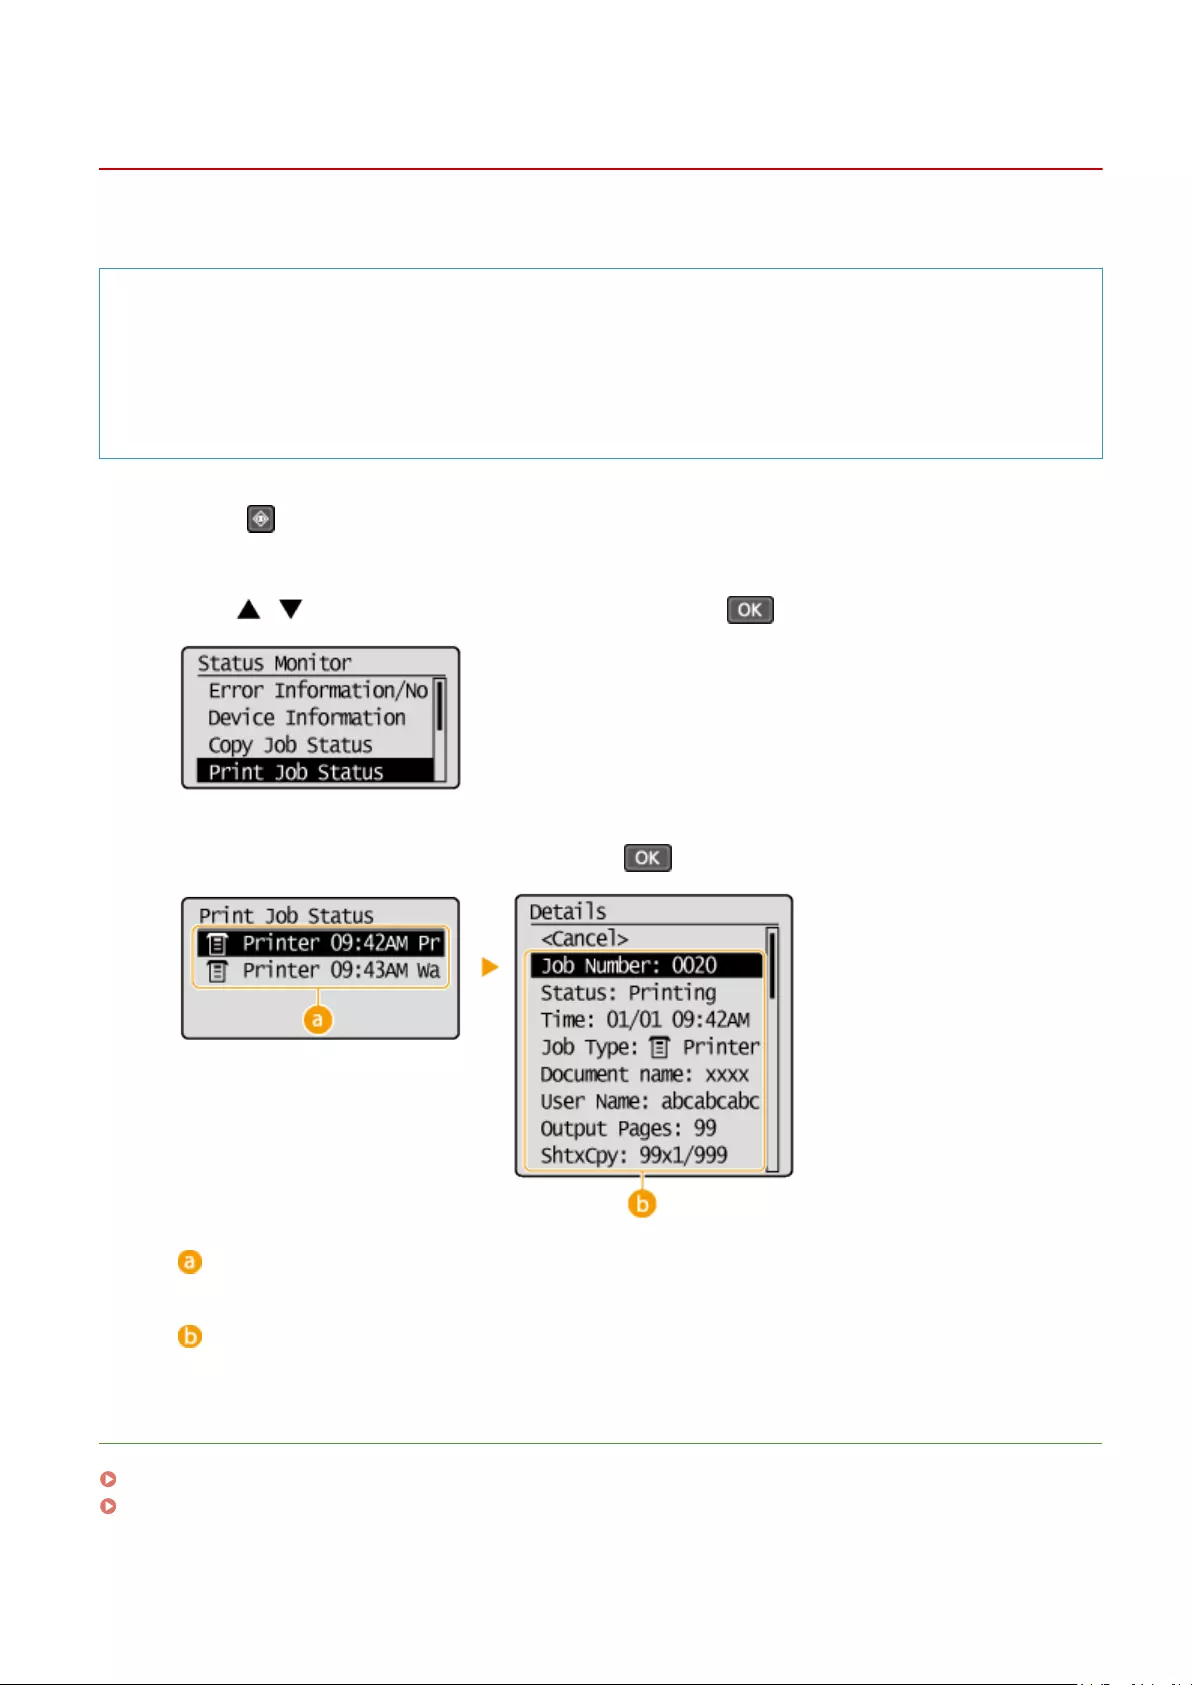
Checking the Printing Status
15A8-01X
You can check the current print statuses.
Useful in the Following Cases
●When your documents are not printed for a long time, you may want to see the waiting list of the
documents waiting to be printed.
●When you cannot nd your printouts that you thought had been printed, you may want to see whether an
error has occurred.
1Press .
2Use / to select <Print Job Status>, and press .
3Select the document to check, and press .
<Print Job Status>
Displays a list of the documents that are being processed or are waiting to be processed.
<Details>
Displays detailed information about the document selected from the list.
LINKS
Printing a Document(P. 87)
Canceling Prints(P. 91)
Using the Machine as a Printer
94

Various Print Settings
15A8-01Y
There are a variety of settings to suit your needs, such as Enlarged/Reduced and 2-sided Printing.
Enlarging or Reducing(P. 97) Switching 1-Sided and 2-Sided
Printing (MF244dw)(P. 99)
Collating Printouts by
Page(P. 101)
Printing Multiple Pages onto
One Sheet(P. 103)
Printing Posters(P. 105) Printing Booklet (MF244dw)
(P. 107)
Printing Borders(P. 109) Printing Dates and Page
Numbers(P. 110)
Printing Watermarks(P. 112)
Using the Machine as a Printer
95

Selecting Document Type(P. 114) Saving Toner(P. 116) Combining and Printing Multiple
Documents(P. 118)
Using the Machine as a Printer
96

Enlarging or Reducing
15A8-020
You can make enlarged or reduced printouts by using a preset print ratio, such as A5
to A4, or a custom print ratio that you set in increments of 1%.
Setting Print Ratio by Specifying the Original Document and Paper Size (Preset Ratio)
The print ratio is automatically set based on the document and paper size you have specied.
[Basic Settings] tab Select the document size in [Page Size] Select the paper size in [Output
Size] [OK]
Specifying Print Ratio in Increments of 1%
[Basic Settings] tab Select the [Manual Scaling] check box Enter the print ratio in [Scaling]
[OK]
Using the Machine as a Printer
97

●Depending on the selected paper size, you may not be able to set the optimum enlarging/reducing ratio. For
example, there may be large blank spaces on your printout, or portions of the document that are missing.
●The enlarging/reducing settings on some applications have priority over those on the printer driver.
LINKS
Printing a Document(P. 87)
Using the Machine as a Printer
98

Switching 1-Sided and 2-Sided Printing
15A8-021
You can make both 1-sided and 2-sided printouts. The default setting is [2-sided Printing].
Change the setting as necessary.
●2-sided printing may not be available with some sizes and types of paper. Paper(P. 419)
[Basic Settings] tab Select [1-sided Printing] or [2-sided Printing] in [1-sided/2-sided/Booklet
Printing] Select the position to bind in [Binding Location] [OK]
[1-sided/2-sided/Booklet Printing]
Select [1-sided Printing] or [2-sided Printing].
●For [Booklet Printing], see Printing Booklet (MF244dw)(P. 107) .
[Binding Location]
Specify the position to bind the printouts with a binding tool such as a stapler. Printing orientation will be
changed depending on the specied binding position. To specify the margin width for the binding position,
click [Gutter].
[Long Edge [Left]]
Prints images in such a way that the printed pages are opened horizontally when bound.
Using the Machine as a Printer
99

[Short Edge [Top]]
Prints images in such a way that the printed pages are opened vertically when bound.
[Gutter]
Specify a binding margin.
LINKS
Printing a Document(P. 87)
Printing Multiple Pages onto One Sheet(P. 103)
Printing Booklet (MF244dw)(P. 107)
Using the Machine as a Printer
100

Collating Printouts by Page
15A8-022
When printing copies of multi-page documents, select [Collate] to print complete sets in
sequential page order. This function is useful when preparing handouts for meetings or
presentations.
[Basic Settings] tab Select [Collate] or [Group] in [Collate/Group] [OK]
[Collate/Group]
Specify the sorting method of the printouts when printing multiple-page documents.
[Collate]
The printouts are grouped into complete sets in sequential page order. For example, if you are printing
three copies of a ve-page document, the printouts will be arranged in the following page order: 1, 2, 3, 4,
5, 1, 2, 3, 4, 5, 1, 2, 3, 4, 5.
[Group]
The printouts are not collated. For example, if you are printing three copies of a ve-page document, the
printouts will be arranged in the following page order: 1, 1, 1, 2, 2, 2, 3, 3, 3, 4, 4, 4, 5, 5, 5.
Using the Machine as a Printer
101

●If you select [Off], whether the printouts are collated or not depends on the setting made on the
application.
LINKS
Printing a Document(P. 87)
Using the Machine as a Printer
102

Printing Multiple Pages onto One Sheet
15A8-023
You can print multiple pages onto a single sheet. For example, you can print four or
nine pages onto a single sheet by using [4 on 1] or [9 on 1]. Use this function if you
want to save paper or to view your document in thumbnails.
●To save more paper, combine this setting with 2-sided printing. Switching 1-Sided and 2-Sided Printing
(MF244dw)(P. 99)
[Basic Settings] tab In [Page Layout], select the number of pages to print onto a single sheet In
[Page Order], select the page distribution layout [OK]
[Page Layout]
Select the number of pages to print onto a single sheet from [1 on 1] to [16 on 1]. For example, to print 16
pages onto a single sheet, select [16 on 1].
●For options such as [Poster [2 x 2]], see Printing Posters(P. 105) .
●Printing may not be performed properly if you combine this setting with an application setting for
collating printouts.
Using the Machine as a Printer
103

[Page Order]
Select a page distribution layout. For example, if you select [Across from Left], the rst page is printed on the
top left, and then the rest of the pages are arranged rightward.
LINKS
Printing a Document(P. 87)
Switching 1-Sided and 2-Sided Printing (MF244dw)(P. 99)
Using the Machine as a Printer
104

Printing Posters
15A8-024
You can print one page of a document onto multiple pages. For example, if you make
a one-page A4-size document nine times larger, you will have a poster 3×3 A4 size
sheets large after you print the document and paste it together.
[Basic Settings] tab In [Page Layout], select the dimensions of your poster (for example, [Poster [2
x 2]]) [OK]
[Page Layout]
Select the layout for poster printing. There are four size settings:[Poster [1 x 2]], [Poster [2 x 2]], [Poster [3 x
3]], and [Poster [4 x 4]].
●Poster size settings cannot be selected when 2-sided printing is enabled. Select [1-sided Printing] in [1-
sided/2-sided/Booklet Printing], and then select a poster size setting.
[Poster Details]
The screen below appears.
Using the Machine as a Printer
105
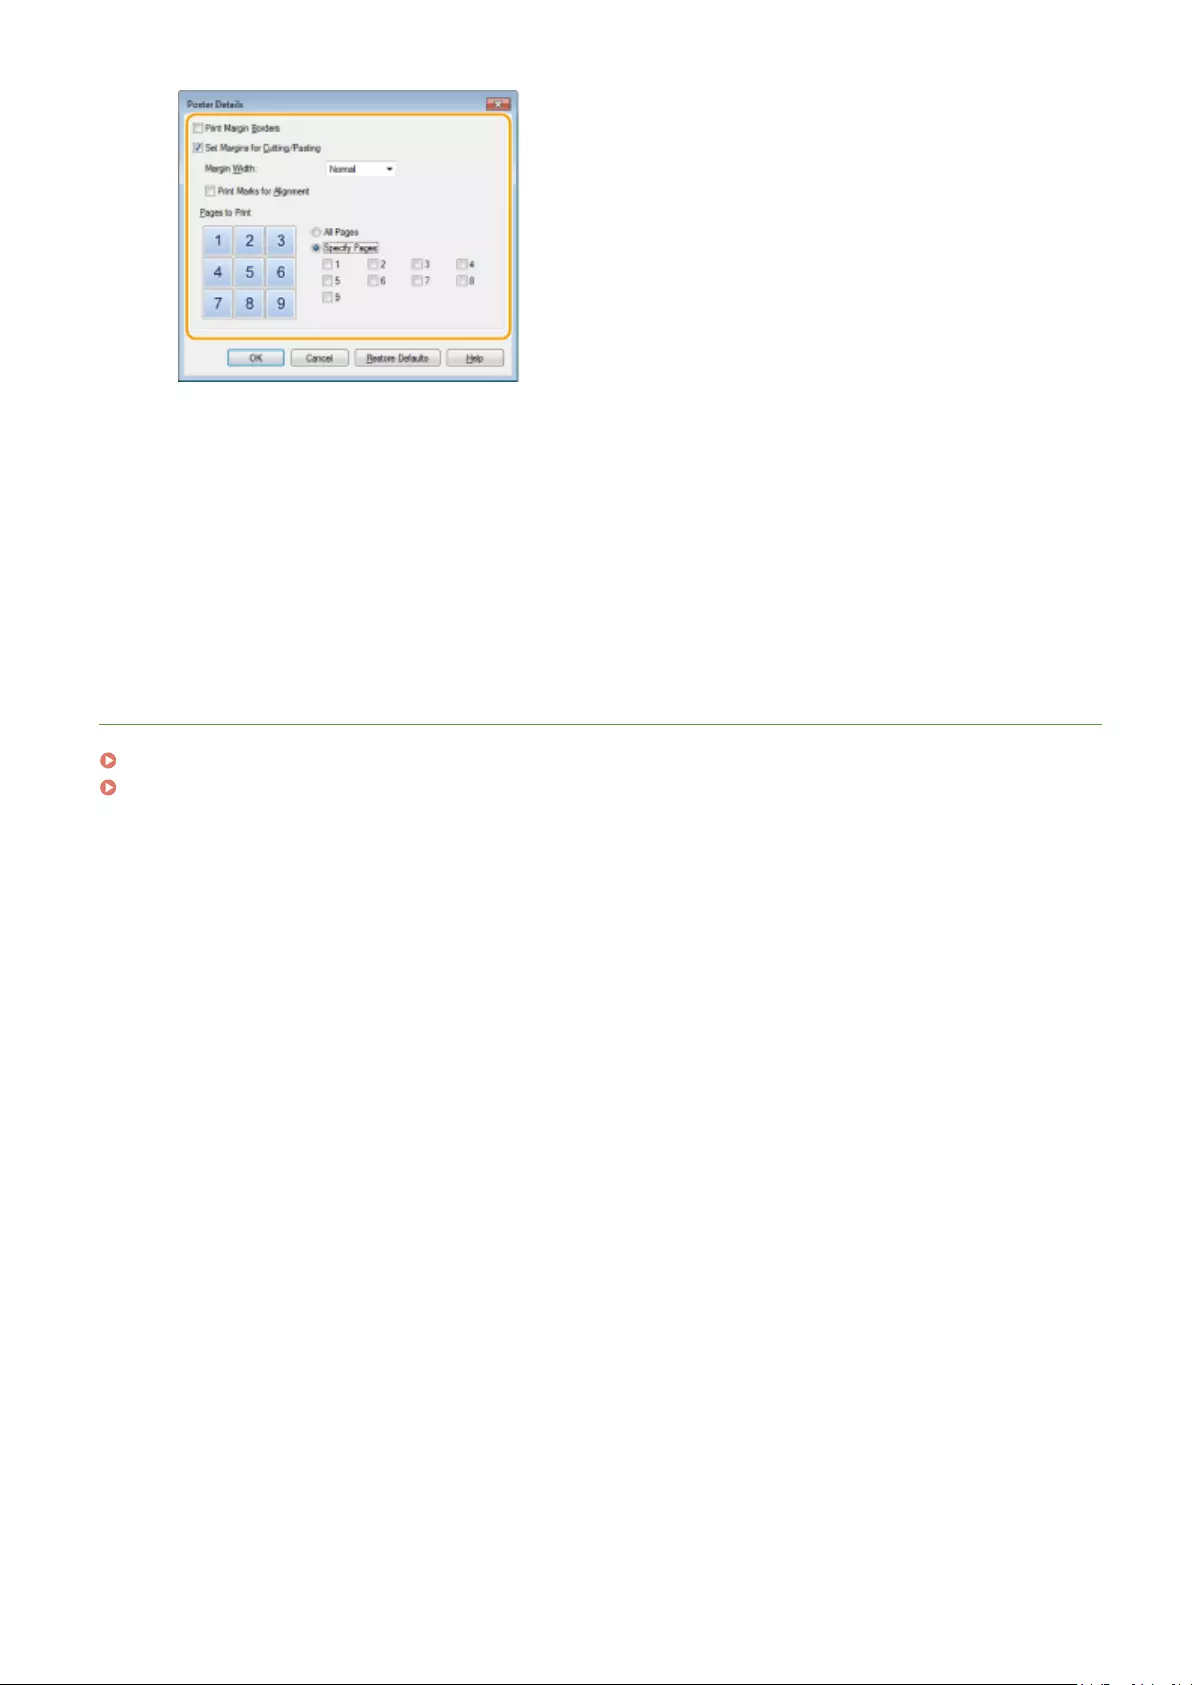
[Print Margin Borders]
Borders are printed on each page. The borders are helpful if you want to paste the printouts together or
cut off the margins.
[Set Margins for Cutting/Pasting]
Prints margins to allow cutting or pasting. To print markings so that margins can be easily identied,
select the [Print Marks for Alignment] check box.
[Pages to Print]
●[All Pages]: Carry out poster printing for all pages.
●[Specify Pages]: Carry out poster printing only for specied pages.
LINKS
Printing a Document(P. 87)
Enlarging or Reducing(P. 97)
Using the Machine as a Printer
106
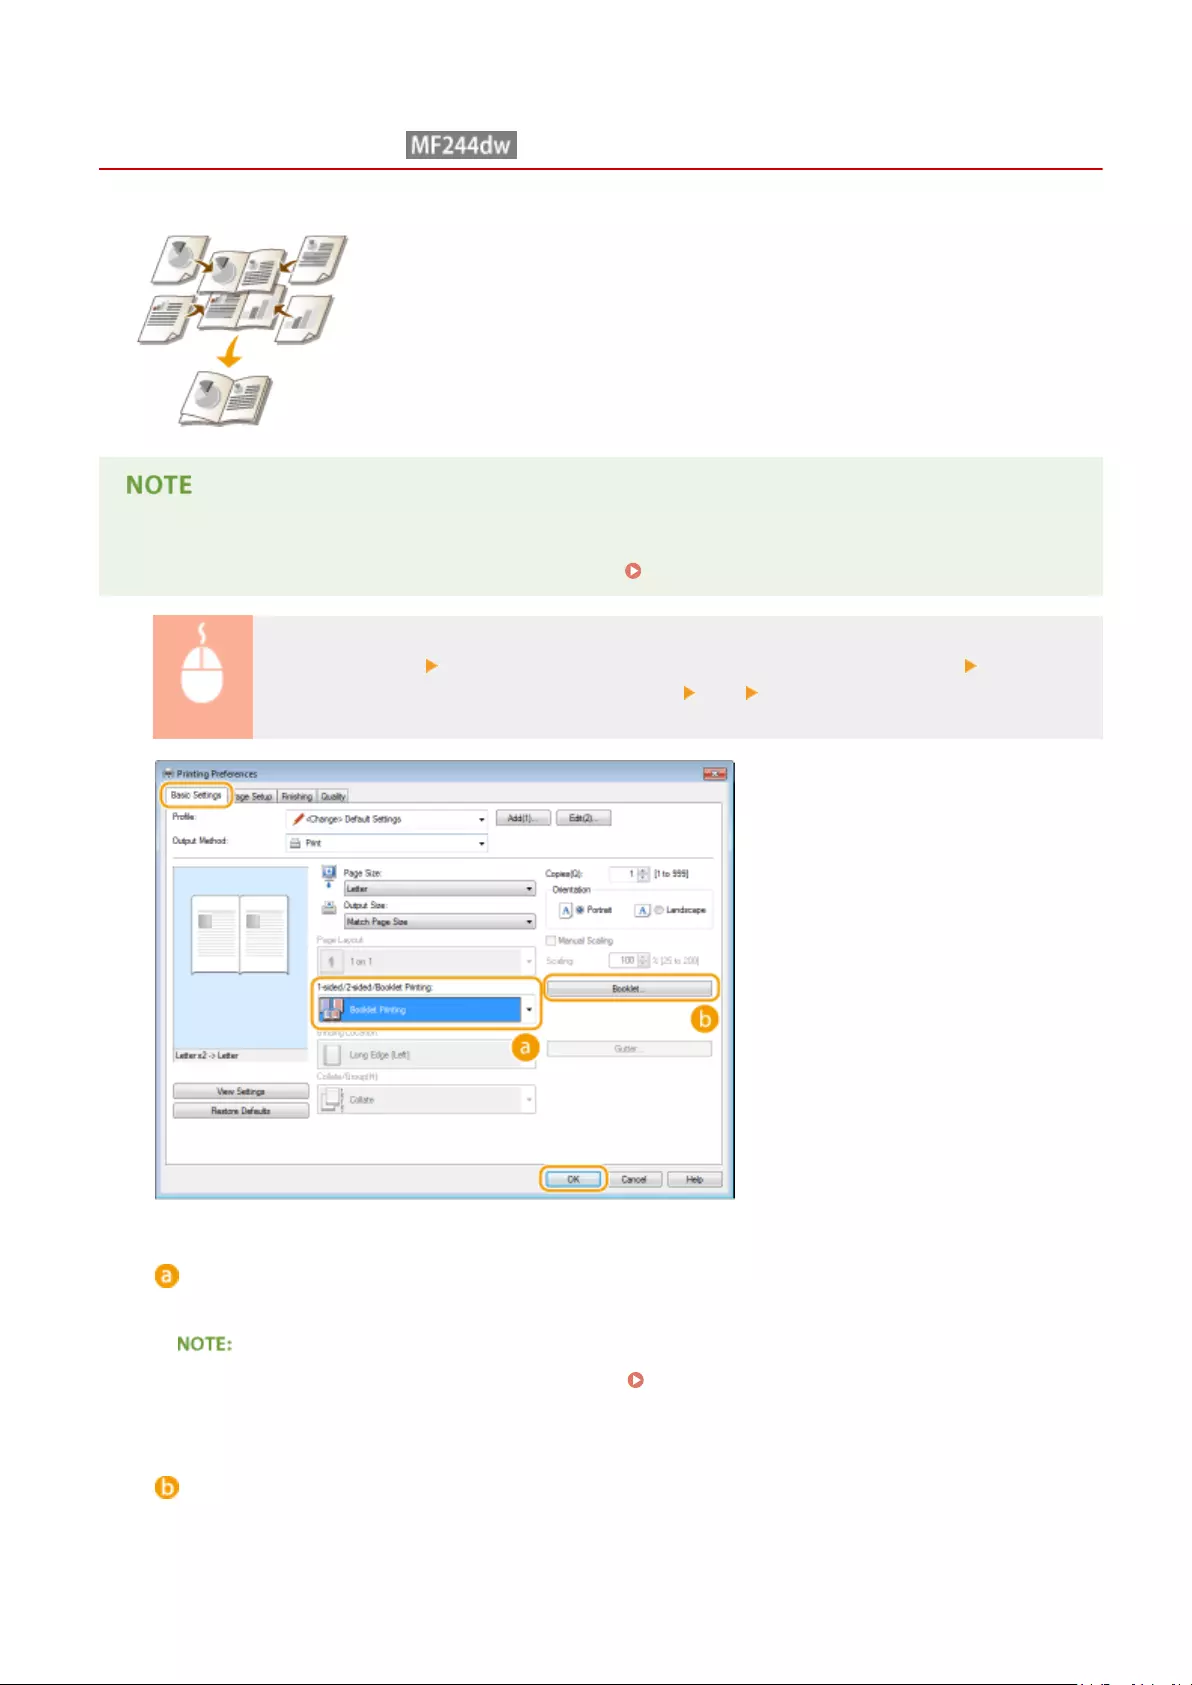
Printing Booklet
15A8-025
You can print two pages of a document on both sides of paper and then fold your
printed pages in half to make a booklet. The printer driver controls the print order in
such a way that the page numbers are correctly arranged.
●Booklet printing may not be available with some sizes and types of paper. The paper that is available for 2-
sided printing is also available for booklet printing. See Paper(P. 419) .
[Basic Settings] tab Select [Booklet Printing] in [1-sided/2-sided/Booklet Printing] Click
[Booklet] to specify detailed settings as necessary [OK] [OK]
[1-sided/2-sided/Booklet Printing]
Select [Booklet Printing].
●For [1-sided Printing] and [2-sided Printing], see Switching 1-Sided and 2-Sided Printing (MF244dw)
(P. 99) .
[Booklet]
The screen below is displayed.
Using the Machine as a Printer
107

[Booklet Printing Method]
●[All Pages at Once]: Prints all of the pages at once as a single bundle so that you can make a booklet just
by folding the printed pages in half.
●[Divide into Sets]: Prints as multiple bundles divided by the number of the pages specied on [Sheets
per Set]. Bind each bundle, and then combine them as one booklet. Select this option when the
document has so many pages that you cannot bind them all into a single booklet.
[Specify Booklet Gutter]
If you are using a stapler or other binding tools, specify the margin width for binding your booklet. Select
the [Specify Booklet Gutter] check box and specify the margin width in [Booklet Gutter].
LINKS
Printing a Document(P. 87)
Using the Machine as a Printer
108

Printing Borders
15A8-026
You can add borders, such as broken lines or double lines, in the margins of
printouts.
[Page Setup] tab Click [Page Options] Select the border type in [Edging] [OK] [OK]
[Edging]
Select the border type.
Preview
Displays a preview with the selected border.
LINKS
Printing a Document(P. 87)
Printing Dates and Page Numbers(P. 110)
Printing Watermarks(P. 112)
Using the Machine as a Printer
109

Printing Dates and Page Numbers
15A8-027
You can print the information such as dates or page numbers, and you can specify
where to print this information on the document (upper-left, lower-right, etc.).
[Page Setup] tab Click [Page Options] Select the print position of the print date, user name or
page number [OK] [OK]
[Print Date]
Specify the position to print the print date.
[Print User Name]
Specify the position to print the user name (logon name) for the computer used to print the document.
[Print Page Number]
Specify the position to print the page number.
Changing the Print Format of Dates and Page Numbers
●You can change formatting details such as font and font size when printing dates, logon names, or page
numbers. Click [Format Settings] on the [Page Options] screen shown above to specify the details.
Using the Machine as a Printer
110

LINKS
Printing a Document(P. 87)
Printing Borders(P. 109)
Printing Watermarks(P. 112)
Using the Machine as a Printer
111

Printing Watermarks
15A8-028
You can print watermarks such as «COPY» or «CONFIDENTIAL» over the document.
You can create new watermarks or use pre-registered watermarks.
[Page Setup] tab Select the [Watermark] check box Select a watermark from the drop-down list
[OK]
[Watermark]
Select the [Watermark] check box to display the list of the watermarks in the drop-down list. Select a
watermark from the menu.
[Edit Watermark]
Displays the screen to create or edit watermarks.
Using the Machine as a Printer
112
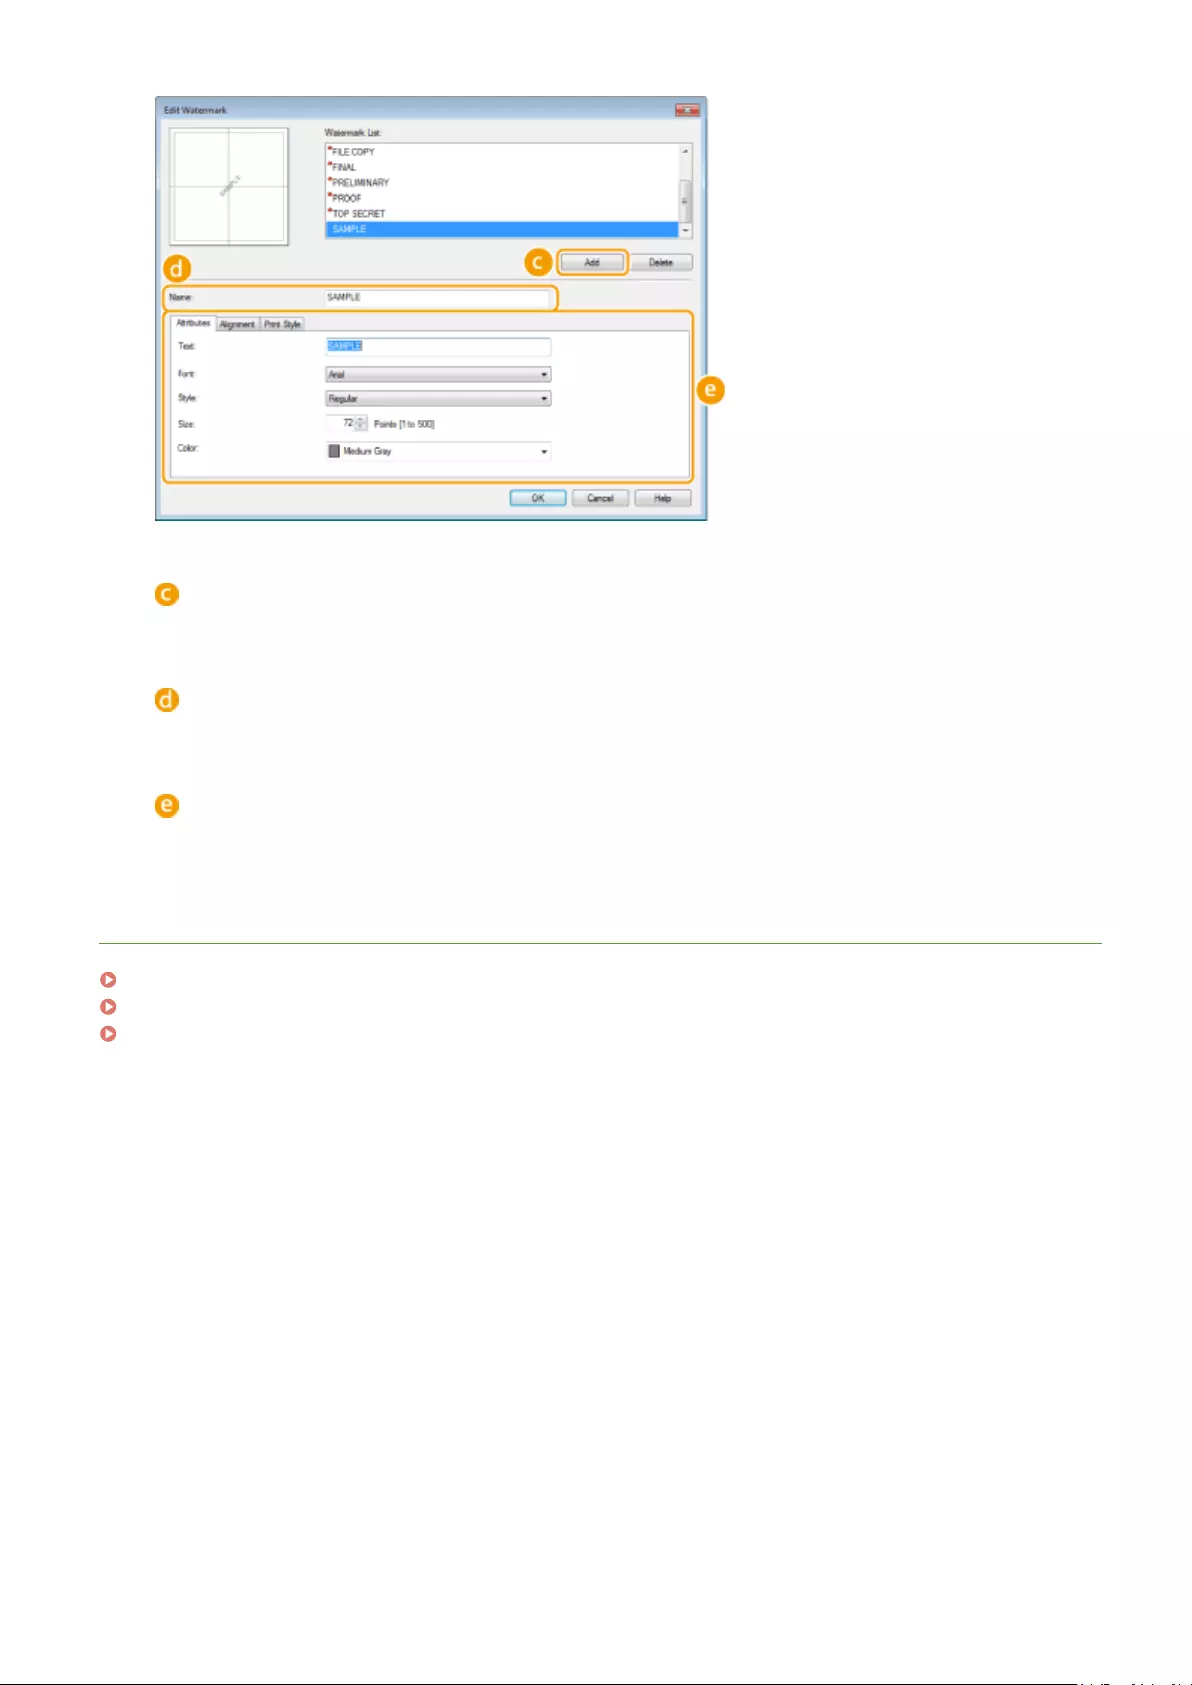
[Add]
Click to create a new watermark. Up to 50 watermarks can be registered.
[Name]
Enter the created watermark name.
[Attributes]/[Alignment]/[Print Style]
Click each tab to specify the text, color, or print position of the watermark. For more information, click [Help]
on the printer driver screen.
LINKS
Printing a Document(P. 87)
Printing Borders(P. 109)
Printing Dates and Page Numbers(P. 110)
Using the Machine as a Printer
113

Selecting Document Type
15A8-029
You can specify the document type to ensure optimal image quality. There are
different settings for photo documents, documents that have charts or graphs, and
documents that have design drawings with ne lines.
[Quality] tab Select the document type in [Objective] [OK]
[Objective]
Select an option that suits the document type or purpose of printing. For example, select [General] for
general use, or select [Photos] when you want to print photo images in optimal print quality.
[General]
A versatile option that is suitable when printing most documents.
[Publications]
Suitable when printing documents that have a mix of photo images, charts, and graphs.
[Graphics]
Suitable when printing documents that have charts or graphs.
[Photos]
Suitable when printing photo images.
[Designs [CAD]]
Suitable when printing design drawings that have many ne lines.
[High Denition Text]
Suitable when printing documents that have small characters.
Using the Machine as a Printer
114

●To specify detailed settings for each item selected on [Objective], click [Advanced Settings]. For more
information, click [Help] on the printer driver screen.
LINKS
Printing a Document(P. 87)
Using the Machine as a Printer
115

Saving Toner
15A8-02A
You can set the printer driver to print documents using less toner.
●When the toner save setting is enabled, ne lines and portions with lighter print density may become
blurred.
[Quality] tab Select the document type in [Objective] Click [Advanced Settings] Select [Toner
Save] in the [Advanced Settings] screen Select [On] from the drop-down list [OK] [OK]
[Objective] Selecting Document Type(P. 114)
Select the document type for which you want to enable the toner save setting.
Using the Machine as a Printer
116

[Advanced Settings]
A screen with settings is displayed. Click [Toner Save] and select [On] from the drop-down list on the bottom
of the screen.
●You can specify whether to enable the toner save setting for each document type. Specify the toner save
setting for each document type listed in [Objective].
●In the [Advanced Settings] screen, you can specify various print settings other than toner save settings.
For more information, click [Help] on the printer driver screen.
LINKS
Printing a Document(P. 87)
Using the Machine as a Printer
117

Combining and Printing Multiple Documents
15A8-02C
By using Canon PageComposer, you can combine multiple documents into one print
job and print the job with specied print settings. This function, for example, enables
you to combine documents made with different applications and print all of the
pages in the same paper size.
1Open a document in an application and display the print dialog box.
●How to display the print dialog box differs for each application. For more information, see the instruction
manual for the application you are using.
2Select the printer driver for this machine, and click [Preferences] or [Properties].
3Select [Edit and Preview] in [Output Method].
●Click [OK] on the [Information] pop-up screen.
●Click [OK] at the bottom of the screen.
4Click [Print] or [OK].
Using the Machine as a Printer
118

➠The Canon PageComposer starts. Printing does not start in this step.
5Repeat steps 1 to 4 for the documents you want to combine.
➠The documents are added to the Canon PageComposer.
6From the [Document Name] list, select the documents to combine, and click .
●To select multiple documents, click the documents while holding down [SHIFT] key or [CTRL] key.
7Change the settings as necessary, and click [Combine].
●The documents selected in step 6 are combined.
Using the Machine as a Printer
119

[Print Preview]
Displays a preview of the document to be printed.
[Document List]/[Print Settings]
●Click the [Document List] tab to display the documents added in steps 1 to 4. You can remove
documents by selecting them in the list and clicking [Delete from List].
●Click the [Print Settings] tab to display the screen for specifying print settings such as the number of
copies or 1-sided/2-sided printing. The settings specied here are applied to the whole print job.
●For more information, click [Help] on the Canon PageComposer screen.
[Details]
Displays the print setting screen of the printer driver. There are fewer settings available than when using
the ordinary printing method.
Using the Machine as a Printer
120

8On the [Document Name] list, select the combined-document print job you want to
print, and click .
➠Printing starts.
●For instructions on how to cancel printing, see Canceling Prints(P. 91) .
LINKS
Printing a Document(P. 87)
Using the Machine as a Printer
121
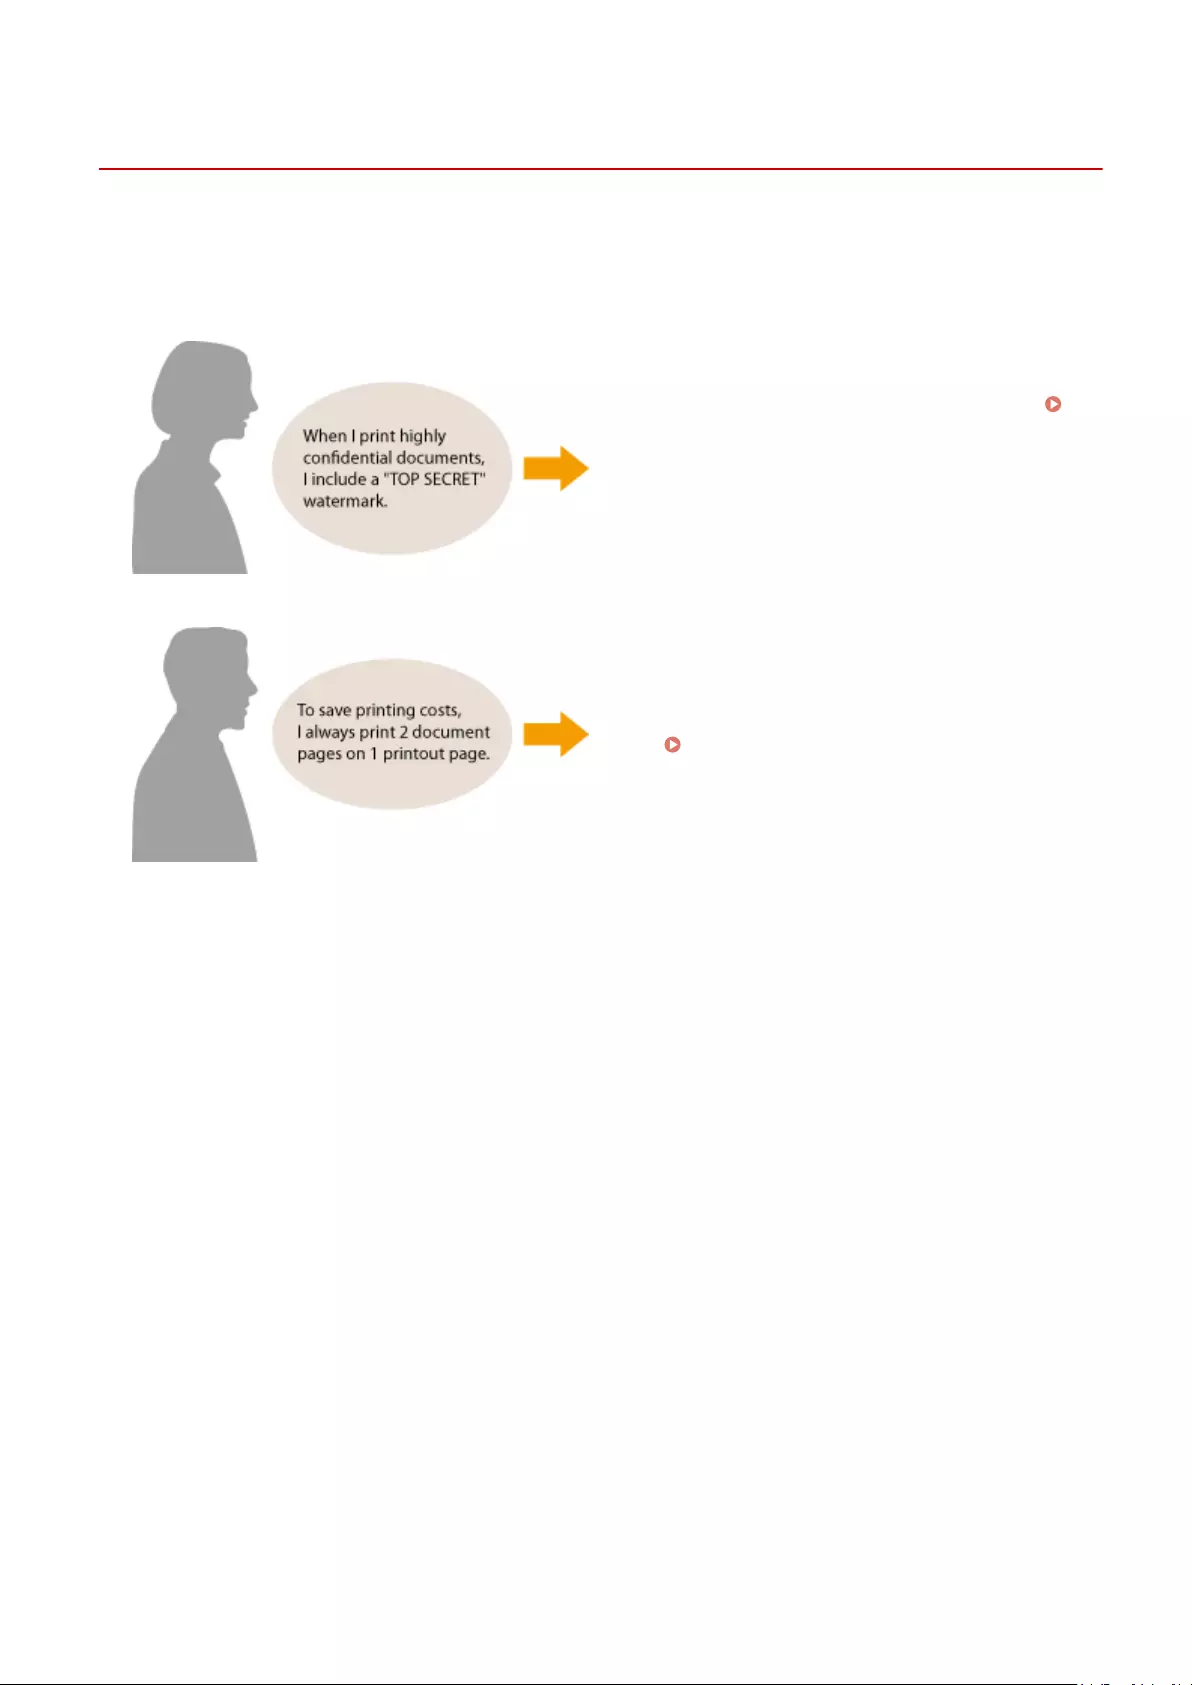
Conguring Print Settings to Your Needs
15A8-02E
You can register combinations of settings as «Proles» to suit your different printing needs. Also, you can register the
settings that you frequently use as the default setting. Once the default setting is set, the registered settings are
automatically displayed on the printer driver screen, and you can skip the operations to specify the print settings and
print immediately.
Specify «TOP SECRET» for a watermark and register it as a
«Prole.» Just select this «Prole» when you need it.
Registering Combinations of Frequently Used Print
Settings(P. 123)
Specify [2 on 1] as the user default in the printer driver.
The next and following print jobs will be performed so
that each two pages are shrinked and printed on one
page. Changing Default Settings(P. 125)
Using the Machine as a Printer
122

Registering Combinations of Frequently Used Print
Settings
15A8-02F
Specifying combinations of settings such as «1-sided landscape orientation on A4 size paper» every time you print may
be time consuming. If you register these frequently used combinations of print settings as «proles,» you can specify
printing settings simply by selecting one of these proles from the list. This section describes how to register proles
and how to print using them.
Registering a Prole(P. 123)
Selecting a Prole(P. 124)
Registering a Prole
1Change the settings that you want to register as a prole, and click [Add].
●Click the [Basic Settings], [Page Setup], [Finishing], or [Quality] tabs to specify the print settings on each
screen as necessary. Various Print Settings(P. 95)
2Enter a prole name in [Name], select an icon, and then click [OK].
●Enter comments on the prole in [Comment] as necessary.
●Click [View Settings] to see the settings to register.
Editing a prole
●By clicking [Edit] on the right side of [Add] on the screen shown in step 1, you can change the name, icon, or
comment of the proles you have previously registered. You cannot edit the pre-registered proles.
Using the Machine as a Printer
123

Selecting a Prole
Select the prole that suits your needs, and click [OK].
Changing the settings of the selected prole
●You can change the settings of a selected prole. In addition, the changed settings can be registered as
another prole.
LINKS
Printing a Document(P. 87)
Changing Default Settings(P. 125)
Using the Machine as a Printer
124
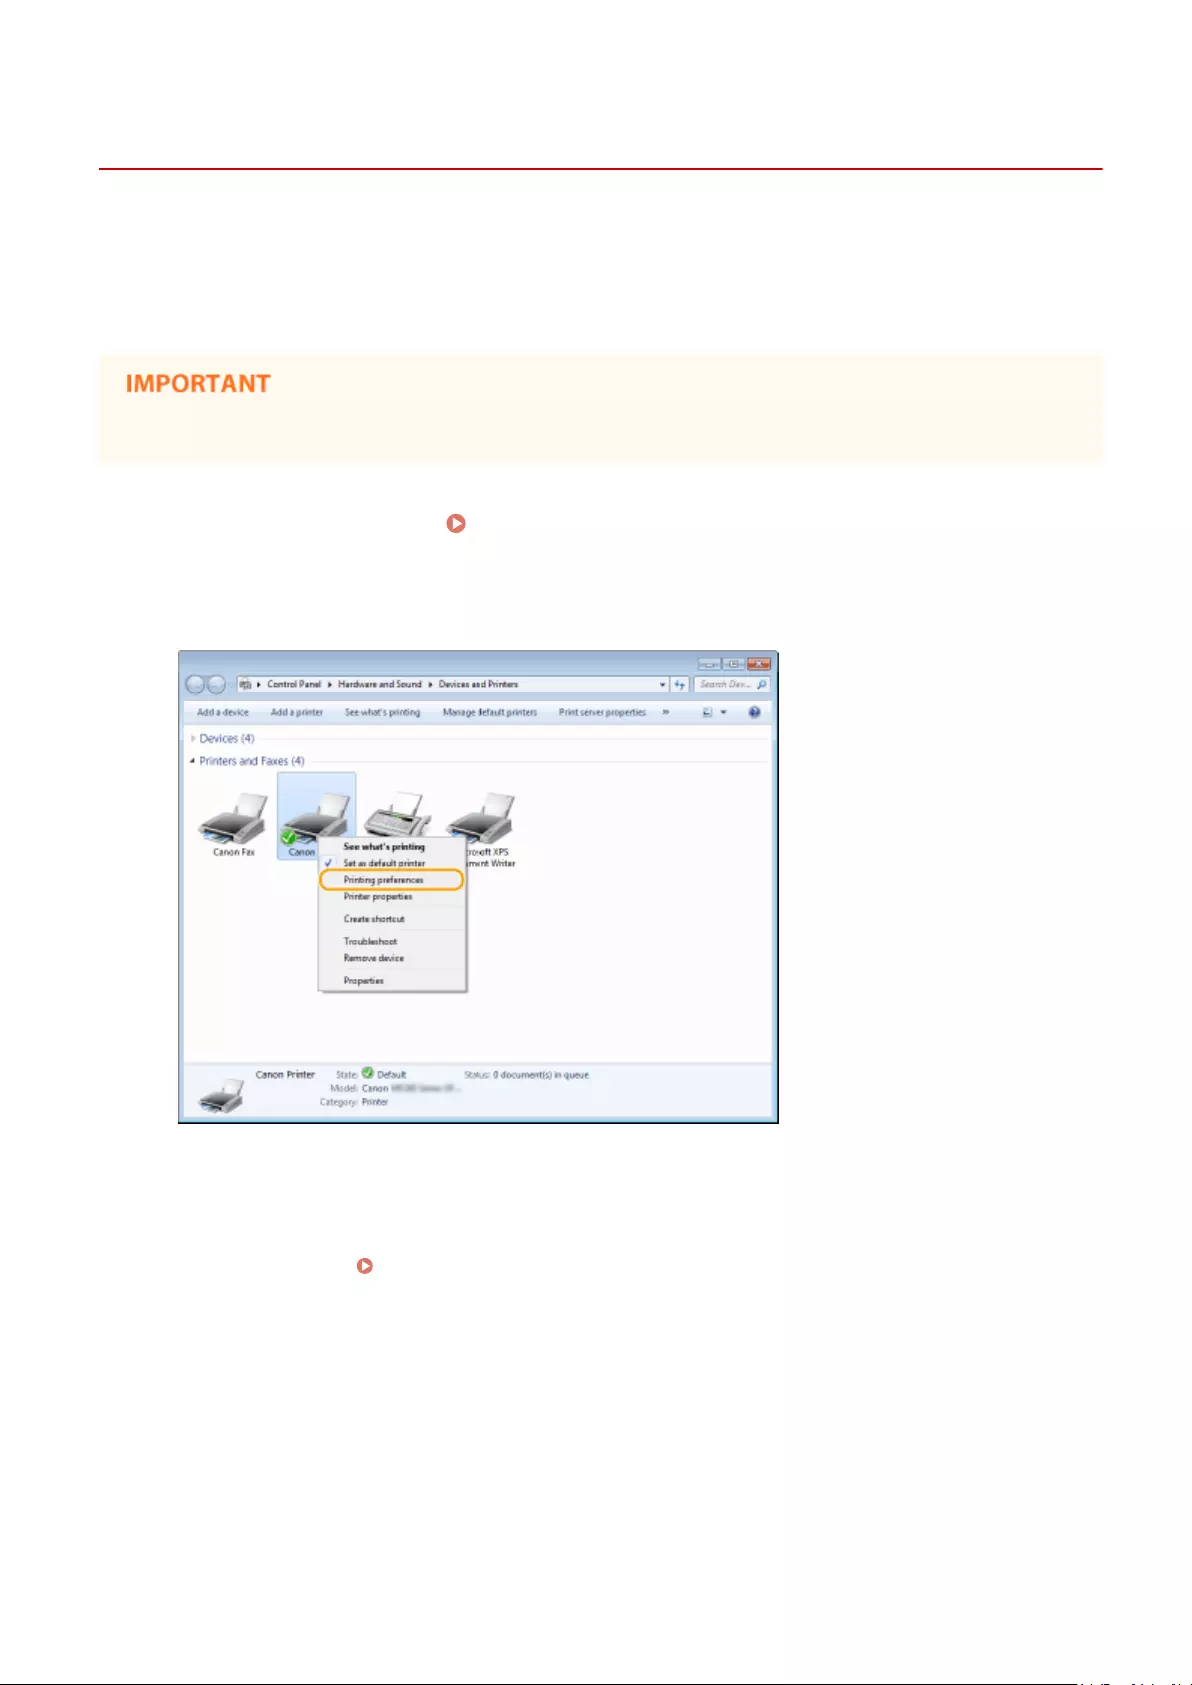
Changing Default Settings
15A8-02H
The default settings are the settings that are rst displayed whenever you open the print settings screen of the printer
driver, but you can change them. For example, if you want to print all documents in such manner that each two pages
are shrinked and printed on one page, specify [2 on 1] as the user default of page layout. From next time on, the
printer driver will be opened with [2 on 1] specied as page layout setting and you will not have to change settings
each time you print.
●To perform the following procedure, log on to your computer with an administrator account.
1Open the printer folder. Displaying the Printer Folder(P. 434)
2Right-click the printer driver icon for this machine and click [Printing preferences].
3Change the settings on the print setting screen, and click [OK].
●Click the [Basic Settings], [Page Setup], [Finishing], or [Quality] tabs to specify the print settings on each
screen as necessary. Various Print Settings(P. 95)
Using the Machine as a Printer
125

LINKS
Printing a Document(P. 87)
Various Print Settings(P. 95)
Using the Machine as a Printer
126

Using the Machine as a Scanner
Using the Machine as a Scanner …………………………………………………………………………………………….. 128
Preparing to Use the Machine as a Scanner (MF244dw / MF232w) ………………………………………………………. 129
Scanning from the Machine ……………………………………………………………………………………………………………… 130
Scanning Using the [Scan -> PC] Key ………………………………………………………………………………………………. 133
Scanning from a Computer ………………………………………………………………………………………………………………. 137
Scanning Using an Application ……………………………………………………………………………………………………… 138
Conguring Scan Settings in ScanGear MF ……………………………………………………………………………………… 140
Using the Machine as a Scanner
127

Using the Machine as a Scanner
15A8-02J
You can scan original documents by using the operation panel of the machine or an application on a computer.
Whichever way you use, the scanned documents are converted into electronic le formats such as PDFs. Use the scan
function to convert large-volume paper documents into les so that you can organize them easily.
●To use this machine as a scanner, you must complete preparations in advance, including installation of
software to a computer. For more information, see «MF Driver Installation Guide.» To connect the machine to
your computer via a network, you must register the machine to the installed software. Preparing to Use
the Machine as a Scanner (MF244dw / MF232w)(P. 129)
●If you are a Mac OS user, see the User’s Guide for ScanGear MF for installing the software and for using scan
functions.
●Depending on the operating system and the version of the scanner driver or applications you are using, the
screens in this manual may differ from your screens.
◼Scanning from the Machine
You can scan and save documents to your computer by using the operation panel of the machine.
Scanning from the Machine(P. 130)
◼Scanning from a Computer
You can scan documents placed on the machine from a computer. The scanned documents are saved to the computer.
You can scan using MF Scan Utility (included with the machine), or with other applications such as an image-processing
or word-processing application. Scanning from a Computer(P. 137)
Scanning from Mobile Devices (MF244dw / MF232w)
●Linking mobile devices such as smartphones or tablets to this machine provides a quick and easy way to
scan documents set on this machine. Can Be Used Conveniently with a Mobile Device (MF244dw /
MF232w)(P. 142)
Using the Machine as a Scanner
128

Preparing to Use the Machine as a Scanner
15A8-02K
Make sure that the machine and your computer are connected and all software is installed. For how to check, see «MF
Driver Installation Guide.» To connect via a wireless or wired LAN, you must register this machine in MF Network
Scanner Selector. Register by following the procedure below. This procedure is not required if the machine and your
computer are connected via USB.
The scan function is not available if the machine and your computer are connected in an IPv6 environment. Use
IPv4 or a USB connection.
1Click in the system tray.
2Select the check box for the machine, and click [OK].
●Up to ten computers can be connected at a time on a network to one product (scanner).
Using the Machine as a Scanner
129

Scanning from the Machine
15A8-02L
The sequence of «scanning a document and saving it to a computer» can be done
entirely from the machine. Scan while specifying what computer documents will be
saved to; whether to scan documents in color or black and white; whether to save
documents as PDFs or JPEGs; and other settings.
1Place the document(s). Placing Documents(P. 38)
2Press (COPY/SCAN) to switch to the Scan mode screen.
3Use / to select <Computer>, and press .
4 Select the destination computer, and press .
●This screen is not displayed if only a computer is connected to the machine via USB.
5Select the scan type.
Using the Machine as a Scanner
130

Scan type Color Resolution File format
<Color Scan> Color 300 dpi JPEG (Exif)
<B&W Scan> Black and white*1 300 dpi PDF (searchable*2)
<Custom 1> Color 300 dpi JPEG (Exif)
<Custom 2> Color 300 dpi JPEG (Exif)
*1 Documents are scanned in black and white only, with no intermediate shades of gray.
*2 A PDF format where characters on the document are scanned as text data and the text can be searched using a computer.
To change settings
●The settings in the table above are all factory default settings. You can change settings from MF Scan
Utility. For more information, click [Instructions] on MF Scan Utility.
●If you are a Mac OS user, see the User’s Guide for ScanGear MF.
6Press .
●Scanning starts.
●To cancel, press <Yes> .
You cannot scan while the ScanGear MF is displayed. Close the
screen before scanning.
When placing documents in the feeder in step 1 (MF244dw)
When scanning is complete, the save destination folder is displayed on the computer.
When placing documents on the platen glass in step 1
When scanning is complete, follow the procedure below (when le format is PDF).
1If there are additional pages of documents to be scanned, place the next document on the platen
glass, and press .
●Repeat this step until you nish scanning all of the pages.
●When there is only one page to be scanned, proceed to the next step.
2Use / to select <Finish Scanning>, and press .
Using the Machine as a Scanner
131

●The save destination folder is displayed on the computer.
About the save destination folder
●By default, the scanned data is saved to the [My Documents] folder. A subfolder named with the scanning
date is created, and the data is saved to that folder.
●You can change the save destination from MF Scan Utility. For more information, click [Instructions] on MF
Scan Utility.
Scan from the machine more easily
●If you have regularly used preferences, such as scanning in color or black and white, or a pre-determined
computer where scanned documents will be saved, specifying these settings each time you scan can be
troublesome. Register these settings in a [Scan -> PC] key so that you can scan with one press of a key.
Scanning Using the [Scan -> PC] Key(P. 133)
Using the Machine as a Scanner
132

Scanning Using the [Scan -> PC] Key
15A8-02R
Place a document on the machine, and press (for MF232w, or
), and scanning starts immediately. The type of scan (color or black and
white), the save destination for the document, and other settings can be registered
to a button, and documents can be scanned using those settings. This section
describes how to register settings in a button and scan with it.
Registering Your Settings in the [Scan -> PC] Key(P. 133)
Using the [Scan -> PC] Key(P. 135)
Registering Your Settings in the [Scan -> PC] Key
Register the computer that scanned images are saved in and the type of scan to (for MF232w, or
).
1Press .
2Use / to select <Scan Settings>, and press .
3Select <Shortcut Key Settings> <Register>.
4Press .
●If you are using the MF232w, select the shortcut key to which you want to register settings, and press .
Using the Machine as a Scanner
133

If you are using the MF232w / MF231, select the shortcut key to which you
want to register settings, and press
5Select the type of connection that is used between the machine and computer, and
press .
<Off>
Select this setting to erase registered settings.
<USB Connection>
Select this setting if the machine and computer are connected via USB.
<Network Connection> (MF244dw / MF232w)
Select this setting if the machine and computer are connected via a network.
6Select the destination computer, and press .
●This screen is not displayed if you select <USB Connection> in step 5.
7Select the scan type, and press .
Scan type Color Resolution File format
<Color Scan> Color 300 dpi JPEG (Exif)
<B&W Scan> Black and white*1 300 dpi PDF (searchable*2)
*1 Documents are scanned in black and white only, with no intermediate shades of gray.
*2 A PDF format where characters on the document are scanned as text data and the text can be searched using a computer.
Using the Machine as a Scanner
134

Scan type Color Resolution File format
<Custom 1> Color 300 dpi JPEG (Exif)
<Custom 2> Color 300 dpi JPEG (Exif)
*1 Documents are scanned in black and white only, with no intermediate shades of gray.
*2 A PDF format where characters on the document are scanned as text data and the text can be searched using a computer.
To change settings
●The settings in the table above are all factory default settings. You can change settings from MF Scan
Utility. For more information, click [Instructions] on MF Scan Utility.
●If you are a Mac OS user, see the User’s Guide for ScanGear MF.
◼Checking the Registered Settings
<Scan Settings> <Shortcut Key Settings> <Conrm
Destination> Select shortcut key
Name of destination computer
Shows the name of the computer registered as the save destination.
Scan type
Shows the type of scan that has been set.
Using the [Scan -> PC] Key
1Place the document(s). Placing Documents(P. 38)
2Press (for MF232w, or ).
Using the Machine as a Scanner
135
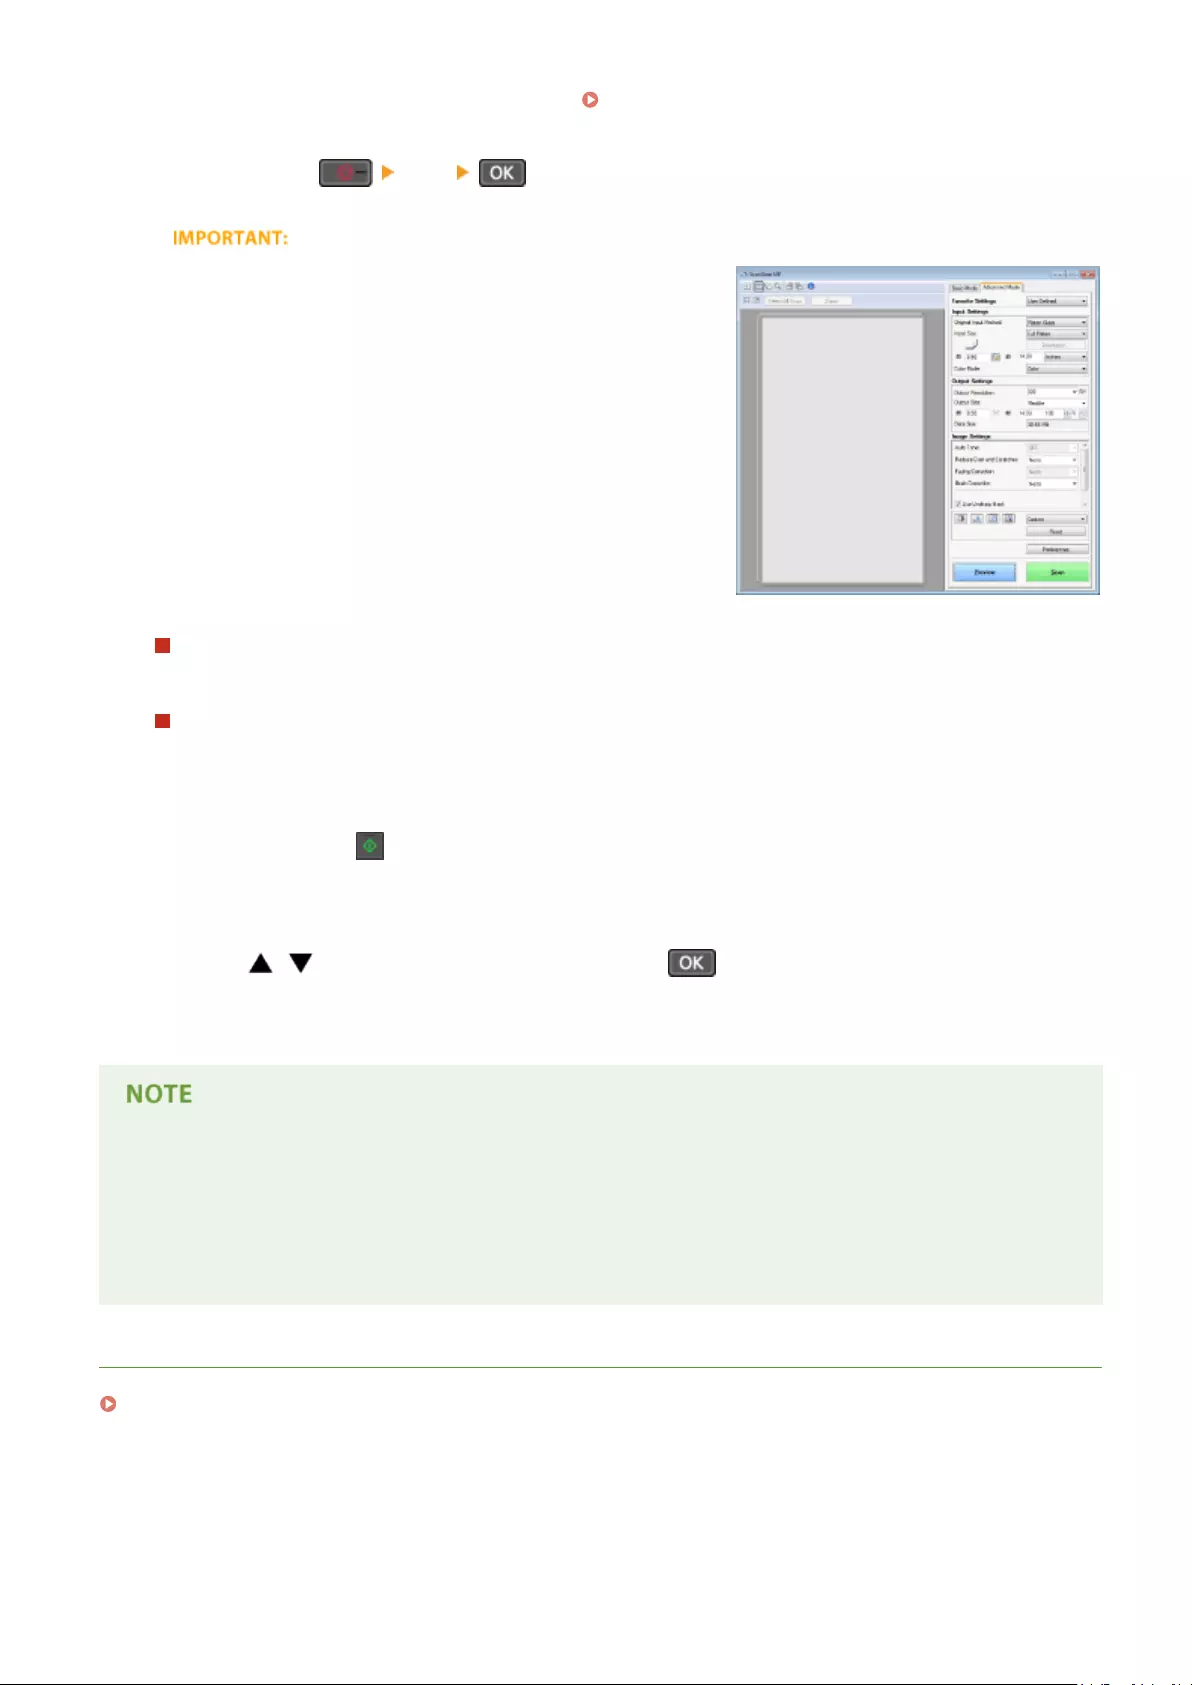
●To check the settings registered in the key, see Checking the Registered Settings(P. 135) .
●Scanning starts.
●To cancel, press <Yes> .
You cannot scan while the ScanGear MF is displayed. Close the
screen before scanning.
When placing documents in the feeder in step 1 (MF244dw)
When scanning is complete, the save destination folder is displayed on the computer.
When placing documents on the platen glass in step 1
When scanning is complete, follow the procedure below (when le format is PDF).
1If there are additional pages of documents to be scanned, place the next document on the platen
glass, and press .
●Repeat this step until you nish scanning all of the pages.
●When there is only one page to be scanned, proceed to the next step.
2Use / to select <Finish Scanning>, and press .
●The save destination folder is displayed on the computer.
About the save destination folder
●By default, the scanned data is saved to the [My Documents] folder. A subfolder named with the scanning
date is created, and the data is saved to that folder.
●You can change the save destination from MF Scan Utility. For more information, click [Instructions] on MF
Scan Utility.
LINKS
Scanning from the Machine(P. 130)
Using the Machine as a Scanner
136

Scanning from a Computer
15A8-02S
There are two ways to scan from a computer: using MF Scan Utility and using an application such as an image-
processing or word-processing application.
Scanning Using MF Scan Utility
MF Scan Utility is an application included with the machine that enables you to scan
documents or images to a computer. You can forward the scanned data to a specied
application, or attach it to an e-mail message. After installing it from the supplied DVD-
ROM, click [MF Scan Utility] displayed in the Windows start menu to start MF Scan Utility.
For details on using this utility, click [Instructions] on MF Scan Utility.
●If you are a Mac OS user, see the User’s Guide for ScanGear MF.
Scanning Using an Application
You can scan images by using an application such as a word-processing or image-
processing application, and load the images directly into the application. You do not
need to start another application to scan.
Using the Machine as a Scanner
137

Scanning Using an Application
15A8-02U
You can scan documents from applications such as image-processing or word-
processing software. The scanned image is directly loaded in the application, allowing
you to edit or process the image immediately. The following procedure varies
depending on the application.
●The application must be compatible with TWAIN or WIA*. For more information, see the instruction manual
for your application.
* TWAIN is a standard for connecting image input devices, such as scanners, with computers. WIA is a function that is an
integrated standard in Windows.
1Place the document(s). Placing Documents(P. 38)
●The second or subsequent documents may not be scanned, or an error message may be displayed
depending on the application. In such a case, place and scan one document at a time.
●When <Auto Online for Remote Scan> is set to <Off>, you must press (COPY/SCAN) <Remote
Scanner> to bring the machine online. Auto Online for Remote Scan(P. 333)
2From the application, select the start scan command.
●The procedure for selecting the start scan command varies depending on the application. For more
information, see the instruction manual for your application.
3Select the scanner driver for the machine.
●Select ScanGear MF or WIA.
4Congure the scan settings as necessary.
●For more information about ScanGear MF scan settings, see Conguring Scan Settings in ScanGear
MF(P. 140)
5Click [Scan].
Using the Machine as a Scanner
138

➠Scanning of the document starts.
●When scanning is complete, the scanned image is forwarded to an application.
LINKS
Conguring Scan Settings in ScanGear MF(P. 140)
Using the Machine as a Scanner
139

Conguring Scan Settings in ScanGear MF
15A8-02W
ScanGear MF is a scanner driver included with the machine. You can use ScanGear
MF to congure advanced scan settings when you scan. The way of
starting ScanGear MF differs depending of the way of scanning from the computer.
Starting from MF Scan Utility
When scanning from MF Scan Utility, click [ScanGear] to start ScanGear MF. For instructions on how to use
ScanGear MF, click [Instructions] on MF Scan Utility.
●If you are a Mac OS user, see the User’s Guide for ScanGear MF.
Starting from an Application
●To scan from applications such as image-processing or word-processing software, select ScanGear MF as
scanner driver. Scanning Using an Application(P. 138)
●For instructions on how to use ScanGear MF, click on the ScanGear MF icon and see the Help.
Using the Machine as a Scanner
140

Can Be Used Conveniently with a
Mobile Device (MF244dw / MF232w)
Can Be Used Conveniently with a Mobile Device (MF244dw / MF232w) ……………………. 142
Connecting to a Mobile Device …………………………………………………………………………………………………………. 143
Make Direct Connection (Access Point Mode) ………………………………………………………………………………….. 144
Making the Best Use of the Machine by Utilizing Applications ……………………………………………………………. 147
Using AirPrint …………………………………………………………………………………………………………………………….. 148
Printing with AirPrint …………………………………………………………………………………………………………….. 153
Scanning with AirPrint …………………………………………………………………………………………………………… 156
If AirPrint Cannot Be Used ……………………………………………………………………………………………………… 158
Using Google Cloud Print …………………………………………………………………………………………………………….. 159
Managing the Machine Remotely …………………………………………………………………………………………………….. 163
Can Be Used Conveniently with a Mobile Device (MF244dw / MF232w)
141
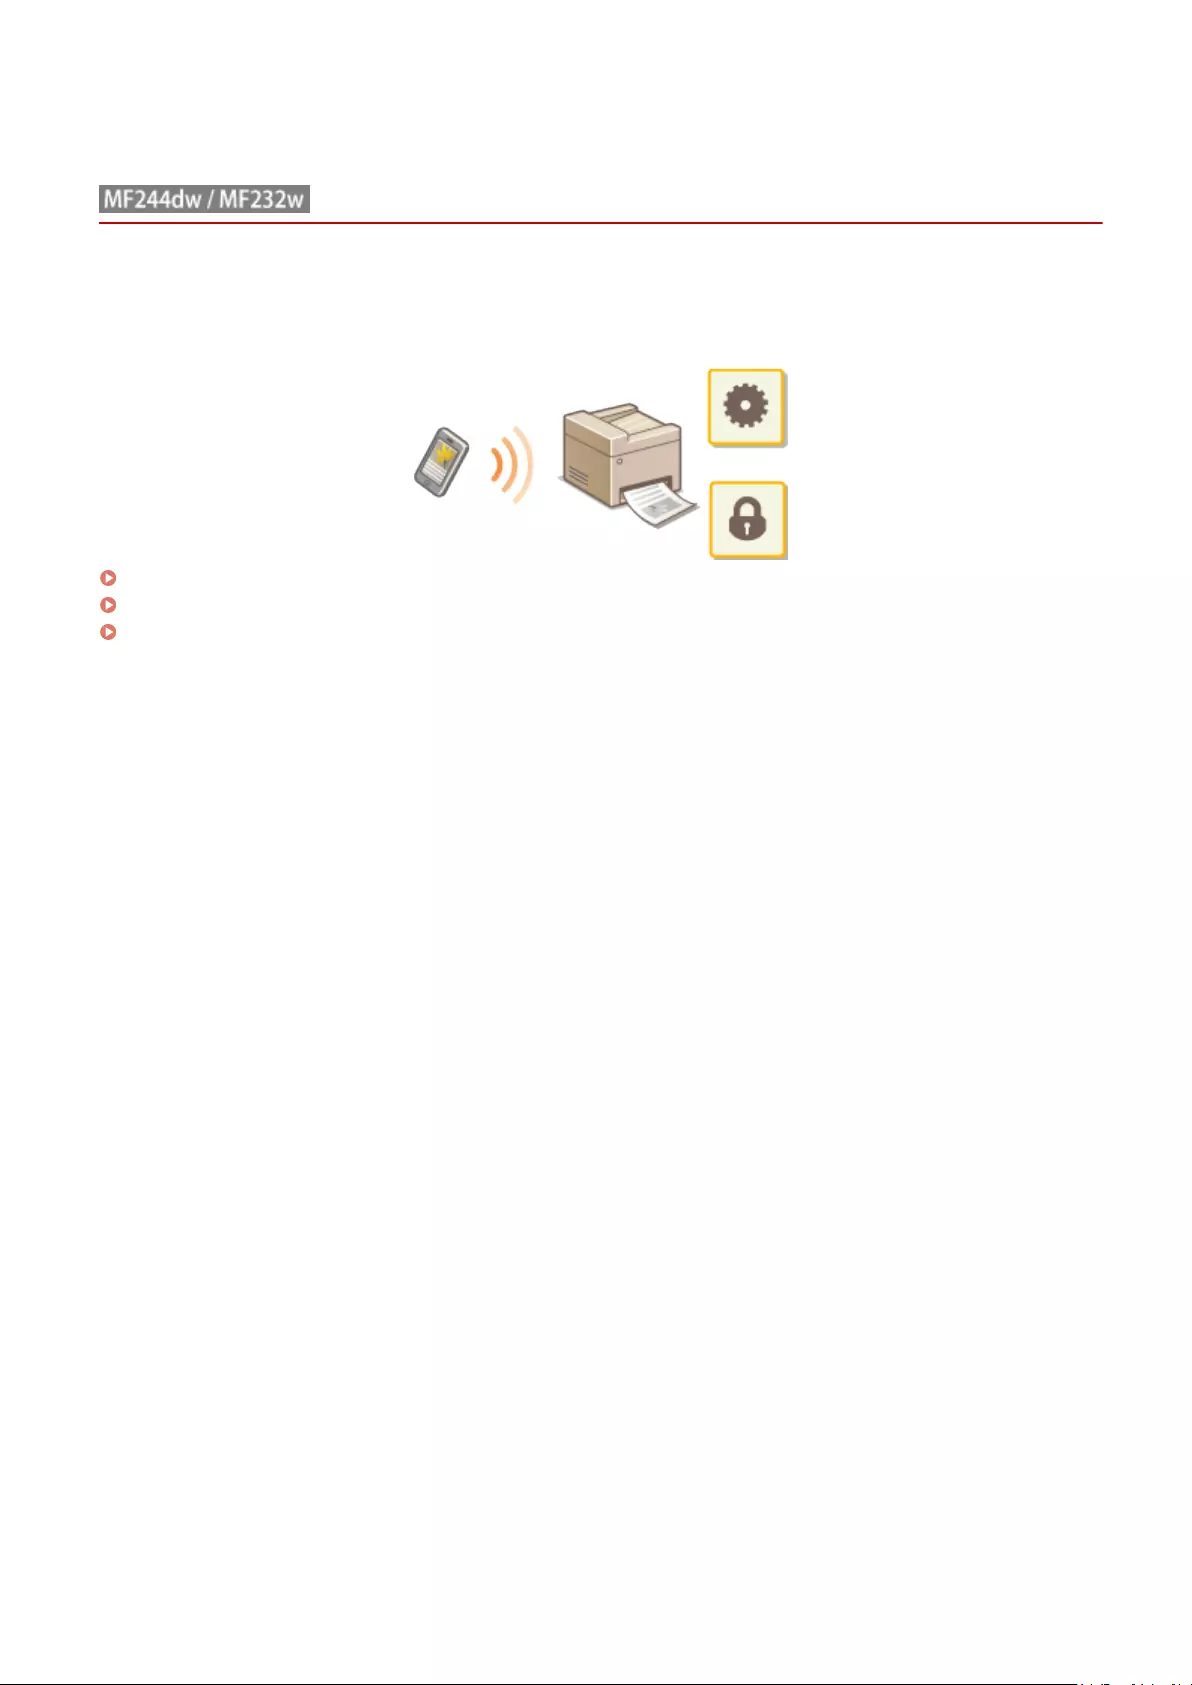
Can Be Used Conveniently with a Mobile Device
15A8-02X
Combining the machine with a mobile device such as a smartphone or tablet enables you to use an appropriate
application to perform printing, scan, or other operation with ease. You can also use a mobile device to operate the
machine remotely, check the printing status, and change machine’s settings.
Connecting to a Mobile Device(P. 143)
Making the Best Use of the Machine by Utilizing Applications(P. 147)
Managing the Machine Remotely(P. 163)
Can Be Used Conveniently with a Mobile Device (MF244dw / MF232w)
142
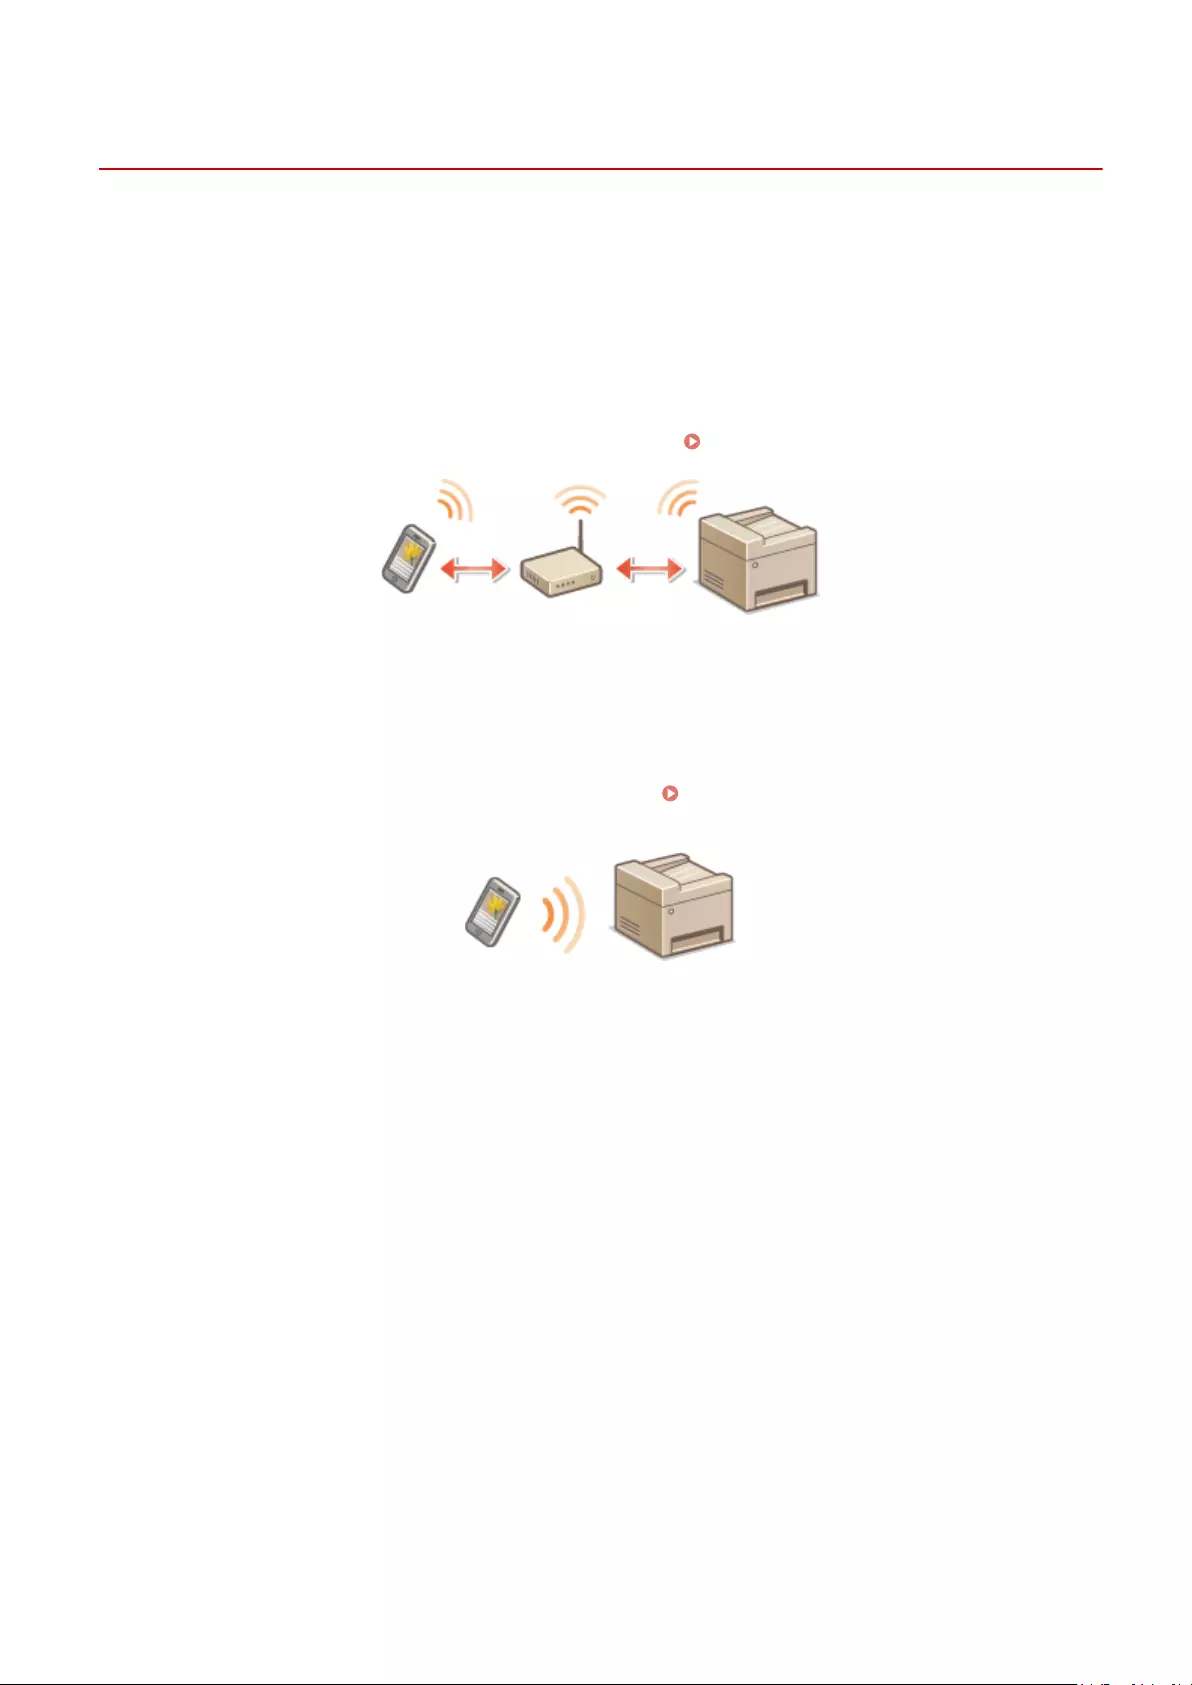
Connecting to a Mobile Device
15A8-02Y
When connecting the machine to a mobile device, you can select whether to connect via a wireless LAN router or
Direct Connection. Select the connection method that best suits your environment and devices.
◼Connecting via a Wireless LAN Router
Like when connecting a computer and the machine, connect a mobile device and the machine via a wireless LAN
router. For how to connect your mobile device and wireless LAN, see the instruction manual for the device or contact
your manufacturer.
Connect the machine to the router with a wired LAN or wireless LAN. Connecting to a Network(P. 166)
◼Making Direct Connection
Connect the mobile device and the machine directly without using a wireless LAN router. Even where no wireless LAN
environment is available, you can quickly connect the machine and a mobile device. You can also congure the
machine to exit Direct Connection mode automatically once a certain period of time elapses after the machine enters
Direct Connection mode and switch to a wireless LAN connection. Make Direct Connection (Access Point Mode)
(P. 144)
Can Be Used Conveniently with a Mobile Device (MF244dw / MF232w)
143

Make Direct Connection (Access Point Mode)
15A8-030
Even in an environment without wireless LAN router, you can connect your mobile device and the machine without
going through dicult settings when you use «Access Point Mode,» which allows you to wirelessly and directly connect
your mobile device to the machine.
Using the Machine in Direct Connection (in Access Point Mode)
Follow these steps to establish a connection using Access Point Mode.
Put the machine into Access Point Mode.
●Set <Use Direct Connection> to <On>.
Use Direct Connection (P. 289)
If connected to the network by wireless LAN
A screen for selecting the Direct Connection method is displayed.
<Direct Connection Only>
Connection by wireless LAN becomes unavailable. Set when only using Direct
Connection.
<Wireless LAN/Direct Conn. (Auto Switch)>
A wireless LAN connection is disconnected only when using Direct Connection. Set
when wishing to switch between Direct Connection and connection by wireless
LAN.
Put the machine into a connection waiting state.
●Press <Direct Connection> . The machine enters the state in which you
can connect your mobile device to the machine.
Can Be Used Conveniently with a Mobile Device (MF244dw / MF232w)
144

Connecting from a mobile device
●Based on the SSID and network key displayed in the display, make wireless LAN
connection settings for connecting to the machine.
●The screen below appears in the display during the connection process.
<Disconnect>
Stops the Direct Connection procedure. When printing, scanning, or other
desired operation is complete, select <Disconnect> and press to terminate
the connection.
<Connection Information>
You can view the information on the Direct Connection being proceeding.
●When the machine is in Direct Connection mode, it is possible that you cannot connect to the Internet
depending on your mobile device.
●If <Use Custom SSID> is <Off> when the machine is in Direct Connection mode, only a single device can be
connected at a time.
●If wireless connection from the mobile device is not performed within 5 minutes while the SSID and network
key are displayed, the connection waiting state terminates.
●If while in communication by Direct Connection, a duration when there is no data transmission between the
machine and the mobile device lasts for some time, the communication may terminate.
●The machine’s SSID and network key are changed each time the Direct Connection procedure is started.
●While in Direct Connection, sleep mode is not as effective at saving power.
●If you use the Direct Connection, do not set the IP address manually on the mobile device. Doing so may
prevent proper communication after using the Direct Connection.
Can Be Used Conveniently with a Mobile Device (MF244dw / MF232w)
145

Setting an arbitrary SSID and network key
●You can enter and set the SSID and network key used for Direct Connection yourself. Setting any SSID allows
up to 5 devices to connect to the machine at the same time. Access Point Mode Settings(P. 289)
Exiting from Direct Connection mode automatically
●You can also congure the machine to exit Direct Connection mode automatically once a certain period of
time elapses after the machine enters Direct Connection mode. If <Wireless LAN/Direct Conn. (Auto Switch)>
is specied as the connection method in Direct Connection mode, the machine connects to a wireless LAN
automatically after exiting Direct Connection mode.
Selecting Wired LAN or Wireless LAN(P. 168)
Time Until Direct Connection Termination (P. 289)
Can Be Used Conveniently with a Mobile Device (MF244dw / MF232w)
146

Making the Best Use of the Machine by Utilizing
Applications
15A8-031
You can use an appropriate application that enables you to perform printing, scanning, or other operation by
operating the machine from your mobile device. The machine supports a dedicated application from Canon and
various other applications. You can select the most appropriate application to your mobile device, the purpose, the
situation, and so on.
◼Printing/Scanning via Canon PRINT Business
You can print from mobile devices that support iOS/Android, and place and scan originals with the machine, then send
to a mobile device. When printing, it is not necessary to perform operations on the machine. For more information on
supported operating systems, detailed setting methods, and operations, see the Canon website (http://
www.canon.com/).
◼Printing with Canon Print Service
You can easily print from the menu of applications that support the Android print subsystem. For more information on
supported operating systems and detailed settings and procedures, see the Canon website (http://www.canon.com/).
◼Using Google Cloud Print
You can print from an application or service that supports Google Cloud Print. You can print by remotely operating the
machine at any time and from anywhere, for example even while you are on the go. Using Google Cloud
Print(P. 159)
◼Printing with Mopria™
This machine also supports Mopria™. Using Mopria™ allows you to print with printers of different models from
different manufacturers by using common operations and common settings. For example, assume that Mopria™
compatible printers of different models from different manufacturers are installed in your oce, at your place, or at
places you are visiting. You can then print with any of those printers by using Mopria™ without the need to install the
respective dedicated applications on them. For details about the models supporting Mopria™ and the system
requirements, see http://www.mopria.org.
Can Be Used Conveniently with a Mobile Device (MF244dw / MF232w)
147

Using AirPrint
15A8-032
You can print or scan without using drivers by sending print data from Apple devices.
AirPrint settings
Conguring AirPrint Settings(P. 148)
Displaying the Screen for AirPrint(P. 151)
Functions of the AirPrint
Printing with AirPrint(P. 153)
Scanning with AirPrint(P. 156)
Troubleshooting
If AirPrint Cannot Be Used(P. 158)
Conguring AirPrint Settings
You can register information, including the name of the machine and installation location, that is used for identifying
the machine. You can also disable the AirPrint function of the machine. Use the Remote UI to change these settings.
1Start the Remote UI and log on in System Manager Mode. Starting Remote
UI(P. 273)
2Click [Settings/Registration].
●If you are using a mobile device, such as iPad, iPhone, or iPod touch, read «click» as «tap» in this section.
3Click [Network Settings] [AirPrint Settings].
Can Be Used Conveniently with a Mobile Device (MF244dw / MF232w)
148

4Click [Edit].
5Specify the required settings, and click [OK].
[Use AirPrint]
Select the check box to enable AirPrint. To disable AirPrint, clear the check box.
[Printer Name]/[Location]/[Speed/Image Quality Priority]/[Latitude]/[Longitude]
Enter the name and the installation location information to help you identify this machine when operating
your Apple device. This information is useful if you have more than one AirPrint printer. Also select whether
to give priority to print speed or to print quality.
Can Be Used Conveniently with a Mobile Device (MF244dw / MF232w)
149

If you select the [Use AirPrint] check box
The following items are also set to <On> automatically.
●<mDNS Settings> for IPv4 and IPv6 Conguring DNS(P. 212)
●<Use HTTP> Disabling HTTP Communication(P. 246)
●[Use IPP Printing] under [IPP Print Settings] Changing the Setting of Functions Available with
AirPrint(P. 150)
●<Use Network Link Scan> Changing the Setting of Functions Available with AirPrint(P. 150)
If you change [Printer Name]
●If you change [Printer Name] that you have once specied, you may be unable to print any more from the
Mac that has been able to be used for printing so far. This phenomenon occurs because <mDNS Name>
( Conguring DNS(P. 212) ) of IPv4 is also changed automatically. In this case, add the machine to the
Mac again.
◼Changing the Setting of Functions Available with AirPrint
If you want to disable functions that you are not going to use with AirPrint or encrypt communications, congure the
necessary setting using the operation panel or Remote UI.
Changing Print Settings
To perform printing with AirPrint, IPP protocol is used.
Turning the function On/Off
You can specify whether to perform printing with AirPrint. The factory default setting is [On].
Log on to the Remote UI in System Manager Mode ( Starting Remote
UI(P. 273) ) [Settings/Registration] [Network Settings] [TCP/IP Settings] [IPP Print
Settings] [Edit] Clear or select the [Use IPP Printing] check box [OK]
Changing the TLS setting
You can specify whether to encrypt communications using TLS when performing printing with AirPrint. The factory
default setting is [On].
●When the machine is connected to a Mac via USB, set [Use TLS] to [Off].
Log on to the Remote UI in System Manager Mode ( Starting Remote
UI(P. 273) ) [Settings/Registration] [Network Settings] [TCP/IP Settings] [IPP Print
Settings] [Edit] Clear or select the [Use TLS] check box [OK]
Changing Scan Settings
To perform scanning with AirPrint, Network Link Scan is used.
Can Be Used Conveniently with a Mobile Device (MF244dw / MF232w)
150

Turning the function On/Off
You can turn on/off the scan function available with AirPrint. The factory default setting is <On>.
<Network Settings> <TCP/IP Settings> <Network Link Scan
Settings> <Use Network Link Scan> Select <Off> or
<On>
Changing the TLS setting
You can specify whether to encrypt communications using TLS when performing scanning with AirPrint. The
factory default setting is [On].
●When the machine is connected to a Mac via USB, set [Use TLS] to [Off].
Log on to the Remote UI in System Manager Mode ( Starting Remote
UI(P. 273) ) [Settings/Registration] [Network Settings] [TCP/IP Settings] [Network Link
Scan Settings] [Edit] Clear or select the [Use TLS] check box [OK]
Displaying the Screen for AirPrint
You can display the screen for AirPrint, on which you can not only access the AirPrint Settings but also view
information about consumables, such as paper and toner cartridge. Further, you can congure security function
settings ( Enabling TLS Encrypted Communication for the Remote UI(P. 249) ).
1Click [System Preferences] in the Dock on the desktop [Printers & Scanners].
2Select this machine and click [Options & Supplies].
3Click [Show Printer Webpage].
4Log on to the Remote UI.
●To change AirPrint settings, log on in System Manager Mode.
➠The screen for AirPrint is displayed.
Can Be Used Conveniently with a Mobile Device (MF244dw / MF232w)
151
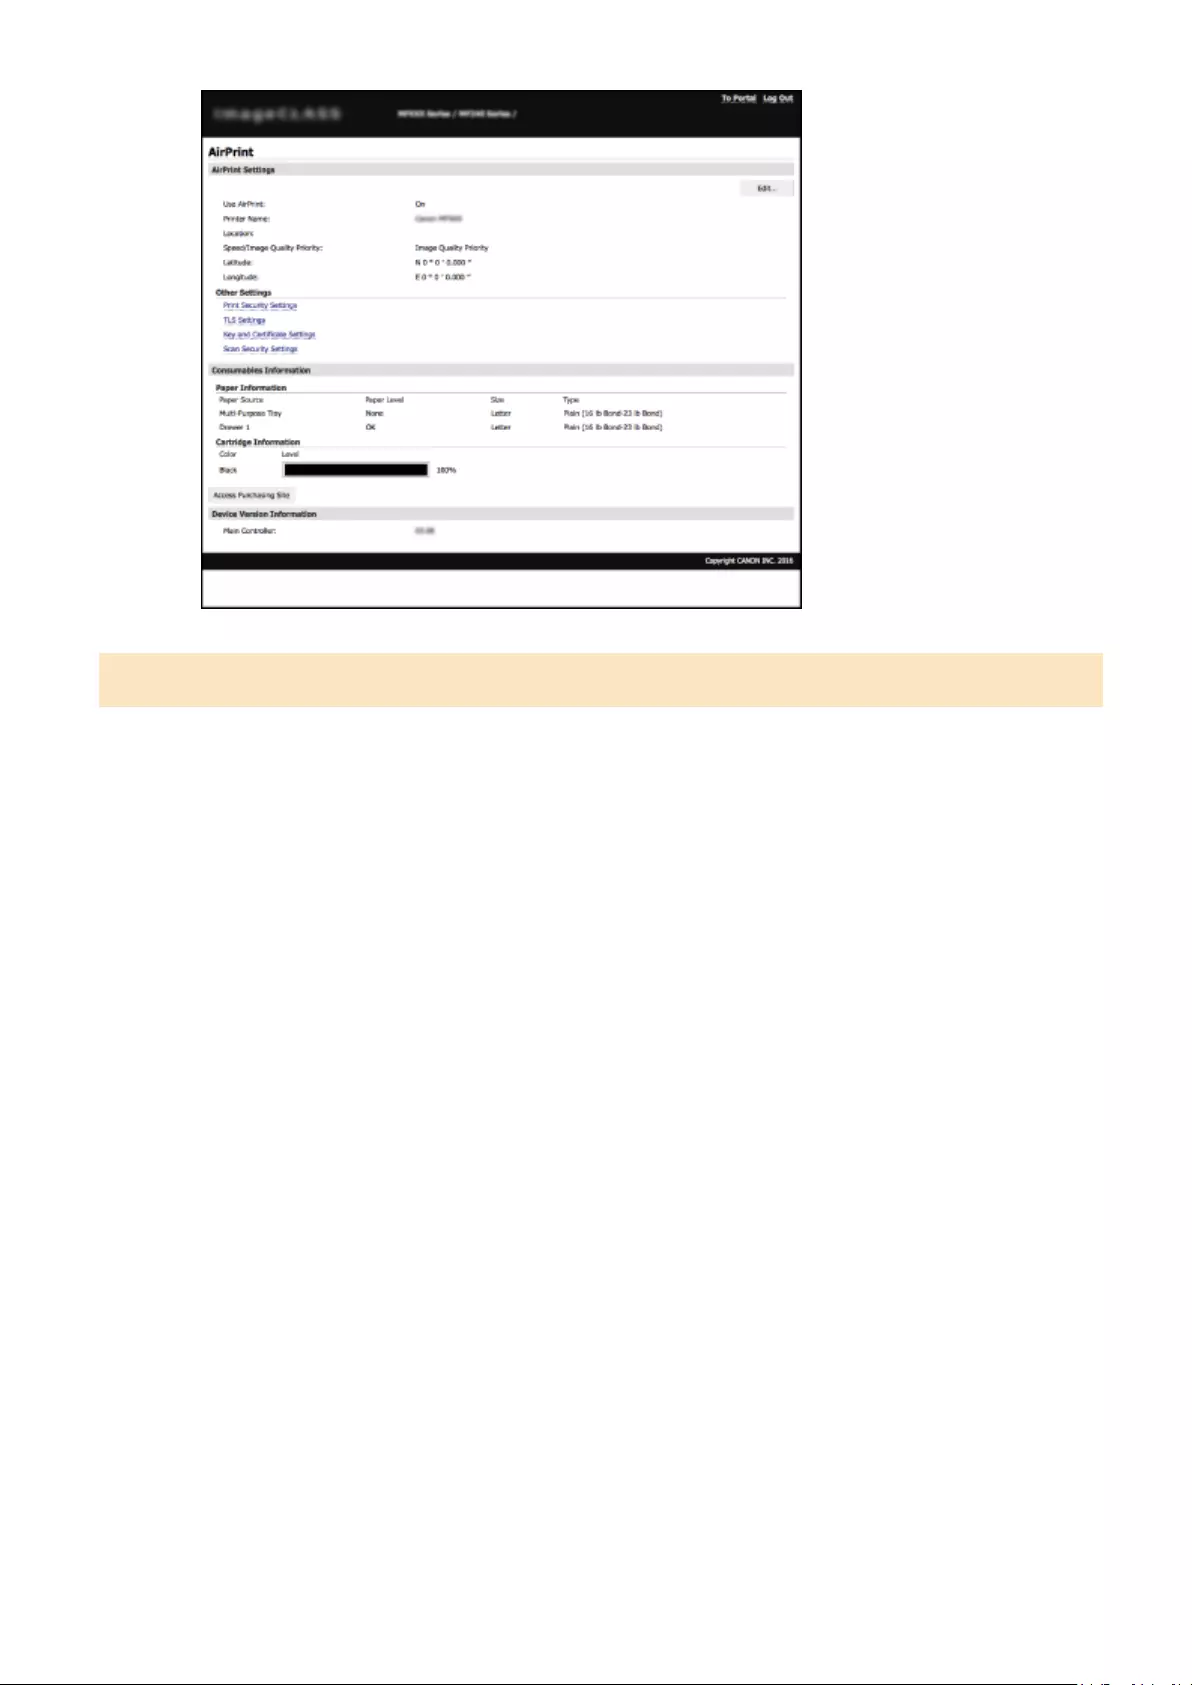
Trademarks
Apple, Bonjour, iPad, iPhone, iPod touch, Mac, Mac OS, OS X, and Safari are trademarks of Apple Inc., registered in the
U.S. and other countries. AirPrint and the AirPrint logo are trademarks of Apple Inc.
Can Be Used Conveniently with a Mobile Device (MF244dw / MF232w)
152

Printing with AirPrint
15A8-033
You do not necessarily need to use a computer for printing e-mails, photos, Web pages, and other documents. AirPrint
enables you to print directly from Apple devices such as iPad, iPhone, and iPod touch.
Printing from iPad, iPhone, or iPod touch(P. 153)
Printing from Mac(P. 154)
System Requirements
To print with AirPrint, you need one of the following Apple devices.
●iPad (all models)
●iPhone (3GS or later)
●iPod touch (3rd generation or later)
●Mac (Mac OS X 10.7 or later)*
* OS X 10.9 or later when you use USB connection.
Network Environment
You need one of the following environments.
●The Apple device and the machine are connected to the same LAN.
●The Apple device and the machine are in Direct Connection.
●The Mac and the machine are connected via USB.
●For printing, it is required to set [Use IPP Printing] to [On]. Changing the Setting of Functions Available
with AirPrint(P. 150)
Printing from iPad, iPhone, or iPod touch
1Make sure that the machine is turned ON and that it is connected to your Apple
device.
●For how to make sure of this, see «Getting Started.» Manuals Included with the Machine(P. 425)
●For how to make sure whether the Apple device and the machine are in Direct Connection, see Make
Direct Connection (Access Point Mode)(P. 144) .
Can Be Used Conveniently with a Mobile Device (MF244dw / MF232w)
153

2From the application on your Apple device, tap to display the menu options.
3From the drop-down list, tap [Print].
4Select this machine from [Printer] in [Printer Options].
●The printers connected to the network are displayed. Select this machine in this step.
●[Printer Options] is not displayed on applications that do not support AirPrint. You cannot print by using
those applications.
5Specify the print settings as necessary.
●The available settings and paper sizes differ depending on the application you are using.
●You can specify the halftones setting for image les using the operation panel. Mobile Print
Halftones(P. 315)
6Tap [Print].
➠Printing starts.
Checking the print status
●During printing, press the Home button of the Apple device twice tap [Print].
Printing from Mac
1Make sure that the machine is turned ON and that it is connected to your Mac.
●For how to make sure of this, see «Getting Started.» Manuals Included with the Machine(P. 425)
2Add the machine to the Mac from [System Preferences] [Printers & Scanners].
●This operation is not necessary if the registration has already been performed for another operation.
3Open a document in an application and display the print dialog box.
●How to display the print dialog box differs for each application. For more information, see the instruction
manual for the application you are using.
4Select this machine in the print dialog box.
●The printers connected to the Mac are displayed. Select this machine in this step.
Can Be Used Conveniently with a Mobile Device (MF244dw / MF232w)
154

5Specify the print settings as necessary.
●The available settings and paper sizes differ depending on the application you are using.
●You can specify the halftones setting for image les using the operation panel. Mobile Print
Halftones(P. 315)
6Click [Print].
➠Printing starts.
Can Be Used Conveniently with a Mobile Device (MF244dw / MF232w)
155

Scanning with AirPrint
15A8-034
You can use AirPrint to transfer the data scanned by the machine directly to a Mac.
System Requirements
To scan with AirPrint, you need a Mac with OS X 10.9 or later installed.
Network Environment
You need one of the following environments.
●The Mac and the machine are connected to the same LAN.
●The Mac and the machine are connected via USB.
●For scanning, it is required to set <Use Network Link Scan> to <On>. Changing the Setting of Functions
Available with AirPrint(P. 150)
●Before scanning, it is required to put the machine into online state. When the auto online function ( Auto
Online for Remote Scan(P. 333) ) is set to <Off>, use the following steps to bring the machine online before
starting the procedure for scanning. (COPY/SCAN) Select <Remote Scanner>
●You cannot scan while settings for operations are being made, or while the machine is performing an
operation whatsoever.
Scanning from the Mac
1Make sure that the machine is turned ON and that it is connected to the Mac.
●For how to make sure of this, see «Getting Started.» Manuals Included with the Machine(P. 425)
2Add the machine to your Mac from [System Preferences] [Printers & Scanners].
●This operation is not necessary if the registration has already been performed for another operation.
3Select this machine from the list of printers in [Printers & Scanners].
4Click [Scan].
Can Be Used Conveniently with a Mobile Device (MF244dw / MF232w)
156

5Click [Open Scanner].
➠The [Scanner] screen is displayed.
6Congure the scan settings as necessary.
7Click [Scan].
➠Scanning starts, and scanned data is displayed.
Can Be Used Conveniently with a Mobile Device (MF244dw / MF232w)
157

If AirPrint Cannot Be Used
15A8-035
If AirPrint cannot be used, try taking the following solutions.
●Make sure that the machine is turned ON. If the machine is turned ON, rst turn it OFF, then wait for at least 10
seconds and then turn it back ON to check if the problem is solved.
●Make sure that no error messages are displayed on the machine.
●Make sure that Apple devices and the machine are connected to the same LAN. If the machine is turned ON, it may
take several minutes before the machine is ready for communication.
●Make sure that Bonjour on your Apple device is enabled.
●For printing, make sure that the paper is loaded in the machine and the machine has sucient toner cartridge
remaining. Displaying the Screen for AirPrint(P. 151)
●For scanning, make sure that the machine’s setting for Network Link Scan is <On>. Changing the Setting of
Functions Available with AirPrint(P. 150)
Can Be Used Conveniently with a Mobile Device (MF244dw / MF232w)
158

Using Google Cloud Print
15A8-036
Google Cloud Print is a service that enables a user who has a Google account to print from applications compatible
with Google Cloud Print via a smartphone, tablet, or computer connected to the Internet. Unlike conventional printing
from a computer, Google Cloud Print enables you to print without using a printer driver. For example, if you want to
print an e-mail or les that are attached to an e-mail, you can print just by using an application compatible with Google
Cloud Print. You will nd your printouts when you go to the machine.
Checking the Machine Settings(P. 159)
Changing Google Cloud Print Settings(P. 159)
Registering the Machine with Google Cloud Print(P. 160)
●When registering the machine or when using Google Cloud Print to print documents, you must be able to
connect the machine to the Internet. You are also responsible for paying all Internet connection fees.
●You may not be able to use this function in some countries or regions.
●Google Cloud Print does not support printing from IPv6 addresses.
●To use Google Cloud Print, a Google account is required. If you do not have one, access Google website to
create your account.
Checking the Machine Settings
Before setting up Google Cloud Print, check the following:
●Make sure that the machine is assigned an IPv4 address and connected to a computer over a network.
Connecting to a Wireless LAN(P. 170)
Connecting to a Wired LAN(P. 169)
●Make sure that the date and time and the time zone settings are correct. Date/Time Settings(P. 303)
Changing Google Cloud Print Settings
Enable the Google Cloud Print function of the machine. You can also disable the Google Cloud Print function of the
machine.
1Press .
2Use / to select <System Management Settings>, and press .
Can Be Used Conveniently with a Mobile Device (MF244dw / MF232w)
159

●If a screen for entering a PIN is displayed, enter the PIN with the numeric keys and press . Setting
the System Manager PIN(P. 229)
3Select <Google Cloud Print Settings> <Enable Google Cloud Print>, and press .
4Select <On> or <Off>, and press .
Registering the Machine with Google Cloud Print
Registering the machine with Google Cloud Print allows you to print from anywhere.
1Start the Remote UI and log on in System Manager Mode. Starting Remote
UI(P. 273)
2Click [Settings/Registration].
3Click [Network Settings] [Google Cloud Print Settings].
Can Be Used Conveniently with a Mobile Device (MF244dw / MF232w)
160
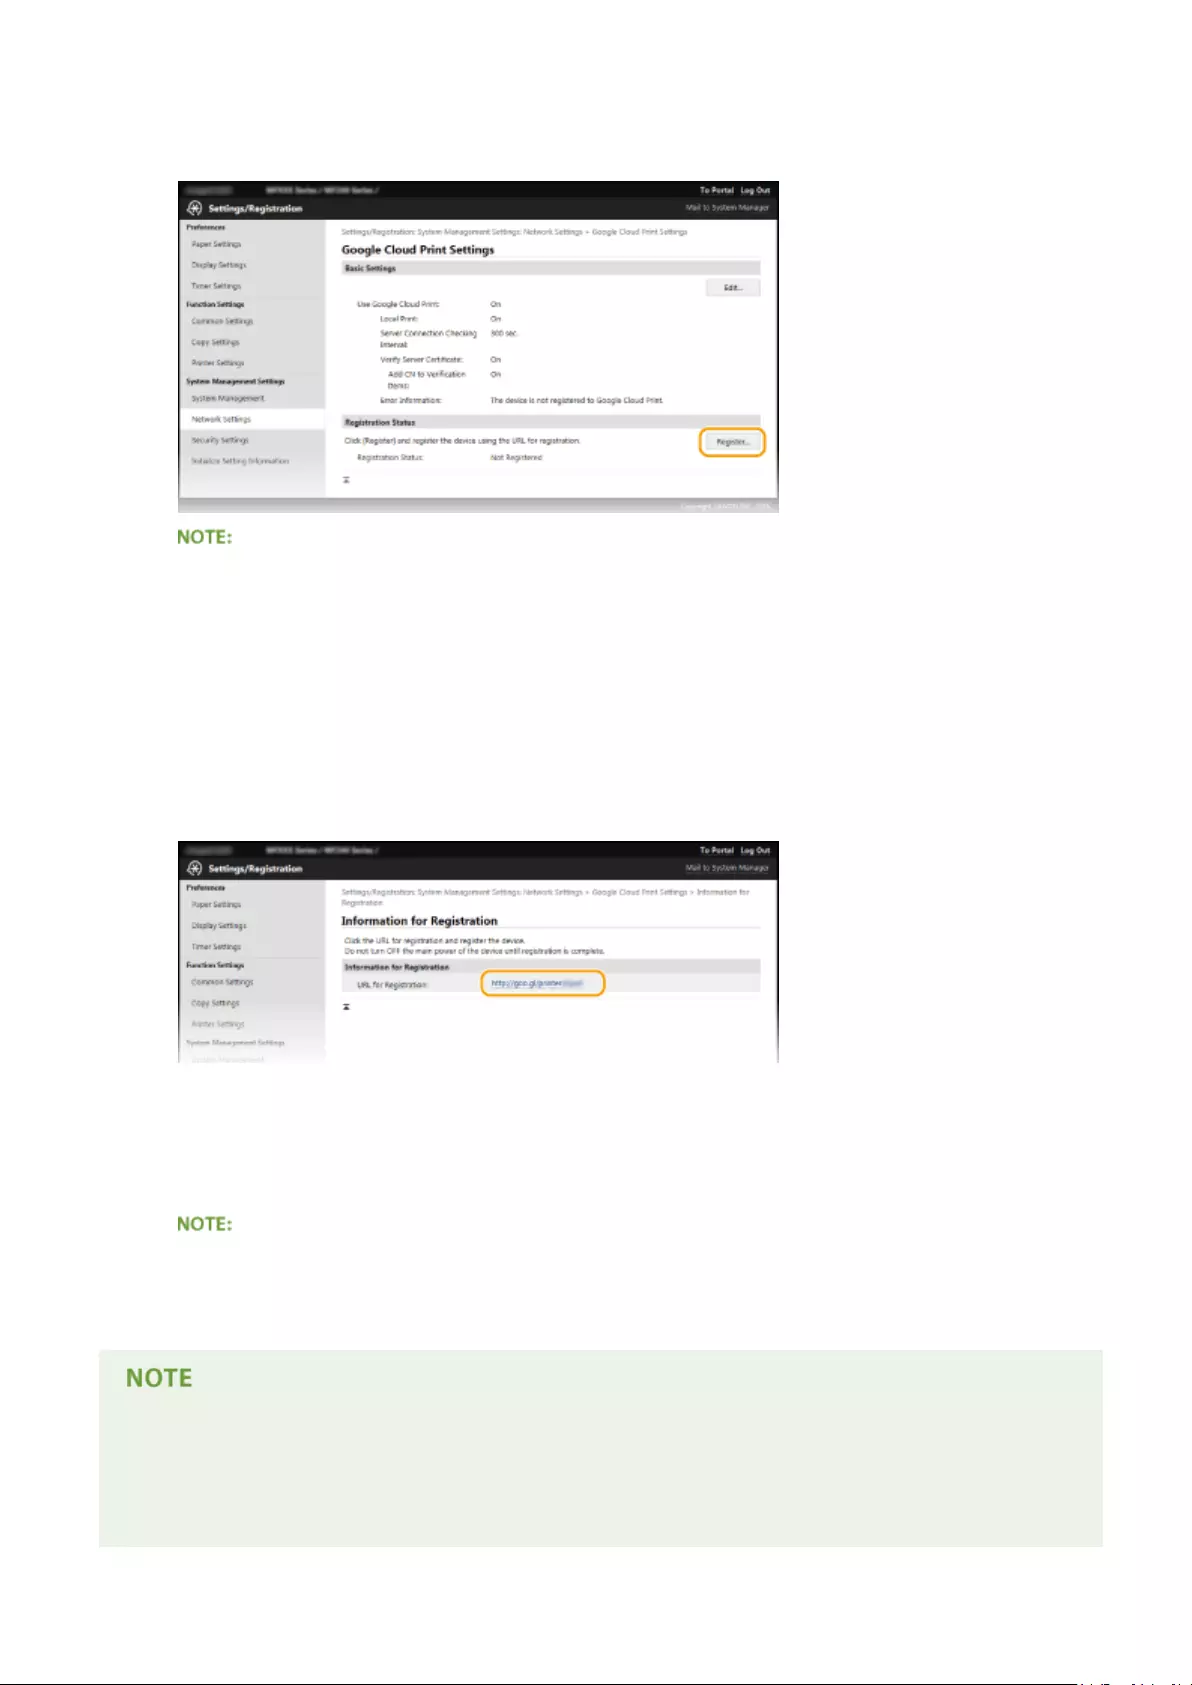
4Click [Register] in [Registration Status].
If [Register] is unavailable
●You need to enable Google Cloud Print. Click [Edit], select the [Use Google Cloud Print] check box, and
then click [OK].
To reregister the machine
●To reregister the machine if the owner of the machine has changed or for other reasons, unregister the
machine and register it again.
5Click the link of the URL displayed for [URL for Registration].
6Follow the on-screen instructions to register the machine.
➠You can print from a Google Cloud Print compatible application such as Google Chrome™.
●Access the Google Cloud Print website for information about the latest applications that support Google
Cloud Print.
Registering from a mobile device or Google Chrome
●You can also register the machine from a mobile device or Google Chrome*. The machine’s display shows
the following conrmation screen before completion of the registration. Select <Yes> to complete the
registration.
Can Be Used Conveniently with a Mobile Device (MF244dw / MF232w)
161

* For the registration procedure, see the instruction manual for your mobile device or the Google Cloud Print website.
Can Be Used Conveniently with a Mobile Device (MF244dw / MF232w)
162
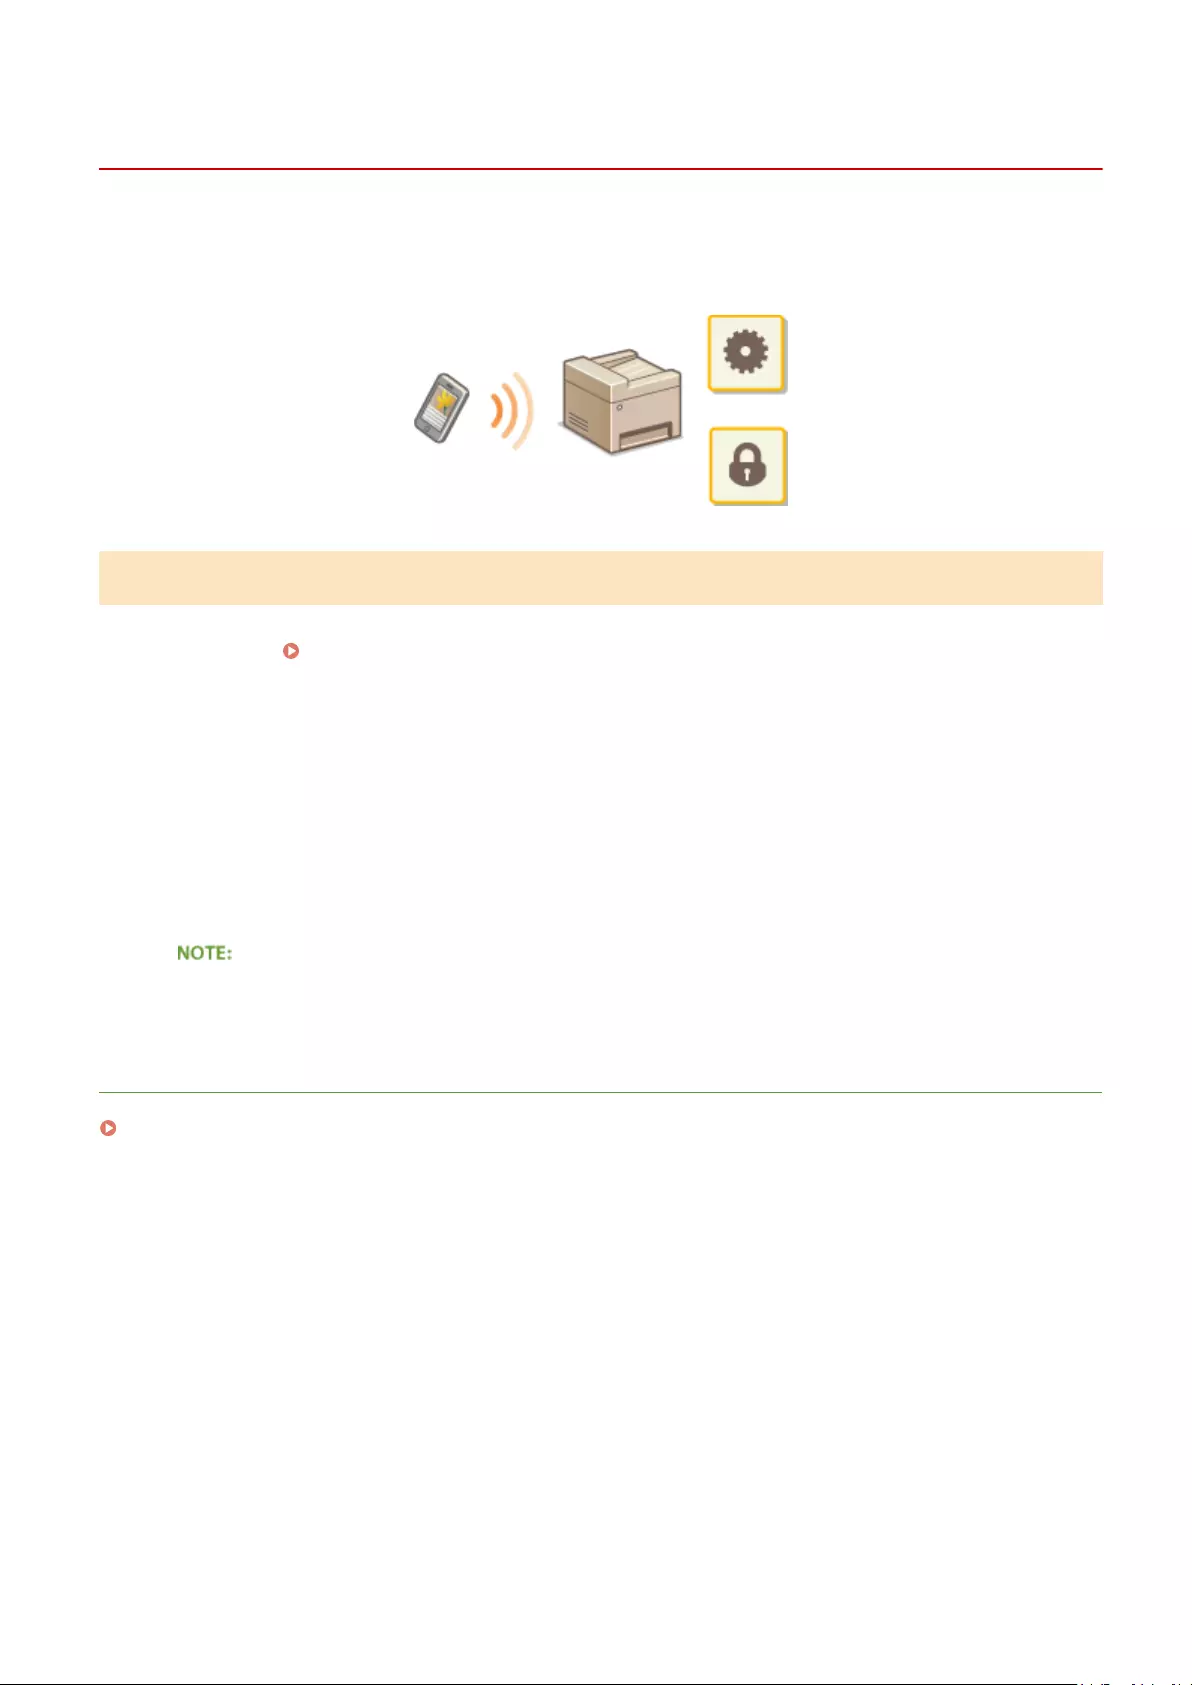
Managing the Machine Remotely
15A8-037
You can use the Remote UI from a Web browser installed on your mobile device. This allows you to check the
machine’s status and specify machine’s settings from your mobile device. Note that the Remote UI screen may not be
displayed properly for some devices and environments.
Starting Remote UI with a Mobile Device
Enter the IP address of the machine into the Web browser and start the Remote UI. Check the IP address set to the
machine in advance ( Viewing Network Settings(P. 194) ). If you have any questions, ask your Network
Administrator.
1Start the Web browser on your mobile device.
2Enter «http://<the IP address of the machine>/» in the address eld.
●If you want to use an IPv6 address, enclose the IPv6 address with brackets (example: http://
[fe80::2e9e:fcff:fe4e:dbce]/).
●Some items of the Remote UI are not displayed in its «Smartphone Version.» If you want to check all items,
see the «PC Version.»
LINKS
Using Remote UI (MF244dw / MF232w)(P. 272)
Can Be Used Conveniently with a Mobile Device (MF244dw / MF232w)
163

Network (MF244dw / MF232w)
Network (MF244dw / MF232w) ………………………………………………………………………………………………… 165
Connecting to a Network …………………………………………………………………………………………………………………. 166
Selecting Wired LAN or Wireless LAN …………………………………………………………………………………………….. 168
Connecting to a Wired LAN …………………………………………………………………………………………………………… 169
Connecting to a Wireless LAN ……………………………………………………………………………………………………….. 170
Setting Up Connection Using WPS Push Button Mode ………………………………………………………………… 172
Setting Up Connection Using WPS PIN Code Mode …………………………………………………………………….. 174
Setting Up Connection by Selecting a Wireless Router ………………………………………………………………… 177
Setting Up Connection by Specifying Detailed Settings ……………………………………………………………….. 180
Checking the SSID and Network Key ………………………………………………………………………………………… 184
Setting IP Addresses ……………………………………………………………………………………………………………………. 187
Setting IPv4 Address ……………………………………………………………………………………………………………… 188
Setting IPv6 Addresses ………………………………………………………………………………………………………….. 191
Viewing Network Settings ……………………………………………………………………………………………………………….. 194
Conguring the Machine for Printing from a Computer …………………………………………………………………….. 197
Conguring Printing Protocols and WSD Functions ………………………………………………………………………….. 198
Conguring Printer Ports …………………………………………………………………………………………………………….. 201
Setting Up Print Server ………………………………………………………………………………………………………………… 204
Conguring the Machine for Your Network Environment ………………………………………………………………….. 207
Conguring Ethernet Settings ………………………………………………………………………………………………………. 208
Changing the Maximum Transmission Unit …………………………………………………………………………………….. 210
Setting a Wait Time for Connecting to a Network …………………………………………………………………………….. 211
Conguring DNS ………………………………………………………………………………………………………………………… 212
Conguring SNTP ……………………………………………………………………………………………………………………….. 216
Monitoring and Controlling the Machine with SNMP ………………………………………………………………………… 218
Network (MF244dw / MF232w)
164

Network
15A8-038
The machine has been designed for exibility of use across a variety of environments, and it includes advanced
technologies in addition to basic network features. Do not worry if you are not a network expert, because the machine
has also been designed for convenience and ease of use. Relax and proceed with the network setup one step at a time.
◼Connecting to a Computer/Viewing the Machine’s Network Settings
Connecting to a Network(P. 166) Viewing Network Settings(P. 194)
◼Conguring or Preparing for Print/Scan Functions
Conguring the Machine for Printing from a Computer(P. 197)
◼Customizing the Machine for More Convenient Network Experience
Conguring the Machine for Your Network Environment(P. 207)
Direct Connection to a mobile device
●You can directly communicate with the machine from your mobile device without the need to congure
dicult network settings. Make Direct Connection (Access Point Mode)(P. 144)
Network (MF244dw / MF232w)
165

Connecting to a Network
15A8-039
When connecting the machine to a wired or wireless local area network (LAN), you need to set an IP address unique to
the selected network. Select «wired» or «wireless» depending on your communication environment and networking
devices. For steps to connect the machine and set an IP address, see «Getting Started» ( Manuals Included with the
Machine(P. 425) ). For specic IP address settings, contact your Internet service provider or Network Administrator.
If the machine is connected to an unsecured network, your personal information might be leaked to a third
party.
●The machine cannot connect to both wired and wireless LANs at the same time.
●The machine does not come with a LAN cable or router. Have them ready as necessary.
●For more information about your networking devices, see the instruction manuals for the devices or contact
your manufacturer.
◼Before You Start
Follow these steps to connect the machine to a network.
Check your computer settings.
●Make sure that the computer is correctly connected to the network. For more
information, see the instruction manuals for the devices you are using, or contact the
device manufacturers.
●Make sure that the network settings have been completed on the computer. If the
network has not been set up properly, you will not be able to use the machine on the
network, even if you perform the rest of the procedure below.
●Depending on the network, you may need to change settings for the
communication method (half-duplex/full-duplex) or the Ethernet type (10BASE-T/
100BASE-TX) ( Conguring Ethernet Settings(P. 208) ). For more information,
contact your Internet service provider or Network Administrator.
●To check the MAC address of the machine.
Viewing the MAC Address for Wired LAN(P. 194)
Viewing the MAC Address and Information for Wireless LAN(P. 195)
Network (MF244dw / MF232w)
166

●To connect to an IEEE 802.1X network, see Conguring IEEE 802.1X
Authentication(P. 252)
Select wired or wireless LAN.
Selecting Wired LAN or Wireless LAN(P. 168)
Connect to a wired or wireless LAN.
●Proceed to the section that corresponds to the setting you selected in step 2.
Connecting to a Wired LAN(P. 169)
Connecting to a Wireless LAN(P. 170)
Set the IP address as necessary.
●This step is required when you want to assign a specic IP address to the machine or
change the dynamic IP addressing protocol from the default DHCP.
Setting IP Addresses(P. 187)
Network (MF244dw / MF232w)
167

Selecting Wired LAN or Wireless LAN
15A8-03A
After you decide on wired or wireless LAN to connect the machine to the computer, select wired LAN or wireless LAN
using the operation panel. For how to connect to and specify settings for a wireless LAN/wired LAN, see «Getting
Started» ( Manuals Included with the Machine(P. 425) ). Note that if you change the setting from <Wired LAN> to
<Wireless LAN> or vice versa, you will need to uninstall MF Drivers installed on your computer and then reinstall them.
For more information, see «MF Driver Installation Guide.»
1Press .
2Use / to select <Network Settings>, and press .
●If a screen for entering a PIN is displayed, enter the PIN with the numeric keys and press . Setting
the System Manager PIN(P. 229)
3Select <Select Wired/Wireless LAN>, and press .
4Select <Wired LAN> or <Wireless LAN>, and press .
LINKS
Connecting to a Network(P. 166)
Connecting to a Wired LAN(P. 169)
Connecting to a Wireless LAN(P. 170)
Network (MF244dw / MF232w)
168

Connecting to a Wired LAN
15A8-03C
Connect the machine to a computer via a router. Use a LAN cable to connect the machine to the router.
1Connect a LAN cable.
●Connect the machine to a router by using a LAN cable.
●Push the connector in until it clicks into place.
2Wait approximately 2 minutes.
●While you wait, the IP address is set automatically.
You can set the IP address manually. Setting IP Addresses(P. 187)
LINKS
Connecting to a Network(P. 166)
Network (MF244dw / MF232w)
169

Connecting to a Wireless LAN
15A8-03E
Wireless routers (or access points) connect the machine to a computer via radio waves. If your wireless router is
equipped with Wi-Fi Protected Setup (WPS), conguring your network is automatic and easy. If your networking
devices do not support automatic conguration, or if you want to specify authentication and encryption settings in
detail, you need to manually set up the connection. Make sure that your computer is correctly connected to the
network.
Setting Up Connection Using WPS(P. 170)
Manually Setting Up Connection(P. 171)
Risk of information leak
Use wireless LAN connection at your own discretion and at your own risk. If the machine is connected to an
unsecured network, your personal information might be leaked to a third party because radio waves used in
wireless communication can go anywhere nearby, even beyond walls.
Wireless LAN security
The wireless LAN security that is supported by the machine is listed below. For the wireless security
compatibility of your wireless router, see the instruction manuals for your networking devices or contact your
manufacturer.
●128 (104)/64 (40) bit WEP
●WPA-PSK (TKIP/AES-CCMP)
●WPA2-PSK (TKIP/AES-CCMP)
Required devices for wireless LAN connection
●The machine does not come with a wireless router. Have the router ready as necessary.
●The wireless router must conform to IEEE 802.11b/g/n and be able to communicate in 2.4 GHz frequency
band. For more information, see the instruction manuals for your networking devices or contact your
manufacturer.
Setting Up Connection Using WPS
When using WPS, two modes are available: push button mode and PIN code mode.
Network (MF244dw / MF232w)
170

◼Push Button Mode
Find the WPS mark shown below on the package of your wireless router. Also make sure that there is a WPS button on
your networking device. Setting Up Connection Using WPS Push Button Mode(P. 172)
◼PIN Code Mode
Some WPS routers do not support the push button mode. If WPS PIN code mode is mentioned on the package or in
the instruction manuals of your networking device, set up the connection by entering the PIN code. Setting Up
Connection Using WPS PIN Code Mode(P. 174)
If the wireless router is set to use WEP authentication, you may not be able to set up connection using WPS.
Manually Setting Up Connection
When manually setting up a wireless connection, you can either select a wireless router or manually enter the required
information. Regardless of the method, make sure that you have the required setup information, including the SSID
and network key ( Checking the SSID and Network Key(P. 184) ).
◼Selecting a Wireless Router
Select this setup option if you need to manually set up the connection but want to complete the setup as easily as
possible. Setting Up Connection by Selecting a Wireless Router(P. 177)
◼Manually Entering the Setup Information
If you want to specify security settings in detail, such as authentication and encryption settings, manually enter the
SSID and network key to set up the connection. Setting Up Connection by Specifying Detailed Settings(P. 180)
LINKS
Connecting to a Network(P. 166)
Selecting Wired LAN or Wireless LAN(P. 168)
Network (MF244dw / MF232w)
171

Setting Up Connection Using WPS Push Button Mode
15A8-03F
If your wireless router supports WPS push button mode, you can easily set up a connection with a WPS button.
How to operate the wireless router may vary on each device. See the instruction manuals for your networking
device for help.
1Press .
2Use / to select <Network Settings>, and press .
●If a screen for entering a PIN is displayed, enter the PIN with the numeric keys and press . Setting
the System Manager PIN(P. 229)
3Select <Wireless LAN Settings>, and press .
●If the <Enable the wireless LAN?> message is displayed, select <Yes>, and press .
●If the <Direct Connection will be disabled. Is it OK?> message is displayed, select <Yes>, and press .
4Read the message that is displayed, and press .
5Select <WPS Push Button Mode>, and press .
6Select <Yes>, and press .
7Press and hold the WPS button on the wireless router.
The button must be pressed within 2 minutes after pressing in step 6.
●Depending on the networking device, you may need to press and hold the button for 2 seconds or longer.
See the instruction manuals for your networking device for help.
Network (MF244dw / MF232w)
172

If an error message is displayed during setup
Press and return to step 5.
8Check that the Wi-Fi indicator is blinking on the operation panel.
●The Wi-Fi indicator blinks when a wireless router is detected.
●When the setup is completed, the screen below is displayed, and approximately 2 seconds later, the Wi-Fi
indicator lights up.
●Wait approximately 2 minutes until the IP address settings of the machine are completed.
Signal strength
When more than one wireless router is available for connection, the machine connects to the device with the
strongest signal. Signal strength is measured using RSSI (Received Signal Strength Indication).
Reducing power consumption
You can set the machine to enter <Power Save Mode> based on signals emitted from the wireless router.
Power Save Mode (P. 288)
If the IP address of the machine has changed
In a DHCP environment, the IP address of the machine may be changed automatically. If this happens, the
connection is maintained as long as the machine and the computer belong to the same subnet.
LINKS
Connecting to a Wireless LAN(P. 170)
Network (MF244dw / MF232w)
173

Setting Up Connection Using WPS PIN Code Mode
15A8-03H
If your wireless router supports WPS PIN code mode, generate a PIN code with the machine and register the code to
the networking device.
How to operate the wireless router may vary on each device. See the instruction manuals for your networking
device for help.
From a Computer
1Access your wireless router from a computer and display the screen for entering a
WPS PIN code.
●For more information, see the instruction manuals for your networking device.
From the Operation Panel
2Press .
3Use / to select <Network Settings>, and press .
●If a screen for entering a PIN is displayed, enter the PIN with the numeric keys and press . Setting
the System Manager PIN(P. 229)
4Select <Wireless LAN Settings>, and press .
●If the <Enable the wireless LAN?> message is displayed, select <Yes>, and press .
●If the <Direct Connection will be disabled. Is it OK?> message is displayed, select <Yes>, and press .
5Read the message that is displayed, and press .
6Select <WPS PIN Code Mode>, and press .
7Select <Yes>, and press .
Network (MF244dw / MF232w)
174
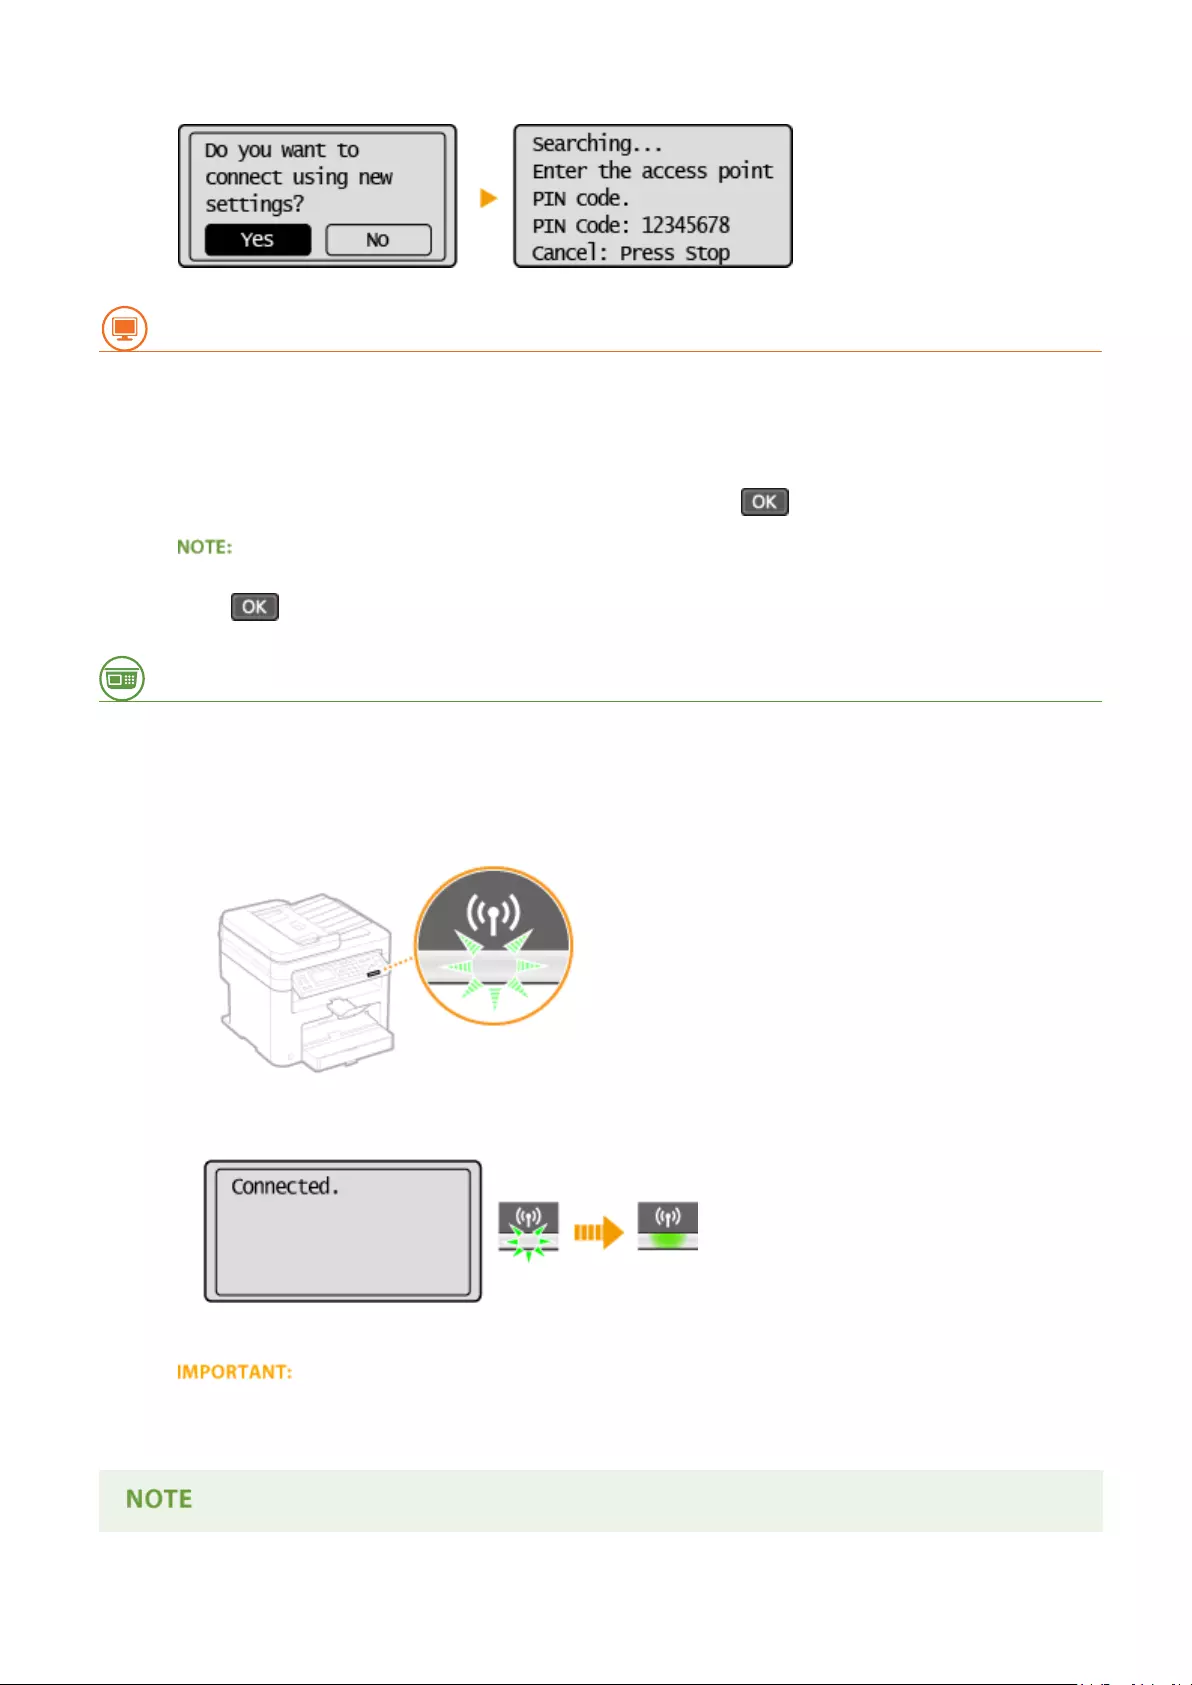
●A PIN code is generated.
From a Computer
8Register the generated PIN code to the wireless router.
●Register the PIN code on the setup screen displayed in step 1.
●The PIN code must be registered within 10 minutes after pressing in step 7.
If an error message is displayed during setup
Press and return to step 6.
From the Operation Panel
9Check that the Wi-Fi indicator is blinking on the operation panel.
●The Wi-Fi indicator blinks when a wireless router is detected.
●When the setup is completed, the screen below is displayed, and approximately 2 seconds later, the Wi-Fi
indicator lights up.
●Wait approximately 2 minutes until the IP address settings of the machine are completed.
Signal strength
When more than one wireless router is available for connection, the machine connects to the device with the
strongest signal. Signal strength is measured using RSSI (Received Signal Strength Indication).
Network (MF244dw / MF232w)
175

Reducing power consumption
You can set the machine to enter <Power Save Mode> based on signals emitted from the wireless router.
Power Save Mode (P. 288)
If the IP address of the machine has changed
In a DHCP environment, the IP address of the machine may be changed automatically. If this happens, the
connection is maintained as long as the machine and the computer belong to the same subnet.
LINKS
Connecting to a Wireless LAN(P. 170)
Network (MF244dw / MF232w)
176

Setting Up Connection by Selecting a Wireless Router
15A8-03J
You can search the wireless routers (or access points) available for connection and select one from the display of the
machine. For the network key, enter a WEP key or TKIP. Before selecting a wireless router, check and write down the
required setup information, including the SSID and network key ( Checking the SSID and Network Key(P. 184) ).
Security settings
If the wireless connection is set up by selecting a wireless router, the WEP authentication method is set to
<Open System> or the WPA/WPA2 encryption method is set to <Auto> (AES-CCMP or TKIP). If you want to select
<Shared Key> for WEP authentication or <AES-CCMP> for WPA/WPA2 encryption, you need to set up the
connection using the manual entry method ( Setting Up Connection by Specifying Detailed
Settings(P. 180) ).
1Press .
2Use / to select <Network Settings>, and press .
●If a screen for entering a PIN is displayed, enter the PIN with the numeric keys and press . Setting
the System Manager PIN(P. 229)
3Select <Wireless LAN Settings>, and press .
●If the <Enable the wireless LAN?> message is displayed, select <Yes>, and press .
●If the <Direct Connection will be disabled. Is it OK?> message is displayed, select <Yes>, and press .
4Read the message that is displayed, and press .
5Select <SSID Settings>, and press .
6Select <Select Access Point>, and press .
●The machine starts searching for available wireless routers.
Network (MF244dw / MF232w)
177

If <Cannot nd the access point.> is displayed
See When an Error Message Appears(P. 347) .
7Select a wireless LAN router, and press .
●Select the router whose SSID matches the one that you have written down.
If your wireless router is not found
Check whether the machine is properly installed and ready to connect to the network. Installation/
Settings Problems(P. 356)
8Enter the network key that you have written down.
●Enter the network key using the numeric keys, select <Apply>, and press .
Entering Text(P. 35)
WEP WPA-PSK or WPA2-PSK
9Select <Yes>, and press .
If an error message is displayed during setup
Press , check whether the network key is correct, and return to step 5.
10 Check that the Wi-Fi indicator is blinking on the operation panel.
●The Wi-Fi indicator blinks when a wireless router is detected.
Network (MF244dw / MF232w)
178

●When the setup is completed, the screen below is displayed, and approximately 2 seconds later, the Wi-Fi
indicator lights up.
●Wait approximately 2 minutes until the IP address settings of the machine are completed.
Signal strength
When more than one wireless router is available for connection, the machine connects to the device with the
strongest signal. Signal strength is measured using RSSI (Received Signal Strength Indication).
Reducing power consumption
You can set the machine to enter <Power Save Mode> based on signals emitted from the wireless router.
Power Save Mode (P. 288)
If the IP address of the machine has changed
In a DHCP environment, the IP address of the machine may be changed automatically. If this happens, the
connection is maintained as long as the machine and the computer belong to the same subnet.
LINKS
Connecting to a Wireless LAN(P. 170)
Network (MF244dw / MF232w)
179

Setting Up Connection by Specifying Detailed Settings
15A8-03K
If you want to specify the security settings in detail or cannot establish the wireless connection using the other
procedures, manually enter all the required information for the wireless LAN connection. Before specifying detailed
settings, check and write down the required information, including the SSID, network key, and wireless security
protocols ( Checking the SSID and Network Key(P. 184) ).
1Press .
2Use / to select <Network Settings>, and press .
●If a screen for entering a PIN is displayed, enter the PIN with the numeric keys and press . Setting
the System Manager PIN(P. 229)
3Select <Wireless LAN Settings>, and press .
●If the <Enable the wireless LAN?> message is displayed, select <Yes>, and press .
●If the <Direct Connection will be disabled. Is it OK?> message is displayed, select <Yes>, and press .
4Read the message that is displayed, and press .
5Select <SSID Settings> <Enter Manually>.
6Enter the SSID that you have written down.
●Enter the SSID using the numeric keys, select <Apply>, and press . Entering Text(P. 35)
7Specify the security settings based on the information that you have written down.
●If you do not need to specify the security settings, select <None>, and press .
Network (MF244dw / MF232w)
180

Using WEP
1Select <WEP>, and press .
2Select an authentication method, and press .
<Open System>
Sets open system authentication, which is also called «open authentication.»
<Shared Key>
Uses the WEP key as a password.
When <Open System> is selected
When connecting to a wireless LAN, the machine experiences an authentication error if the shared key
authentication is set on the wireless router. If this happens, the machine automatically changes the
setting to <Shared Key> and retries the connection.
3Select <Edit WEP Key>, and press .
4Select the WEP key (1 to 4) you want to edit, and press .
●Up to four WEP keys can be registered.
5Enter the network key that you have written down.
●Enter the network key using the numeric keys, and select <Apply>, and press . Entering
Text(P. 35)
6Select <Select WEP Key>, and press .
Network (MF244dw / MF232w)
181
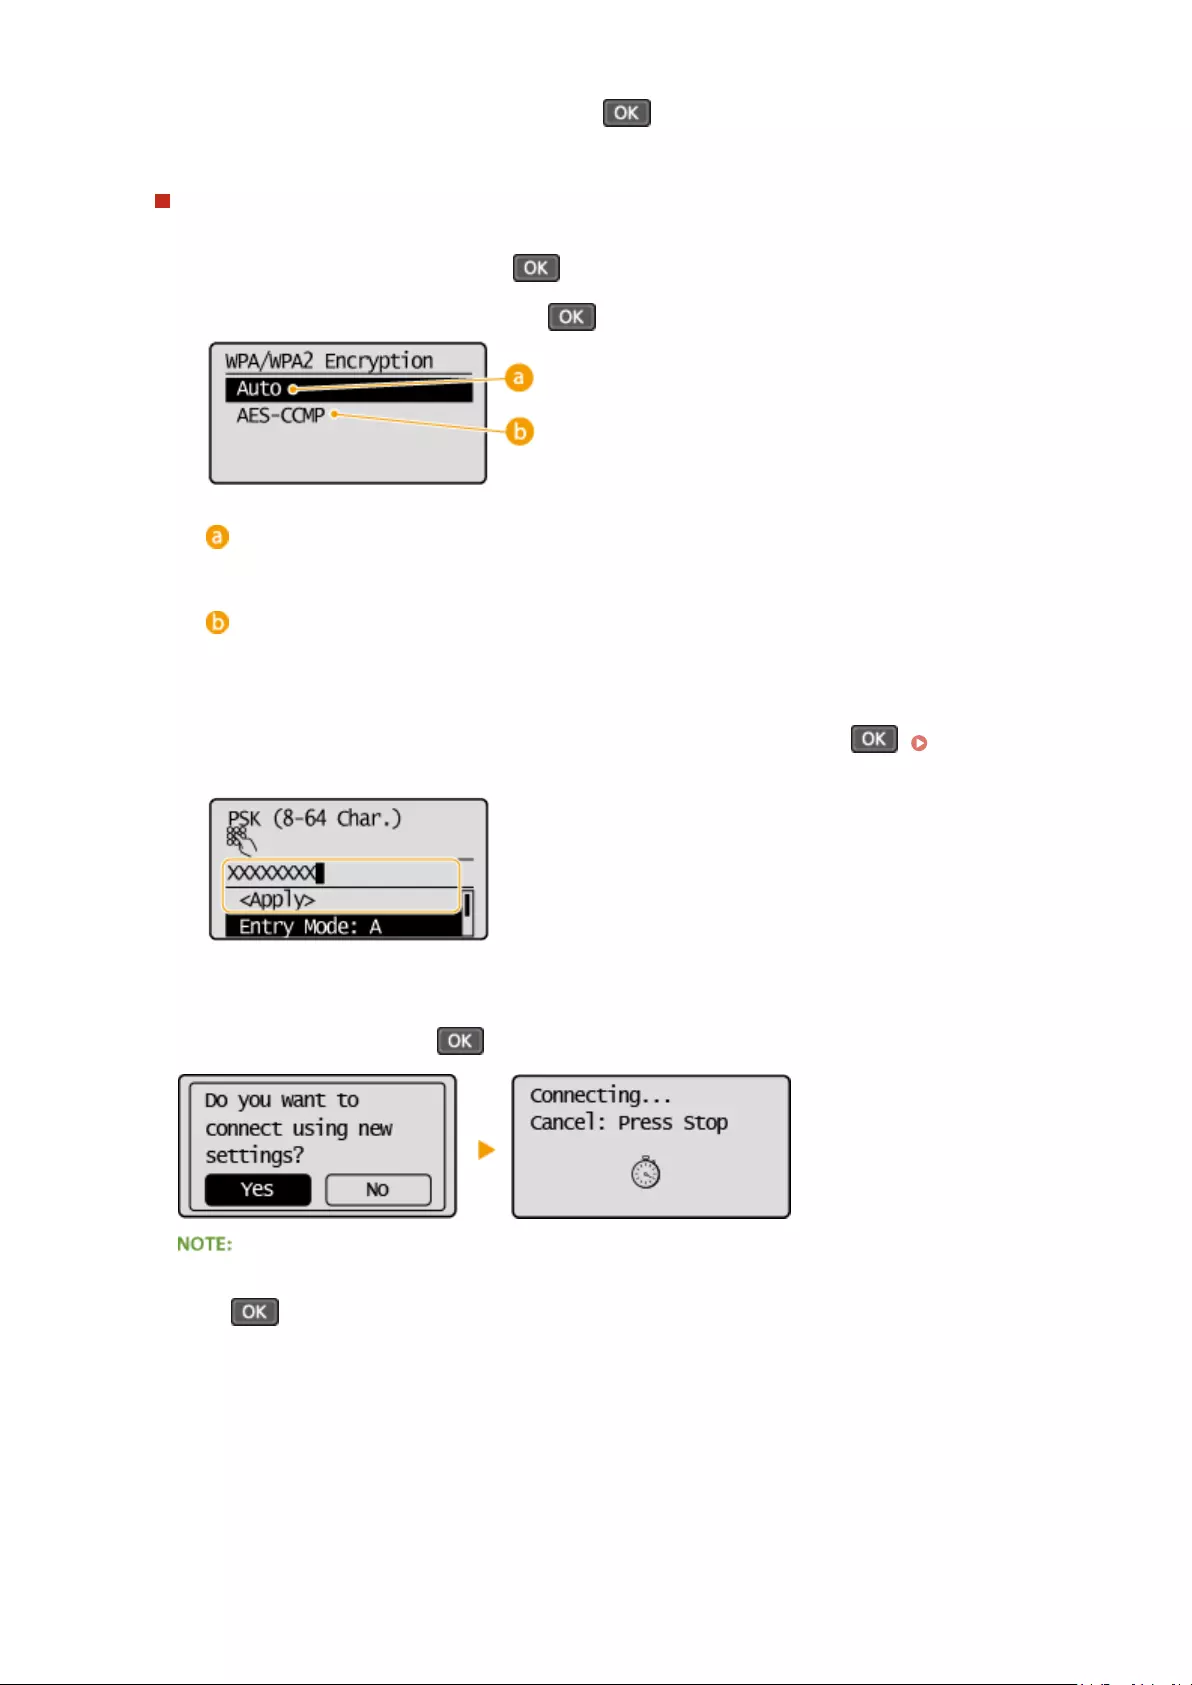
7Select the WEP key you have edited, and press .
Using WPA-PSK or WPA2-PSK
1Select <WPA/WPA2-PSK>, and press .
2Select an encryption method, and press .
<Auto>
Sets the machine to automatically select AES-CCMP or TKIP to match the setting of the wireless router.
<AES-CCMP>
Sets AES-CCMP as the encryption method.
3Enter the network key that you have written down.
●Enter the network key using the numeric keys, select <Apply>, and press . Entering
Text(P. 35)
8Select <Yes>, and press .
If an error message is displayed during setup
Press , check whether the specied settings are correct, and return to step 5.
9Check that the Wi-Fi indicator is blinking on the operation panel.
●The Wi-Fi indicator blinks when a wireless router is detected.
Network (MF244dw / MF232w)
182
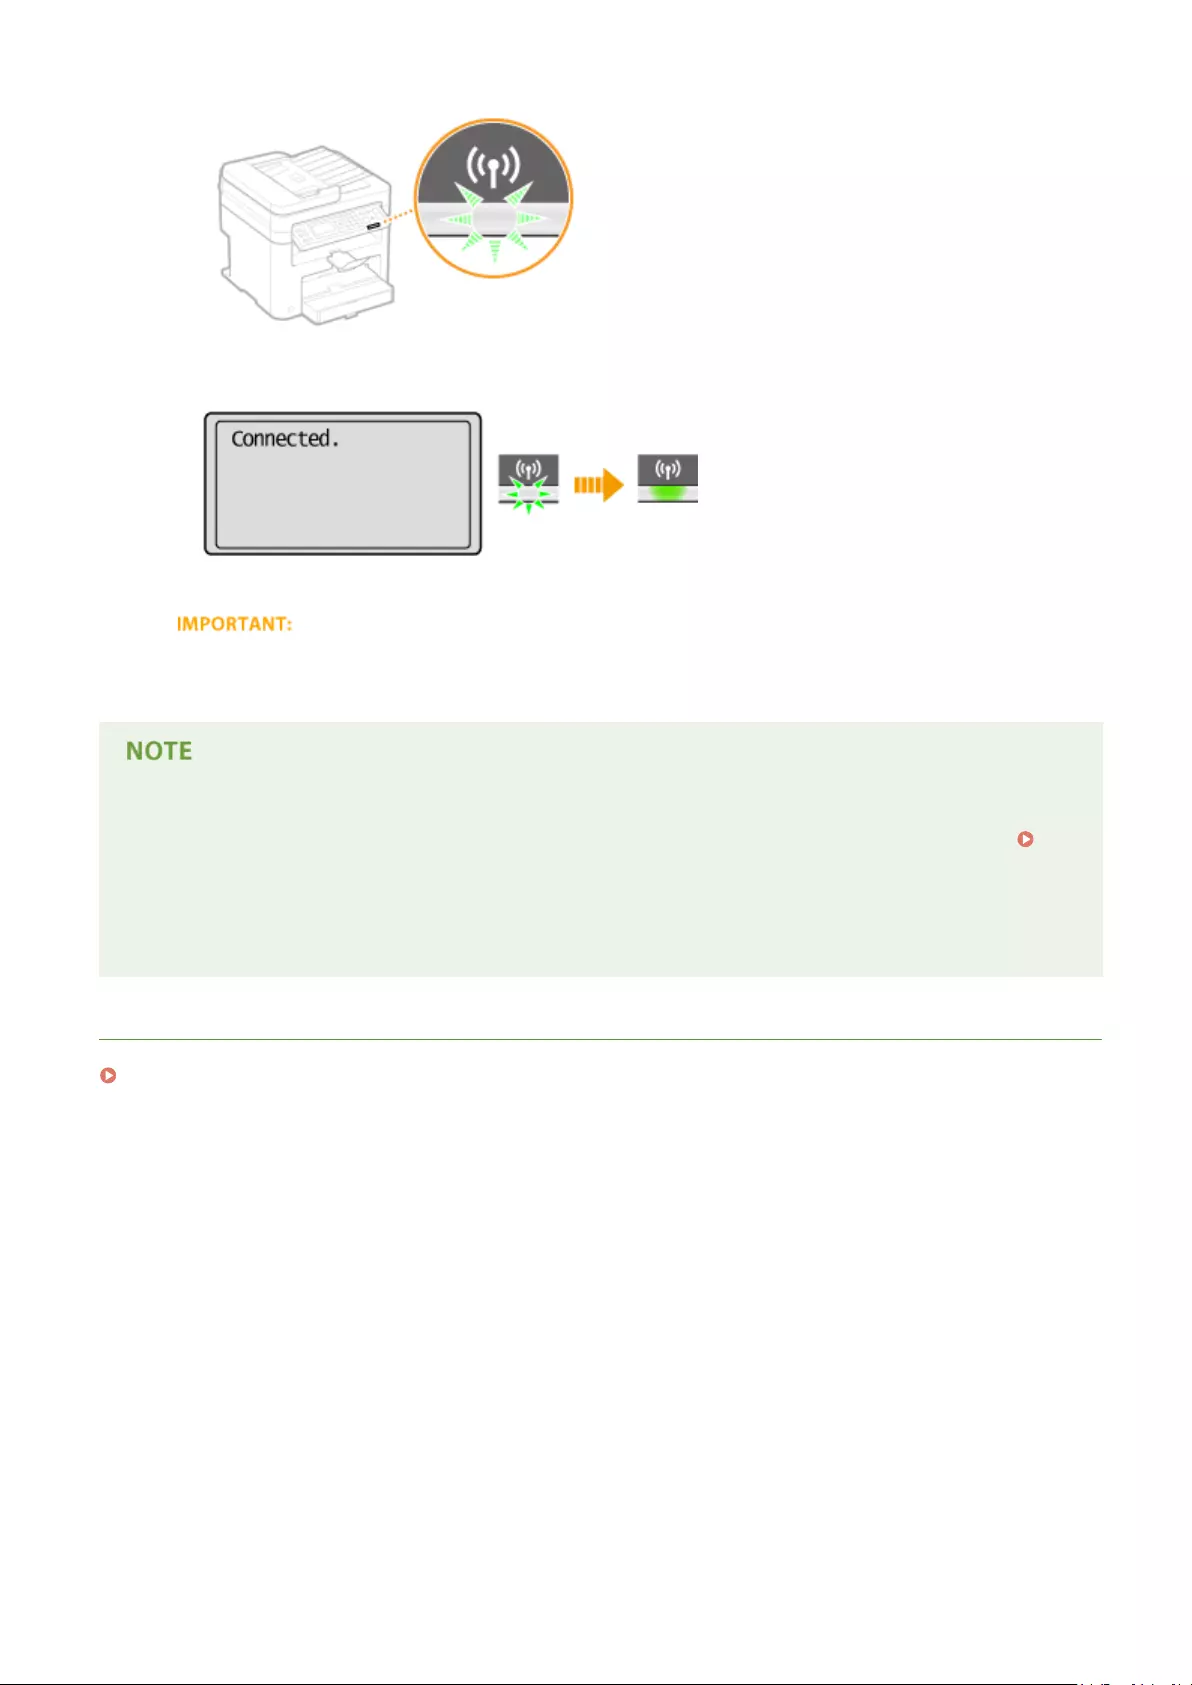
●When the setup is completed, the screen below is displayed, and approximately 2 seconds later, the Wi-Fi
indicator lights up.
●Wait approximately 2 minutes until the IP address settings of the machine are completed.
Signal strength
When more than one wireless router is available for connection, the machine connects to the device with the
strongest signal. Signal strength is measured using RSSI (Received Signal Strength Indication).
Reducing power consumption
You can set the machine to enter <Power Save Mode> based on signals emitted from the wireless router.
Power Save Mode (P. 288)
If the IP address of the machine has changed
In a DHCP environment, the IP address of the machine may be changed automatically. If this happens, the
connection is maintained as long as the machine and the computer belong to the same subnet.
LINKS
Connecting to a Wireless LAN(P. 170)
Network (MF244dw / MF232w)
183

Checking the SSID and Network Key
15A8-03L
When manually setting up a wireless connection, you need to specify the SSID and network key of your wireless router.
The SSID and network key may be indicated on these networking devices. Check your devices and write down the
necessary information before setting up the connection. For more information, see the instruction manuals for your
networking devices or contact your manufacturer.
SSID A name given for identifying a specic wireless LAN. Some other terms used for SSID include
«access point name» and «network name.»
Network Key
A keyword or password used for encrypting data or authenticating a network. Some other
terms used for network key include «encryption key,» «WEP key,» «WPA/WPA2 passphrase,»
and «preshared key (PSK).»
Wireless Security
Protocols
(Authentication/
Encryption)
When manually setting up a wireless connection by specifying detailed settings, you need to
specify security settings. Check the following information:
●Security types (WEP/WPA-PSK/WPA2-PSK)
●Authentication method (Open System/Shared Key)
●Encryption method (TKIP/AES-CCMP)
◼Checking the SSID and Network Key from a Computer
The SSID or the network key may have been changed. If you do not know the SSID or the network key, you can check
them by using the Canon MF/LBP Wireless Setup Assistant included with the provided DVD-ROM. The Canon MF/LBP
Wireless Setup Assistant can be used on a computer connected to a wireless LAN.
If you are a Mac OS user
The provided DVD-ROM that comes with the machine does not contain the Canon MF/LBP Wireless Setup
Assistant for Mac OS. It is available from the following Canon Web site: http://www.canon.com/
1Insert the provided DVD-ROM into the drive on the computer.
●Select a language and click [OK] if you are prompted to do so.
2Click [Start Software Programs].
Network (MF244dw / MF232w)
184
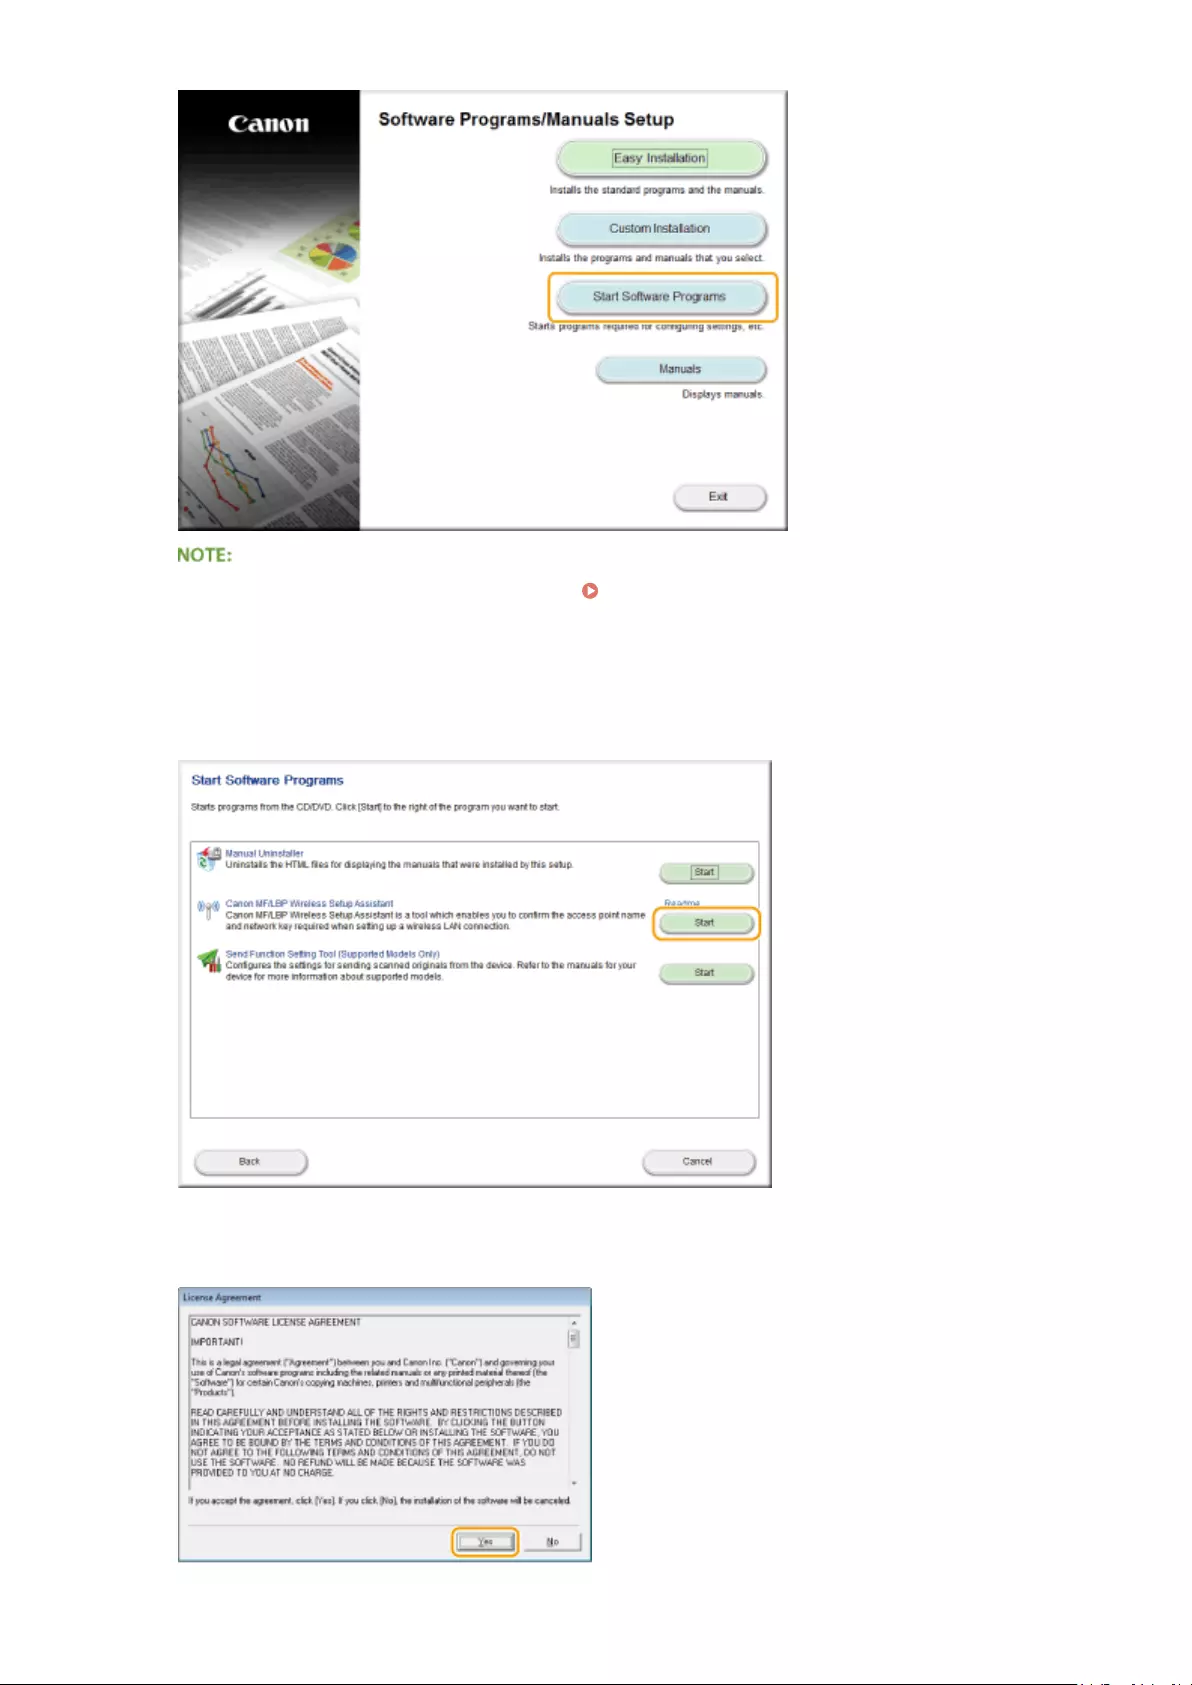
●If the above screen is not displayed Displaying the [Software Programs/Manuals Setup]
Screen(P. 435)
●If [AutoPlay] is displayed, click [Run MInst.exe].
3Click [Start] for [Canon MF/LBP Wireless Setup Assistant].
4Read the License Agreement and click [Yes] to agree.
Network (MF244dw / MF232w)
185
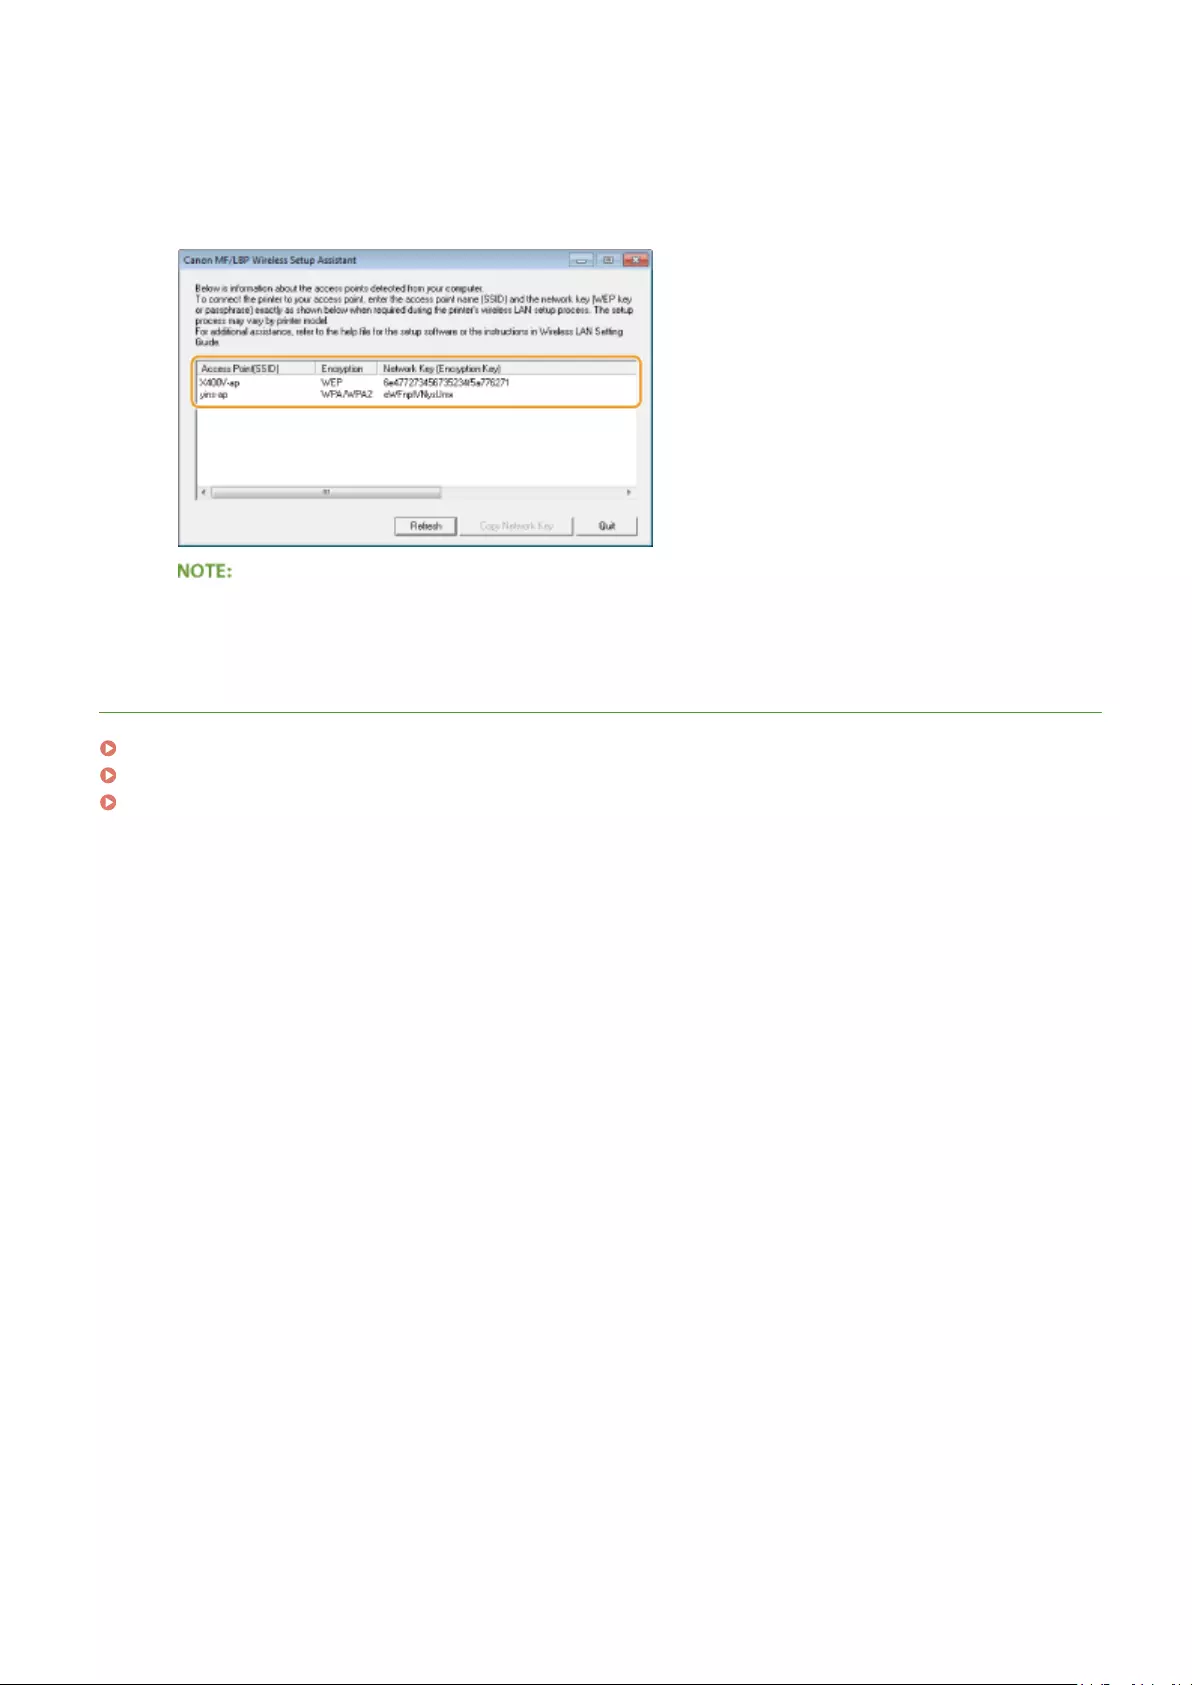
5Check the information displayed for the wireless router.
●Write down the necessary information. If you do not know what information is necessary, write down all the
information that is displayed.
If wireless routers are not found
Click [Refresh]. If nothing happens, check that the settings are correctly congured on the computer and the
wireless router.
LINKS
Connecting to a Wireless LAN(P. 170)
Setting Up Connection by Selecting a Wireless Router(P. 177)
Setting Up Connection by Specifying Detailed Settings(P. 180)
Network (MF244dw / MF232w)
186

Setting IP Addresses
15A8-03R
Connecting the machine to a network requires a unique network IP address. Two versions of IP addresses are
available: IPv4 and IPv6. Congure these settings depending on the network environment. To use IPv6 addresses, you
need to properly congure the IPv4 address settings.
Network (MF244dw / MF232w)
187

Setting IPv4 Address
15A8-03S
The machine’s IPv4 address can be either assigned automatically by a dynamic IP
addressing protocol, such as DHCP, or entered manually. When connecting the
machine to a wired LAN, make sure that the connectors of the LAN cable are rmly
inserted into the ports ( Connecting to a Wired LAN(P. 169) ). You can test the
network connection if necessary.
Setting IPv4 Address(P. 188)
Testing the Network Connection(P. 190)
Setting IPv4 Address
1Press .
2Use / to select <Network Settings>, and press .
●If a screen for entering a PIN is displayed, enter the PIN with the numeric keys and press . Setting
the System Manager PIN(P. 229)
3Select <TCP/IP Settings> <IPv4 Settings> <IP Address Settings>.
4Congure IP address settings.
<Auto Acquire>
Select to automatically assign an IP address via a protocol such as DHCP. When <Auto Acquire: On> is
displayed, automatic addressing is enabled.
<Manually Acquire>
Select to congure the IP address settings by manually entering an IP address. In order to select this
option, <Auto Acquire> must be set to <Off>.
<Check Settings>
Select when you want to view the current IP address settings.
Automatically assigning an IP address
1Select <Auto Acquire> <Select Protocol>.
Network (MF244dw / MF232w)
188

2Select <DHCP>, <BOOTP>, or <RARP>, and press .
If you do not want to use DHCP/BOOTP/RARP to assign an IP address
Select <Off>. If you select <DHCP>, <BOOTP>, or <RARP> when these services are unavailable, the
machine will waste time and communications resources searching the network for these services.
3Check that <Auto IP> is set to <On>.
●If <Off> is selected, change the setting to <On>.
4Select <Apply>, and press .
IP addresses assigned via DHCP/BOOTP/RARP override the address obtained via Auto IP.
Manually entering an IP address
1Check that <Auto Acquire> is set to <Off>.
●If <On> is displayed, select <Auto Acquire>, and set both <Select Protocol> and <Auto IP> to <Off>.
2Select <Manually Acquire>, and press .
3Specify the IP address, subnet mask, and gateway address (or default gateway).
●Specify the settings in the following order: <IP Address> <Subnet Mask> <Gateway Address>.
●Enter each setting using the numeric keys, and press on each screen.
Network (MF244dw / MF232w)
189

Checking whether the settings are correct
Make sure that the Remote UI screen can be displayed with your computer ( Starting Remote UI(P. 273) ). If
a computer is not available, you can check the connection by using the operation panel ( Testing the
Network Connection(P. 190) ).
Testing the Network Connection
1Press .
2Use / to select <Network Settings>, and press .
●If a screen for entering a PIN is displayed, enter the PIN with the numeric keys and press . Setting
the System Manager PIN(P. 229)
3Select <TCP/IP Settings> <IPv4 Settings> <PING Command>.
4Enter the IPv4 address of another device on the network, and press .
●If a proper connection has been established, the result is displayed as shown above.
LINKS
Setting IPv6 Addresses(P. 191)
Viewing Network Settings(P. 194)
Network (MF244dw / MF232w)
190

Setting IPv6 Addresses
15A8-03U
The IPv6 addresses of the machine can be congured via the Remote UI. Before
setting IPv6 addresses, check the IPv4 address settings ( Viewing IPv4
Settings(P. 194) ). You need to set the correct IPv4 settings to use IPv6 addresses.
Note that the scan function that uses the scanner driver or MF Scan Utility is not
available in an IPv6 environment. The machine can use up to nine of the following
IPv6 addresses:
Type Maximum
number
available
Description
Link-local address 1 An address that is only valid within a subnet or link and cannot be used to
communicate with devices beyond a router. A link-local address is automatically set
when the IPv6 function of the machine is enabled.
Manual address 1 An address that is entered manually. When using this address, specify the prex
length and default router address.
Stateless address 6 An address that is generated automatically using the MAC address of the machine
and the network prex that is advertised by the router. Stateless addresses are
discarded when the machine is restarted (or turned ON).
Stateful address 1 An address obtained from a DHCP server using DHCPv6.
1Start the Remote UI and log on in System Manager Mode. Starting Remote
UI(P. 273)
2Click [Settings/Registration].
3Click [Network Settings] [TCP/IP Settings].
Network (MF244dw / MF232w)
191

4Click [Edit] in [IPv6 Settings].
5Select the [Use IPv6] check box and congure the required settings.
[Use IPv6]
Network (MF244dw / MF232w)
192

Select the check box to enable IPv6 on the machine. When not using IPv6, clear the check box.
[Use Stateless Address]
Select the check box when using a stateless address. When not using a stateless address, clear the check box.
[Use Manual Address]
When you want to manually enter an IPv6 address, select the check box and enter the IP address, prex
length, and default router address in the corresponding text boxes.
[IP Address]
Enter an IPv6 address. Addresses that start with «ff» (or multicast address) cannot be entered.
[Prex Length]
Enter a number that indicates how many bits are available for the network address.
[Default Router Address]
Specify the IPv6 address of the default router as necessary. Addresses that start with «ff» (or multicast
address) cannot be entered.
[Use DHCPv6]
Select the check box when using a stateful address. When not using DHCPv6, clear the check box.
6Click [OK].
Checking whether the settings are correct
Make sure that the Remote UI screen can be displayed with your computer by using the IPv6 address of the
machine. Starting Remote UI(P. 273)
Using the operation panel
IPv6 settings can also be accessed from <Menu> screen. IPv6 Settings(P. 291)
LINKS
Setting IPv4 Address(P. 188)
Viewing Network Settings(P. 194)
Network (MF244dw / MF232w)
193
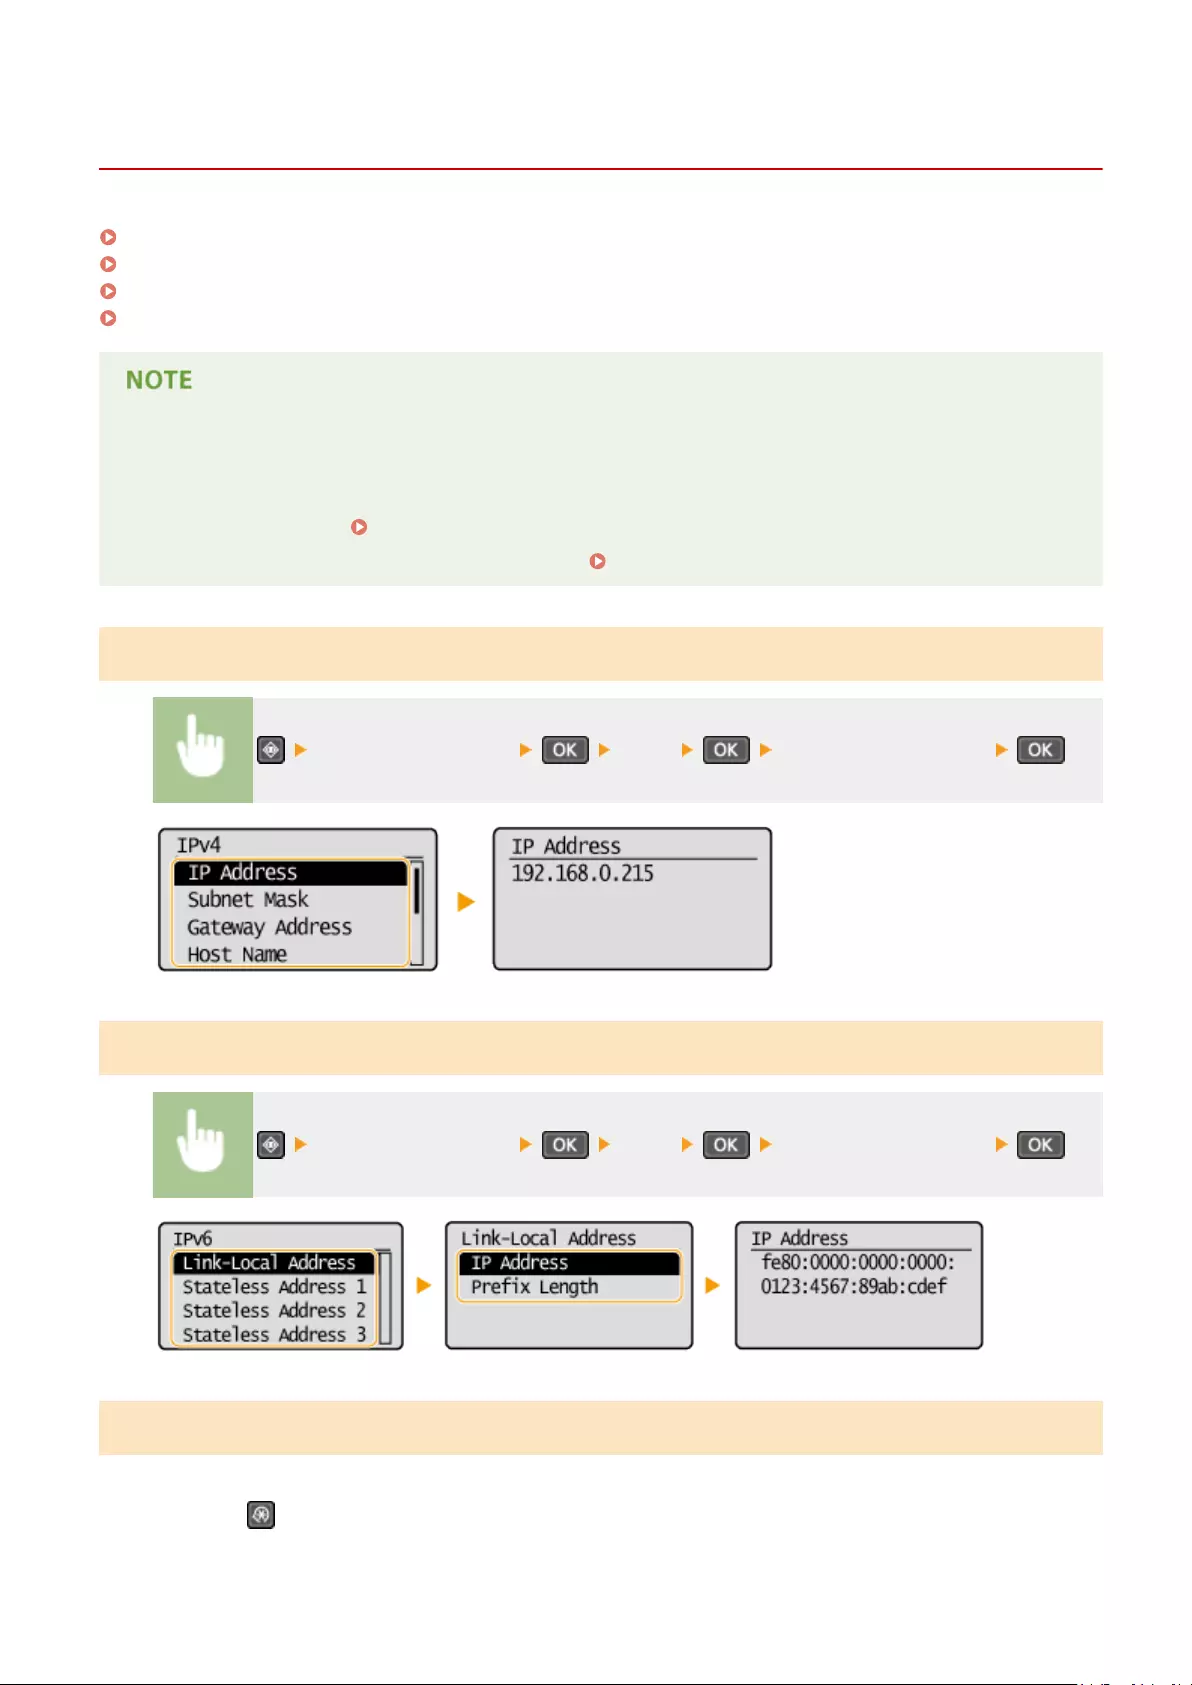
Viewing Network Settings
15A8-03W
Viewing IPv4 Settings(P. 194)
Viewing IPv6 Settings(P. 194)
Viewing the MAC Address for Wired LAN(P. 194)
Viewing the MAC Address and Information for Wireless LAN(P. 195)
●The IP address is not correctly congured if it is displayed as «0.0.0.0».
●Connecting the machine to a switching hub or bridge may result in a connection failure even when the IP
address is correctly congured. This problem can be solved by setting a certain interval before the machine
starts communicating. Setting a Wait Time for Connecting to a Network(P. 211)
●You can print a list of the current network settings. Output Reports(P. 297)
Viewing IPv4 Settings
<Network Information> <IPv4> Select the setting to view
Viewing IPv6 Settings
<Network Information> <IPv6> Select the setting to view
Viewing the MAC Address for Wired LAN
1Press .
Network (MF244dw / MF232w)
194
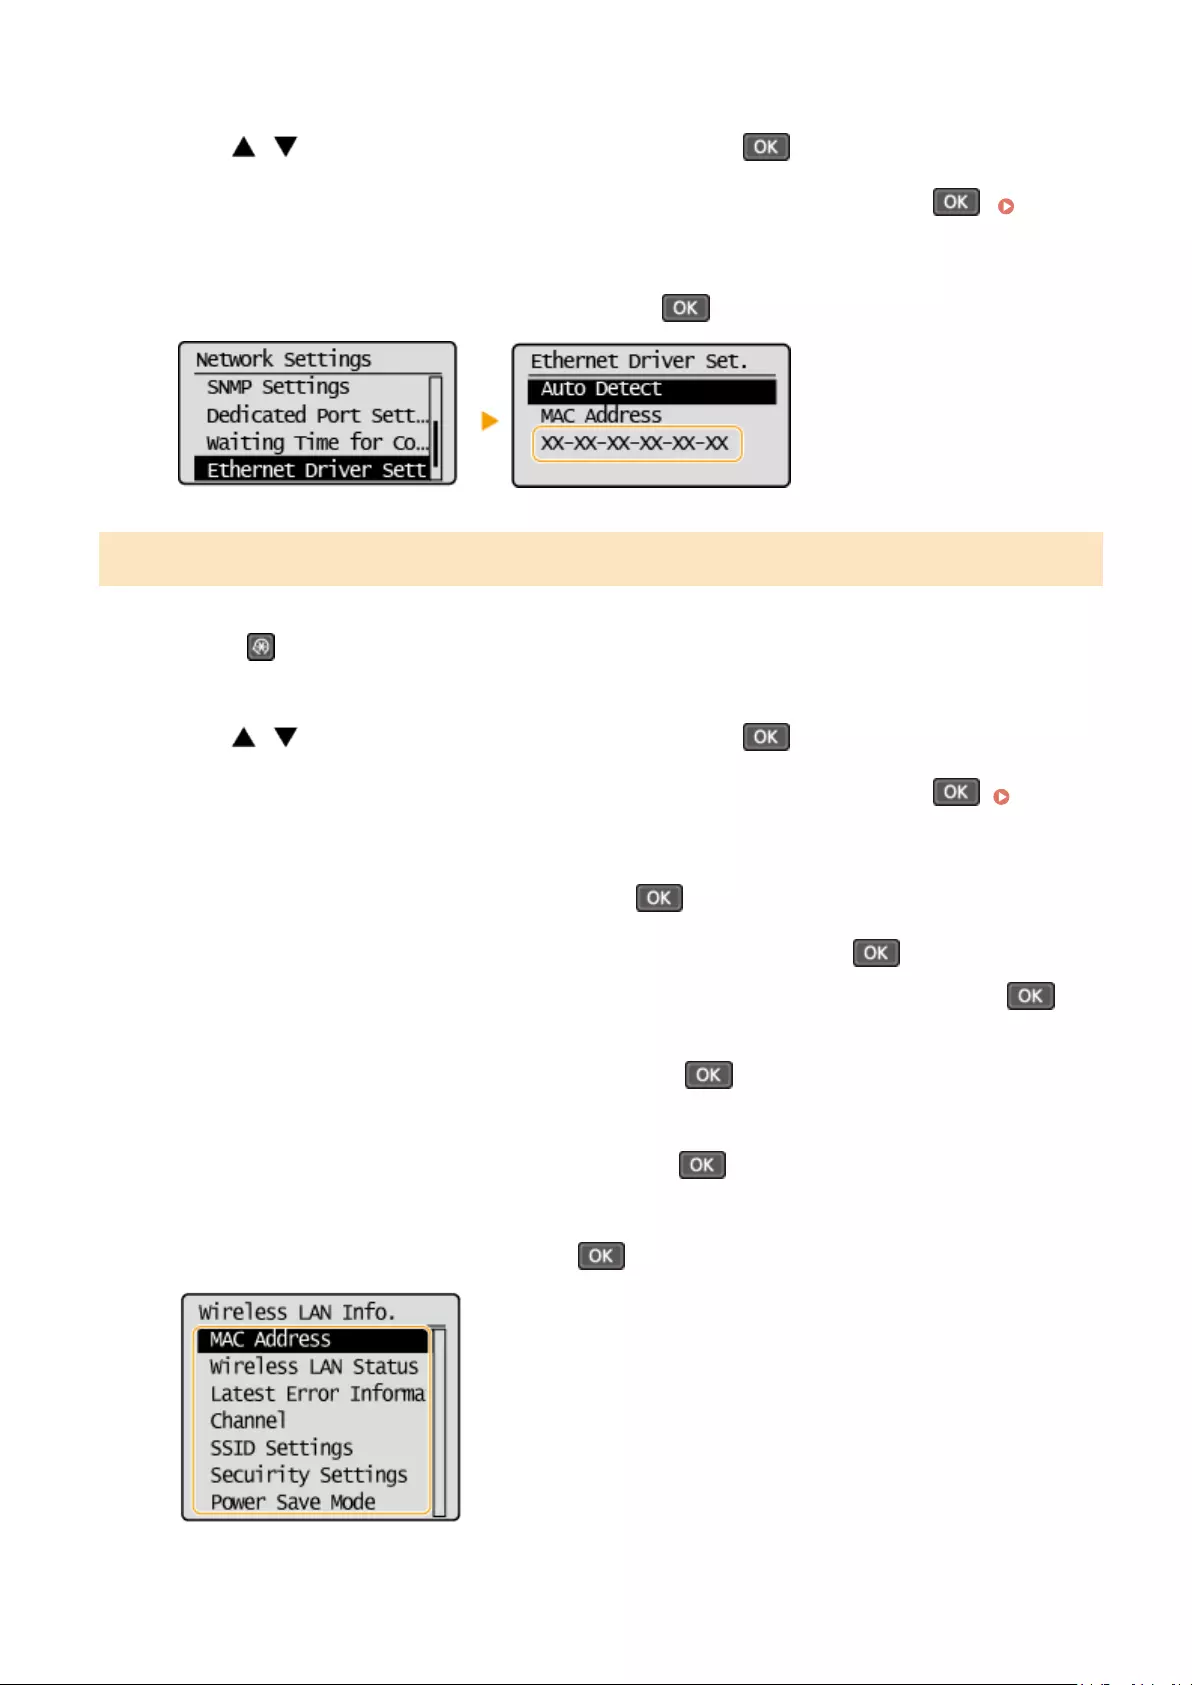
2Use / to select <Network Settings>, and press .
●If a screen for entering a PIN is displayed, enter the PIN with the numeric keys and press . Setting
the System Manager PIN(P. 229)
3Select <Ethernet Driver Settings>, and press .
Viewing the MAC Address and Information for Wireless LAN
1Press .
2Use / to select <Network Settings>, and press .
●If a screen for entering a PIN is displayed, enter the PIN with the numeric keys and press . Setting
the System Manager PIN(P. 229)
3Select <Wireless LAN Settings>, and press .
●If the <Enable the wireless LAN?> message is displayed, select <Yes>, and press .
●If the <Direct Connection will be disabled. Is it OK?> message is displayed, select <Yes>, and press .
4Read the message that is displayed, and press .
5Select <Wireless LAN Information>, and press .
6Select the setting to view, and press .
Network (MF244dw / MF232w)
195

Viewing WEP and WPA/WPA2-PSK information
1Select <Security Settings>, and press .
2Conrm and select the current security setting, and press .
●If the security settings are not congured, <None> is displayed.
3Select the setting to view, and press .
WEP WPA/WPA2-PSK
●<Wireless LAN Status> and <Latest Error Information> can be viewed from . Press
<Network Information> <Network Connection Method> and select the setting to view.
LINKS
Connecting to a Wireless LAN(P. 170)
Setting IPv4 Address(P. 188)
Setting IPv6 Addresses(P. 191)
Conguring DNS(P. 212)
Network (MF244dw / MF232w)
196

Conguring the Machine for Printing from a Computer
15A8-03X
When using the machine as a network printer, you can congure the protocols and ports used for printing and create
a print server for the machine. Before conguring the machine for printing from a computer, perform the basic setup
procedures, including the printer driver installation. For more information, see «MF Driver Installation Guide.»
●Printing protocols are rules for delivering document data created on a computer to the machine, and can be
selected according to the printing purpose or the network environment.
●Ports are gateways for passing document data from a computer to the printer. Incorrect port settings are
often the cause when documents cannot be printed from a network computer.
Network (MF244dw / MF232w)
197

Conguring Printing Protocols and WSD Functions
15A8-03Y
Congure the protocols that are used for printing documents from a networked computer. The protocols supported
by the machine include LPD, RAW, and WSD (Web Services on Devices).
To change protocols’ port numbers, see Changing Port Numbers (MF244dw / MF232w)(P. 241) .
1Start the Remote UI and log on in System Manager Mode. Starting Remote
UI(P. 273)
2Click [Settings/Registration].
3Click [Network Settings] [TCP/IP Settings].
4Congure printing protocols.
Conguring LPD or RAW
1Click [Edit] in [LPD Print Settings] or [RAW Print Settings].
Network (MF244dw / MF232w)
198

2Congure the settings as necessary.
[Use LPD Printing]
Select the check box to print via LPD. When not using LPD printing, clear the check box.
[Use RAW Printing]
Select the check box to print via RAW. When not using RAW printing, clear the check box.
3Click [OK].
Conguring WSD
1Click [Edit] in [WSD Settings].
2Congure the settings as necessary.
Network (MF244dw / MF232w)
199

[Use WSD Printing]
Select the check box to print via WSD. When not using WSD printing, clear the check box.
[Use WSD Browsing]
Select the check box to obtain information about the machine from a computer via WSD. This check box is
automatically selected when the [Use WSD Printing] check box is selected.
[Use WSD Scanning]
Available for Windows Vista/7/8/10, WSD scanning enables you to scan documents to a computer without
installing the scanner driver. Select the check box to scan documents via WSD. When not using WSD
scanning, clear the check box.
[Use Computer Scanning]
Select the check box to use WSD scanning by operating the machine with the operation panel. This check
box can only be selected when the [Use WSD Scanning] check box is selected. To perform scanning, press
(COPY/SCAN) and specify a WSD-connected computer as a scan destination ( Scanning from the
Machine(P. 130) ).
[Use Multicast Discovery]
Select the check box to set the machine to reply to multicast discovery messages. If the check box is
cleared, the machine stays in sleep mode even when multicast discovery messages are owing on the
network.
3Click [OK].
Using the operation panel
●LPD, RAW, and WSD settings can also be accessed from <Menu> screen.
LPD Print Settings(P. 293)
RAW Print Settings(P. 293)
WSD Settings(P. 293)
Setting up WSD network devices on Windows Vista/7/8/10
●The WSD printer and scanner can be added from the printer folder. Open the printer folder ( Displaying
the Printer Folder(P. 434) ) click [Add a device] or [Add a printer] and follow the on-screen instructions.
For more information about how to install MF Drivers for the WSD network printer, see «MF Driver
Installation Guide.»
LINKS
Conguring Printer Ports(P. 201)
Network (MF244dw / MF232w)
200

Conguring Printer Ports
15A8-040
Printing errors can occur when the IP address of the machine has been changed, or when a printer has been added via
the Windows printer folder. These errors are typically caused by incorrect printer port settings. For example, an
incorrect port number or port type may have been specied. In such situations, your attempt to print fails because the
document data cannot reach the machine. To x this type of problem, congure the printer port settings on the
computer.
To perform the following procedure, log on to your computer with an administrator account.
1Open the printer folder. Displaying the Printer Folder(P. 434)
2Right-click your printer icon and click [Printer properties] (or [Properties]).
3Click the [Ports] tab and congure the required settings.
Network (MF244dw / MF232w)
201
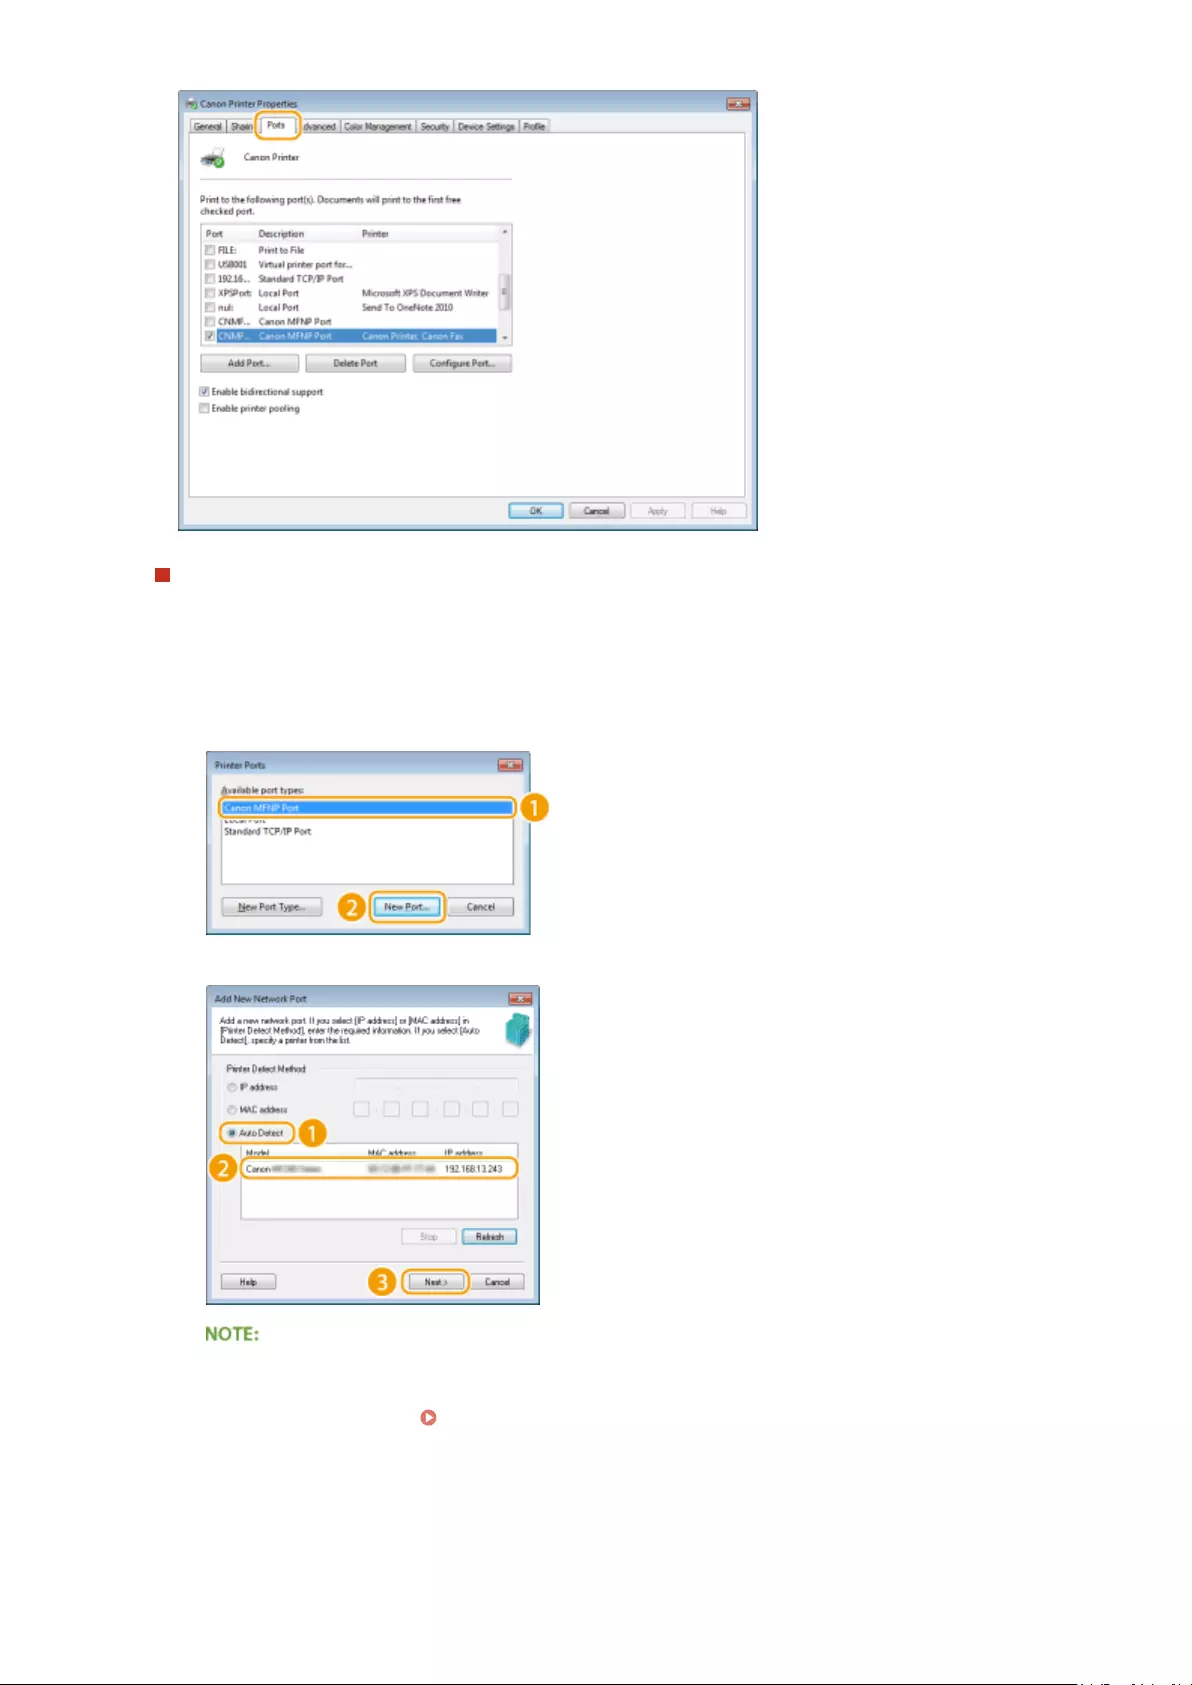
Adding a port
If the IP address of the machine has been changed, add a new port. Adding a port is also an effective solution
when an incorrect port type was selected in the Windows printer folder during the printer driver installation.
1Click [Add Port].
2Select [Canon MFNP Port] in [Available port types] and click [New Port].
3Click [Auto Detect], select the machine when it is detected, and click [Next].
If the machine is not detected
Click [Refresh]. If the problem persists, click [IP address] or [MAC address], enter the IP address or MAC
address of the machine ( Viewing Network Settings(P. 194) ), and then click [Next].
Network (MF244dw / MF232w)
202

4Click [Add] [Finish].
5Click [Close].
Changing the port type or number
If the printing protocols ( Conguring Printing Protocols and WSD Functions(P. 198) ) or port numbers
( Changing Port Numbers (MF244dw / MF232w)(P. 241) ) have been changed on the machine, the
corresponding settings on the computer must also be congured. This change is only available for LPR or
RAW ports.
1Click [Congure Port].
2Click the [LPR] or [RAW] radio button in [Protocol Type], change the number in the [Port Number] text box
as necessary, and then click [OK].
4Click [Close].
LINKS
Setting Up Print Server(P. 204)
Network (MF244dw / MF232w)
203

Setting Up Print Server
15A8-041
With a print server, you can reduce the load on the computer that you print from. The print server also enables each
computer to install MF Drivers over the network, which saves you the trouble of installing the drivers on each
computer by using the provided DVD-ROM. To set up a computer on the network as a print server, congure the
settings for sharing the printer.
●To perform the following procedure, log on to your computer with an administrator account.
●You may be unable to install drivers over the network depending on the operating system and the bit
architecture (32-bit or 64-bit) of the print server and client computers.
●When implementing a print server in a domain environment, consult your Network Administrator.
To obtain device information when using a print server
●Canon Driver Information Assist Service must be added during the printer driver installation. For more
information, see «MF Driver Installation Guide.»
1Open the printer folder. Displaying the Printer Folder(P. 434)
2Right-click your printer icon and click [Printer properties] (or [Properties]).
3Click the [Sharing] tab, select [Share this printer], and enter the share name of the
machine.
Network (MF244dw / MF232w)
204
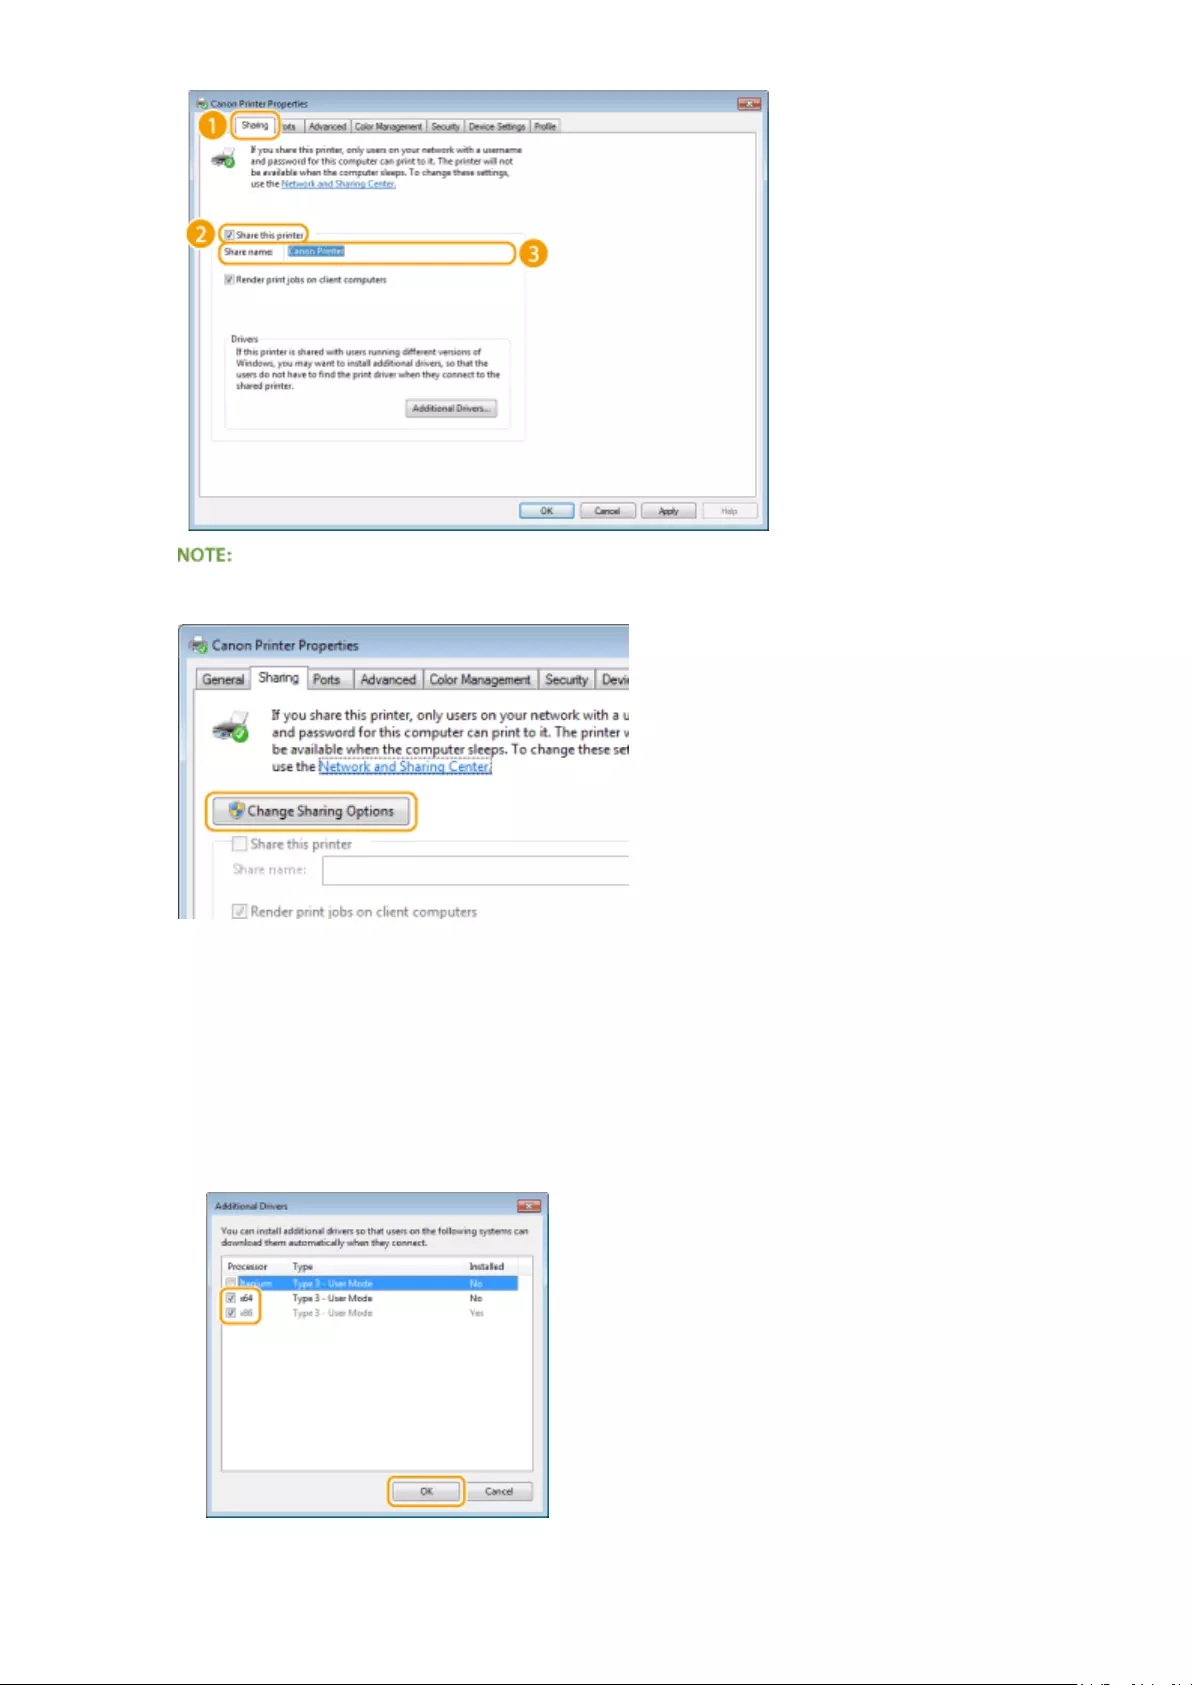
When [Change Sharing Options] is displayed
Click [Change Sharing Options]. If the [User Account Control] dialog box appears, click [Yes] (or [Continue]).
4Install additional drivers as necessary.
●This operation is required if you want to install MF Drivers in other computers running a different bit
architecture via the print server.
1Click [Additional Drivers].
2Select the check box for the bit architecture that other computers are running, and click [OK].
●Select additional drivers from the following, according to the operating system of the print server.
Network (MF244dw / MF232w)
205

Print server Select the check box for
32-bit operating systems [x64]
64-bit operating systems [x86] under [Processor]
If you do not know whether your Windows Vista/7/8/10/Server 2008/Server 2012 is a 32-bit or 64-bit
operating system, see Checking the Bit Architecture(P. 437) .
3Insert the provided DVD-ROM into the drive on the computer, click [Browse] to specify the folder that
contains MF Drivers, and then click [OK].
* Specify the folder for your language in [xxxx].
●If the print server runs a 32-bit operating system, select [intdrv] [UFRII] or [PCL] [XXXX]* [x64]
[Driver] folders on the provided DVD-ROM.
●If the print server runs a 64-bit operating system, select [intdrv] [UFRII] or [PCL] [XXXX]* [32bit]
[Driver] folders on the provided DVD-ROM.
4Follow the on-screen instructions to install the drivers.
5Click [OK].
◼Installing MF Drivers on a Computer via the Print Server
1Locate the shared printer in the print server. Displaying Shared Printers in the
Print Server(P. 435)
2Double-click the shared printer.
3Follow the on-screen instructions to install the drivers.
LINKS
Printing from a Computer(P. 86)
Network (MF244dw / MF232w)
206

Conguring the Machine for Your Network
Environment
15A8-042
The conguration of a network varies depending on the purpose of the network. Specify the settings necessary to suit
your network environment.
Network (MF244dw / MF232w)
207
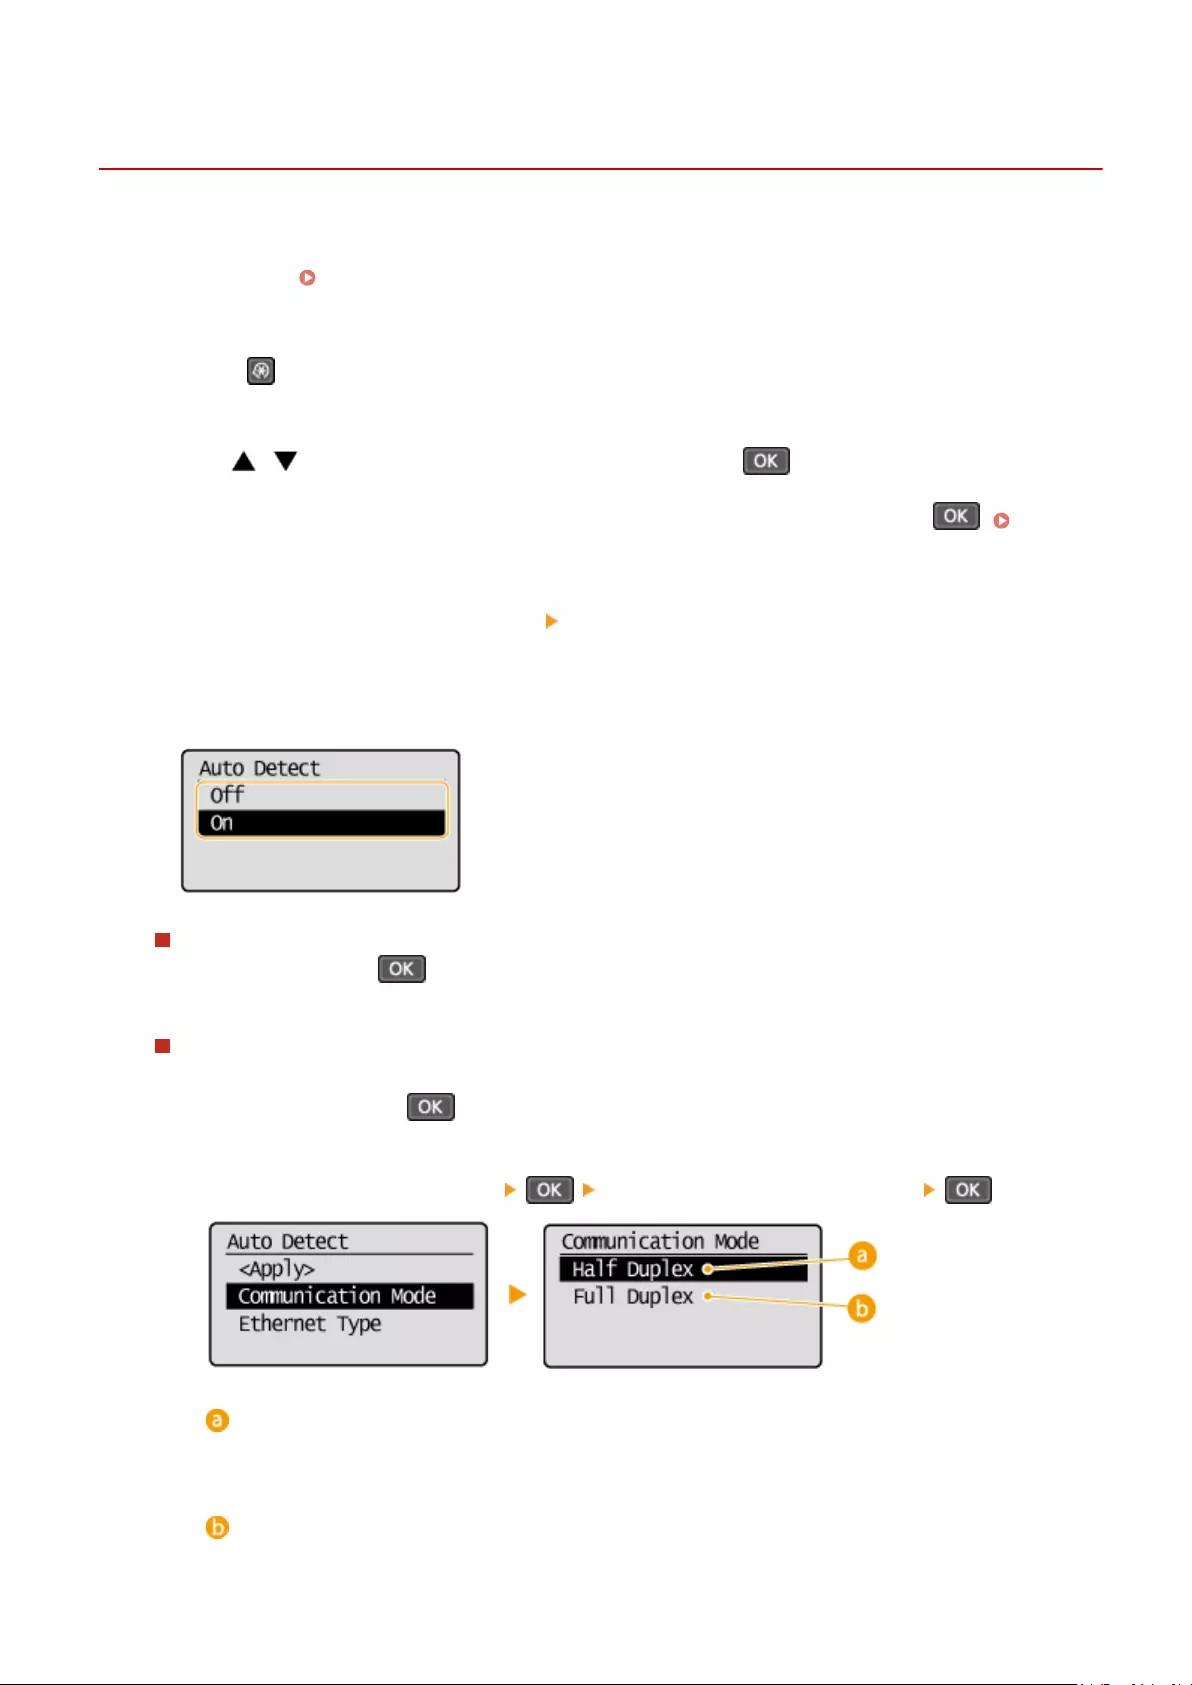
Conguring Ethernet Settings
15A8-043
Ethernet is a standard for communicating data in a local area network (LAN). You can set the communication mode
(half-duplex/full-duplex) and the Ethernet type (10BASE-T/100BASE-TX). In general, the machine can be used without
changing the defaults ( Ethernet Driver Settings(P. 296) ), but you can change these settings to suit your network
environment.
1Press .
2Use / to select <Network Settings>, and press .
●If a screen for entering a PIN is displayed, enter the PIN with the numeric keys and press . Setting
the System Manager PIN(P. 229)
3Select <Ethernet Driver Settings> <Auto Detect>.
4Select whether to congure Ethernet settings automatically or manually.
Conguring Ethernet settings automatically
Select <On>, and press . The machine detects and automatically sets the communication mode and the
Ethernet type that can be used.
Conguring Ethernet settings manually
1Select <Off>, and press .
2Select the communication mode.
●Select <Communication Mode> select <Half Duplex> or <Full Duplex> .
<Half Duplex>
Alternately sends and receives communication data. Select when the machine is connected to a
networking device using half duplex.
<Full Duplex>
Simultaneously sends and receives communication data. Use this setting for most environments.
Network (MF244dw / MF232w)
208

3Select the Ethernet type.
●Select <Ethernet Type> select <10BASE-T> or <100BASE-TX> .
4Select <Apply>, and press .
LINKS
Changing the Maximum Transmission Unit(P. 210)
Setting a Wait Time for Connecting to a Network(P. 211)
Network (MF244dw / MF232w)
209
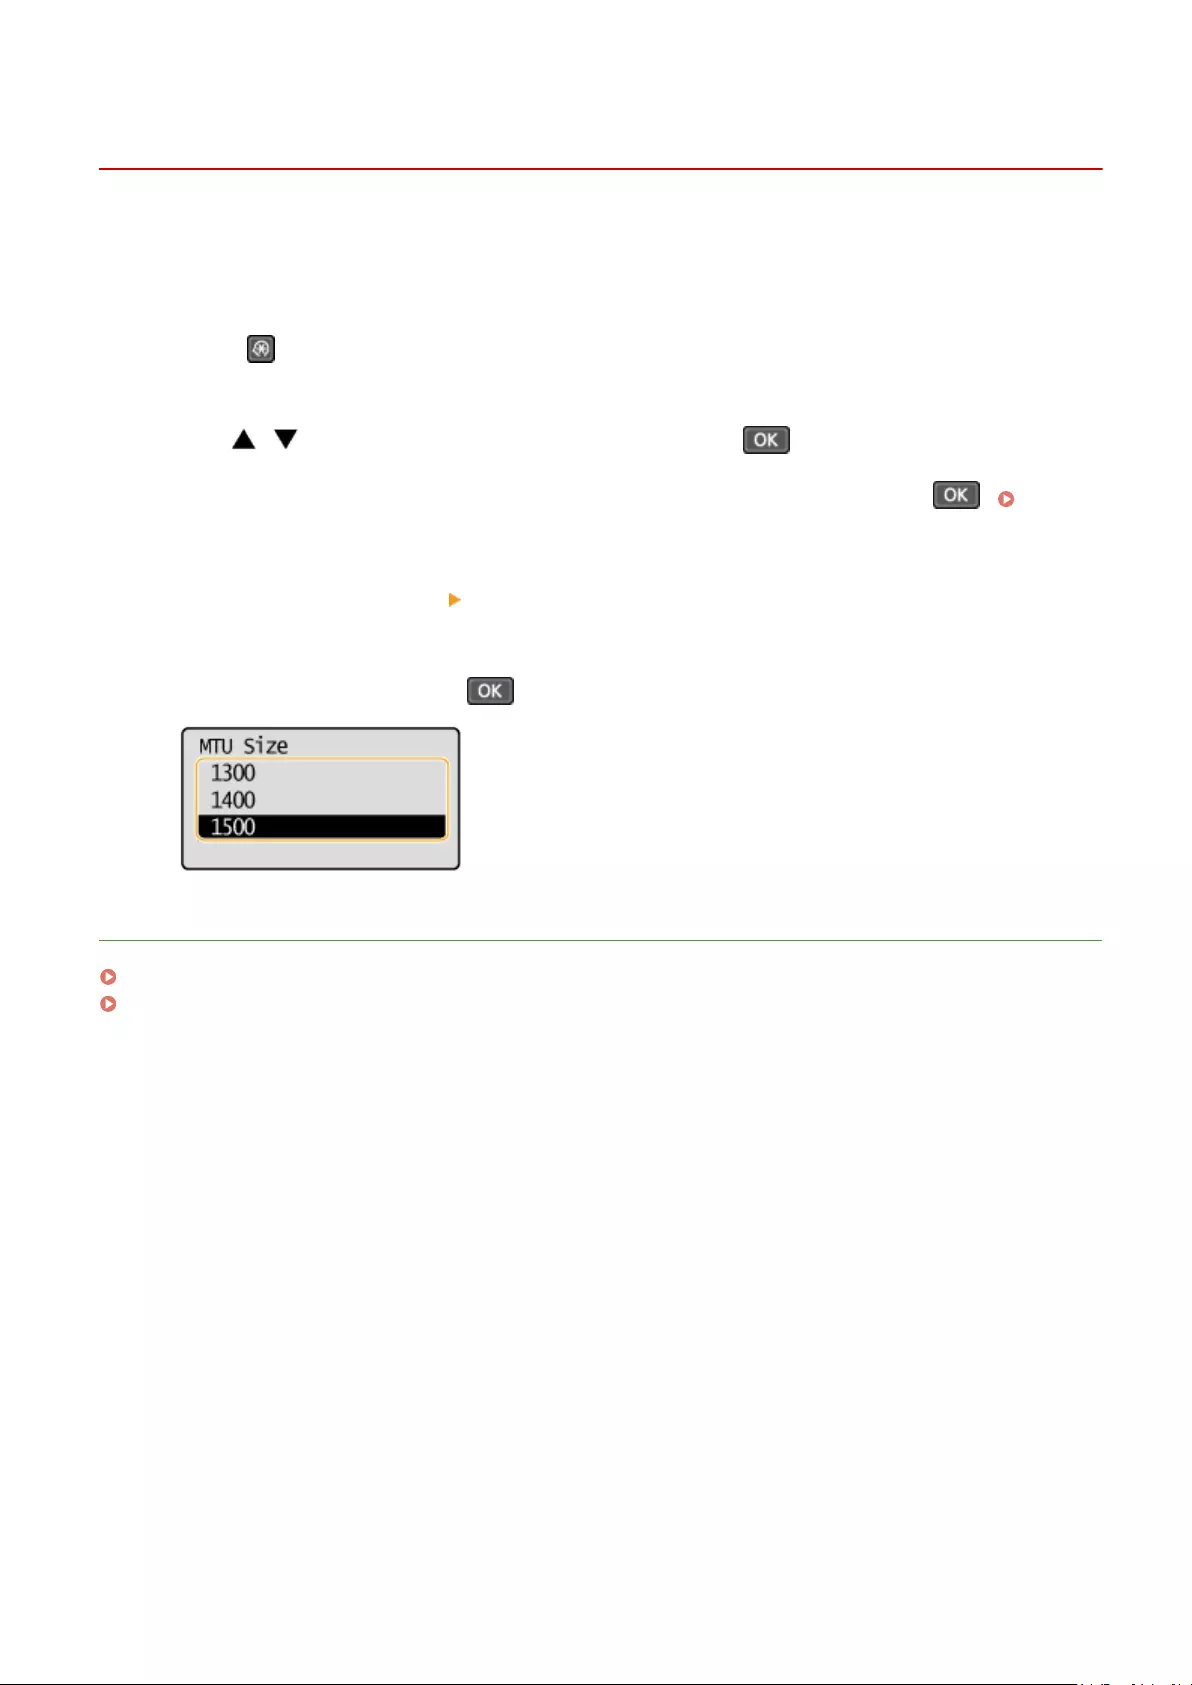
Changing the Maximum Transmission Unit
15A8-044
In most Ethernet networks, the maximum size of a packet that can be sent is 1500 bytes. A packet refers to a chunk of
data into which the original data is divided before being sent. The maximum transmission unit (MTU) may vary on each
network. Change the settings of the machine as necessary. For more information, contact your Network Administrator.
1Press .
2Use / to select <Network Settings>, and press .
●If a screen for entering a PIN is displayed, enter the PIN with the numeric keys and press . Setting
the System Manager PIN(P. 229)
3Select <TCP/IP Settings> <MTU Size>.
4Select the MTU, and press .
LINKS
Conguring Ethernet Settings(P. 208)
Setting a Wait Time for Connecting to a Network(P. 211)
Network (MF244dw / MF232w)
210

Setting a Wait Time for Connecting to a Network
15A8-045
When a network is designed to enjoy redundant connectivity with multiple switching hubs or bridges, it must have a
mechanism to prevent packets from looping. One effective solution is to dene the role of each switch port. However,
communication may still be disrupted for several tens of seconds immediately after you change the way that network
devices are connected, or if you add a new device. If this type of problem occurs, set a wait time for connecting to the
network.
1Press .
2Use / to select <Network Settings>, and press .
●If a screen for entering a PIN is displayed, enter the PIN with the numeric keys and press . Setting
the System Manager PIN(P. 229)
3Select <Waiting Time for Connection at Startup>, and press .
4Enter the wait time in seconds, and press .
●Use / or the numeric keys to enter the time.
LINKS
Conguring Ethernet Settings(P. 208)
Changing the Maximum Transmission Unit(P. 210)
Network (MF244dw / MF232w)
211

Conguring DNS
15A8-046
DNS (Domain Name System) provides a service for name resolution that associates a host (or domain) name with an IP
address. Congure the DNS, mDNS, or DHCP option settings as necessary. Note that the procedures for conguring
DNS are different for IPv4 and IPv6.
1Start the Remote UI and log on in System Manager Mode. Starting Remote
UI(P. 273)
2Click [Settings/Registration].
3Click [Network Settings] [TCP/IP Settings].
4Congure DNS settings.
Conguring IPv4 DNS
1Click [Edit] in [IPv4 Settings].
Network (MF244dw / MF232w)
212

2Congure IPv4 DNS settings.
[DNS Settings]
[Primary DNS Server Address]
Enter the IP address of a DNS server.
[Secondary DNS Server Address]
Enter the IP address of a secondary DNS server, if any.
[Host Name]
Enter up to 47 alphanumeric characters for the host name of the machine that is to be registered to
the DNS server.
[Domain Name]
Enter up to 47 alphanumeric characters for the name of the domain the machine belongs to, such
as «example.com.»
[DNS Dynamic Update]
Select the check box to dynamically update the DNS records whenever the machine’s IP address is
changed. When specifying the interval between updates, enter the time in hours in the [DNS
Dynamic Update Interval] text box.
[mDNS Settings]
[Use mDNS]
Adopted by Bonjour, mDNS (multicast DNS) is a protocol for associating a host name with an IP
address without using DNS. Select the check box to enable mDNS and enter the mDNS name in the
[mDNS Name] text box.
[DHCP Option Settings]
[Acquire Host Name]
Select the check box to enable Option 12 to obtain the host name from the DHCP server.
[DNS Dynamic Update]
Select the check box to enable Option 81 to dynamically update the DNS records through the DHCP
server.
Network (MF244dw / MF232w)
213

3Click [OK].
Conguring IPv6 DNS
1Click [Edit] in [IPv6 Settings].
2Congure IPv6 DNS settings.
●The [Use IPv6] check box must be selected to congure the settings. Setting IPv6
Addresses(P. 191)
[DNS Settings]
[Primary DNS Server Address]
Enter the IP address of a DNS server. Addresses that start with «ff» (or multicast address) cannot be
entered.
[Secondary DNS Server Address]
Enter the IP address of a secondary DNS server, if any. Addresses that start with «ff» (or multicast
address) cannot be entered.
Network (MF244dw / MF232w)
214

[Use Same Host Name/Domain Name as IPv4]
Select the check box to use the same host and domain names as in IPv4.
[Host Name]
Enter up to 47 alphanumeric characters for the host name of the machine that is to be registered to
the DNS server.
[Domain Name]
Enter up to 47 alphanumeric characters for the name of the domain the machine belongs to, such
as «example.com.»
[DNS Dynamic Update]
Select the check box to dynamically update the DNS records whenever the machine’s IP address is
changed. To specify the type(s) of addresses you want to register to the DNS server, select the
check box for [Register Manual Address], [Register Stateful Address], or [Register Stateless
Address]. To specify the interval between updates, enter the time in hours in the [DNS Dynamic
Update Interval] text box.
[mDNS Settings]
[Use mDNS]
Adopted by Bonjour, mDNS (multicast DNS) is a protocol for associating a host name with an IP
address without using DNS. Select the check box to enable mDNS.
[Use Same mDNS Name as IPv4]
Select the check box to use the same mDNS name as in IPv4. To set a different name, clear the
check box and enter the mDNS name in the [mDNS Name] text box.
3Click [OK].
Using the operation panel
DNS settings can also be accessed from <Menu> screen. IPv4 Settings(P. 290) IPv6 Settings(P. 291)
LINKS
Setting IPv4 Address(P. 188)
Setting IPv6 Addresses(P. 191)
Viewing Network Settings(P. 194)
Network (MF244dw / MF232w)
215

Conguring SNTP
15A8-047
Simple Network Time Protocol (SNTP) enables you to adjust the system clock by
using the time server on the network. The protocol is typically used for synchronizing
the machine and a server. The time is adjusted based on Coordinated Universal Time
(UTC), so specify the time zone setting before conguring SNTP ( Date/Time
Settings(P. 303) ). SNTP settings can be specied via the Remote UI.
●The SNTP of the machine supports both NTP (version 3) and SNTP (versions 3 and 4) servers.
1Start the Remote UI and log on in System Manager Mode. Starting Remote
UI(P. 273)
2Click [Settings/Registration].
3Click [Network Settings] [TCP/IP Settings].
4Click [Edit] in [SNTP Settings].
Network (MF244dw / MF232w)
216

5Select the [Use SNTP] check box and specify the required settings.
[Use SNTP]
Select the check box to use SNTP for synchronization. If you do not want to use SNTP, clear the check box.
[NTP Server Name]
Enter the IP address of the NTP or the SNTP server. If DNS is available on the network, you can enter a host
name (or FQDN) of up to 255 alphanumeric characters instead (example: ntp.example.com).
[Polling Interval]
Specify the interval between one synchronization and the next. Specify an interval from 1 to 48 hours.
6Click [OK].
Testing communication with the NTP/SNTP server
●You can view communication status with the registered server by clicking [Settings/Registration] [Network
Settings] [TCP/IP Settings] and then clicking [Check NTP Server] in [SNTP Settings] that appears. If a
proper connection has been established, the result is displayed as shown below. Note that this operation
does not adjust the system clock.
Network (MF244dw / MF232w)
217

Monitoring and Controlling the Machine with SNMP
15A8-048
Simple Network Management Protocol (SNMP) is a protocol for monitoring and controlling communication devices in a
network by using Management Information Base (MIB). The machine supports SNMPv1 and security-enhanced
SNMPv3. You can check the status of the machine from a computer when you print documents or use the Remote UI.
You can enable either SNMPv1 or SNMPv3, or both at the same time. Specify the settings for each version to suit your
network environment and the purpose of use.
SNMPv1
SNMPv1 uses information called «community» to dene the scope of SNMP communication. Because this
information is exposed to the network in plain text, your network will be vulnerable to attacks. If you want to
ensure network security, disable SNMPv1 and use SNMPv3.
SNMPv3
With SNMPv3, you can implement network device management that is protected by robust security features.
Note that TLS must be enabled for the Remote UI before conguring SNMPv3 ( Enabling TLS Encrypted
Communication for the Remote UI(P. 249) ).
●The machine does not support the trap notication feature of SNMP.
●To change the port number of SNMP, see Changing Port Numbers (MF244dw / MF232w)(P. 241) .
●SNMP management software, when installed on a computer on the network, enables you to congure,
monitor, and control the machine remotely from the computer. For more information, see the instruction
manuals for your management software.
1Start the Remote UI and log on in System Manager mode. Starting Remote
UI(P. 273)
2Click [Settings/Registration].
Network (MF244dw / MF232w)
218

3Click [Network Settings] [SNMP Settings].
4Click [Edit].
5Specify SNMPv1 settings.
●If you do not need to change SNMPv1 settings, proceed to the next step.
Network (MF244dw / MF232w)
219

[Use SNMPv1]
Select the check box to enable SNMPv1. You can specify the rest of SNMPv1 settings only when this check box
is selected.
[Use Community Name 1]/[Use Community Name 2]
Select the check box to specify a community name. If you do not need to specify a community name, clear
the check box.
[Community Name]
Enter up to 32 alphanumeric characters for the name of the community.
[MIB Access Permission]
For each community, select [Read/Write] or [Read Only] for the access privileges to MIB objects.
[Read/Write] Permits both viewing and changing the values of MIB objects.
[Read Only] Permits only viewing the values of MIB objects.
[Use Dedicated Community]
Dedicated Community is a preset community, intended exclusively for Administrators using Canon software.
Select the check box to use Dedicated Community. If you do not need to use Dedicated Community, clear the
check box.
6Specify SNMPv3 settings.
●If you do not need to change SNMPv3 settings, proceed to the next step.
Network (MF244dw / MF232w)
220

[Use SNMPv3]
Select the check box to enable SNMPv3. You can specify the rest of SNMPv3 settings only when this check box
is selected.
[Enable User]
Select the check box to enable [User Settings 1]/[User Settings 2]/[User Settings 3]. To disable user settings,
clear the corresponding check box.
[User Name]
Enter up to 32 alphanumeric characters for the user name.
[MIB Access Permission]
Select [Read/Write] or [Read Only] for the access privileges to MIB objects.
[Read/Write] Permits both viewing and changing the values of MIB objects.
[Read Only] Permits only viewing the values of MIB objects.
[Security Settings]
Select [Authentication On/Encryption On], [Authentication On/Encryption Off], or [Authentication Off/
Encryption Off] for the desired combination of authentication and encryption settings.
[Authentication Algorithm]
If you selected [Authentication On/Encryption On] or [Authentication On/Encryption Off] for [Security
Settings], select the algorithm that corresponds to your environment.
[Encryption Algorithm]
If you selected [Authentication On/Encryption On] for [Security Settings], select the algorithm that
corresponds to your environment.
[Set/Change Password]
To set or change the password, select the check box and enter between 6 and 16 alphanumeric characters
for the password in the [Authentication Password] or [Encryption Password] text box. For conrmation, enter
the same password in the [Conrm] text box. Passwords can be set independently for authentication and
encryption algorithms.
[Context Name 1]/[Context Name 2]/[Context Name 3]
Enter up to 32 alphanumeric characters for the context name. Up to three context names can be registered.
7Specify Printer Management Information Acquisition Settings.
Network (MF244dw / MF232w)
221

●With SNMP, the printer management information, such as printing protocols and printer ports, can be
monitored and obtained regularly from a computer on the network.
[Acquire Printer Management Information from Host]
Select the check box to enable monitoring of the printer management information of the machine via SNMP.
To disable monitoring of the printer management information, clear the check box.
8Click [OK].
Disabling SNMPv1
●Some of the functions of the machine become unavailable, such as obtaining machine information via the
printer driver.
Using the operation panel
●You can also specify SNMPv1 settings and enable/disable SNMPv3 settings from <Menu> screen. SNMP
Settings(P. 294)
Enabling Both SNMPv1 and SNMPv3
●If both versions of SNMP are enabled, it is recommended that MIB access permission in SNMPv1 be set to
[Read Only]. MIB access permission can be set independently in SNMPv1 and SNMPv3 (and for each user in
SNMPv3). Selecting [Read/Write] (full access permission) in SNMPv1 negates the robust security features
that characterize SNMPv3 because most of the machine settings can then be controlled with SNMPv1.
LINKS
Enabling TLS Encrypted Communication for the Remote UI(P. 249)
Network (MF244dw / MF232w)
222

Security
Security ……………………………………………………………………………………………………………………………………………. 224
Protecting the Machine from Unauthorized Access …………………………………………………………………………… 225
Preventing Unauthorized Access …………………………………………………………………………………………………… 226
Setting Access Privileges ……………………………………………………………………………………………………………… 228
Setting the System Manager PIN …………………………………………………………………………………………….. 229
Setting a Remote UI PIN (MF244dw / MF232w) ………………………………………………………………………….. 231
Restricting Communication by Using Firewalls (MF244dw / MF232w) ………………………………………………….. 233
Specifying IP Addresses for Firewall Rules ………………………………………………………………………………… 234
Specifying MAC Addresses for Firewall Rules …………………………………………………………………………….. 238
Changing Port Numbers (MF244dw / MF232w) ……………………………………………………………………………….. 241
Setting a Proxy (MF244dw / MF232w) …………………………………………………………………………………………….. 243
Restricting the Machine’s Functions (MF244dw / MF232w) …………………………………………………………………. 245
Disabling HTTP Communication ……………………………………………………………………………………………………. 246
Disabling Remote UI ……………………………………………………………………………………………………………………. 247
Implementing Robust Security Features (MF244dw / MF232w) …………………………………………………………… 248
Enabling TLS Encrypted Communication for the Remote UI ………………………………………………………………. 249
Conguring IEEE 802.1X Authentication …………………………………………………………………………………………. 252
Conguring Settings for Key Pairs and Digital Certicates ………………………………………………………………… 257
Generating Key Pairs …………………………………………………………………………………………………………….. 259
Using CA-issued Key Pairs and Digital Certicates ……………………………………………………………………… 266
Verifying Key Pairs and Digital Certicates ………………………………………………………………………………… 269
Security
223
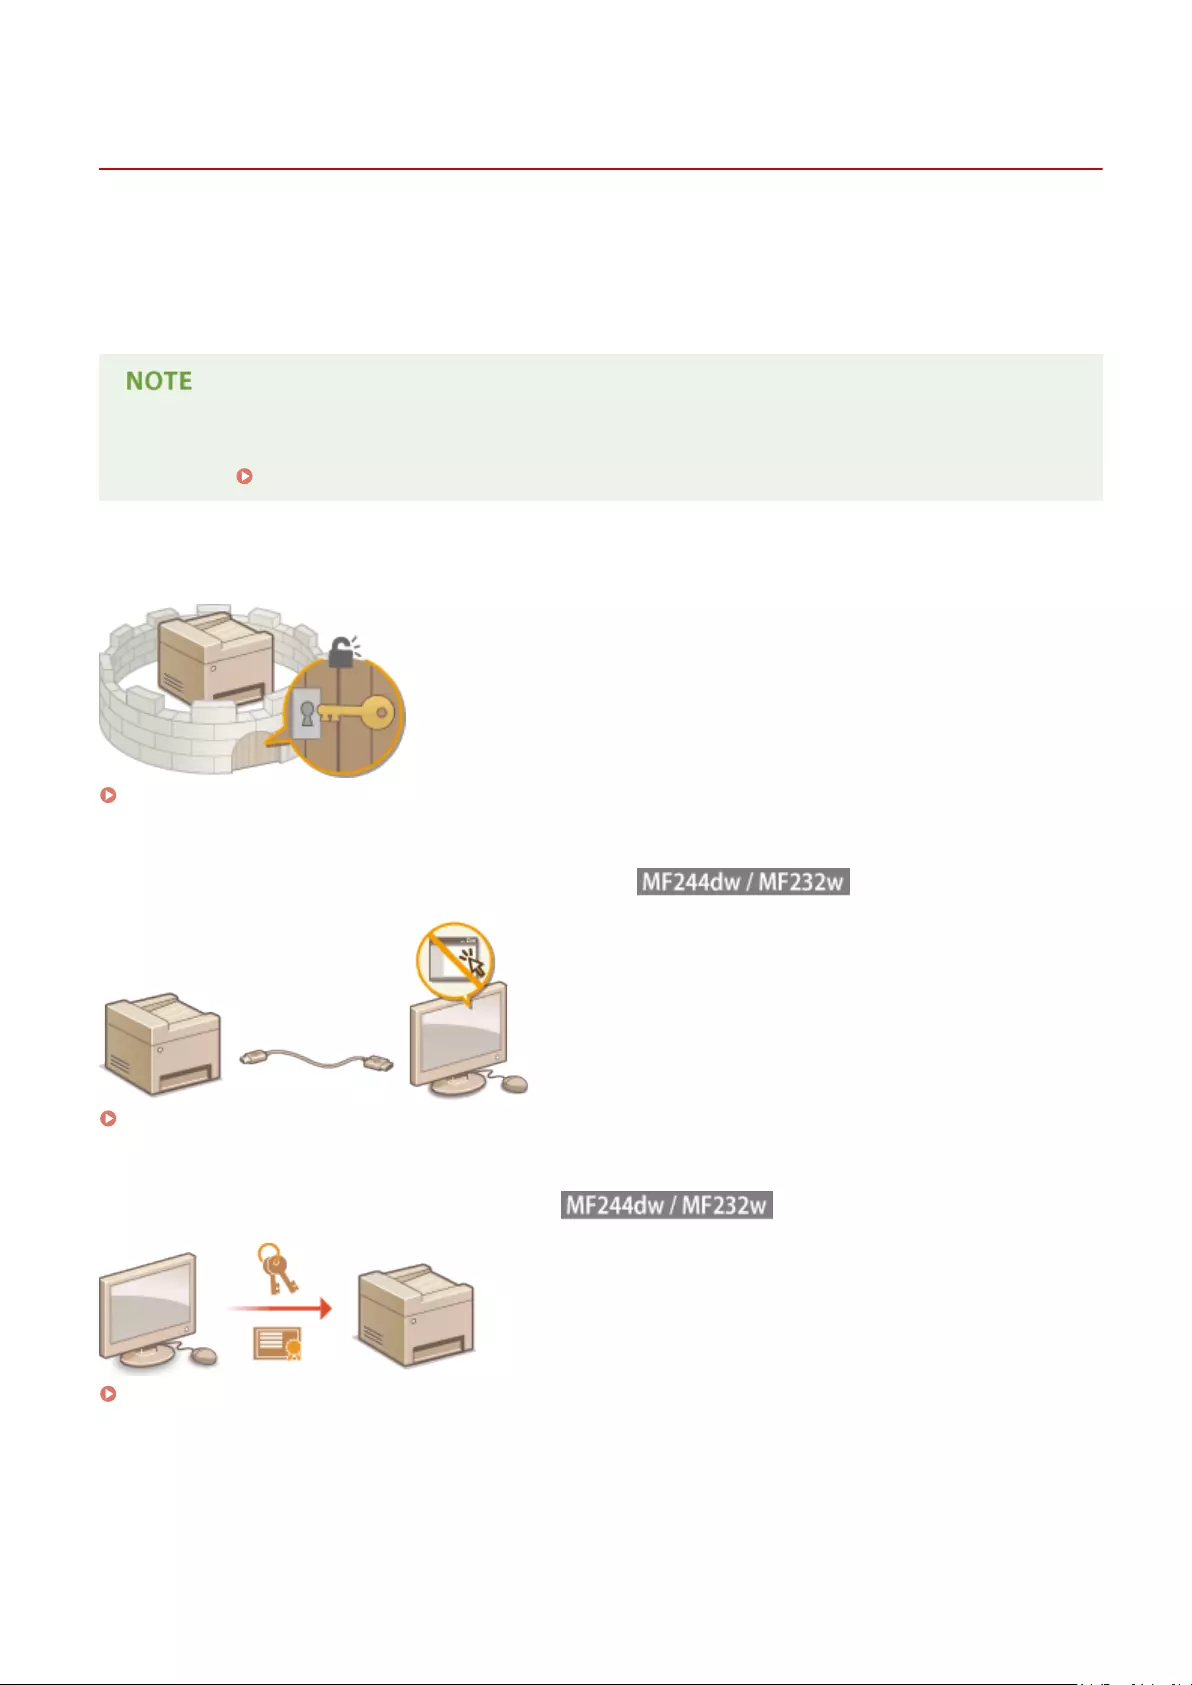
Security
15A8-049
Condential information is handled by information devices everywhere, including computers and printers, and any of
these devices may become a target for malicious third parties at anytime. Attackers may directly gain unauthorized
access to your devices, or indirectly take advantage of negligence or improper use. Either way, you may incur
unanticipated losses when your condential information is leaked. To counter these risks, the machine is equipped
with a variety of security functions. Set the necessary conguration depending on your network environment.
●You can congure the best security system by building an environment that inhibits access to printers on
your in-house network via the Internet and using such environment together with the machine’s security
features. Preventing Unauthorized Access(P. 226)
◼Establishing the Basics of Information Security
Protecting the Machine from Unauthorized Access(P. 225)
◼Preparing for Risks from Negligence or Misuse
Restricting the Machine’s Functions (MF244dw / MF232w)(P. 245)
◼Implementing Robust Security Features
Implementing Robust Security Features (MF244dw / MF232w)(P. 248)
Security
224
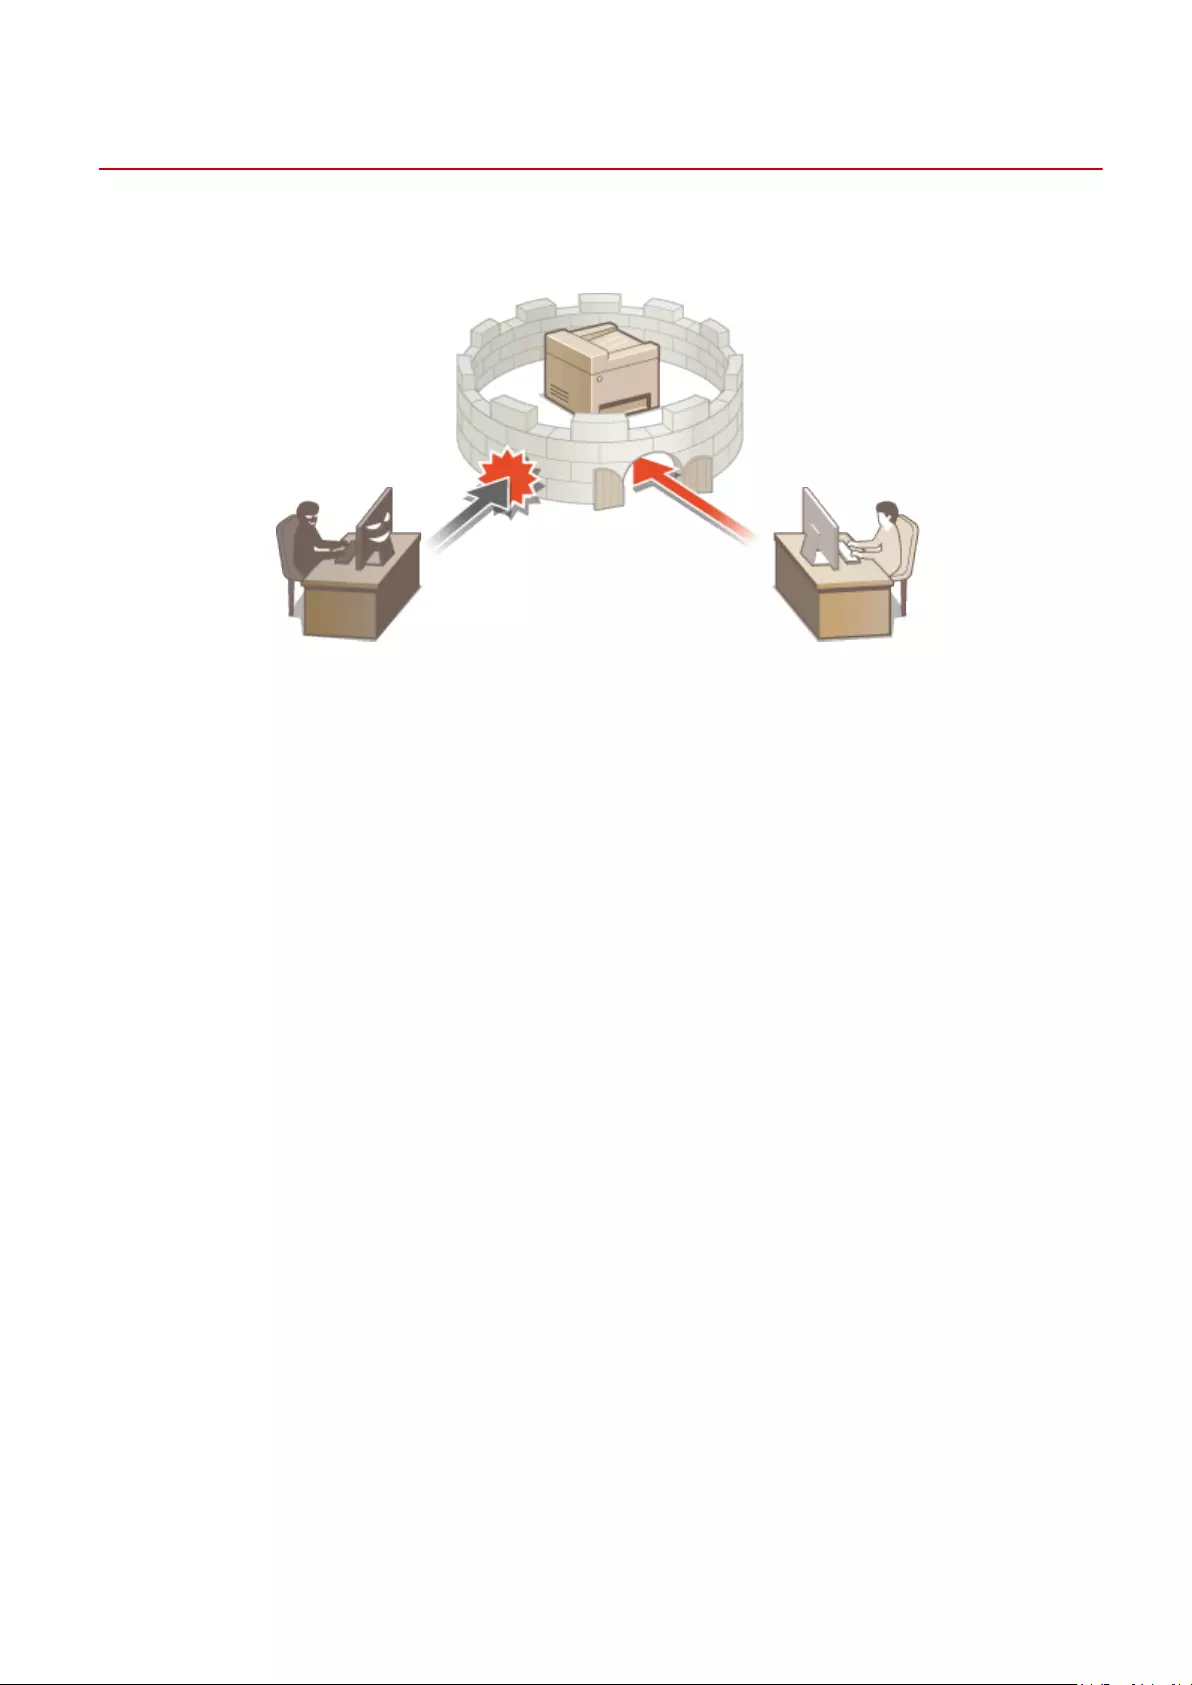
Protecting the Machine from Unauthorized Access
15A8-04A
Prevent unauthorized third parties from accessing and using the machine. You can implement multiple security
measures, such as using rewalls and changing port numbers.
Security
225

Preventing Unauthorized Access
15A8-04C
This section describes the security measures on how to prevent unauthorized access from the external network. This is
a must-read for all users and administrators before using this machine, other printers, and multifunction machines
connected to the network. In recent years, a printer/multifunction machine connected to the network can offer you a
variety of useful functions, such as printing from a computer, operating from a computer using the remote function,
and sending scanned documents via the Internet. On the other hand, it is essential to take security measures to
reduce the security risk for information leakage, as a printer/multifunction machine has become more exposed to
threats, such as unauthorized access and theft, when it is connected to the network. This section explains necessary
settings you need to specify to prevent unauthorized access before using a printer/multifunction machine connected
to the network.
Security Measures to Prevent Unauthorized Access from the External Network
Assigning a Private IP Address (MF244dw / MF232w)(P. 226)
Using Firewall to Restrict Transmission (MF244dw / MF232w)(P. 227)
Specifying the TLS Encrypted Communication (MF244dw / MF232w)(P. 227)
Setting PIN to Manage Information Stored in the Multifunction Machine(P. 227)
Assigning a Private IP Address (MF244dw / MF232w)
An IP address is a numerical label assigned to each device participating in a computer network. A «global IP address» is
used for the communication connecting to the Internet, and a «private IP address» is used for the communication
within a local area network, such as a LAN in the company. If a global IP address is assigned, your printer/
multifunction machine is open to the public and can be accessed via the Internet. Thus, the risk of information leakage
due to unauthorized access from external network increases. On the other hand, if a private IP address is assigned,
your printer/multifunction machine is closed to a local area network and can be accessed by only users on your local
area network, such as a LAN in the company.
Global IP Address
Can be accessed from the external network
Private IP Address
Can be accessed from the users within a local area network
Basically, assign a private IP address to your printer/multifunction machine. Make sure to conrm the IP address,
assigned to the printer/multifunction machine you are using, is a private IP address or not. A private IP address is
found in one of the following ranges.
Ranges for Private IP addresses
●From 10.0.0.0 to 10.255.255.255
●From 172.16.0.0 to 172.31.255.255
●From 192.168.0.0 to 192.168.255.255
For information on how to conrm the IP address, see Setting IPv4 Address(P. 188) .
●If a global IP address is assigned to a printer/multifunction machine, you can create a network environment
to reduce the risk of unauthorized access by installing security software, such as a rewall that prevents
Security
226

access from the external networks. If you want to assign a global IP address to and use a printer/
multifunction machine, contact your network administrator.
Using Firewall to Restrict Transmission (MF244dw / MF232w)
A rewall is a system that prevents unauthorized access from the external networks and protects against attacks/
intrusions to a local area network. You can use a rewall on your network environment to block access from the
external network that appears to be dangerous, by restricting communication from specied IP address of the
external network. The function installed to a Canon printer/multifunction machine enables you to set up the IP
address lter. For information on how to set up an IP address lter, see Specifying IP Addresses for Firewall
Rules(P. 234) .
Specifying the TLS Encrypted Communication (MF244dw / MF232w)
For information on the TLS Encrypted Communication, see Implementing Robust Security Features (MF244dw /
MF232w)(P. 248) , and on the procedures to specify, see Enabling TLS Encrypted Communication for the Remote
UI(P. 249) .
Setting PIN to Manage Information Stored in the Multifunction Machine
If a malicious third party attempts to gain unauthorized access to a printer/multifunction machine, setting PIN to
information stored in the machine will reduce the risk of information leakage. Canon printer/multifunction machine
enables you to protect various type of information by setting PIN.
Setting PIN to Each Function
●Setting PIN for Using Remote UI
For more information, see Setting a Remote UI PIN (MF244dw / MF232w)(P. 231) .
●Setting PIN for the System Manager Settings
For more information, see Setting the System Manager PIN(P. 229) .
Listed above are some examples of security measures for preventing unauthorized access. For more information on
the other security measures, see Security(P. 224) and take necessary security measures for preventing
unauthorized access to suit your environment.
Security
227
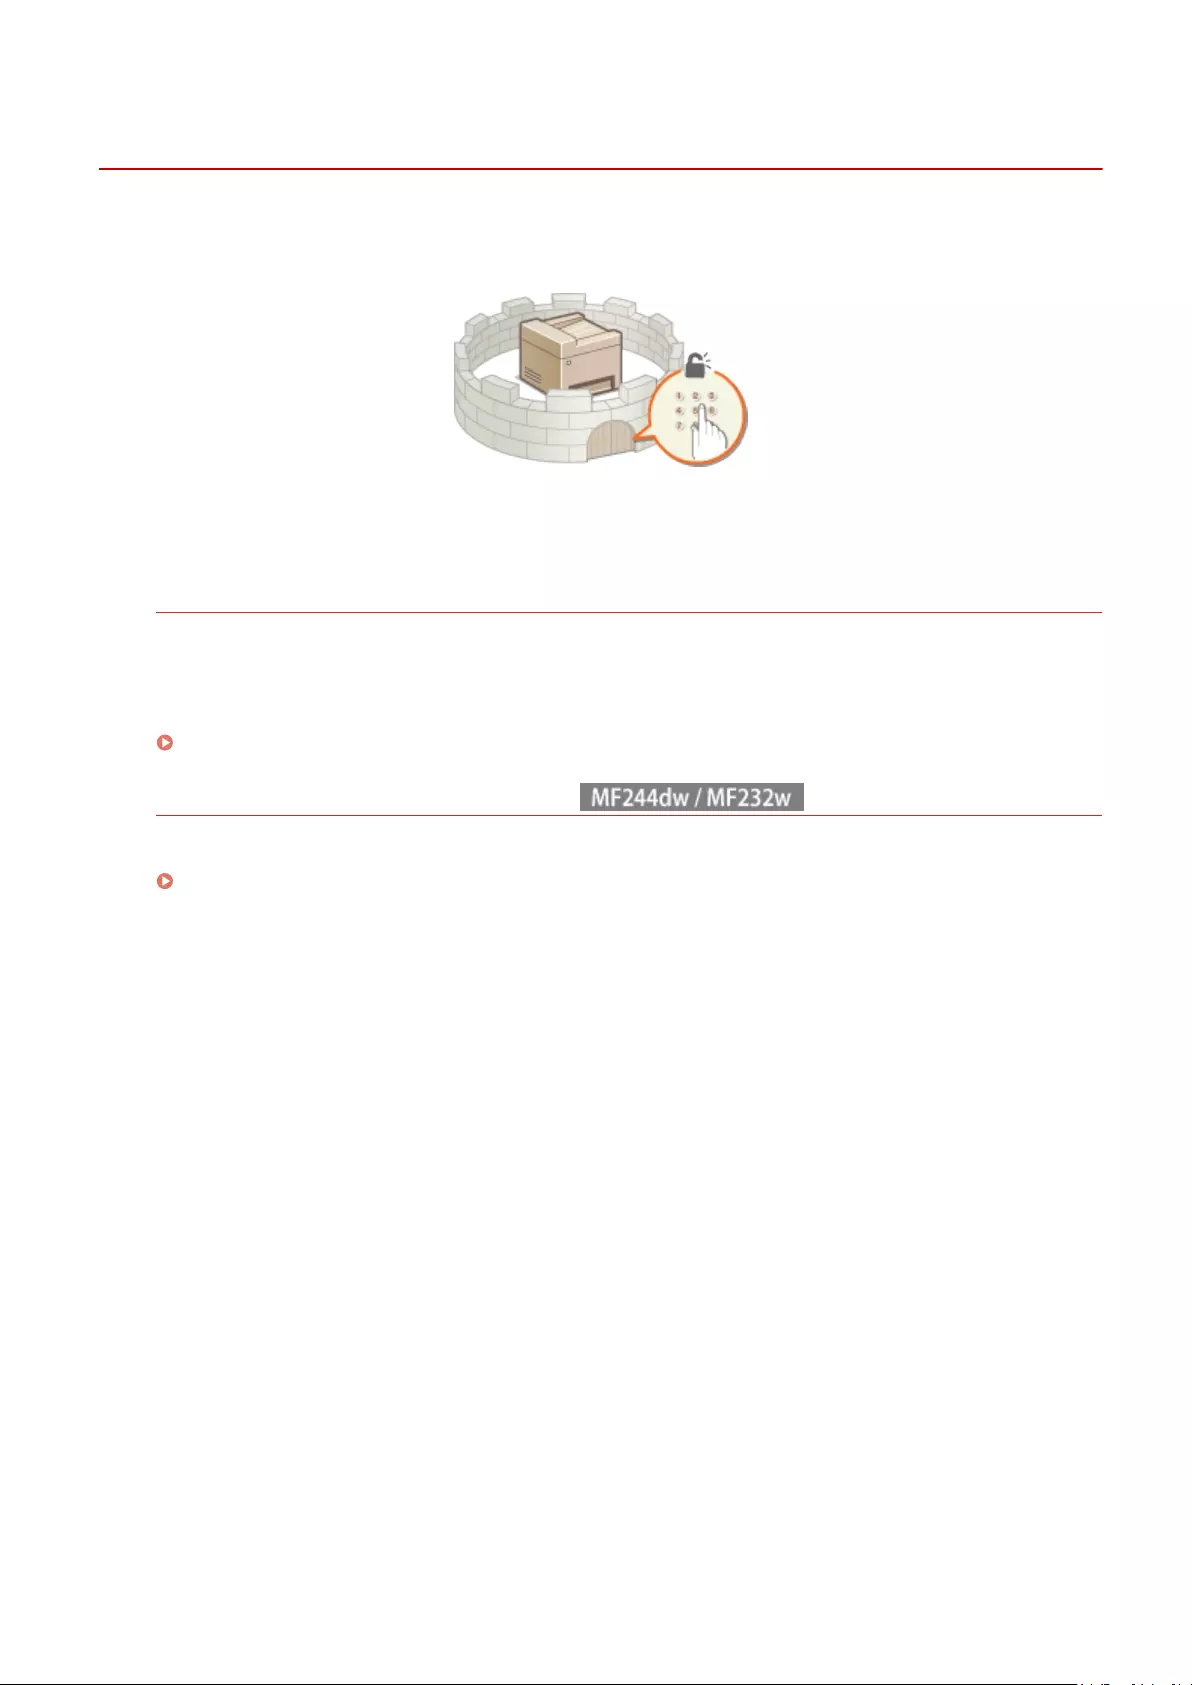
Setting Access Privileges
15A8-04E
Protect the machine from unauthorized access by only allowing users with access privileges to use the machine. When
privileges are set, the user must enter a PIN to change settings or access the Remote UI.
Access privileges are divided into two types: System Manager Mode and General User Mode. System Manager Mode
has full access privileges, and a System Manager PIN can be set to restrict logon in this mode. And by setting a Remote
UI Access PIN, you can restrict use of the Remote UI in General User Mode and in System Manager Mode without a
System Manager PIN set.
System Manager PIN
System Manager PIN is intended exclusively for Administrators having full access privileges. If you specify this
PIN, you need to log on to the machine using this PIN in order to access <Network Settings> or <System
Management Settings>. Set the System Manager PIN when you need different access privilege levels for
administrators and general users.
Setting the System Manager PIN(P. 229)
Remote UI PIN (Remote UI Access PIN)
This is a PIN for using the Remote UI. Only users who know the PIN can access the Remote UI.
Setting a Remote UI PIN (MF244dw / MF232w)(P. 231)
Security
228

Setting the System Manager PIN
15A8-04F
Set a System Manager PIN that is intended exclusively for Administrators. You can access <Network Settings>, <System
Management Settings>, etc. only when the PIN has been entered correctly. It is recommended that only
Administrators know the PIN.
1Press .
2Use / to select <System Management Settings>, and press .
3Select <System Manager Information Settings> <System Manager PIN>.
4Specify the System Manager PIN.
●Enter a number of up to seven digits using the numeric keys, and press .
●When <PIN (Conrm)> is displayed, enter the PIN once again to conrm.
●You cannot set a PIN that consists only of zeros, such as «00» or «0000000».
●To disable the PIN, press to erase the PIN (leave the text box blank), and press .
Setting the System Manager Name
1Select <System Manager Name>, and press .
2Enter up to 32 characters for the System Manager Name, select <Apply>, and press . Entering
Text(P. 35)
Security
229
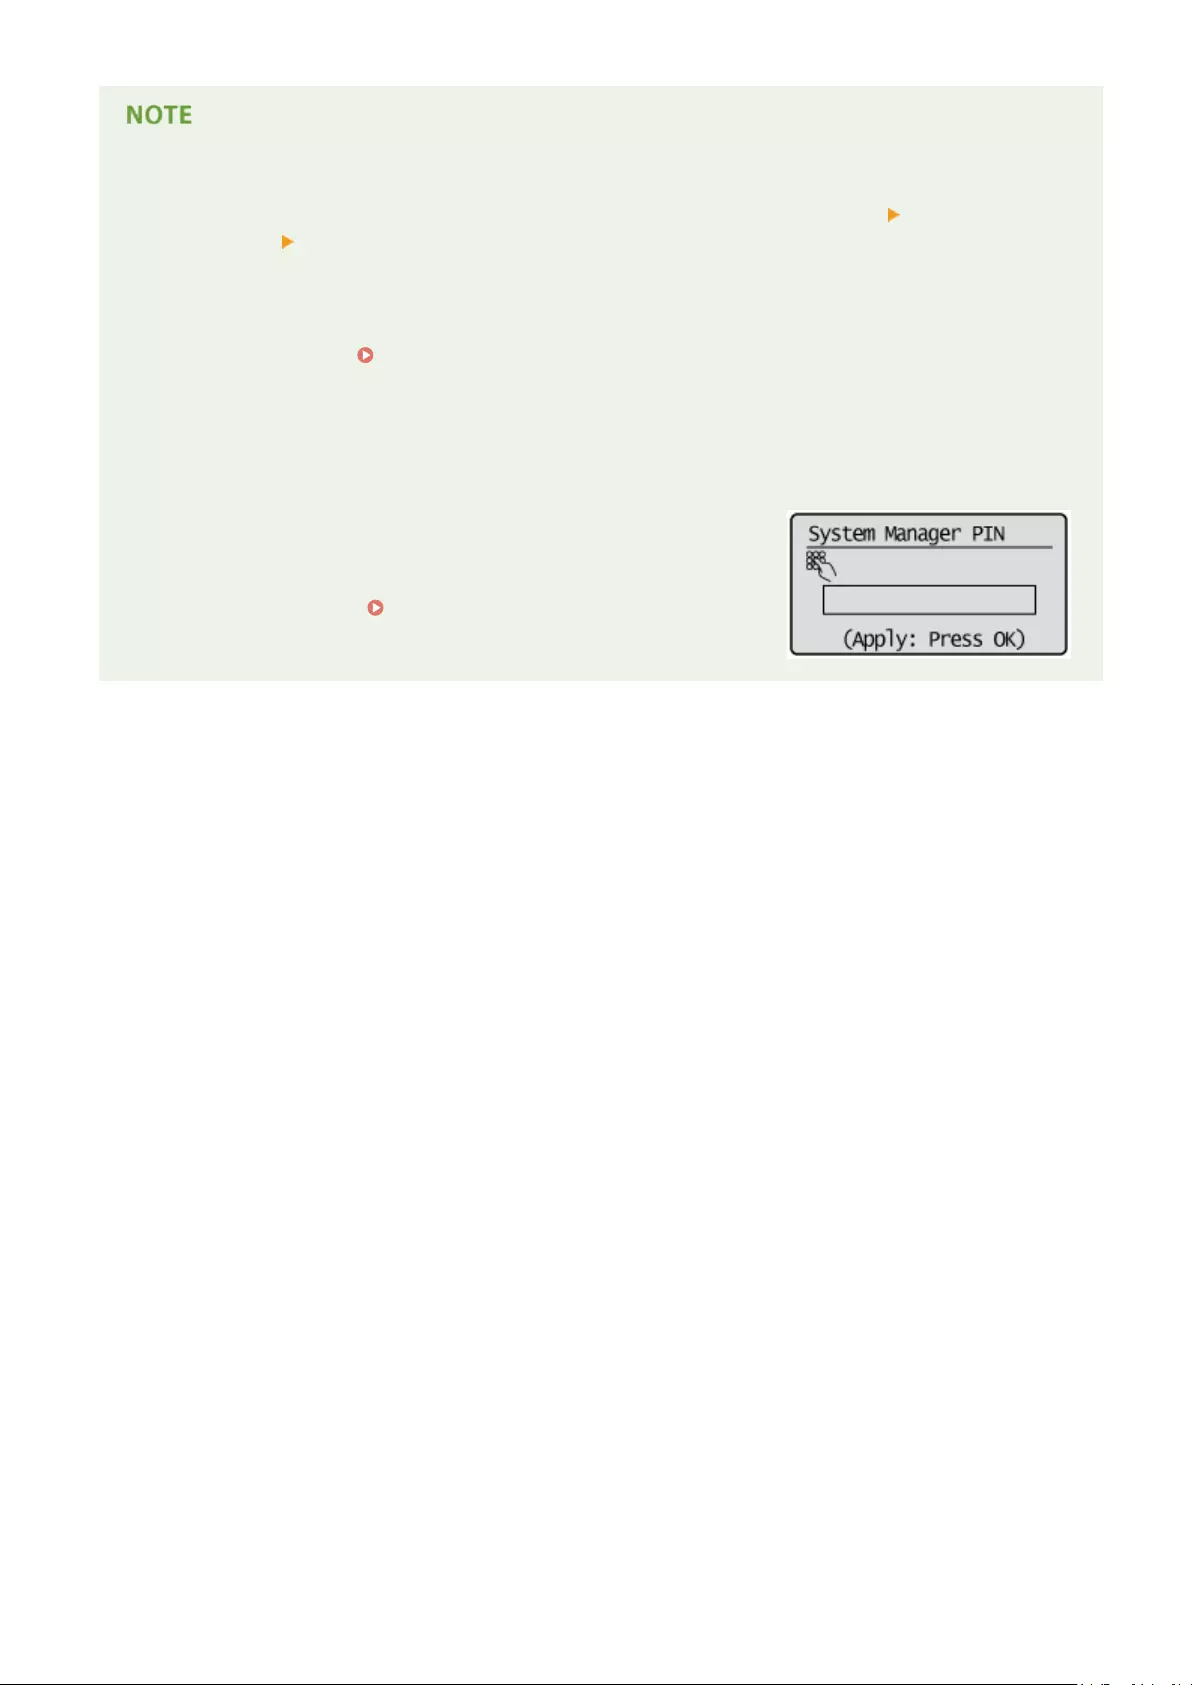
Conguring settings via the Remote UI (MF244dw / MF232w)
●Start the Remote UI and log on in System Manager Mode. Click [Settings/Registration] [System
Management] [Edit] and specify the necessary settings on the displayed screen.
●By using the Remote UI, you can register a variety of information, including contact information,
Administrator comments, the installation location of the machine, as well as to the settings that you can
register by using the operation panel. The registered information can be viewed on the [Device Information]
page of the Remote UI. Checking System Manager Information(P. 280)
If PIN is forgotten
●Do not forget your PIN. If you forget your PIN, contact your authorized Canon dealer or the Canon help line.
If a System Manager PIN is Set
●If you try to access <Network Settings>, <System Management
Settings>, etc., the following screen is displayed. Enter the set PIN.
●Entering a PIN is also required when logging on in System Manager
Mode in the Remote UI. Starting Remote UI(P. 273)
Security
230
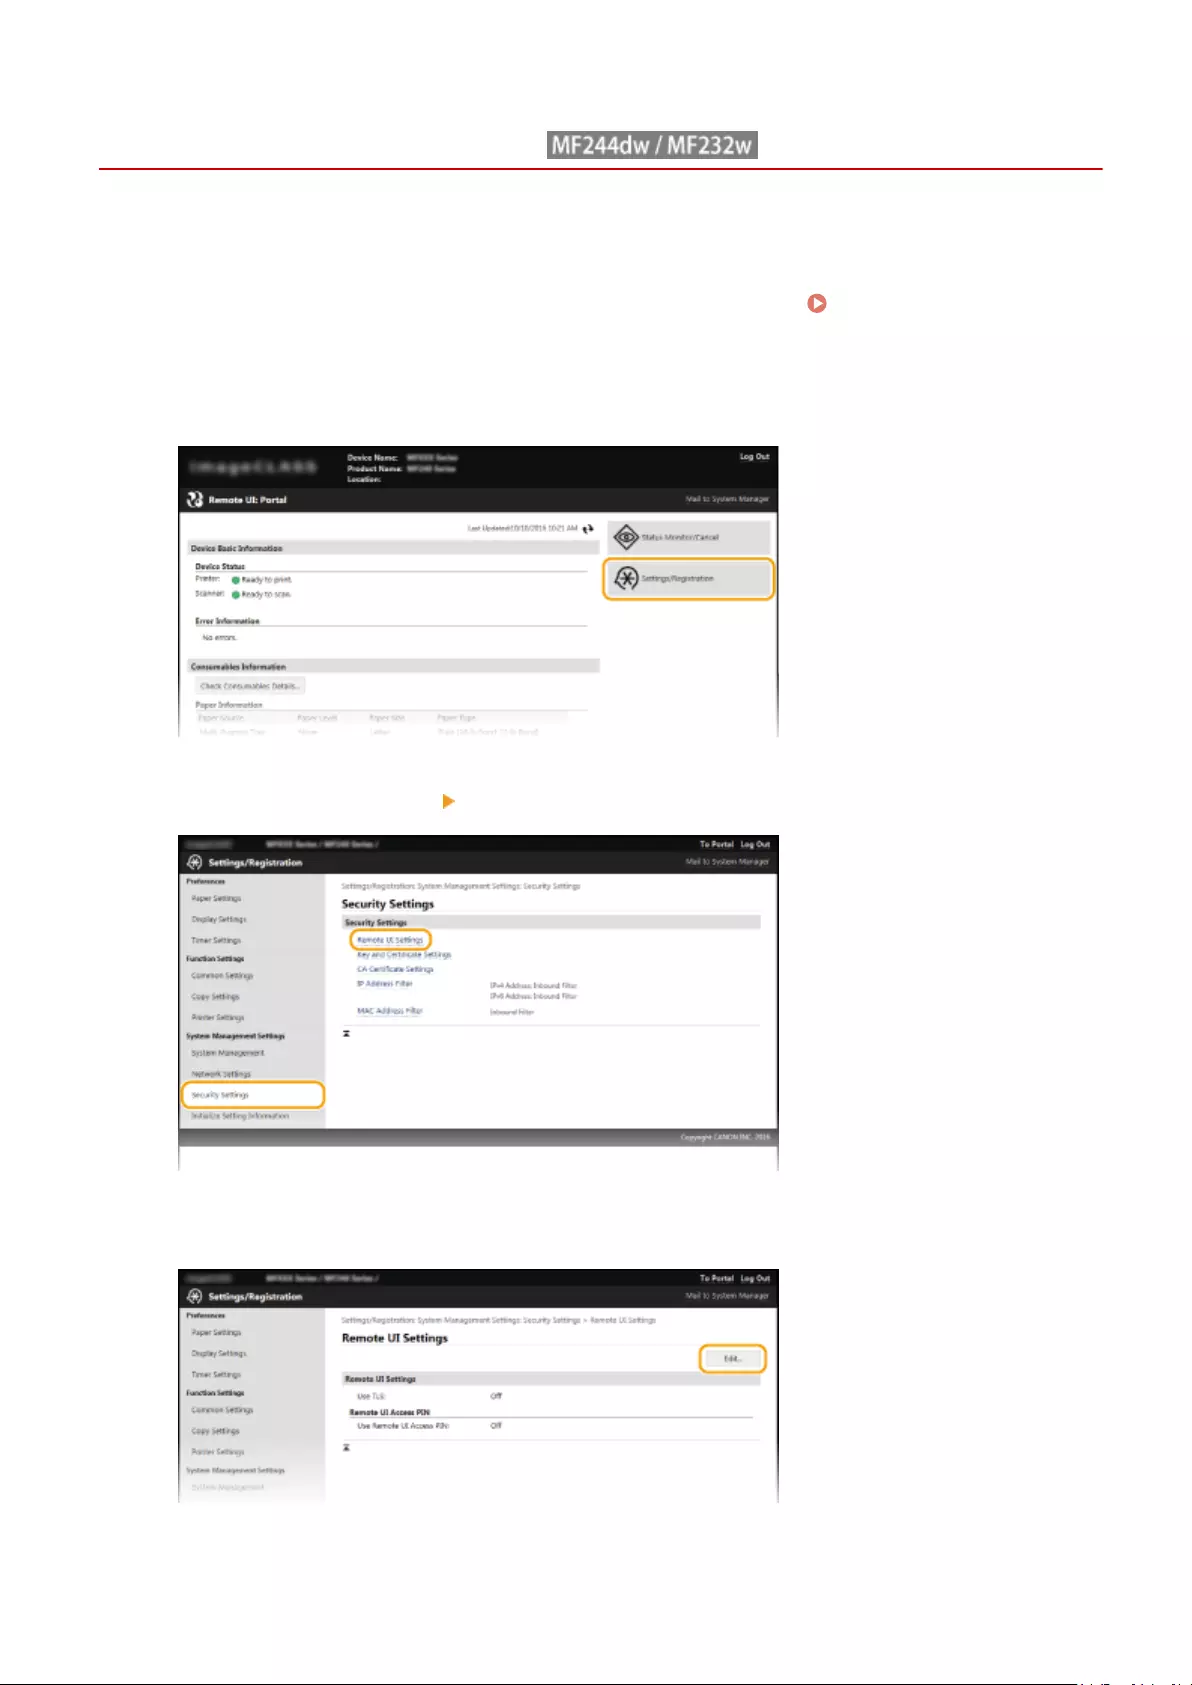
Setting a Remote UI PIN
15A8-04H
You can set a PIN for access to the Remote UI. All users use a common PIN.
1Start the Remote UI and log on in System Manager Mode. Starting Remote
UI(P. 273)
2Click [Settings/Registration].
3Click [Security Settings] [Remote UI Settings].
4Click [Edit].
5Select the [Use Remote UI Access PIN] check box and set the PIN.
Security
231
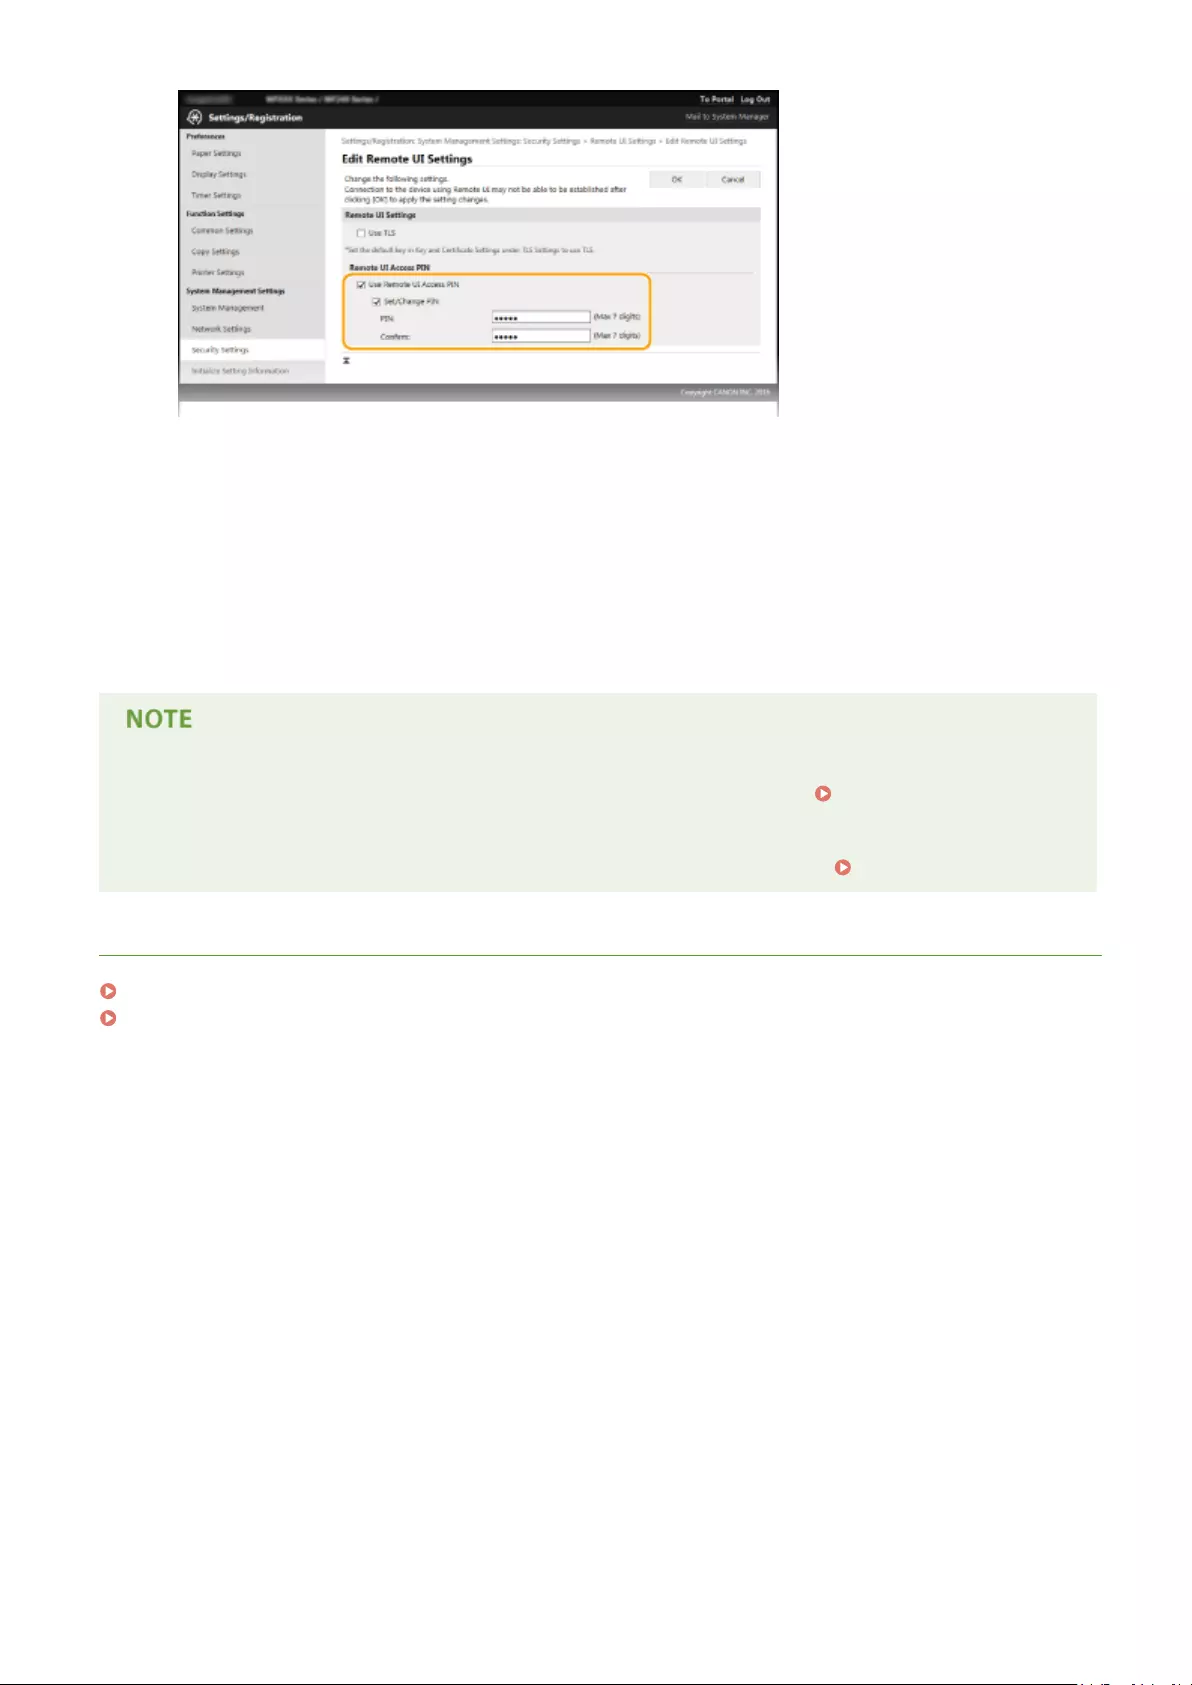
[Use Remote UI Access PIN]
If you select this check box, you must enter a PIN to access the Remote UI.
[Set/Change PIN]
To set a PIN, select the check box and enter a number of up to seven digits both in the [PIN] and [Conrm]
text boxes.
6Click [OK].
If PIN is forgotten
●Set a new Remote UI Access PIN in the settings menu on the operation panel. Remote UI Settings(P. 333)
If Remote UI settings are initialized
●The Remote UI Access PIN is also initialized. After an initialization, reset the PIN. Initializing Menu(P. 397)
LINKS
Setting Access Privileges(P. 228)
Setting the System Manager PIN(P. 229)
Security
232

Restricting Communication by Using Firewalls
15A8-04J
Without proper security, unauthorized third parties can access computers and other communication devices that are
connected to a network. To prevent this unauthorized access, specify the settings for packet lter, a feature that
restricts communication to devices with specied IP addresses or MAC addresses.
Security
233

Specifying IP Addresses for Firewall Rules
15A8-04K
You can either limit communication to only devices with specied IP addresses, or block devices with specied IP
addresses but permit other communications. You can specify a single IP address or a range of IP addresses.
●Up to 4 IP addresses (or ranges of IP addresses) can be specied for both IPv4 and IPv6.
●The packet lters described in this section control communications over TCP, UDP, and ICMP.
1Start the Remote UI and log on in System Manager Mode. Starting Remote
UI(P. 273)
2Click [Settings/Registration].
3Click [Security Settings] [IP Address Filter].
4Click [Edit] for the lter type that you want to use.
Security
234

[IPv4 Address: Inbound Filter]
Select to restrict receiving data from the machine to a computer by specifying IPv4 addresses.
[IPv6 Address: Inbound Filter]
Select to restrict receiving data from the machine to a computer by specifying IPv6 addresses.
5Specify the settings for packet ltering.
[Blocked Addresses]
Register addresses to be blocked, as well as check or delete registered blocked addresses.
[Allowed Addresses]
Register addresses to be allowed, as well as check or delete registered allowed addresses.
1Select the [Use Filter] check box.
●Select the check box to restrict communication. Clear the check box to disable the restriction.
2Specify the address.
●Enter the IP address (or the range of IP addresses) in the [Address to Register] text box and click
[Add].
Security
235

Registered address Result
[Blocked Addresses]
Restricts communication (received) with devices having their IP addresses entered
for [Address to Register]. Communication is allowed with devices with any other IP
addresses.
[Allowed Addresses]
Allows communication (received) only with devices having their IP addresses entered
for [Address to Register], and restricts communication with devices with any other IP
addresses.
Registered as both
Allows communication (received) only with devices having their IP addresses
registered in [Allowed Addresses], and restricts communication with devices with any
other IP addresses. However, communication is restricted for IP addresses also
registered in [Blocked Addresses].
Check for entry errors
If IP addresses are incorrectly entered, you may be unable to access the machine from the Remote UI,
in which case you need to set <IPv4 Address Filter> or <IPv6 Address Filter> to <Off>. IPv4 Address
Filter (P. 331) IPv6 Address Filter (P. 332)
Entry form for IP addresses
Description Example
Entering a single address IPv4:
Delimit numbers with periods.
192.168.0.10
IPv6:
Delimit alphanumeric
characters with colons.
fe80::10
Specifying a range of addresses Insert a hyphen between the
addresses.
IPv4:
192.168.0.10-192.168.0.20
IPv6:
fe80::10-fe80::20
Specifying a range of addresses with a
prex (IPv6 only)
Enter the address, followed by
a slash and a number
indicating the prex length.
fe80::1234/64
Deleting an IP address from exceptions
Select an IP address and click [Delete].
3Click [OK].
Security
236

You can enable or disable the IP Address Filter settings from <Menu>. IPv4 Address Filter (P. 331) IPv6
Address Filter (P. 332)
LINKS
Specifying MAC Addresses for Firewall Rules(P. 238)
Security
237

Specifying MAC Addresses for Firewall Rules
15A8-04L
You can limit communication to only devices with specied MAC addresses, or block devices with specied MAC
addresses but permit other communications. Up to 10 MAC addresses can be specied.
This function is unavailable when the machine is connected to a wireless LAN.
1Start the Remote UI and log on in System Manager Mode. Starting Remote
UI(P. 273)
2Click [Settings/Registration].
3Click [Security Settings] [MAC Address Filter].
4Click [Edit].
Security
238
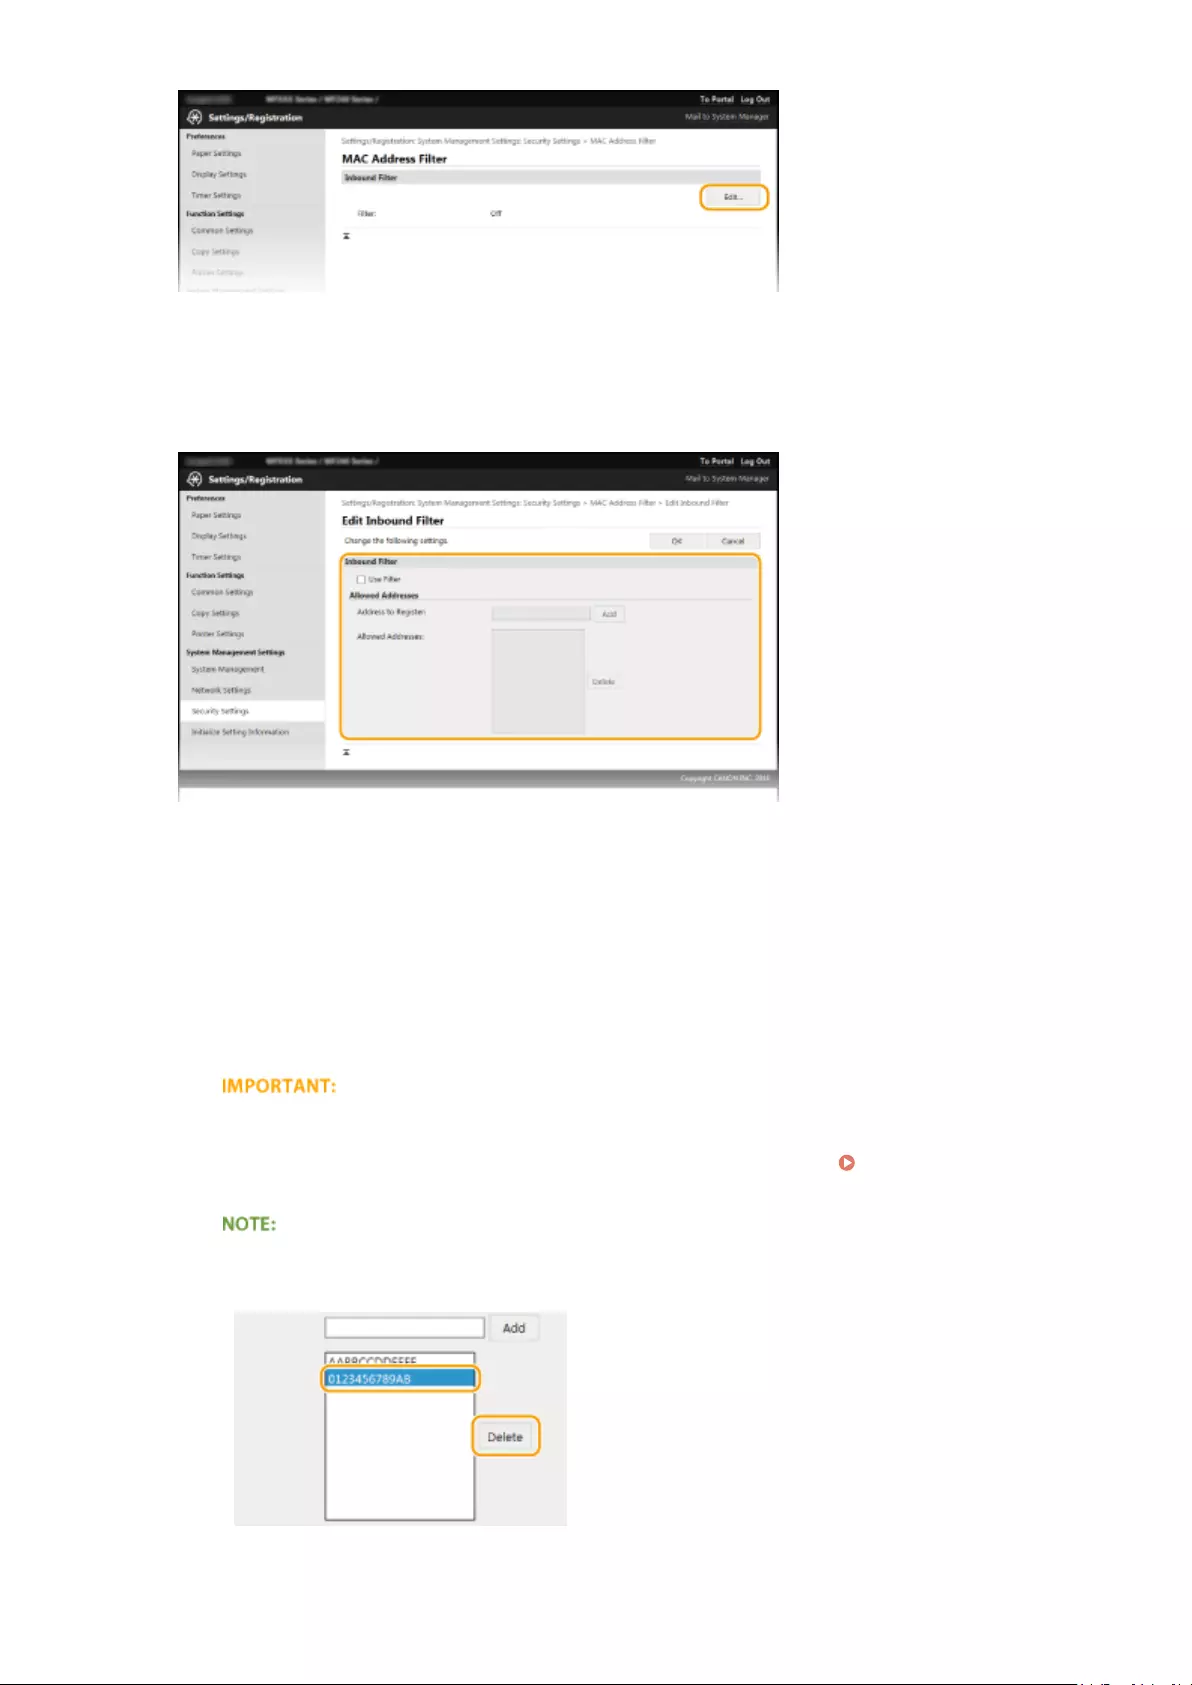
[Inbound Filter]
Select to restrict receiving data from the machine to a computer by specifying MAC addresses.
5Specify the settings for packet ltering.
1Select the [Use Filter] check box.
●Select the check box to restrict communication. Clear the check box to disable the restriction.
2Specify the address.
●Enter the MAC address in the [Address to Register] text box and click [Add]. Allows communication
(received) only with devices having registered MAC addresses, and restricts communication with
devices with any other MAC addresses.
●You do not need to delimit the address with hyphens or colons.
Check for entry errors
If MAC addresses are incorrectly entered, you may become unable to access the machine from the
Remote UI, in which case you need to set <MAC Address Filter> to <Off>. MAC Address Filter (P. 332)
Deleting a MAC address from exceptions
Select a MAC address and click [Delete].
3Click [OK].
Security
239

You can enable or disable the MAC Address Filter settings from <Menu>. MAC Address Filter (P. 332)
LINKS
Specifying IP Addresses for Firewall Rules(P. 234)
Security
240

Changing Port Numbers
15A8-04R
Ports serve as endpoints for communicating with other devices. Typically, conventional port numbers are used for
major protocols, but devices that use these port numbers are vulnerable to attacks because these port numbers are
well-known. To enhance security, your Network Administrator may change the port numbers. When a port number has
been changed, the new number must be shared with the communicating devices, such as computers and servers.
Specify the port number settings depending on the network environment.
To change the port number for proxy server, see Setting a Proxy (MF244dw / MF232w)(P. 243) .
1Press .
2Use / to select <Network Settings>, and press .
●If a screen for entering a PIN is displayed, enter the PIN with the numeric keys and press . Setting
the System Manager PIN(P. 229)
3Select <TCP/IP Settings> <Port Number Settings>.
4Select a port, and press .
Learning more about the ports
●<LPD>/<RAW>/<WSD Multicast Discovery> Conguring Printing Protocols and WSD Functions(P. 198)
●<HTTP> Disabling HTTP Communication(P. 246)
●<SNMP> Monitoring and Controlling the Machine with SNMP(P. 218)
5Enter the port number using the numeric keys, and press .
LINKS
Security
241

Conguring Printer Ports(P. 201)
Security
242
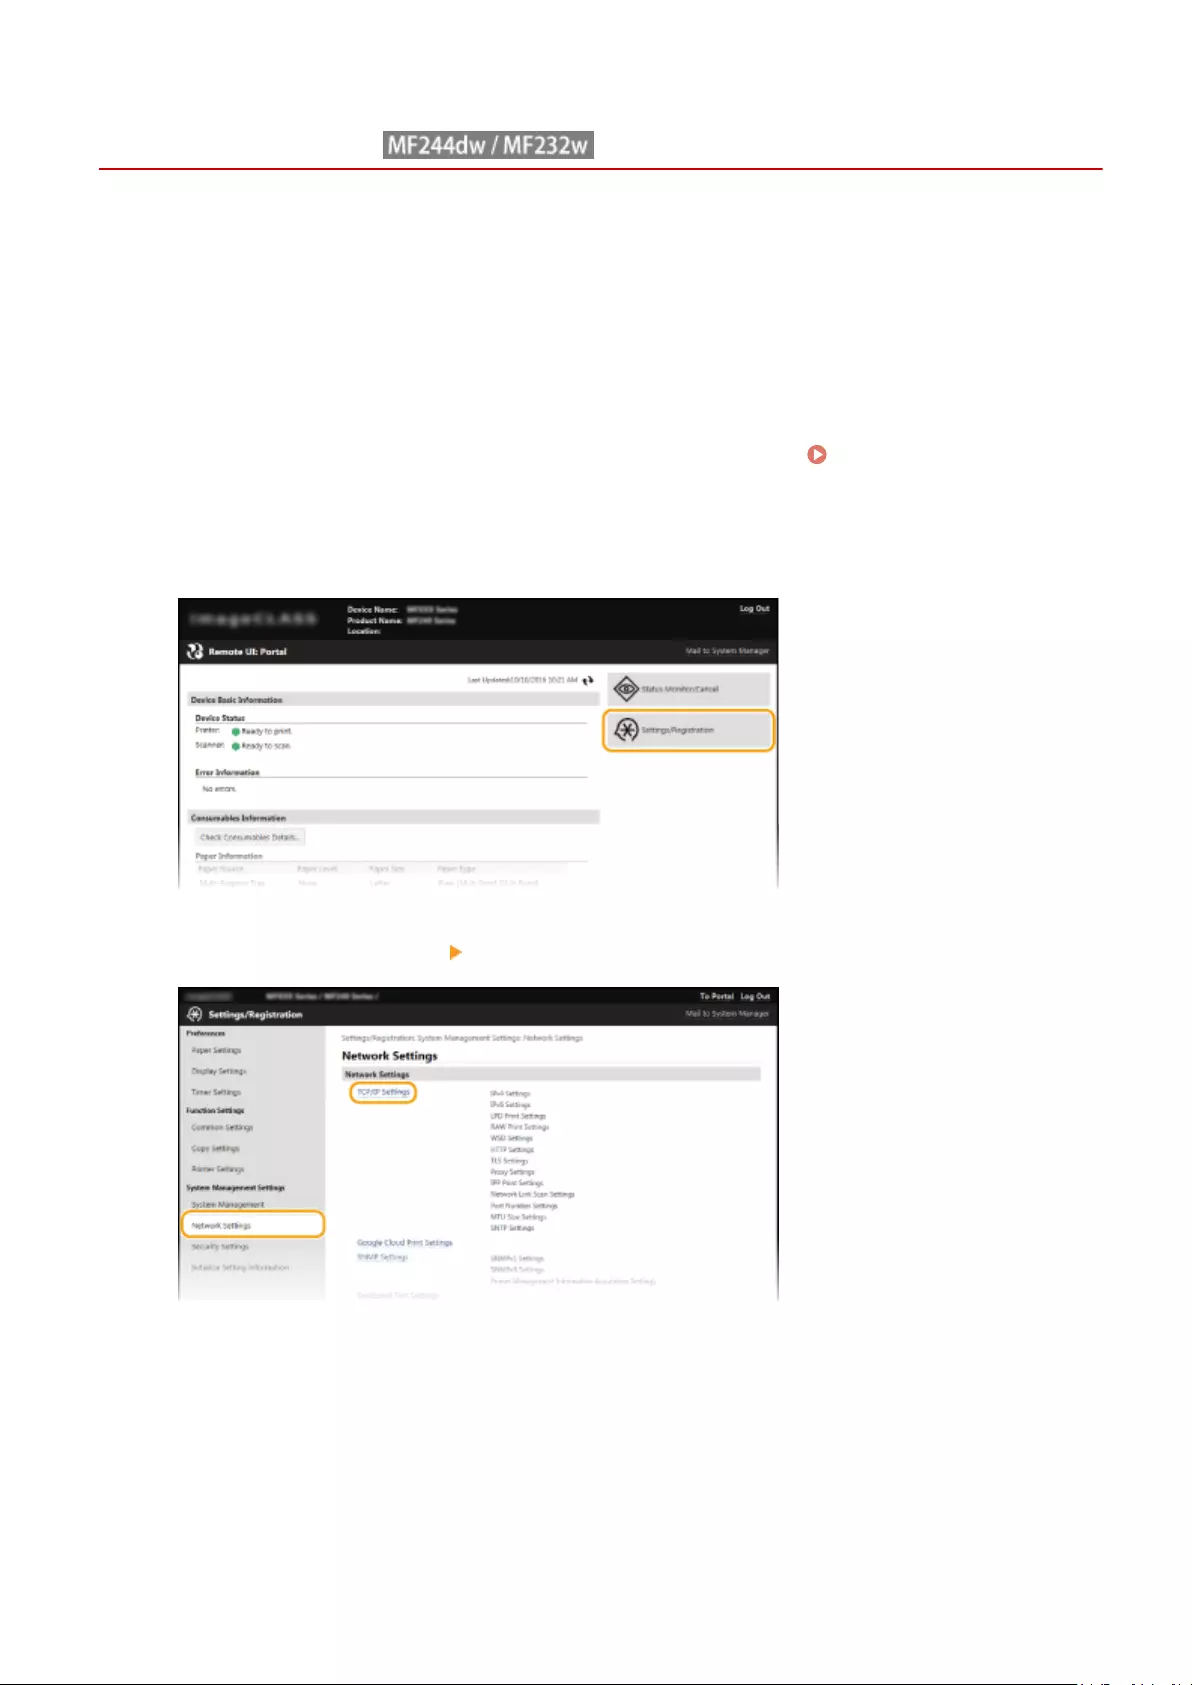
Setting a Proxy
15A8-04S
A proxy (or HTTP proxy server) refers to a computer or software that carries out HTTP communication for other
devices, especially when communicating with resources outside the network, such as when browsing Web sites. The
client devices connect to the outside network through the proxy server, and do not communicate directly to the
resources outside. Setting a proxy not only facilitates management of trac between in-house and outside networks
but also blocks unauthorized access and consolidates anti-virus protection for enhanced security. When you use
Google Cloud Print to print over the Internet, you can enhance security by setting a proxy. When setting a proxy, make
sure that you have the necessary proxy information, including the IP address, port number, and a user name and
password for authentication.
1Start the Remote UI and log on in System Manager Mode. Starting Remote
UI(P. 273)
2Click [Settings/Registration].
3Click [Network Settings] [TCP/IP Settings].
4Click [Edit] in [Proxy Settings].
Security
243
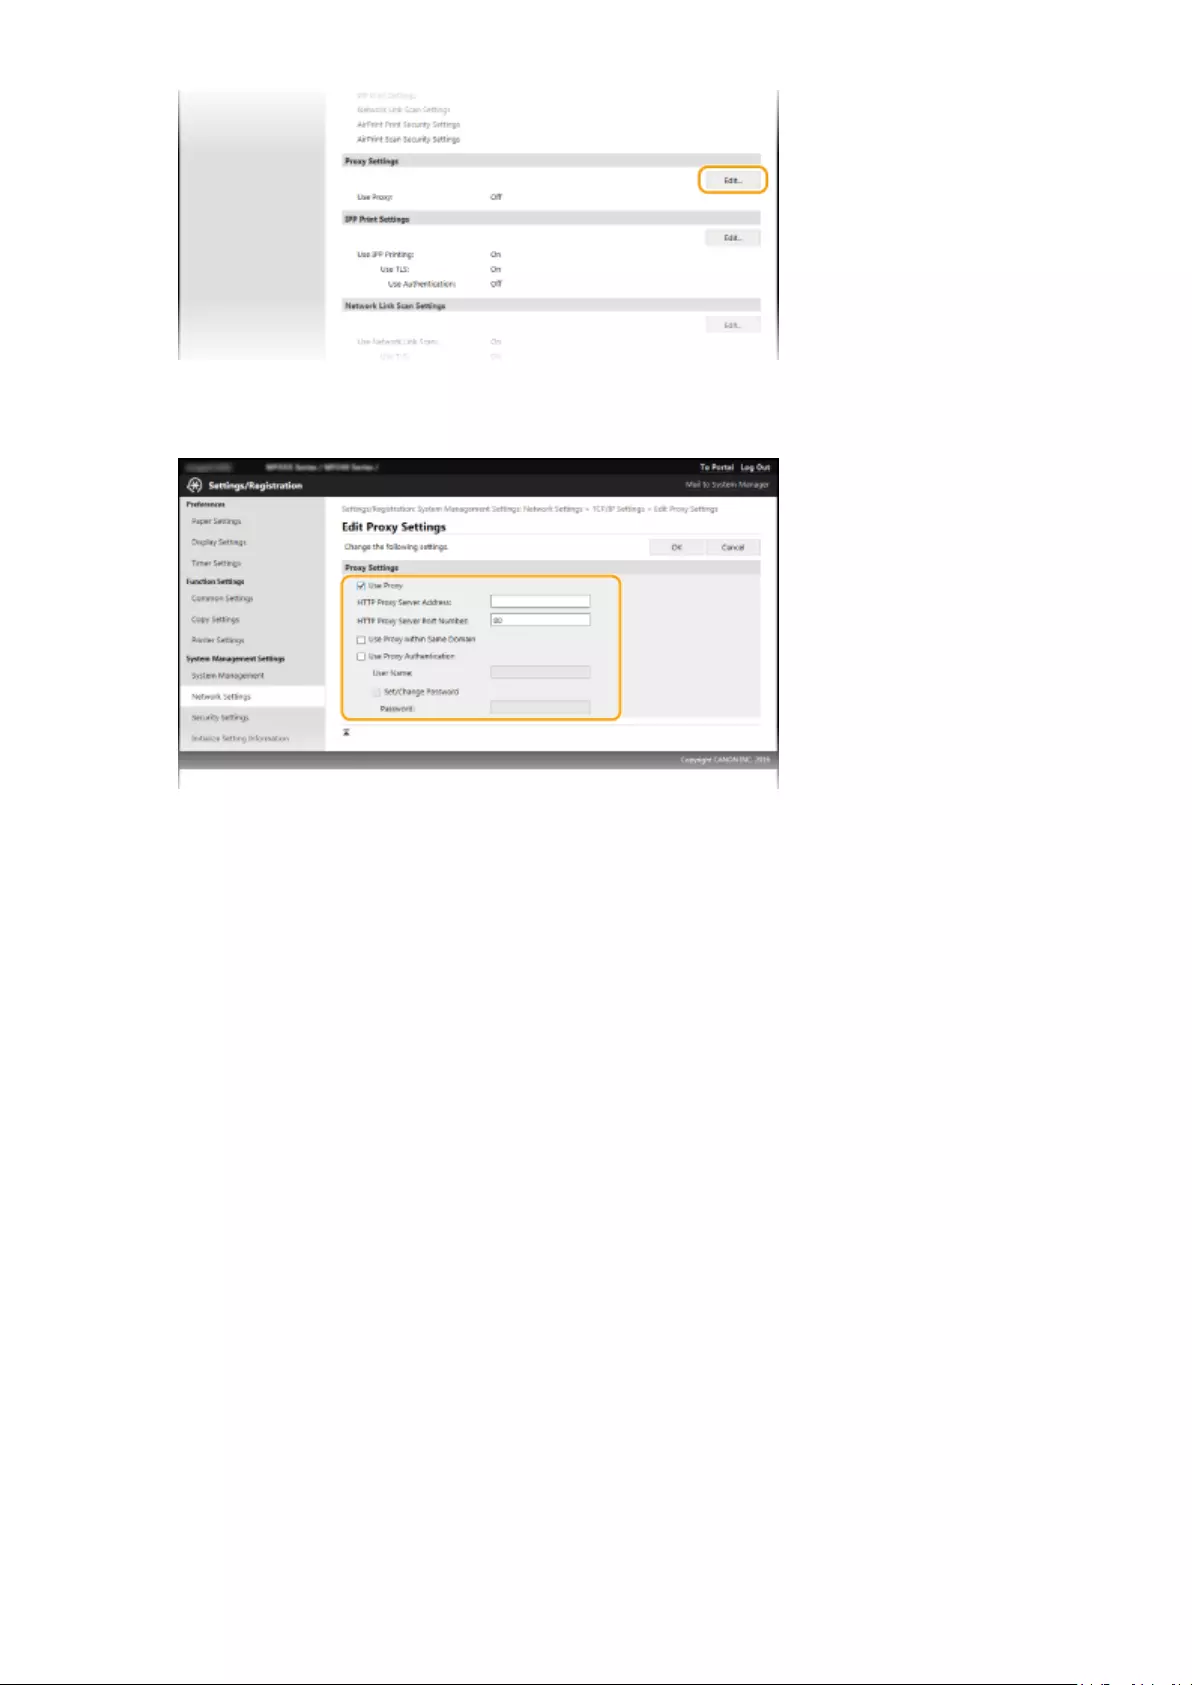
5Select the [Use Proxy] check box and specify the required settings.
[Use Proxy]
Select the check box to use the specied proxy server when communicating with an HTTP server.
[HTTP Proxy Server Address]
Enter the address of the proxy server. Specify the IP address or host name depending on the environment.
[HTTP Proxy Server Port Number]
Change the port number as necessary. Enter a number between 1 and 65535.
[Use Proxy within Same Domain]
Select the check box to use a proxy server specied in the same domain.
[Use Proxy Authentication]
To enable authentication by the proxy server, select the check box and enter up to 24 alphanumeric
characters for the user name in the [User Name] text box.
[Set/Change Password]
To set or change the password for the proxy authentication, when it is enabled, select the check box and
enter up to 24 alphanumeric characters for the new password in the [Password] text box.
6Click [OK].
Security
244

Restricting the Machine’s Functions
15A8-04U
Some of the functions of the machine may rarely be used or provide opportunities for misuse. For security purposes,
the machine can be set to limit its capabilities by partially or completely disabling these functions.
Disabling HTTP Communication and Remote Management
Disabling HTTP Communication(P. 246)
Disabling Remote UI(P. 247)
Security
245

Disabling HTTP Communication
15A8-04W
HTTP is used for communications over the network, such as when you access the machine via the Remote UI. If you
are using a USB connection or are otherwise not using HTTP, you can disable HTTP to block malicious third-party
intrusions via the unused HTTP port.
Disabling HTTP disables some of the network capabilities, such as the Remote UI, WSD printing, and printing
with Google Cloud Print.
1Press .
2Use / to select <Network Settings>, and press .
●If a screen for entering a PIN is displayed, enter the PIN with the numeric keys and press . Setting
the System Manager PIN(P. 229)
3Select <TCP/IP Settings> <Use HTTP>.
4Select <Off>, and press .
<Off>
Disables HTTP communication.
<On>
Enables HTTP communication.
LINKS
Using Remote UI (MF244dw / MF232w)(P. 272)
Changing Port Numbers (MF244dw / MF232w)(P. 241)
Conguring Printing Protocols and WSD Functions(P. 198)
Security
246
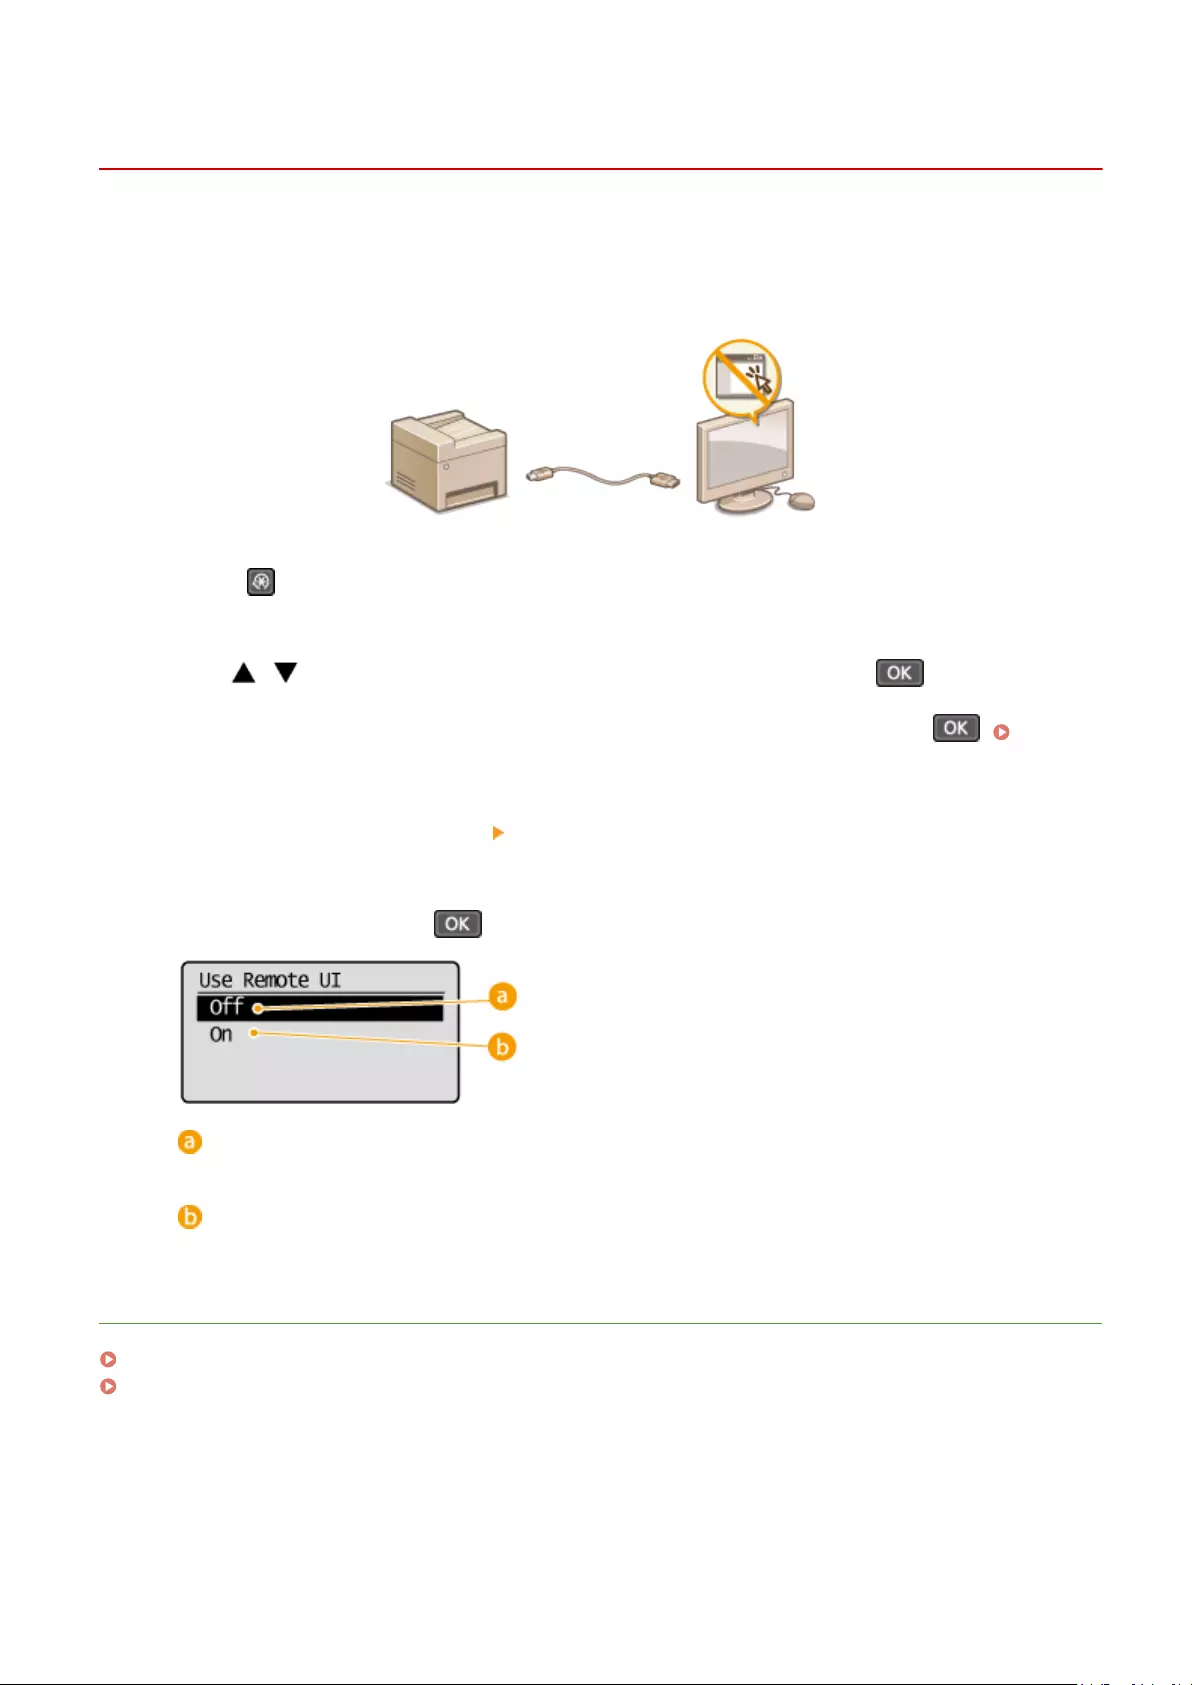
Disabling Remote UI
15A8-04X
The Remote UI is useful because the machine settings can be specied by using a Web browser on a computer. To use
the Remote UI, the machine must be connected to a computer over the network. If you do not need to use the Remote
UI, you might want to disable the Remote UI to reduce the risk of having your machine controlled remotely over the
network by malicious third parties.
1Press .
2Use / to select <System Management Settings>, and press .
●If a screen for entering a PIN is displayed, enter the PIN with the numeric keys and press . Setting
the System Manager PIN(P. 229)
3Select <Remote UI Settings> <Use Remote UI>.
4Select <Off>, and press .
<Off>
Disables the Remote UI.
<On>
Enables the Remote UI.
LINKS
Using Remote UI (MF244dw / MF232w)(P. 272)
Disabling HTTP Communication(P. 246)
Security
247

Implementing Robust Security Features
15A8-04Y
Authorized users may incur unanticipated losses from attacks by malicious third parties, such as sning, spoong,
and tampering of data as it ows over a network. To protect your important and valuable information from these
attacks, the machine supports the following features to enhance security and secrecy.
TLS Encrypted Communication
TLS is a protocol for encryption for data sent over a network and is often used for communication via a Web
browser or an e-mail application. TLS enables secure network communication when you access the machine
from a computer via the Remote UI. Enabling TLS Encrypted Communication for the Remote UI(P. 249)
IEEE 802.1X Authentication
IEEE 802.1X is a standard and mechanism for blocking unauthorized access to the network by collectively
managing user authentication information. If a device tries to connect to the 802.1X network, the device must
go through user authentication in order to prove that the connection is made by an authorized user.
Authentication information is sent to and checked by a RADIUS server, which permits or rejects communication
to the network depending on the authentication result. If authentication fails, a LAN switch (or an access point)
blocks access from the outside of the network. The machine can connect to an 802.1X network as a client
device. Conguring IEEE 802.1X Authentication(P. 252)
LINKS
Conguring Settings for Key Pairs and Digital Certicates(P. 257)
Security
248

Enabling TLS Encrypted Communication for the Remote
UI
15A8-050
You can encrypt communication between the machine and a Web browser on the computer by using Transport Layer
Security (TLS). TLS is a mechanism for encrypting data sent or received over the network. TLS must be enabled when
the Remote UI is used for specifying settings for IEEE 802.1X authentication (TTLS/PEAP) or SNMPv3. To use TLS for the
Remote UI, you need to set a key pair and enable the TLS function. Generate or install the key pair for TLS before
enabling TLS ( Conguring Settings for Key Pairs and Digital Certicates(P. 257) ).
1Start the Remote UI and log on in System Manager Mode. Starting Remote
UI(P. 273)
2Click [Settings/Registration].
3Click [Network Settings] [TCP/IP Settings].
4Click [Key and Certicate] in [TLS Settings].
Security
249

5Click [Register Default Key] on the right of the key pair you want to use.
Viewing details of a certicate
●You can check the details of the certicate or verify the certicate by clicking the corresponding text link
under [Key Name], or the certicate icon. Verifying Key Pairs and Digital Certicates(P. 269)
6Enable TLS for the Remote UI.
1Click [Security Settings] [Remote UI Settings].
2Click [Edit].
Security
250

3Select the [Use TLS] check box and click [OK].
Using the operation panel
●You can also enable or disable TLS encrypted communication from <Menu>. Use TLS(P. 331)
Starting the Remote UI with TLS
●If you try to start the Remote UI when TLS is enabled, a security alert may be displayed regarding the
security certicate. In this case, check that the correct URL is entered in the address eld, and then proceed
to display the Remote UI screen. Starting Remote UI(P. 273)
LINKS
Generating Key Pairs(P. 259)
Using CA-issued Key Pairs and Digital Certicates(P. 266)
Conguring IEEE 802.1X Authentication(P. 252)
Monitoring and Controlling the Machine with SNMP(P. 218)
Security
251
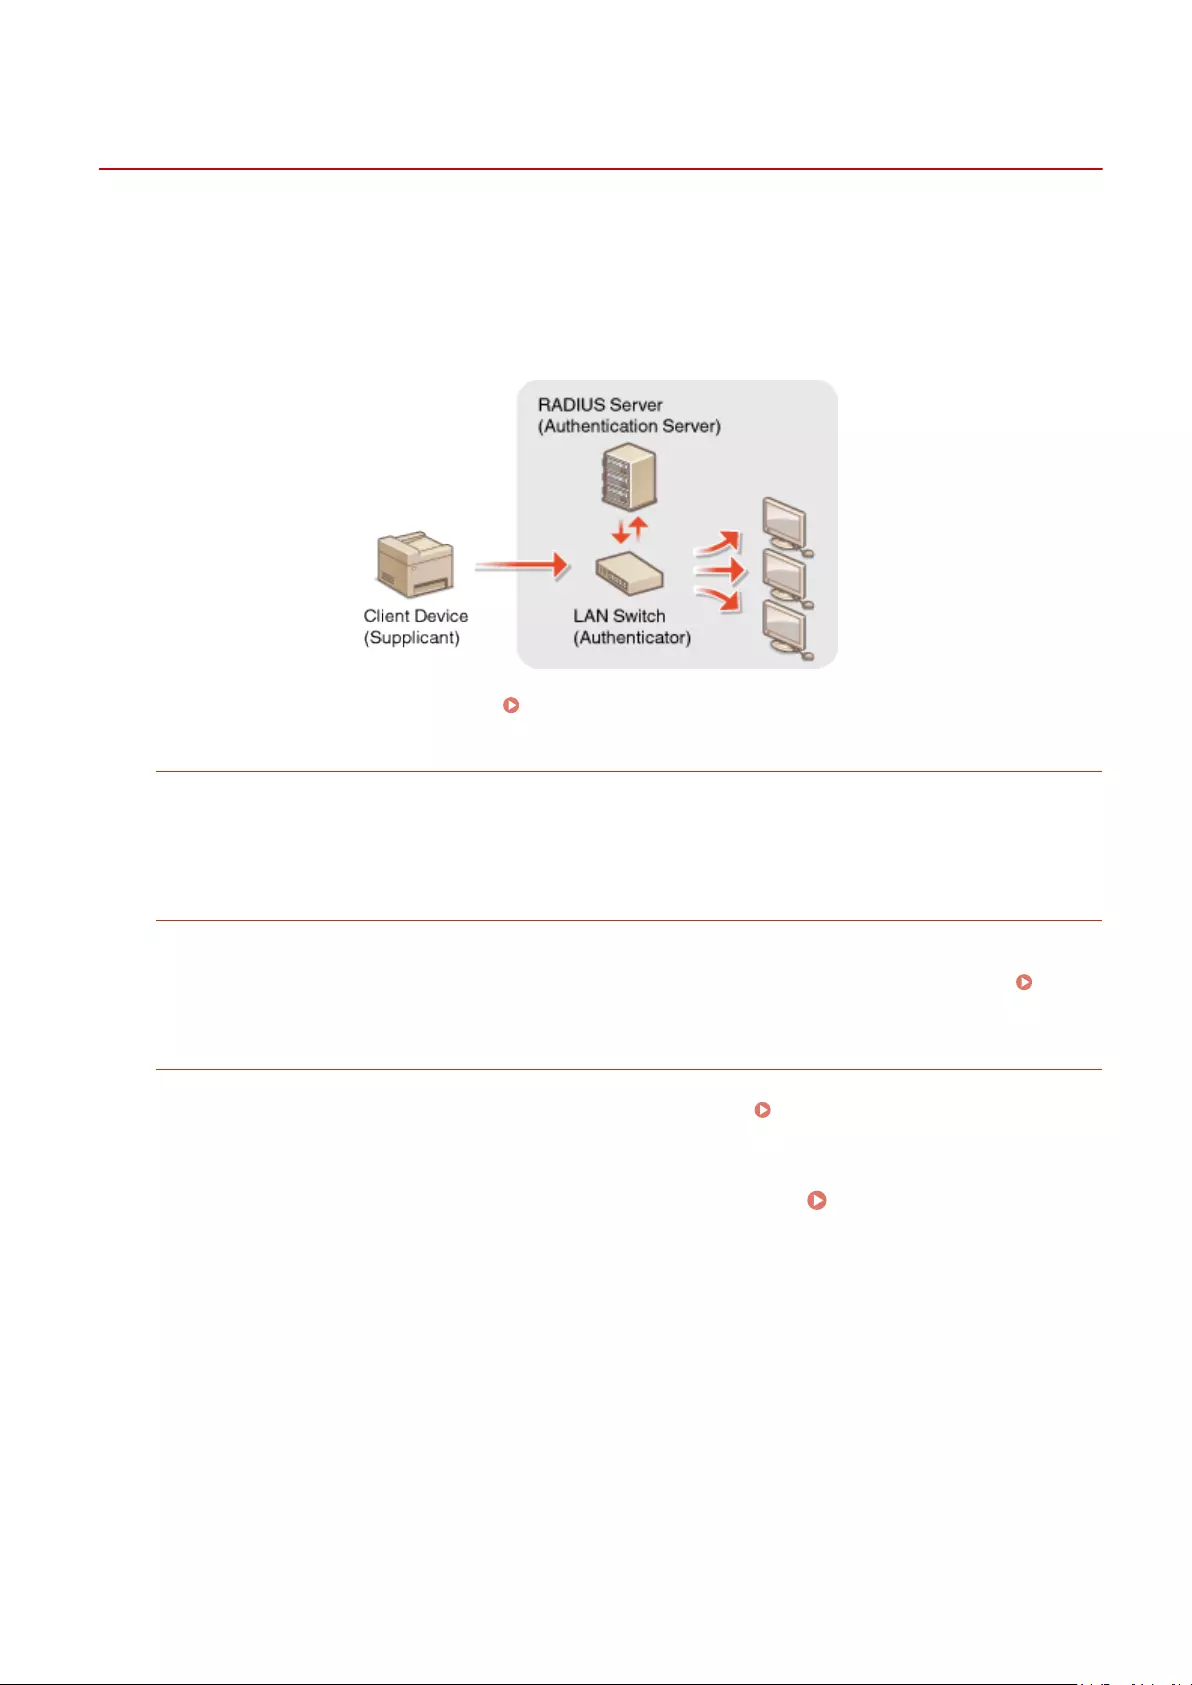
Conguring IEEE 802.1X Authentication
15A8-051
The machine can connect to an 802.1X network as a client device. A typical 802.1X network consists of a RADIUS server
(authentication server), LAN switch (authenticator), and client devices with authentication software (supplicants). If a
device tries to connect to the 802.1X network, the device must go through user authentication in order to prove that
the connection is made by an authorized user. Authentication information is sent to and checked by a RADIUS server,
which permits or rejects communication to the network depending on the authentication result. If authentication fails,
a LAN switch (or an access point) blocks access from the outside of the network.
Select the authentication method from the options below. If necessary, install or register a key pair or CA certicate
before conguring IEEE 802.1X authentication ( Using CA-issued Key Pairs and Digital Certicates(P. 266) ).
TLS
The machine and the authentication server authenticate each other by mutually verifying their certicates. A
key pair issued by a certication authority (CA) is required for the client authentication (when authenticating the
machine). For the server authentication, a CA certicate installed via the Remote UI can be used in addition to a
CA certicate preinstalled in the machine.
TTLS
This authentication method uses a user name and password for the client authentication and a CA certicate for
the server authentication. MSCHAPv2 or PAP can be selected as the internal protocol. TTLS can be used with
PEAP at the same time. Enable TLS for the Remote UI before conguring this authentication method (
Enabling TLS Encrypted Communication for the Remote UI(P. 249) ).
PEAP
The required settings are almost the same as those of TTLS. MS-CHAPv2 is used as the internal protocol. Enable
TLS for the Remote UI before conguring this authentication method ( Enabling TLS Encrypted
Communication for the Remote UI(P. 249) ).
1Start the Remote UI and log on in System Manager Mode. Starting Remote
UI(P. 273)
2Click [Settings/Registration].
Security
252

3Click [Network Settings] [IEEE 802.1X Settings].
4Click [Edit].
5Select the [Use IEEE 802.1X] check box, enter the login name in the [Login Name] text
box, and specify the required settings.
Security
253

[Use IEEE 802.1X]
Select the check box to enable IEEE 802.1X authentication.
[Login Name]
Enter up to 24 alphanumeric characters for a name (EAP identity) that is used for identifying the user.
Setting TLS
1Select the [Use TLS] check box and click [Key and Certicate].
2Click [Register Default Key] on the right of the key pair you want to use for the client authentication.
Viewing details of a key pair or certicate
●You can check the details of the certicate or verify the certicate by clicking the corresponding text
link under [Key Name], or the certicate icon. Verifying Key Pairs and Digital Certicates(P. 269)
Setting TTLS/PEAP
1Select the [Use TTLS] or [Use PEAP] check box.
Security
254

Internal protocol for TTLS
●You can select MSCHAPv2 or PAP. If you want to use PAP, click the [PAP] radio button.
2Click [Change User Name/Password].
●To specify a user name other than the login name, clear the [Use Login Name as User Name] check
box. Select the check box if you want to use the login name as the user name.
3Set the user name/password and click [OK].
Security
255
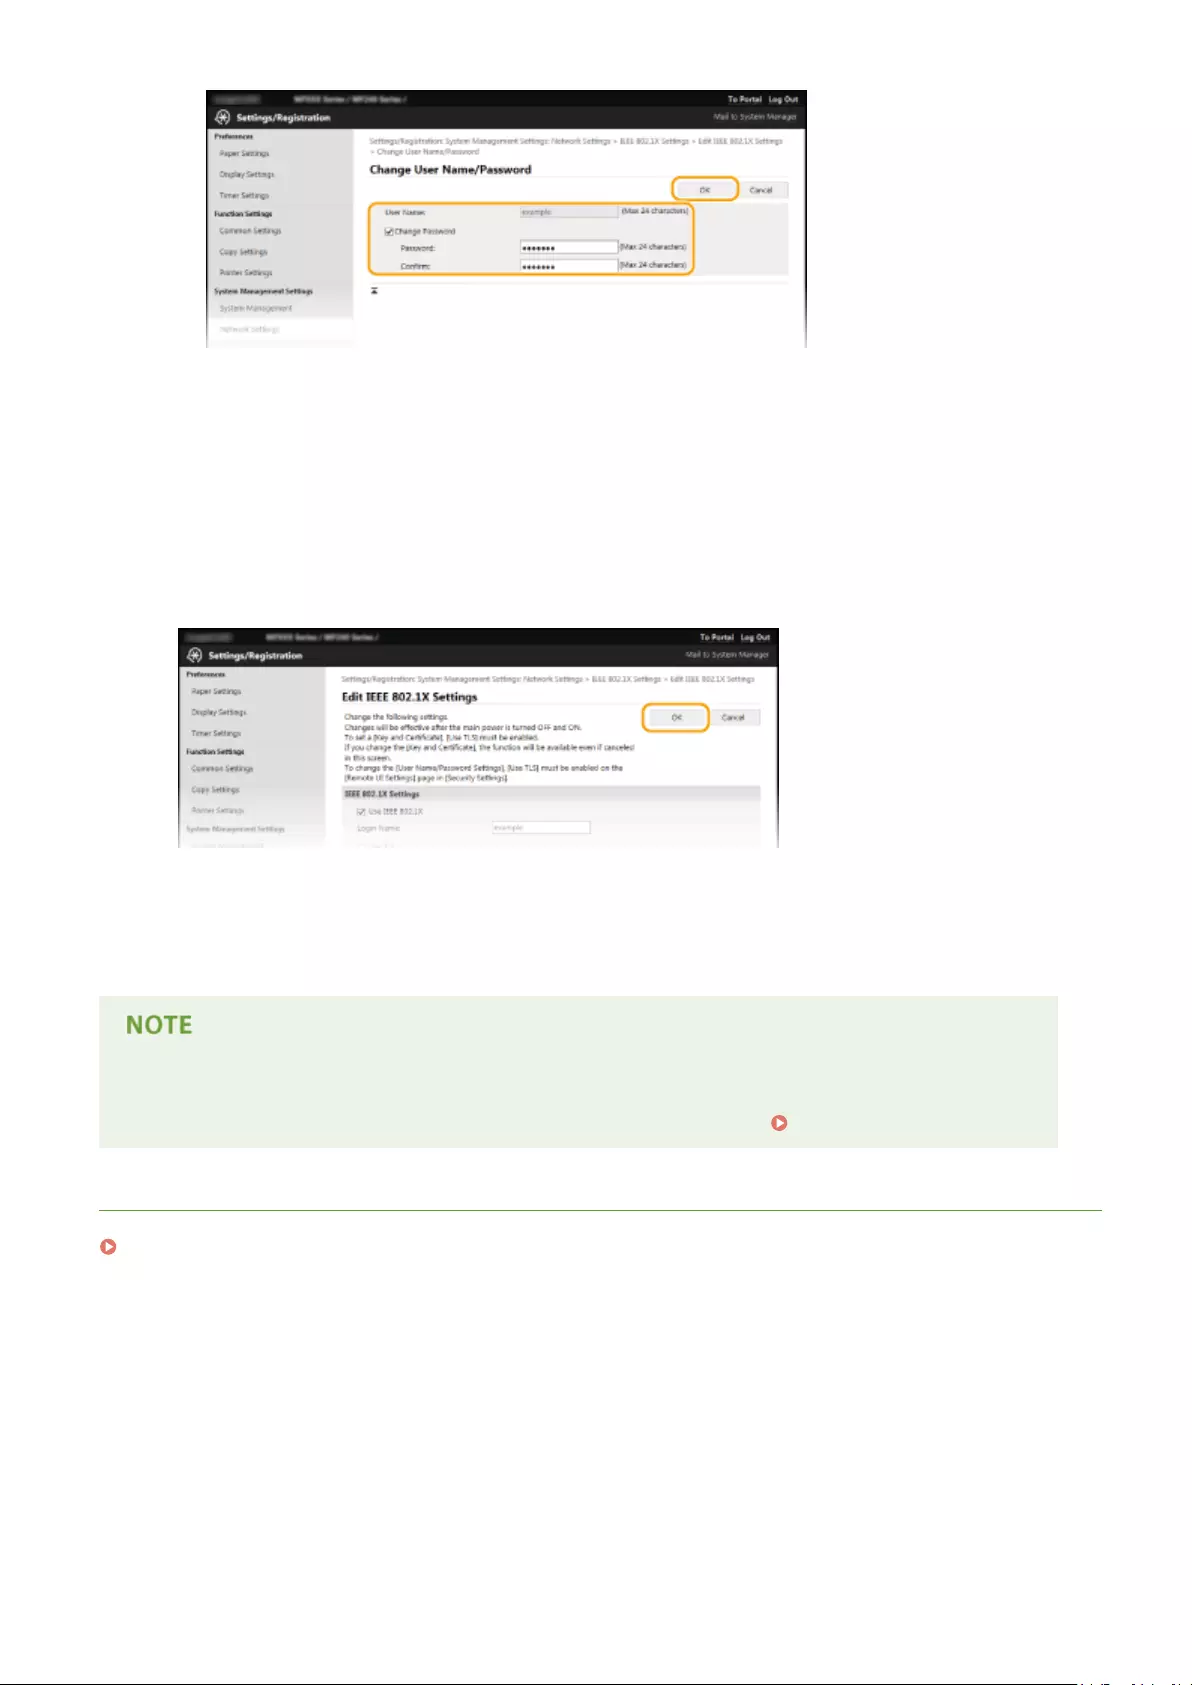
[User Name]
Enter up to 24 alphanumeric characters for the user name.
[Change Password]
To set or change the password, select the check box and enter up to 24 alphanumeric characters for the
new password both in the [Password] and [Conrm] text boxes.
6Click [OK].
7Restart the machine.
●Turn OFF the machine, wait for at least 10 seconds, and turn it back ON.
Using the operation panel
●You can also enable or disable IEEE 802.1X authentication from <Menu>. IEEE 802.1X Settings(P. 296)
LINKS
Conguring Settings for Key Pairs and Digital Certicates(P. 257)
Security
256

Conguring Settings for Key Pairs and Digital
Certicates
15A8-052
In order to encrypt communication with a remote device, an encryption key must be sent and received over an
unsecured network beforehand. This problem is solved by public-key cryptography. Public-key cryptography ensures
secure communication by protecting important and valuable information from attacks, such as sning, spoong, and
tampering of data as it ows over a network.
Key Pair
A key pair consists of a public key and a secret key, both of which are required for encrypting or
decrypting data. Because data that has been encrypted with one of the key pair cannot be
returned to its original data form without the other, public-key cryptography ensures secure
communication of data over the network. A key pair is used for TLS encrypted communication
or TLS of the IEEE 802.1X authentication. Up to ve key pairs (including the preinstalled pairs)
can be generated to the machine ( Using CA-issued Key Pairs and Digital
Certicates(P. 266) ). A key pair can be generated with the machine ( Generating Key
Pairs(P. 259) ).
CA Certicate
Digital certicates including CA certicates are similar to other forms of identication, such as
driver’s licenses. A digital certicate contains a digital signature, which enables the machine to
detect any spoong or tampering of data. It is extremely dicult for third parties to abuse
digital certicates. A digital certicate that contains a public key of a certication authority (CA)
is referred to as a CA certicate. CA certicates are used for verifying the device the machine is
communicating with for features such as printing with Google Cloud Print or IEEE 802.1X
authentication. Up to 67 CA certicates can be registered, including the 62 certicates that are
preinstalled in the machine ( Using CA-issued Key Pairs and Digital Certicates(P. 266) ).
◼Key and Certicate Requirements
The certicate contained in a key pair generated with the machine conforms to X.509v3. If you install a key pair or a CA
certicate from a computer, make sure that they meet the following requirements:
Format ●Key pair: PKCS#12*1
●CA certicate: X.509v1 or X.509v3, DER (encoded binary), PEM
File extension ●Key pair: «.p12» or «.pfx»
●CA certicate: «.cer»
Public key algorithm
(and key length)
RSA (512 bits, 1024 bits, 2048 bits, or 4096 bits)
Certicate signature algorithm SHA1-RSA, SHA256-RSA, SHA384-RSA*2, SHA512-RSA*2, MD5-RSA, or MD2-RSA
Certicate thumbprint algorithm SHA1
*1 Requirements for the certicate contained in a key pair are pursuant to CA certicates.
*2 SHA384-RSA and SHA512-RSA are available only when the RSA key length is 1024 bits or more.
Security
257

●The machine does not support use of a certicate revocation list (CRL).
Security
258

Generating Key Pairs
15A8-053
A key pair can be generated with the machine when it is required for encrypted communication via Transport Layer
Security (TLS). You can use TLS when accessing the machine via the Remote UI. Up to ve key pairs (including the
preinstalled pairs) can be generated to the machine. Self-signed certicates are used with key pairs generated in
«Network Communication». With a «Key and Certicate Signing Request (CSR)», you can apply for a CA-issued digital
certicate for the key pair generated by the machine.
Generate Network Communication Key(P. 259)
Generate Key and Certicate Signing Request (CSR)(P. 261)
Generate Network Communication Key
1Start the Remote UI and log on in System Manager Mode. Starting Remote
UI(P. 273)
2Click [Settings/Registration].
3Click [Security Settings] [Key and Certicate Settings].
4Click [Generate Key].
Security
259
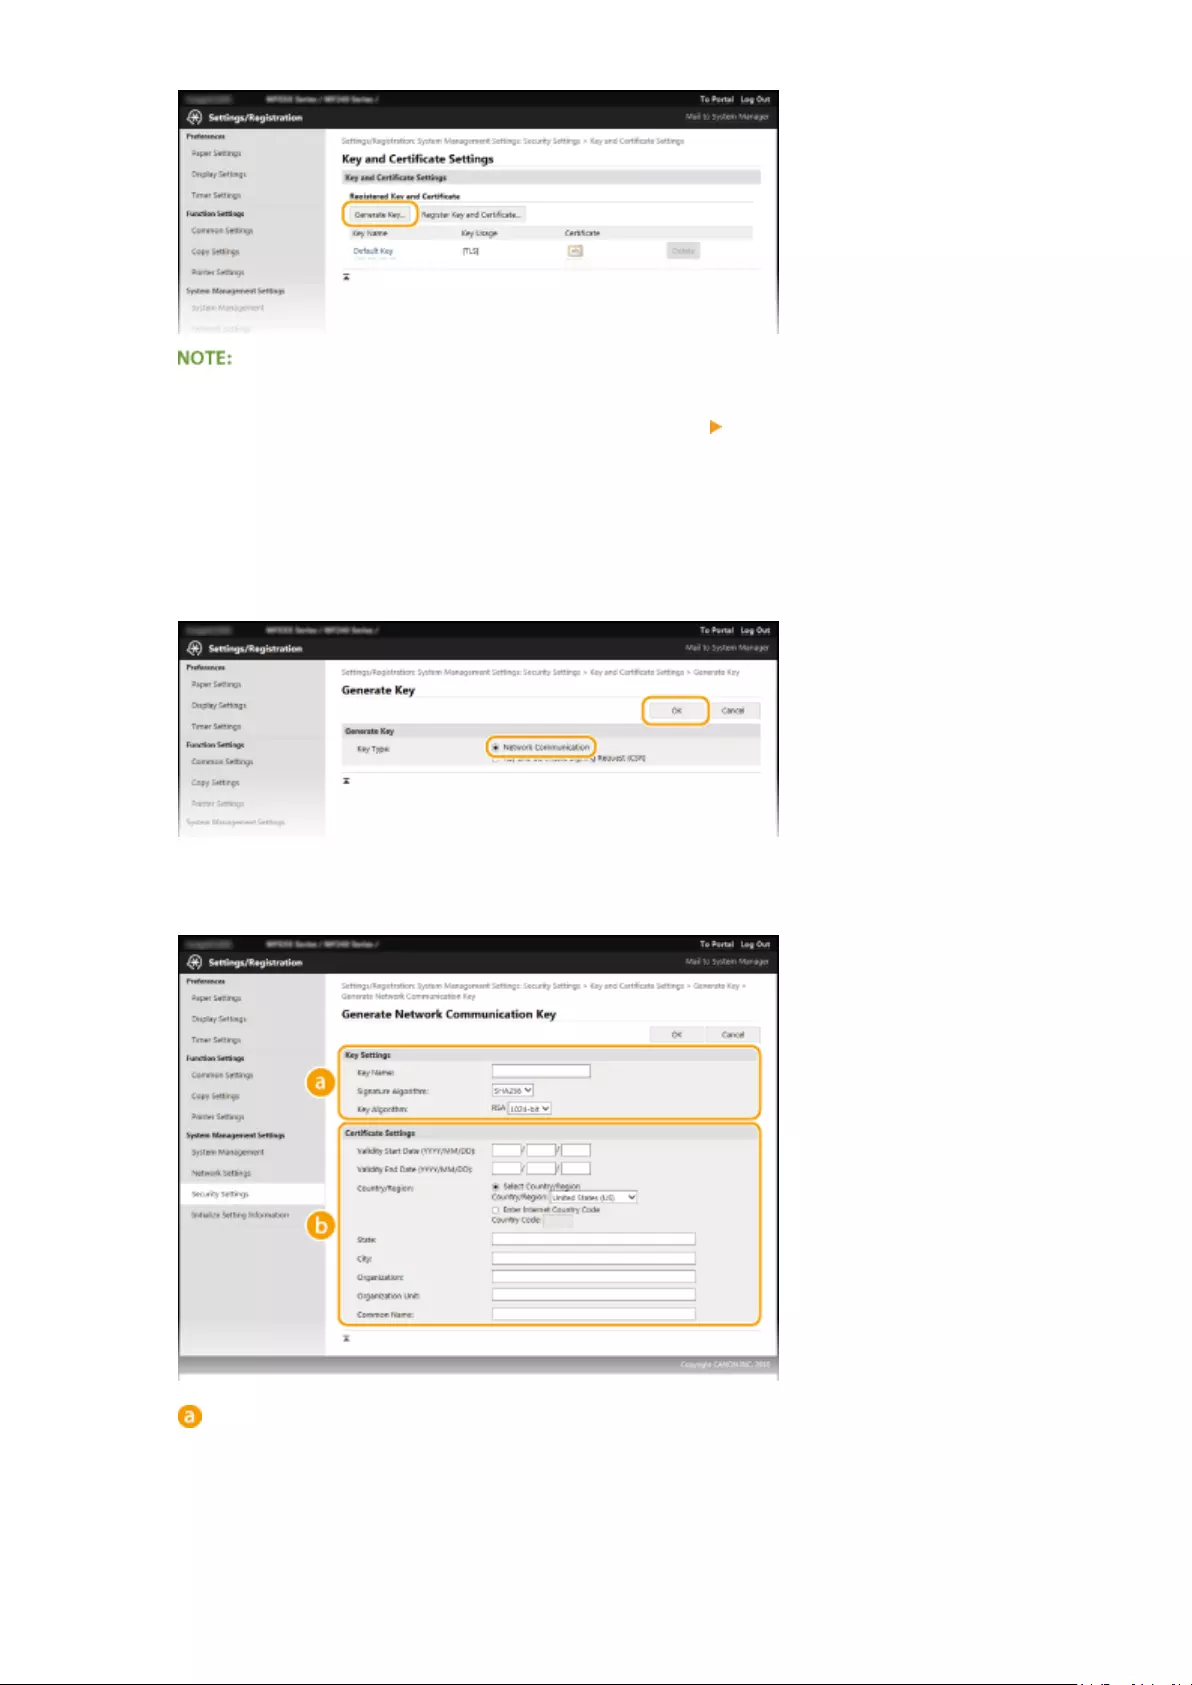
Deleting a registered key pair
●Click [Delete] on the right of the key pair you want to delete click [OK].
●A key pair cannot be deleted if it is currently used for some purpose, such as when «[TLS]» or «[IEEE
802.1X]» is displayed under [Key Usage]. In this case, disable the function or replace the key pair before
deleting it.
5Select [Network Communication] and click [OK].
6Specify settings for the key and certicate.
[Key Settings]
[Key Name]
Enter up to 24 alphanumeric characters for naming the key pair. Set a name that will be easy for you to
nd later in a list.
[Signature Algorithm]
Select the signature algorithm from the drop-down list.
Security
260

[Key Algorithm]
RSA is used for generating a key pair. Select the key length from the drop-down list. The larger the
number for the key length, the slower the communication. However, the security is tighter.
●[512-bit] cannot be selected for the key length, if [SHA384] or [SHA512] is selected for [Signature
Algorithm].
[Certicate Settings]
[Validity Start Date (YYYY/MM/DD)]
Enter the validity start date of the certicate in the range between 01/01/2000 and 31/12/2099, in the
order of: year, month, day.
[Validity End Date (YYYY/MM/DD)]
Enter the validity end date of the certicate in the range between 01/01/2000 and 31/12/2099, in the
order of: year, month, day. A date earlier than [Validity Start Date (YYYY/MM/DD)] cannot be set.
[Country/Region]
Click the [Select Country/Region] radio button and select the country/region from the drop-down list.
You can also click the [Enter Internet Country Code] radio button and enter a country code, such as «US»
for the United States.
[State]/[City]
Enter up to 24 alphanumeric characters for the location as necessary.
[Organization]/[Organization Unit]
Enter up to 24 alphanumeric characters for the organization name as necessary.
[Common Name]
Enter up to 48 alphanumeric characters for the common name of the certicate as necessary. «Common
Name» is often abbreviated as «CN.»
7Click [OK].
●Keys for network communication may take approximately 10 to 15 minutes to generate.
●After a key pair is generated, it is automatically registered to the machine.
Generate Key and Certicate Signing Request (CSR)
1Start the Remote UI and log on in System Manager Mode.
Starting Remote UI(P. 273)
2Click [Settings/Registration].
Security
261

3Click [Security Settings] [Key and Certicate Settings].
4Click [Generate Key].
Deleting a registered key pair
●Click [Delete] on the right of the key pair you want to delete click [OK].
●A key pair cannot be deleted if it is currently used for some purpose, such as when «[TLS]» or «[IEEE
802.1X]» is displayed under [Key Usage]. In this case, disable the function or replace the key pair before
deleting it.
5Select [Key and Certicate Signing Request (CSR)] and click [OK].
6Specify settings for the key and certicate.
Security
262

[Key Settings]
[Key Name]
Enter up to 24 alphanumeric characters for naming the key pair. Set a name that will be easy for you to
nd later in a list.
[Signature Algorithm]
Select the signature algorithm from the drop-down list.
[Key Algorithm]
RSA is used for generating a key pair. Select the key length from the drop-down list. The larger the
number for the key length, the slower the communication. However, the security is tighter.
●[512-bit] cannot be selected for the key length, if [SHA384] or [SHA512] is selected for [Signature
Algorithm].
[Certicate Signing Request (CSR) Settings]
[Country/Region]
Click the [Select Country/Region] radio button and select the country/region from the drop-down list.
You can also click the [Enter Internet Country Code] radio button and enter a country code, such as «US»
for the United States.
[State]/[City]
Enter up to 24 alphanumeric characters for the location as necessary.
[Organization]/[Organization Unit]
Enter up to 24 alphanumeric characters for the organization name as necessary.
[Common Name]
Enter up to 48 alphanumeric characters for the common name of the certicate as necessary. «Common
Name» is often abbreviated as «CN.»
7Click [OK].
●Key and Certicate Signing Request (CSR) may take approximately 10 to 15 minutes to generate.
8Click [Store in File].
●A dialog box for storing the le appears. Choose where to store the le and click [Save].
Security
263
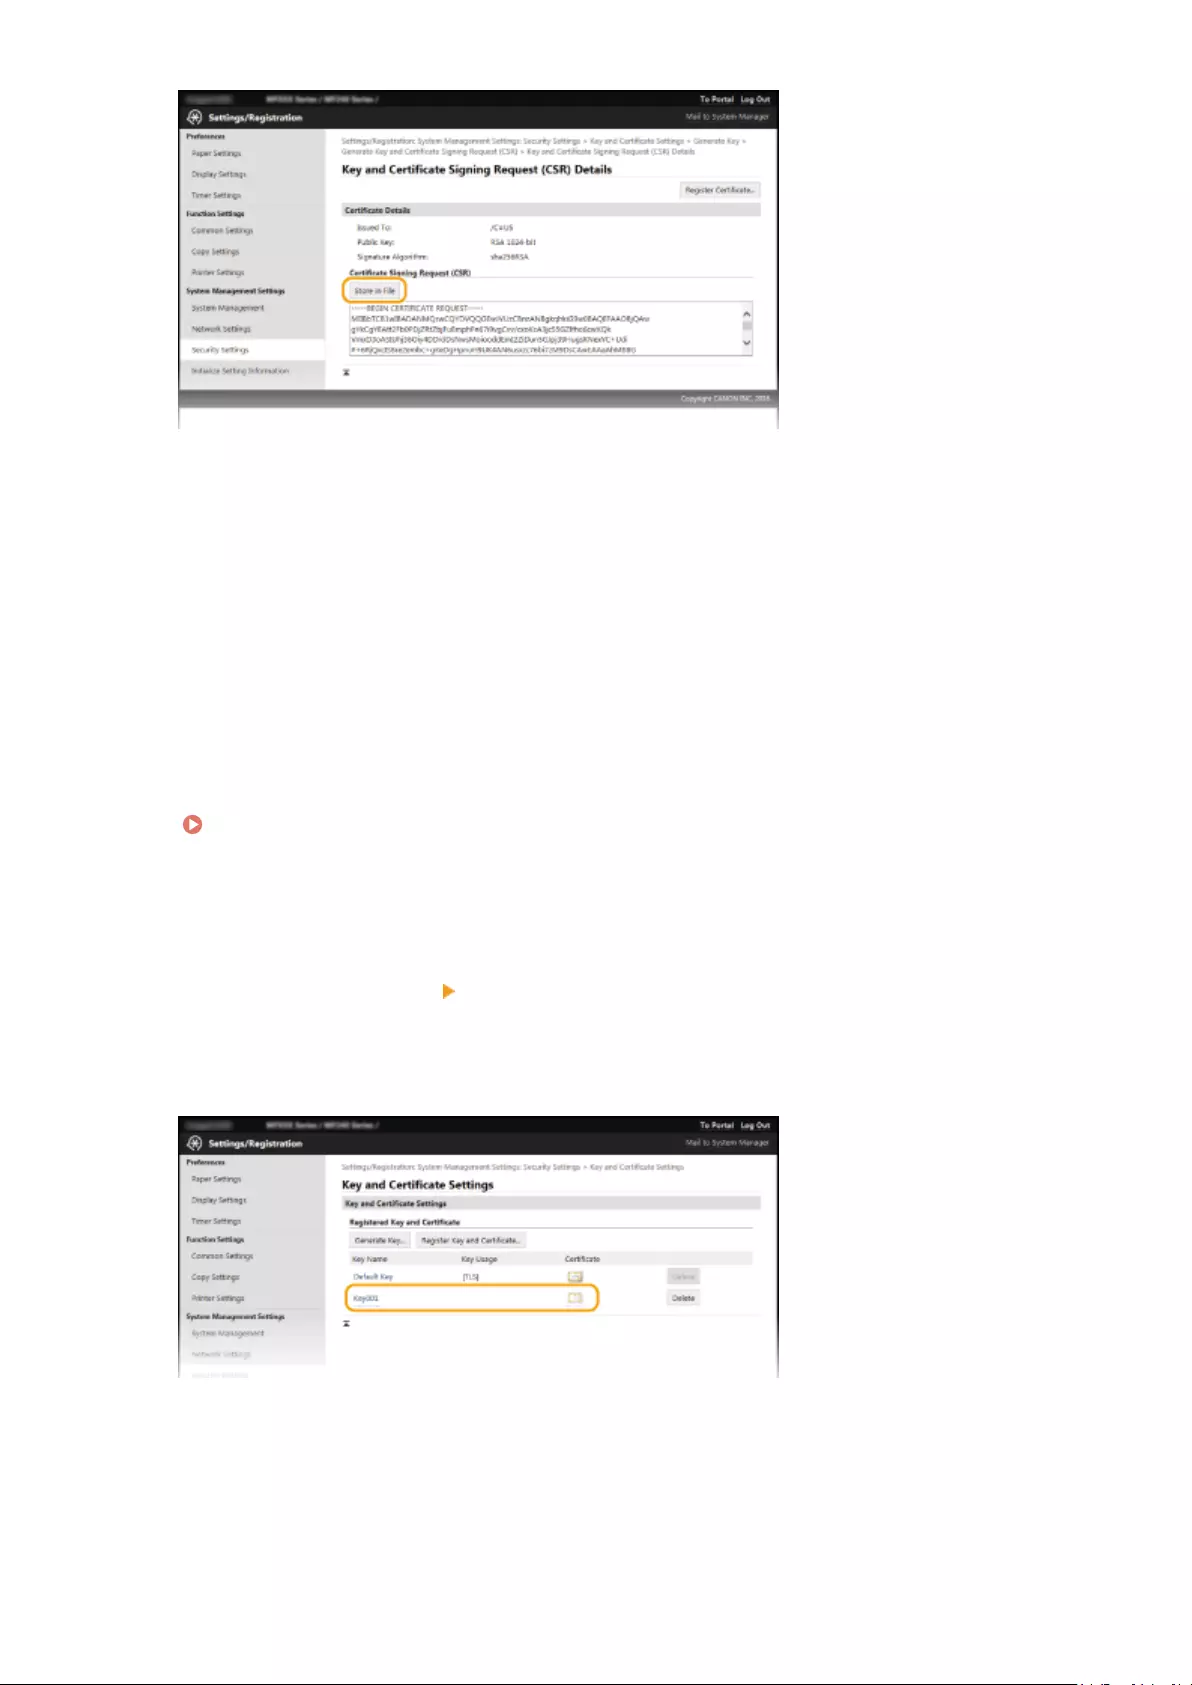
➠The Key and Certicate Signing Request (CSR) le is stored on the computer.
9Attach the stored le and submit the application to the certication authority.
◼Registering the CA-issued Digital Certicate
You cannot use the key pair generated by the Certicate Signing Request (CSR) until the certicate is registered. Once
the certication authority has issued the digital certicate, register it using the procedure below.
1Start the Remote UI and log on in Administrator mode.
Starting Remote UI(P. 273)
2Click [Settings/Registration].
3Click [Security Settings] [Key and Certicate Settings].
4Click [Key Name] or [Certicate] for the certicate to be registered.
5Click [Register Certicate].
Security
264

6Click [Browse], specify the le for the certicate signing request, and click [Register].
LINKS
Using CA-issued Key Pairs and Digital Certicates(P. 266)
Verifying Key Pairs and Digital Certicates(P. 269)
Enabling TLS Encrypted Communication for the Remote UI(P. 249)
Security
265

Using CA-issued Key Pairs and Digital Certicates
15A8-054
Key pairs and digital certicates can be obtained from a certication authority (CA) for use with the machine. You can
store and then register these les by using the Remote UI. Make sure that the key pair and the certicate satisfy the
requirements of the machine ( Key and Certicate Requirements(P. 257) ). Up to ve key pairs (including the
preinstalled key pairs) and up to 67 CA certicates (including the 62 preinstalled certicates) can be registered.
1Start the Remote UI and log on in System Manager Mode. Starting Remote
UI(P. 273)
2Click [Settings/Registration].
3Click [Security Settings] [Key and Certicate Settings] or [CA Certicate Settings].
●Click [Key and Certicate Settings] to install a key pair, or [CA Certicate Settings] to install a CA certicate.
4Click [Register Key and Certicate] or [Register CA Certicate].
Security
266

Deleting a registered key pair or CA certicate
●Click [Delete] on the right of the key pair or CA certicate you want to delete click [OK]. You cannot
delete the preinstalled CA certicates.
●A key pair cannot be deleted if it is currently used for some purpose, such as when «[TLS]» or «[IEEE
802.1X]» is displayed under [Key Usage]. In this case, disable the function or replace the key pair before
deleting it. The preinstalled CA certicate cannot be deleted.
Disabling or enabling the preinstalled CA certicates
●Click [Disable] on the right of the preinstalled CA certicate you want to disable. To enable the certicate
again, click [Enable] on the right of the certicate.
5Click [Install].
Deleting a key pair or CA certicate le
●Click [Delete] on the right of the le you want to delete click [OK].
6Click [Browse], specify the le to install, and click [Start Installation].
➠The key pair or CA certicate is installed in the machine.
7Register the key pair or CA certicate.
Security
267

Registering a key pair
1Click [Register] on the right of the key pair you want to register.
2Enter the name of the key pair and password, and then click [OK].
[Key Name]
Enter up to 24 alphanumeric characters for the name of the key pair to be registered.
[Password]
Enter up to 24 alphanumeric characters for the password of the private key set for the le to be
registered.
Registering a CA certicate
Click [Register] on the right of the CA certicate you want to register.
LINKS
Generating Key Pairs(P. 259)
Verifying Key Pairs and Digital Certicates(P. 269)
Enabling TLS Encrypted Communication for the Remote UI(P. 249)
Conguring IEEE 802.1X Authentication(P. 252)
Security
268
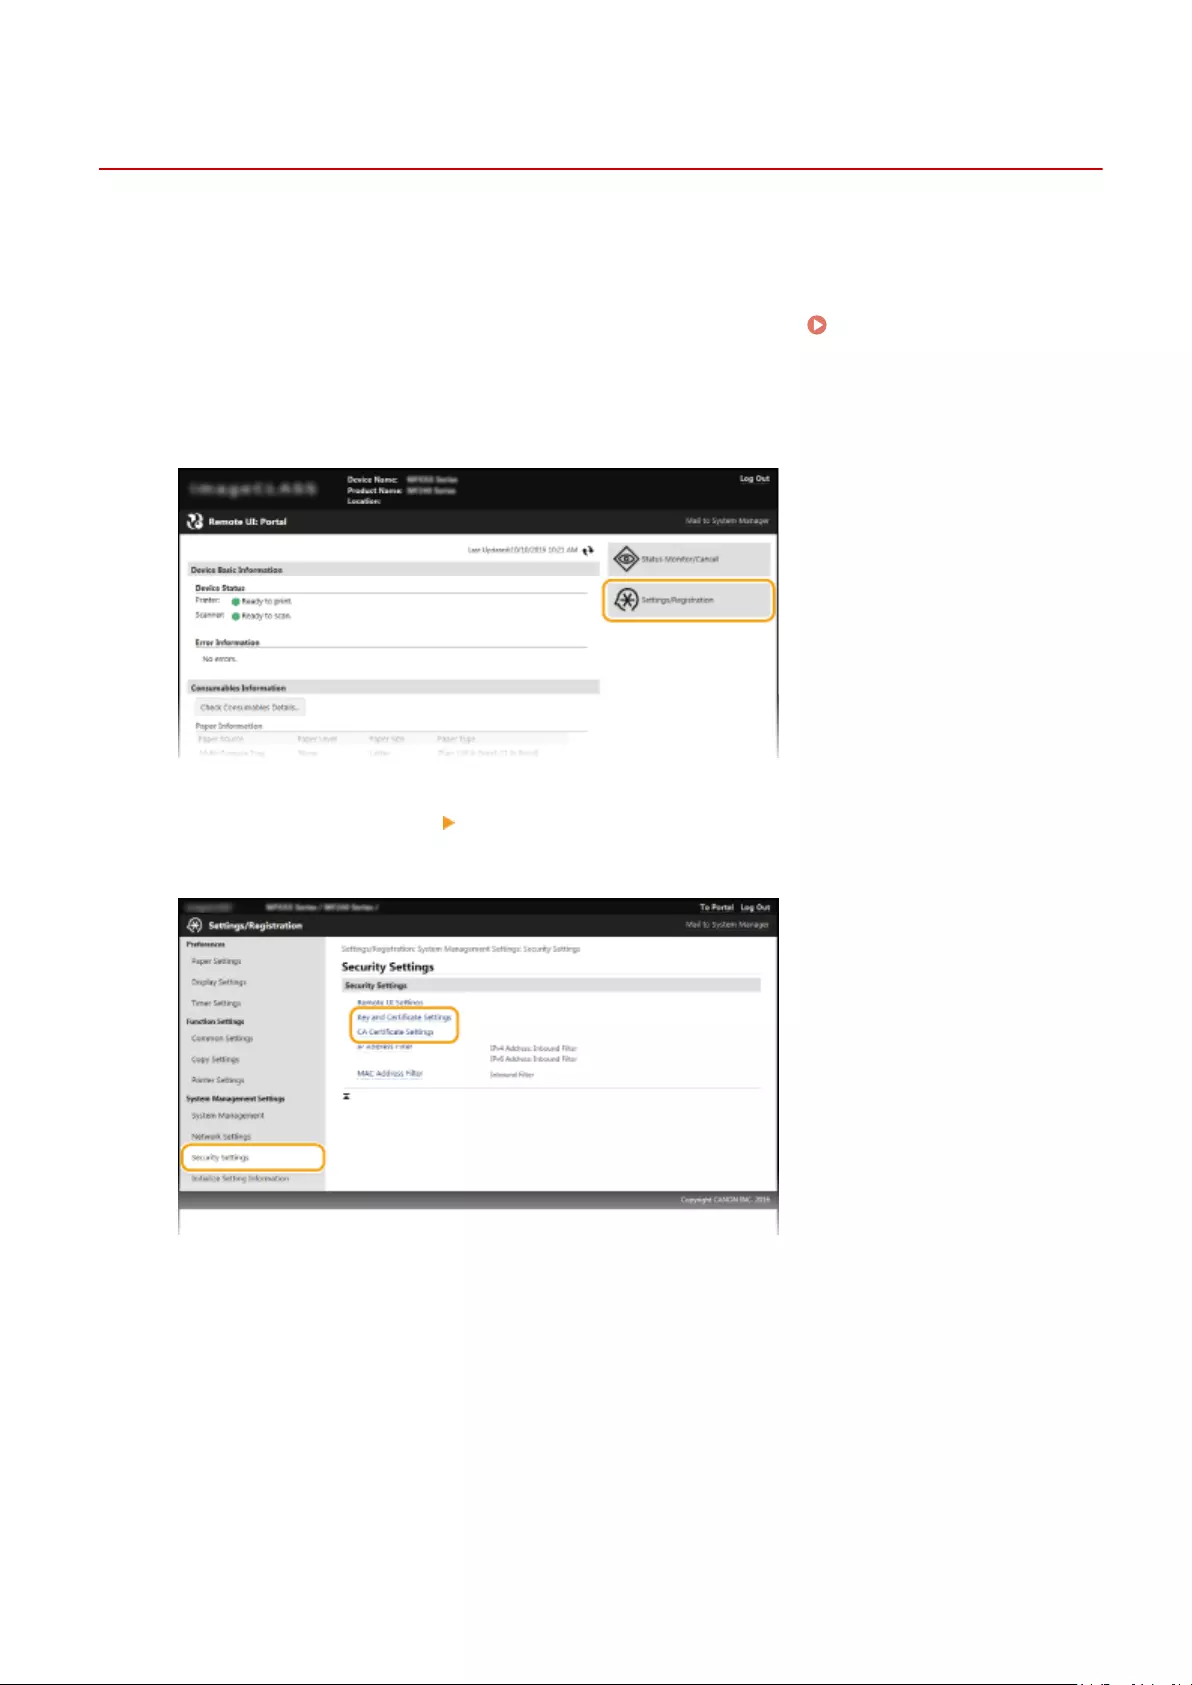
Verifying Key Pairs and Digital Certicates
15A8-055
Once key pairs and CA certicates are registered, you can view their detailed information or verify them for validity
and signature.
1Start the Remote UI and log on in System Manager Mode. Starting Remote
UI(P. 273)
2Click [Settings/Registration].
3Click [Security Settings] [Key and Certicate Settings] or [CA Certicate Settings].
●Click [Key and Certicate Settings] to verify a key pair, or [CA Certicate Settings] to verify a CA certicate.
4Click the icon for the key pair or certicate that you want to verify.
Security
269
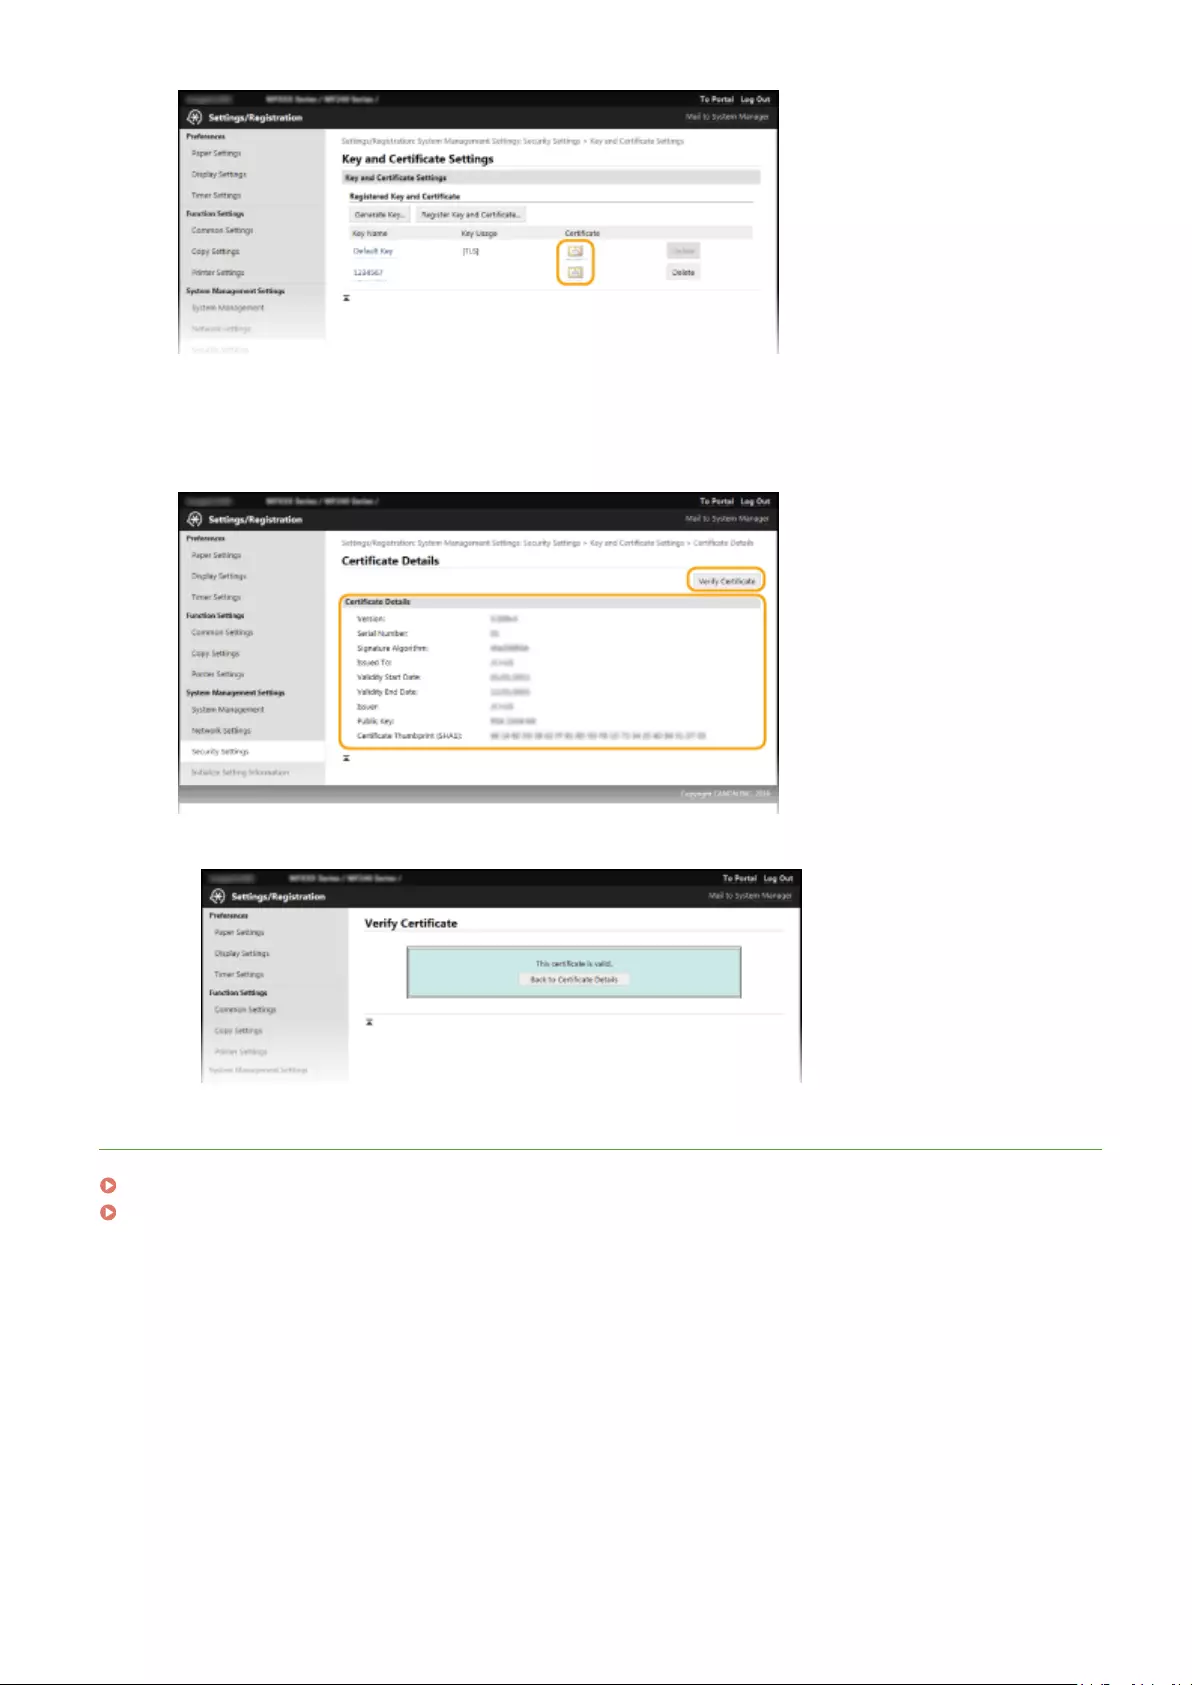
➠Certicate details can be viewed on this screen.
5Check the details of the certicate, and click [Verify Certicate].
➠The result from verifying the certicate is displayed as shown below.
LINKS
Generating Key Pairs(P. 259)
Using CA-issued Key Pairs and Digital Certicates(P. 266)
Security
270

Using Remote UI (MF244dw /
MF232w)
Using Remote UI (MF244dw / MF232w) ………………………………………………………………………………… 272
Starting Remote UI …………………………………………………………………………………………………………………………. 273
Remote UI Screens ………………………………………………………………………………………………………………………….. 275
Managing Documents and Checking the Machine Status …………………………………………………………………… 278
Setting Up Menu Options from Remote UI ………………………………………………………………………………………… 282
Using Remote UI (MF244dw / MF232w)
271

Using Remote UI
15A8-056
Using a Web browser to operate the machine remotely, you can check the documents waiting to be printed or the
status of the machine. You can also make some settings such as security. You can do this without leaving your desk,
making system management easier.
Functions of the Remote UI
Managing Documents and Checking the Machine Status(P. 278)
Setting Up Menu Options from Remote UI(P. 282)
Basics of the Remote UI
Starting Remote UI(P. 273)
Remote UI Screens(P. 275)
System Requirements
The following environment is required to use the Remote UI. In addition, set the Web browser to enable
Cookies.
Windows
●Windows Vista/7/8/10
●Microsoft Internet Explorer 7.0 or later
Mac OS
●Mac OS 10.6 or later (except for Classic environment)
●Safari 3.2.1 or later
Using Remote UI (MF244dw / MF232w)
272

Starting Remote UI
15A8-057
To operate remotely, you need to input the IP address of the machine into a Web browser and start the Remote UI.
Check the IP address set to the machine in advance ( Viewing Network Settings(P. 194) ). If you have any
questions, ask your Network Administrator.
1Start the Web browser.
2Enter «http://(the IP address of the machine)/» in the address eld, and press the
[ENTER] key.
●If you want to use an IPv6 address, enclose the IPv6 address with brackets (example: http://
[fe80::2e9e:fcff:fe4e:dbce]/).
If a security alert is displayed
●A security alert may be displayed if communication with an Apple device is encrypted ( Enabling TLS
Encrypted Communication for the Remote UI(P. 249) ). When certicate settings or TLS settings have no
errors, continue browsing the Web site.
●A security alert may be displayed when the Remote UI communication is encrypted ( Enabling TLS
Encrypted Communication for the Remote UI(P. 249) ). When certicate settings or TLS settings have no
errors, continue browsing the website.
3Log on to the Remote UI.
When a System Manager PIN is not set
Select [System Manager Mode] or [General User Mode].
[System Manager Mode]
You can perform all the Remote UI operations and settings. Enter the appropriate PIN in [System Manager
PIN] ( Setting the System Manager PIN(P. 229) ). If [System Manager PIN] is not set, you do not need
to input anything.
[General User Mode]
You can check the status of documents or the machine, and you can also change some of the settings. If
you wish to delete your print documents, enter the user name of the documents in [User Name]. The user
Using Remote UI (MF244dw / MF232w)
273

name is automatically set to print documents based on information such as your computer name or
computer logon name.
[Remote UI Access PIN]
If [Remote UI Access PIN] is set, enter the PIN. Setting a Remote UI PIN (MF244dw / MF232w)(P. 231)
When a System Manager PIN is set
Enter the registered [System Manager PIN]. Setting the System Manager PIN(P. 229)
4Click [Log In].
●Portal Page (main page) will be displayed. Remote UI Screens(P. 275)
Using Remote UI (MF244dw / MF232w)
274

Remote UI Screens
15A8-058
This section describes the typical screens of the Remote UI.
Portal Page (Main Page)(P. 275)
[Status Monitor/Cancel] Page(P. 276)
[Settings/Registration] Page(P. 277)
Portal Page (Main Page)
[Log Out]
Logs off from the Remote UI. The Login page will be displayed.
[Mail to System Manager]
Displays a window for creating an e-mail to the system manager specied in [System Manager Information]
under [System Management].
Refresh Icon
Refreshes the currently displayed page.
Device Basic Information
Displays the current status of the machine and error information. If an error has occurred, the link to the
Error Information page will be displayed.
Consumables Information
Displays paper information and the amount remaining in the toner cartridges.
Click [Check Consumables Details] to display the screen for checking consumables. Checking
Consumables(P. 279)
Using Remote UI (MF244dw / MF232w)
275

Support Link
Displays the support link specied in [Device Information] under [System Management].
[Status Monitor/Cancel]
Displays the status of the current print documents and history of print and copy documents. You can also
check the status of the machine.
[Settings/Registration]
Displays [Settings/Registration] page. When you have logged on in System Manager Mode, you can change
the settings items and save/load the registered data. Setting Up Menu Options from Remote UI(P. 282)
[Status Monitor/Cancel] Page
[To Portal]
Returns to Portal Page (main page).
Menu
Click an item, and the content is displayed in the right page. Managing Documents and Checking the
Machine Status(P. 278)
Breadcrumb Trail
Indicates the series of pages you opened to display the currently displayed page. You can check what page is
currently displayed.
Refresh Icon
Refreshes the currently displayed page.
Top Icon
Moves the scroll box up to the top of the page when the page is scrolled down.
Using Remote UI (MF244dw / MF232w)
276

[Settings/Registration] Page
[To Portal]
Returns to Portal Page (main page).
Menu
Click an item, the content is displayed in the right page. Setting Up Menu Options from Remote
UI(P. 282)
Breadcrumb Trail
Indicates the series of pages you opened to display the currently displayed page. You can check what page is
currently displayed.
Top Icon
Moves the scroll box up to the top of the page when the page is scrolled down.
System Management Settings
●You can only set [System Management Settings] when you have logged on in System Manager Mode.
●When you have logged on in General User Mode, only [System Management] will be displayed.
Using Remote UI (MF244dw / MF232w)
277

Managing Documents and Checking the Machine
Status
15A8-059
Checking Current Status of Print Documents(P. 278)
Checking Error Information(P. 279)
Checking Consumables(P. 279)
Checking Maximum Print Speed(P. 279)
Checking System Manager Information(P. 280)
Checking Print Total Counter(P. 280)
The document le name displays only 255 characters. The printed application name may be added to the le
name.
Checking Current Status of Print Documents
The list of the documents currently printing or waiting to be printed is displayed.
Log on to the Remote UI ( Starting Remote UI(P. 273) ) [Status Monitor/Cancel] [Job Status]
You can delete a document job by clicking [Cancel].
●If you logged on in System Manager Mode, all the print documents currently printing and waiting to
be printed will be listed.
●If you entered your user name when you logged on in General User Mode, your user name will only
be displayed on the documents that you printed.
●Click [Job Number] on the paused documents to display detailed information. You can check the user
name and the page count of the printed document.
Using Remote UI (MF244dw / MF232w)
278

Checking Error Information
When an error occurs, this page will be displayed by clicking the message displayed under [Error Information] on
Portal Page (main page). Portal Page (Main Page)(P. 275)
Log on to the Remote UI ( Starting Remote UI(P. 273) ) [Status Monitor/Cancel] [Error
Information]
Checking Consumables
Paper size and paper type for the paper source, toner cartridge model number, etc. are displayed. You can also click
[Check Consumables Details] in Portal Page (Main Page)(P. 275) to display this page.
Log on to the Remote UI ( Starting Remote UI(P. 273) ) [Status Monitor/Cancel]
[Consumables]
Checking Maximum Print Speed
The maximum print speed is displayed.
Using Remote UI (MF244dw / MF232w)
279

Log on to the Remote UI ( Starting Remote UI(P. 273) ) [Status Monitor/Cancel] [Device
Features]
Checking System Manager Information
Information about the machine and the system manager is displayed. This information is set in [System Management]
on the [Settings/Registration] page. System Management Settings(P. 330)
Log on to the Remote UI ( Starting Remote UI(P. 273) ) [Status Monitor/Cancel] [Device
Information]
Checking Print Total Counter
The total number of pages that have been printed by the copy and print functions is displayed.
Log on to the Remote UI ( Starting Remote UI(P. 273) ) [Status Monitor/Cancel] [Check
Counter]
Using Remote UI (MF244dw / MF232w)
280

LINKS
Remote UI Screens(P. 275)
Using Remote UI (MF244dw / MF232w)
281

Setting Up Menu Options from Remote UI
15A8-05A
You can change the various machine settings by using the Remote UI. Most of the settings can be set also on the
machine, but some settings can only be set using the Remote UI.
Some settings require you to rst log on in System Manager Mode before you can change them.
1Start the Remote UI. Starting Remote UI(P. 273)
2Click [Settings/Registration].
3Click the menu item you want to set, then click [Edit].
●For more information about the settings menu, see each item below
Menu items Referents
Preferences
Paper Settings Specifying Paper Size and Type(P. 53)
Display Settings Preferences(P. 300)
Using Remote UI (MF244dw / MF232w)
282

Menu items Referents
Timer Settings Timer Settings(P. 303)
Function Settings
Common Settings Common Settings (MF244dw)(P. 308)
Copy Settings Copy Settings(P. 310)
Printer Settings Printer Settings(P. 314)
System Management Settings
System Management System Management Settings(P. 330)
Network Settings Network (MF244dw / MF232w)(P. 165)
Security Settings Security(P. 224)
Initialize Setting Information Initializing Menu(P. 397)
LINKS
Remote UI Screens(P. 275)
Using Remote UI (MF244dw / MF232w)
283

Setting Menu List
Setting Menu List …………………………………………………………………………………………………………………………. 285
Direct Connection (MF244dw / MF232w) ……………………………………………………………………………………………. 286
Network Settings (MF244dw / MF232w) …………………………………………………………………………………………….. 287
Output Reports ……………………………………………………………………………………………………………………………….. 297
Preferences …………………………………………………………………………………………………………………………………….. 300
Timer Settings ………………………………………………………………………………………………………………………………… 303
Common Settings (MF244dw) …………………………………………………………………………………………………………… 308
Copy Settings ………………………………………………………………………………………………………………………………….. 310
Scan Settings ………………………………………………………………………………………………………………………………….. 312
Printer Settings ………………………………………………………………………………………………………………………………. 314
Adjustment/Maintenance ………………………………………………………………………………………………………………… 324
System Management Settings ………………………………………………………………………………………………………….. 330
Setting Menu List
284

Setting Menu List
15A8-05C
There are various settings in this machine. You can adjust each of the settings in detail. Access these settings by
pressing .
You can print the setting menu in list form to check the current settings: Output Reports(P. 297)
Setting Menu List
285

Direct Connection
15A8-05E
Make a direct connection between a mobile device and the machine. Using
the Machine in Direct Connection (in Access Point Mode)(P. 144)
Settings for Direct Connection can be specied from Direct Connection
Settings (P. 289) .
Setting Menu List
286

Network Settings
15A8-05F
All the settings about the network are listed with short descriptions. Default
settings are marked with a dagger ( ).
If a screen for entering a PIN is displayed, enter the PIN with the numeric keys and press . Setting the
System Manager PIN(P. 229)
Select Wired/Wireless LAN(P. 287)
Wireless LAN Settings(P. 287)
Direct Connection Settings (P. 289)
TCP/IP Settings(P. 290)
SNMP Settings(P. 294)
Dedicated Port Settings(P. 295)
Waiting Time for Connection at Startup(P. 296)
Ethernet Driver Settings(P. 296)
IEEE 802.1X Settings(P. 296)
Initialize Network Settings(P. 296)
Select Wired/Wireless LAN
When switching the machine from Wireless LAN to Wired LAN, you need to specify the setting. Conversely, when
switching the machine from Wired LAN to Wireless LAN, you do not need to specify this setting (You can switch using
the following <Wireless LAN Settings>). Selecting Wired LAN or Wireless LAN(P. 168)
Wired LAN
Wireless LAN
Wireless LAN Settings
Specify settings for connecting the machine to a wireless LAN. You can also view the current settings or specify the
setting for saving power consumption. See «Getting Started» Manuals Included with the Machine(P. 425) .
SSID Settings
Select to congure a wireless connection by specifying information including an SSID or a network key by
inputting manually from the operation panel.
Select Access Point
Wireless LAN routers that can access the machine are automatically located, so you can select from the list.
You must manually enter a network key, such as a WEP key or a PSK. Setting Up Connection by Selecting
a Wireless Router(P. 177)
Setting Menu List
287

Enter Manually
Select to congure a wireless connection by manually entering an SSID. By using this method, you can specify
authentication and encryption settings in detail. Setting Up Connection by Specifying Detailed
Settings(P. 180)
Security Settings
None
WEP
Open System
Select WEP Key: 1/2/3/4
Edit WEP Key
Shared Key
Select WEP Key: 1/2/3/4
Edit WEP Key
WPA/WPA2-PSK
Auto
AES-CCMP
WPS Push Button Mode
Select to automatically congure a wireless connection by using the button on a WPS wireless router. Setting
Up Connection Using WPS Push Button Mode(P. 172)
WPS PIN Code Mode
Select to congure a wireless connection by entering a PIN code for a WPS wireless router. Setting Up
Connection Using WPS PIN Code Mode(P. 174)
Power Save Mode
Select whether or not the machine enters Power Save Mode based on signals emitted from the wireless router.
Off
On
<Network Settings> <Wireless LAN Settings> Read the displayed
message <Power Save Mode> Select <Off> or <On>
Wireless LAN Information
Select to view the current wireless LAN settings. Viewing Network Settings(P. 194)
MAC Address
Wireless LAN Status
Latest Error Information
Channel
SSID Settings
Security Settings
Power Save Mode
Setting Menu List
288

Direct Connection Settings
Congure settings for Direct Connection. After conguring settings, you can connect to the machine directly and
wirelessly from a mobile device even without an access point or wireless LAN router.
Use Direct Connection
Select whether to use Direct Connection. You can select <Direct Connection Only> or <Wireless LAN/Direct Conn.
(Auto Switch)> when <Use Direct Connection> is set to <On> while the Wirelss LAN connection is enabled.
Make Direct Connection (Access Point Mode)(P. 144)
Off
On
Direct Connection Only
Wireless LAN/Direct Conn. (Auto Switch)
<Network Settings> <Direct Connection Settings> <Use Direct
Connection> <On> Select <Direct Connection Only> or <Wireless LAN/Direct
Conn. (Auto Switch)> when <Wireless LAN> is selected in <Select Wired/Wireless
LAN>
Time Until Direct Connection Termination
Set the time that the machine exits Direct Connection mode automatically. Can be set when <Use Direct
Connection> is <On>. Once the time set in <Time Until Direct Connection Termination> is reached,
communication between the machine and a mobile device is discontinued. Before starting a large print job, you
should set a long delay time or set the delay time to <0> (Off).
0 (Off)
1 to 10 to 60 (min.)
<Network Settings> <Direct Connection Settings> <Time Until Direct
Connection Termination> Set time to disconnect
Access Point Mode Settings
To make detailed settings, such as authentication and encryption, enter an SSID and network key to congure
settings. Can be set when <Use Direct Connection> is <On>.
Use Custom SSID
Off
On
SSID (1-20 Characters)
Setting Menu List
289
Use Custom Network Key
Off
On
Network Key (10 Char.)
<Network Settings> <Direct Connection Settings> <Access Point Mode
Settings> Select <Use Custom SSID> or <Use Custom Network Key> <On>
Set SSID Settings or Network Key Settings <Apply>
TCP/IP Settings
Specify settings for using the machine in a TCP/IP network, such as IP address settings.
IPv4 Settings
Specify settings for using the machine in an IPv4 network.
IP Address Settings
Congure the IP address, which is used for identifying devices, such as computers and printers, on a TCP/IP
network. Setting IPv4 Address(P. 188)
Auto Acquire
Select Protocol
Off
DHCP
BOOTP
RARP
Auto IP
Off
On
Manually Acquire
IP Address: 0.0.0.0
Subnet Mask: 0.0.0.0
Gateway Address: 0.0.0.0
Check Settings
Auto Acquire
IP Address
Subnet Mask
Gateway Address
PING Command
Select to check that the machine is connected to a computer over a network. Testing the Network
Connection(P. 190)
DNS Settings
Specify settings for Domain Name System (DNS), which provides a host name for IP address resolutions.
Conguring DNS(P. 212)
Setting Menu List
290
DNS Server Settings
Primary DNS Server: 0.0.0.0
Secondary DNS Server: 0.0.0.0
DNS Host Name/Domain Name Settings
Host Name
Domain Name
DNS Dynamic Update Settings
Off
On
DNS Dyn. Updt. Intrvl.
0 to 24 to 48 (hr.)
mDNS Settings
Specify settings for using DNS functions without DNS servers. Conguring DNS(P. 212)
Off
On
mDNS Name
DHCP Option Settings
Select whether to acquire the host name and whether to use the dynamic update function via the DHCP
options when DHCP is enabled. Conguring DNS(P. 212)
Acquire Host Name
Off
On
DNS Dynamic Update
Off
On
IPv6 Settings
Specify settings for using the machine in an IPv6 network.
Use IPv6
Enable or disable IPv6 in the machine. You can also view the current settings. Setting IPv6
Addresses(P. 191)
Off
On
Check Settings
Link-Local Address
Prex Length
Stateless Address Settings
Enable or disable stateless addresses. Setting IPv6 Addresses(P. 191)
Off
Setting Menu List
291

On
Check Settings
Stateless Address
Prex Length
Use DHCPv6
Enable or disable the stateful address that is acquired via DHCPv6. Setting IPv6 Addresses(P. 191)
Off
On
Check Settings
Stateful Address
Prex Length
DNS Settings
Specify settings for Domain Name System (DNS), which provides a host name for IP address resolutions.
Conguring DNS(P. 212)
DNS Host Name/Domain Name Settings
Use IPv4 Host/Domain
Off
Host Name
Domain Name
On
DNS Dynamic Update Settings
Off
On
Register Manual Address
Off
On
Register Stateful Address
Off
On
Register Stateless Address
Off
On
DNS Dynamic Update Interval
0 to 24 to 48 (hr.)
mDNS Settings
Specify settings for using DNS functions without DNS servers. Conguring DNS(P. 212)
Off
On
Use IPv4 Name for mDNS
Setting Menu List
292

Off
mDNS Name
On
LPD Print Settings
Enable or disable LPD, a printing protocol that can be used on any hardware platform or operating system.
Conguring Printing Protocols and WSD Functions(P. 198)
Off
On
RAW Print Settings
Enable or disable RAW, a Windows specic printing protocol. Conguring Printing Protocols and WSD
Functions(P. 198)
Off
On
WSD Settings
Enable or disable automatic browsing and acquiring information for the printer or scanner by using the WSD
protocol that is available on Windows Vista/7/8/10/Server 2008/Server 2012. Conguring Printing Protocols
and WSD Functions(P. 198)
WSD Print Settings
Use WSD Print
Off
On
Use WSD Browsing
Off
On
WSD Scan Settings
Use WSD Scan
Off
On
Use Computer Scan
Off
On
Use Multicast Discovery
Off
On
Use HTTP
Enable or disable HTTP, which is required for communications with a computer, such as when using the Remote
UI, WSD printing, or printing with Google Cloud Print. Disabling HTTP Communication(P. 246)
Off
On
Setting Menu List
293

Port Number Settings
Change port numbers for protocols according to the network environment. Changing Port Numbers
(MF244dw / MF232w)(P. 241)
LPD
1 to 515 to 65535
RAW
1 to 9100 to 65535
WSD Multicast Discovery
1 to 3702 to 65535
HTTP
1 to 80 to 65535
SNMP
1 to 161 to 65535
MTU Size
Select the maximum size of packets the machine sends or receives. Changing the Maximum Transmission
Unit(P. 210)
1300
1400
1500
SNMP Settings
Specify the settings for monitoring and controlling the machine from a computer running SNMP-compatible software.
Monitoring and Controlling the Machine with SNMP(P. 218)
SNMPv1 Settings
Enable or disable SNMPv1. When enabling SNMPv1, specify a community name and access privileges to
Management Information Base (MIB) objects.
Off
On
Community Name 1 Settings
Off
On
Community Name
MIB Access Permission
Community Name 2 Settings
Off
On
Community Name
MIB Access Permission
Setting Menu List
294
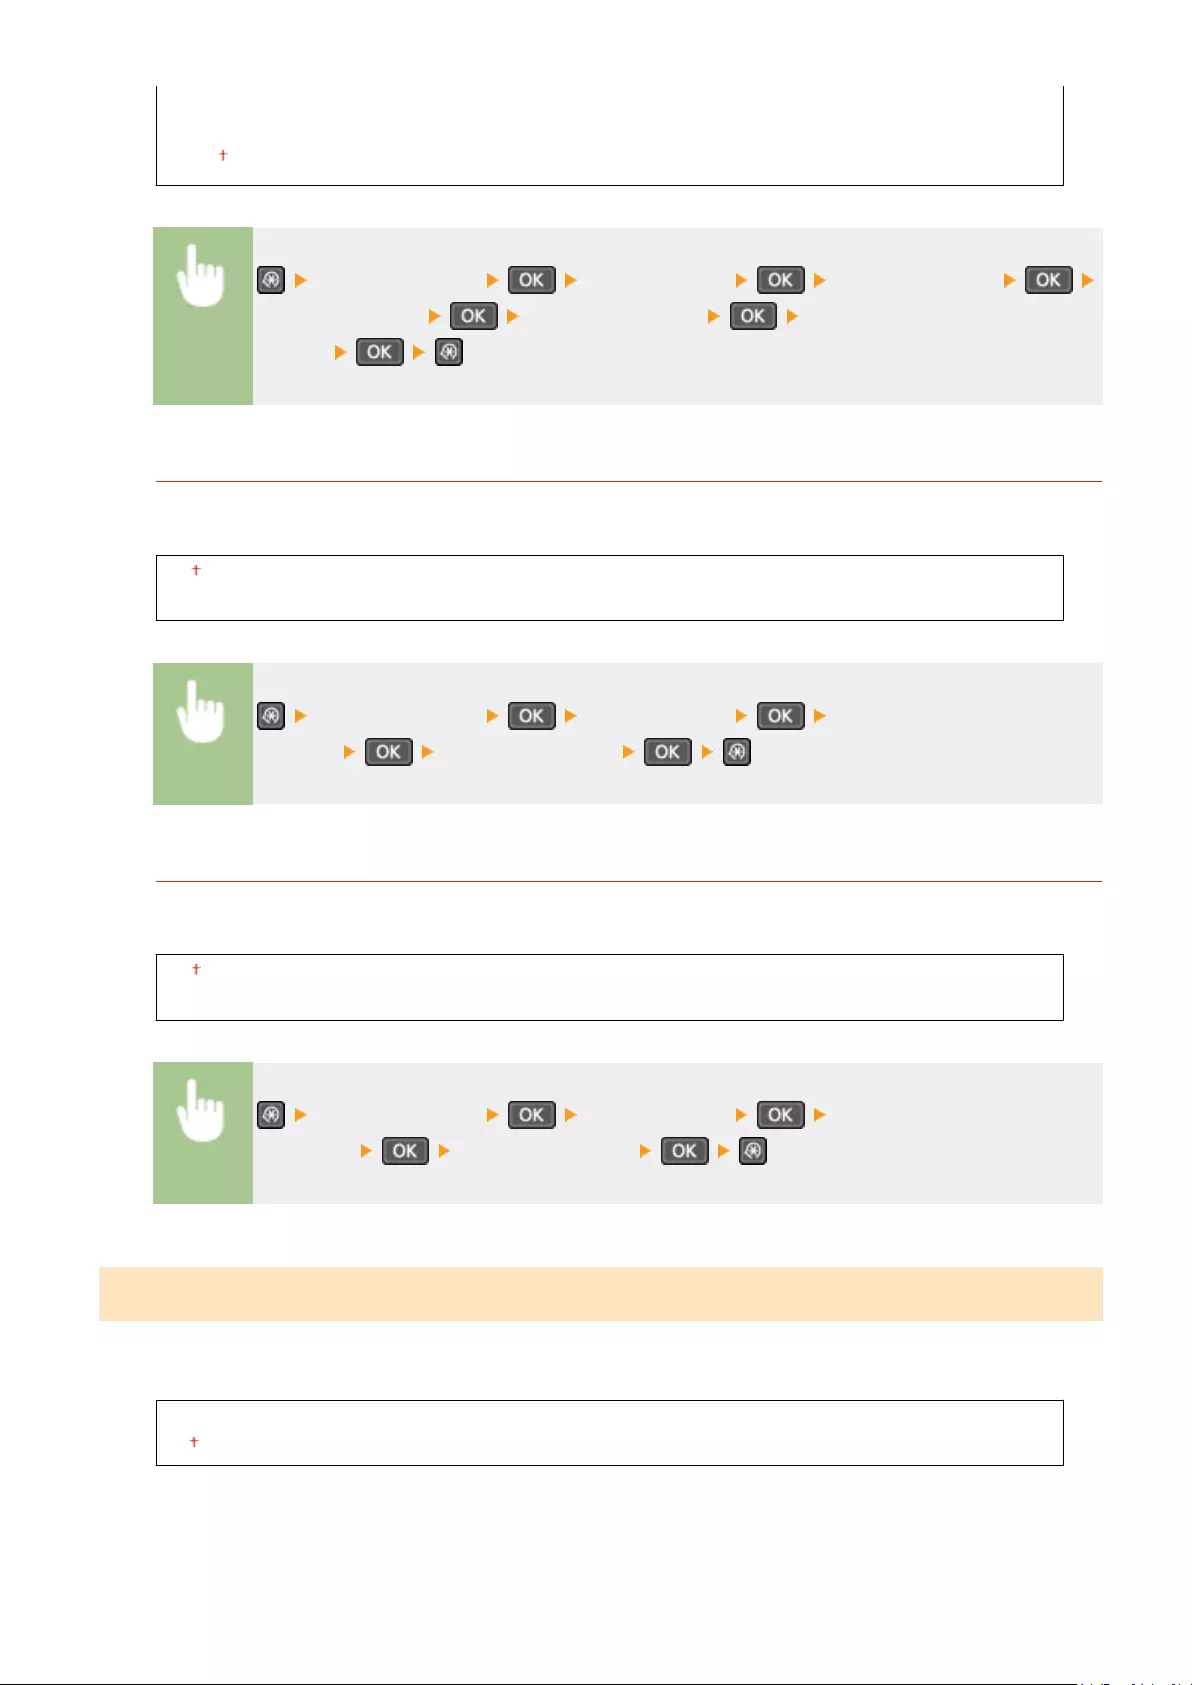
Dedicated Community Settings
Off
On
<Network Settings> <SNMP Settings> <SNMPv1 Settings>
<SNMPv1 Settings> Select <Off> or <On> Specify settings if <On> is
selected
SNMPv3 Settings
Enable or disable SNMPv3. Use the Remote UI to specify detailed settings that are applied when SNMPv3 is
enabled.
Off
On
<Network Settings> <SNMP Settings> <SNMPv3
Settings> Select <Off> or <On>
Acquire Printer Mngt. Info. from Host
Enable or disable the monitoring of printer management information from a networked computer running
SNMP-compatible software.
Off
On
<Network Settings> <SNMP Settings> <Acquire Printer Mngt. Info.
from Host> Select <Off> or <On>
Dedicated Port Settings
Enable or disable the dedicated port. The dedicated port is used when printing or scanning uses MF Scan Utility and
when browsing or specifying the machine settings over the network.
Off
On
Setting Menu List
295

<Network Settings> <Dedicated Port Settings> Select <Off> or
<On>
Waiting Time for Connection at Startup
Specify a wait time for connecting to a network. Select the setting depending on the network environment. Setting a
Wait Time for Connecting to a Network(P. 211)
0 to 300 (sec.)
Ethernet Driver Settings
Select the communication mode of Ethernet (half-duplex/full-duplex) and the Ethernet type (10BASE-T/100BASE-TX).
You can also view the MAC address of the machine.
Auto Detect
Select whether to automatically detect or manually select the communication mode and the Ethernet type.
Conguring Ethernet Settings(P. 208)
Off
Communication Mode
Half Duplex
Full Duplex
Ethernet Type
10BASE-T
100BASE-TX
On
MAC Address
Check the MAC address of the machine, which is a number unique to each communication device. Viewing
the MAC Address for Wired LAN(P. 194)
IEEE 802.1X Settings
Enable or disable IEEE 802.1X authentication. Conguring IEEE 802.1X Authentication(P. 252)
Off
On
Initialize Network Settings
Select to return the Network Settings to the factory defaults. Initialize Menu(P. 337)
Setting Menu List
296
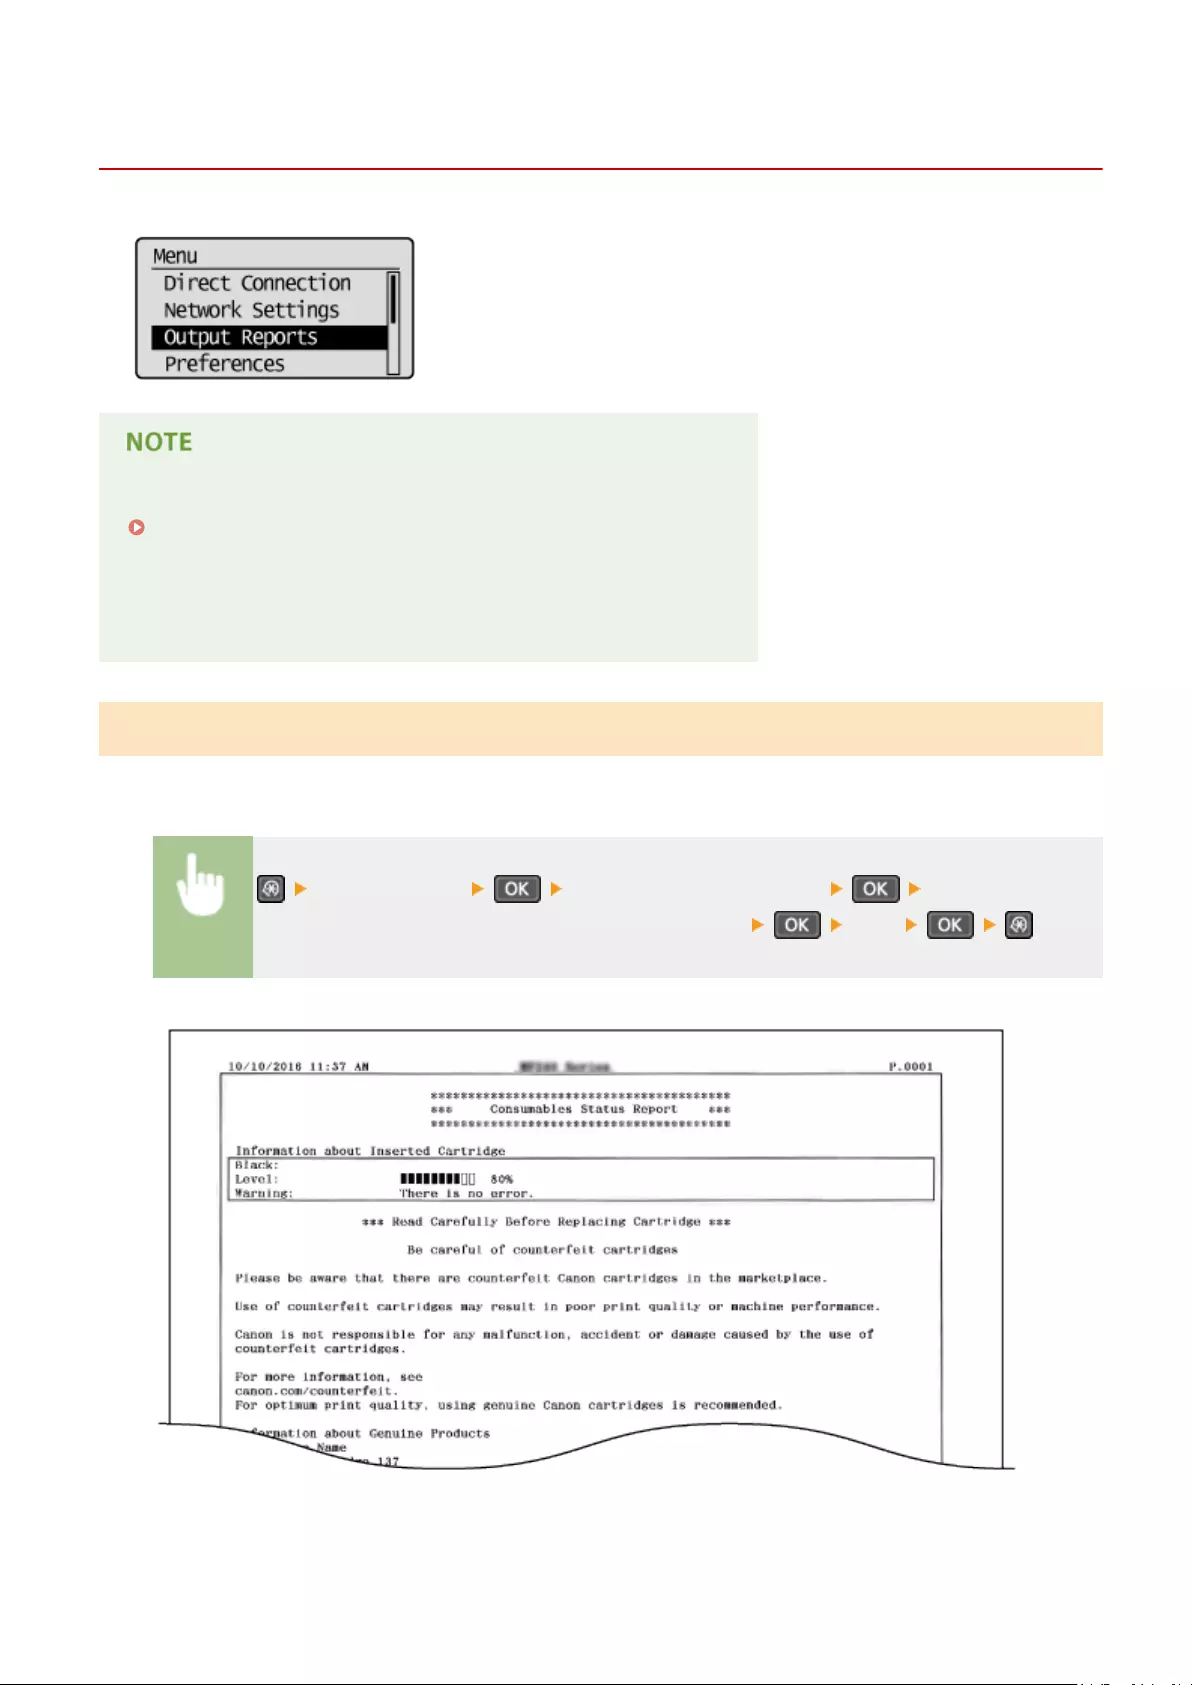
Output Reports
15A8-05H
You can check the list of the settings as well as the content that has been
registered in the machine by printing a User Data List.
Reports or lists can be printed on A4 or Letter size paper.
Loading Paper(P. 42)
Asterisks (*)
●Settings marked with «*1» are only available for MF244dw / MF232w.
●Settings marked with «*2» are only available for MF244dw.
Consumables Status Report
You can check the consumables status installed in the machine.
<Output Reports> <Consumables Status Report> Check that the size
of paper displayed on the screen is loaded in the machine <Yes>
Example:
Setting Menu List
297

Eco Report *1
You can check information such as the number of printouts per month and amount of consumed power, and also
check ways to increase savings.
<Output Reports> <Eco Report> Check that the size of paper
displayed on the screen is loaded in the machine <Yes>
Example:
User Data List
You can check a list of the machine‘s setting items (setting menu list) and their settings.
<Output Reports> <User Data List> Check that the size of paper
displayed on the screen is loaded in the machine <Yes>
Example:
Setting Menu List
298
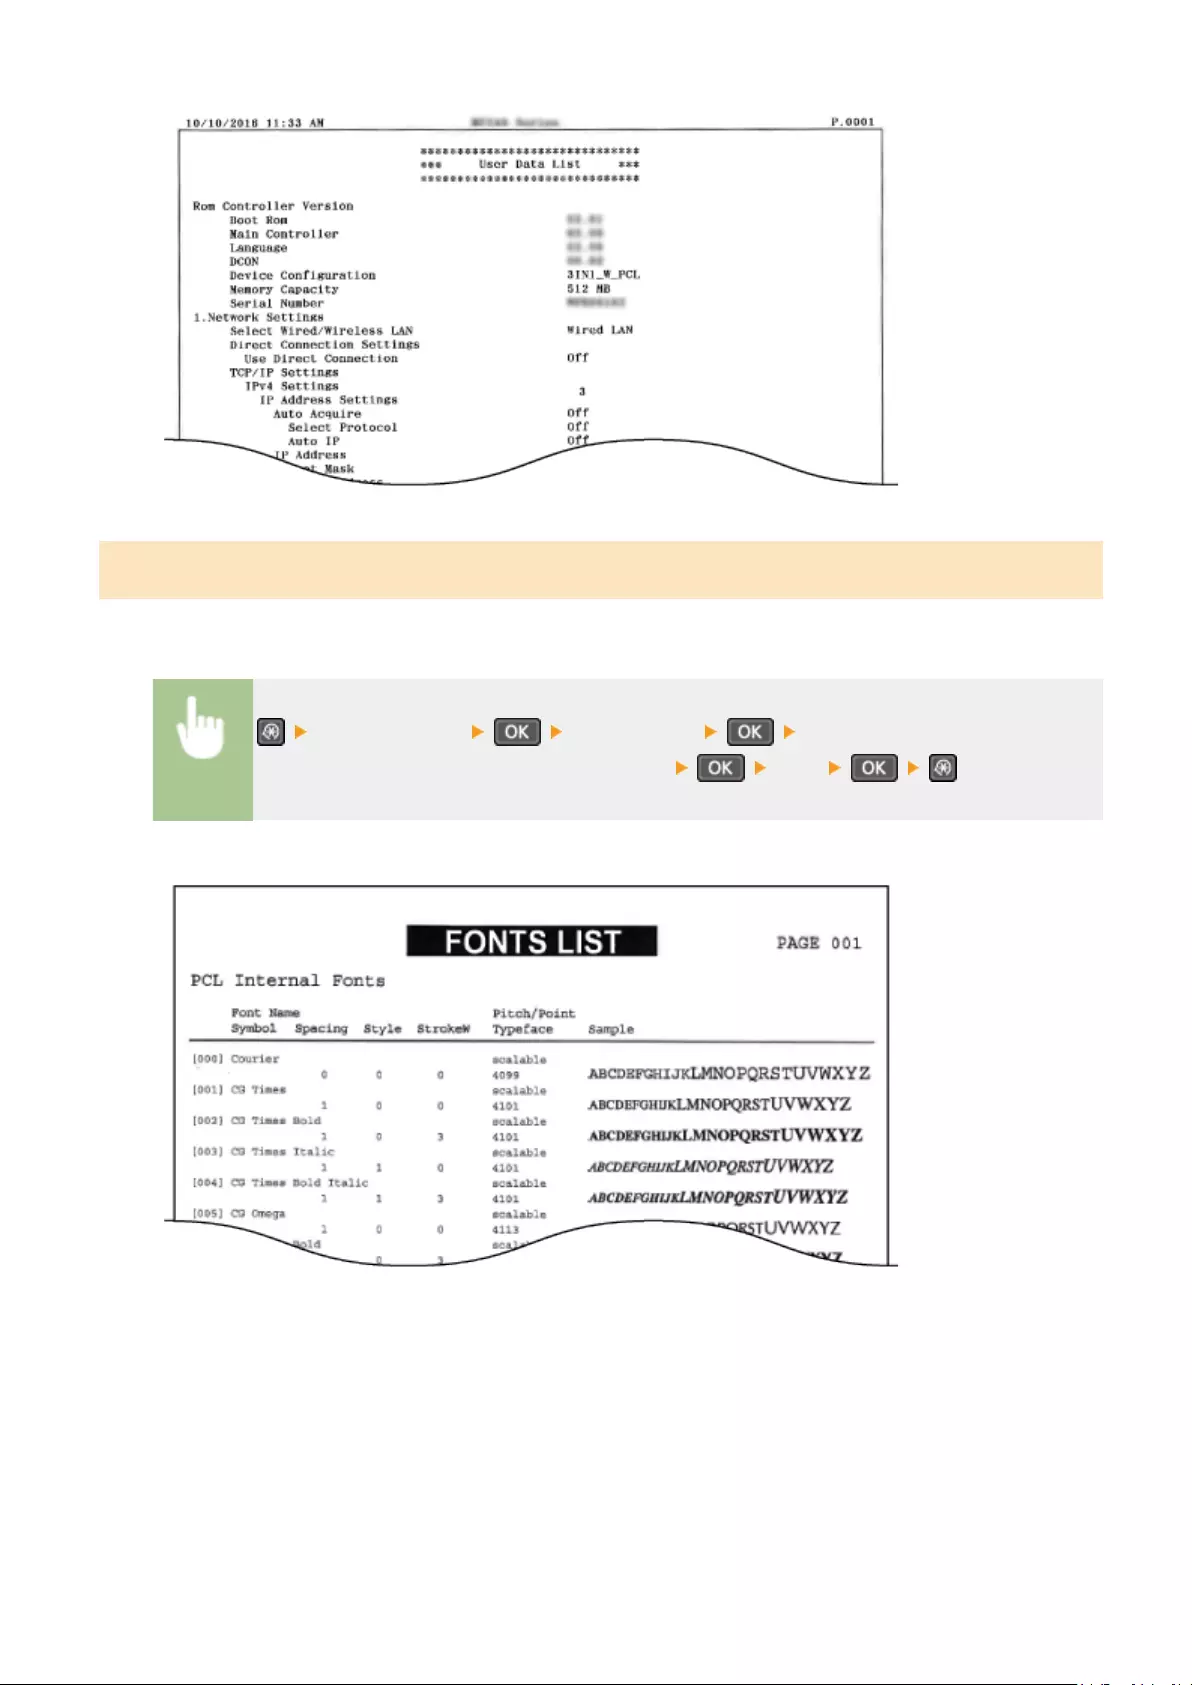
PCL Font List *2
You can print a list to check the fonts available in PCL mode.
<Output Reports> <PCL Font List> Check that the size of paper
displayed on the screen is loaded in the machine <Yes>
Example:
Setting Menu List
299

Preferences
15A8-05J
All the settings about the display are listed with short descriptions. Default
settings are marked with a dagger ( ).
Asterisks (*)
●Settings marked with «*1» are only available for the MF244dw.
●Settings marked with «*2» have different defaults depending on the country or region of purchase.
●Settings marked with «*3» are only available for the MF244dw / MF232w.
Display Settings
Contrast
Adjust the brightness of the display to suit the installation location of the machine.
Five Levels
<Preferences> <Display Settings> <Contrast> Use /
to adjust the brightness
Invert Screen Colors
Select <On> to invert the display colors. Select <On> if the display is hard to view even after the brightness was
adjusted in <Contrast>.
Off
On
<Preferences> <Display Settings> <Invert Screen
Colors> Select <On> or <Off>
Millimeter/Inch Entry Switch
Select the unit of measurement.
Setting Menu List
300
Millimeter
Inch
<Preferences> <Display Settings> <Millimeter/Inch Entry
Switch> Select <Millimeter> or <Inch>
Notify to Check Paper Settings
Specify whether to display a message prompting you to check paper settings when loading paper into the
paper drawer or manual feed slot.
Off
On
<Preferences> <Display Settings> <Notify to Check Paper Settings>
Select <Off> or <On>
Notify to Clean Original Scanning Area*1
When set to <On>, a message is displayed for dirt or soiling on the original scanning area.
Off
On
<Preferences> <Display Settings> <Notify to Clean Original Scanning
Area> Select <Off> or <On>
Message Display Time
Specify the interval in seconds at which two different messages are alternately displayed.
1 to 2 to 5 (sec.)
<Preferences> <Display Settings> <Message Display
Time> Enter a number for the interval
Scrolling Speed
Adjust the speed for scrolling the screen by selecting from three levels.
Setting Menu List
301

Slow
Standard
Fast
<Preferences> <Display Settings> <Scrolling
Speed> Select the speed
Cursor Movement Type
Congure how the cursor moves after a character is entered on the screen. Select <Auto> to automatically move
the cursor to the right of the entered character. Select <Manual> to manually move the cursor to the right of the
entered character.
Auto
Manual
<Preferences> <Display Settings> <Cursor Movement
Type> Select <Auto> or <Manual>
Language*2
Select the display language used for the display, reports, and lists.
Arabic, Basque, Bulgarian, Catalan, Chinese (Simplied), Chinese (Traditional), Croatian, Czech, Danish,
Dutch, English , Estonian, Finnish, French, German, Greek, Hungarian, Italian, Japanese, Korean, Latvian,
Lithuanian, Norwegian, Polish, Portuguese, Romanian, Russian, Slovak, Slovene, Spanish, Swedish, Turkish
<Preferences> <Display Settings> <Language> Select a
language
Remote UI Language*2 *3
Select the display language used for the Remote UI screens.
Chinese (Simplied), Chinese (Traditional), Czech, Danish, Dutch, English , Finnish, French, German,
Hungarian, Italian, Japanese, Korean, Norwegian, Polish, Portuguese, Russian, Spanish, Swedish, Turkish
<Preferences> <Display Settings> <Remote UI
Language> Select a language
Setting Menu List
302
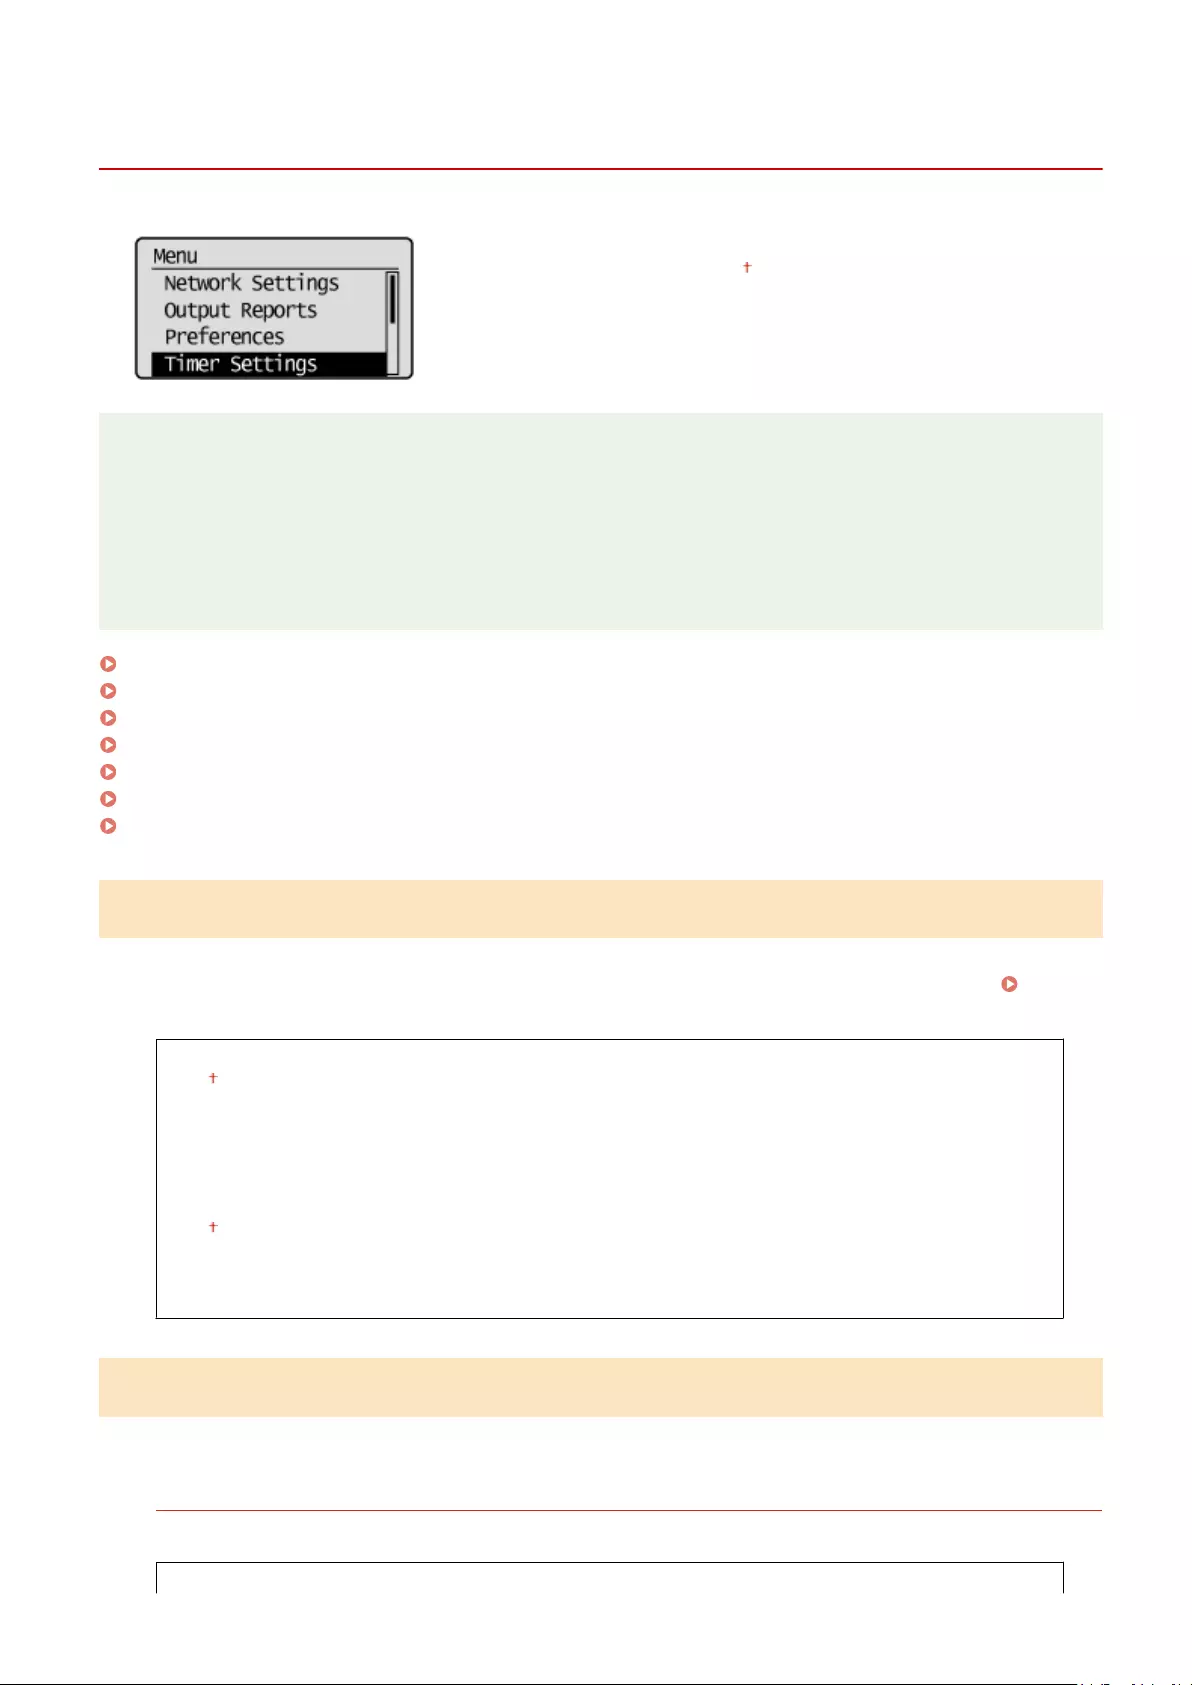
Timer Settings
15A8-05K
All the settings about the timer are listed with short descriptions. Default
settings are marked with a dagger ( ).
NOTE
Asterisks (*)
●Settings marked with «*1» are only available for the MF244dw / MF232w.
●Settings marked with «*2» may be unavailable or have different defaults depending on the country or region
of purchase.
Quiet Mode Time(P. 303)
Date/Time Settings(P. 303)
Auto Sleep Time(P. 305)
Auto Reset Time(P. 305)
Function After Auto Reset(P. 306)
Auto Oine Time(P. 306)
Auto Shutdown Time(P. 307)
Quiet Mode Time *1
You can reduce the operation sound of the machine when you want it to run more quietly (quiet mode). Set a time for
the machine to enter quiet mode automatically. You can also set the machine to always run in quiet mode. Entering
Quiet Mode(P. 57)
Start Time
Off
On
Start time setting to enter quiet mode
End Time
Off
On
Stop time setting to exit quiet mode
Date/Time Settings *1
Specify date and time settings, including the date format and the 12- or 24-hour clock display setting.
Date Format *2
Select the date format (order of year, month, and day).
YYYY MM/DD
Setting Menu List
303
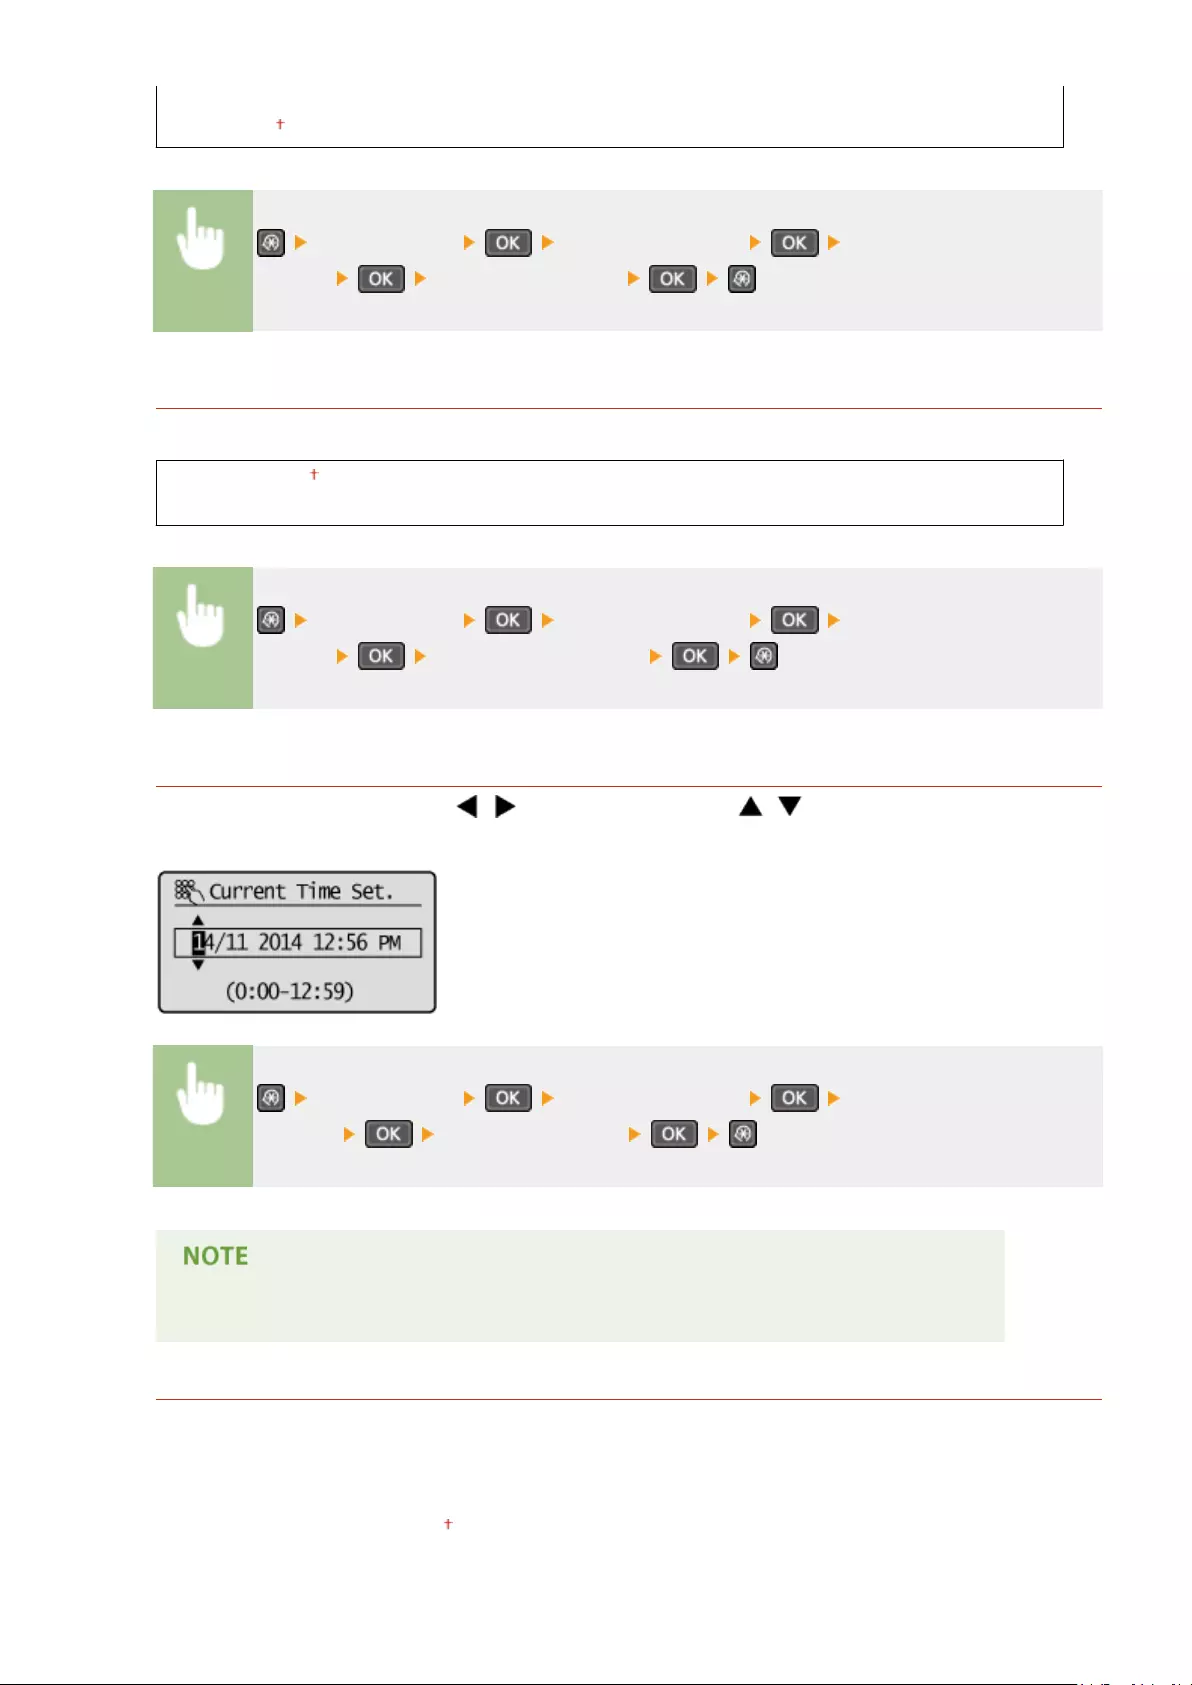
MM/DD/YYYY
DD/MM YYYY
<Timer Settings> <Date/Time Settings> <Date
Format> Select the date format
Time Format
Select the 12- or 24-hour clock display setting.
12 Hour (AM/PM)
24 Hour
<Timer Settings> <Date/Time Settings> <Time
Format> Select the display setting
Current Date/Time Settings
Set the current date and time. Use / to move the cursor, and / to specify the date and time or
switch between <AM>/<PM>.
<Timer Settings> <Date/Time Settings> <Current Date/Time
Settings> Set the date and time
The current date and time cannot be changed for 1 hour after daylight saving time is in effect.
Time Zone
Select the time zone. If the time zone setting is changed, the values set in <Current Date/Time Settings> are also
changed accordingly.
(UTC-12:00) International Date Line West
to
(UTC) Coordinated Universal Time
to
Setting Menu List
304

(UTC+14:00) Kiritimati Island
UTC
Coordinated Universal Time (UTC) is the primary time standard by which the world regulates clocks and
time. The correct UTC time zone setting is required for Internet communications.
<Timer Settings> <Date/Time Settings> <Time
Zone> Select a time zone
Daylight Saving Time Settings *2
Enable or disable daylight saving time. If daylight saving time is enabled, specify the dates from which and to
which daylight saving time is in effect.
Off
On
Start: Month, Day
End: Month, Day
<Timer Settings> <Date/Time Settings> <Daylight Saving Time
Settings> <On> Select a starting month and day
<Apply> Select an ending month and day <Apply>
Auto Sleep Time
If the machine has not been operated or has had no data to process for a specied period of time, the machine enters
sleep mode to save energy consumption (Auto Sleep). Specify the period of time after which auto sleep is performed.
Auto Sleep is not performed when the setting menu is displayed. We recommend using the factory default settings to
save the most power. Entering Sleep Mode(P. 59)
1 to 30 (min.)
Auto Reset Time
If a key is not pressed for a specied period of time, the screen and the settings are initialized to display the default
screen (Auto Reset). Specify the interval at which the Auto Reset is performed. Select <0> to disable the Auto Reset
function. The Auto Reset is not performed in the following cases:
●The setting menu is displayed.
●The machine is processing data, such as when printing documents.
Setting Menu List
305

●An error message is displayed and the error indicator is blinking (However, Auto Reset is performed when the error
does not prevent the user from continuing to use a function.)
0 (Auto Reset is disabled.)
1 to 2 to 9 (min.)
<Timer Settings> <Auto Reset Time> Set the Auto Reset time
The screen displayed after the Auto Reset is performed can be selected in <Function After Auto Reset>.
Function After Auto Reset
Select whether to return the display to the default screen after the Auto Reset is performed. If <Default Function> is
selected, the display returns to the main screen for copy mode. If <Selected Function> is selected, the display returns
to the main screen of the function that was selected.
Default Function
Selected Function
<Timer Settings> <Function After Auto Reset> Select <Default
Function> or <Selected Function>
Auto Oine Time
If a key has not been pressed for a specied period of time after the screen below is displayed (the machine is set
online for scanning), the machine automatically becomes oine. Specify the time period at which the machine
becomes oine. You can also set the machine to remain online.
0 (The machine remains online.)
1 to 5 to 60 (min.)
Setting Menu List
306

<Timer Settings> <Auto Oine Time> Set the time period
Auto Shutdown Time
Set a timer to automatically shut down the machine after the specied period of idle time has elapsed since the
machine entered the sleep mode. Setting Auto Shutdown Time(P. 61)
0 (Auto Shutdown is disabled.)
1 to 4 to 8 (hr.)
Setting Menu List
307

Common Settings
15A8-05L
All the settings about the operation of the paper drawer and the paper feed
method are listed with short descriptions. Default settings are marked with a
dagger ( ).
Switch Paper Feed Method
Specify this setting when you print a document on paper with logos. To print on paper with logos, you need to change
how the paper loaded in the paper source is facing depending on whether you are performing 1- or 2-sided printing.
However, if you change the setting to <Print Side Priority>, you can just load the paper face down for both 1- and 2-
sided printing. For more information, see Loading Preprinted Paper(P. 51) .
Multi-Purpose Tray
Speed Priority
Print Side Priority
Drawer 1
Speed Priority
Print Side Priority
<Common Settings> <Switch Paper Feed Method> Select the paper
source Select <Speed Priority> or <Print Side Priority>
Paper Sources
Select the paper source that you want to change the setting for.
<Speed Priority>
When using paper that has been preprinted with a logo, you need to change how it is facing when you
perform 1-sided and 2-sided printing.
We recommend selecting <Speed Priority> if you do not need to consider which side to print on.
Setting Menu List
308

<Print Side Priority>
To print on a specic side of paper, you do not need to ip over paper in the paper source whether 1- or 2-
sided printing is selected.
●If <Print Side Priority> is set for a paper source that is loaded with paper you cannot use for 2-sided
printing ( Paper(P. 419) ), <Speed Priority> is applied to the paper source instead. In this case, you need
to load the paper in the same way as when <Speed Priority> is selected ( Loading Preprinted
Paper(P. 51) ).
●1-sided printing speed may be slower when <Print Side Priority> is selected.
Setting Menu List
309
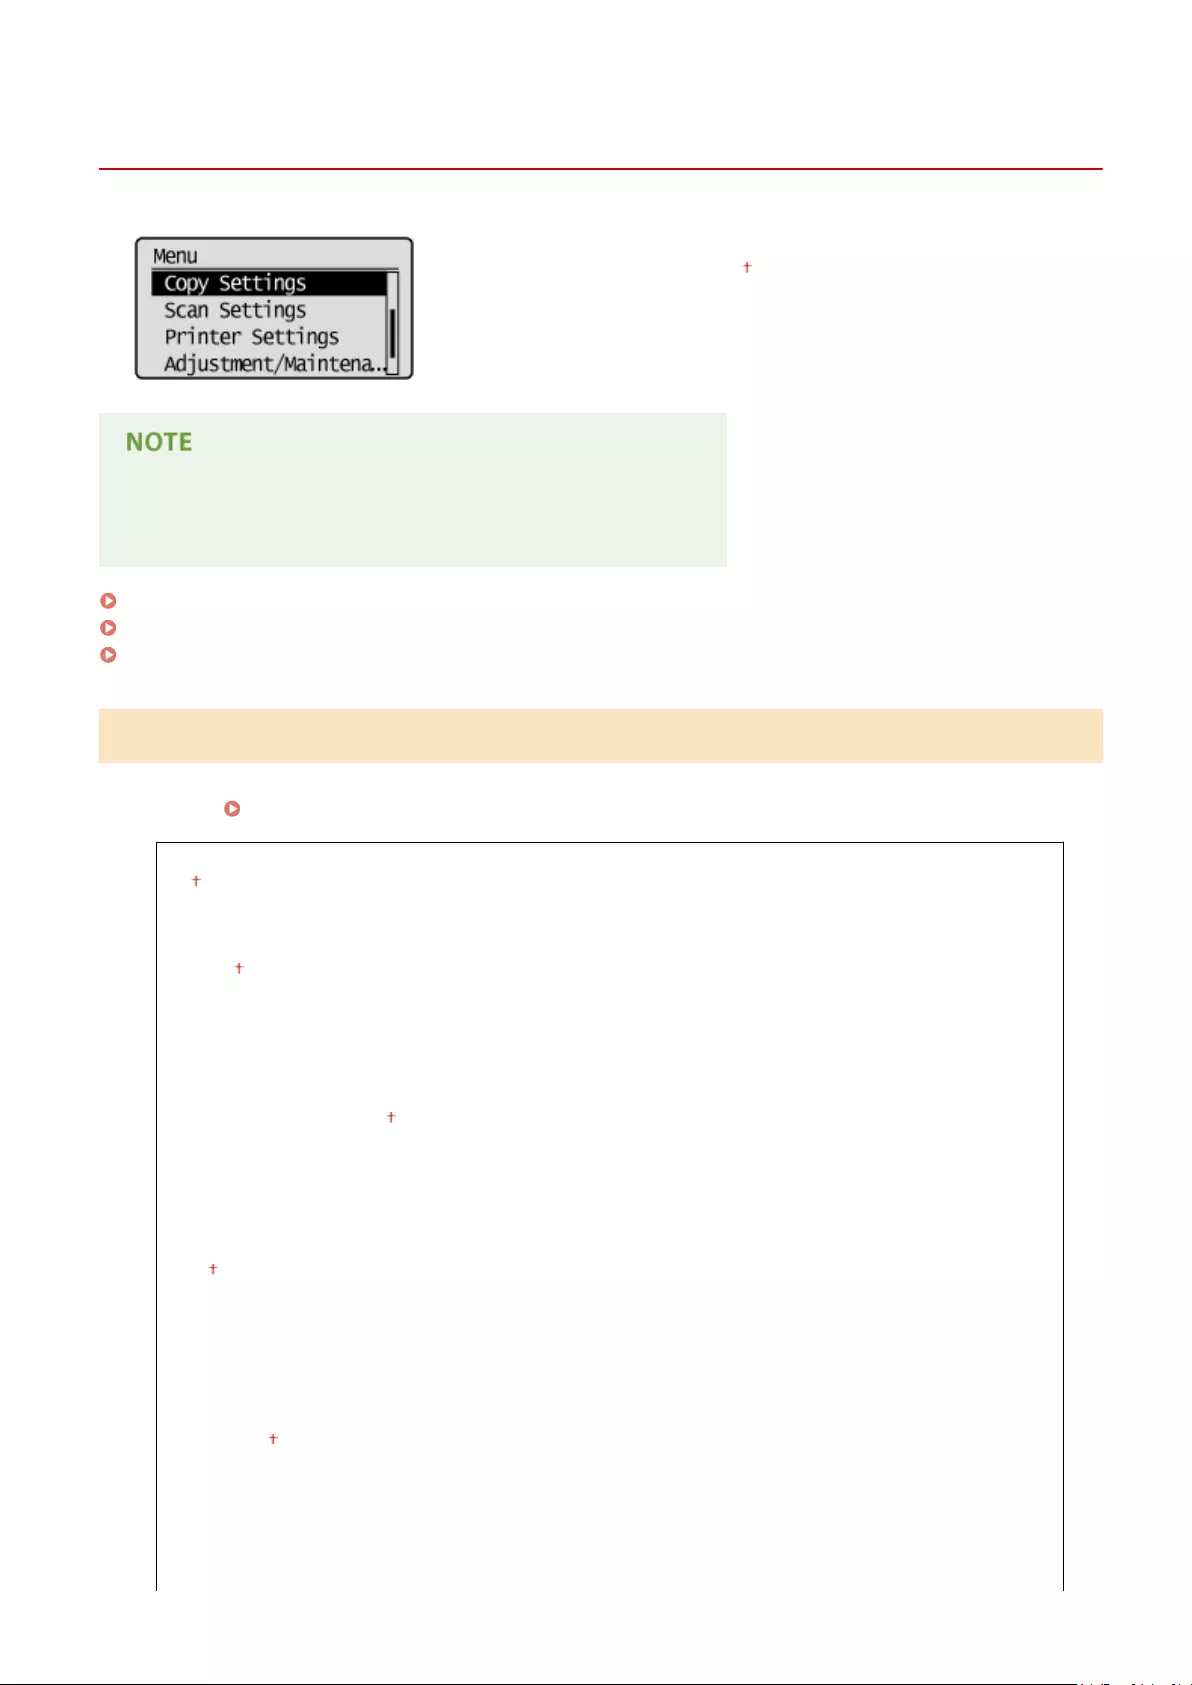
Copy Settings
15A8-05R
All the settings about the copy are listed with short descriptions. Default
settings are marked with a dagger ( ).
Asterisks (*)
Settings marked with an asterisk (*) are only available for MF244dw.
Change Default Settings (P. 310)
Correct Density(P. 311)
Initialize Default Settings(P. 311)
Change Default Settings
You can change the factory default settings about copy. The selected settings are used as the default settings of the
copy function. Changing Default Settings(P. 83)
Number of Copies
1 to 999
Density
-4 to 0 to +4
Auto Density
Original Type
Text
Text/Photo (High Speed)
Text/Photo
Photo
2-Sided*
Off
1->2-Sided
Original/Finishing Type
Copy Ratio
Custom Ratio
100% (1:1)
400% (Max)
200%
141% A5->A4
70% A4->A5
50%
Setting Menu List
310
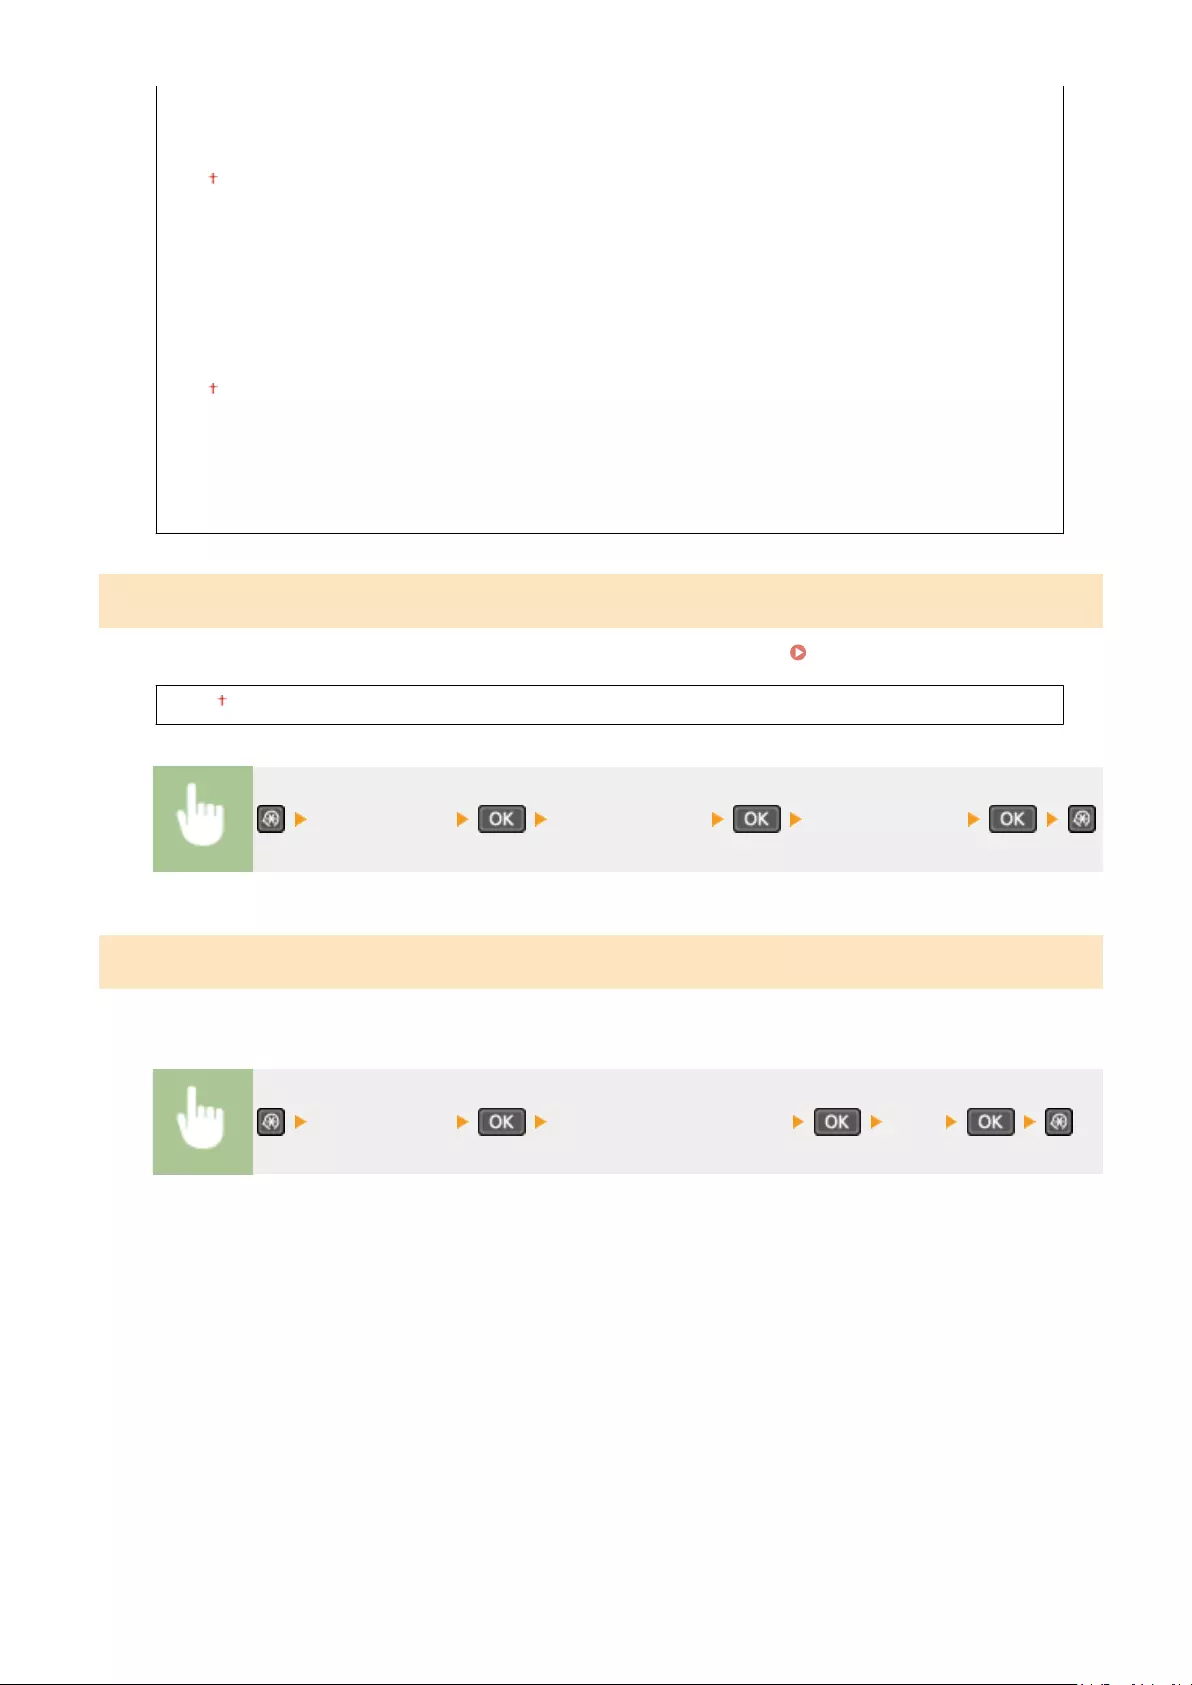
25% (Min)
N on 1
Off
2 on 1
4 on 1
ID Card Copy
Select Layout
Collate
Off
On
Sharpness
Seven Levels
Correct Density
Specify the initial copy density. You can also change the copy density temporarily. Adjusting Density(P. 72)
-4 to 0 to +4
<Copy Settings> <Correct Density> Adjust the density
Initialize Default Settings
Select this option to restore the default copy settings.
<Copy Settings> <Initialize Default Settings> <Yes>
Setting Menu List
311

Scan Settings
15A8-05S
All the settings about the scan are listed with short descriptions. Default
settings are marked with a dagger ( ).
Asterisks (*)
Settings marked with an asterisk (*) are only available for MF244dw.
Shortcut Key Settings
Register scan settings for the key (for MF232w, and keys). The settings include the computer
that scanned images are saved in, the type of scan (color or black and white), and the le format (PDF or JPEG).
Registering these settings enables you to scan documents into a specied computer just by pressing a button. You can
view the registered settings by selecting <Conrm Destination>. Scanning Using the [Scan -> PC] Key(P. 133)
MF244dw / MF231
Register
Scan -> PC
Off
USB Connection
Color Scan
B&W Scan
Custom 1
Custom 2
Network Connection*
Color Scan
B&W Scan
Custom 1
Custom 2
Conrm Destination
Scan -> PC
MF232w
Register
Scan -> PC1
Off
USB Connection
Color Scan
B&W Scan
Setting Menu List
312

Custom 1
Custom 2
Network Connection
Color Scan
B&W Scan
Custom 1
Custom 2
Scan -> PC2
Off
USB Connection
Color Scan
B&W Scan
Custom 1
Custom 2
Network Connection
Color Scan
B&W Scan
Custom 1
Custom 2
Conrm Destination
Scan -> PC1
Scan -> PC2
Setting Menu List
313
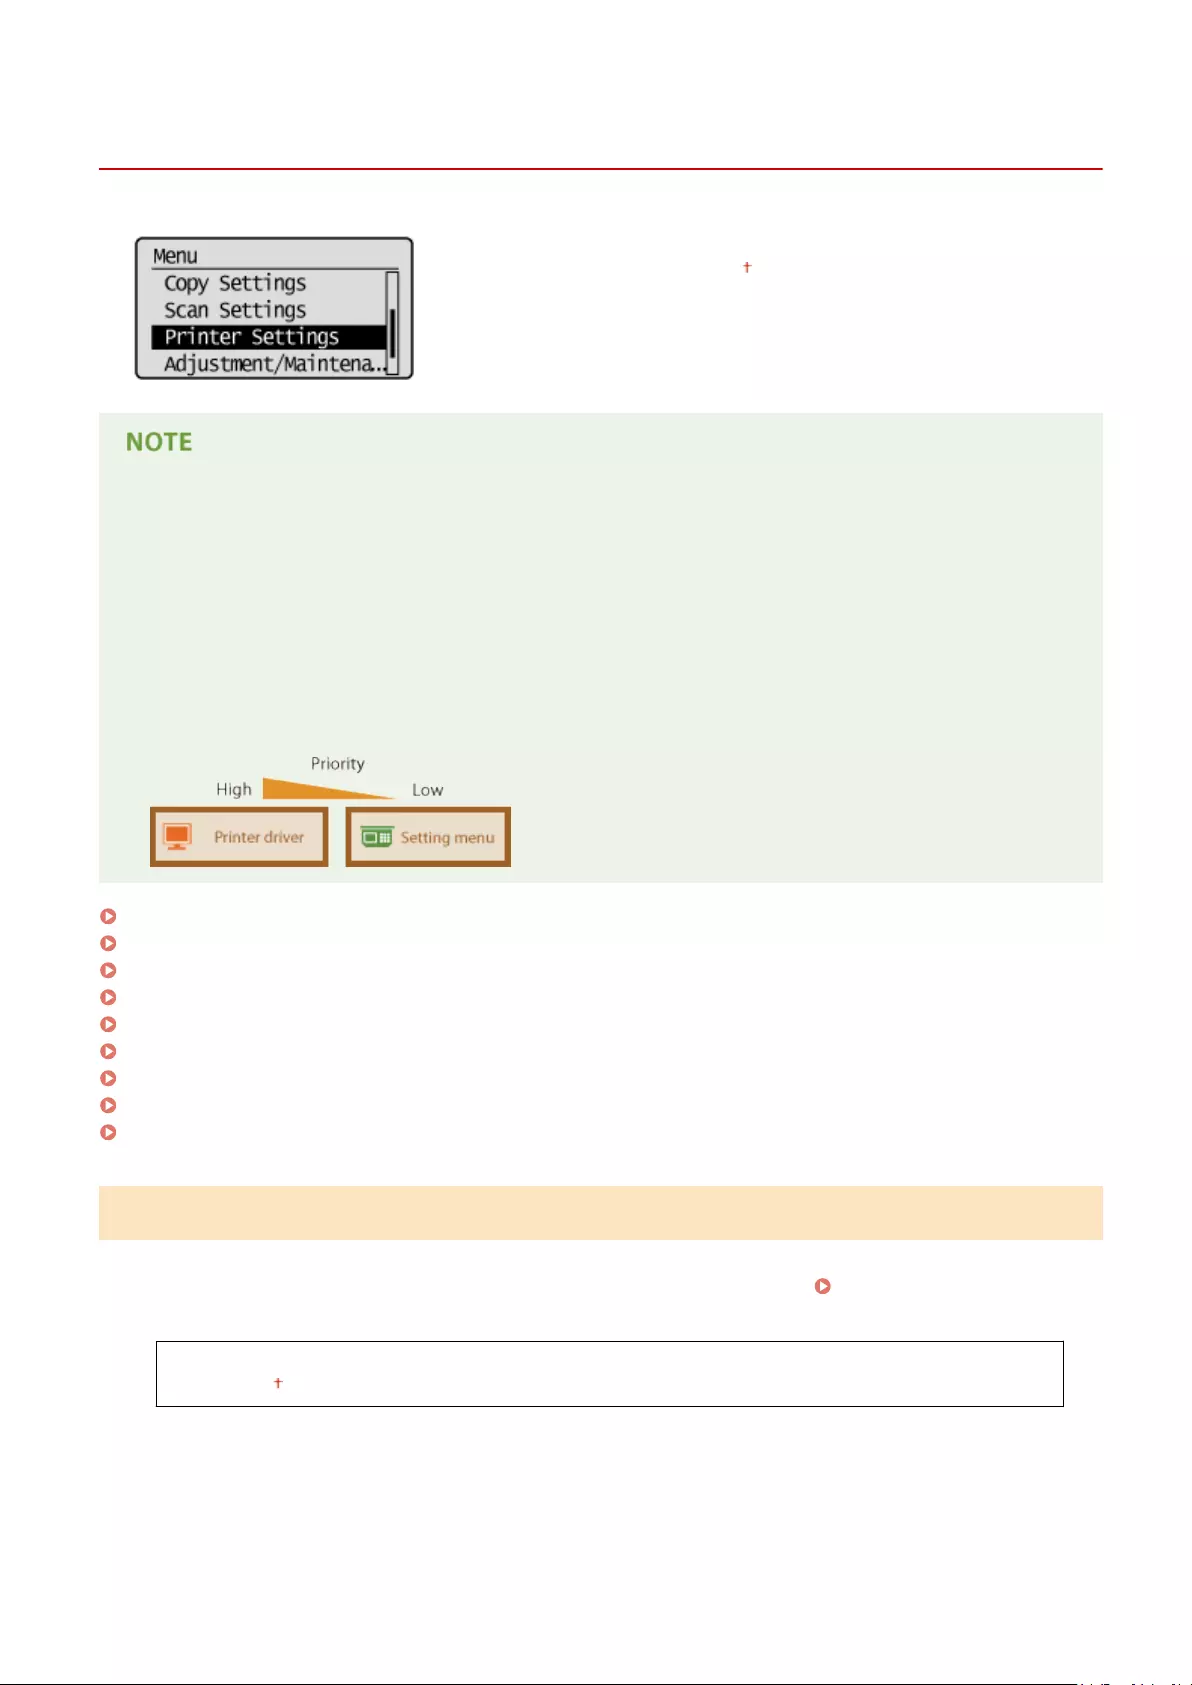
Printer Settings
15A8-05U
All the settings about the printer are listed with short descriptions. Default
settings are marked with a dagger ( ).
Asterisks (*)
●Settings marked with «*1» are only available for the MF244dw / MF232w.
●Settings marked with «*2» are only available for the MF244dw.
Priority of settings
●If a print setting is specied both from the printer driver and the operation panel of the machine, the
specication from the printer driver overrides that from the operation panel. The specication from the
operation panel becomes effective in some specic cases, such as when performing PCL printing and
printing from UNIX or other operating system that does not support printer drivers.
Action When Paper Size Mismatch(P. 314)
Mobile Print Halftones(P. 315)
Copies(P. 315)
2-Sided Printing(P. 315)
Default Paper(P. 316)
Print Quality(P. 316)
Layout(P. 317)
Timeout(P. 318)
PCL(P. 319)
Action When Paper Size Mismatch
Set whether printing goes ahead if a paper size other than the size loaded in the paper source is selected. You can also
set the machine not to go ahead with printing and instead display an alert message. When an Error Message
Appears(P. 347)
Force Output
Display Error
Setting Menu List
314
<Printer Settings> <Action When Paper Size Mismatch> Select <Force
Output> or <Display Error>
Mobile Print Halftones *1
Select the image processing when printing from a mobile device. Select <Gradation> for photos and illustrations, and
<Error Diffusion> for mostly text documents for more attractive printouts.
Gradation
Error Diffusion
<Printer Settings> <Mobile Print Halftones> Select <Gradation> or
<Error Diffusion>
Copies *2
Set the number of copies to print.
1 to 999
<Printer Settings> <Copies> Set the number of copies to print
2-Sided Printing *2
Select whether to make 2-sided printouts.
Off
On
<Printer Settings> <2-Sided Printing> Select <Off> or <On>
Setting Menu List
315
Default Paper *2
Use this item to specify the paper size. Paper(P. 419)
<Printer Settings> <Default Paper> Select the paper size
Print Quality
You can change settings related to print quality.
Density *2
Adjust the toner density.
17 Levels
Fine Adjust
High
17 Levels
Medium
17 Levels
Low
17 Levels
●The settings specied for <Density> are disabled when <Toner Save> is enabled.
<Printer Settings> <Print Quality> <Density> Adjust the
density <Apply>
Toner Save
You can save toner consumption. Select <On> when you want to check the layout or other appearance
characteristics before proceeding to nal printing of a large job.
Off
On
Setting Menu List
316

<Printer Settings> <Print Quality> <Toner Save> Select
<Off> or <On>
Special Print Mode *2
Select <Special Settings 1> if a printed bar code is unreadable, or <Special Settings 2> if print results are partially
faded.
Off
Special Settings 1
Special Settings 2
<Printer Settings> <Print Quality> <Special Print Mode>
Select <Special Settings 1> or <Special Settings 2>
Resolution *2
Specify the resolution to be used for print data processing.
1200 dpi
600 dpi
<Printer Settings> <Print Quality> <Resolution> Select
<1200 dpi> or <600 dpi>
Density Fine Adjustment *2
Finely adjust the density. You can specify this setting only when <1200 dpi> is selected in <Resolution>.
-1 to 0 to 1
<Printer Settings> <Print Quality> <Density Fine Adjustment>
Specify the density
Layout *2
Specify the page layout settings such as binding position.
Setting Menu List
317
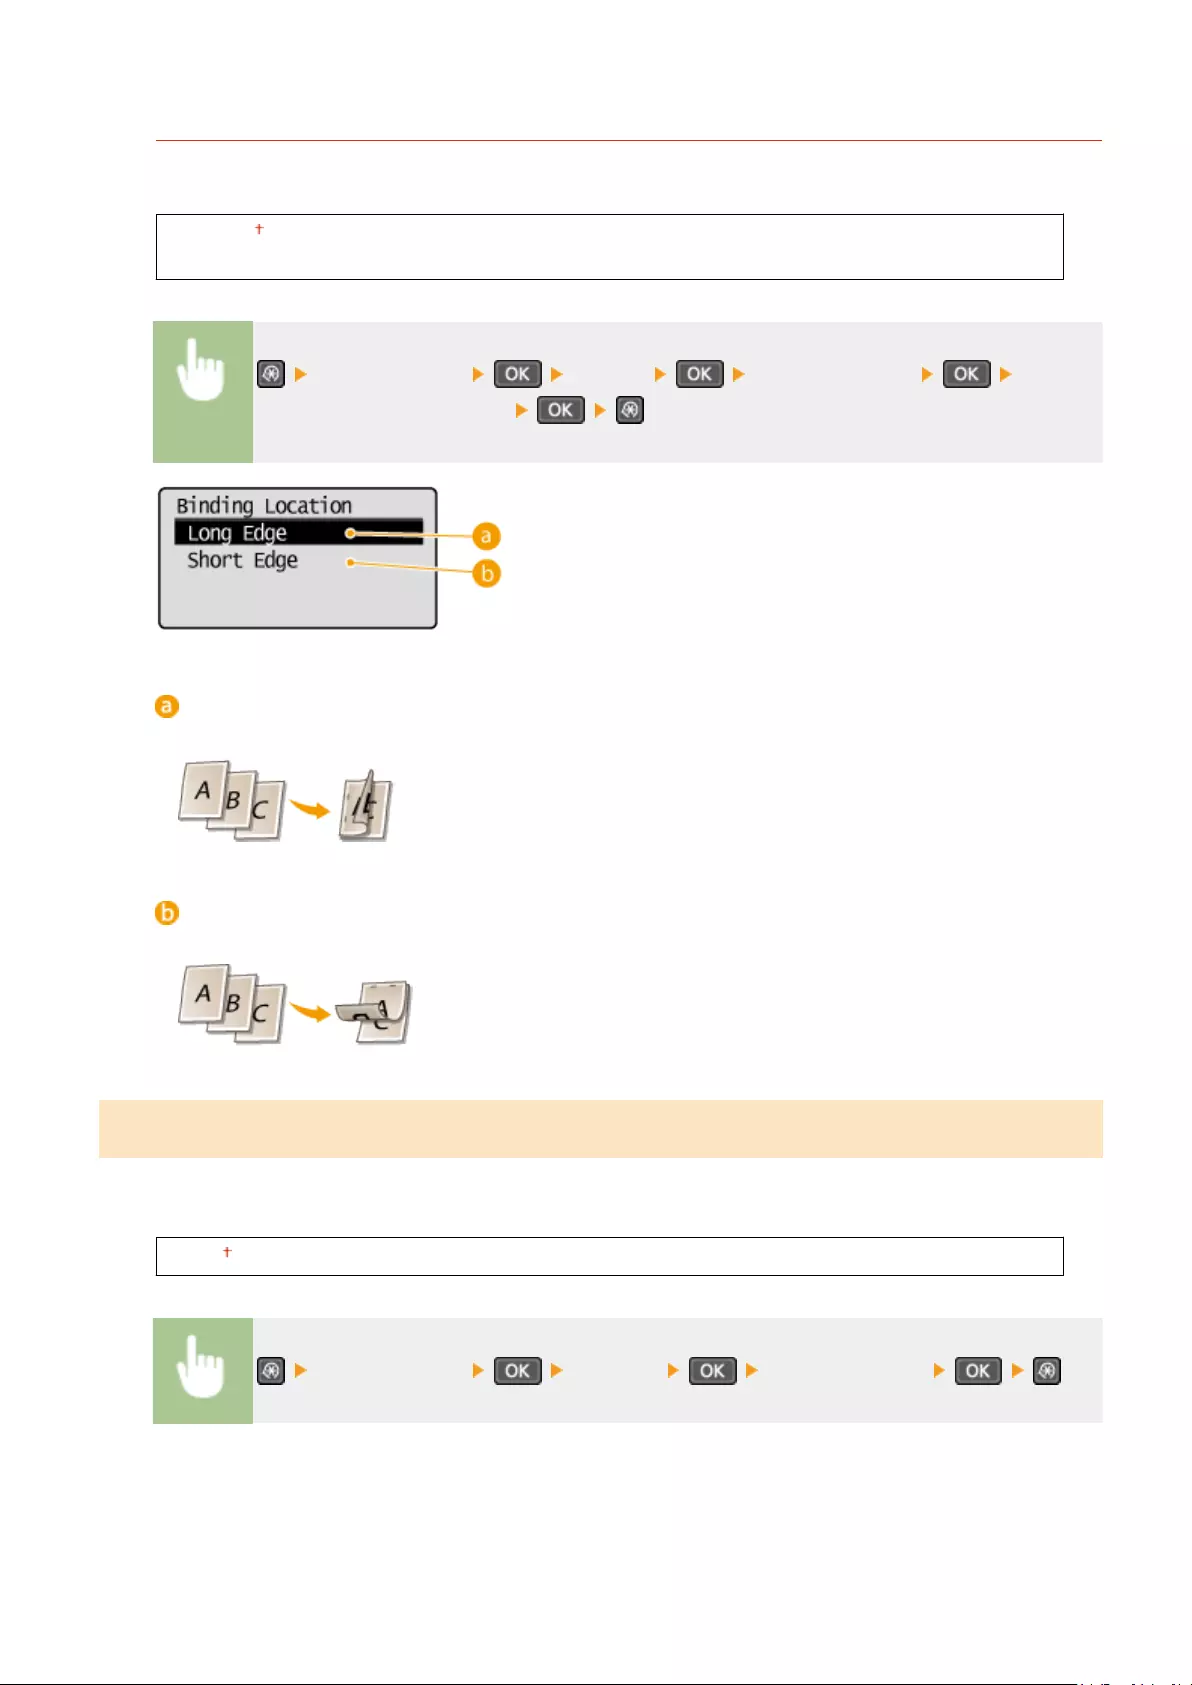
Binding Location
If you are binding the printouts with a binding tool such as a stapler, use this item to specify whether to bind on
the long or short edge.
Long Edge
Short Edge
<Printer Settings> <Layout> <Binding Location> Select
<Long Edge> or <Short Edge>
<Long Edge>
Specify this to bind on the long edge of paper.
<Short Edge>
Specify this to bind on the short edge of paper.
Timeout *2
Set the time period after which the current print job is automatically canceled in the case of a print data reception
interruption.
5 to 15 to 300 (sec.)
<Printer Settings> <Timeout> Set the time period
Setting Menu List
318
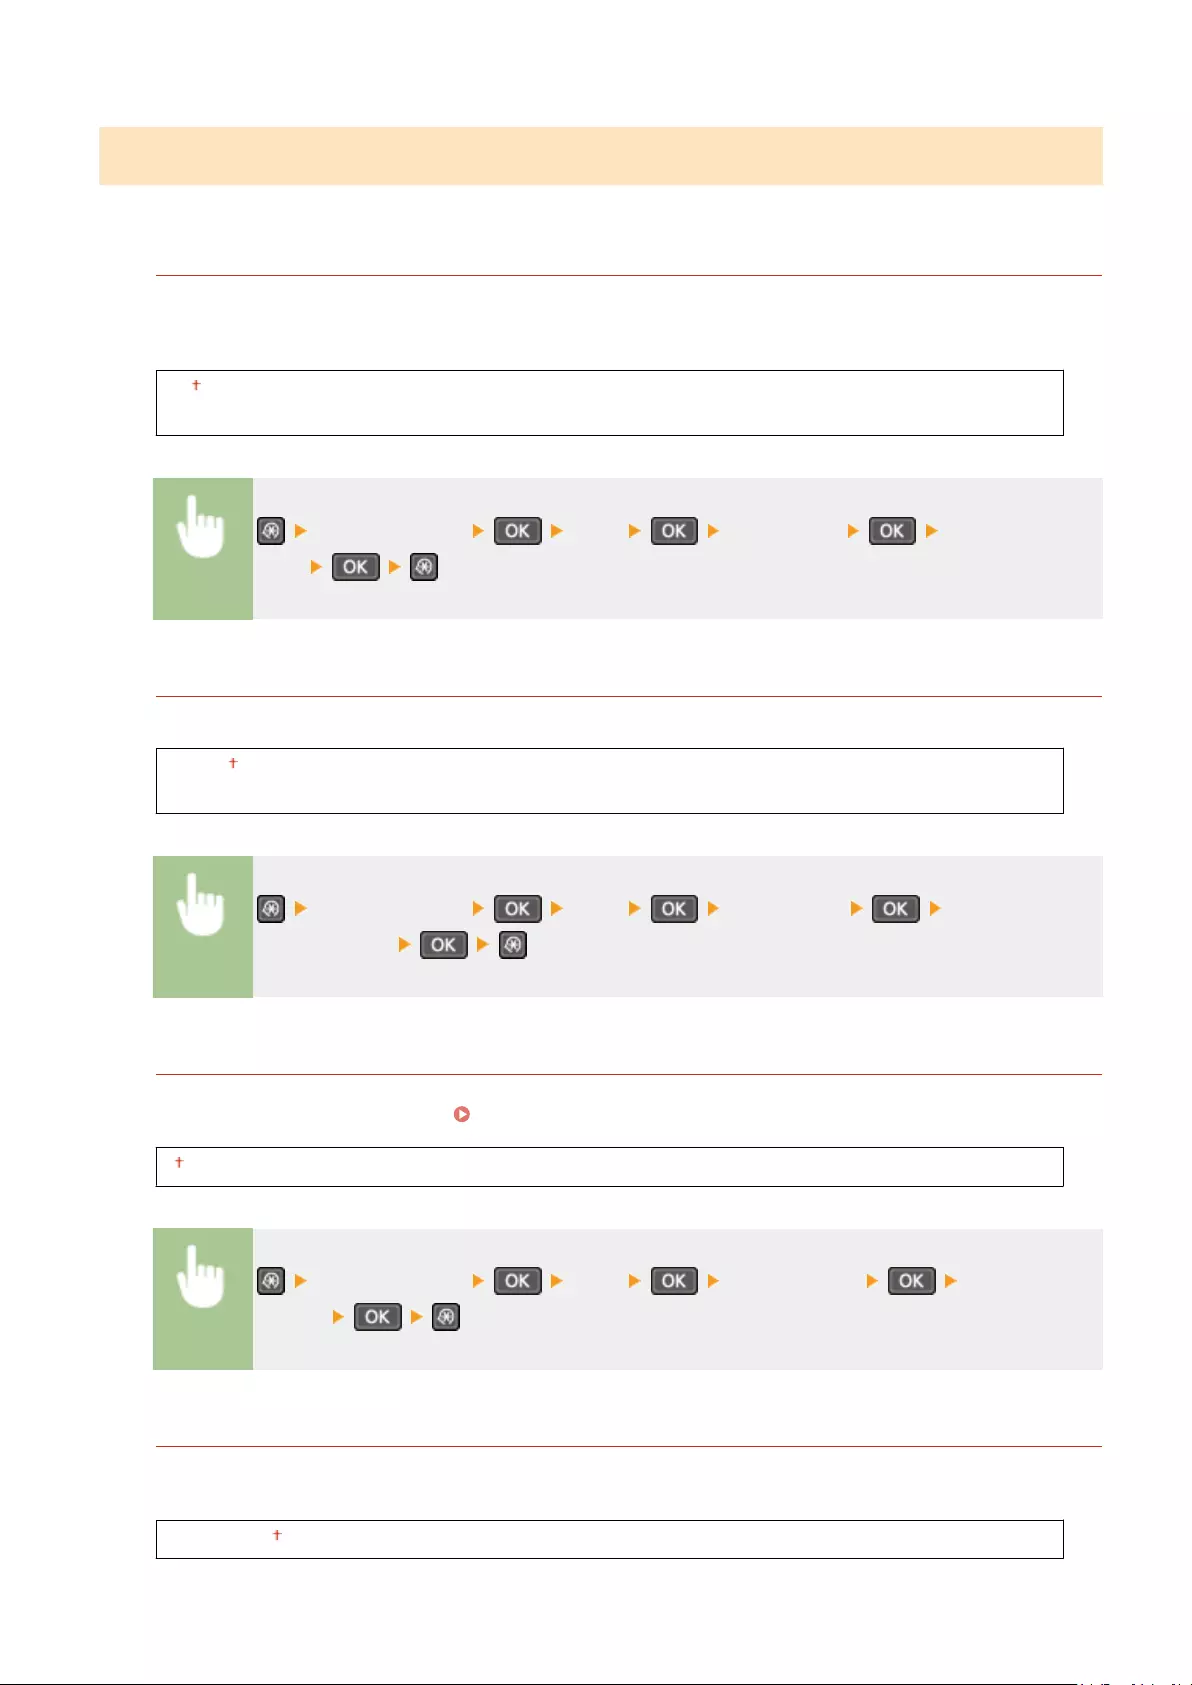
PCL *2
Specify the PCL printing settings such as page layout and print quality.
Paper Save
Select whether to save paper by not outputting blank pages in documents. By selecting <On>, the machine will
not output blank pages. To output all your document data when printing, including any blank pages that you
have inserted in your document, select <Off>.
Off
On
<Printer Settings> <PCL> <Paper Save> Select <Off> or
<On>
Orientation
Select <Portrait> (vertical orientation) or <Landscape> (horizontal orientation) for the page orientation.
Portrait
Landscape
<Printer Settings> <PCL> <Orientation> Select <Portrait>
or <Landscape>
Font Number
Specify the font to use by selecting a corresponding font ID number. You can print the PCL font list with font
samples from the operation panel. PCL Font List(P. 299)
0 to 54
<Printer Settings> <PCL> <Font Number> Select the font
number
Point Size
Set the font size in points, adjustable in 0.25 increments. You can specify this setting only when a proportionally-
spaced scalable font is selected in <Font Number>.
4.00 to 12.00 to 999.75 (point)
Setting Menu List
319

<Printer Settings> <PCL> <Point Size> Specify the point
size
Pitch
Set the font pitch, or cpi (characters per inch), adjustable in 0.01 increments. You can specify this setting only
when a xed-pitch scalable font or a bitmap font is selected in <Font Number>.
0.44 to 10.00 to 99.99 (cpi)
<Printer Settings> <PCL> <Pitch> Specify the pitch value
Form Lines
Set the number of lines printed on one page from 5 to 128. This setting is automatically changed according to
the settings specied in <Default Paper Size> and <Orientation>.
5 to 64 to 128 (lines)
<Printer Settings> <PCL> <Form Lines> Specify the
number of lines
Character Code
Select the character code that is most suited for the computer you send print data from. The specied setting is
ignored when the character code is controlled by the font specied in <Font Number>.
DESKTOP
ISO4
ISO6
ISO11
ISO15
ISO17
ISO21
ISO60
ISO69
ISOL1
ISOL2
ISOL5
ISOL6
LEGAL
MATH8
MCTEXT
PC8
PC850
PC852
PC8DN
PC8TK
PC1004
PIFONT
PSMATH
PSTEXT
ROMAN8
VNINTL
VNMATH
VNUS
WIN30
WINBALT
WINL1
Setting Menu List
320

MSPUBL
PC775
WINL2
WINL5
<Printer Settings> <PCL> <Character Code> Select the
character code
Custom Paper
Select whether to set a custom paper size. Select <On> to set the dimensions of the paper in <X dimension> and
<Y dimension>.
Off
On
<Printer Settings> <PCL> <Custom Paper> Select <Off> or
<On>
Unit of Measure
Select the unit of measurement to use to set a custom paper size.
Millimeters
Inches
<Printer Settings> <PCL> <Unit of Measure> Select
<Millimeters> or <Inches>
X dimension
Specify the horizontal dimension (short edge) of the custom paper.
77 to 216 (mm)
<Printer Settings> <PCL> <X dimension> Specify the
dimension
Y dimension
Specify the vertical dimension (long edge) of the custom paper.
Setting Menu List
321

127 to 356 (mm)
<Printer Settings> <PCL> <Y dimension> Specify the
dimension
Append CR to LF
Select whether to append a carriage return (CR) when the machine receives a line feed code (LF). If <Yes> is
selected, the print position moves to the beginning of the next line when the machine receives an LF code. If
<No> is selected, the print position moves to the next line, just under the received LF code.
Yes
No
<Printer Settings> <PCL> <Append CR to LF> Select <Yes>
or <No>
Enlarge A4 Print Width
Select whether to expand the width of the printable area of A4 size paper in portrait orientation to that of LTR
size.
Off
On
<Printer Settings> <PCL> <Enlarge A4 Print Width> Select
<Off> or <On>
Setting Menu List
322

Halftones
You can select the printing method to reproduce halftones (the intermediate range between the lighter and
darker areas of an image) for optimal image quality. For each document, you can make settings by type of
image.
Text
Color Tone
Gradation
Resolution
Graphics
Color Tone
Gradation
Resolution
Image
Color Tone
Gradation
Resolution
<Printer Settings> <PCL> <Halftones> Select the type of
image Select the halftone reproduction method
Type of image
Select the object for which to change the setting. <Text> represents letters and characters, <Graphics>
represents lines and gures, and <Image> represents photos and images.
<Color Tone>
Produces a sharp print with strong contrast of lightness and darkness. It is suitable for printing image data
such as photo image data.
<Gradation>
Produces a print with smooth gradation or smooth edges. It is suitable for printing gures or graphs
containing gradation areas.
<Resolution>
Produces a ne print with clear edges of text. It is suitable for printing characters and ne lines.
Setting Menu List
323

Adjustment/Maintenance
15A8-05W
All the settings about adjustment and maintenance are listed with short
descriptions. Default settings are marked with a dagger ( ).
Asterisks (*)
Settings marked with an asterisk (*) are only available for the MF244dw / MF232w.
Displ. Timing for Cartridge Prep. Notif.(P. 324)
Toner Save(P. 324)
Special Processing(P. 325)
Clean Fixing Assembly (P. 329)
Displ. Timing for Cartridge Prep. Notif.
Set the display timing for the message notifying you that the amount remaining in the toner cartridges is low.
1 to 10 to 99 (%)
<Adjustment/Maintenance> <Displ. Timing for Cartridge Prep. Notif.>
Enter the toner cartridge level
Toner Save
Select whether to reduce toner consumption when copying.
Copy
Off
On
<Adjustment/Maintenance> <Toner
Save> <Copy> <On>
Setting Menu List
324

When set to <On>
Fine lines and portions with lighter print density may become blurred.
Special Processing
If the print results on special types of paper are not satisfactory, the following settings may improve the quality of the
printouts.
Special Printing Mode U
If toner appears splattered around text and patterns in a printout, select <On>.
Off
On
<Adjustment/Maintenance> <Special Processing> <Special Printing
Mode U> <On>
When set to <On>
Print quality can be affected by the type of paper (especially lightweight paper) and the printing environment
(especially high humidity).
Special Printing Mode V
Adjust this setting if the print paper curls or wrinkles.
Off
Mode 1
Mode 2
Mode 3
<Adjustment/Maintenance> <Special Processing> <Special Printing
Mode V> Select the mode
To enable the setting
Setting Menu List
325
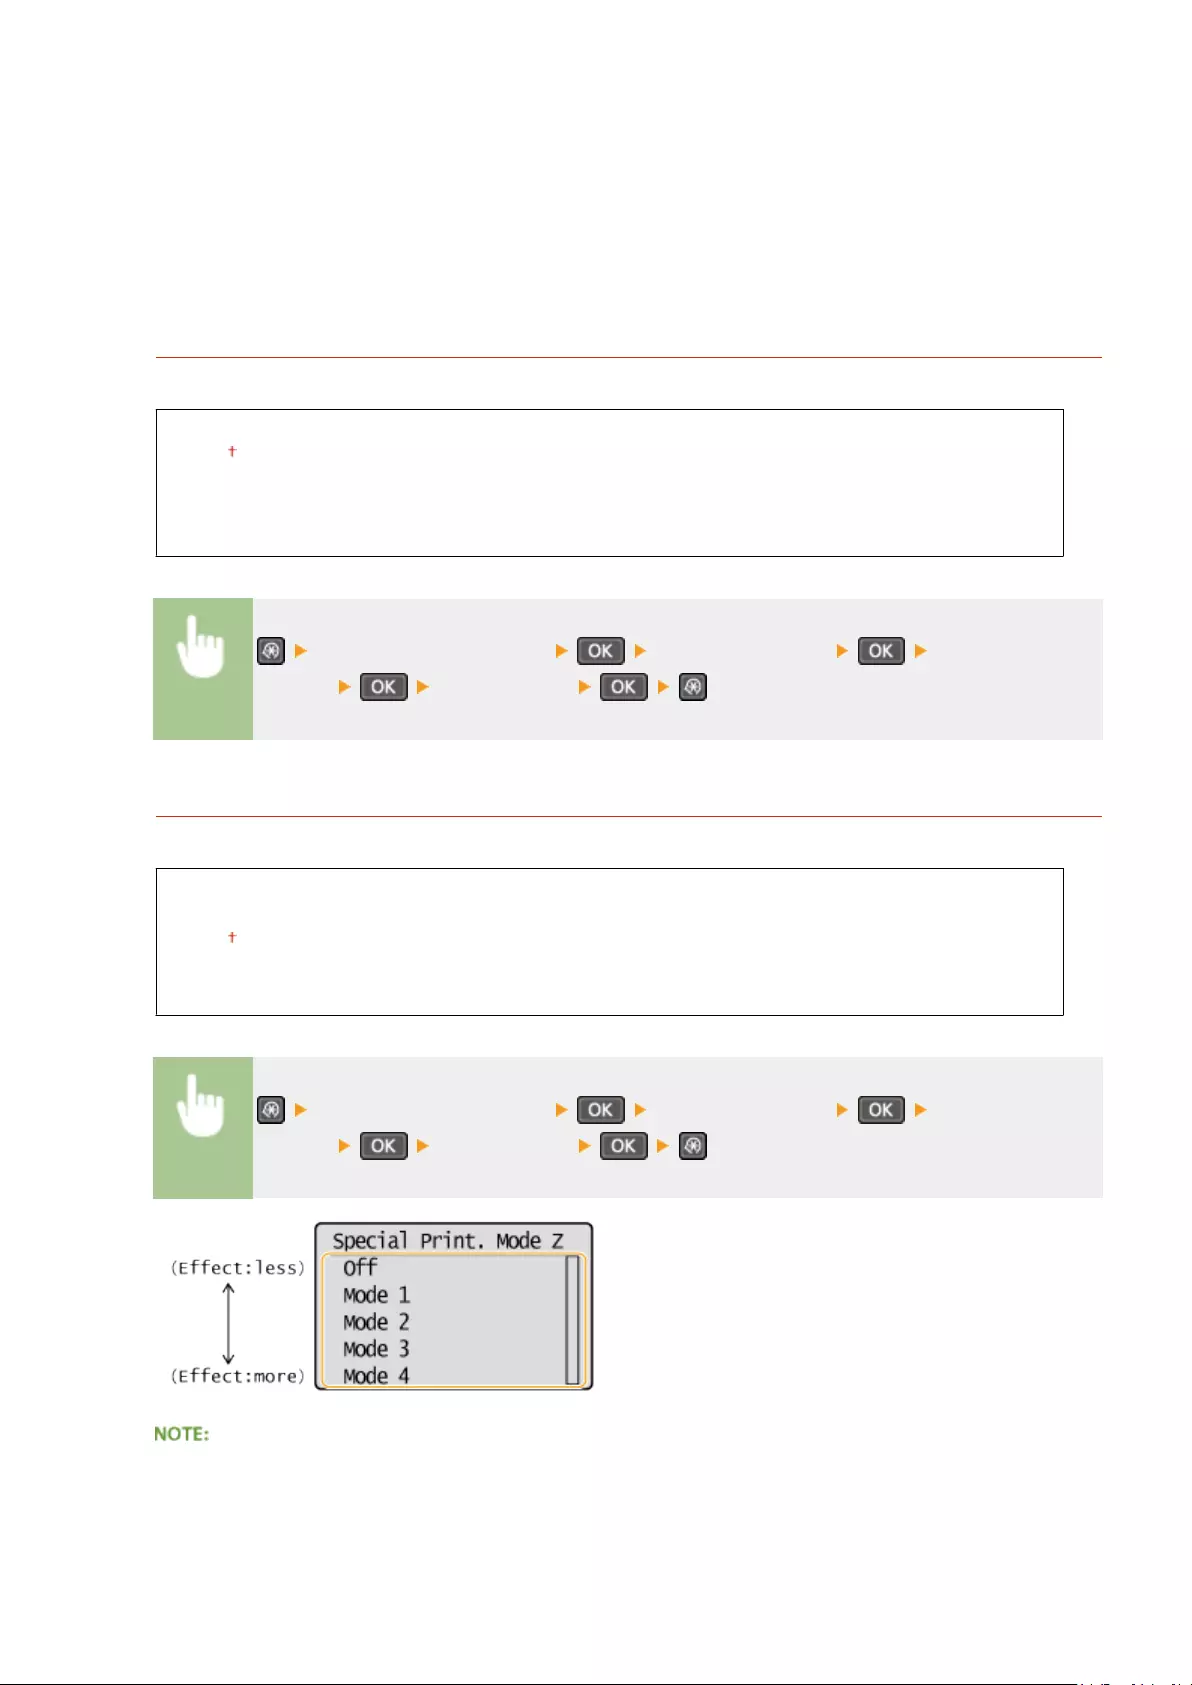
This setting is enabled in the following conditions.
●The paper size is set to <B5>, <A5>, <STMT>, or <EXEC>
●<Paper Type> is set to <Plain (60-89 g/m²)>, <Plain L (60-89 g/m²)>, <Recycled (60-89 g/m²)>, <Color (60-89
g/m²)>, or <Envelope>
After the setting is enabled
Print speed is slower.
Special Printing Mode X *
Adjust this setting if streaks adhere to the print paper.
Off
Mode 1
Mode 2
Mode 3
Mode 4
<Adjustment/Maintenance> <Special Processing> <Special Printing
Mode X> Select the mode
Special Printing Mode Z
Adjust this setting if streaks adhere to the print paper output when copying.
Off
Mode 1
Mode 2
Mode 3
Mode 4
<Adjustment/Maintenance> <Special Processing> <Special Printing
Mode Z> Select the mode
After the setting is changed
Setting Menu List
326

By specifying <Off> or <Mode 1>, streaks may adhere to the print paper. By specifying <Mode 3> or <Mode 4>,
outlines may be blurred or images may appear somewhat grainy. The print density becomes lighter as the
setting progresses from <Off> to <Mode 4>.
After printing from a smartphone or tablet
If streaks adhere to the paper, change the setting with <Special Printing Mode Z>.
Special Printing Mode B
Adjust this setting if streaks adhere to the print paper after replacing the toner cartridge or after not printing
for a long period of time.
Off
Mode 1
Mode 2
Mode 3
<Adjustment/Maintenance> <Special Processing> <Special Printing
Mode B> Select the mode
After the setting is enabled
Print speed is slower.
Special Printing Mode C
Adjust this setting if streaks adhere to the print paper.
Off
On
<Adjustment/Maintenance> <Special Processing> <Special Printing
Mode C> <On>
After the setting is enabled
●While more effect is gained than with <Special Printing Mode Z>, print speed is slower.
Setting Menu List
327

Special Printing Mode D
Adjust this setting if streaks adhere to the print paper. Also, setting this item to <On> will reduce the operating
noise during printing.
Copy
Off
On
Off
On
<Adjustment/Maintenance> <Special Processing> <Special Printing
Mode D> Select <Copy> or <Print> <On>
After the setting is enabled
●While more effect is gained than with <Special Printing Mode Z>, print speed is slower.
After printing from a smartphone or tablet
If streaks adhere to the paper, change the setting with <Special Printing Mode D> <Copy>.
Special Printing Mode I
Only select <On> if paper jams frequently when printing on lightweight paper or on curled paper.
Off
On
<Adjustment/Maintenance> <Special Processing> <Special Printing
Mode I> <On>
When set to <On>
White patches may appear in images printed on paper other than lightweight paper.
Special Printing Mode J
If printing is uneven when printing ne lines or faint images, select <On>.
Off
On
Setting Menu List
328

<Adjustment/Maintenance> <Special Processing> <Special Printing
Mode J> <On>
When set to <On>.
The following may occur.
●Denition may be affected
●Toner appears in non-print areas when using a new toner cartridge
●Toner cartridge may be used up more quickly
Special Printing Mode K
If toner does not adhere adequately and printouts are faded, select <On>.
Off
On
<Adjustment/Maintenance> <Special Processing> <Special Printing
Mode K> <On>
When set to <On>
Print speed is slower.
Clean Fixing Assembly
Clean the xing assembly after a toner cartridge is replaced or if black streaks appear on printouts. Fixing
Assembly(P. 383)
Setting Menu List
329

System Management Settings
15A8-05X
All the settings about System Management Settings are listed with short
descriptions. Default settings are marked with a dagger ( ).
NOTE
If a screen for entering a PIN is displayed
Enter the PIN with the numeric keys and press . Setting the System Manager PIN(P. 229)
Asterisks (*)
●Settings marked with «*1» are only available for the MF244dw / MF232w.
●Settings marked with «*2» have different defaults depending on the country or region of purchase.
●Settings marked with «*3» are only available for the MF244dw.
●«*4«: Displayed as <Display Consumables Info. (Toner Status)> for the MF231.
Network Settings(P. 330)
System Manager Information Settings(P. 330)
Device Information Settings(P. 331)
Security Settings(P. 331)
Select Country/Region(P. 332)
Remote UI Settings(P. 333)
Auto Online for Remote Scan(P. 333)
Use as USB Device(P. 334)
Enable Product Extended Survey Program(P. 334)
Displ. Consmbls. Info (RUI/Toner Status)(P. 334)
Google Cloud Print Settings(P. 335)
PDL Selection (Plug and Play) (P. 335)
Update Firmware(P. 336)
Initialize Eco Report Counter(P. 336)
Initialize Menu(P. 337)
Initialize All Data/Settings(P. 337)
Network Settings *1
See Network Settings (MF244dw / MF232w)(P. 287) .
System Manager Information Settings
Specify the PIN exclusively for Administrators who have access privileges to <Network Settings> and <System
Management Settings>. You can set the PIN from <System Manager PIN>. You can also register the name of an
Administrator. Setting the System Manager PIN(P. 229)
Setting Menu List
330

System Manager PIN
Enter a number of up to seven digits for the System Manager PIN.
System Manager Name
Enter up to 32 alphanumeric characters for the name of an Administrator.
Device Information Settings
Enter up to 32 alphanumeric characters for the name and the installation location to identify the machine.
Device Name
Location
<System Management Settings> <Device Information Settings> Select
<Device Name> or <Location> Enter <Device Name> or <Location> ( Entering
Text(P. 35) ) <Apply>
Security Settings *1
Enable or disable settings for IP address or MAC address packet ltering.
Use TLS
Select whether to use TLS encrypted communication. Enabling TLS Encrypted Communication for the
Remote UI(P. 249)
Off
On
IPv4 Address Filter
Enable or disable settings for ltering packets received from devices with specied IPv4 addresses.
Specifying IP Addresses for Firewall Rules(P. 234)
Off
On
Setting Menu List
331

<System Management Settings> <Security Settings> <IPv4 Address
Filter> <Inbound Filter> Select <Off> or <On>
IPv6 Address Filter
Enable or disable settings for ltering packets received from devices with specied IPv6 addresses.
Specifying IP Addresses for Firewall Rules(P. 234)
Off
On
<System Management Settings> <Security Settings> <IPv6 Address
Filter> <Inbound Filter> Select <Off> or <On>
MAC Address Filter
Enable or disable settings for ltering packets received from devices with specied MAC addresses.
Specifying MAC Addresses for Firewall Rules(P. 238)
Off
On
<System Management Settings> <Security Settings> <MAC Address
Filter> <Inbound Filter> Select <Off> or <On>
Select Country/Region *2
Specify the country or region where the machine is used. The default setting may vary depending on the setting
selected at initial power-on.
Austria (AT)
Belarus (BY)
Belgium (BE)
Czech Republic (CZ)
Denmark (DK)
Egypt (EG)
Finland (FI)
France (FR)
Germany (DE)
Greece (GR)
Hungary (HU)
Ireland (IE)
Netherlands (NL)
Norway (NO)
Poland (PL)
Portugal (PT)
Russia (RU)
Saudi Arabia (SA)
Slovenia (SI)
South Africa (ZA)
Spain (ES)
Sweden (SE)
Switzerland (CH)
Ukraine (UA)
Setting Menu List
332
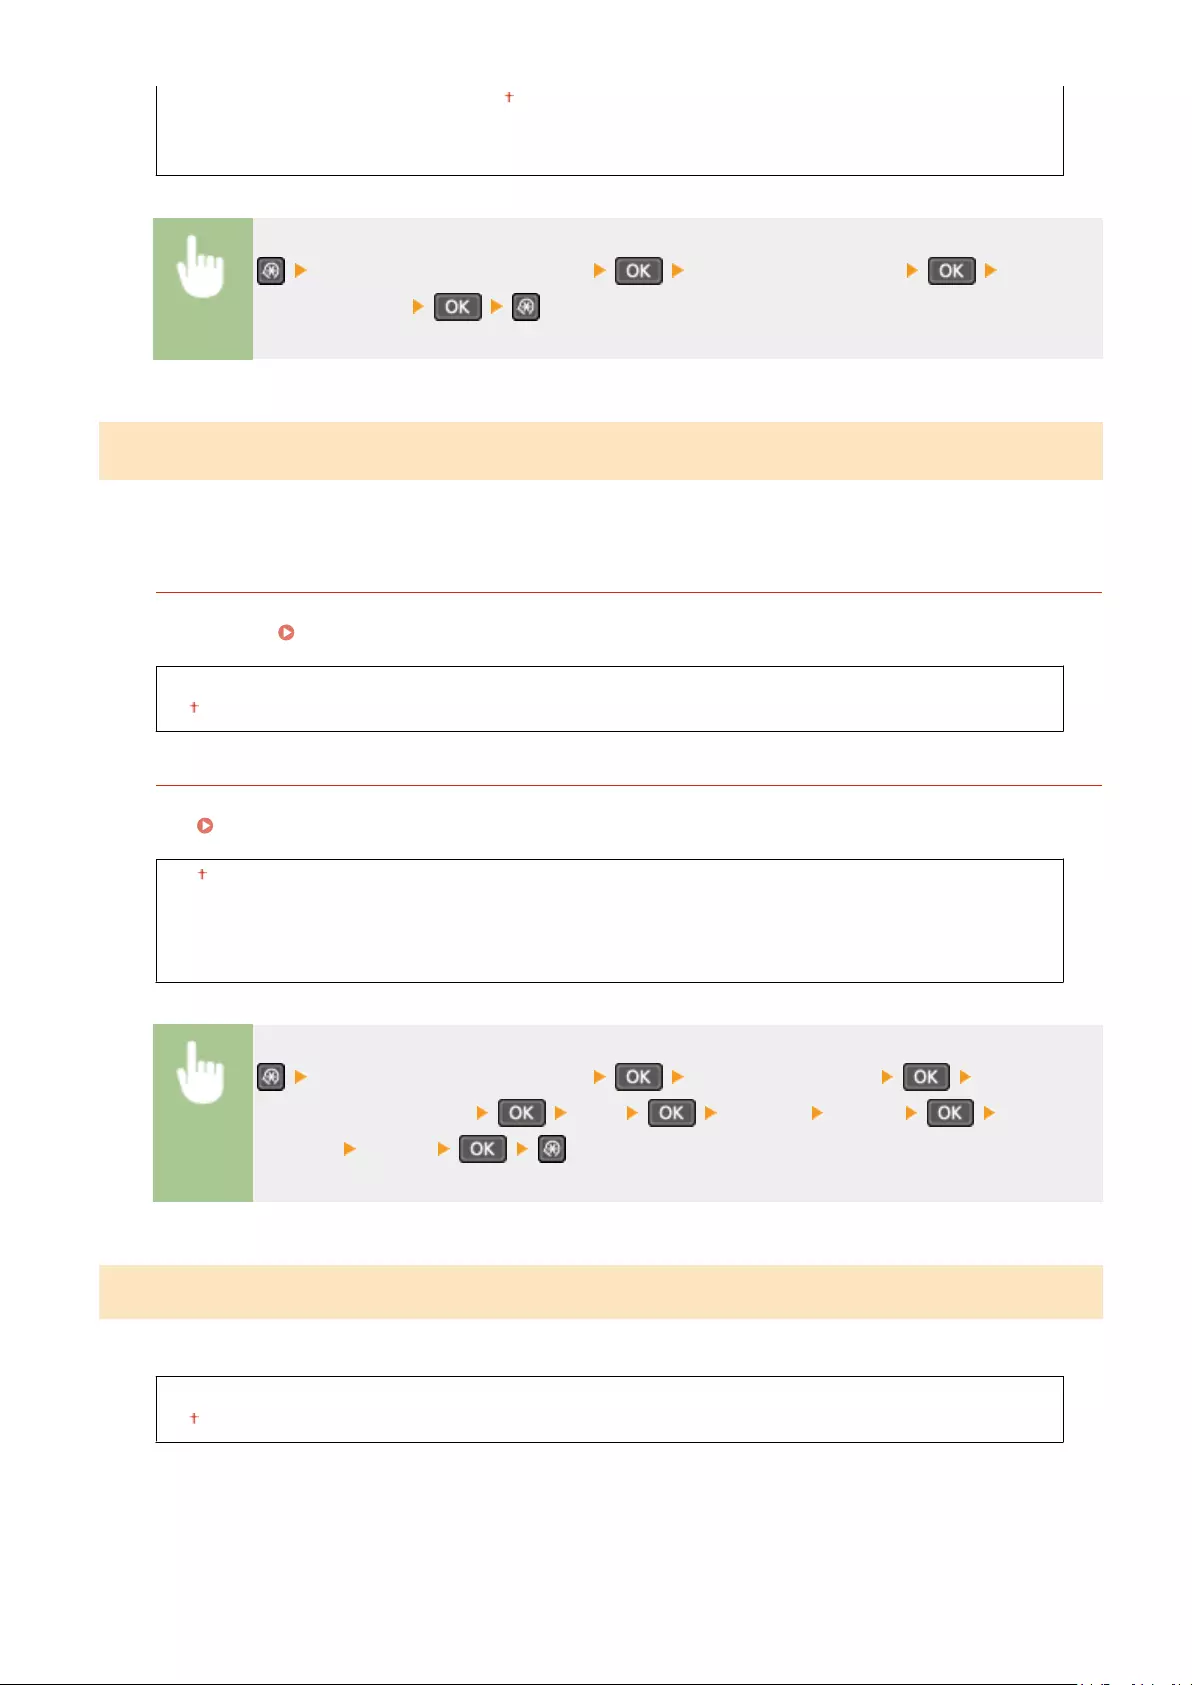
Italy (IT)
Jordan (JO)
Luxembourg (LU)
Great Britain (GB)
Other
<System Management Settings> <Select Country/Region> Select a
country or region
Remote UI Settings *1
Congure settings for using the Remote UI. Using the Remote UI allows you to congure machine settings from a Web
browser.
Use Remote UI
Select whether to use the Remote UI. Using the Remote UI allows you to congure machine settings from a
Web browser. Disabling Remote UI(P. 247)
Off
On
Remote UI Access Security Settings
Set whether a PIN is required for accessing the Remote UI. Set a PIN of up to 7 digits. All users use a common
PIN. Setting a Remote UI PIN (MF244dw / MF232w)(P. 231)
Off
On
Remote UI Access PIN
<System Management Settings> <Remote UI Settings> <Remote UI
Access Security Settings> <On> Enter PIN <Apply> PIN
(Conrm) <Apply>
Auto Online for Remote Scan
Select whether to use this feature to go online for remote scanning, even without using the operation panel.
Off
On
Setting Menu List
333

<System Management Settings> <Auto Online for Remote
Scan> Select <Off> or <On>
Use as USB Device
Enable or disable the USB port that is used for connecting the machine to a computer.
Off
On
<System Management Settings> <Use as USB Device> Select <Off> or
<On> Restart the machine
Enable Product Extended Survey Program
Enable or disable the Product Extended Survey Program (a program for the machine usage survey).
Off
On
<System Management Settings> <Enable Product Extended Survey
Program> Select <Off> or <On>
Displ. Consmbls. Info (RUI/Toner Status) *4
Set whether to display a button in the Remote UI for accessing the Web site for purchasing toner cartridges. Also set
whether to use Toner Status.
Displ. Consumables Purchase Button (RUI)*1
Off
On
Toner Status Settings
Off
On
Displ. Purchase Button
Off
Setting Menu List
334

On
<System Management Settings> <Displ. Consmbls. Info (RUI/Toner
Status)> Select <Displ. Consumables Purchase Button (RUI)>*1 or <Toner Status
Settings> Select <Off> or <On>
If you selected <On> for <Toner Status Settings>, continue by selecting <On> or <Off> for <Displ. Purchase
Button>.
Google Cloud Print Settings *1
Enable or disable Google Cloud Print. Using Google Cloud Print(P. 159)
Enable Google Cloud Print
Off
On
Google Cloud Print Registration Status
PDL Selection (Plug and Play)
Select a page description language so that the machine is detected as a printer that is compatible with that language
when it is connected to a computer by using Plug and Play. For more information, see «MF Driver Installation Guide.»
Network*1
Select a page description language so that the machine is detected as a printer that is compatible with that
language when it is detected over the network.
UFRII LT
UFRII LT (V4)
PCL6*3
USB
Select a page description language so that the machine is detected as a printer that is compatible with that
language when it is connected to a computer via USB.
UFRII LT
UFRII LT (V4)
PCL6*3
Any setting change is enabled the next time the main power is turned ON.
Setting Menu List
335
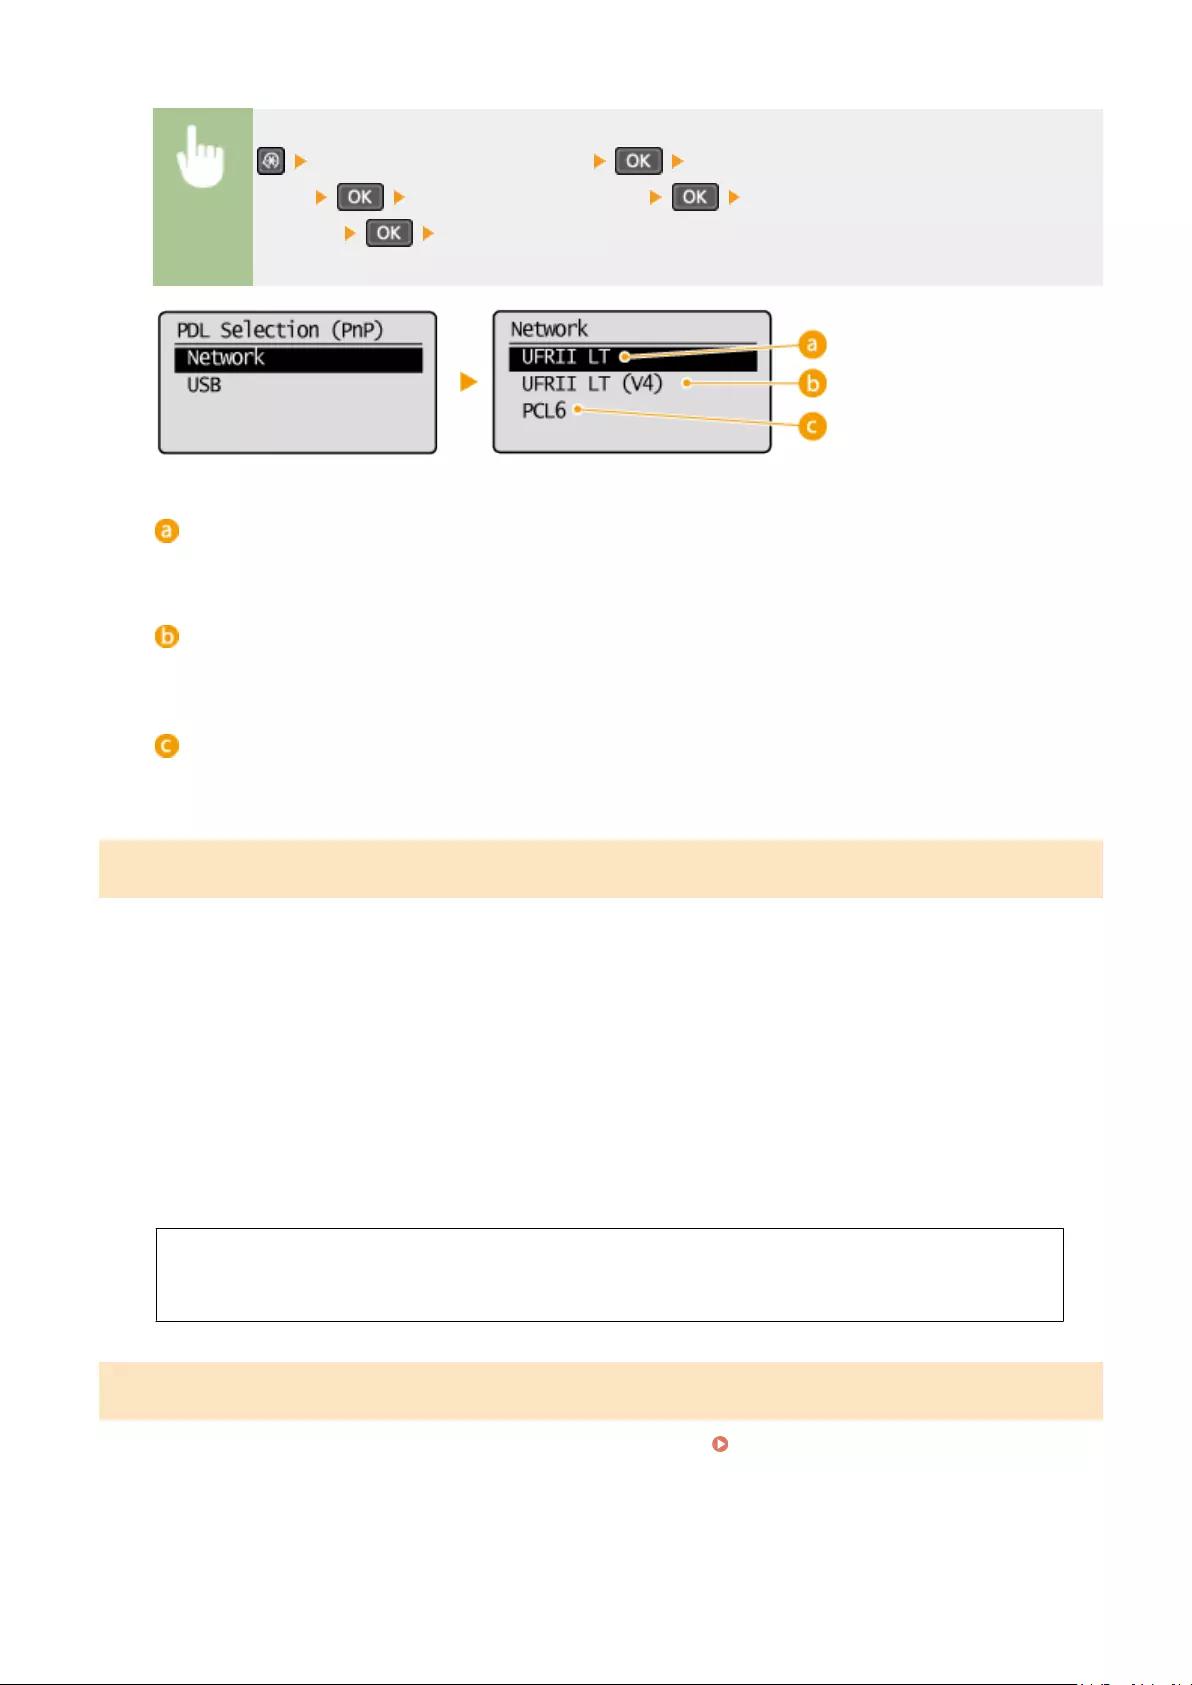
<System Management Settings> <PDL Selection (Plug and
Play)> Select <Network> or <USB> Select a page description
language Restart the machine
<UFRII LT>
Detects and connects the machine as a UFRII LT printer.
<UFRII LT (V4)>
Detects and connects the machine as a UFRII LT printer that is compatible with XML Paper Specication (XPS).
<PCL6>*3
Detects and connects the machine as a PCL6 printer.
Update Firmware
Select how to install the rmware update according to the environment of the machine.
●<Via PC>
Select to manually install the rmware update available on the Canon Web site yourself. For instructions on
how to install the update, see the instruction manual available on the Web site. When the machine uses a
wireless LAN, update with <Via Internet> below or use a USB cable to connect.
●<Via Internet>*1
Select to automatically install the rmware update without using a computer. Follow the on-screen
instructions to perform the update. The machine must be connected to the Internet.
●<Version Information>
Select to check details for the current rmware.
Via PC
Via Internet*1
Version Information
Initialize Eco Report Counter *1
Select to restore the Eco Report Counter settings to the factory defaults. Initialize Eco Report Counter (MF244dw /
MF232w)(P. 399)
Setting Menu List
336

Initialize Menu
Select to restore the settings listed below to the factory defaults. You can restore all the settings listed below at once,
or you can restore individual settings separately. Initializing Menu(P. 397)
Preferences
Timer Settings
Common Settings*3
Copy Settings
Scan Settings
Printer Settings
Adjustment/Maintenance
System Management Settings
Initialize All
System Management Settings
Select to restore the System Management Settings to the factory defaults. You can restore all the System
Management Settings at once. Initializing Menu(P. 397)
Network Settings*1
System Manager Information Settings
Device Information Settings
Security/Remote UI Settings*1
Auto Online for Remote Scan
Use as USB Device
Enable Product Extended Survey Program
Displ. Consmbls. Info (RUI/Toner Status)*4
Google Cloud Print Settings*1
PDL Selection (Plug and Play)
Initialize All
Initialize All Data/Settings
Delete all data on the machine and return it to its factory default settings.
<System Management Settings> <Initialize All Data/
Settings> <Yes> <Yes> Restart the machine
Setting Menu List
337

Troubleshooting
Troubleshooting …………………………………………………………………………………………………………………………… 339
Clearing Jams ………………………………………………………………………………………………………………………………….. 341
When an Error Message Appears ……………………………………………………………………………………………………… 347
Common Problems ………………………………………………………………………………………………………………………….. 355
Installation/Settings Problems ……………………………………………………………………………………………………… 356
Copy/Printing Problems ………………………………………………………………………………………………………………. 360
When You Cannot Print Properly ………………………………………………………………………………………………………. 363
Printing Results Are Not Satisfactory ……………………………………………………………………………………………… 365
Paper Creases or Curls ………………………………………………………………………………………………………………… 370
Paper Is Fed Incorrectly ……………………………………………………………………………………………………………….. 372
When a Problem Cannot Be Solved …………………………………………………………………………………………………… 374
Troubleshooting
338

Troubleshooting
15A8-05Y
When a problem occurs, check this chapter to nd out solutions before contacting Canon.
◼Paper Jams
If a document or paper jams, see Clearing Jams(P. 341) to remove the jammed paper.
◼A Message Appears
If the screen displays a message, see the following section.
When an Error Message Appears(P. 347)
◼Common Problems
If you suspect that the machine is malfunctioning, see the following sections before contacting Canon.
Common Problems(P. 355)
Installation/Settings Problems(P. 356)
Copy/Printing Problems(P. 360)
◼Printing Results are Not Satisfactory
If printing results are not satisfactory, see When You Cannot Print Properly(P. 363) .
◼When a Problem Cannot Be Solved
If a problem persists, see When a Problem Cannot Be Solved(P. 374) to nd out where to contact.
Troubleshooting
339

Troubleshooting
340

Clearing Jams
15A8-060
If a paper jams, <Paper jammed.> is displayed on the screen. Press to display simple solutions. If it is dicult to
understand the procedures on the display, see the following sections to clear jams.
MF244dw
●<Open feeder cover.>
Document Jams in the Feeder (MF244dw)(P. 342)
●<Close upper area.> <Lift control panel.>
Paper Jams inside the Machine(P. 342)
MF232w / MF231
●<Close upper area.> <Lift control panel.>
Paper Jams inside the Machine(P. 342)
When removing the jammed paper, do not turn OFF the machine
Turning OFF the machine deletes the data that is being printed.
If paper tears
Remove all the paper fragments to prevent them from becoming jammed.
If paper jams repeatedly
●Make sure that the paper and the packing material are completely removed.
●Tap the paper stack on a at surface to even the edges of the paper before loading it into the machine.
●Check that the paper is appropriate for the machine.
Paper(P. 419)
●Check that no jammed paper fragments remain in the machine.
Do not forcibly remove the jammed document or paper from the machine
Forcibly removing the paper may damage parts. If you are not able to remove the paper, contact your local
authorized Canon dealer or the Canon help line.
Troubleshooting
341

When a Problem Cannot Be Solved(P. 374)
Document Jams in the Feeder (MF244dw)
If there are documents placed in the feeder, remove them rst. Then, follow the procedure below.
1Open the feeder cover.
2Gently pull out the document.
3Close the feeder cover.
Paper Jams inside the Machine
1Remove the toner cartridge.
1Lift the operation panel.
Troubleshooting
342

The operation panel cannot be opened if the feeder or the platen glass cover is not completely closed.
Forcing the operation panel up may cause damage.
2Open the toner cover by the grip at the front right of the toner cover.
3Remove the toner cartridge.
2Gently pull out the document.
Troubleshooting
343

3Check whether paper is jammed inside the paper exit guide.
1Pull out toward you while pressing the button ( ) to open the paper exit guide.
2Gently pull out the document.
3Close the paper exit guide.
4Check whether paper is jammed inside the machine.
1Gently pull out any paper between the xing assembly ( ) and roller ( ) until you can see the edge of
the paper.
2Once the edge of the paper is visible, pull it out slowly.
Troubleshooting
344
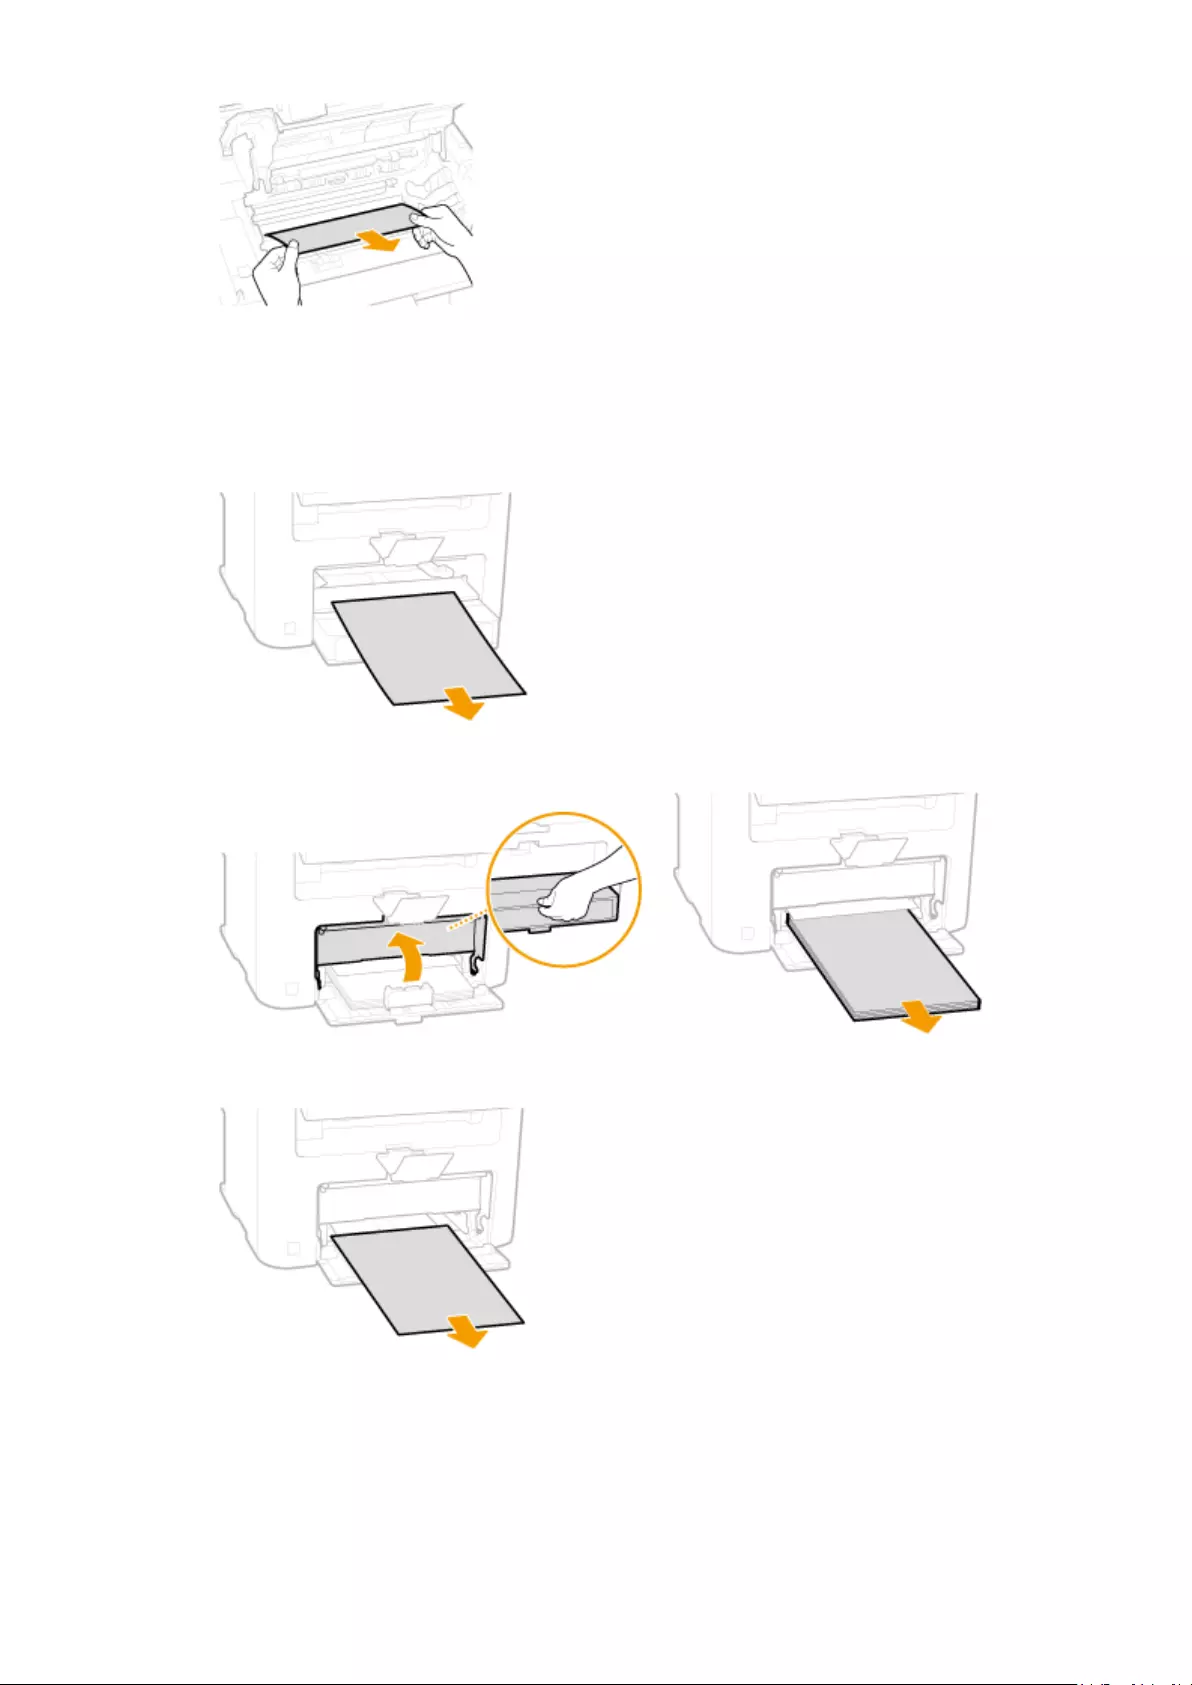
5Check whether paper is jammed in the manual feed slot or paper drawer.
1Slowly pull out any paper in the manual feed slot.
2Open the paper cover and remove any loaded paper.
3Gently pull out the document.
4Load paper and close the paper cover.
●For MF232w / MF231, proceed to step 7.
6Check whether paper is jammed inside the rear cover.
Troubleshooting
345
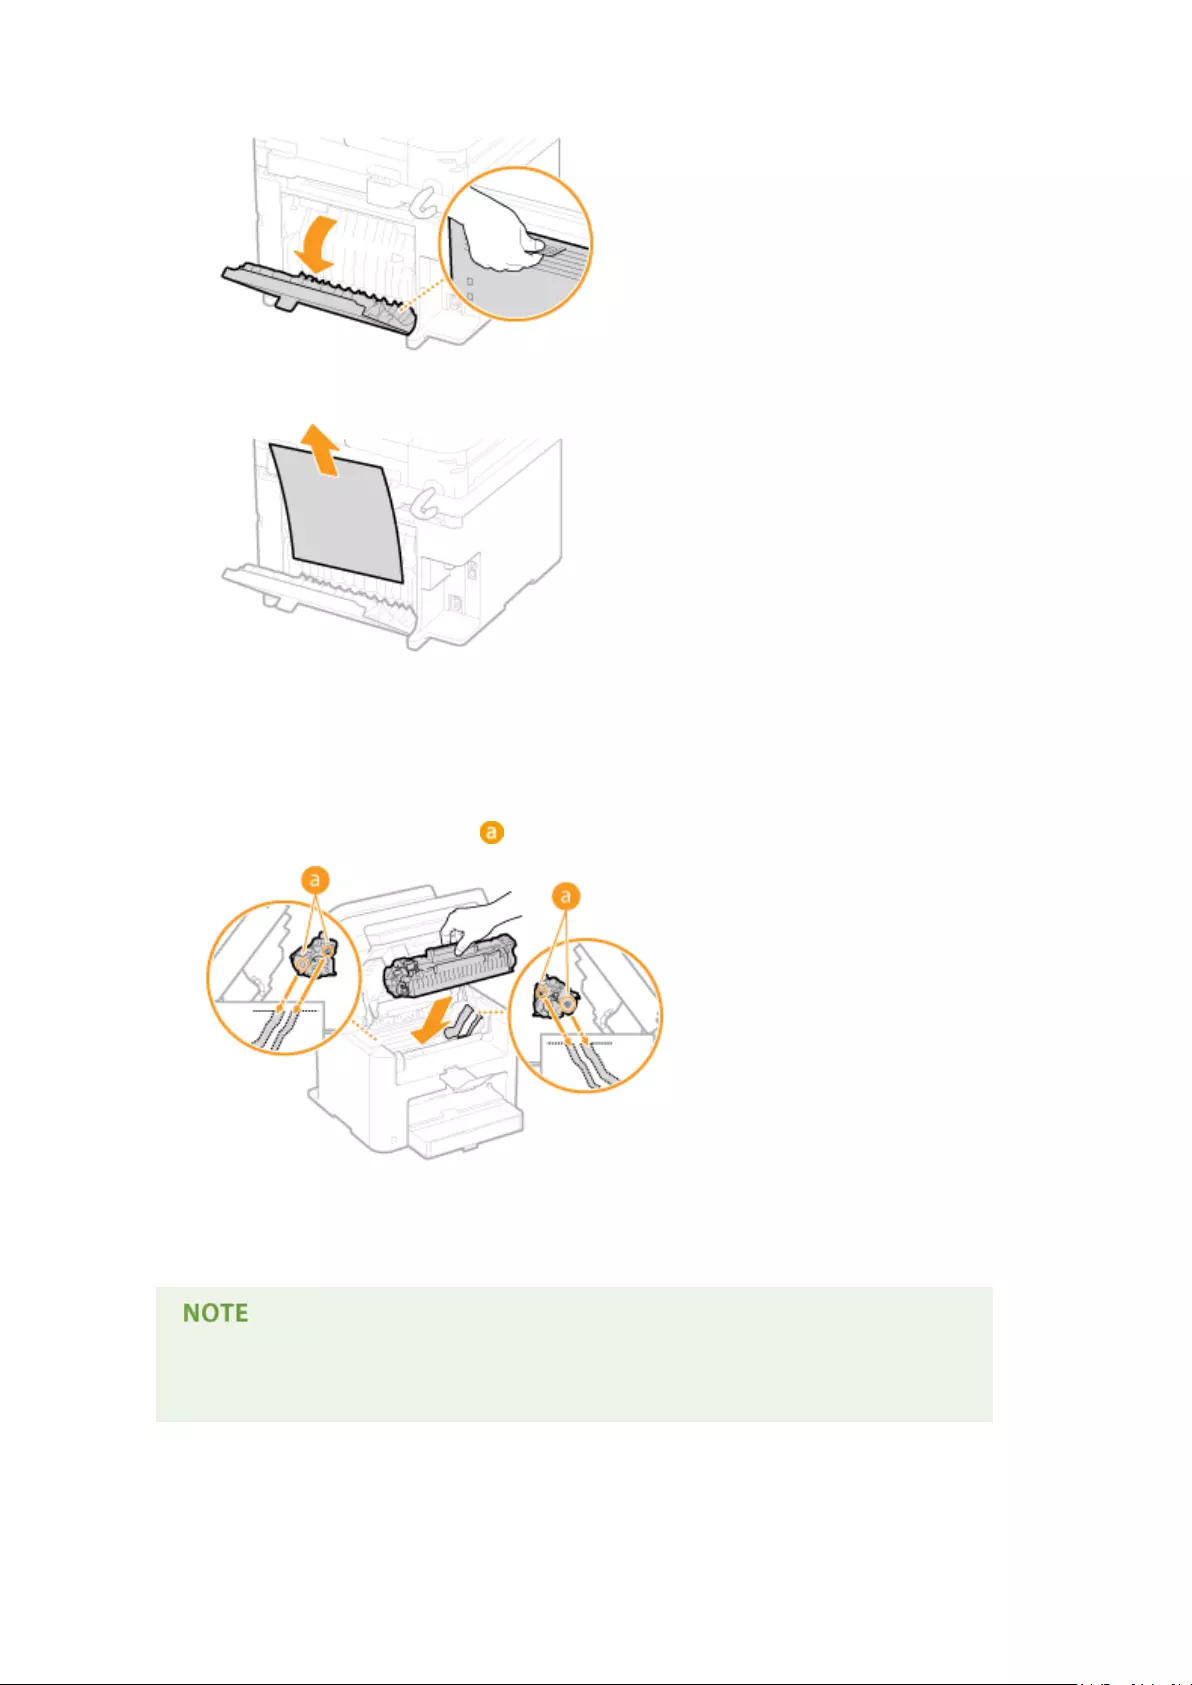
1Open the rear cover.
2Gently pull out the document.
3Close the rear cover.
7Install the toner cartridge.
●Align the right and left projections ( ) with the toner cartridge guides, and push securely all the way in.
8Close the toner cover, and lower the operation panel.
If you cannot close the toner cover
Make sure that the toner cartridge is inserted properly. Forcing it closed may cause damage.
Troubleshooting
346

When an Error Message Appears
15A8-061
If you cannot connect network or the memory is full, or you encounter operation problems, a message appears on the
display. Find out more information about messages in the following list.
A counterfeit or non-Canon cartridge may be in use.
You might not be using a Canon genuine toner cartridge.
●We recommend Canon genuine toner cartridges as replacement toner cartridges.
Consumables(P. 424)
Amount in cart. cannot be displ. correctly.
Toner cartridge is not installed correctly, or there is possible trouble on the toner cartridge.
●Reinstall the toner cartridge. If this message does not disappear after reinstalling several times, the toner
cartridge might be possibly broken. Contact the shop where you purchased the machine, or the Canon
Customer Care Center.
How to Replace Toner Cartridges(P. 390)
You might not be using a Canon genuine toner cartridge.
●We recommend Canon genuine toner cartridges as replacement toner cartridges.
Consumables(P. 424)
Cannot nd the access point.
When automatic setting with WPS was attempted, a wireless router could not be detected within a
specic period of time.
●Connect again paying attention to the time limit.
Setting Up Connection Using WPS Push Button Mode(P. 172)
Setting Up Connection Using WPS PIN Code Mode(P. 174)
An SSID of a wireless router was entered, but the entry was incorrect.
●Check the SSID and enter the correct one again.
Checking the SSID and Network Key(P. 184)
Setting Up Connection by Specifying Detailed Settings(P. 180)
A wireless router could not be detected due to setting problems of the network to be connected.
●Check whether the machine is properly installed and ready to connect to the network.
Installation/Settings Problems(P. 356)
●If the problem persists, check the security settings of the wireless router.
Troubleshooting
347

Cart. Comm. Error A counterfeit or non-Canon cartridge may be in use.
Toner cartridge is not installed correctly, or there is possible trouble on the toner cartridge.
●Reinstall the toner cartridge. If this message does not disappear after reinstalling several times, the toner
cartridge might be possibly broken. Contact the shop where you purchased the machine, or the Canon
Customer Care Center.
How to Replace Toner Cartridges(P. 390)
You might not be using a Canon genuine toner cartridge.
●We recommend Canon genuine toner cartridges as replacement toner cartridges.
Consumables(P. 424)
Cart. end of lifetime. Rplcmt. recommended.
The toner cartridge has reached the end of its lifetime.
●Replacement of the toner cartridge is recommended.
How to Replace Toner Cartridges(P. 390)
Check the authentication settings.
The authentication method set on the machine does not match the authentication method set on the
RADIUS server.
●Check that the same authentication method is set on this machine and the RADIUS server, and set the
correct authentication method.
Conguring IEEE 802.1X Authentication(P. 252)
Could not connect. Check the PSK settings.
The network key (PSK) of a wireless router to be connected is not set to the machine correctly.
●Check the network key (PSK) of the wireless router, and set it to the machine again.
Checking the SSID and Network Key(P. 184)
Setting Up Connection by Selecting a Wireless Router(P. 177)
Setting Up Connection by Specifying Detailed Settings(P. 180)
●If the problem persists even after checking the network key, check whether the machine is properly
installed and ready to connect to the network.
Installation/Settings Problems(P. 356)
Could not connect using Access Point Mode.
Connection in Access Point Mode failed due to an error.
●Wait a few moments and try again. If you still cannot connect, try switching the machine off briey.
Troubleshooting
348

Make Direct Connection (Access Point Mode)(P. 144)
Could not connect using the wireless LAN.
A connection failed due to an error while setting wireless LAN connection.
●Restart the machine and set again.
●If the problem persists even after restarting the machine, check whether the machine is properly installed
and ready to connect to the network.
Installation/Settings Problems(P. 356)
●If the problem persists even after checking the wireless LAN connection, check the security settings of the
wireless router.
Could not connect using WPS.
When automatic setting with WPS was attempted, the connection failed due to an error.
●Wait for a while, and set again. If the problem persists, check whether the wireless router supports WPS.
If WPS is supported:
Check whether the machine is properly installed and ready to connect to the network.
Installation/Settings Problems(P. 356)
If WPS is not supported:
Set using another connecting method.
Connecting to a Wireless LAN(P. 170)
Could not detect any connections from wireless devices.
It was not possible to detect any mobile device within the predetermined length of time.
●Connect again paying attention to the time limit.
Using the Machine in Direct Connection (in Access Point Mode)(P. 144)
Could not perform cleaning.
Paper jammed during cleaning.
●Remove the jammed paper, set paper correctly, and perform cleaning again.
Clearing Jams(P. 341)
Fixing Assembly(P. 383)
Could not perform Shared Key auth. Check WEP settings.
The network key (the WEP key) of a wireless router to be connected is not set to the machine correctly.
●Check the network key (the WEP key) of the wireless router, and set it to the machine again.
Troubleshooting
349

Checking the SSID and Network Key(P. 184)
Setting Up Connection by Specifying Detailed Settings(P. 180)
●Connect again by selecting a wireless router or by manually changing the WEP authentication method to
<Open System>.
Setting Up Connection by Selecting a Wireless Router(P. 177)
Setting Up Connection by Specifying Detailed Settings(P. 180)
The authentication method of the machine is set to <Shared Key>, but that of the wireless router is set to
«Open System.»
●Change the WEP authentication method to «Shared Key» at the wireless router, and connect again. For
more information about how to change, see the instruction manuals for your networking devices or
contact your manufacturer.
Could not update the device time because its battery has run out. Cannot
use Google Cloud Print if the time settings are incorrect.
The machine’s battery has run out and the correct time settings could not be kept.
●Set the correct time again.
Current Date/Time Settings(P. 304)
Direct Connection terminated.
Connection between the machine and the mobile device was terminated.
●Reestablish Direct Connection.
Using the Machine in Direct Connection (in Access Point Mode)(P. 144)
Google Cloud Print not avail. Server auth err
Cloud Print could not perform server authentication, or could not acquire information for registration.
●Check whether the date and time settings are correctly specied.
Date/Time Settings(P. 303)
Google Cloud Print not avail. Server comm err
Cloud Print is unavailable due to an error.
Check whether the machine is correctly connected to a wireless LAN or wired LAN.
Connecting to a Wireless LAN(P. 170)
Connecting to a Wired LAN(P. 169)
●A port that is used for Cloud Print may be blocked by a rewall or other protection. Check whether the
5222 port is available with your computer.
●If a proxy server is used on the network, check whether the proxy settings on the machine and the server
are correct. For details, contact your Network Administrator.
Troubleshooting
350

Setting a Proxy (MF244dw / MF232w)(P. 243)
Incorrect number of characters/invalid characters entered.
The network key (the WPA/WPA2-PSK or WEP key) of a wireless router is not entered correctly.
●Check the network key (the WPA/WPA2-PSK or WEP key) of the wireless router, and set it to the machine
again. For more information about how to check the network key, see the instruction manuals for your
networking devices or contact your manufacturer.
Checking the SSID and Network Key(P. 184)
Setting Up Connection by Selecting a Wireless Router(P. 177)
Setting Up Connection by Specifying Detailed Settings(P. 180)
Insert the toner cartridge.
The toner cartridge is not set or properly set.
●Properly set the toner cartridge.
How to Replace Toner Cartridges(P. 390)
Maximum number of wireless devices connected w/ Direct Connection has
been reached. To connect other devices, terminate some of current
connections.
The number of directly connected mobile devices is at a maximum.
●To connect other devices by Direct Connection, disconnect current device(s) and try connecting again.
Using the Machine in Direct Connection (in Access Point Mode)(P. 144)
No Paper: XXXX*
*<Drawer 1> or <MP Tray> is displayed for XXXX.
Paper is not loaded in the paper drawer or the manual feed slot.
●Load the paper.
Loading Paper(P. 42)
Paper on which reports or lists can be printed is not loaded.
●Reports or lists can be printed on A4 or Letter size paper. Load A4 or Letter size paper and set its size.
Loading Paper(P. 42)
Specifying Paper Size and Type(P. 53)
Troubleshooting
351

No reply from the destination.
A network cable may be disconnected, or there may be a problem in a switch.
●Check the status of the network cables and switches.
No response from host.
The machine is not connected to a network correctly.
●Check the machine and network settings, and connect again.
Connecting to a Network(P. 166)
Paper jammed.
Paper jams.
●Remove the jammed paper or document, and print again (Printing may resume automatically).
Clearing Jams(P. 341)
Preparing a cartridge is recommended.
The toner cartridge needs to be replaced soon.
●Shake the toner cartridge to evenly distribute the toner inside the toner cartridge. It is recommended to
replace the toner cartridge when printing a large volume of documents.
Before Replacing the Toner Cartridge(P. 388)
Replacing Toner Cartridges(P. 386)
Set the correct authentication information.
The client authentication information (key pair and certicate, user name and password, or CA
certicate) is not set correctly.
●Check the specied authentication method and authentication information (key pair and certicate, user
name and password, and CA certicate).
Conguring IEEE 802.1X Authentication(P. 252)
Verifying Key Pairs and Digital Certicates(P. 269)
Size/Settings Mismatch
The paper size setting on the operation panel does not match the loaded paper size.
●Match the paper size setting specied in <Paper Settings> and the size of the paper that is actually loaded.
Troubleshooting
352

To use the loaded paper
Change the setting of <Paper Settings> to match the loaded paper size.
Specifying Paper Size and Type(P. 53)
If printing from a computer, check whether the paper size setting in the printer driver matches the loaded
paper size.
To load paper without changing the settings
Load the paper with the size that is set to <Paper Settings>.
Loading Paper(P. 42)
The connection with the PC has been lost. Check the connection.
The connection to the computer was lost during a scan.
●Check the connection between the machine and the computer.
Preparing to Use the Machine as a Scanner (MF244dw / MF232w)(P. 129)
The memory is full. Scanning will be canceled. Print?
A document could not be scanned due to insucient memory space.
●Select whether to print up to the scanned pages or to cancel the scanning. If you cancel, divide the
document into multiple sections and scan them, or change the scanning settings.
The WEP key is not set correctly. Check the WEP settings.
The network key (the WEP key) of a wireless router to be connected is not set to the machine correctly.
●Check the network key (the WEP key) of the wireless router, and set it to the machine again.
Checking the SSID and Network Key(P. 184)
Setting Up Connection by Selecting a Wireless Router(P. 177)
Setting Up Connection by Specifying Detailed Settings(P. 180)
The authentication method of the machine is set to <Shared Key>, but that of the wireless router is set to
«Open System.»
●Connect again by selecting a wireless router or by manually changing the WEP authentication method to
<Open System>.
Setting Up Connection by Selecting a Wireless Router(P. 177)
Setting Up Connection by Specifying Detailed Settings(P. 180)
●Change the WEP authentication method to «Shared Key» at the wireless router, and connect again. For
more information about how to change, see the instruction manuals for your networking devices or
contact your manufacturer.
Use Remote UI to set info. necessary for authentication.
The IEEE 802.1X settings are incorrect.
Troubleshooting
353

●Check whether [Login Name] is set correctly.
●Check whether the [Use TLS], [Use TTLS], or [Use PEAP] check box is selected.
●If using TLS, check whether a key pair is registered.
●If using TTLS or PEAP, check whether a user name and password are set correctly.
Conguring IEEE 802.1X Authentication(P. 252)
Troubleshooting
354

Common Problems
15A8-062
If you encounter problems when using the machine, check the items in this section before contacting us. If the
problems persist, contact your local authorized Canon dealer or the Canon help line.
Check the Following
Is the machine turned ON? Is the power cord connected?
●If the machine is turned ON but does not respond, turn it OFF, check whether the power cord is connected
correctly, and turn it back ON. For information on connecting the power cord, see Getting Started.
Manuals Included with the Machine(P. 425)
Are the LAN cable and USB cable connected correctly?
●Check whether these cables are connected correctly.
Parts and Their Functions(P. 15)
Is sleep mode activated?
●If you leave the machine unattended for a specic period of time, it enters sleep mode for power
conservation, not allowing you to operate it.
To cancel sleep mode, press .
Is any message displayed on the screen?
●If a problem occurs, a message is displayed.
When an Error Message Appears(P. 347)
If a Problem Persists Even after Checking
Click the link that corresponds to the problem.
Installation/Settings Problems(P. 356)
Copy/Printing Problems(P. 360)
Troubleshooting
355

Installation/Settings Problems
15A8-063
See Common Problems(P. 355) also.
Problems with the Wireless/Wired LAN Connection (MF244dw / MF232w)(P. 356)
Problem with the USB Connection(P. 359)
Problem with the Print Server (MF244dw / MF232w)(P. 359)
Problems with the Wireless/Wired LAN Connection (MF244dw / MF232w)
The wireless LAN and wired LAN cannot be connected at the same time.
●The wireless LAN and wired LAN cannot be connected at the same time. The following can be used at the
same time: a USB cable and a wireless LAN, or a USB cable and a wired LAN.
Remote UI is not displayed.
●Are <Use HTTP> and <Use Remote UI> set to <On>?
Disabling HTTP Communication(P. 246)
Disabling Remote UI(P. 247)
●If the machine is connected to a wireless LAN, check that the Wi-Fi indicator is lit and the IP address is set
correctly, and then start the Remote UI again.
Operation Panel(P. 23)
Viewing Network Settings(P. 194)
●If the machine is connected to a wired LAN, check that the cable is connected rmly and the IP address is set
correctly, and then start the Remote UI again.
Connecting to a Wired LAN(P. 169)
Viewing Network Settings(P. 194)
●Are you using a proxy server? If so, add the machine’s IP address to the [Exceptions] list (addresses that do
not use the proxy server) in the Web browser’s proxy settings dialog.
●Is communication not limited by the rewall on your computer? If IP addresses are or an MAC address is
incorrectly entered, the Remote UI cannot be displayed. In that case, you need to use the operation panel to
set <IPv4 Address Filter>, <IPv6 Address Filter>, or <MAC Address Filter> to <Off>.
Restricting Communication by Using Firewalls (MF244dw / MF232w)(P. 233)
IPv4 Address Filter (P. 331)
IPv6 Address Filter (P. 332)
MAC Address Filter (P. 332)
A connection to a network cannot be established.
●The IP address may not be set correctly. Set the IP address again.
Setting IP Addresses(P. 187)
●When you connect the machine to a computer via wireless LAN, check whether the machine is properly
installed and ready to connect to the network.
When the Machine Cannot Connect to the Wireless LAN(P. 357)
Troubleshooting
356

You are unsure of the set IP address. Viewing Network Settings(P. 194)
The connection method cannot be switched between a wired LAN and a
wireless LAN.
●Did you select a wired LAN or a wireless LAN on the operation panel on the machine as well? This selection is
required to have the machine switch to your selection.
Selecting Wired LAN or Wireless LAN(P. 168)
You are unsure of the SSID or the network key of the wireless router to be
connected. The SSID is not displayed on the screen.
●Check whether the SSID can be found on the wireless router or package box.
●Check the SSID or the network key of the wireless router by using Canon MF/LBP Wireless Setup Assistant.
Checking the SSID and Network Key(P. 184)
The SSID of the wireless router to be connected is not displayed in the access
point list.
●Check whether the SSID is correct.
Checking the SSID and Network Key(P. 184)
●If the SSID of the wireless router is hidden (using a stealth mode*), set the SSID to be visible on the wireless
router.
* A mode that disables the SSID auto-detection of other devices.
●Check whether the machine is properly installed and ready to connect to the network.
When the Machine Cannot Connect to the Wireless LAN(P. 357)
The machine dials up to an unintended connection destination (if a dialup
router is connected to a network).
●If a dialup router does not need to pass broadcast packets, set the dialup router so that the broadcast
packets will not pass. If the dialup router needs to pass broadcast packets, check whether the settings are
correct.
●If a DNS server is located in an external network, set the IP address to be connected, not the host name, even
if connecting to the devices that are on the network that is connected to the machine.
●If a DNS server is located on a network that is connected to the machine and the information about the
devices that are connected to an external network is registered to the DNS server, check whether the settings
are correct.
When the Machine Cannot Connect to the Wireless LAN
Check the status of your computer.
●Have the settings of the computer and the wireless router been completed?
●Are the cables of the wireless router (including the power cord and LAN cable)
correctly plugged in?
●Is the wireless router turned on?
Troubleshooting
357

If the problem persists even after checking the above:
●Turn off the devices, and then turn them on again.
●Wait for a while, and try again to connect to the network.
Check whether the machine is turned ON.
●If the machine is turned ON, turn it OFF, and then turn it back ON.
Check the installation site of the machine and the wireless router.
●Is the machine too far from the wireless router?
●Are there any obstacles such as walls between the machine and the wireless router?
●Are there any appliances such as microwave ovens or digital cordless phones that
emit radio waves near the machine?
Perform one of the following settings again.
Setting Up Connection Using WPS Push Button Mode(P. 172)
Setting Up Connection Using WPS PIN Code Mode(P. 174)
Setting Up Connection by Selecting a Wireless Router(P. 177)
Setting Up Connection by Specifying Detailed Settings(P. 180)
When you need to manually set up the connection
If the wireless router is set as described below, manually enter all the required information for the wireless LAN
connection ( Setting Up Connection by Specifying Detailed Settings(P. 180) ).
●ANY connection refusal* is activated.
●The WEP key that was automatically generated (hexadecimal) is selected.
●The stealth mode is activated.
* A function in which the wireless router refuses the connection if the SSID on the device to be connected is set to «ANY»
or is blank.
When you need to change the settings of the wireless router
If the wireless router is set as described below, change the settings of the router.
●The MAC address packet ltering is set.
Troubleshooting
358

●When only IEEE 802.11n is used for the wireless communication, WEP is selected or the WPA/WPA2
encryption method is set to TKIP.
Problem with the USB Connection
Cannot communicate.
●Change the USB cable. If you are using a long USB cable, replace it with a short one.
●If you are using a USB hub, connect the machine directly to your computer using a USB cable.
Problem with the Print Server (MF244dw / MF232w)
You cannot nd the print server to connect to.
●Are the print server and computer connected correctly?
●Is the print server running?
●Do you have user rights to connect to the print server? If you are not sure, contact the server administrator.
●Is [Network discovery] enabled? (Windows Vista/7/8/10/Server 2008/Server 2012)
Enabling [Network discovery](P. 434)
You cannot connect to a shared printer.
●On the network, does the machine appear among the printers of the print server? If it is not displayed,
contact the network or server administrator.
Displaying Shared Printers in the Print Server(P. 435)
Troubleshooting
359

Copy/Printing Problems
15A8-064
See Common Problems(P. 355) also.
Printing/copy results are not satisfactory. Paper creases or curls. When You
Cannot Print Properly(P. 363)
You cannot print.
●Can you print a Windows test page? If you can print a Windows test page, there is no problem with the
machine or the printer driver. Check the print settings of your application.
Printing a Test Page in Windows(P. 436)
If you cannot print a test page, check the following according to your environment.
Wireless LAN connection (MF244dw / MF232w)
●Check the connection status (signal strength) of the wireless LAN.
Viewing Network Settings(P. 194)
If the connection is poor, try the following.
●Change the channel of your wireless LAN router. If you have more than one router, set the channels to be
at least ve channels apart.
●If you can change the radio output power of your wireless LAN router, raise the output power.
●If your computer is connected to a wireless LAN, are the computer and this machine using the same
wireless LAN router SSID? If they are different, reset the wireless LAN connection settings of this machine.
Viewing Network Settings(P. 194)
Checking the SSID to Which Your Computer Is Connected(P. 441)
Connecting to a Wireless LAN(P. 170)
When you reset wireless LAN connection settings
●As the wireless LAN router, select the one with the SSID to which the computer is connected.
●Have you selected the correct port? If there is no port to use, create a port.
Checking the Printer Port(P. 439)
Conguring Printer Ports(P. 201)
●Is communication not limited by the rewall on your computer? If IP addresses are incorrectly entered,
you will be not able to access the machine. In that case, you need to use the operation panel to set <IPv4
Address Filter> or <IPv6 Address Filter> to <Off>.
Restricting Communication by Using Firewalls (MF244dw / MF232w)(P. 233)
IPv4 Address Filter (P. 331)
IPv6 Address Filter (P. 332)
●Disable security software and other resident software.
●Reinstall the printer driver in accordance with the MF Driver Installation Guide.
●Can you print from other computers on the network? If you also cannot print from other computers,
contact your local authorized Canon dealer or the Canon help line.
Wired LAN connection (MF244dw / MF232w)
Troubleshooting
360

●Have you selected the correct port? If there is no port to use, create a port.
Checking the Printer Port(P. 439)
Conguring Printer Ports(P. 201)
●Is communication not limited by the rewall on your computer? If IP addresses are or an MAC address is
incorrectly entered, you will be not able to access the machine. In that case, you need to use the operation
panel to set <IPv4 Address Filter>, <IPv6 Address Filter>, or <MAC Address Filter> to <Off>.
Restricting Communication by Using Firewalls (MF244dw / MF232w)(P. 233)
IPv4 Address Filter (P. 331)
IPv6 Address Filter (P. 332)
MAC Address Filter (P. 332)
●Disable security software and other resident software.
●Reinstall the printer driver in accordance with the MF Driver Installation Guide.
●Can you print from other computers on the network? If you also cannot print from other computers,
contact your local authorized Canon dealer or the Canon help line.
USB connection
●Have you selected the correct port? If there is no port to use or you are not sure, reinstall the printer driver
in accordance with the MF Driver Installation Guide. When you reinstall the printer driver, the correct port
is created automatically.
Checking the Printer Port(P. 439)
●Is bidirectional communication enabled? Enable bidirectional communication, and restart the computer.
Checking Bidirectional Communication(P. 440)
●Disable security software and other resident software.
●Connect to another USB port on the computer.
●Can you print from a USB connection to another computer? If you also cannot print from other computers,
contact your local authorized Canon dealer or the Canon help line.
Via print server (MF244dw / MF232w)
●Can you print from the print server? If you can print from the print server, check the connection between
the print server and your computer.
Problem with the Print Server (MF244dw / MF232w)(P. 359)
●Disable security software and other resident software.
●Reinstall the printer driver in accordance with the MF Driver Installation Guide.
●Can you print from other computers via the print server? If you also cannot print from other computers,
contact your local authorized Canon dealer or the Canon help line.
Printing seems to be slow. *
●Print or delete data in memory.
* When the free space in memory is running low, the processing speed of the machine becomes slow, just as a computer
does. There is nothing abnormal.
Troubleshooting
361

You cannot print with Google Cloud Print. Using Google Cloud Print(P. 159)
It takes a long time before printing starts.
●Did you print to narrow width paper? After you print to narrow width paper, the machine may cool itself to
maintain the print quality. As a result, it may take some time before the next job is printed. Wait until the
machine is ready to print. Printing will resume when the temperature inside the machine has fallen.
A blank sheet is output (nothing is printed).
●Did you pull the sealing tape out when loading the toner cartridge? If you did not pull it out, remove the
toner cartridge, pull the sealing tape out, and reload the toner cartridge.
How to Replace Toner Cartridges(P. 390)
Troubleshooting
362

When You Cannot Print Properly
15A8-065
If printing results are not satisfactory, or paper creases or curls, try the following solutions. If the problems persist,
contact your local authorized Canon dealer or the Canon help line.
Smudge Marks Appear on the
Edge of Printouts(P. 365)
Streaks Appear on
Printouts(P. 365)
White Streaks Appear(P. 366)
Toner Smudges and Splatters
Appear(P. 366)
Printouts Are Faded(P. 367) Printed Pages Have White
Specks(P. 367)
A Portion of the Page Is Not
Printed(P. 368)
Print Density Is Uneven(P. 368) Printouts Are Grayish(P. 369)
Troubleshooting
363
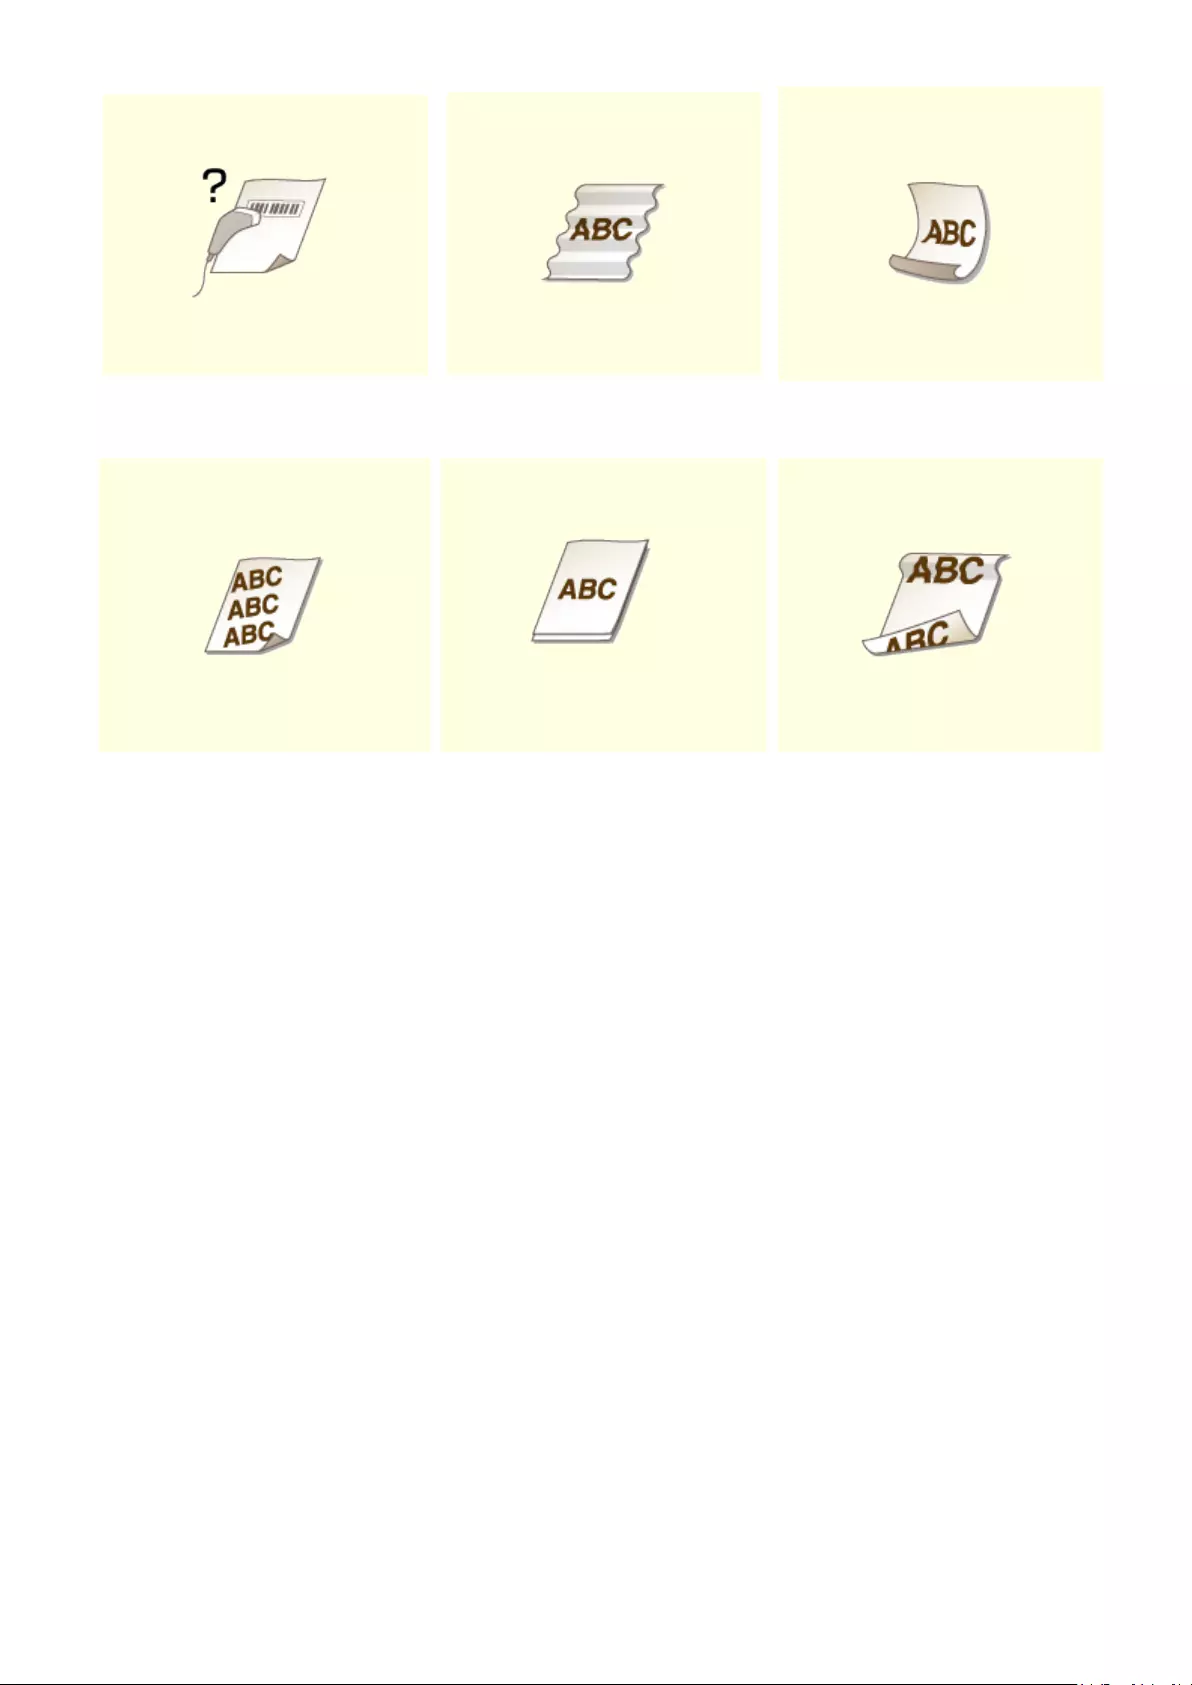
Cannot Scan a Printed
Barcode(P. 369)
Paper Creases(P. 370) Paper Curls(P. 370)
Printouts Are Skewed(P. 372) Paper Is Not Fed/Two or More
Sheets Are Fed Together(P. 372)
Paper Jams Frequently with 2-
Sided Printing (MF244dw)(P. 373)
Troubleshooting
364

Printing Results Are Not Satisfactory
15A8-066
Dirt inside the machine may affect printing results. Perform care and cleaning to the machine rst.
Cleaning the Machine(P. 377)
Smudge Marks Appear on the Edge of Printouts
Do you print data without margins?
●This symptom occurs if a margin is set to none in the printer driver. A margin of 5 mm or less around the
edge of paper or 10 mm or less around the edge of envelopes is not printable with the machine. Make
sure to have margins around the document to print.
[Finishing] tab [Advanced Settings] [Expand Print Region and Print] [Off]
Streaks Appear on Printouts
Are you using appropriate paper?
●Check usable paper, and replace with appropriate paper.
Paper(P. 419)
Loading Paper(P. 42)
●If using the appropriate paper still does not solve the problem, change one of the <Special Printing Mode
Z>, <Special Printing Mode C>, and <Special Printing Mode D> settings.
Special Processing (P. 325)
●To print from a computer, change the setting for [Special Print Adjustment] in the printer driver.
[Mode 1] has the least effect while [Mode 4] has the most effect. Try each in order starting with [Mode 1].
Increasing the effect makes the print density lighter. Outlines may also be blurred or images may appear
somewhat grainy.
Troubleshooting
365

Did you just replace the toner cartridge? Have you not used the printer for a
long period of time?
●Change the setting for <Special Printing Mode B>.
Special Processing (P. 325)
White Streaks Appear
Is the platen glass dirty?
●Clean the platen glass and the underside of the feeder.
Platen Glass(P. 379)
Is the amount remaining in the toner cartridge nearly empty?
●Check the amount remaining in the toner cartridge, and replace the toner cartridges as necessary.
Replacing Toner Cartridges(P. 386)
Toner Smudges and Splatters Appear
Are you using appropriate paper?
●Check usable paper, and replace with appropriate paper.
Paper(P. 419)
Loading Paper(P. 42)
●Change the setting for <Special Printing Mode U>.
Special Processing (P. 325)
Is the amount remaining in the toner cartridge nearly empty?
●Check the amount remaining in the toner cartridge, and replace the toner cartridges as necessary.
Troubleshooting
366

Replacing Toner Cartridges(P. 386)
Printouts Are Faded
Is the amount remaining in the toner cartridge nearly empty?
●Check the amount remaining in the toner cartridge, and replace the toner cartridges as necessary.
Replacing Toner Cartridges(P. 386)
Are you using appropriate paper?
●Check usable paper, and replace with appropriate paper. Also, specify the paper size and type settings
properly.
Paper(P. 419)
Loading Paper(P. 42)
Specifying Paper Size and Type(P. 53)
Are you using the machine in a special environment (in particular, a low-
temperature environment)?
●Toner may not adhere adequately, causing printouts to appear faded. Change the setting for <Special
Printing Mode K>.
Special Processing (P. 325)
Printed Pages Have White Specks
Are you using appropriate paper?
●Check usable paper, and replace with appropriate paper.
Paper(P. 419)
Loading Paper(P. 42)
Troubleshooting
367

Is the drum in the toner cartridge deteriorated?
●Replace the toner cartridge with a new one.
Replacing Toner Cartridges(P. 386)
Are you printing a document with strong contrasts?
●Change the setting for [Special Print Mode] using the Printer Driver.
When set to [Special Settings 2], print density is lighter compared with [Off] or [Special Settings 1]. Text and
lines may also appear faded.
A Portion of the Page Is Not Printed
Do you print data without margins?
●This symptom occurs if a margin is set to none in the printer driver. A margin of 5 mm or less around the
edge of paper or 10 mm or less around the edge of envelopes is not printable with the machine. Make
sure to have margins around the document to print.
[Finishing] tab [Advanced Settings] [Expand Print Region and Print] [Off]
Print Density Is Uneven
Is the amount remaining in the toner cartridge nearly empty?
●Check the amount remaining in the toner cartridge, and replace the toner cartridges as necessary.
Replacing Toner Cartridges(P. 386)
Is printing sometimes uneven when printing ne lines?
●Change the setting for <Special Printing Mode J>.
Troubleshooting
368

Special Processing (P. 325)
Printouts Are Grayish
Is <Correct Density> in <Copy Settings> set too dark?
●Adjust the setting so that density is lighter.
Correct Density(P. 311)
Is the printer installed where it is subject to direct sunlight or strong light?
●Install the printer in an appropriate location.
Installation(P. 3)
Relocating the Machine(P. 393)
Was the toner cartridge been left in direct sunlight for a long period of time?
●Store the toner cartridge in an appropriate location for two to three hours, then try printing again. This
may solve the problem. If the problem persists, replace the toner cartridge.
Replacing Toner Cartridges(P. 386)
Cannot Scan a Printed Barcode
Are you trying to scan a barcode printed with factory default settings?
●In the printer driver, specify [Special Settings 1] for the setting of [Special Print Mode].
●When set to [Special Settings 1], print density is lighter compared with [Off]. Text and lines may also
appear faded.
●White specks may appear in images when this feature is used with paper other than lightweight paper.
Troubleshooting
369

Paper Creases or Curls
15A8-067
Paper Creases
Is paper loaded correctly?
●If paper is not loaded below the load limit guide or is loaded obliquely, it may crease.
Loading Paper(P. 42)
Are you using paper that has absorbed moisture?
●Replace with appropriate paper.
Loading Paper(P. 42)
Are you using appropriate paper?
●Check usable paper, and replace with appropriate paper.
Paper(P. 419)
●If the problem persists after using appropriate paper, change the setting for <Special Printing Mode V>.
Special Processing (P. 325)
Paper Curls
Are you using appropriate paper?
●Check usable paper, and replace with appropriate paper. Also, specify the paper size and type settings
properly.
Paper(P. 419)
Loading Paper(P. 42)
Troubleshooting
370

Specifying Paper Size and Type(P. 53)
●If using plain paper (60 to 89 g/m²), making the following change in the printer driver may solve the
problem.
[Page Setup] tab [Paper Type] [Plain L [60-89 g/m2]].
●If the use of the appropriate paper does not solve the poblem, change the setting for <Special Printing
Mode V>.
Special Processing(P. 325)
Troubleshooting
371

Paper Is Fed Incorrectly
15A8-068
Printouts Are Skewed
Do the paper guides align with the edges of the paper?
●If the paper guides are too loose or too tight, the printouts are skewed.
Loading Paper(P. 42)
Is the paper source the manual feed slot?
●Load the paper into the paper drawer.
Loading Paper in the Paper Drawer(P. 44)
Are you printing on curled envelopes?
●Uncurl the envelopes, and print again.
Loading Envelopes(P. 49)
Paper Is Not Fed/Two or More Sheets Are Fed Together
Is paper loaded correctly?
●Fan the paper stack thoroughly so that paper is not stuck together.
●Check whether paper is loaded correctly.
Loading Paper(P. 42)
●Check whether the number of sheets of paper loaded is appropriate and whether the appropriate paper is
used.
Paper(P. 419)
Troubleshooting
372

Loading Paper(P. 42)
●Check whether mixed sizes and types of paper are loaded together.
Paper Jams Frequently with 2-Sided Printing (MF244dw)
Does paper jam frequently especially with lightweight paper or curled paper
during 2-sided printing?
●Set <Special Printing Mode I> to <On>.
Special Processing (P. 325)
Troubleshooting
373

When a Problem Cannot Be Solved
15A8-069
If you cannot solve a problem by referring to the information in this chapter, contact your local authorized Canon
dealer or the Canon help line.
Do not disassemble or repair the machine yourself
If you disassemble or repair the machine yourself, it may not be covered by warranty.
◼When Contacting Canon
When contacting us, have the following information ready:
●Product name (MF244dw / MF232w / MF231)
●Dealer where you purchased the machine
●Details about your problem (such as what you did and what happened as a result)
●Serial number (eight alphanumeric characters long, found on the label on the back side of the machine)
MF244dw MF232w / MF231
Troubleshooting
374

Maintenance
Maintenance ………………………………………………………………………………………………………………………………….. 376
Cleaning the Machine ……………………………………………………………………………………………………………………… 377
Exterior ……………………………………………………………………………………………………………………………………… 378
Platen Glass ……………………………………………………………………………………………………………………………….. 379
Feeder (MF244dw) ………………………………………………………………………………………………………………………. 382
Fixing Assembly ………………………………………………………………………………………………………………………….. 383
Machine Interior …………………………………………………………………………………………………………………………. 384
Replacing Toner Cartridges ……………………………………………………………………………………………………………… 386
Before Replacing the Toner Cartridge ……………………………………………………………………………………………. 388
How to Replace Toner Cartridges ………………………………………………………………………………………………….. 390
Relocating the Machine …………………………………………………………………………………………………………………… 393
Viewing the Counter Value ………………………………………………………………………………………………………………. 395
Initializing Settings …………………………………………………………………………………………………………………………. 396
Initializing Menu …………………………………………………………………………………………………………………………. 397
Initialize Eco Report Counter (MF244dw / MF232w) ………………………………………………………………………….. 399
Initializing All Data/Settings ………………………………………………………………………………………………………….. 400
Maintenance
375

Maintenance
15A8-06A
This chapter describes upkeep of the machine, including how to clean the machine and initialize settings.
◼Basic Cleaning Cleaning the Machine(P. 377)
●The machine becomes dirty Exterior(P. 378)
●Smudge marks appear on originals or printouts Platen Glass(P. 379) Feeder
(MF244dw)(P. 382)
●Streaks appear on printouts Fixing Assembly(P. 383)
●The interior of the machine becomes dirty Machine Interior(P. 384)
◼Replacing Toner Cartridges
●If you want to check the remaining toner cartridge level Replacing Toner
Cartridges(P. 386)
●How to replace toner cartridges How to Replace Toner Cartridges(P. 390)
◼Relocating the Machine
●Relocating the machine for maintenance or an oce move Relocating the
Machine(P. 393)
◼Checking the Total Pages Printed by the Machine
If you want to check the total page number of printouts Viewing the Counter Value(P. 395)
◼Initializing Settings
If you want to restore the settings Initializing Settings(P. 396)
Maintenance
376

Cleaning the Machine
15A8-06C
Regularly clean the machine to prevent deterioration in printing quality and to ensure that you use it safely and easily.
Carefully read the safety instructions before you start cleaning. Maintenance and Inspections(P. 
Where to Clean
Exterior of the machine
Exterior(P. 378)
Rollers inside the feeder (MF244dw)
Feeder (MF244dw)(P. 382)
Interior of the machine and xing assembly
Fixing Assembly(P. 383)
Machine Interior(P. 384)
Platen glass and the underside of the feeder or the platen
grass cover
Platen Glass(P. 379)
Maintenance
377

Exterior
15A8-06E
Regularly wipe the exterior of the machine, especially around the ventilation slots, to keep the machine in good
condition.
●Ventilation slots are provided only on MF244dw.
1Turn OFF the machine, and unplug the power cord from the AC power outlet.
●When you turn OFF the machine, data that is waiting to be printed is deleted.
2Clean the exterior of the machine.
●Use a soft, well-wrung-out cloth dampened with water or a mild detergent diluted with water.
●To locate the ventilation slots, see Front Side(P. 16) .
3Wait for the exterior of machine to dry completely.
4Reconnect the power cord and turn ON the machine.
Maintenance
378
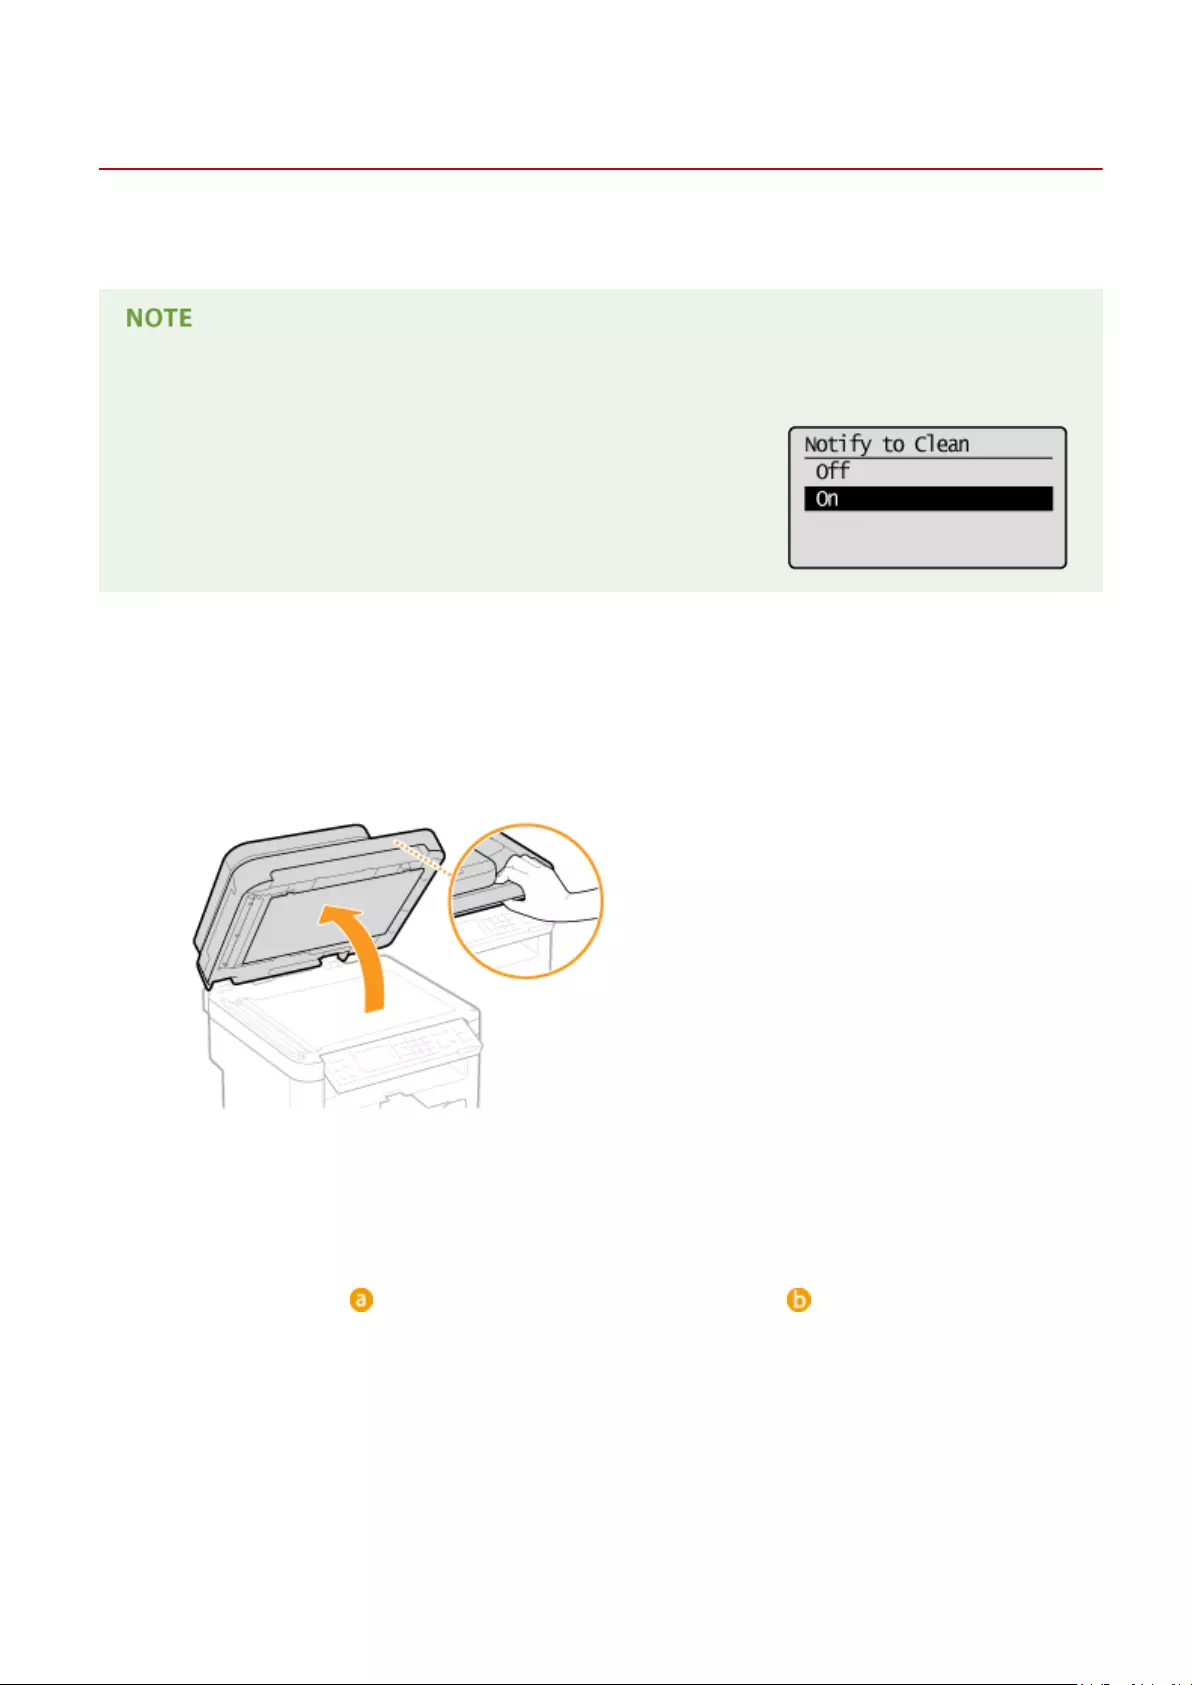
Platen Glass
15A8-06F
Regularly wipe off the dust from the platen glass and the underside of the feeder or the platen glass cover to prevent
smudges to be printed on documents or printouts.
Feeder scan area cleaning notication (MF244dw)
To display a message for soiling on the platen glass, set <Notify to Clean> to
<On>.
1Turn OFF the machine, and unplug the power cord from the AC power outlet.
●When you turn OFF the machine, data that is waiting to be printed is deleted.
2Open the feeder or the platen glass cover.
3Clean the platen glass and the underside of the feeder or the platen glass cover.
●Clean the areas with a cloth dampened with water. Then, wipe the area with a soft, dry cloth.
●For MF244dw, in addition to the platen glass and underside of the feeder, make sure to clean and wipe the
white strip of plate ( ) and the surface of the transparent plastic part ( ), too.
Maintenance
379

●When wiping the transparent plastic part ( ), take care not to bend the plastic.
If the problem persists (MF244dw)
Remove the transparent plastic part ( ) and wipe it.
1Hold the tabs ( ) at both ends of the transparent plastic part, and remove the plastic part by gently
lifting the rearward end rst.
●The plastic part ( ) is rather damageable. When removing it, be careful not to bend it.
2Wipe the scanning area ( ).
3Wipe the back side of the transparent plastic part.
Maintenance
380

4Wait for the plastic part to dry completely.
5Place the transparent plastic part back into position.
●Make sure of the proper orientation, then hold the tabs and place the plastic part back into position
by gently lowering the frontward end rst.
4Wait for the cleaned area to dry completely.
5Gently close the feeder or the platen glass cover.
6Reconnect the power cord and turn ON the machine.
Maintenance
381

Feeder
15A8-06H
Dust and graphite powder may adhere to the roller inside the feeder and cause smudges to appear on printouts. To
clean the feeder, perform the following procedure.
1Turn OFF the machine, and unplug the power cord from the AC power outlet.
●When you turn OFF the machine, data that is waiting to be printed is deleted.
2Open the feeder cover.
3Wipe roller ( ) inside feeder.
●Clean the areas with a well-wrung-out cloth dampened with water. Then, wipe the area with a soft, dry cloth.
4Gently close the feeder cover.
5Reconnect the power cord and turn ON the machine.
Maintenance
382

Fixing Assembly
15A8-06J
Dirt may adhere to the xing units inside the machine and cause black streaks to appear on printouts. To clean the
xing unit, perform the following procedure. Note that you cannot clean the xing unit when the machine has
documents waiting to be printed. To clean the xing unit, you need paper larger than plain A4 or Letter size paper. Set
the paper in the manual feed slot before performing the following procedure.
●Cleaning consumes the toner cartridge. Make sure that there is sucient toner cartridge remaining
beforehand.
●It takes approximately 90 seconds to clean the xing assembly.
Checking Toner cartridge Level(P. 387)
Loading Paper in the Manual Feed Slot(P. 47)
1Press .
2Use / to select <Adjustment/Maintenance>, and press .
3Select <Clean Fixing Assembly>, and press .
4Load paper (A4/LTR or larger) in the manual feed slot, and press .
●After cleaning is completed and the message <Finished.> appears, press to return to the copy mode
screen.
Maintenance
383

Machine Interior
15A8-06K
Clean the interior of the machine regularly so that toner/paper dust does not collect.
1Turn OFF the machine, and unplug the power cord from the AC power outlet.
●When you turn OFF the machine, data that is waiting to be printed is deleted.
2Lift the operation panel.
If you cannot lift the operation panel
Make sure the feeder or platen glass cover is completely closed. If a thick original such as a book is placed on
the platen glass, remove the original. Forcing the operation panel up may cause damage.
3Open the toner cover by the grip at the front right of the toner cover.
4Pull the toner cartridge out of the machine.
Maintenance
384

5Using a lint-free clean, soft, dry cloth, wipe away toner/paper dust from the inside.
6Install the toner cartridge.
●Align the right and left projections ( ) with the toner cartridge guides, and push securely all the way in.
7Close the toner cover, and lower the operation panel.
If you cannot close the toner cover
Make sure that the toner cartridge is inserted properly. Forcing it closed may cause damage.
8Reconnect the power cord and turn ON the machine.
Maintenance
385

Replacing Toner Cartridges
15A8-06L
The machine will display a message when a toner cartridge is nearly empty. Note that the print quality becomes poor if
you continue printing without taking any action. You can check the remaining toner cartridge level on the display.
When a Message Appear(P. 386)
If Printouts Are Poor in Quality(P. 386)
Checking Toner cartridge Level(P. 387)
◼When a Message Appear
Depending on which message is displayed, you will need to make sure that you have a replacement toner cartridge
ready or replace the toner cartridge. Before Replacing the Toner Cartridge(P. 388) How to Replace Toner
Cartridges(P. 390) Consumables(P. 424)
<Preparing a cartridge is recommended.>
This message noties you that a toner cartridge needs to be replaced soon. Shake the toner cartridge to evenly
distribute the toner inside the cartridge. Replace the toner cartridge if you see this message before you start to
print a large job.
Specify when this message is displayed
●You can set any value as the percentage of the amount remaining in the toner cartridge that triggers this
message. Displ. Timing for Cartridge Prep. Notif.(P. 324)
<Cart. end of lifetime. Rplcmt. recommended.>
This message noties you that a toner cartridge has reached the end of its lifetime. It is recommended that you
replace the cartridge with a new one. You can continue printing, but the print quality cannot be guaranteed.
◼If Printouts Are Poor in Quality
If your printouts begin to show any of the following features, one of your toner cartridges is nearly empty. Replace the
nearly empty toner cartridge even if no message is displayed.
Before Replacing the Toner Cartridge(P. 388)
How to Replace Toner Cartridges(P. 390)
White streaks appear Partially faded Uneven density
Maintenance
386

Toner smudges and splatters appear Blank space of originals becomes grayish in
printouts
◼Checking Toner cartridge Level
You can check the amount remaining in the toner cartridge according to the following, whenever you want to. It is
recommended that you check the level before you start to print a large job.
<Device Information> <Cartridge Level> Check the amount remaining
in the toner cartridge
Cartridge Level
Displays the amount remaining in the toner cartridges. Other internal parts may reach the end of their
lifetime before the toner runs out.
●The displayed amount remaining in the toner cartridge can be used only as a guide and may differ
from the actual amount.
LINKS
Consumables(P. 9)
Maintenance
387

Before Replacing the Toner Cartridge
15A8-06R
Perform the following before replacing the toner cartridge. The message may no longer appear, or print quality may
be improved. Review cautions for handling the toner cartridge before starting. Maintenance and Inspections(P.
Consumables(P. 9)
1Lift the operation panel.
If you cannot lift the operation panel
Make sure the feeder or platen glass cover is completely closed. If a thick original such as a book is placed on
the platen glass, remove the original. Forcing the operation panel up may cause damage.
2Open the toner cover by the grip at the front right of the toner cover.
3Pull the toner cartridge out of the machine.
Maintenance
388

4Shake the toner cartridge 5 or 6 times as shown below to evenly distribute the toner
inside the cartridge.
5Install the toner cartridge.
●Align the right and left projections ( ) with the toner cartridge guides, and push securely all the way in.
6Close the toner cover, and lower the operation panel.
If you cannot close the toner cover
Make sure that the toner cartridge is inserted properly.
Forcing it closed may cause damage.
LINKS
Replacing Toner Cartridges(P. 386)
Maintenance
389
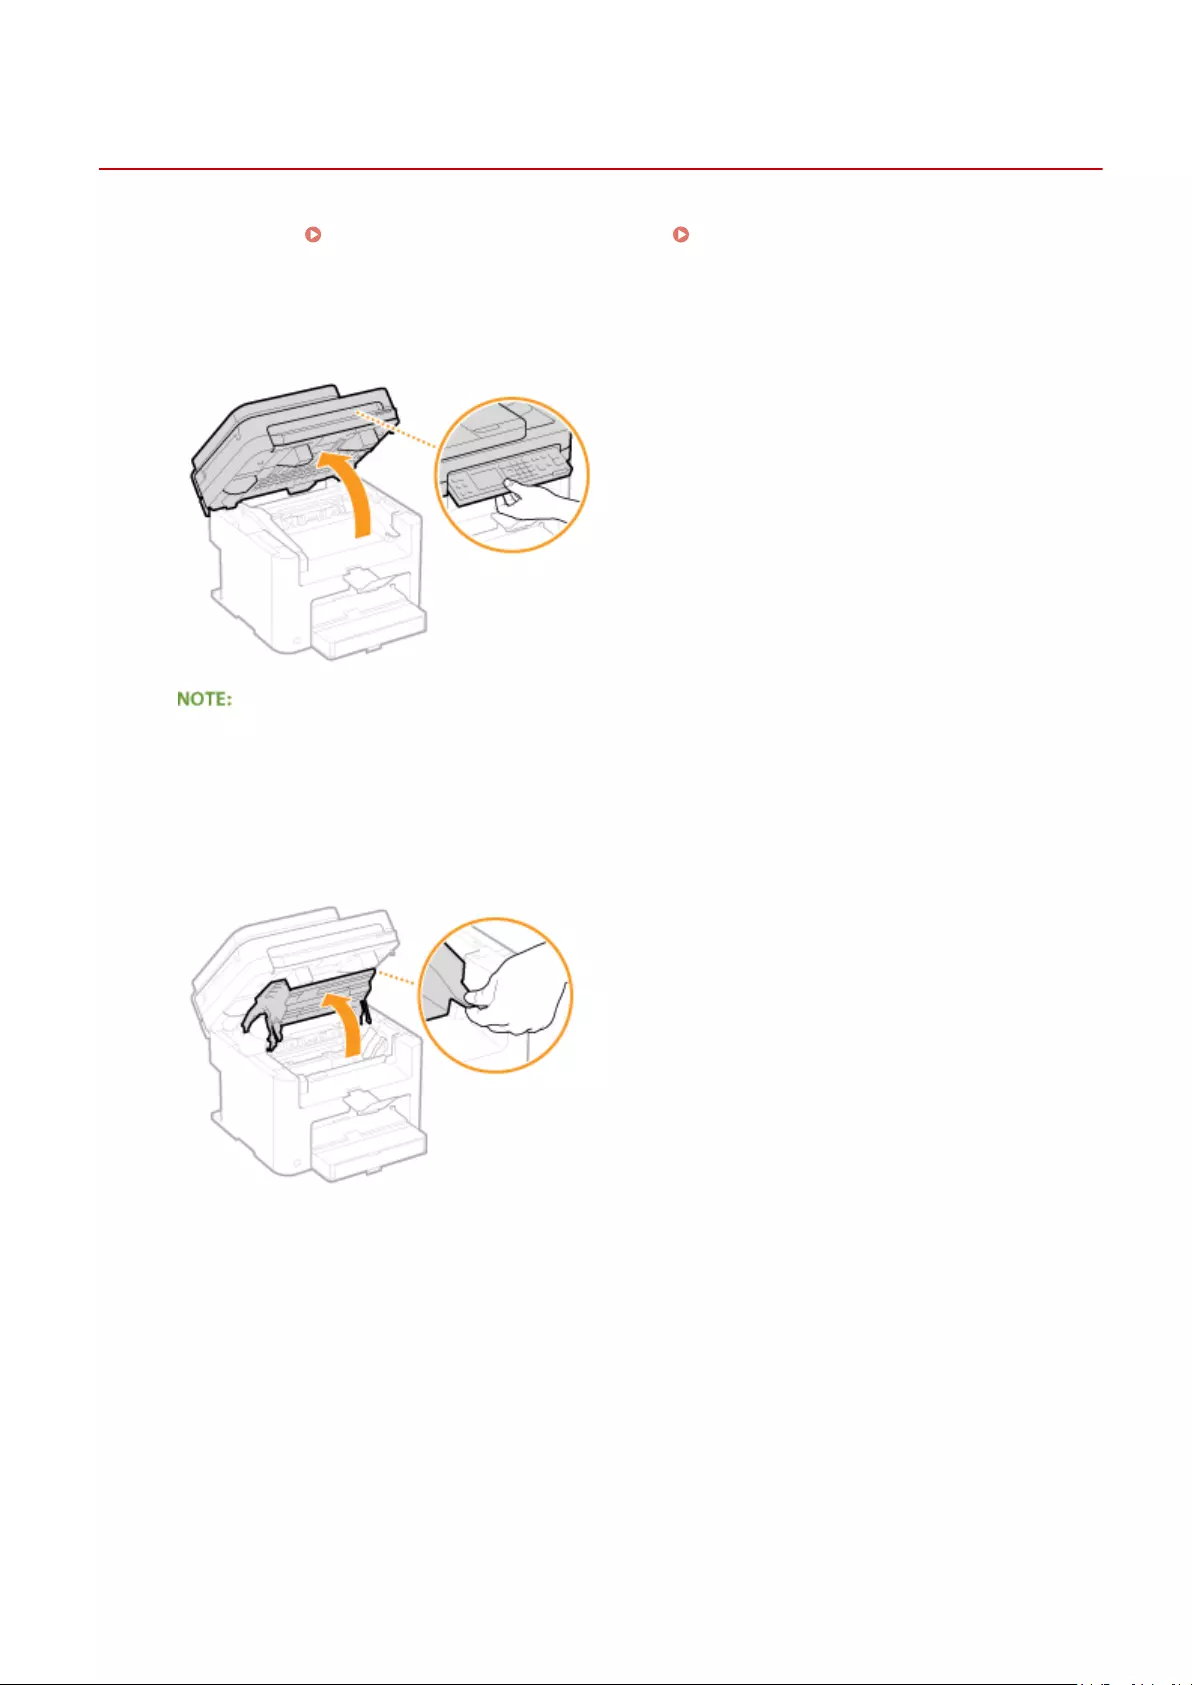
How to Replace Toner Cartridges
15A8-06S
Read the precautions in Maintenance and Inspections(P. and Consumables(P. 9) before replacing the toner
cartridges.
1Lift the operation panel.
If you cannot lift the operation panel
Make sure the feeder or platen glass cover is completely closed. If a thick original such as a book is placed on
the platen glass, remove the original. Forcing the operation panel up may cause damage.
2Open the toner cover by the grip at the front right of the toner cover.
3Pull the toner cartridge out of the machine.
Maintenance
390
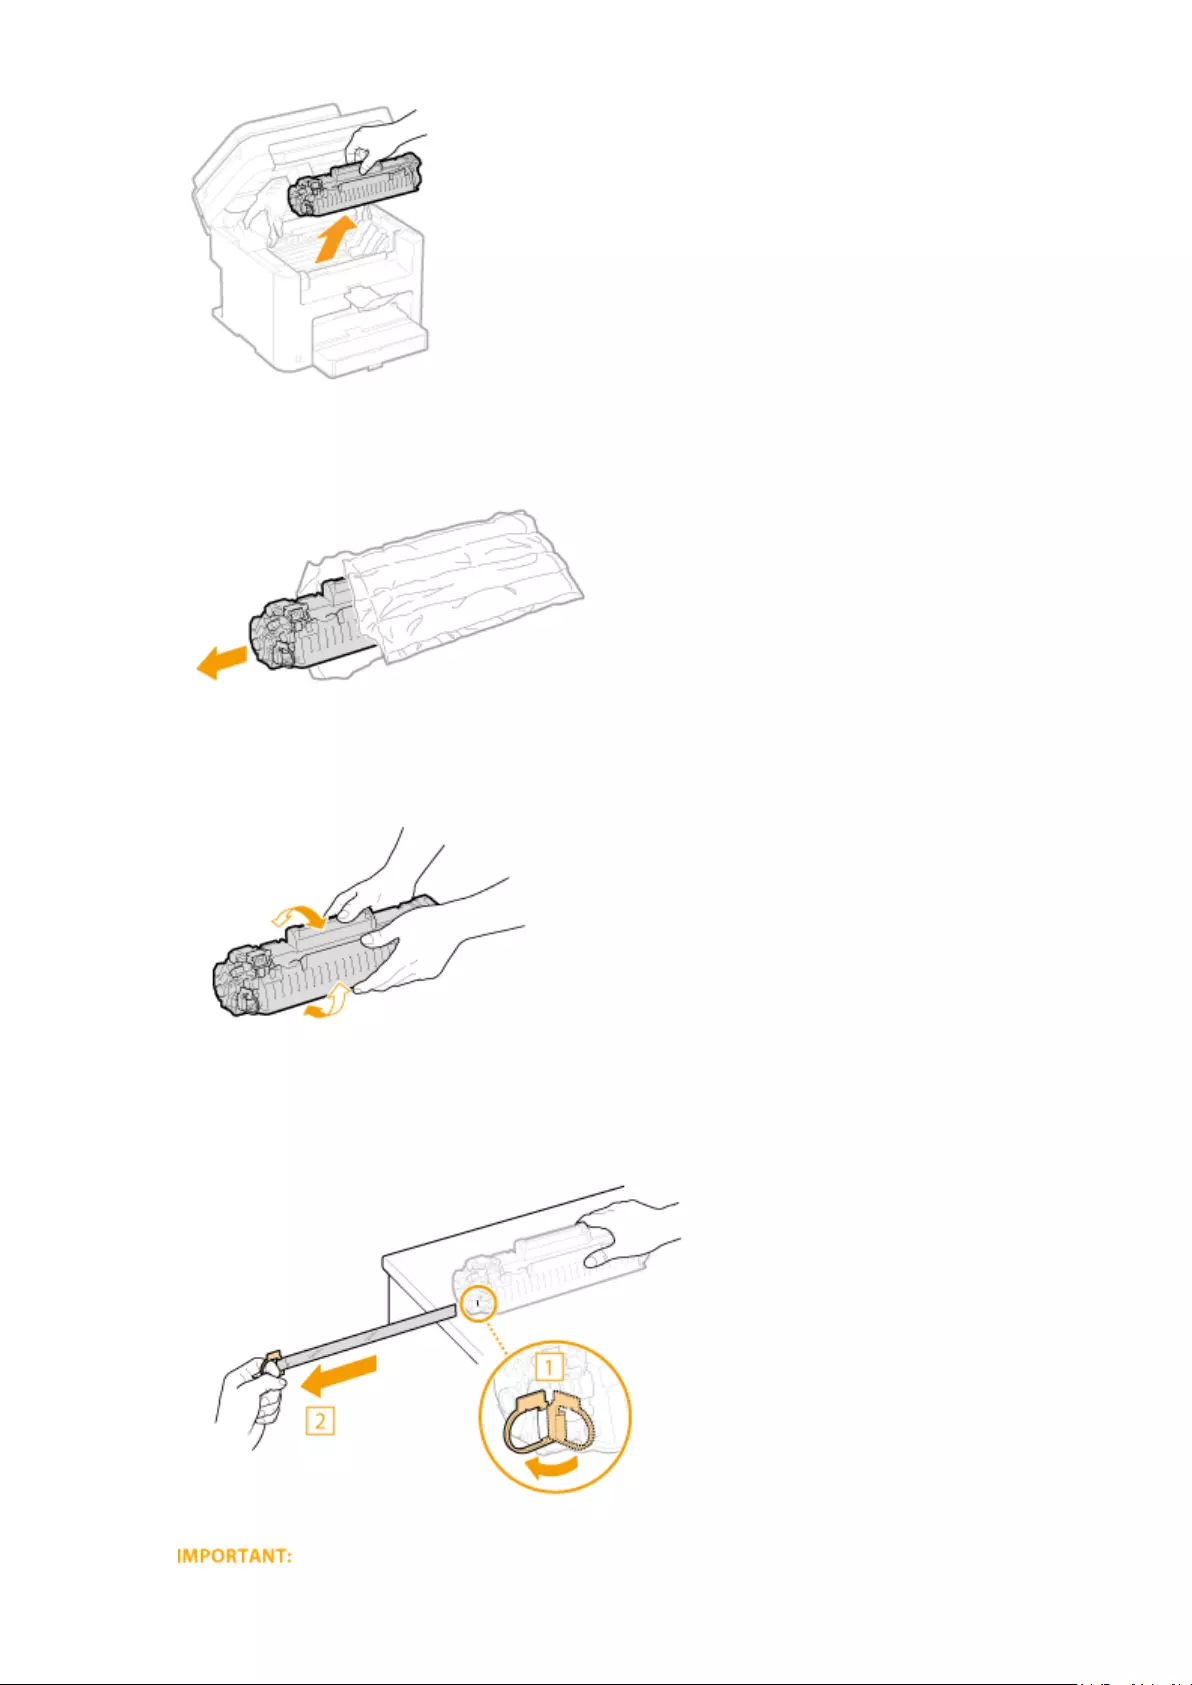
4Remove the replacement toner cartridge from the protective bag.
5Shake the toner cartridge 5 or 6 times as shown below to evenly distribute the toner
inside the cartridge, and then place it on a at surface.
6Pull the sealing tape straight out.
●The full length of the sealing tape is approximately 50 cm.
Maintenance
391

When pulling out the sealing tape
If the sealing tape remains inside the toner cartridge, the quality of printouts may deteriorate.
●Do not pull out the sealing tape at an angle or sideways. If the tape breaks, you may not be able to pull it
out completely.
●If the sealing tape becomes stuck when pulling it out, keep pulling until it is completely removed.
7Install the toner cartridge.
●Align the right and left projections ( ) with the toner cartridge guides, and push securely all the way in.
8Close the toner cover, and lower the operation panel.
If you cannot close the toner cover
Make sure that the toner cartridge is inserted properly. Forcing it closed may cause damage.
LINKS
Before Replacing the Toner Cartridge(P. 388)
Maintenance
392

Relocating the Machine
15A8-06U
The machine is heavy. Make sure to follow the procedures below when moving the machine to avoid injury, and also
make sure to read the safety precautions before you begin. Important Safety Instructions(P. 2)
1Turn OFF the machine and computer.
●When you turn OFF the machine, data that is waiting to be printed is deleted.
2Disconnect the cables and cord from the machine in numerical order as in the
illustration below.
●Whether the cables with «*» are connected depends on your environment.
Power plug
Power cord
USB cable*
LAN cable*
3When transporting the machine across a long distance, remove the toner cartridges.
How to Replace Toner Cartridges(P. 390)
4Open the paper cover and remove any paper.
●If the paper guides are extended, return them so that they t in the paper drawer.
5Close all the open covers, and move the machine to the new location.
●Check how heavy the machine is and carry it without straining. Machine Specications(P. 414)
●Lift by the carrying grips on the front of the machine.
Maintenance
393

6Carefully place the machine at the new installation site.
●For installation steps after moving, see «Getting Started». Manuals Included with the Machine(P. 425)
Maintenance
394

Viewing the Counter Value
15A8-06W
You can check total for the number of pages used for printouts. This total includes lists in addition to copies and
printouts of data from computers.
<Device Information> <Check Counter>
Maintenance
395

Initializing Settings
15A8-06X
You can restore the following settings:
Initializing Menu(P. 397)
Initialize Eco Report Counter (MF244dw / MF232w)(P. 399)
Initializing All Data/Settings(P. 400)
Maintenance
396

Initializing Menu
15A8-06Y
You can restore the settings of the machine ( Setting Menu List(P. 285) ). Depending on the settings selected, you
may need to restart the machine after initialization.
●If a screen for entering a PIN is displayed, enter the PIN with the numeric keys and press . Setting
the System Manager PIN(P. 229)
<System Management Settings> <Initialize Menu> Select the item you
want to initialize <Yes>
Items for initializing
Select the setting you want to initialize.
When <System Management Settings> is selected
Select the specic system management settings that you want to initialize and select <Yes>, and press .
Settings to be initialized
Select the settings to be initialized.
Maintenance
397

<Initialize All>
Initializes all the system management settings.
If Remote UI settings are initialized
●The Remote UI Access PIN is also initialized. After an initialization, reset the Remote UI Access PIN.
Setting a Remote UI PIN (MF244dw / MF232w)(P. 231)
●You can use the procedure below to restore the default <Network Settings>.
<Network Settings> <Initialize Network Settings> <Yes> Restart
the machine
<Initialize All>
Initializes all the settings.
Maintenance
398

Initialize Eco Report Counter
15A8-070
You can initialize the number of printouts appearing in the Eco Report and return it to its factory default setting. The
number of printouts returns to 0 after being initialized.
If a screen appears prompting you to enter a PIN, enter the correct PIN using the numeric keys, and press
. Setting the System Manager PIN(P. 229)
<System Management Settings> <Initialize Eco Report
Counter> <Yes>
LINKS
Eco Report(P. 298)
Maintenance
399
Initializing All Data/Settings
15A8-071
To make changes to registered data and settings all at once such as when changing the installation location of the
machine, you can delete registered data and initialize all settings ( Setting Menu List(P. 285) ) together at the same
time. You are required to restart the machine after initializing all data/settings.
If a screen for entering a PIN is displayed, enter the PIN with the numeric keys and press . Setting the
System Manager PIN(P. 229)
<System Management Settings> <Initialize All Data/Settings>
<Yes> <Yes> Restart the machine.
Maintenance
400

Appendix
Appendix …………………………………………………………………………………………………………………………………………. 402
Third Party Software (MF244dw / MF232w) ……………………………………………………………………………………….. 403
Feature Highlights ………………………………………………………………………………………………………………………….. 404
Going Green and Saving Money ……………………………………………………………………………………………………. 405
Improving Eciency ……………………………………………………………………………………………………………………. 407
Going Digital ……………………………………………………………………………………………………………………………… 409
So Much More ……………………………………………………………………………………………………………………………. 411
Specications …………………………………………………………………………………………………………………………………. 413
Machine Specications ………………………………………………………………………………………………………………… 414
Wireless LAN Specications (MF244dw / MF232w) ……………………………………………………………………………. 416
Document Type ………………………………………………………………………………………………………………………….. 417
Scan Area …………………………………………………………………………………………………………………………….. 418
Paper ………………………………………………………………………………………………………………………………………… 419
Copy Specications ……………………………………………………………………………………………………………………… 421
Scanner Specications …………………………………………………………………………………………………………………. 422
Printer Specications …………………………………………………………………………………………………………………… 423
Consumables ………………………………………………………………………………………………………………………………….. 424
Manuals Included with the Machine …………………………………………………………………………………………………. 425
Using User’s Guide ………………………………………………………………………………………………………………………….. 426
Screen Layout of User’s Guide ………………………………………………………………………………………………………. 427
Viewing User’s Guide …………………………………………………………………………………………………………………… 431
Manual Display Settings ………………………………………………………………………………………………………………. 432
Others ……………………………………………………………………………………………………………………………………………. 433
Basic Windows Operations …………………………………………………………………………………………………………… 434
Notice ……………………………………………………………………………………………………………………………………….. 443
Appendix
401

Appendix
15A8-072
This chapter contains technical specications of this machine, instructions on how to use the User’s Guide, disclaimers,
copyright information, and other important information for customers.
Appendix
402

Third Party Software
15A8-085
For information related to third-party software, click the following icon.
Appendix
403

Feature Highlights
15A8-073
Give the features that are described in this section. The features are grouped under four headings: «Going Green and
Saving Money», «Improving Eciency», «Going Digital», and «So Much More».
Appendix
404

Going Green and Saving Money
15A8-074
2-Sided Printing (MF244dw)
You can use 2-sided printing for copies, print jobs sent from your computer. Because you’ll only be using half
the paper you would otherwise, you can cut your paper costs in half. The key enables you to save
even more paper by allowing you to simultaneously select the settings for 2-sided copying and for copying
multiple pages onto one sheet.
●To make 2-sided copies: 2-Sided Copying (MF244dw)(P. 75)
●To save paper when you copy: Using the [Paper Save Copy] Key (MF244dw / MF231)(P. 79)
●To print 2-sided documents from your computer: Switching 1-Sided and 2-Sided Printing (MF244dw)
(P. 99)
Print Multiple Pages on a Single Sheet
To really start saving paper, shrink multiple pages onto a single sheet — 2 or 4 pages for copies, and up to 16
pages for print jobs sent from your computer. This is even more effective when used together with 2-sided
printing.
●To copy multiple pages of a document onto one sheet: Copying Multiple Documents onto One Sheet
(2 on 1/4 on 1)(P. 77)
●To save paper when you copy: Using the [Paper Save Copy] Key (MF244dw / MF231)(P. 79)
●To print multiple pages of a document onto one sheet: Printing Multiple Pages onto One Sheet(P. 103)
Appendix
405
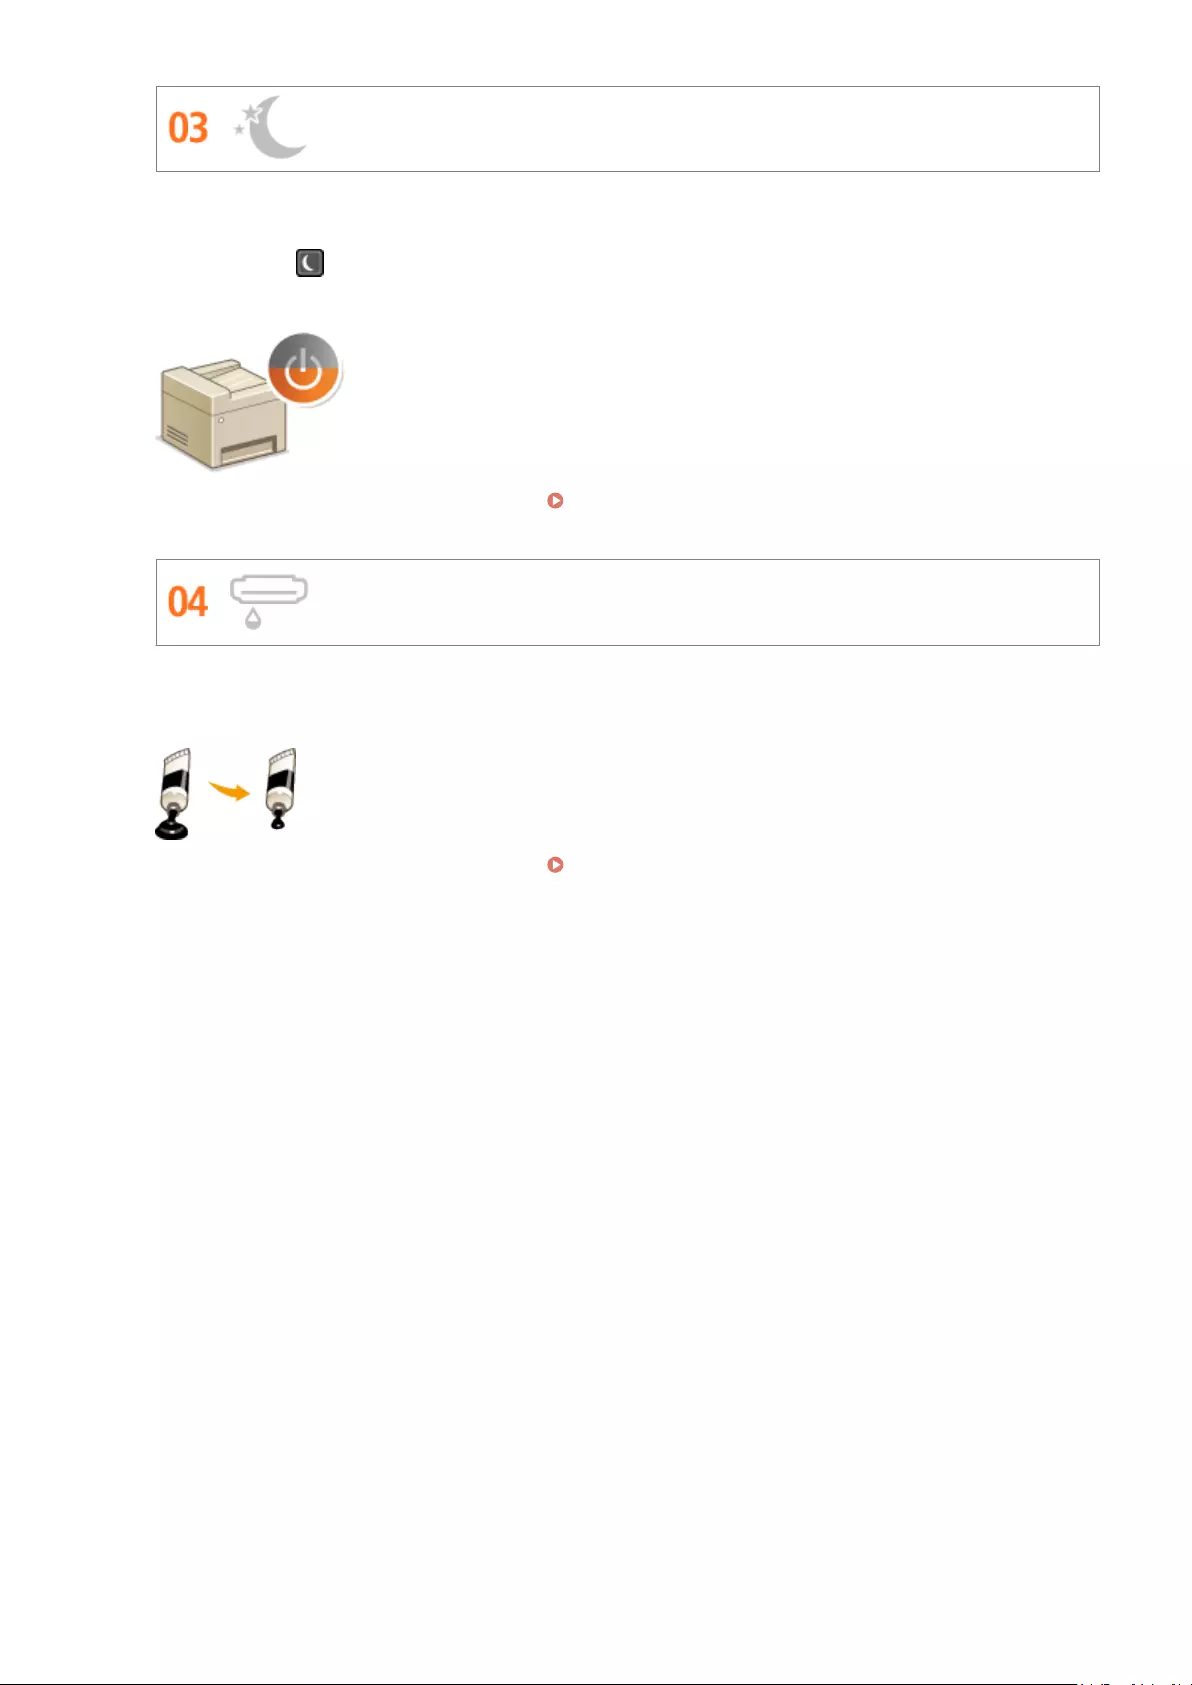
Sleep Mode
For saving energy and money, a sleep mode that powers down a machine when nobody is using it has become
an essential feature. This machine will enter sleep mode automatically, and can also be put to sleep whenever
you want. Press once to put the machine to sleep. Press it again to instantly wake the machine back into
action.
For more information about this function, see Entering Sleep Mode(P. 59) .
Save Toner
Got multi-page documents or drafts that don’t need presentation-quality printing?
There’s a setting that uses less toner. Give it a try and save toner and money.
For more information about this function, see Saving Toner(P. 116) .
Appendix
406
Improving Eciency
15A8-075
Shortcut Keys for Copying and Scanning
Take advantage of the shortcut keys on the operation panel so you don’t have to recongure the same settings
over and over again. Use the key to save paper by copying two or four pages onto one sheet. If you
are using a machine capable of 2-sided printing, you can also copy on both sides of the sheet. For scanning, use
the key to preset your favorite save destinations, scan types, and le formats. Just place your document
and press the shortcut key to scan.
●To save paper when you copy: Using the [Paper Save Copy] Key (MF244dw / MF231)(P. 79)
●To easily scan documents: Scanning Using the [Scan -> PC] Key(P. 133)
Remote Management with Remote UI (MF244dw / MF232w)
Remote UI lets you manage a lot from your computer, all without having to go over to the machine. Congure
settings and keep an eye on the machine’s status with an intuitive, easy-to-understand Web browser interface
that you’ll master immediately. Save your time and energy for things other than taking care of the machine.
For more information about this function, see Using Remote UI (MF244dw / MF232w)(P. 272) .
Make Print Settings Quickly with Intuitive Operation
Appendix
407

You can easily specify the page layout as well as binding position, switching between 1-sided and 2-sided
printing, etc. intuitively on the preview image in the printer driver. The simple click-operation allows you to
conveniently make settings while viewing how settings are applied.
For more information Printing a Document(P. 87)
Appendix
408

Going Digital
15A8-076
Scan Only What You Need
What if you’re scanning a whole page of a newspaper but all you’re really interested in is a headline and a
photo? Use ScanGear MF. You can select what you want from a preview, and then have the scanner disregard
the rest. Otherwise you’ll have to use an editing program to crop out everything you don’t need.
Using your product to scan, print or otherwise reproduce certain documents, and the use of such images
as scanned, printed or otherwise reproduced by your product, may be prohibited by law and may result
in criminal and/or civil liability. If you are uncertain about the legality of using your product to scan, print
or otherwise reproduce any particular document, and/or of the use of the images scanned, printed or
otherwise reproduced, you should consult in advance with your legal advisor for guidance.
For more information about this function, see Conguring Scan Settings in ScanGear MF(P. 140) .
Searchable PDFs
Searching of text in a PDF can be done with a «searchable PDF*«. By scanning an original with both text and
images, text portions are converted by OCR into text data. In addition to being able to search for text
information, you can also copy required portions into an Excel spreadsheet or Word document in Microsoft
Oce. Eliminate the need to type in customer data, addresses, etc. from scratch.
* You cannot create a searchable PDF in the Mac OS environment.
For more information about scanning from a computer, see Scanning from a Computer(P. 137) .
Appendix
409

Add Images to a Work in Progress
Some applications work with the machine to let you easily import scanned images directly into documents
you’re working on. This way you can skip the steps of opening a separate application just for receiving the
scanned images and then exporting them to the application you’re really using.
For more information about this function, see Scanning Using an Application(P. 138) .
Appendix
410

So Much More
15A8-077
Using a smartphone/tablet (MF244dw / MF232w)
At times such as when you want to quickly print out a proposal you completed on a tablet while travelling to a
business destination, or scan materials handed out at a meeting using a smartphone, Canon PRINT Business
or Canon Print Service comes in handy. Even in environments without a wireless LAN router, you can connect to
the machine with a mobile device wirelessly and directly.
PCless, quick, and easy! An even broader range of possibilities for work/play with functionality made for this age
of speed.
For more information Can Be Used Conveniently with a Mobile Device (MF244dw / MF232w)(P. 142)
Easy Printing with Google Cloud Print (MF244dw / MF232w)
Hook up to Google Cloud Print with your laptop or cell phone, send your data, and out come your printed
documents. With this machine, Google Cloud Print, and your mobile device, print whenever you want from
wherever you want.
For more information about this function, see Using Google Cloud Print(P. 159) .
Go Wireless (MF244dw / MF232w)
No cables, easy installation, simple maintenance. If you’ve got a WPS wireless LAN router, bypass the settings
process altogether and be ready to go before you know it. Enjoy the kind of clutter-free and easy to use
Appendix
411
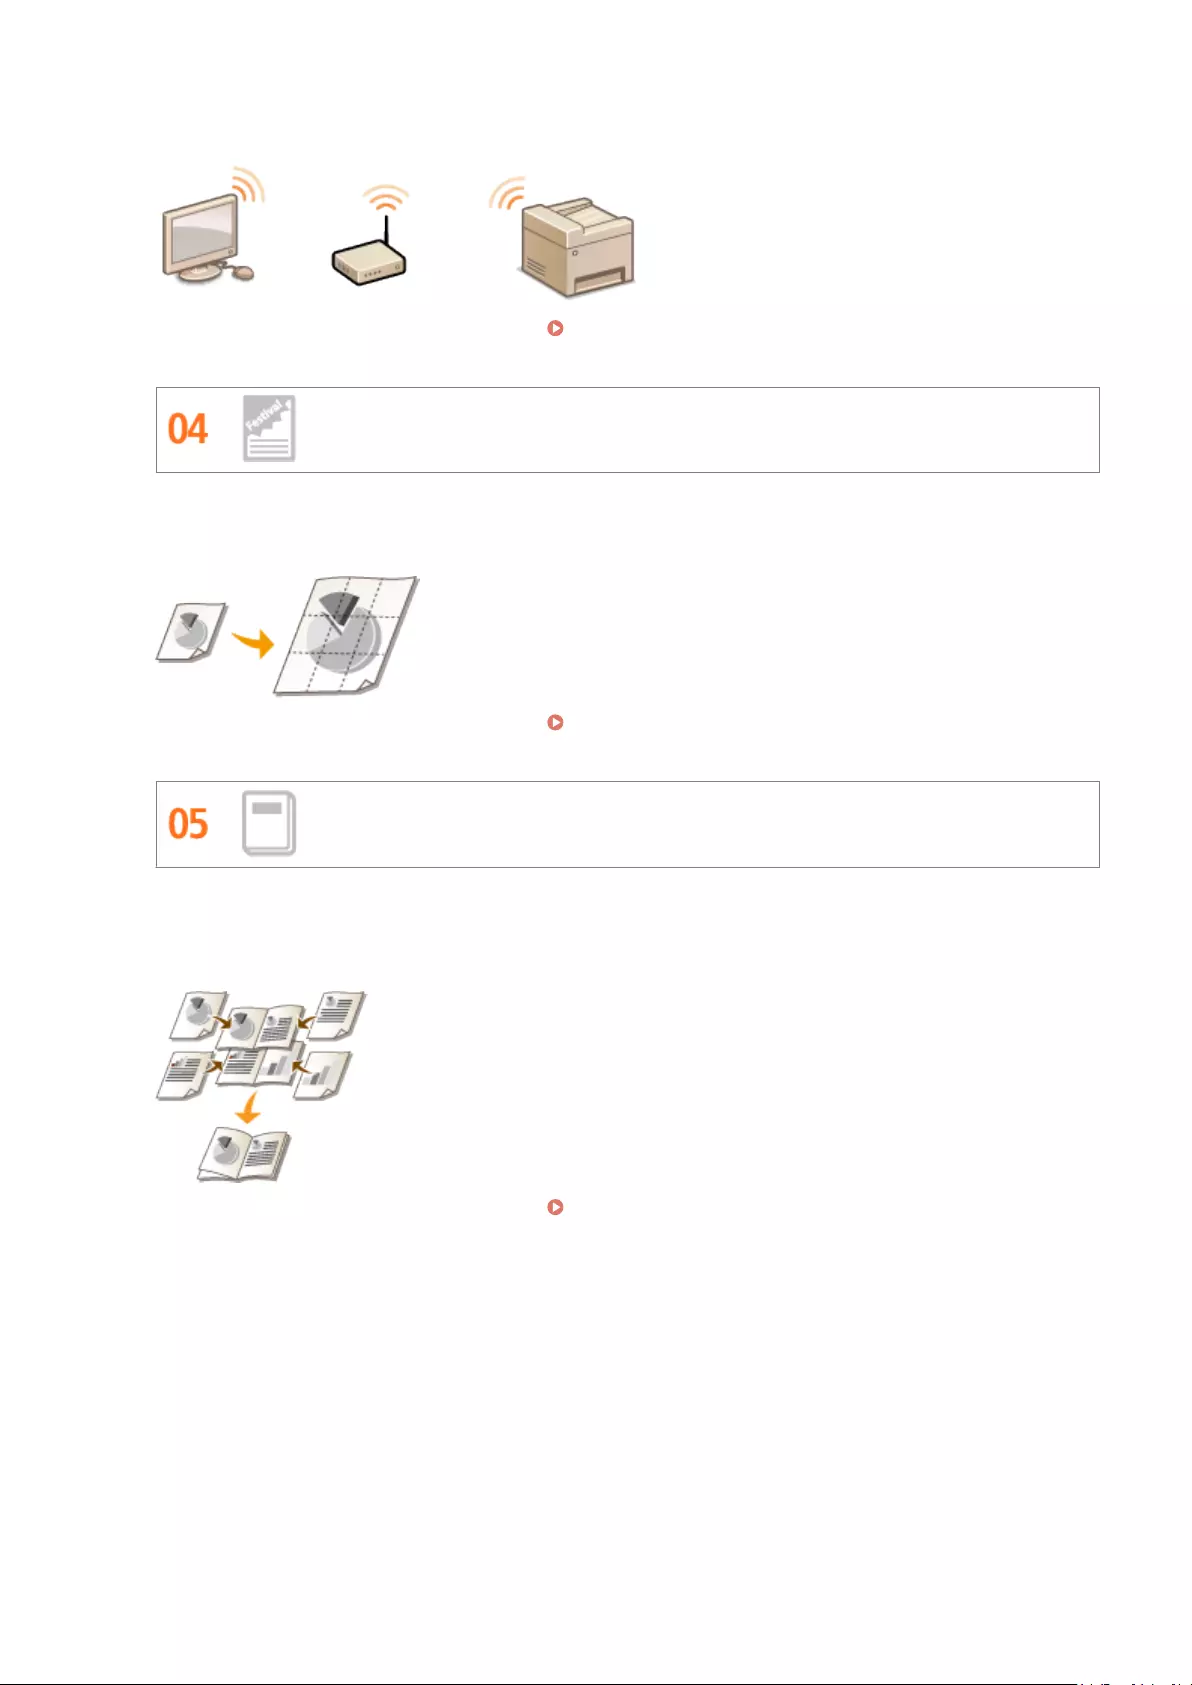
document system that you can only get from wireless. Compatible with IEEE 802.11b/g/n for stress-free
wireless, and also supports WEP and WPA/WPA2-PSK (TKIP/AES-CCMP) for tighter security.
For more information about this function, see Connecting to a Wireless LAN(P. 170) .
Make Posters
Blow up a regular one-sheet printout and make an exceptionally large poster. A large poster will be printed out
on nine sheets. Put them together in a 3×3 grid, and voila!
For more information about this function, see Printing Posters(P. 105) .
Make Booklets (MF244dw)
Sometimes your documents deserve better presentation than a staple in the upper-left corner. Making booklets
is easy. The print driver will take care of the page positioning for you. All you have to do is fold the pages and
staple them along the middle.
For more information about this function, see Printing Booklet (MF244dw)(P. 107) .
Appendix
412

Specications
15A8-078
The machine specications are subject to change without prior notice due to improvements of the machine.
Machine Specications(P. 414)
Wireless LAN Specications (MF244dw / MF232w)(P. 416)
Document Type(P. 417)
Scan Area(P. 418)
Paper(P. 419)
Copy Specications(P. 421)
Scanner Specications(P. 422)
Printer Specications(P. 423)
Appendix
413

Machine Specications
15A8-079
Type Personal Desktop
Power Supply*1 220 to 240 V, 50/60 Hz
(Power requirements differ depending on the country in which you purchased
the product.)
Power Consumption Maximum
— MF244dw
1,150 W or less
— MF232w / MF231
1,120 W or less
Average consumption during standby mode
— MF244dw
Approx. 4.1 W
— MF232w / MF231
Approx. 4.2 W
Average consumption during sleep mode
— MF244dw
Approx. 1.3 W (by USB Connections)
Approx. 1.4 W (by Wired Connections)
Approx. 2.1 W (by Wireless Connections)
— MF232w
Approx. 1.2 W (by USB Connections)
Approx. 1.3 W (by Wired Connections)
Approx. 2.0 W (by Wireless Connections)
— MF231
Approx. 1.2 W
When the power switch is turned OFF
0.5 W or less
Warm-up Time*2
(From power ON until machine enters standby)
— MF244dw / MF232w
13.5 seconds or less
— MF231
12.0 seconds or less
Weight*3 — MF244dw
Approx. 12.7 kg
— MF232w
Approx. 10.8 kg
— MF231
Approx. 10.7 kg
Dimensions
(W x D x H)
— MF244dw
390 x 371 x 360 mm
— MF232w / MF231
390 x 371 x 312 mm
*1 The current value displayed on the rating label indicates average current consumption.
*2 Warm-up time may vary depending on the use conditions and environment of the machine.
*3 The value indicates the mass of the main unit including toner cartridges.
*4 MF244dw / MF232w only
*5 Indicates that the sound pressure level of each bystander position is below the ISO 7779 absolute criteria for the background noise level.
Appendix
414
Environmental Conditions Temperature: 10 to 30°C
Humidity: 20% to 80% RH (no condensation)
Host Interface 100BASE-TX*4
10BASE-T*4
Hi-Speed USB
IEEE 802.11b/g/n (Infrastructure mode)*4
Noise
(measured in accordance with ISO 7779, declared noise
emission in accordance with ISO 9296)
LwAd (Declared A-weighted sound power level (1 B = 10 dB))
— MF244dw
During standby mode: Inaudible*5
During printing: 6.6 B or less (1-sided)
During printing: 6.6 B or less (2-sided)
— MF232w / MF231
During standby mode: Inaudible*5
During printing: 6.6 B or less (1-sided)
LpAm (Declared A-weighted emission sound pressure level (Bystander
position))
— MF244dw
During standby mode: Inaudible*5
During printing: Approx. 52 dB (1-sided)
During printing: Approx. 52 dB (2-sided)
— MF232w / MF231
During standby mode: Inaudible*5
During printing: Approx. 51 dB (1-sided)
Acceptable Documents Supported Document Types(P. 417)
Acceptable Paper Stock Paper(P. 419)
Printable Range Printable Area(P. 420)
Scan Range Scan Area(P. 418)
*1 The current value displayed on the rating label indicates average current consumption.
*2 Warm-up time may vary depending on the use conditions and environment of the machine.
*3 The value indicates the mass of the main unit including toner cartridges.
*4 MF244dw / MF232w only
*5 Indicates that the sound pressure level of each bystander position is below the ISO 7779 absolute criteria for the background noise level.
Appendix
415

Wireless LAN Specications
15A8-07A
Standard IEEE 802.11g, IEEE 802.11b, IEEE 802.11n
Frequency Range 2,412 to 2,472 MHz
Communication Mode Infrastructure Mode / Access Point Mode
Security Infrastructure Mode
WEP, WPA-PSK (TKIP/AES-CCMP), WPA2-PSK (TKIP/AES-CCMP)
Access Point Mode
WPA2-PSK (AES-CCMP)
Connection Method WPS (Wi-Fi Protected Setup), Manual setup
Appendix
416

Document Type
15A8-07C
◼Supported Document Types
Platen Glass Feeder (MF244dw)
Size
(W x L)
Up to 216 x 297 mm Maximum size: 216 x 356 mm
Minimum size: 148 x 105 mm
Weight 50 to 105 g/m²
Paper Capacity 1 sheet Up to 35 sheets (A4, 80 g/m²)
Appendix
417

Scan Area
15A8-07E
The shaded areas in the table below indicate the scan area of the document. Make sure that text and images in your
documents t within the shaded area. The scan area varies depending on the function used and where documents are
placed.
Platen Glass Feeder (MF244dw)
Copy
The scan area for copying may differ from the
printable area. Printable Area(P. 420)
The scan area for copying may differ from the
printable area. Printable Area(P. 420)
Scan
Appendix
418

Paper
15A8-07F
◼Supported Paper Sizes
Paper sizes that can be loaded in the paper drawer, and the manual feed slot are listed below.
A4 (210 x 297 mm)*1
B5 (182 x 257 mm)
A5 (148 x 210 mm)
Legal (216 x 356 mm)*1
Letter (216 x 279 mm)*1
Statement (140 x 216 mm)
Executive (184 x 267 mm)
Ocio (216 x 318 mm)*1
Ocio (Brazil) (216 x 355 mm)*1
Ocio (Mexico) (216 x 341 mm)*1
Letter (Government) (203 x 267 mm)
Legal (Government) (203 x 330 mm)
Foolscap (216 x 330 mm)*1
Foolscap (Australia) (206 x 338 mm)
Legal (India) (215 x 345 mm)*1
F4A (216 x 343 mm)*1
Envelope No. 10 (COM10) (104.7 x 241.3 mm)
Envelope Monarch (98.4 x 190.5 mm)*2
Envelope C5 (162 x 229 mm)
Envelope DL (110 x 220 mm)
3x5inch (76 x 127 mm)*2
Custom*3
*1 Only in MF244dw, automatic 2-sided printing is available without replacing paper.
*2 You can load Envelope Monarch and 3x5inch only in the manual feed slot.
*3 Custom paper size of 76.2 to 216.0 mm in width and 210 to 356 mm in length can be loaded in the paper drawer. Custom
paper size of 76.2 to 216.0 mm in width and 127 to 356.0 mm in length can be loaded in the manual feed slot.
Appendix
419
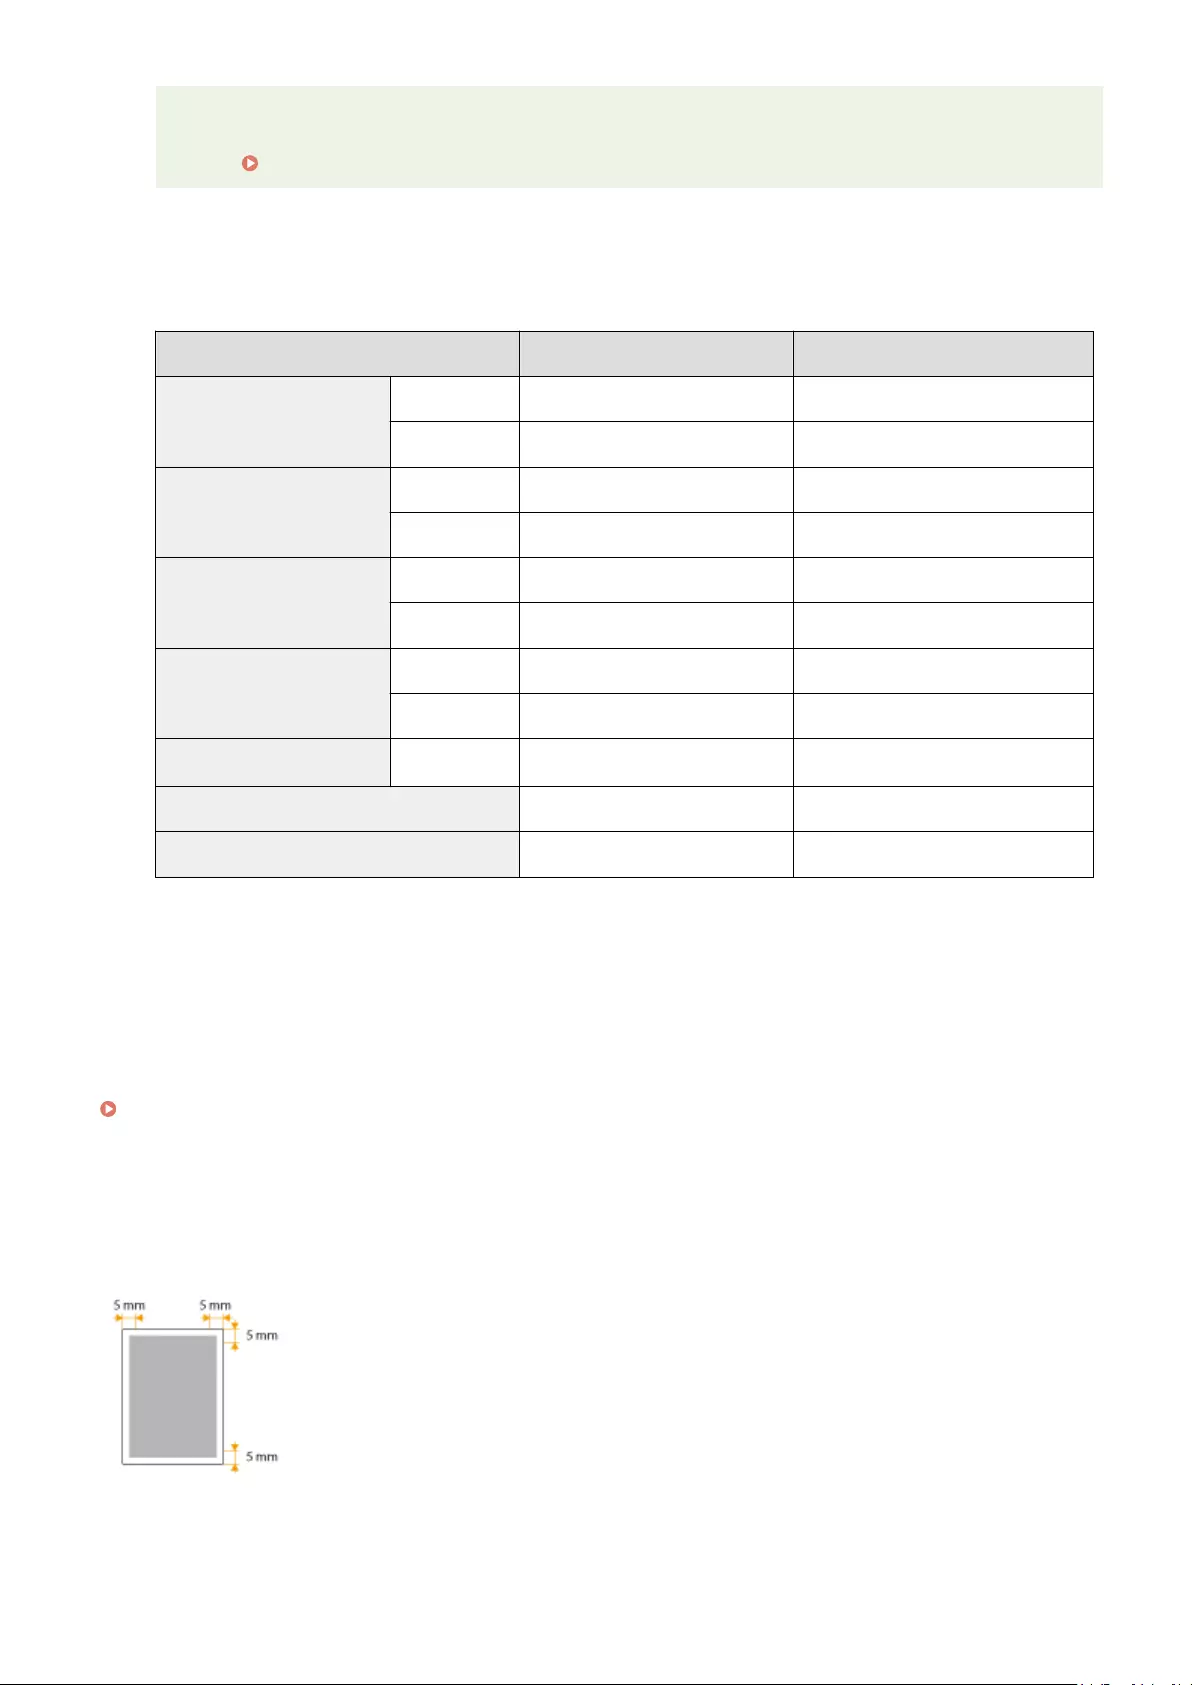
The default paper size of the machine is set to A4. Change the paper size setting when using a different
size of paper.
Specifying Paper Size and Type(P. 53)
◼Paper Type and Paper Source Capacity
Chlorine-free paper can be used with this machine.
Paper Type Paper Capacity for Paper Drawer Paper Capacity for Manual Feed Slot
Plain paper*1
60 to 80 g/m² 250 sheets 1 sheet
81 to 89 g/m² 170 sheets 1 sheet
Heavy paper*2
90 to 105 g/m² 170 sheets 1 sheet
106 to 163 g/m² 100 sheets 1 sheet
Recycled paper*1
60 to 80 g/m² 250 sheets 1 sheet
81 to 89 g/m² 170 sheets 1 sheet
Color paper*1
60 to 80 g/m² 250 sheets 1 sheet
81 to 89 g/m² 170 sheets 1 sheet
Bond paper*3 60 to 163 g/m² 100 sheets 1 sheet
Label 100 sheets 1 sheet
Envelope 20 sheets 1 sheet
*1 Only in MF244dw, automatic 2-sided printing is available without replacing paper.
*2 Only in MF244dw, automatic 2-sided printing is available for heavy paper 1 (90 to 120 g/m²).
*3 Only in MF244dw, automatic 2-sided printing is available for bond paper 1 (60 to 90 g/m²) and bond paper 2 (91 to 120 g/m²).
◼Paper Type and Setting for the Machine
Loading Paper(P. 42)
◼Printable Area
The shaded areas in the image below indicate the printable area of the document.
Appendix
420
Copy Specications
15A8-07H
Scan Resolution Text/Photo (High Speed)
300 x 600 dpi
Text/Photo, Photo, Text
600 x 600 dpi
Output Resolution 600 x 600 dpi
Copy Ratio 100% 1:1, 400% Max, 200%, 141% A5->A4, 70% A4->A5, 50%,
25% Min
Copy Speed*1
(A4 Plain 1:1)
MF244dw
27 cpm
MF232w / MF231
23 cpm
Continuous Copying Capacity Maximum 999 copies
First Copy Time
(A4)
Platen glass: 9 seconds or less
Feeder*2: 14 seconds or less
*1 The copy speed on A4 size plain paper on one-side printing is measured during continuous copying. Copy speeds vary depending on the
output resolution, the paper type and size, and the paper feeding direction. Copy speeds on smaller paper sizes may be slower. Plus, the machine
may experience downtime or decrease the copy speed in the middle of a continuous copy run to adjust the temperature inside the machine or
maintain the optimal print quality.
*2 MF244dw only.
Appendix
421

Scanner Specications
15A8-07J
Type Color scanner
Maximum Scan Size Platen glass: up to 216 x 297 mm
Feeder*1: up to 216 x 356 mm
Scan Resolution Optical resolution
Platen glass: up to 600 x 600 dpi
Feeder*1: up to 300 x 300 dpi
Software interpolation resolution
9,600 x 9,600 dpi
Scan Speed*2
(A4, 300 x 300 dpi)
Color: Approx. 4 seconds/sheet
Black and White: Approx. 3 seconds/sheet
Driver TWAIN
WIA 2.0
ICA
*1 MF244dw only.
*2 Speed of scanning via the platen glass. The communication time is not included.
Appendix
422
Printer Specications
15A8-07K
Output Tray Capacity*1
(a fresh stack of A4 size paper)
Approx. 100 sheets (68 g/m²)
Print Speed*2
(A4 Plain 1:1)
MF244dw
27 ppm
MF232w / MF231
23 ppm
First Print Time*3
(A4)
6 seconds or less
Print Resolution 600 dpi x 600 dpi (1,200 dpi equivalent x 1,200 dpi equivalent)
Gradation 256 gradations
Toner Cartridges Consumables(P. 424)
*1 May vary depending on the installation environment and paper type used.
*2 The print speed on A4 size plain paper on one-side printing is measured during continuous printing. Print speeds vary depending on the
output resolution, the paper type and size, and the paper feeding direction. Print speeds on smaller paper sizes may be slower. Plus, the machine
may experience downtime or decrease the print speed in the middle of a continuous print run to adjust the temperature inside the machine or
maintain the optimal print quality.
*3 May vary depending on the output environment.
Appendix
423
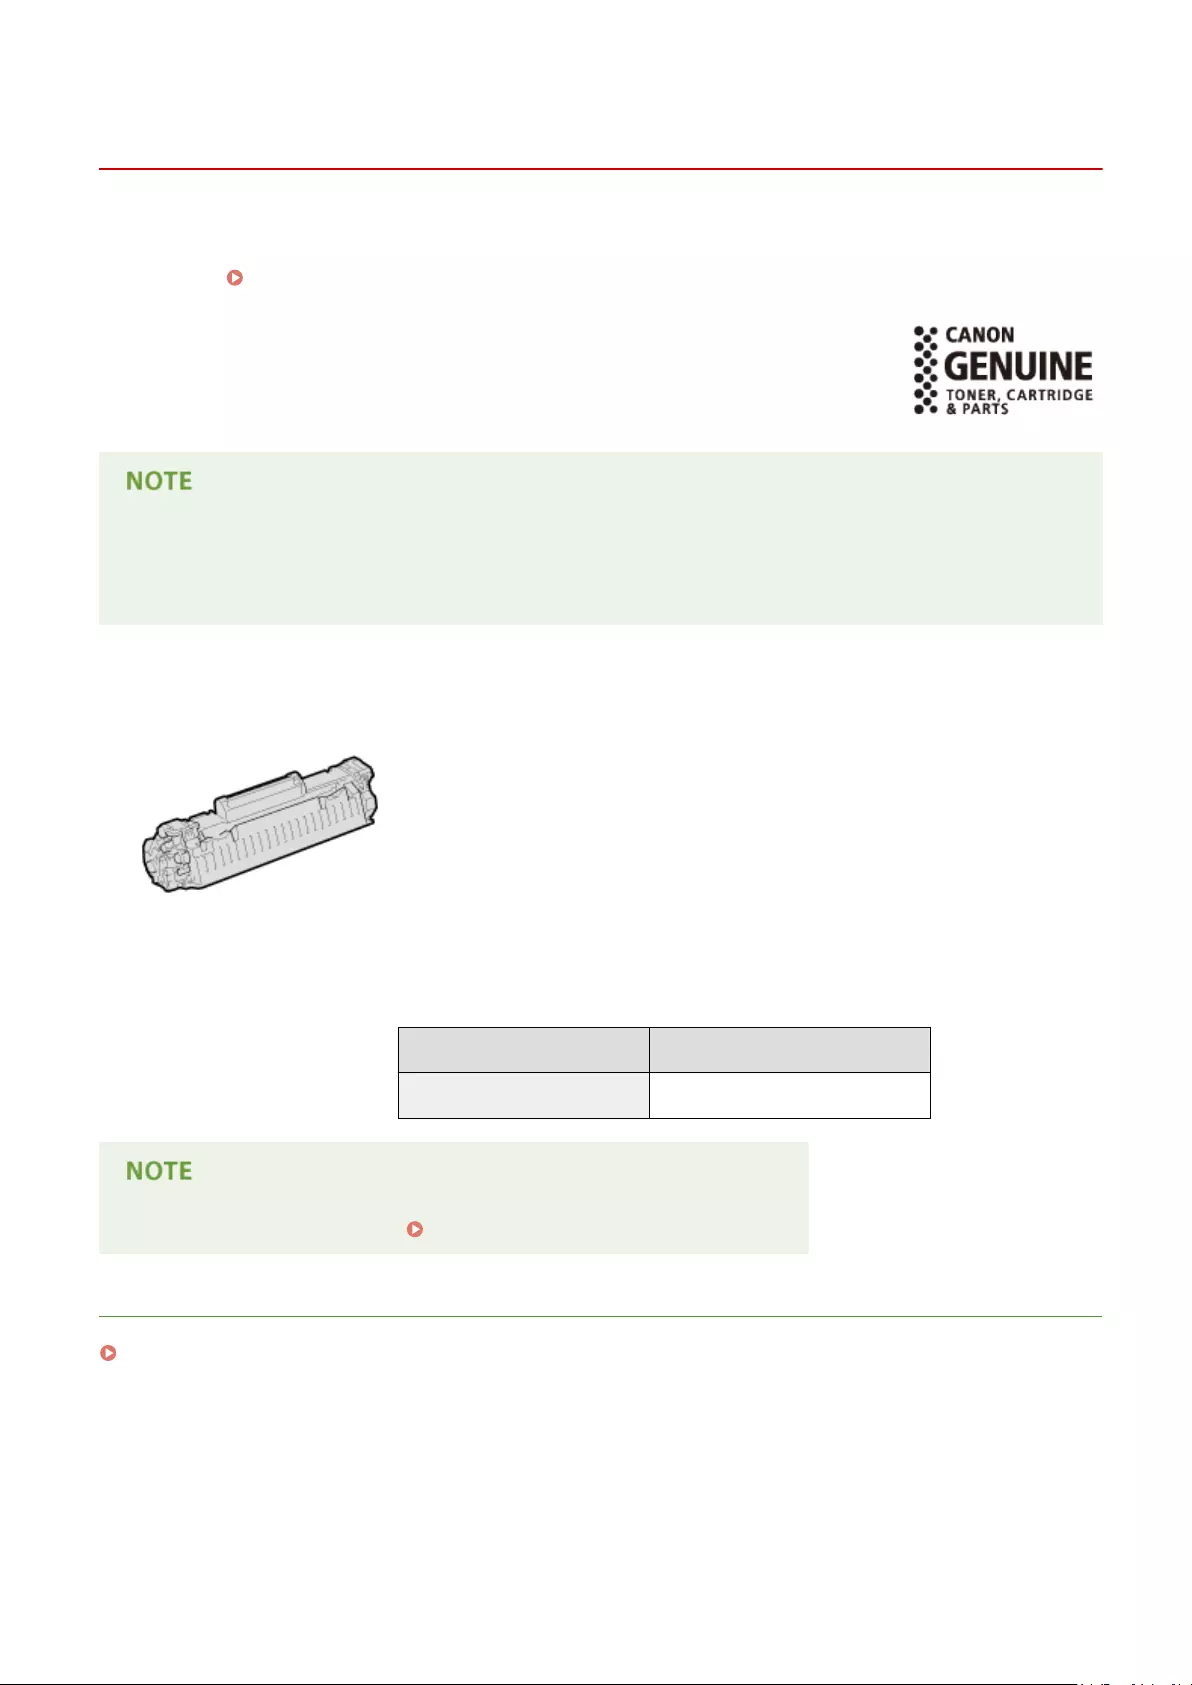
Consumables
15A8-07L
The following is a guide to the estimated replacement time for the consumables used in this machine. Purchase
consumables at your local authorized Canon dealer. Observe safety and health precautions when storing and handling
consumables ( Consumables(P. 9) ).
For optimum print quality, using Canon genuine Toner, Cartridge and Parts is
recommended.
●Depending on the installation environment, printing paper size, or document type, you may need to replace
consumables before the end of the estimated lifetime.
●Replacement toner cartridges are different from the supplied toner cartridges, so the yield may also differ.
◼Toner Cartridges
Supplied Toner Cartridges
The average yield* of the toner cartridge that comes with the machine is 900
sheets.
* The average yield is based on «ISO/IEC 19752» (the global standard related to «Method for
the determination of toner cartridge yield for monochromatic electrophotographic printers
and multi-function devices that contain printer components» issued by ISO [International
Organization for Standardization]) when printing A4 size paper with the default print
density setting.
Replacement Toner Cartridges
For optimum print quality, using Canon genuine toner cartridges is recommended.
Canon Genuine Toner Cartridge Average yield of toner cartridge *
Canon Cartridge 737 2,400 sheets
When replacing toner cartridges How to Replace Toner Cartridges(P. 390)
LINKS
Replacing Toner Cartridges(P. 386)
Appendix
424

Manuals Included with the Machine
15A8-07R
The manuals listed below are included with the machine. Refer to them as necessary.
Getting Started Read this manual rst. It describes basic setup procedures, from
removing the packing materials to setting up the machine.
Wireless LAN Setting
Guide (MF244dw / MF232w)
This manual describes the procedure for connecting the machine
to a wireless LAN router, it also contains information for
troubleshooting when conguring the settings. Read this manual
with Getting Started.
User’s Guide (This Manual)
This manual describes all the functions of the machine in a manual
that is viewed using a Web browser. You can browse information
by category or enter a keyword to search for pages on a specic
topic. Using User‘s Guide(P. 426)
Appendix
425

Using User‘s Guide
15A8-07S
The User‘s Guide is a manual that can be viewed on your computer, smartphone, or other similar device.
How to Find the Topic You Are Looking for
You can nd the page you are looking for using the following 2 methods.
Search the contents
You can nd the page you are looking for by selecting the topic from [Contents] on the left side of the screen.
Top Page(P. 427)
Topic Page(P. 429)
Search by keyword
Perform a search by entering a keyword, such as «copy» or «wireless LAN», and the pages containing the
keyword are displayed. You can nd the page you are looking for from those results. You can also enter phrases
such as «connecting to a network.» The keyword search also supports the AND Boolean to search for multiple
keywords.
Search(P. 429)
System Requirements
●If you do not have access to Adobe Reader to view the manuals in PDF format, try other programs such as
PDF Preview developed by Vivid Document Imaging Technologies.
Appendix
426
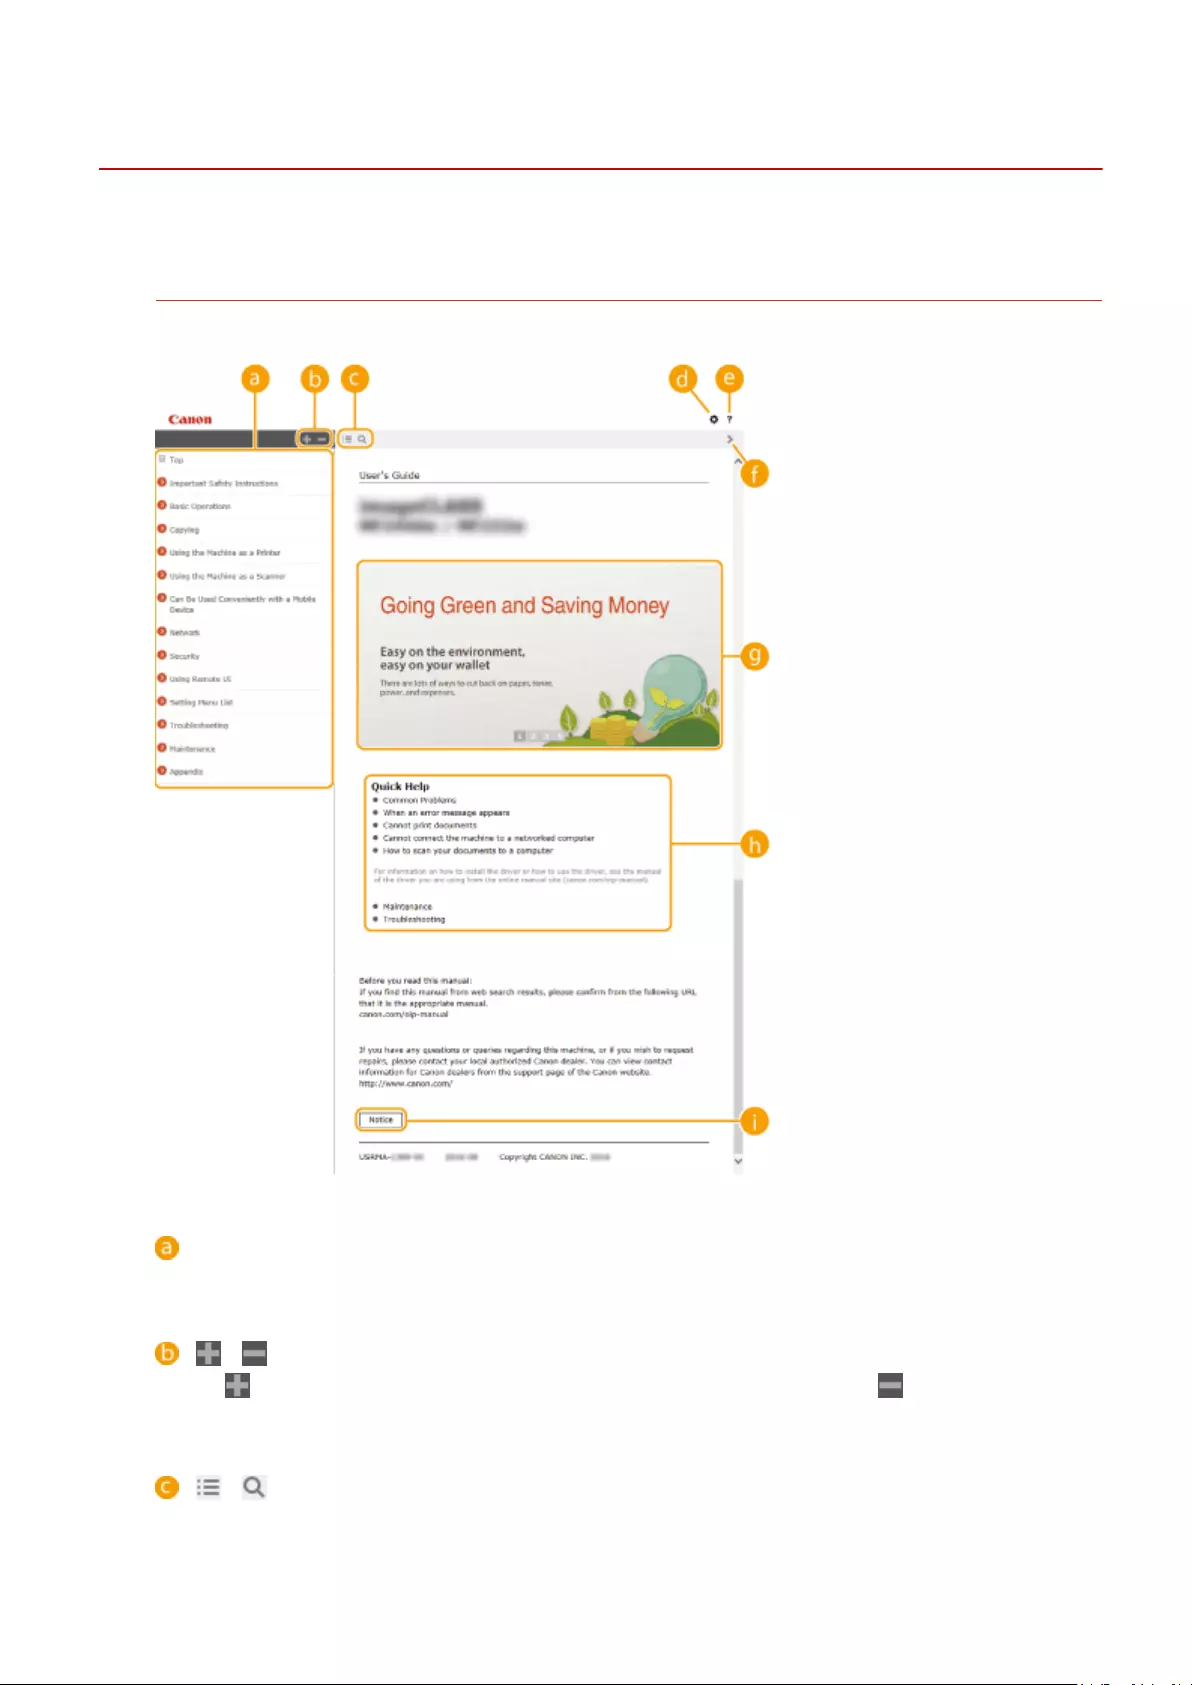
Screen Layout of User’s Guide
15A8-07X
The User‘s Guide is divided into different screens, and the content of each screen varies.
Top Page
Appears when the User’s Guide starts.
Contents
The titles of chapters are displayed.
/
Click to display all items, including those nested underneath other items. Click to return to the
original list.
/
Click to switch between the table of contents and the search display.
Appendix
427

Click to specify settings such as text size, layout, and display method for the User’s Guide.
Click to display information on how to view the User’s Guide, how to perform a search, and other
information.
/
Click to display the previous or following topic.
Feature Highlights
Provides a variety of practical examples of ways to use the machine. Click / / / to toggle the
display by category, or click the sliding display for more information about each category. The sliding display
can be stopped by moving the pointer onto it. Feature Highlights(P. 428)
[Quick Help]
Click to view how to solve problems.
[Notice]
Click to view important information you should know when using the machine.
Feature Highlights
Provides a variety of practical examples of ways to use the machine.
/
Click to display the detailed information. Click to close the window.
Appendix
428
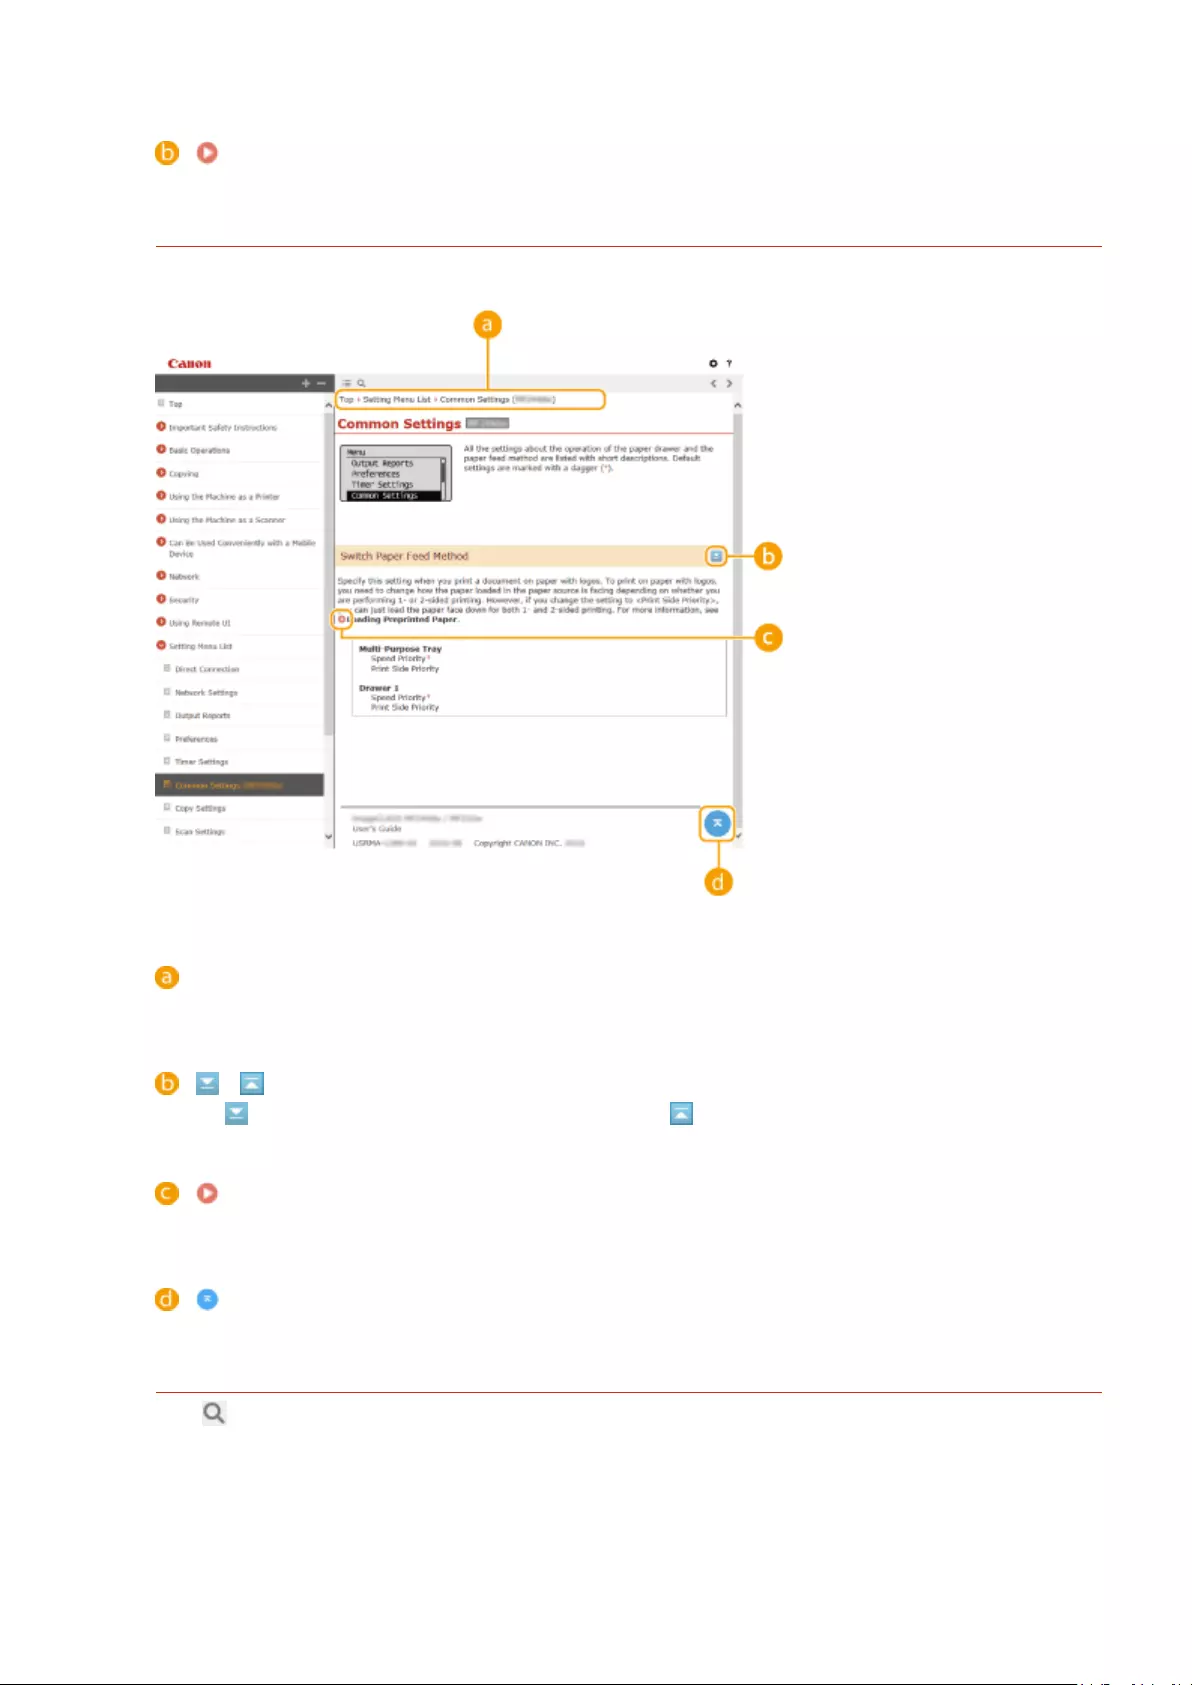
Click to display the corresponding topic page.
Topic Page
Contains information about how to congure and use the machine.
Navigation
See what chapter topic you are currently viewing.
/
Click to display the hidden detailed descriptions. Click to close the detailed descriptions.
Click to go to the corresponding page. To return to the previous page, click «Back» on your Web browser.
Click to return to the page top.
Search
Click to display the search screen. Contains a text box to perform a search by keyword and nd the page
you are looking for.
Appendix
429
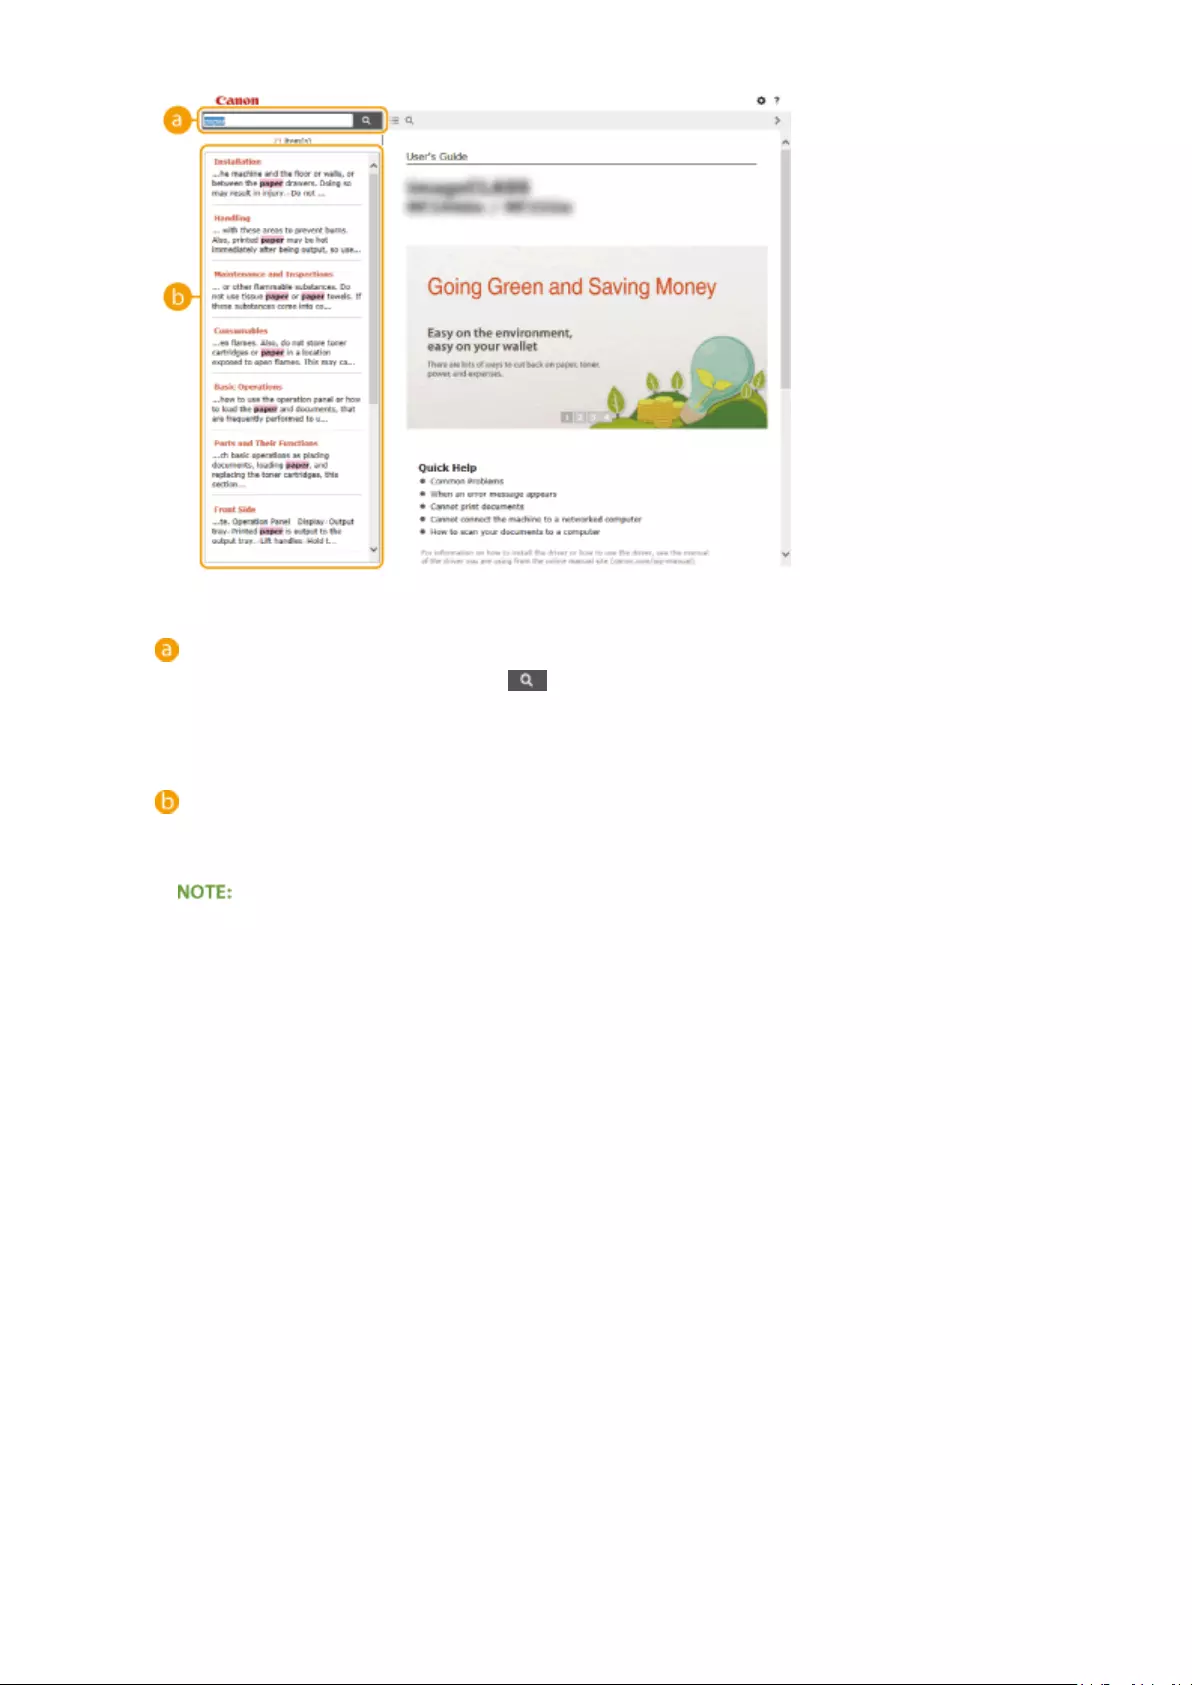
[Enter keyword(s) here]
Enter a keyword or keywords and click to display the search results. Search for pages containing all
keywords by spacing keywords apart. Search for only pages with exact matches by enclosing keyword
phrases in double quotation marks.
Search result
Displays the search results of the pages that contain the specied keywords. From the results, locate the
page you are looking for and click the topic title of the page.
●Specied keywords appear in bold in search results.
Appendix
430

Viewing User’s Guide
15A8-07Y
Marks
Cautions regarding safety, restrictions and cautions regarding the handling of the machine, useful tips, and
other information are indicated using the marks below.
Indicates a warning concerning operations that may lead to death or injury to
persons if not performed correctly. To use the machine safely, always pay
attention to these warnings.
Indicates a caution concerning operations that may lead to injury to persons if not
performed correctly. To use the machine safely, always pay attention to these
cautions.
Indicates an operation that must not be performed. Read these items carefully,
and make sure not to perform the described operations.
Indicates operational requirements and restrictions. Be sure to read these items
carefully to operate the machine correctly, and avoid damage to the machine or
property.
Indicates a clarication of an operation, or contains additional explanations for a
procedure.
Indicates useful functions or tips for using the machine.
Keys and Buttons Used in this Manual
Keys on the operation panel and buttons on the computer display appear in the following notation:
Type Example
Keys on the operation panel
Settings displayed on the operation panel <Timer Settings>
<Specify destination.>
Buttons and other text interfaces displayed on the computer display [Preferences]
Screens Used in This Manual
Unless otherwise noted, displays used in the User’s Guide are those for the MF244dw. Depending on the
operating system you are using, the appearance of the displays used in this manual may slightly differ from the
actual displays. Also, the appearance of drivers and software may differ depending on their version.
Illustrations Used in This Manual
Unless otherwise noted, illustrations used in the User’s Guide are those for the MF244dw. When differences are
signicant, multiple illustrations are used with the model names, such as «MFXXXX / MFXXXX.»
Appendix
431

Manual Display Settings
15A8-080
Appendix
432

Others
15A8-081
This section describes basic Windows operations and includes disclaimers, copyright information, and other
information.
Appendix
433
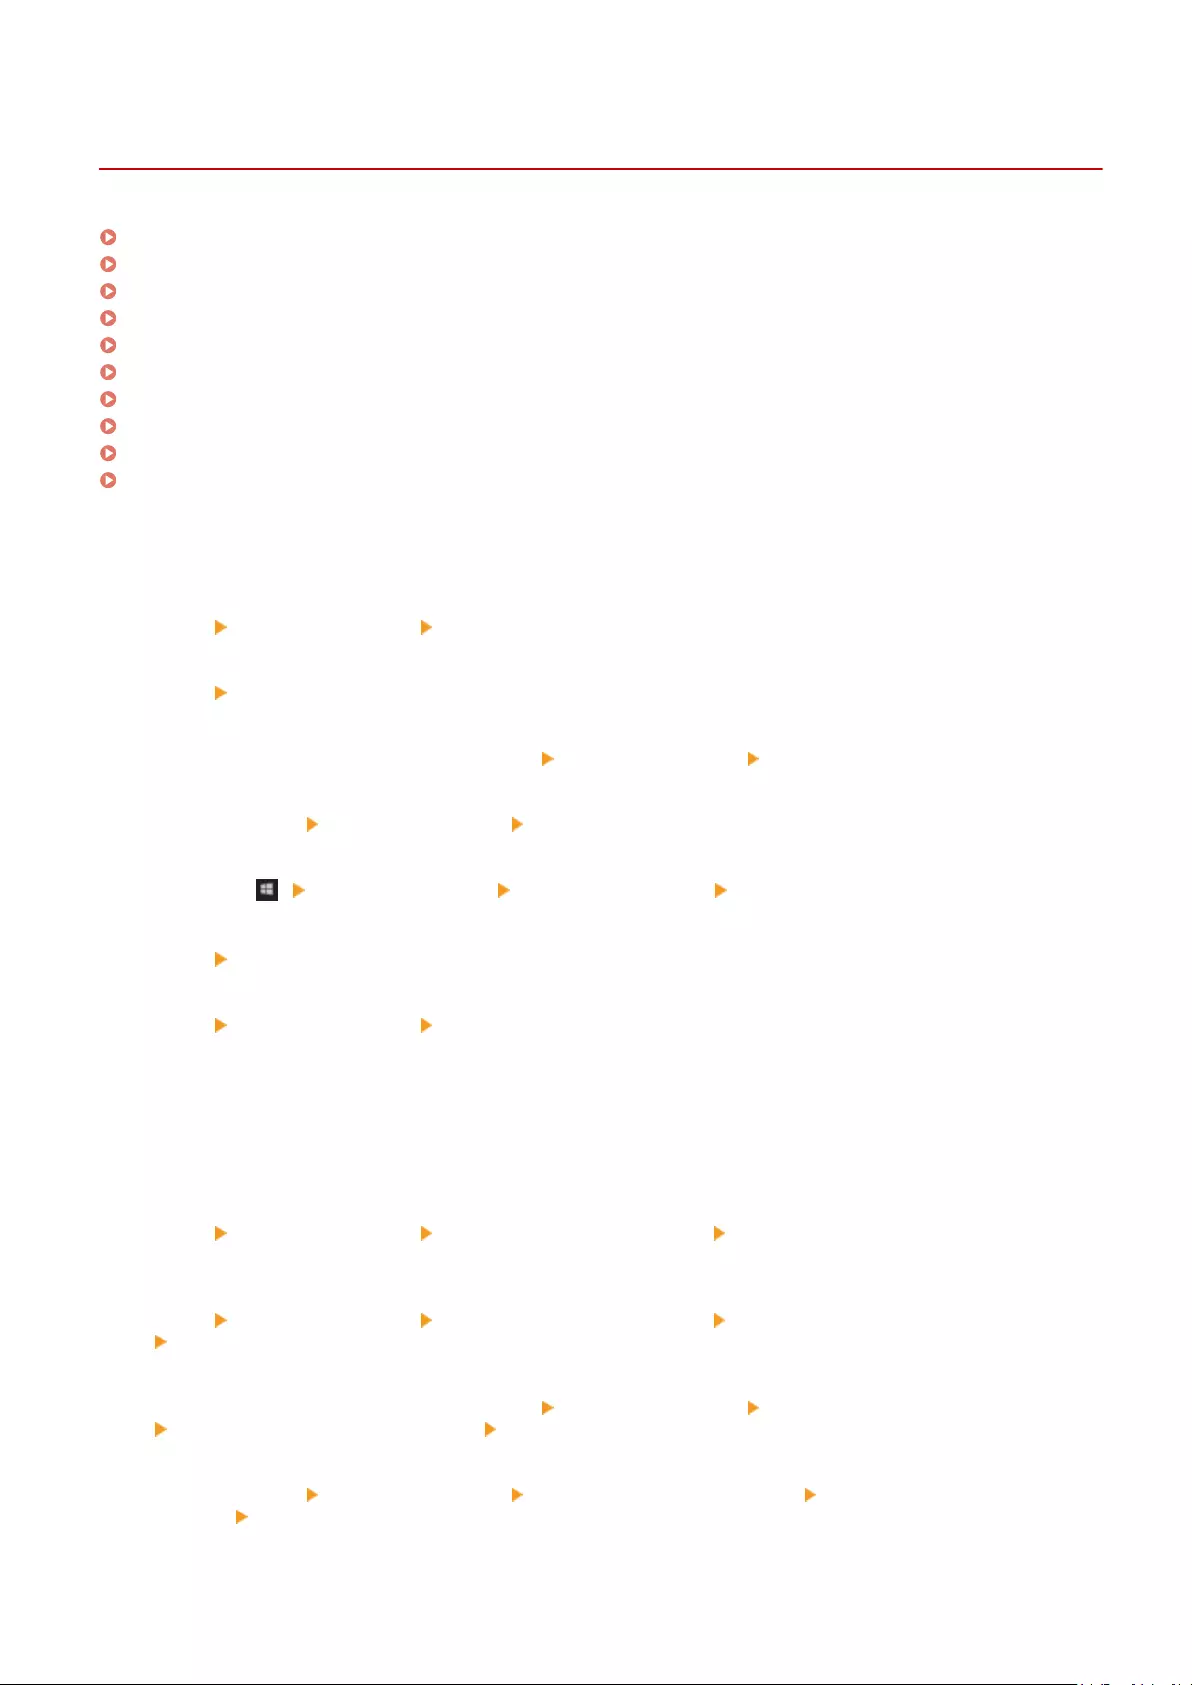
Basic Windows Operations
15A8-082
Displaying the Printer Folder(P. 434)
Enabling [Network discovery](P. 434)
Displaying Shared Printers in the Print Server(P. 435)
Displaying the [Software Programs/Manuals Setup] Screen(P. 435)
Printing a Test Page in Windows(P. 436)
Checking the Bit Architecture(P. 437)
Checking the Computer Name(P. 438)
Checking the Printer Port(P. 439)
Checking Bidirectional Communication(P. 440)
Checking the SSID to Which Your Computer Is Connected(P. 441)
◼Displaying the Printer Folder
Windows Vista
[Start] select [Control Panel] [Printer].
Windows 7/Server 2008 R2
[Start] select [Devices and Printers].
Windows 8/Server 2012
Right-click the lower-left corner of the screen select [Control Panel] [View devices and printers].
Windows 8.1/Server 2012 R2
Right-click [Start] select [Control Panel] [View devices and printers].
Windows 10
Right-click [ ] select [Control Panel] [Hardware and Sound] [Devices and printers].
Windows Server 2003
[Start] select [Printers and Faxes].
Windows Server 2008
[Start] select [Control Panel] double-click [Printers].
◼Enabling [Network discovery]
If you are using Windows Vista/7/8/10/Server 2008/Server 2012, enable [Network discovery] to view the computers on
your network.
Windows Vista
[Start] select [Control Panel] [View network status and tasks] select [Turn on network discovery] under
[Network discovery].
Windows 7/Server 2008 R2
[Start] select [Control Panel] [View network status and tasks] [Change advanced sharing settings]
select [Turn on network discovery] under [Network discovery].
Windows 8/Server 2012
Right-click the lower-left corner of the screen select [Control Panel] [View network status and tasks]
[Change advanced sharing settings] select [Turn on network discovery] under [Network discovery].
Windows 8.1/Server 2012 R2
Right-click [Start] select [Control Panel] [View network status and tasks] [Change advanced sharing
settings] select [Turn on network discovery] under [Network discovery].
Windows 10
Appendix
434
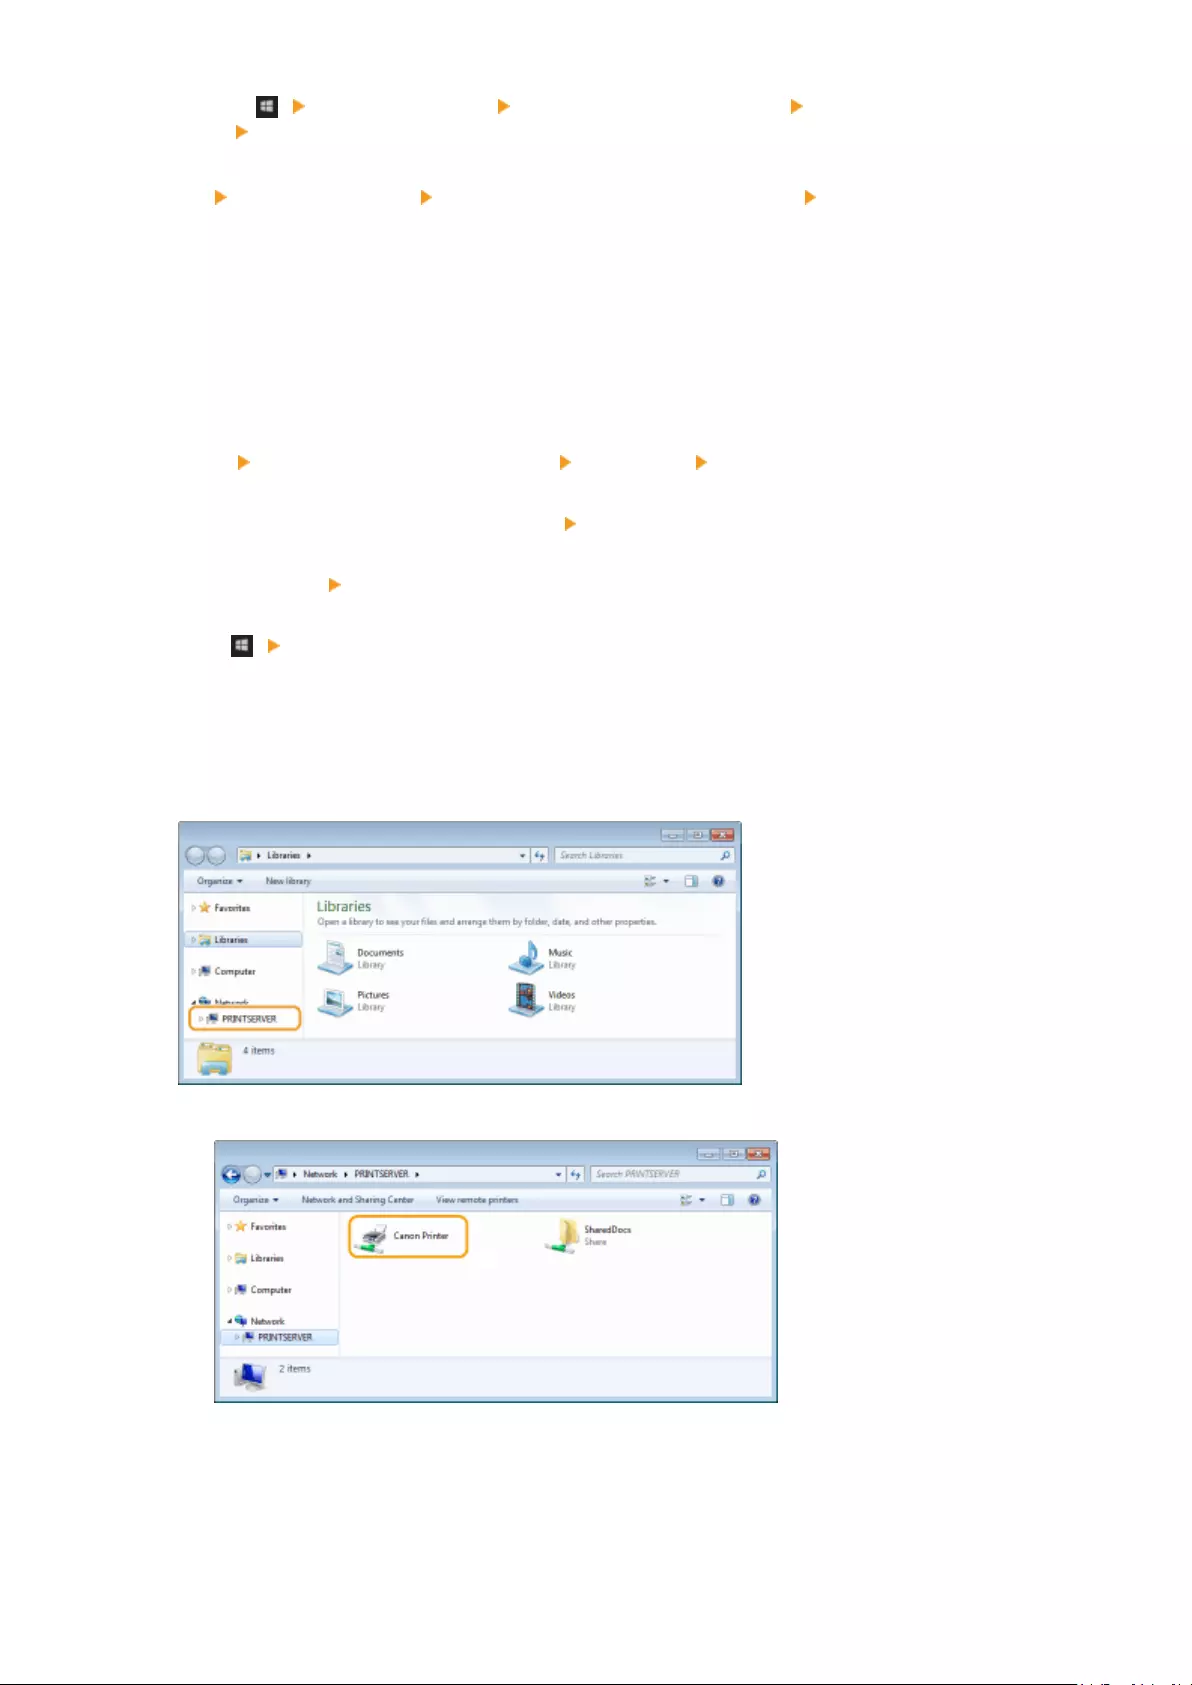
Right-click [ ] select [Control Panel] [View network status and tasks] [Change advanced sharing
settings] select [Turn on network discovery] under [Network discovery].
Windows Server 2008
[Start] select [Control Panel] double-click [Network and Sharing Center] select [Turn on network
discovery] under [Network discovery].
◼Displaying Shared Printers in the Print Server
1Open Windows Explorer.
Windows Vista/7/Server 2003/Server 2008
[Start] select [All Programs] or [Programs] [Accessories] [Windows Explorer].
Windows 8/Server 2012
Right-click the lower-left corner of the screen select [File Explorer].
Windows 8.1/Server 2012 R2
Right-click [Start] select [File Explorer].
Windows 10
Click [ ] select [File Explorer].
2Select [Network] or [My Network Places] in printer server.
●To view computers on the network, you may need to turn on network discovery or search the network for
computers.
➠Shared printers are displayed.
1
◼Displaying the [Software Programs/Manuals Setup] Screen
If your computer does not display the [Software Programs/Manuals Setup] screen after inserting the provided DVD-
ROM, follow the procedure below. The DVD-ROM drive name is indicated as «D:» in this manual. The DVD-ROM drive
name may differ depending on the computer you are using.
Appendix
435

Windows Vista/7/Server 2008
[Start] enter «D:\MInst.exe» in [Search programs and les] or [Start Search] press the [ENTER] key.
Windows 8/Server 2012
Right-click the lower-left corner of the screen [Run] enter «D:\MInst.exe» click [OK]
Windows 8.1/Server 2012 R2
Right-click [Start] [Run] enter «D:\MInst.exe» click [OK]
Windows 10
Click [Search the web and Windows] enter «D:\MInst.exe» click «D:\MInst.exe» displayed in the search
results
Windows Server 2003
[Start] [Run] enter «D:\MInst.exe» click [OK]
◼Printing a Test Page in Windows
You can check whether the printer driver is operational by printing a test page in Windows.
1Load A4 size paper in the multi-purpose tray. Loading Paper in the Manual Feed
Slot(P. 47)
2Open the printer folder. Displaying the Printer Folder(P. 434)
3Right-click the printer driver icon for this machine and click [Printer properties] or
[Properties].
4Click [Print Test Page] in [General] tab.
Appendix
436

➠The test page is printed.
◼Checking the Bit Architecture
If you are not sure whether your computer is running 32-bit or 64-bit Windows follow the procedure below.
1Display [Control Panel].
Windows Vista/7/Server 2008
[Start] select [Control Panel].
Windows 8/Server 2012
Right-click the lower-left corner of the screen select [Control Panel].
Windows 8.1/Server 2012 R2
Right-click [Start] select [Control Panel].
Windows 10
Proceed to step 2.
2Display [System].
Windows Vista/7/8/Server 2008 R2/Server 2012
Click [System and Maintenance] or [System and Security] [System].
Windows 10
Click [ ] select [Settings] [System] [About].
Windows Server 2008
Double-click [System].
3Check the bit architecture.
For 32-bit versions
[32-bit Operating System] is displayed.
For 64-bit versions
[64-bit Operating System] is displayed.
Appendix
437

◼Checking the Computer Name
Windows Vista/7/8/10/Server 2008/Server 2012
1Display [Control Panel].
Windows Vista/7/Server 2008
[Start] select [Control Panel].
Windows 8/Server 2012
Right-click the lower-left corner of the screen select [Control Panel].
Windows 8.1/Server 2012 R2
Right-click [Start] select [Control Panel].
Windows 10
Proceed to step 2.
2Display [System].
Windows Vista/7/8/Server 2008 R2/Server 2012
Click [System and Maintenance] or [System and Security] [System].
Windows 10
Click [ ] select [Settings] [System] [About].
Windows Server 2008
Double-click [System].
3Check the computer name.
Appendix
438

Windows Server 2003
1[Start] select [Control Panel] [System].
2Click [Change] in [Computer Name] tab.
3Check the computer name.
◼Checking the Printer Port
1Open the printer folder. Displaying the Printer Folder(P. 434)
2Right-click the printer driver icon for this machine and click [Printer properties] or
[Properties].
Appendix
439
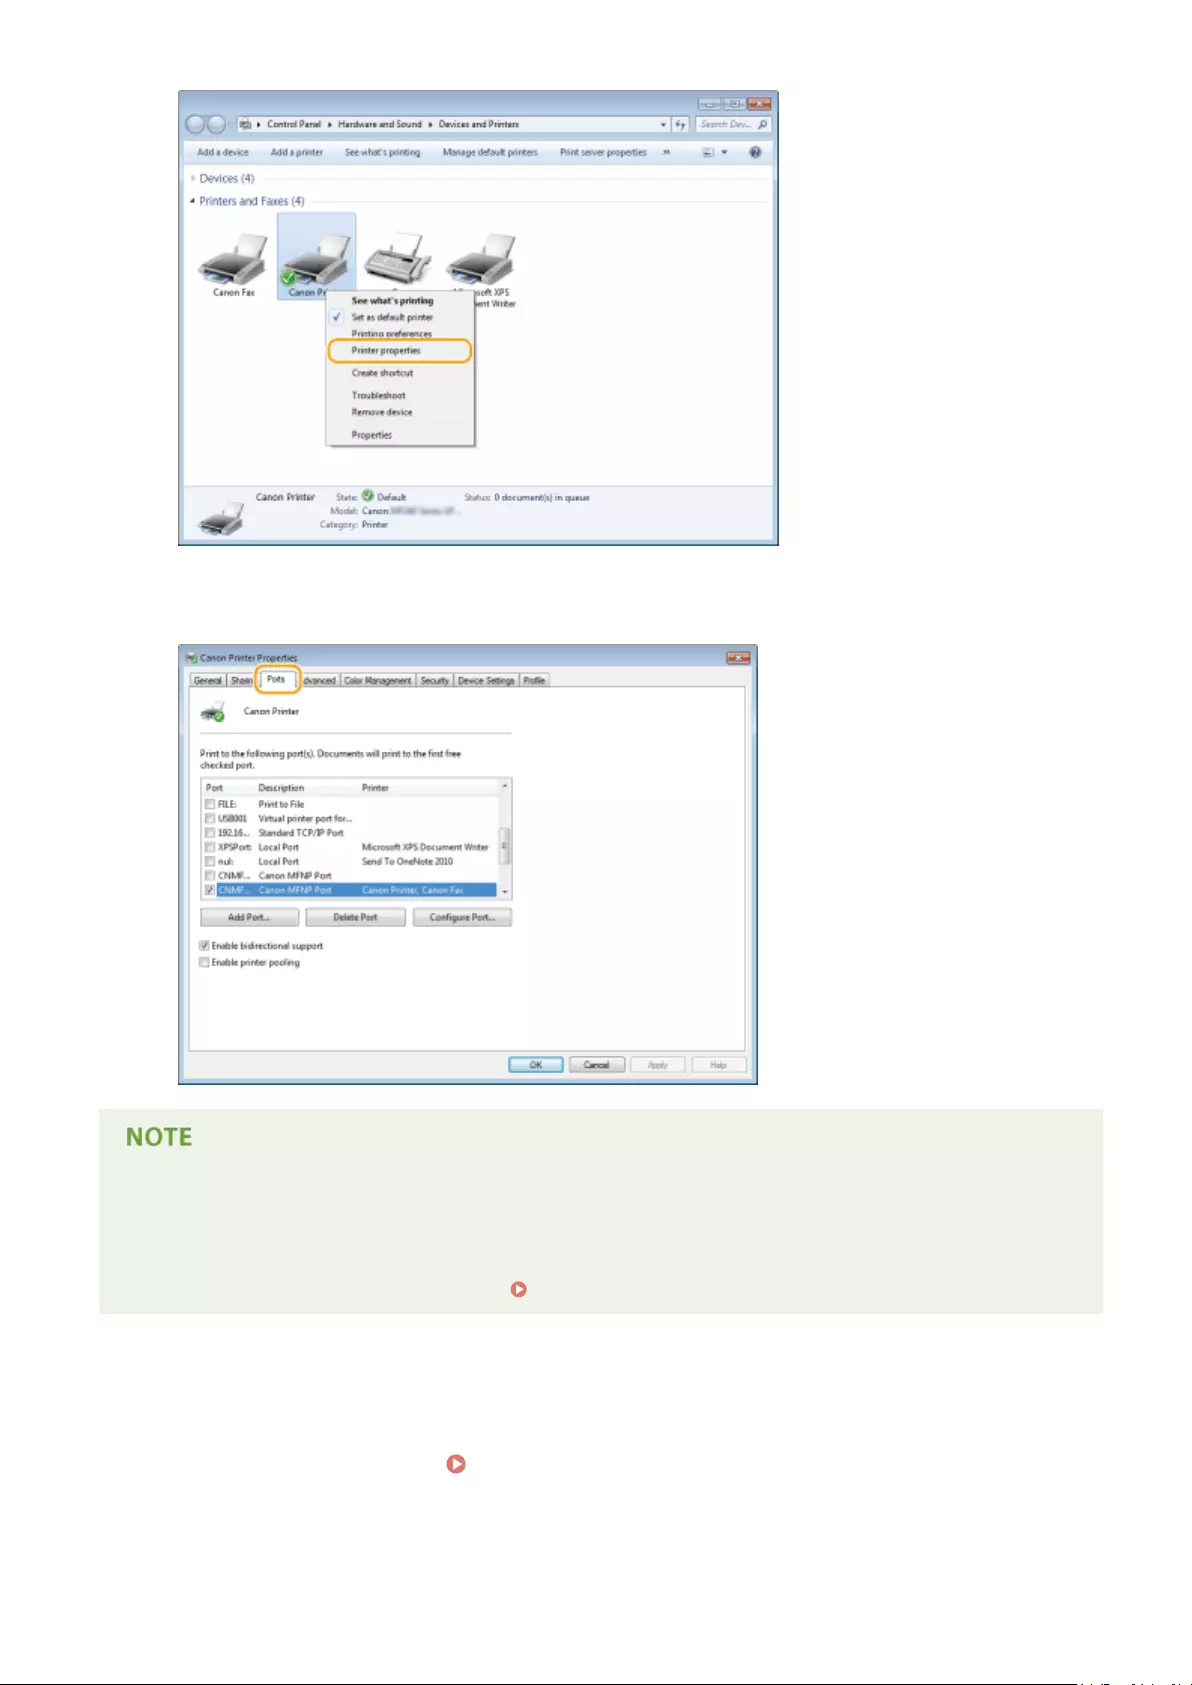
3In the [Ports] tab, check that the port is selected correctly.
If you are using a network connection and have changed the machine’s IP address
●If [Description] for the selected port is [Canon MFNP Port], and the machine and the computer are on the
same subnet, then the connection will be maintained. You do not need to add a new port. If it is [Standard
TCP/IP Port], you need to add a new port. Conguring Printer Ports(P. 201)
◼Checking Bidirectional Communication
1Open the printer folder. Displaying the Printer Folder(P. 434)
Appendix
440

2Right-click the printer driver icon for this machine and click [Printer properties] or
[Properties].
3In the [Ports] tab, make sure that the [Enable bidirectional support] check box is
selected.
◼Checking the SSID to Which Your Computer Is Connected
If your computer is connected to a wireless LAN network, click , , or in the system tray to display the SSID of
the connected wireless LAN router.
Appendix
441

Appendix
442

Notice
15A8-084
◼International ENERGY STAR Program
As an ENERGY STAR® Partner, Canon Inc. has determined that this product meets the
ENERGY STAR Program for energy eciency.
The International ENERGY STAR Oce Equipment Program is an international program that
promotes energy saving through the use of computers and other oce equipment.
The program backs the development and dissemination of products with functions that
effectively reduce energy consumption. It is an open system in which business proprietors
can participate voluntarily.
The targeted products are oce equipment, such as computers, displays, printers,
facsimiles, and copiers. The standards and logos are uniform among participating nations.
◼IPv6 Ready Logo
The protocol stack included in this machine has obtained the IPv6 Ready Logo Phase-1
established by the IPv6 Forum.
◼WEEE and Battery Directives
Only for European Union and EEA (Norway, Iceland and Liechtenstein)
These symbols indicate that this product is not to be disposed of with your household waste, according to the WEEE
Directive (2012/19/EU), the Battery Directive (2006/66/EC) and/or national legislation implementing those Directives.
If a chemical symbol is printed beneath the symbol shown above, in accordance with the Battery Directive, this
indicates that a heavy metal (Hg = Mercury, Cd = Cadmium, Pb = Lead) is present in this battery or accumulator at a
concentration above an applicable threshold specied in the Battery Directive.
This product should be handed over to a designated collection point, e.g., on an authorized one-for-one basis when
you buy a new similar product or to an authorized collection site for recycling waste electrical and electronic
equipment (EEE) and batteries and accumulators. Improper handling of this type of waste could have a possible
impact on the environment and human health due to potentially hazardous substances that are generally associated
with EEE. Your cooperation in the correct disposal of this product will contribute to the effective usage of natural
resources.
For more information about the recycling of this product, please contact your local city oce, waste authority,
approved scheme or your household waste disposal service or visit www.canon-europe.com/weee, or www.canon-
europe.com/battery.
Batteries are not included in MF231.
◼Environmental Information
Appendix
443

Reducing your environmental impact while saving money
Power Consumption and Activation Time
The amount of electricity a device consumes depends on the way the device is used. This product is designed and
set in a way to allow you to reduce your electricity costs. After the last print it switches to Ready Mode. In this
mode it can print again immediately if required. If the product is not used for a time, the device switches to its
Power Save Mode.
The devices consume less power (Watt) in these modes.
If you wish to set a longer Activation Time or would like to completely deactivate the Power Save Mode, please
consider that this device may then only switch to a lower energy level after a longer period of time or not at all.
Canon does not recommend extending the Activation Times from the optimum ones set as default.
Energy Star®
The Energy Star® programme is a voluntary scheme to promote the development and purchase of energy
ecient models, which help to minimise environmental impact.
Products which meet the stringent requirements of the Energy Star® programme for both environmental benets
and the amount of energy consumption will carry the Energy Star® logo accordingly.
Paper types
This product can be used to print on both recycled and virgin paper (certied to an environmental stewardship
scheme), which complies with EN12281 or a similar quality standard. In addition it can support printing on media
down to a weight of 64g/m².
Lighter paper means less resources used and a lower environmental footprint for your printing needs.
Duplex printing (Standard duplex printing products only)
Duplex printing capability enables you to print on both sides automatically, and therefore helps to reduce the use
of valuable resources by reducing your paper consumption.
The duplex function has been auto enabled during the set up and driver installation and Canon strongly
recommends that you do not disable this function. You should continue to use the duplex function to reduce the
environmental impact of your work with this product at all times.
◼Disclaimers
●The information in this document is subject to change without notice.
●CANON INC. MAKES NO WARRANTY OF ANY KIND WITH REGARD TO THIS MATERIAL, EITHER EXPRESS OR IMPLIED,
EXCEPT AS PROVIDED HEREIN, INCLUDING WITHOUT LIMITATION, THEREOF, WARRANTIES AS TO MARKETABILITY,
MERCHANTABILITY, FITNESS FOR A PARTICULAR PURPOSE OF USE, OR NON-INFRINGEMENT. CANON INC. SHALL
NOT BE LIABLE FOR ANY DIRECT, INCIDENTAL, OR CONSEQUENTIAL DAMAGES OF ANY NATURE, OR LOSSES OR
EXPENSES RESULTING FROM THE USE OF THIS MATERIAL.
◼Trademarks
Adobe, Acrobat, and Reader are registered trademarks of Adobe Systems Incorporated in the United States and/or
other countries.
Apple, Bonjour, iPad, iPhone, iPod touch, Safari, Mac, Mac OS and OS X are trademarks of Apple Inc.
Microsoft, Windows, Windows Vista, Windows Server, Internet Explorer, Word and Excel are either registered
trademarks or trademarks of Microsoft Corporation in the United States and/or other countries.
iOS is a trademark or registered trademark of Cisco in the U.S. and other countries and is used under license.
Google Cloud Print, Google Chrome and Android are either registered trademarks or trademarks of Google Inc.
This product contains the Universal Font Scaling Technology or UFST® under license from Monotype Imaging, Inc.
UFST® is a trademark of Monotype Imaging, Inc. registered in the United States Patent and Trademark Oce and may
be registered in certain jurisdictions.
UFST: Copyright © 1989 — 1996, 1997, 2003, 2004, 2008, all rights reserved, by Monotype Imaging Inc.
Appendix
444

Adobe, PostScript, and the PostScript logo are either registered trademarks or trademarks of Adobe Systems
Incorporated in the United States and/or other countries.
Copyright © 2007 -08 Adobe Systems Incorporated. All rights reserved.
Protected by U.S. Patents 5,737,599; 5,781,785; 5,819,301; 5,929,866; 5,943,063; 6,073,148; 6,515,763; 6,639,593;
6,754,382; 7,046,403; 7,213,269; 7,242,415; Patents pending in the U.S. and other countries.
All instances of the name PostScript in the text are references to the PostScript language as dened by Adobe Systems
Incorporated unless otherwise stated. The name PostScript also is used as a product trademark for Adobe Systems’
implementation of the PostScript language interpreter.
Except as otherwise stated, any reference to a «PostScript printing device,» «PostScript display device,» or similar item
refers to a printing device, display device or item (respectively) that contains PostScript technology created or licensed
by Adobe Systems Incorporated and not to devices or items that purport to be merely compatible with the PostScript
language.
Adobe, the Adobe logo, PostScript, the PostScript logo, and PostScript 3 are either registered trademarks or
trademarks of Adobe Systems Incorporated in the United States and/or other countries.
Linux is a registered trademark of Linus Torvalds. Microsoft and Windows are either registered trademarks or
trademarks of Microsoft Corporation in the United States and/or other countries.
All other trademarks are the property of their respective owners.
The Adobe PDF logo is a trademark or registered trademark of Adobe Systems Incorporated in the United States and
other countries.
Copyright © 2008 Adobe Systems Incorporated. All rights reserved.
Protected by U.S. Patents 6,185,684; 6,205,549; 7,213,269; 7,272,628; 7,278,168; Patents pending in the U.S. and other
countries.
Appendix
445

All instances of the name PostScript in the text are references to the PostScript language as dened by Adobe Systems
Incorporated unless otherwise stated. The name PostScript also is used as a product trademark for Adobe Systems’
implementation of the PostScript language interpreter.
Except as otherwise stated, any reference to a «PostScript printing device,» «PostScript display device,» or similar item
refers to a printing device, display device or item (respectively) that contains PostScript technology created or licensed
by Adobe Systems Incorporated and not to devices or items that purport to be merely compatible with the PostScript
language.
Adobe, the Adobe logo, Adobe LiveCycle® Policy Server, PostScript, the PostScript Logo, and PostScript 3 are either
registered trademarks or trademarks of Adobe Systems Incorporated in the United States and/or other countries.
All other trademarks are the property of their respective owners.
Portions of this software are copyright © 2007 The FreeType Project (www.freetype.org). All rights reserved.
All other product and brand names are registered trademarks, trademarks or service marks of their respective owners.
◼Copyright
Reproduction of the contents of this document in whole or in part without prior permission is prohibited.
Appendix
446

This Font Software is licensed under the SIL Open Font License,
Version 1.1.
This license is copied below, and is also available with a FAQ at:
http://scripts.sil.org/OFL
————————————————————
SIL OPEN FONT LICENSE Version 1.1 — 26 February 2007
————————————————————
PREAMBLE
The goals of the Open Font License (OFL) are to stimulate worldwide
development of collaborative font projects, to support the font
creation efforts of academic and linguistic communities, and to
provide a free and open framework in which fonts may be shared and
improved in partnership with others.
The OFL allows the licensed fonts to be used, studied, modied and
redistributed freely as long as they are not sold by themselves. The
fonts, including any derivative works, can be bundled, embedded,
redistributed and/or sold with any software provided that any reserved
names are not used by derivative works. The fonts and derivatives,
however, cannot be released under any other type of license. The
requirement for fonts to remain under this license does not apply to
any document created using the fonts or their derivatives.
DEFINITIONS
«Font Software» refers to the set of les released by the Copyright
Holder(s) under this license and clearly marked as such. This may
include source les, build scripts and documentation.
«Reserved Font Name» refers to any names specied as such after the
copyright statement(s).
«Original Version» refers to the collection of Font Software
components as distributed by the Copyright Holder(s).
«Modied Version» refers to any derivative made by adding to,
deleting, or substituting — in part or in whole — any of the
components of the Original Version, by changing formats or by porting
the Font Software to a new environment.
«Author» refers to any designer, engineer, programmer, technical
writer or other person who contributed to the Font Software.
PERMISSION & CONDITIONS
Permission is hereby granted, free of charge, to any person obtaining
a copy of the Font Software, to use, study, copy, merge, embed,
modify, redistribute, and sell modied and unmodied copies of the
Font Software, subject to the following conditions:
SIL OPEN FONT LICENSE
447

1) Neither the Font Software nor any of its individual components, in
Original or Modied Versions, may be sold by itself.
2) Original or Modied Versions of the Font Software may be bundled,
redistributed and/or sold with any software, provided that each copy
contains the above copyright notice and this license. These can be
included either as stand-alone text les, human-readable headers or
in the appropriate machine-readable metadata elds within text or
binary les as long as those elds can be easily viewed by the user.
3) No Modied Version of the Font Software may use the Reserved Font
Name(s) unless explicit written permission is granted by the
corresponding Copyright Holder. This restriction only applies to the
primary font name as presented to the users.
4) The name(s) of the Copyright Holder(s) or the Author(s) of the Font
Software shall not be used to promote, endorse or advertise any
Modied Version, except to acknowledge the contribution(s) of the
Copyright Holder(s) and the Author(s) or with their explicit written
permission.
5) The Font Software, modied or unmodied, in part or in whole,
must be distributed entirely under this license, and must not be
distributed under any other license. The requirement for fonts to
remain under this license does not apply to any document created using
the Font Software.
TERMINATION
This license becomes null and void if any of the above conditions are
not met.
DISCLAIMER
THE FONT SOFTWARE IS PROVIDED «AS IS», WITHOUT WARRANTY OF ANY KIND,
EXPRESS OR IMPLIED, INCLUDING BUT NOT LIMITED TO ANY WARRANTIES OF
MERCHANTABILITY, FITNESS FOR A PARTICULAR PURPOSE AND NONINFRINGEMENT
OF COPYRIGHT, PATENT, TRADEMARK, OR OTHER RIGHT. IN NO EVENT SHALL THE
COPYRIGHT HOLDER BE LIABLE FOR ANY CLAIM, DAMAGES OR OTHER LIABILITY,
INCLUDING ANY GENERAL, SPECIAL, INDIRECT, INCIDENTAL, OR CONSEQUENTIAL
DAMAGES, WHETHER IN AN ACTION OF CONTRACT, TORT OR OTHERWISE, ARISING
FROM, OUT OF THE USE OR INABILITY TO USE THE FONT SOFTWARE OR FROM
OTHER DEALINGS IN THE FONT SOFTWARE.
SIL OPEN FONT LICENSE
448

— 1 —
The Software Subjected to the Other License Conditions
Please refer to Table of Software and respective License terms below, for more detail and corresponding
license conditions.
Table of Software
Names of Software Terms and Conditions of the License:
See Page
bldimake 2
FreeType 3
snmp 8
Incl 11
JPEG 12
math 13
mDNSResponder 14
mDNSResponder (part of mDNSShared) 18
OpenSSL 19
xpm 23

— 2 —
bldimake
Copyright (c) 1985, 1986, 1987, 1988 The Open Group
All right Reserved.
Permission to use, copy, modify, distribute, and sell this software and its documentation for any purpose is
hereby granted without fee, provided that the above copyright notice appear in all copies and that both that
copyright notice and this permission notice appear in supporting documentation. The above copyright
notice and this permission notice shall be included in all copies or substantial portions of the Software.
THE SOFTWARE IS PROVIDED «AS IS», WITHOUT WARRANTY OF ANY KIND, EXPRESS OR IMPLIED,
INCLUDING BUT NOT LIMITED TO THE WARRANTIES OF MERCHANTABILITY, FITNESS FOR A
PARTICULAR PURPOSE AND NONINFRINGEMENT. IN NO EVENT SHALL THE OPEN GROUP BE LIABLE
FOR ANY CLAIM, DAMAGES OR OTHER LIABILITY, WHETHER IN AN ACTION OF
CONTRACT, TORT OR OTHERWISE, ARISING FROM, OUT OF OR IN CONNECTION WITH THE
SOFTWARE OR THE USE OR OTHER DEALINGS IN THE SOFTWARE.
Except as contained in this notice, the name of The Open Group shall not be used in advertising or otherwise
to promote the sale, use or other dealings in this Software without prior written authorization from The Open
Group.

— 3 —
FreeType
The FreeType Project LICENSE
——————————
2006-Jan-27
Copyright 1996-2002, 2006 by
David Turner, Robert Wilhelm, and Werner Lemberg
Introduction
============
The FreeType Project is distributed in several archive packages;
some of them may contain, in addition to the FreeType font engine,
various tools and contributions which rely on, or relate to, the
FreeType Project.
This license applies to all files found in such packages, and
which do not fall under their own explicit license. The license
affects thus the FreeType font engine, the test programs,
documentation and makefiles, at the very least.
This license was inspired by the BSD, Artistic, and IJG
(Independent JPEG Group) licenses, which all encourage inclusion
and use of free software in commercial and freeware products
alike. As a consequence, its main points are that:
o We don’t promise that this software works. However, we will be
interested in any kind of bug reports. (`as is’ distribution)
o You can use this software for whatever you want, in parts or
full form, without having to pay us. (`royalty-free’ usage)
o You may not pretend that you wrote this software. If you use
it, or only parts of it, in a program, you must acknowledge

— 4 —
somewhere in your documentation that you have used the
FreeType code. (`credits‘)
We specifically permit and encourage the inclusion of this
software, with or without modifications, in commercial products.
We disclaim all warranties covering The FreeType Project and
assume no liability related to The FreeType Project.
Finally, many people asked us for a preferred form for a
credit/disclaimer to use in compliance with this license. We thus
encourage you to use the following text:
«««
Portions of this software are copyright © <year> The FreeType
Project (www.freetype.org). All rights reserved.
«««
Please replace <year> with the value from the FreeType version you
actually use.
Legal Terms
===========
0. Definitions
———-—-
Throughout this license, the terms `package’, `FreeType Project’,
and `FreeType archive‘ refer to the set of files originally
distributed by the authors (David Turner, Robert Wilhelm, and
Werner Lemberg) as the `FreeType Project’, be they named as alpha,
beta or final release.
`You’ refers to the licensee, or person using the project, where
`using’ is a generic term including compiling the project’s source
code as well as linking it to form a `program’ or `executable’.
This program is referred to as `a program using the FreeType

— 5 —
engine’.
This license applies to all files distributed in the original
FreeType Project, including all source code, binaries and
documentation, unless otherwise stated in the file in its
original, unmodified form as distributed in the original archive.
If you are unsure whether or not a particular file is covered by
this license, you must contact us to verify this.
The FreeType Project is copyright (C) 1996-2000 by David Turner,
Robert Wilhelm, and Werner Lemberg. All rights reserved except as
specified below.
1. No Warranty
———-—-
THE FREETYPE PROJECT IS PROVIDED `AS IS’ WITHOUT WARRANTY OF ANY
KIND, EITHER EXPRESS OR IMPLIED, INCLUDING, BUT NOT LIMITED TO,
WARRANTIES OF MERCHANTABILITY AND FITNESS FOR A PARTICULAR
PURPOSE. IN NO EVENT WILL ANY OF THE AUTHORS OR COPYRIGHT HOLDERS
BE LIABLE FOR ANY DAMAGES CAUSED BY THE USE OR THE INABILITY TO
USE, OF THE FREETYPE PROJECT.
2. Redistribution
———-——-
This license grants a worldwide, royalty-free, perpetual and
irrevocable right and license to use, execute, perform, compile,
display, copy, create derivative works of, distribute and
sublicense the FreeType Project (in both source and object code
forms) and derivative works thereof for any purpose; and to
authorize others to exercise some or all of the rights granted
herein, subject to the following conditions:
o Redistribution of source code must retain this license file
(`FTL.TXT‘) unaltered; any additions, deletions or changes to
the original files must be clearly indicated in accompanying
documentation. The copyright notices of the unaltered,

— 6 —
original files must be preserved in all copies of source
files.
o Redistribution in binary form must provide a disclaimer that
states that the software is based in part of the work of the
FreeType Team, in the distribution documentation. We also
encourage you to put an URL to the FreeType web page in your
documentation, though this isn’t mandatory.
These conditions apply to any software derived from or based on
the FreeType Project, not just the unmodified files. If you use
our work, you must acknowledge us. However, no fee need be paid
to us.
3. Advertising
———-—-
Neither the FreeType authors and contributors nor you shall use
the name of the other for commercial, advertising, or promotional
purposes without specific prior written permission.
We suggest, but do not require, that you use one or more of the
following phrases to refer to this software in your documentation
or advertising materials: `FreeType Project’, `FreeType Engine’,
`FreeType library’, or `FreeType Distribution’.
As you have not signed this license, you are not required to
accept it. However, as the FreeType Project is copyrighted
material, only this license, or another one contracted with the
authors, grants you the right to use, distribute, and modify it.
Therefore, by using, distributing, or modifying the FreeType
Project, you indicate that you understand and accept all the terms
of this license.
4. Contacts
———-—
There are two mailing lists related to FreeType:

— 7 —
o freetype@nongnu.org
Discusses general use and applications of FreeType, as well as
future and wanted additions to the library and distribution.
If you are looking for support, start in this list if you
haven‘t found anything to help you in the documentation.
o freetype—devel@nongnu.org
Discusses bugs, as well as engine internals, design issues,
specific licenses, porting, etc.
Our home page can be found at
http://www.freetype.org
— end of FTL.TXT —

— 8 —
snmp
Copyright 1988, 1989 by Carnegie Mellon University
All Rights Reserved
Permission to use, copy, modify, and distribute this software and its
documentation for any purpose and without fee is hereby granted,
provided that the above copyright notice appear in all copies and that
both that copyright notice and this permission notice appear in
supporting documentation, and that the name of CMU not be
used in advertising or publicity pertaining to distribution of the
software without specific, written prior permission.
CMU DISCLAIMS ALL WARRANTIES WITH REGARD TO THIS SOFTWARE, INCLUDING
ALL IMPLIED WARRANTIES OF MERCHANTABILITY AND FITNESS, IN NO EVENT SHALL
CMU BE LIABLE FOR ANY SPECIAL, INDIRECT OR CONSEQUENTIAL DAMAGES OR
ANY DAMAGES WHATSOEVER RESULTING FROM LOSS OF USE, DATA OR PROFITS,
WHETHER IN AN ACTION OF CONTRACT, NEGLIGENCE OR OTHER TORTIOUS ACTION,
ARISING OUT OF OR IN CONNECTION WITH THE USE OR PERFORMANCE OF THIS
SOFTWARE.
/* Copyright (C) 1995-1998 Eric Young (eay@cryptsoft.com)
* All rights reserved.
*
* This package is an SSL implementation written
* by Eric Young (eay@cryptsoft.com).
* The implementation was written so as to conform with Netscapes SSL.
*
* This library is free for commercial and non-commercial use as long as
* the following conditions are aheared to. The following conditions
* apply to all code found in this distribution, be it the RC4, RSA,
* lhash, DES, etc., code; not just the SSL code. The SSL documentation
* included with this distribution is covered by the same copyright terms
* except that the holder is Tim Hudson (tjh@cryptsoft.com).
*
* Copyright remains Eric Young’s, and as such any Copyright notices in

— 9 —
* the code are not to be removed.
* If this package is used in a product, Eric Young should be given attribution
* as the author of the parts of the library used.
* This can be in the form of a textual message at program startup or
* in documentation (online or textual) provided with the package.
*
* Redistribution and use in source and binary forms, with or without
* modification, are permitted provided that the following conditions
* are met:
* 1. Redistributions of source code must retain the copyright
* notice, this list of conditions and the following disclaimer.
* 2. Redistributions in binary form must reproduce the above copyright
* notice, this list of conditions and the following disclaimer in the
* documentation and/or other materials provided with the distribution.
* 3. All advertising materials mentioning features or use of this software
* must display the following acknowledgement:
* «This product includes cryptographic software written by
* Eric Young (eay@cryptsoft.com)»
* The word ‘cryptographic’ can be left out if the rouines from the library
* being used are not cryptographic related  .
.
* 4. If you include any Windows specific code (or a derivative thereof) from
* the apps directory (application code) you must include an acknowledgement:
* «This product includes software written by Tim Hudson (tjh@cryptsoft.com)»
*
* THIS SOFTWARE IS PROVIDED BY ERIC YOUNG «AS IS» AND
* ANY EXPRESS OR IMPLIED WARRANTIES, INCLUDING, BUT NOT LIMITED TO, THE
* IMPLIED WARRANTIES OF MERCHANTABILITY AND FITNESS FOR A PARTICULAR PURPOSE
* ARE DISCLAIMED. IN NO EVENT SHALL THE AUTHOR OR CONTRIBUTORS BE LIABLE
* FOR ANY DIRECT, INDIRECT, INCIDENTAL, SPECIAL, EXEMPLARY, OR CONSEQUENTIAL
* DAMAGES (INCLUDING, BUT NOT LIMITED TO, PROCUREMENT OF SUBSTITUTE GOODS
* OR SERVICES; LOSS OF USE, DATA, OR PROFITS; OR BUSINESS INTERRUPTION)
* HOWEVER CAUSED AND ON ANY THEORY OF LIABILITY, WHETHER IN CONTRACT, STRICT
* LIABILITY, OR TORT (INCLUDING NEGLIGENCE OR OTHERWISE) ARISING IN ANY WAY
* OUT OF THE USE OF THIS SOFTWARE, EVEN IF ADVISED OF THE POSSIBILITY OF
* SUCH DAMAGE.
*
* The licence and distribution terms for any publically available version or
* derivative of this code cannot be changed. i.e. this code cannot simply be

— 10 —
* copied and put under another distribution licence
* [including the GNU Public Licence.]
*/
Copyright 1988, 1989 by Carnegie Mellon University
Copyright 1989 TGV, Incorporated
All Rights Reserved
Permission to use, copy, modify, and distribute this software and its
documentation for any purpose and without fee is hereby granted,
provided that the above copyright notice appear in all copies and that
both that copyright notice and this permission notice appear in
supporting documentation, and that the name of CMU and TGV not be used
in advertising or publicity pertaining to distribution of the software
without specific, written prior permission.
CMU AND TGV DISCLAIMS ALL WARRANTIES WITH REGARD TO THIS SOFTWARE,
INCLUDING ALL IMPLIED WARRANTIES OF MERCHANTABILITY AND FITNESS, IN NO
EVENT SHALL CMU OR TGV BE LIABLE FOR ANY SPECIAL, INDIRECT OR
CONSEQUENTIAL DAMAGES OR ANY DAMAGES WHATSOEVER RESULTING FROM LOSS OF
USE, DATA OR PROFITS, WHETHER IN AN ACTION OF CONTRACT, NEGLIGENCE OR
OTHER TORTIOUS ACTION, ARISING OUT OF OR IN CONNECTION WITH THE USE OR
PERFORMANCE OF THIS SOFTWARE.

— 11 —
Incl
Copyright (c) 1994-96 SunSoft, Inc.
Permission is hereby granted, free of charge, to any person obtaining a copy of this
software and associated documentation files (the «Software»), to deal in the Software
without restriction, including without limitation the rights to use, copy, modify,
merge, publish, distribute, sublicense, and/or sell copies of the Software, and to
permit persons to whom the Software is furnished to do so, subject to the following
conditions:
The above copyright notice and this permission notice shall be included in all copies
or substantial portions of the Software.
THE SOFTWARE IS PROVIDED «AS IS», WITHOUT WARRANTY OF ANY KIND, EXPRESS OR IMPLIED,
INCLUDING BUT NOT LIMITED TO THE WARRANTIES OF MERCHANTABILITY, FITNESS FOR A
PARTICULAR PURPOSE AND NONINFRINGEMENT. IN NO EVENT SHALL SUNSOFT INC. OR ITS
PARENT COMPANY BE LIABLE FOR ANY CLAIM, DAMAGES OR OTHER LIABILITY, WHETHER IN AN
ACTION OF CONTRACT, TORT OR OTHERWISE, ARISING FROM, OUT OF OR IN CONNECTION WITH
THE SOFTWARE OR THE USE OR OTHER DEALINGS IN THE SOFTWARE.
Except as contained in this notice, the name of SunSoft, Inc. shall not be used in advertising or otherwise to
promote the sale, use or other dealings in this Software without prior written authorization from SunSoft, Inc.

— 12 —
JPEG
«this software is based in part on the work of the Independent JPEG Group.».

— 13 —
math
Copyright (c) 1993 by Sun Microsystems, Inc. All rights reserved.
Developed at SunPro, a Sun Microsystems, Inc. business.
Permission to use, copy, modify, and distribute this software is freely granted, provided that this notice is
preserved.
copysignf.c:* Copyright (c) 1993 by Sun Microsystems, Inc. All rights reserved.
math_private.h:* Copyright (c) 1993 by Sun Microsystems, Inc. All rights reserved.
powf.c:* Copyright (c) 1993 by Sun Microsystems, Inc. All rights reserved.
scalbnf.c:* Copyright (c) 1993 by Sun Microsystems, Inc. All rights reserved.

— 14 —
mDNSResponder
Apache License
Version 2.0, January 2004
http://www.apache.org/licenses/
TERMS AND CONDITIONS FOR USE, REPRODUCTION, AND DISTRIBUTION
1. Definitions.
«License» shall mean the terms and conditions for use, reproduction, and distribution as defined by Sections 1
through 9 of this document.
«Licensor» shall mean the copyright owner or entity authorized by the copyright owner that is granting the
License.
«Legal Entity» shall mean the union of the acting entity and all other entities that control, are controlled by, or
are under common control with that entity. For the purposes of this definition, «control» means (i) the power,
direct or indirect, to cause the direction or management of such entity, whether by contract or otherwise, or (ii)
ownership of fifty percent (50%) or more of the outstanding shares, or (iii) beneficial ownership of such entity.
«You» (or «Your») shall mean an individual or Legal Entity exercising permissions granted by this License.
«Source» form shall mean the preferred form for making modifications, including but not limited to software
source code, documentation source, and configuration files.
«Object» form shall mean any form resulting from mechanical transformation or translation of a Source form,
including but not limited to compiled object code, generated documentation, and conversions to other media
types.
«Work» shall mean the work of authorship, whether in Source or Object form, made available under the License,
as indicated by a copyright notice that is included in or attached to the work (an example is provided in the
Appendix below).
«Derivative Works» shall mean any work, whether in Source or Object form, that is based on (or derived from)
the Work and for which the editorial revisions, annotations, elaborations, or other modifications represent, as a
whole, an original work of authorship. For the purposes of this License, Derivative Works shall not include
works that remain separable from, or merely link (or bind by name) to the interfaces of, the Work and Derivative
Works thereof.

— 15 —
«Contribution» shall mean any work of authorship, including the original version of the Work and any
modifications or additions to that Work or Derivative Works thereof, that is intentionally submitted to Licensor
for inclusion in the Work by the copyright owner or by an individual or Legal Entity authorized to submit on
behalf of the copyright owner. For the purposes of this definition, «submitted» means any form of electronic,
verbal, or written communication sent to the Licensor or its representatives, including but not limited to
communication on electronic mailing lists, source code control systems, and issue tracking systems that are
managed by, or on behalf of, the Licensor for the purpose of discussing and improving the Work, but excluding
communication that is conspicuously marked or otherwise designated in writing by the copyright owner as «Not
a Contribution.»
«Contributor» shall mean Licensor and any individual or Legal Entity on behalf of whom a Contribution has been
received by Licensor and subsequently incorporated within the Work.
2. Grant of Copyright License. Subject to the terms and conditions of this License, each Contributor hereby
grants to You a perpetual, worldwide, non-exclusive, no-charge, royalty-free, irrevocable copyright license to
reproduce, prepare Derivative Works of, publicly display, publicly perform, sublicense, and distribute the Work
and such Derivative Works in Source or Object form.
3. Grant of Patent License. Subject to the terms and conditions of this License, each Contributor hereby grants
to You a perpetual, worldwide, non-exclusive, no-charge, royalty-free, irrevocable (except as stated in this
section) patent license to make, have made, use, offer to sell, sell, import, and otherwise transfer the Work,
where such license applies only to those patent claims licensable by such Contributor that are necessarily
infringed by their Contribution(s) alone or by combination of their Contribution(s) with the Work to which such
Contribution(s) was submitted. If You institute patent litigation against any entity (including a cross-claim or
counterclaim in a lawsuit) alleging that the Work or a Contribution incorporated within the Work constitutes
direct or contributory patent infringement, then any patent licenses granted to You under this License for that
Work shall terminate as of the date such litigation is filed.
4. Redistribution. You may reproduce and distribute copies of the Work or Derivative Works thereof in any
medium, with or without modifications, and in Source or Object form, provided that You meet the following
conditions:
a. You must give any other recipients of the Work or Derivative Works a copy of this License; and
b. You must cause any modified files to carry prominent notices stating that You changed the files; and
c. You must retain, in the Source form of any Derivative Works that You distribute, all copyright, patent,
trademark, and attribution notices from the Source form of the Work, excluding those notices that do
not pertain to any part of the Derivative Works; and

— 16 —
d. If the Work includes a «NOTICE» text file as part of its distribution, then any Derivative Works that You
distribute must include a readable copy of the attribution notices contained within such NOTICE file,
excluding those notices that do not pertain to any part of the Derivative Works, in at least one of the
following places: within a NOTICE text file distributed as part of the Derivative Works; within the Source
form or documentation, if provided along with the Derivative Works; or, within a display generated by
the Derivative Works, if and wherever such third-party notices normally appear. The contents of the
NOTICE file are for informational purposes only and do not modify the License. You may add Your own
attribution notices within Derivative Works that You distribute, alongside or as an addendum to the
NOTICE text from the Work, provided that such additional attribution notices cannot be construed as
modifying the License.
You may add Your own copyright statement to Your modifications and may provide additional or different
license terms and conditions for use, reproduction, or distribution of Your modifications, or for any such
Derivative Works as a whole, provided Your use, reproduction, and distribution of the Work otherwise complies
with the conditions stated in this License.
5. Submission of Contributions. Unless You explicitly state otherwise, any Contribution intentionally submitted
for inclusion in the Work by You to the Licensor shall be under the terms and conditions of this License, without
any additional terms or conditions. Notwithstanding the above, nothing herein shall supersede or modify the
terms of any separate license agreement you may have executed with Licensor regarding such Contributions.
6. Trademarks. This License does not grant permission to use the trade names, trademarks, service marks, or
product names of the Licensor, except as required for reasonable and customary use in describing the origin of
the Work and reproducing the content of the NOTICE file.
7. Disclaimer of Warranty. Unless required by applicable law or agreed to in writing, Licensor provides the
Work (and each Contributor provides its Contributions) on an «AS IS» BASIS, WITHOUT WARRANTIES OR
CONDITIONS OF ANY KIND, either express or implied, including, without limitation, any warranties or
conditions of TITLE, NON-INFRINGEMENT, MERCHANTABILITY, or FITNESS FOR A PARTICULAR
PURPOSE. You are solely responsible for determining the appropriateness of using or redistributing the Work
and assume any risks associated with Your exercise of permissions under this License.
8. Limitation of Liability. In no event and under no legal theory, whether in tort (including negligence), contract,
or otherwise, unless required by applicable law (such as deliberate and grossly negligent acts) or agreed to in
writing, shall any Contributor be liable to You for damages, including any direct, indirect, special, incidental, or
consequential damages of any character arising as a result of this License or out of the use or inability to use
the Work (including but not limited to damages for loss of goodwill, work stoppage, computer failure or
malfunction, or any and all other commercial damages or losses), even if such Contributor has been advised of
the possibility of such damages.

— 17 —
9. Accepting Warranty or Additional Liability. While redistributing the Work or Derivative Works thereof, You
may choose to offer, and charge a fee for, acceptance of support, warranty, indemnity, or other liability
obligations and/or rights consistent with this License. However, in accepting such obligations, You may act only
on Your own behalf and on Your sole responsibility, not on behalf of any other Contributor, and only if You
agree to indemnify, defend, and hold each Contributor harmless for any liability incurred by, or claims asserted
against, such Contributor by reason of your accepting any such warranty or additional liability.
END OF TERMS AND CONDITIONS
APPENDIX: How to apply the Apache License to your work
To apply the Apache License to your work, attach the following boilerplate notice, with the fields enclosed by
brackets «[]» replaced with your own identifying information. (Don’t include the brackets!) The text should be
enclosed in the appropriate comment syntax for the file format. We also recommend that a file or class name
and description of purpose be included on the same «printed page» as the copyright notice for easier
identification within third-party archives.
Copyright [yyyy] [name of copyright owner] Licensed under the Apache License, Version 2.0 (the «License»);
you may not use this file except in compliance with the License. You may obtain a copy of the License at
http://www.apache.org/licenses/LICENSE-2.0 Unless required by applicable law or agreed to in writing,
software distributed under the License is distributed on an «AS IS» BASIS, WITHOUT WARRANTIES OR
CONDITIONS OF ANY KIND, either express or implied. See the License for the specific language governing
permissions and limitations under the License.

— 18 —
mDNSResponder (part of mDNSShared)
* Copyright (c) 2003-2004, Apple Computer, Inc. All rights reserved.
*
* Redistribution and use in source and binary forms, with or without
* modification, are permitted provided that the following conditions are met:
*
* 1. Redistributions of source code must retain the above copyright notice,
* this list of conditions and the following disclaimer.
* 2. Redistributions in binary form must reproduce the above copyright notice,
* this list of conditions and the following disclaimer in the documentation
* and/or other materials provided with the distribution.
* 3. Neither the name of Apple Computer, Inc. («Apple») nor the names of its
* contributors may be used to endorse or promote products derived from this
* software without specific prior written permission.
*
* THIS SOFTWARE IS PROVIDED BY APPLE AND ITS CONTRIBUTORS «AS IS» AND ANY
* EXPRESS OR IMPLIED WARRANTIES, INCLUDING, BUT NOT LIMITED TO, THE IMPLIED
* WARRANTIES OF MERCHANTABILITY AND FITNESS FOR A PARTICULAR PURPOSE ARE
* DISCLAIMED. IN NO EVENT SHALL APPLE OR ITS CONTRIBUTORS BE LIABLE FOR ANY
* DIRECT, INDIRECT, INCIDENTAL, SPECIAL, EXEMPLARY, OR CONSEQUENTIAL DAMAGES
* (INCLUDING, BUT NOT LIMITED TO, PROCUREMENT OF SUBSTITUTE GOODS OR SERVICES;
* LOSS OF USE, DATA, OR PROFITS; OR BUSINESS INTERRUPTION) HOWEVER CAUSED AND
* ON ANY THEORY OF LIABILITY, WHETHER IN CONTRACT, STRICT LIABILITY, OR TORT
* (INCLUDING NEGLIGENCE OR OTHERWISE) ARISING IN ANY WAY OUT OF THE USE OF THIS
* SOFTWARE, EVEN IF ADVISED OF THE POSSIBILITY OF SUCH DAMAGE.
*/

— 19 —
OpenSSL
OpenSSL License
———-——
/* ====================================================================
* Copyright (c) 1998-2011 The OpenSSL Project. All rights reserved.
*
* Redistribution and use in source and binary forms, with or without
* modification, are permitted provided that the following conditions
* are met:
*
* 1. Redistributions of source code must retain the above copyright
* notice, this list of conditions and the following disclaimer.
*
* 2. Redistributions in binary form must reproduce the above copyright
* notice, this list of conditions and the following disclaimer in
* the documentation and/or other materials provided with the
* distribution.
*
* 3. All advertising materials mentioning features or use of this
* software must display the following acknowledgment:
* «This product includes software developed by the OpenSSL Project
* for use in the OpenSSL Toolkit. (http://www.openssl.org/)»
*
* 4. The names «OpenSSL Toolkit» and «OpenSSL Project» must not be used to
* endorse or promote products derived from this software without
* prior written permission. For written permission, please contact
* openssl-core@openssl.org.
*
* 5. Products derived from this software may not be called «OpenSSL»
* nor may «OpenSSL» appear in their names without prior written
* permission of the OpenSSL Project.
*
* 6. Redistributions of any form whatsoever must retain the following
* acknowledgment:
* «This product includes software developed by the OpenSSL Project
* for use in the OpenSSL Toolkit (http://www.openssl.org/)»

— 20 —
*
* THIS SOFTWARE IS PROVIDED BY THE OpenSSL PROJECT «AS IS» AND ANY
* EXPRESSED OR IMPLIED WARRANTIES, INCLUDING, BUT NOT LIMITED TO, THE
* IMPLIED WARRANTIES OF MERCHANTABILITY AND FITNESS FOR A PARTICULAR
* PURPOSE ARE DISCLAIMED. IN NO EVENT SHALL THE OpenSSL PROJECT OR
* ITS CONTRIBUTORS BE LIABLE FOR ANY DIRECT, INDIRECT, INCIDENTAL,
* SPECIAL, EXEMPLARY, OR CONSEQUENTIAL DAMAGES (INCLUDING, BUT
* NOT LIMITED TO, PROCUREMENT OF SUBSTITUTE GOODS OR SERVICES;
* LOSS OF USE, DATA, OR PROFITS; OR BUSINESS INTERRUPTION)
* HOWEVER CAUSED AND ON ANY THEORY OF LIABILITY, WHETHER IN CONTRACT,
* STRICT LIABILITY, OR TORT (INCLUDING NEGLIGENCE OR OTHERWISE)
* ARISING IN ANY WAY OUT OF THE USE OF THIS SOFTWARE, EVEN IF ADVISED
* OF THE POSSIBILITY OF SUCH DAMAGE.
* ====================================================================
*
* This product includes cryptographic software written by Eric Young
* (eay@cryptsoft.com). This product includes software written by Tim
* Hudson (tjh@cryptsoft.com).
*
*/
Original SSLeay License
———————-—
/* Copyright (C) 1995-1998 Eric Young (eay@cryptsoft.com)
* All rights reserved.
*
* This package is an SSL implementation written
* by Eric Young (eay@cryptsoft.com).
* The implementation was written so as to conform with Netscapes SSL.
*
* This library is free for commercial and non-commercial use as long as
* the following conditions are aheared to. The following conditions
* apply to all code found in this distribution, be it the RC4, RSA,
* lhash, DES, etc., code; not just the SSL code. The SSL documentation
* included with this distribution is covered by the same copyright terms
* except that the holder is Tim Hudson (tjh@cryptsoft.com).
*

— 21 —
* Copyright remains Eric Young’s, and as such any Copyright notices in
* the code are not to be removed.
* If this package is used in a product, Eric Young should be given attribution
* as the author of the parts of the library used.
* This can be in the form of a textual message at program startup or
* in documentation (online or textual) provided with the package.
*
* Redistribution and use in source and binary forms, with or without
* modification, are permitted provided that the following conditions
* are met:
* 1. Redistributions of source code must retain the copyright
* notice, this list of conditions and the following disclaimer.
* 2. Redistributions in binary form must reproduce the above copyright
* notice, this list of conditions and the following disclaimer in the
* documentation and/or other materials provided with the distribution.
* 3. All advertising materials mentioning features or use of this software
* must display the following acknowledgement:
* «This product includes cryptographic software written by
* Eric Young (eay@cryptsoft.com)»
* The word ‘cryptographic’ can be left out if the rouines from the library
* being used are not cryptographic related :-).
* 4. If you include any Windows specific code (or a derivative thereof) from
* the apps directory (application code) you must include an acknowledgement:
* «This product includes software written by Tim Hudson (tjh@cryptsoft.com)»
*
* THIS SOFTWARE IS PROVIDED BY ERIC YOUNG «AS IS» AND
* ANY EXPRESS OR IMPLIED WARRANTIES, INCLUDING, BUT NOT LIMITED TO, THE
* IMPLIED WARRANTIES OF MERCHANTABILITY AND FITNESS FOR A PARTICULAR PURPOSE
* ARE DISCLAIMED. IN NO EVENT SHALL THE AUTHOR OR CONTRIBUTORS BE LIABLE
* FOR ANY DIRECT, INDIRECT, INCIDENTAL, SPECIAL, EXEMPLARY, OR CONSEQUENTIAL
* DAMAGES (INCLUDING, BUT NOT LIMITED TO, PROCUREMENT OF SUBSTITUTE GOODS
* OR SERVICES; LOSS OF USE, DATA, OR PROFITS; OR BUSINESS INTERRUPTION)
* HOWEVER CAUSED AND ON ANY THEORY OF LIABILITY, WHETHER IN CONTRACT, STRICT
* LIABILITY, OR TORT (INCLUDING NEGLIGENCE OR OTHERWISE) ARISING IN ANY WAY
* OUT OF THE USE OF THIS SOFTWARE, EVEN IF ADVISED OF THE POSSIBILITY OF
* SUCH DAMAGE.
*
* The licence and distribution terms for any publically available version or

— 22 —
* derivative of this code cannot be changed. i.e. this code cannot simply be
* copied and put under another distribution licence
* [including the GNU Public Licence.]
*/

— 23 —
xpm
Copyright (c) 1989-95 GROUPE BULL
Permission is hereby granted, free of charge, to any person obtaining a copy of this
software and associated documentation files (the «Software»), to deal in the Software
without restriction, including without limitation the rights to use, copy, modify,
merge, publish, distribute, sublicense, and/or sell copies of the Software, and to
permit persons to whom the Software is furnished to do so, subject to the following
conditions:
The above copyright notice and this permission notice shall be included in all copies
or substantial portions of the Software.
THE SOFTWARE IS PROVIDED «AS IS», WITHOUT WARRANTY OF ANY KIND, EXPRESS OR IMPLIED,
INCLUDING BUT NOT LIMITED TO THE WARRANTIES OF MERCHANTABILITY, FITNESS FOR A
PARTICULAR PURPOSE AND NONINFRINGEMENT. IN NO EVENT SHALL GROUPE BULL BE LIABLE
FOR ANY CLAIM, DAMAGES OR OTHER LIABILITY, WHETHER IN AN ACTION OF
CONTRACT, TORT OR OTHERWISE, ARISING FROM, OUT OF OR IN CONNECTION WITH THE
SOFTWARE OR THE USE OR OTHER DEALINGS IN THE SOFTWARE.
Except as contained in this notice, the name of GROUPE BULL shall not be used in advertising or otherwise to
promote the sale, use or other dealings in this Software without prior written authorization from GROUPE
BULL.