
Wireless-N WiFi Repeater беспроводный усилитель WiFi. Производитель: BLUELANS, Китай.
Как работает беспроводной усилитель WiFi сигнала Wireless-N WiFi Repeater
Wireless-N WiFi Repeater принимает сигнал от роутера и ретранслирует его дальше, таким образом увеличивая радиус действия сети Wifi. Можно использовать в Wifi диапазоне без провода, либо соединить репитер wifi с роутером проводом витая пара UTP и установить на значительно бОльшем расстоянии, чем зона Wifi роутера.
Технические характеристики Wi-Fi ретранслятора Wireless-N WiFi Repeater
- Модель: Wireless-N WiFi Repeater 300mbps беспроводной повторитель;
- Интерфейс: 10/100м LAN;
- Диапазон частот: 2.4 ГГц-2.4835 ГГц;
- Скорость: до 300 Мбит/с;
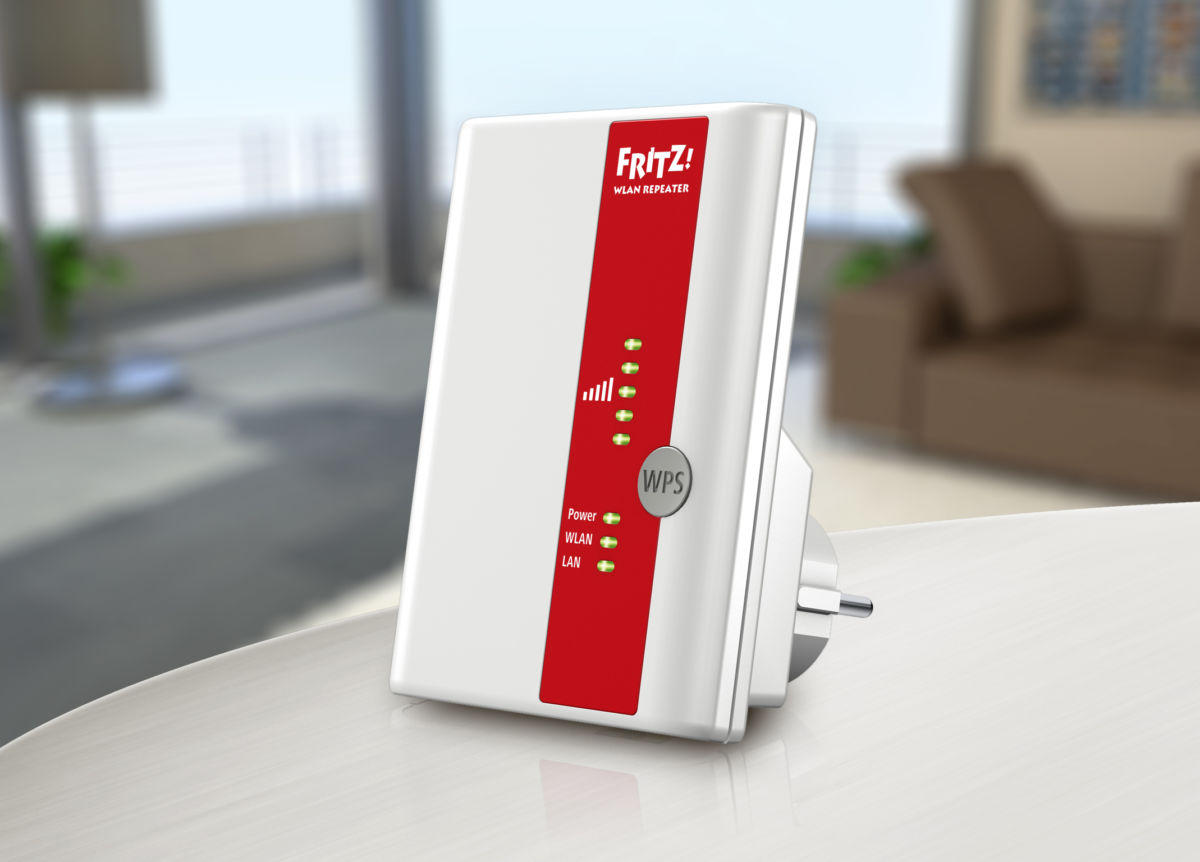
- Индикация сверху вниз: Сеть 220В; Индикация беспроводной сети; WPS индикатор; LAN индикатор;
- Питание: AC 100В-240В;
- IP адрес по умолчанию: 192.168.10.1;
- Имя и пароль по умолчанию: admin / admin;
- Кнопки: Кнопка WPS, Кнопка сброса Reset.
Как настроить усилитель WiFi Wireless-N Repeater инструкция на русском
Заходим через браузер на беспроводный повторитель. Для этого набираем в адресной строке IP адрес 192.168.10.1, вводим в открывшемся окне имя и пароль admin / admin. В случае, если используем репитер как ретранслятор без провода, то в программе нажимаем кнопку Repeater, далее выбираем сеть Wifi к которой подключится наш повторитель, вводим пароль сети, теперь устройство готово к работе. Если же репитер подключаем через провод, то в интерфейсе нажимаем кнопку AP, далее вбиваем настройки Wifi сети и пароль нашего вайфая. Дополнительно в комплекте идет инструкция с картинками. На нашем гаджете в WiFi подключениях находим и выбираем наш усилитель.
- June 12, 2024
- WiFi
Table of Contents
- Introduction :
- Package Contents
- Getting Started
- Wireless Repeater Mode
- Wireless-N Wifi Repeater
- Configuring via Web Browser
- Firmware Upgrade
- Factory Default and Settings Backup, Restore
- Read User Manual Online (PDF format)
- Download This Manual (PDF format)
WiFi-Repeater
User Manual
**Quick Installation Guide(Q.1.G.)
REV.32.1**
Open Source Code
This product includes software codes developed by third parties. These sofware
codes are sutject to either the GNU General Public License (GPL), Version 2,
June 1991 or the GNU Lesser General Public License (LGPL), Version 2.1,
February 1999. You can copy, distritute, and/or modify in accordance with the
terms and conditions of GPL or LGPL.
The source code should be complete, if you think our need to provide any
additional source code files under GNU General Public License (GPL), please
contact us. We are committed to meeting the requirements of the GNU General
Public License (GPI.). You are welcome to contac us local ofice to get the
orresponding software and licenses. Please inform us your conact detals and
the product code. Ve will send you a CD with the software and license for
free.
Please refer to the GNU GPL Web site for further information.
http://ww.gnu.org/licens/licenses.en.html.
Introduction :
The WiFi Repeater is a combined wired/wireless network connection device
designed specifically for small business, ofice, and home office networking
requirements. It allows a wireless network to be expanded using multiple
access points without the need for a wired backbone to link them. It also
works well with other 11b/g and lln protocol wireless products.

NOTE : If you need to ‘the Wi-Fi Repeater, you need press and hold the
reset button inside the tiny hole for’ seconds.
Package Contents
Before you starting to use this router, please check if I there’s anything
missing in the package, and contact your dealer of purchasa to claim for
missing items:
1 x Wireless-N Repeater
1 x RJ-45 Networking Cable
1 x Quick installation Guide
Getting Started
Setting up a Wireless Infrastructure Network
For a typical wireless setup at home (as shown below), please do the Mowing:
Wireless Repeater Mode
You will need WiFi AP/Router Internet access
Wireless AP Mode
You will need broedband Router Internet access
Conrect the WiFi-Repeater to your Routor/Swtch with RJ-45 Cable

How to configure the WI-FI Repeater
You can configure the Wi-Fi Repealer by connecting it with your computer/aptop
with enclosed RJ45 cable cr wirelessly.
A. Configure the Wi-Fi Repeater wirelessly.
Al. Plug the Wi-Fi Repeater to a wall socket.
A2. Click on the network icon( ) on the right bottom of your desktop. You will
find the signal from the WI-Fl Repeater. Click on ‘Connect’ and wall for a few
seconds. A3. Open web browser and type https://192.168.10.1 in the browser’s
address box. This number is the detault IP address for this device. Note:
Please check whether the WiFi-Repeater accord with factory default settings
once you can’t download http://192.168.10.1. If you are still not sure what
reasons, you can reset the WiFi-Repeater, just need to press the reset button
for 10 seconds, then try again.
A4. The login screen telow will appear. Enter the “User Name’ and “Password”
then click “or to lbgin. The default User name is “admin” and Password is
sadmIn”. A5. After logging in, you will see the web page below: Click on
‘Repeater’ to continue.
Wireless-N Wifi Repeater
A6.Select your Wireless SSID to continue. A7. When you see below, please do
not change any setting but only insert the key of votir network.
Click on ‘Apply’ button, The Repeater will restart. Wait for a few seconds
your Wi-Fi Repeater is ready for use.
- The default wireless SSID and Security key of Wi-Fi Repeater is same as your AP/router.
B. Configure the WI-Fl Repeater with RJ45 Cable.
- Plug the Wi-Fi Repeater to a wall socket. Connect your computer 1 laptop with the Wi-Fi Repeater with enclosed RJ45 Cable.
- Follow process A3 to A7 to configure your Wi-Fi Repeater.
C. Configure the Wireless AP Mode.
- Plug the Wi-Fi Repeater into a wall socket.
- Follow process A2 to A4.
- Click on ‘AP to continue.
- The following massage will be displaygd on your web browser:


| SSID | the “SSID” of your wireless network. |
|---|---|
| Channel | Auto (recommend) |
| Securty typo | Setup the wireless security and encryption to prevent from |
unauthorized access and monitoring.
Supports 64/128-bit WEP, WPA, WPA2, WPAWPA2 encryption methods.
Securty key| the “Password” of your wireless network.
Click on ‘Apply’ button, The Repealer will restart. Walt a few seconds your
Wi-Fi Repeater is ready for use.
How to connect your computer/laptop with the Wi-FI Repeater
Adding a Wireless computers to the WIFi-Repeater
- Log on to the computer.
- Open Connect to a Network by right-clicking the network icon ( ) in the otification area.
- Choose the wireless network from the list that appears, and then click Connect.
- Type the network security key or passphrase if you are asked to do so, and then click OK. You’ll see a confirmation message when you are connected to the network.
- To confirm that you added the computer, do the following: Open Network by clicking the Start button , and then clicking Control Panel. In the search box, type network, and then, under Network and Sharing Center, click View network computers and devices. You should see icons for the computer you added and for the other computers and devices that are part of the network.
Note : If you don’t see icons dill in the Network folder, then network
discovery and file sharing might be turned off.
Adding a Wireless computers to the WIFI-Repeater with WPS Button
- Log on to the computer.
- Press the WPS button of the VViFi Repeater directly for 2.3 seconds.
- Press the WPS button of the Wireless Adapter directly for 2- 3 seconds. Click Finish to complete the WPS configuration. (Please check your Wireless adapter Manual with WPS configuration)
- You should see icons for the computer you added and for the other computers and devices that are part of the network.
Adding a wired (Ethernet) computer to the WIFI-Repeater
- Plug the W-Fi Repeater to a wall socket. Connect your computer I laptop with the Wi-Fi Repeater with enclosed RJ45 Cable.
- To confirm that you added the computer, do the Mowing: Open Network by clicking the Start button , and then clicking Control Panel. In the search box, type network, and then, under Network and Sharing Center, click View network computers and devices. You should see icons for the computer you added and for the other computers and devices that are part of the network.
For more information:
https://windows. microsoft. conven-US/windows
7/Add-a-device—onr—computer—to-a—network
https://windows.microsof.com/en-US/windowsvVetting—up-a-—vireiess-
network
https://windows.microsoft.com/en~US/windows—vista/settirg—up—a—wireless—network
How to configure your computer/laptop with the Network IP Address
- Log on to the computer.
- Click the “Start” button (it should be located at the lower-left comer of your screen), then click ‘Control Panel’. Click “View Network Status and Tasks”, and then click “Manage Network Connections”. Right-click “Local Area Network”, then select “Properties”. When the “Local Area Connection Properties” window appears, select “Internet Protocol Version 4 (TCPIIPv4)” and then click “Properties”.
- Setting IP address manually: Type IP adress is 102.168.10.x (x is from 2 to 254), and Subnet mask is 255.255.255.0. Type the Routers LAN IP address (the default IP is 192.168.10.1) into the Default gateway field.
Configuring via Web Browser
Wireless Base Configuration – AP Mode
In AP mode and click “Wireless -> Basic Settings” located at the web
management interface, the following message will be displayed on your web
browser:
You could configure he minimum number of Wireless settings for communication,
such as Network Name (SSID) and Channel. The Access Point car be set simply
with only the minimum setting items.
| Wireless Enable | Wireless On/Off |
|---|---|
| SSID | the “SSID’ of your wireless network. |
| Channel | Auto (recommend) |
| Security type | Setup the wireless security and encryption to prevent from |
unauthorized access and monitoring. Supports 64/128-bit WEP, WPA, WPA2,
WPAWPA2 encryption methods.
Security key| the “Password’ of your wireless network.
Click ‘Apply’ button, The WiFi Repeater will restart.
Wireless Base Configuration – Repeater Mode
In Repeater mode and click ‘Wireless-> Basic Settings’ located at the web
management interface, the followirg message will be displayed on your web
browser:
| Wireless Enable | Wireless On/Off |
|---|---|
| Delete | Remove the repeater connection profile |
| Repeater ssid | the aSSID” of your repeater wireless network. |
| Security type | Setup the repeater ssid secunity type. |
| Security key | the “Password’ of your repeater wireless network. |
Click ‘Apply’button, The WiFi Repeater will restart.
Change Management password
Default password of Wireless Router is eadmin% and it’s displayed on the login
prompt when accessed from web browser.
There’s a security risk if you don’t change ‘he default password, since
everyone can see it.
This is very important when you ! wireless function enabled.
change password, please follow the following instructions:
Please click ‘Management -> Password’ menu on the web management interface.
the following message will be displayer on your web browser:
If you want to keep original password unchanged. click ‘Cancel’.
Click ‘Apply’ button, The WiFi Repeater will log off.
Firmware Upgrade
The system software used by this router is called as ‘firmware’, just like any
applications on your computer, when you replace the old application with a new
one, your computer will be equipped with new function. You can also use this
firmware upgrade function to add new functions to your router, even fix the
bugs of this router.
Please click ‘Management-> Upgrade Firmware’ located at the web management
interface, and then the following message will be displayed on your web
browser: Click ‘Browse…’or ‘Choose File’ button first; youll ba prompted to
provide the filename of fimmware upgrade file. Please download the latast
firmware file from our website, and use it to upgrade your router.
After a firmware upgrade file is selected, click ‘Upload’ button, and the
router will start firmware upgrade procedure automatically.
The procedure may take several minutes, please be patient.
NOTE: Never interrupt the upgrade procedure by closing the web browser or
physically disconnect your computer from router. If the firmware you uploaded
is corrupt, the firmware upgrade will fail, and you may have to retum this
router to the dealer of purchase to ask for help. (Warranty voids if you
interrupted the upgrade prccedure).
Factory Default and Settings Backup, Restore
You can backup all Setting of this router to a file, so you can make several
copied of router configuration for security reason.
To backup or restore router setting, please follow the following instructions:
Please click ‘Save/Reload setting’ located at the web management interface,
then the following message will be displayed on your web browser.
Save Settings| Press ‘Save…’ button, you can please save it as another
filename for different versions, and keep it in a safe place.
—|—
Load Settings| Press ‘Browse..’ to pick a previously-saved configuration file
from your computer, and then click ‘Upload…’ . After the. configuration is
uploaded, the router’s configuration will be replaced by the file you just
uploaded.
Reset Settings| Click this ‘Load default button to remove all settings
WEEE Directive & Product Disposal
At the and of is serviceable life, this product should not be treated as
household or general waste. It should be handed over to the applicable
collector point for the recycling of electrical and electronic equipment, or
returned to the supplier `or disposal.
Read User Manual Online (PDF format)
Read User Manual Online (PDF format) >>
Download This Manual (PDF format)
Download this manual >>

Универсальный репитер представляет собой дополнительное сетевое оборудование, позволяющее решить проблему недостаточной зоны покрытия Wi-Fi сети. Суть работы подобного усилителя заключается в дублировании поступающего сигнала с последующей раздачей клиентским устройствам. Качественный ретранслятор не только увеличивает зону действия беспроводной сети, но и повышает стабильность соединения путем усиления интернет-сигнала. Для эффективной работы этого устройства пользователю следует знать, как настроить репитер без привлечения специалиста.
Повторитель сигнала: режимы работы
Независимо от модели, репитер усиливает сигнал и раздает его на устройства, подключенные к беспроводному пространству.
Устройства нового поколения наделены функционалом, позволяющим оборудованию работать в нескольких режимах:
- Wireless — точка доступа;
- Universal Repeater;
- мост с возможностями точки доступа.
Большинство устройств этой категории дублируют существующую беспроводную сеть. Репитеры раздают сигнал, поступающий от базового маршрутизатора без образования дополнительной сети. Только отдельные модели повторителей во время работы создают отдельную Wi-Fi сеть. Детальная инструкция на репитер поможет пользователю разобраться в тонкостях подключения и настройки оборудования, а также правильно выбрать место для установки репитера.
Как установить антенну репитера
Ретрансляторы могут оснащаться антеннами 2 видов:
- наружного типа;
- для внутреннего размещения.
Первые монтируют на крыше дома или специальной мачте. Это позволит усиливать слабый сигнал, поступающий от вышки оператора сотовой связи, с последующей раздачей на смартфоны. Комнатные антенны рекомендовано монтировать на самой дальней стене. Так пользователь решит проблему слабого сигнала в помещениях, сильно удаленных от репитера.
Где расположить повторитель
Для верного выбора места размещения повторителя владельцу следует определить, на каком расстоянии от базового роутера не добивает интернет-сигнал.
Подобная ситуация образуется по ряду причин:
- масса препятствий в зоне прохождения сигнала;
- неправильный выбор расположения маршрутизатора;
- необходимость распространения беспроводной сети на дополнительные помещения.
Для оптимального покрытия зоны действия Wi-Fi сети, раздаваемой роутером, специалисты рекомендуют придерживаться таких правил:
- избегать расположения сетевого оборудования около домашней техники, создающей помехи;
- минимизировать наличие металлических и зеркальных конструкций вблизи роутера;
- стремиться к размещению устройства в центральной части квартиры;
- устанавливать маршрутизатор на возвышенности.
В случае нехватки площади покрытия беспроводной сети решить проблему можно при помощи универсального репитера.
Как правильно подключить репитер
Модели повторителей сигнала последних поколений, в том числе марки Xiaomi, оснащены удобным блоком питания, входящим в конструкцию устройства. Это минимизирует количество проводов. Для подключения репитера пользователю достаточно включить его в электрическую розетку. После подачи питания оборудование включится автоматически, а владельцу останется только задать настройки для корректной работы прибора. О готовности к раздаче сигнала репитер оповестит владельца с помощью световых индикаторов, значение которых можно выяснить с помощью руководства пользователя.
После подключения репитера можно переходить к его настройке, учитывая следующие особенности:
- Практически все репитеры дублируют беспроводную сеть базового роутера. Это объясняет отсутствие необходимости создания дополнительного имени сети и пароля доступа.
- Клиентские устройства подсоединяются к источнику более мощного интернет-сигнала. Владельцу такого устройства нет надобности выяснять, как подключиться к репитеру.
- Владелец может создать единую локальную сеть между устройствами, подключенными к одной беспроводной сети.
Опираясь на перечисленные нюансы, можно выбрать месторасположение и параметры настройки репитера.
Как настроить репитер
Во время настройки параметров репитера пользователи могут столкнуться с рядом проблем, которые решаются с помощью правильного алгоритма работы. Настроить репитер можно 2 способами:
- с помощью WPS;
- через административную панель.
Каждый метод имеет отдельную инструкцию, которой пользователю следует придерживаться.
Как настраивать по WPS
Этот вариант настройки репитера специалисты называют самым простым и доступным методом для начинающих юзеров. Используя технологию WPS, можно настроить параметры не только Wireless WiFi Repeater серии N, но и ряда других моделей.
Пошаговая инструкция настройки ретранслятора включает такие операции:
- Нажать кнопку WPS на повторителе.
- Через 1 минуту проделать аналогичную операцию с базовым роутером.
- Дождаться соединения устройств.
В случае корректного выполнения всех действий репитер подключится к основному маршрутизатору, и начнет раздавать сигнал.
Настройка репитера через панель управления
Отдельные модели повторителей сигнала, в том числе марки TP Link, не имеют встроенной кнопки WPS. В этом случае пользователю надо выполнять настройку устройства через веб-меню.
Для настройки репитера TP Link следует придерживаться такой инструкции:
- Для подключения к ПК использовать кабель.
- В адресной строке браузера указать хост-нейм GSM оператора tplinkrepeater.net.
- Для входа в репитер на странице авторизации использовать значение admin в поле логин и пароль.
- Перейти в раздел быстрой настройки.
- Указать регион использования.
- Дождаться завершения поиска доступных сетей.
- Выбрать нужную сеть WiFi.
- Указать код доступа к основной сети и имя базового роутера.
На последнем этапе сохранить изменения с помощью кнопки. После этого повторитель должен подключиться к базовому устройству. В случае отсутствия подключения надо выполнить сброс настроек, а затем повторную настройку параметров.
Сбросить настройки на заводские можно 2 способами:
- с помощью специальной кнопки Reset;
- через административную панель.
Первый вариант предполагает активацию кнопки сброса с помощью тонкого металлического предмета. С его помощью следует зажать клавишу на 10 сек. Оборудование перезагрузится с заводскими настройками в автоматическом режиме.
Второй способ выполняется через панель настроек. Пользователю надо перейти в системные инструменты и активировать режим восстановления с помощью соответствующей кнопки. В обоих случаях потребуется повторное конфигурирование репитера.
Настройка репитера из Китая
Китайское сетевое оборудование этого типа, в том числе Xiaomi, пользуются повышенным спросом среди покупателей. Подобная популярность объясняется небольшой стоимостью и хорошим качеством, несмотря на отсутствие русского языка.
Для настройки репитера из Китая владельцу надо подключать оборудование по такой схеме:
- Подсоединить устройство к питанию вблизи компьютера.
- Подключить репитер проводным или беспроводным методом к ПК или ноутбуку.
- Во время настройки Wi-Fi ретранслятор располагают в зоне покрытия сети.
- Активировать режим подключения с помощью соответствующей кнопки.
Успешное подключение позволяет выполнить настройку оборудования. Пользователю следует знать, как правильно настроить китайский репитер.
Алгоритм действий включает следующие операции:
- В адресной строке интернет-обозревателя указать корректный IP устройства. Уточнить нужную информацию можно на информационной наклейке или в инструкции.
- На странице авторизации для логина и пароля использовать буквенное значение admin.
- В меню настроек выбрать нужный режим подключения в строке Wireless Repeater Mode. Для беспроводного метода выбрать значение Repeater Mode, а для проводного указать AP Mode.
- В списке доступных сетей выбрать нужную, кликнуть по ней и подтвердить выбор с помощью кнопки Apply. В отдельных случаях потребуется указать код доступа к сети.
В случае отсутствия в списке нужной Wi-Fi сети следует обновить информацию путем нажатия кнопки. О подключении репитера пользователя оповестит система с помощью надписи.
Возможные проблемы и варианты решения
Во время работы репитера пользователи могут столкнуться с некоторыми сложностями. Зачастую их можно устранить самостоятельно.
Если репитер не подключается к интернету через роутер, выполняют такие рекомендации:
- Устанавливают репитер ближе к маршрутизатору.
- Используют метод сброса настроек на заводские параметры и повторную настройку оборудования.
- Обновляют программное обеспечение ретранслятора.
Используя эти простые рекомендации специалистов, владелец репитера сможет самостоятельно решить проблему отсутствия подключения устройства к базовому роутеру.
The Wireless-N Repeater Setup is a easy process. The DN-70181 is a WIFI Repeater with a wired/wireless network connection that is meant for small business, office, and home office networking. It enables the expansion of a wireless network by deploying several access points. There’s no need for a connected backbone to connect them. It also works with other 11b/g devices. Wireless gadgets that use the 11n protocol are also available.
HOW TO CONFIGURE THE WIFI REPEATER
After connecting it to your computer or laptop using the provided RJ45 cable or wirelessly, you can configure the Wi-Fi Repeater.
Follow the steps given below to configure the WIFI repeater wirelessly.
- At first, connect the Wi-Fi Repeater to a power outlet.
- On the right bottom of your desktop, click the network symbol or the signal from the “Wireless Repeater” can be found here. Wait for a few seconds after clicking ‘Connect.’
- In the address field of your web browser, put http://192.168.10.1 or Http://myrepeater.net. This device’s IP address is set to this number by default.
NOTE
If you are unable to download http://192.168.10.1 please verify whether the WIFI-Repeater is set to factory defaults. If you’re still not sure what’s causing the problem, you can reset the WIFI-Repeater by pressing the reset button for 10 seconds and then trying again.
- The login screen will display as seen below. To login, enter your “User Name” and “Password,” then click “OK.” And “admin” is the default user name, while “admin” is the default password.
- You will see the web page below after checking in and clicking “Setup Wizard”. To continue, choose “Wireless Repeater Mode (Station)” and then click “Next.”
- To proceed, select your Wireless SSID.
- Please do not modify any settings when you visit the site below; instead, just enter your network’s key.
The Repeater will restart once you press the ‘Save and Reboot’ button. Wait a few seconds before using your Wi-Fi Repeater. Wi-Fi Repeater uses the same SSID and KEY as your AP/router.
FOLLOW THE STEPS GIVEN BELLOW TO CONFIGURE THE WIFI REPEATER WITH RJ45 CABLE
- Firstly, connect the Wi-Fi Repeater to an outlet. With the included RJ45 cable, connect your computer or laptop to the Wi-Fi Repeater.
- In the address field of your web browser, put http://192.168.10.1.This device’s IP address is set to this number by default.
NOTE
If you are unable to download http://192.168.10.1 please verify whether the WIFI-Repeater is set to factory defaults. If you’re still not sure what’s causing the problem, you can reset the WIFI-Repeater by pressing the reset button for 10 seconds and then trying again.
- Now, the login screen will display as seen below.
To login, enter your “User Name” and “Password,” then click “OK.”And “admin” is the default user name, while “admin” is the default password.
- Then, you will see the web page below after checking in and clicking “Setup Wizard”. To proceed, choose “Wireless Repeater Mode (Station)” and then click “Next.”
- To proceed, select your Wireless SSID.
- Please do not modify any settings when you visit the site below; instead, just enter your network’s key. The Repeater will restart once you press the ‘Save and Reboot’ button. Wait a few seconds before using your Wi-Fi Repeater.
Wi-Fi Repeater uses the same SSID and KEY as your AP/router.
FOLLOW THE STEPS GIVEN BELOW TO CONFIGURE THE WIFI REPEATER WITH WPS BUTTON
1. Insert the Wi-Fi Repeater into a power outlet.
2. Confirm that WIFI-Repeater is set to “Wireless Repeater Mode (Station)” mode.
Step 1: For 3 seconds, press the WPS button on the AP/Router immediately. (For WPS configuration, please consult your AP/manual Router).
Step 2: Press and hold the WIFI Repeater’s WPS button for 7 to 10 seconds.
Step 3: After a few moments, your Wi-Fi Repeater will be ready to use.
The Wi-Fi Repeater’s Wireless SSID and KEY are the same as your AP/ router’s.
FOLLOW THE STEPS GIVEN BELOW TO CONFIGURE THE WIRELESS AP MODE
- Firstly, connect the Wi-Fi Repeater to a power source.
- Then, carry out steps A3–A4 in reverse order.
- To continue, select “Standard Wireless AP Mode” and then click “Next.”
- In your web browser, the following message will appear:
- SSID stands for “Secure Service Set Identifier.” It’s your wireless network’s “name.”Number of channels: Auto (recommend)
- ENCRYPTION: Set up wireless security and encryption to protect against illegal access and surveillance.
- The Repeater will restart when you click the ‘Save and Reboot’ button.
- Wait a few moments, your Wi-Fi Repeater will be ready.
FIRMWARE UPGRADE for Wirless N Repeater-
This router’s system software is known as “firmware,” and just like any other application on your computer, when you replace an old programme with a new one, your computer will gain new capabilities. This firmware update mechanism can also be used to add additional functionality to your router or to remedy faults.
Please go to the web administration interface and click on ‘Management-> Upgrade Firmware,’ which will display the following notice on your browser:
After clicking the ‘Browse…’ option, you will be requested to enter the filename of the firmware update file. Please visit our website to obtain the most recent firmware file and use it to upgrade your router.
After selecting a firmware update file, click the “Upload” button, and the router will immediately begin the firmware upgrading process. Please bear with us as the operation takes a few minutes.
NOTE:
Close your web browser or physically separate your computer from the router before starting the upgrading procedure. If the firmware you uploaded is corrupt, the firmware upgrade will fail, and you’ll have to return the router to the retailer where you bought it to get assistance. (If you interrupt the upgrading process, your warranty will be voided).
HOW TO RESET WIRELESS N REPEATER?
If you are facing any problem with wireless N repeater so don’t worry because you can reset it and is very easy to do. For that follow the steps given below.
- To clear all settings, click the ‘Reset’ button.
- The WIFI Repeater will restart when you click the ‘Upload ‘button.
Устанавливаем WLAN-репитер с помощью процедуры WPS
WPS является аббревиатурой Wi-Fi protected Setup, то есть «защищённая установка«.
- Установка очень проста. Подключите WLAN-репитер к электрической розетке, а затем нажмите и удерживайте WPS-кнопку на устройстве в течение нескольких секунд.
- Когда на репитере загорится светодиодный сигнал, в течение следующих двух минут нажмите клавишу WPS на вашем WLAN-роутере. Её вы тоже должны удерживать несколько секунд, до тех пор, пока не загорится светодиодный индикатор. После этого репитер автоматически свяжется с роутером через WLAN.
- Не каждый репитер располагает WPS-кнопкой. В этом случае вы можете инсталлировать устройство вручную.
Ручная инсталляция WLAN-репитера для Windows
Этот путь к инсталляции ведет через пользовательский интерфейс репитера.
- Для начала подключите WLAN-репитер к электросети. Лучше всего будет, если розетка находится рядом с компьютером. Альтернативно вы можете подсоединить репитер к компьютеру LAN-кабелем.
- На компьютере с операционной системой Windows кликните на значок сети. Как правило, он находится в правой части панели задач.
- Выберите здесь свой Wi-Fi репитер. Он появится в списке, как только вы подключите его к электросети. Деактивируйте пункт «Подключаться автоматически», убрав соответствующую галочку рядом.
- После этого кликните на «Подключение». Теперь вы должны будете ввести WLAN Key. Его вы найдете на нижней стороне своего репитера. В заводских настройках обычно указано «00000000».
- Запустите на вашем компьютере веб-браузер и откройте пользовательский интерфейс своего репитера. Необходимый для этого IP-адрес вы найдете в инструкции к устройству или на сайте производителя.
- Обратите внимание на то, чтобы вы были залогинены в той интернет-сети, к которой хотели бы подключить репитер. Залогиньтесь в пользовательском интерфейсе репитера, в котором сначала должны задать пароль и нажать «ОК». По следующим шагам вас проведет ассистент настройки.
- Выберите «WLAN мост» в качестве вида доступа и подтвердите это нажатием на «Далее».
- Чтобы перейти к пункту «Выбор ретранслятора беспроводной сети», установите галочку рядом с той WLAN-сетью, в которую хотели бы включить свой репитер. Подтвердите свои действия нажатием на «Далее».
- Далее следуют параметры безопасности репитера. Для этого выберите шифрование После этого вы должны ввести пароль вашей сети в «ключ сети WLAN» (пароль от Wi-Fi) и снова нажать на «Далее».
- Далее появится окно с заголовком «Применить настройки». Кликните на «Завершить». Инсталляция и настройка репитера будут готовы. Но может пройти несколько минут до тех пор, пока роутер и репитер не установят связь друг с другом. После этого вы можете переключить репитер к другой электророзетке.
Инсталлируем WLAN-репитер под Mac
Настройка включения WLAN-репитера в сеть для Mac производится не сильно иначе, чем для Windows.
- Для этого сначала включите репитер и соедините его через LAN-кабель с компьютером.
- Затем убедитесь, что LAN-соединение находится на верхнем месте в настройках системы в разделе «Сеть», то есть имеет приоритет.
- Запустите веб-браузер и введите в адресной строке адрес страницы репитера — его можно узнать на сайте производителя. Следующие действия выполните аналогично тому, как мы описывали в разделе по настройке для Windows.
Читайте также:
- Как сбросить роутер до заводских настроек: 2 стандартных способа
- Ваш Wi-Fi взломали? Как вычислить непрошеных гостей
Редактор направлений «Мобильные устройства» и «Техника для дома»