
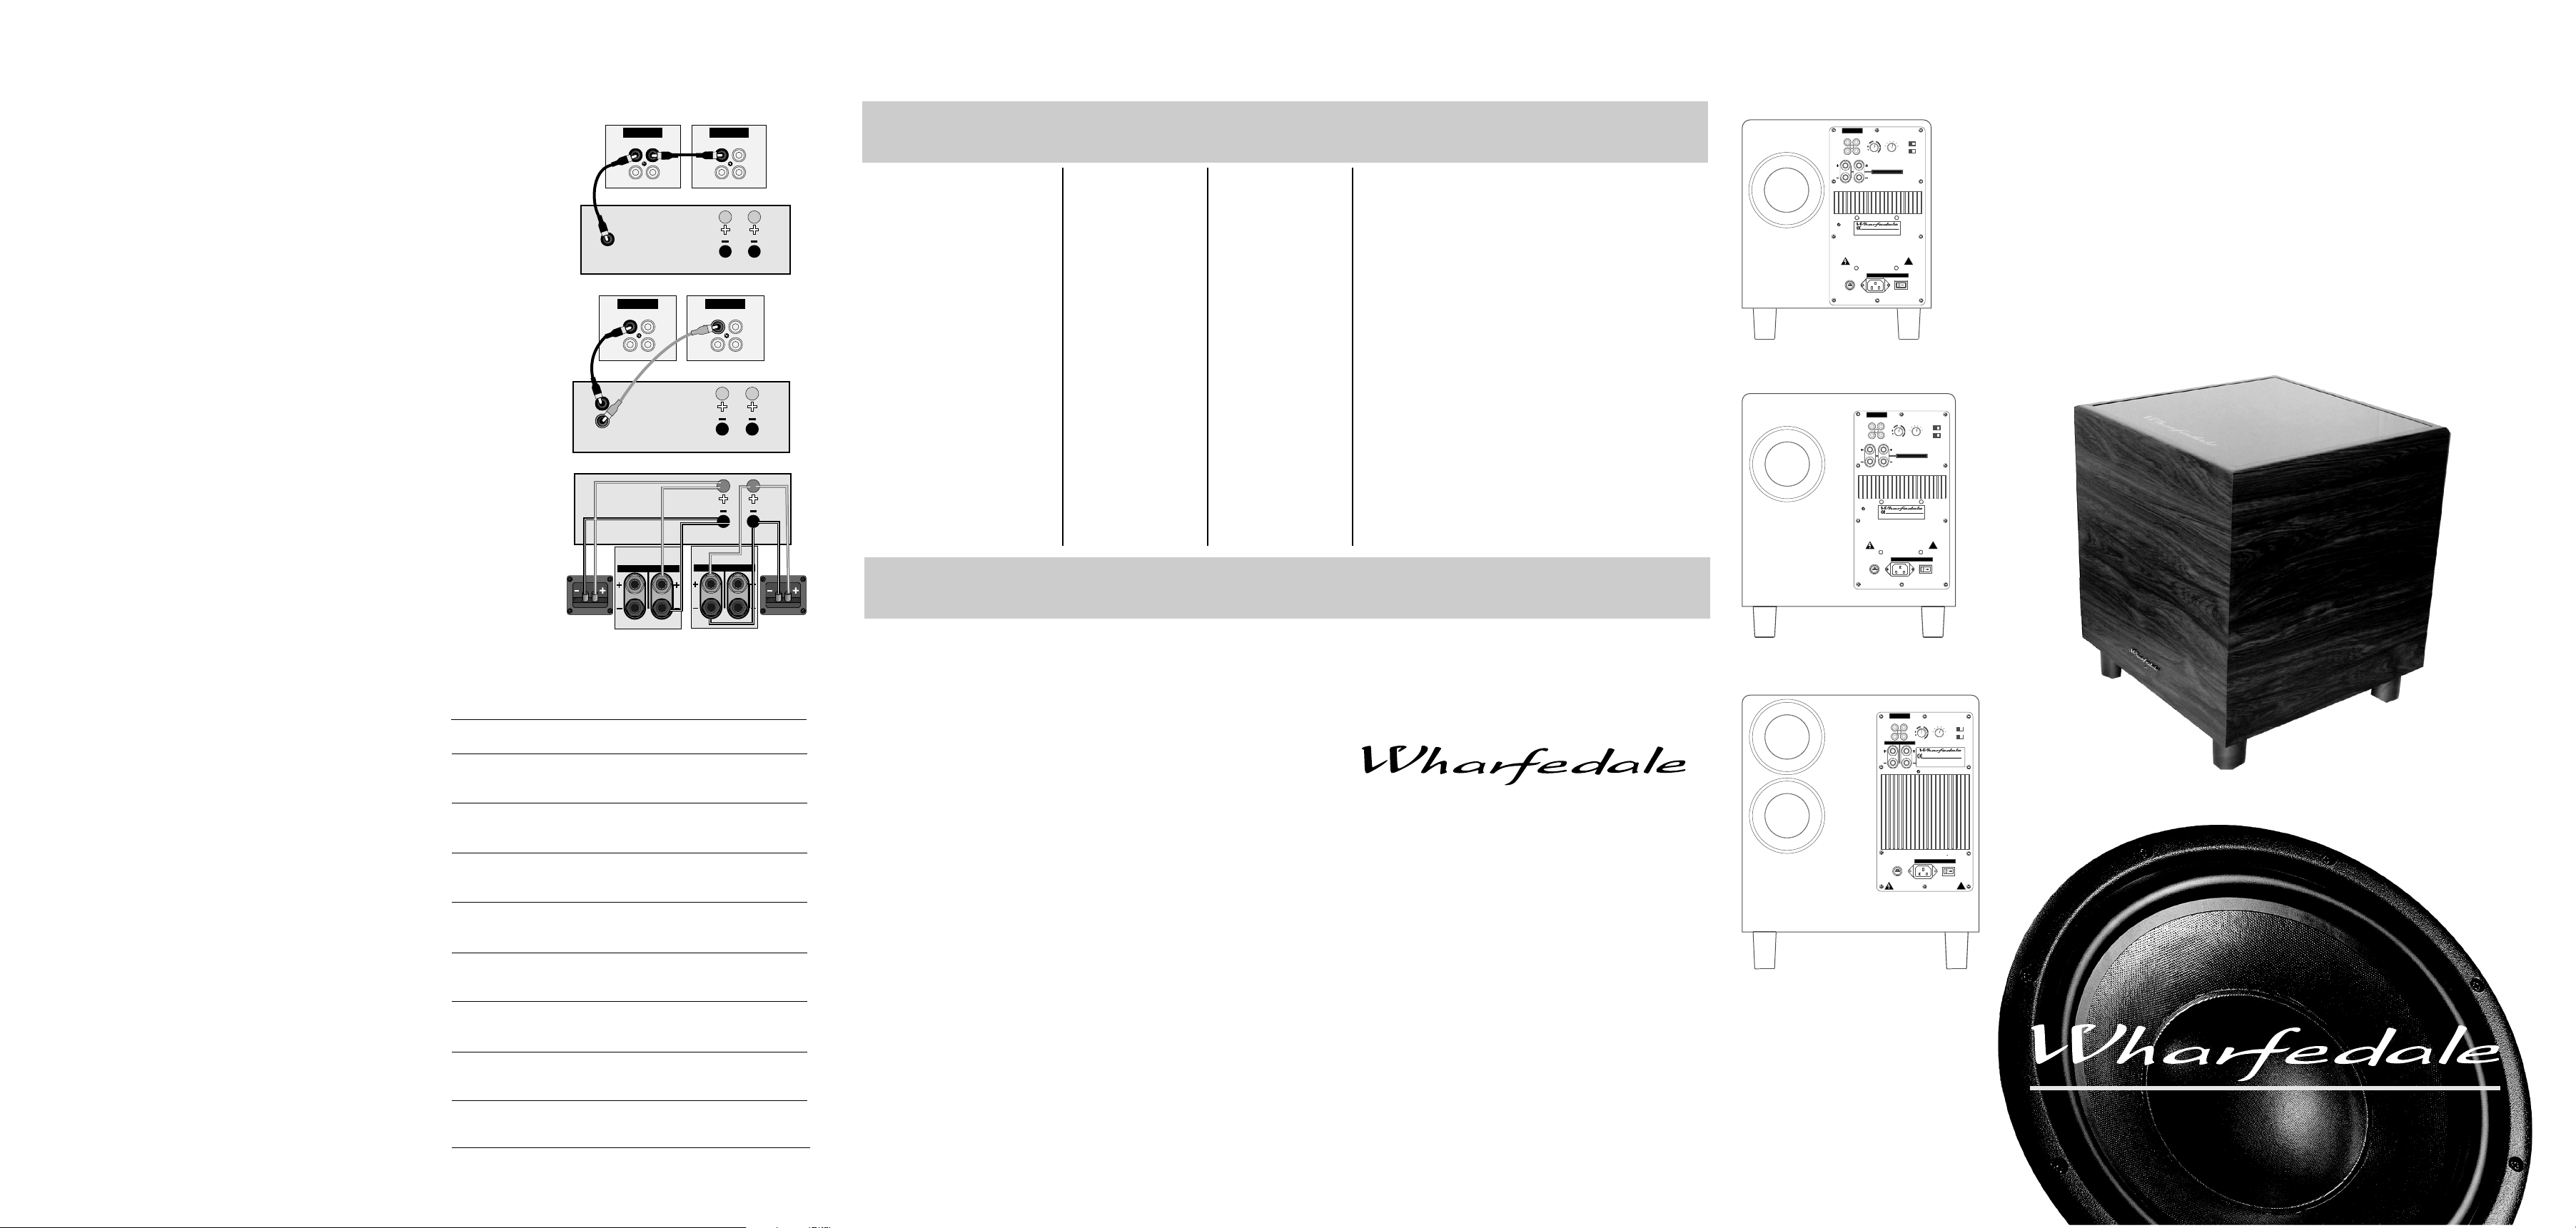
THE HOME THEATRE ENVIRONMENT CONNECTING TWO SUBWOOFERS
FRONT, CENTRE AND REAR CHANNELS
The front channel loudspeakers should be placed on either side of the television screen, 2 to 3
metres apart. and rotated slightly towards the listeners.
As the Centre speaker carries the dialogue effects, it should be placed central to the listening
position and close to the TV screen. Operating height is important. Ideally, the front and
centre channel speakers should be operated at the same height and with the tweeters at ear
level to a seated listener.
Place the Rear speakers 2.5 — 3.5 metres apart in a high position behind the listener. If you
are using dipole or special surround speakers follow the instructions for those units.
SUBWOOFER
As the ear is unable to detect the direction from which deep bass originates, this allows
freedom in positioning the subwoofer. Varying the distance from the wall will alter the
amount of bass. Some prefer to place the subwoofer against a corner of the room. This
arrangement gives more bass at the possible expense of clarity.
LOUDSPEAKER SIZES
Many digital AV Processors require you to specify the size of speakers in the various channels.
These are usually ‘Large’ or ‘Small’. Unless your loudspeakers are large floor standing units,
you should choose ‘Small’ for the Front channels, as the subwoofer is going to be better at
providing clean, deep and louder bass. Choose ‘Small’ for the surround channels and also for
the Centre channel, so that any bass from these channels will be directed to the subwoofer.
Set the ‘Subwoofer’ option on the processor to ‘On’ or ‘Yes’.
SETTING LEVELS
Once the loudspeaker settings have been finalised, put the AV amplifier into its “Test” mode
(see instructions supplied with your processor.) Adjust the levels until all channels are
reproduced at equal loudness.
You may need to adjust the subwoofer output level. Avoid setting too high a level or you will
swamp the sound with bass which be tiring to listen to and may limit the subwoofer’s ability
to respond to large bass transients. Set a sensible level going into the subwoofer. The
subwoofer volume control should be between 12 o’clock and 3 o’clock .
LFE
The Low Frequency Effects channel was designed as an additional bass channel with its own
dedicated subwoofer. In practice however, if all the speakers are set to Small, the LFE channel
will be combined with the bass from other channels and all this feeds into the subwoofer. When
you set the LFE level from your AV processor, use care with this setting as the LFE channel may
contain powerful low frequencies which, although normal in a cinema, may overload a
domestic subwoofer.
If, during a programme, you hear popping or thumping noises coming from the subwoofer,
immediately turn the AV Processor’s volume level down and then back off the LFE level. If this
does not cure the problem, back off the volume level at the subwoofer.
Please read the relevant sections of your AV amplifier manual and familiarise yourself with
the various issues. If you are unsure, consult your dealer for help.
CARE AND MAINTENANCE
The loudspeaker cabinets can be cleaned with a damp cloth or with a spray furniture polish
and a soft cloth. Apply the spray sparingly to the cloth and then polish the cabinet. Never
apply spray directly to the cabinet.
GUARANTEE & SERVICE
In the unlikely even that your unit develops a fault you should return it to your Wharfedale
dealer using the original packing to ensure safe shipping.
The terms of your guarantee may vary from country to country but in all locations the
guarantee excludes:
All damage caused through accident, misuse, wear and tear, neglect, incorrect installation,
adjustment or repair by unauthorised personnel.
Liability for damage or loss occurring in transit to or from the purchaser.
Wharfedale will not be liable for any consequential damage, loss or injury, arising from or in
conjunction with this equipment.
SUBWOOFER
LINE CONNECTION
LEFT
RIGHT
SUBWOOFER
OUT
AV AMPLIFIER
STEREO
LINE CONNECTION
LEFT
RIGHT
LEFT
RIGHT
PRE OUT
STEREO AMPLIFIER
HIGH LEVEL
SPEAKER
CONNECTION
FRONT RIGHT
AMPLIFIER
SPEAKER LEVEL INPUTS
TROUBLESHOOTING
If your system is not working properly please work through this checklist before returning a
unit to your dealer.
at the mains.
Symptom Possible Cause
No Sound
Sound lacks bass content
Bass reproduction indistinct
Excessive bass distortion at low
volume levels
Excessive or distorted bass at high
volume levels
Distorted or rattling sounds at high
volume levels
Popping sounds or thumps from the
subwoofer
Indistinct sound
Poor localisation of effects
Television picture is distorted or there
is colour distortion
Before investigating the cause of a problem, always switch off the system
System not switched on; Speaker cables shorting
terminals out; Wrong source selected
Subwoofer not switched on; Subwoofer phase
incorrect; Subwoofer crossover control too low
Subwoofer level set too high; LFE level set too
high; Subwoofer incorrectly wired
System level set too high; Bass control set too
high; Subwoofer too close to room corners
System level set too high; Objects placed on
subwoofer; Objects too close to subwoofer
System level set too high;
Subwoofer level set too high
One or more loudspeakers is out of phase
(See the relevant pages of this manual for the
Subwoofer too close to TV. (Switch off system and TV.
Move units away. Leave 15 mins. Switch on)
LINE LEVEL
INPUT
LINE LEVEL
INPUT
LEFT
OUTPUT
OUTPUT
RIGHT
LEFT
RIGHT
SPEAKER LEVEL INPUTS
RIGHT
LEFT
LEFT
LEFT
LINE LEVEL
INPUT
RIGHT
LINE LEVEL
INPUT
RIGHT
RIGHT
OUTPUT
OUTPUT
RIGHT
LEFT
LEFT
LEFT
FRONT LEFT
Specifications
Drive Unit
Amplifier Power
Input Sensitivity
(Line input)
Crossover Range
Frequency Response
(6 dB Boundary position)
LF Response (Fb)
Maximum SPL (ref 1m)
Weight
Dimensions Overall
H x W x D mm
H x W x D inches
200mm diameter
(8 inch)
100 watts
250mv
for 75 watts
35 — 85 Hz
40 — 95 Hz
50Hz
107dB
12.2 Kg 15.5 Kg 17.6 Kg
345 x 295 x325
13.6 x 11.6 x 12.8
Service & Information
Authorised Wharfedale Service Centres
UK
Wharfedale International Ltd.
IAG House, Sovereign Court,
Ermine Business Park,
Huntingdon,
Cambs PE29 6XU,
England.
Tel:+44 (0)1480 447700
Fax: +44 (0)1480 43176
USA
IAG America, Inc.
15 Walpole Park South
Walpole
MA 02081
Tel: +1 508 850 3950
Korbon Trading Ltd
6800 Kitimat Road
Units 19-20
Mississauga
Ontario
Tel: +1 905 567 1920
For information on other authorised service centres worldwide contact Wharfedale
International in the U.K.
A worldwide distributor list is available on the Wharfedale website:
www.wharfedale.co.uk
The name ‘WHARFEDALE’ is a registered trademark of Wharfedale International Ltd.
Wharfedale has a policy of continuous product development and reserves the right to
change specification without notice.
Wharfedale is a member of the International Audio Group.
CANADA
PC 10+PC 8+ PC 12+
250mm diameter
(10 inch)
100 watts
300mm diameter
(12 inch)
150 watts
250mv
for 75 watts
35 — 85 Hz
for 100 watts
35 — 85 Hz
35 — 95 Hz 30 — 95 Hz
45Hz
108dB
385 x 335 x 360
15.2 x 13.2 x 14.2
430 x 375 x 375
16.9 x 14.8 x 14.8
Loudspeaker Manufacturers since 1932
In 1932, when Gilbert Briggs founded the Wharfedale Wireless Works, his
1932
company was at the leading edge of an exciting new technology which was
dedicated to bringing the pleasure of music and entertainment to a wide range
of people. As the technology advanced Wharfedale gave many music lovers their
first taste of High Fidelity, mounting a series of live sound demonstrations which
excited the audio world and heralded the era of the modern hi-fi loudspeaker.
Today Wharfedale still takes the same uncompromising approach to the design
and manufacture of every loudspeaker system, using high quality components
and state-of-the-art testing to ensure consistently high performance. And that
means that you can continue to count on the quality of all Wharfedale products.
300mv
40Hz
110dB
PowerCube 8+
LINE LEVEL
INPUT OUTPUT
VOLUME
LEFT
RIGHT
SPEAKER LEVEL INPUTS
RIGHT
LEFT
N11189
SUB-WOOFER AMPLIFIER
MODEL: POWER CUBE 10+
MODEL: POWER CUBE 10+
WHARFEDALE INTERNATIONAL LTD,HUNTINGDON, UNITED KINGDOM
SERIAL No.:
WARNING:
TO REDUCE THE RISK OF FIRE OR ELECTRICAL SHOCK,
DO NOT EXPOSE THIS PRODUCT TO RAIN OR MOISTURE
CAUTION:
DISCONNECT SUPPLY CORD BEFORE CHANGING FUSE,
REPLACE ONLY WITH SAME TYPE FUSE AND RATING
ATTENTION:
DEBRANCHER AVANT DE REPLACER LE FUSIBLE,
UTILISER UN FUSIBLE DE RECHANGE
DE MEME TYPE ET CALIBRE
AC INPUT
FUSE
~230V/50Hz 100W
PowerCube 10+
LINE LEVEL
INPUT OUTPUT
LEFT
RIGHT
LEFT
N11189
FUSE
PowerCube 12+
CROSSOVER
CROSSOVER
FREQUENCY
FREQUENCY
65
55
PHASE
45
75
35
85
AUTO
(Hz)
POWER
!
POWER
O
OFF ON
CROSSOVER
CROSSOVER
VOLUME
FREQUENCY
FREQUENCY
45
35
SPEAKER LEVEL INPUTS
RIGHT
SUB-WOOFER AMPLIFIER
MODEL: POWER CUBE 10+
MODEL: POWER CUBE 10+
WHARFEDALE INTERNATIONAL LTD,HUNTINGDON, UNITED KINGDOM
SERIAL No.:
WARNING:
TO REDUCE THE RISK OF FIRE OR ELECTRICAL SHOCK,
DO NOT EXPOSE THIS PRODUCT TO RAIN OR MOISTURE
CAUTION:
DISCONNECT SUPPLY CORD BEFORE CHANGING FUSE,
REPLACE ONLY WITH SAME TYPE FUSE AND RATING
ATTENTION:
DEBRANCHER AVANT DE REPLACER LE FUSIBLE,
UTILISER UN FUSIBLE DE RECHANGE
DE MEME TYPE ET CALIBRE
AC INPUT
~230V/50Hz 100W
LINE LEVEL
INPUT OUTPUT
LEFT
RIGHT
SPEAKER LEVEL INPUTS
RIGHT
LEFT
TO REDUCE THE RISK OF FIRE OR ELECTRICAL SHOCK
DO NOT EXPOSE THIS PRODUCT TO RAIN OR MOISTURE
FUSE
T2A 250V
~230V/50Hz 150W
CAUTION:
DISCONNECT SUPPLY CORD
BEFORE CHANGING FUSE.
REPLACE ONLY WITH SAME
TYPE FUSE AND RATING
180º0º
OFFON
65
55
PHASE
75
85
AUTO
(Hz)
POWER
!
POWER
O
OFF ON
CROSSOVER
CROSSOVER
VOLUME
FREQUENCY
FREQUENCY
55
45
35
(Hz)
VOLUME
CROSSOVER
FREQUENCY
SUB-WOOFER AMPLIFIER
MODEL:POWER CUBE 12+
WHARFEDALE INTERNATIONAL HUNTINGDON,UNITED KINGDOM
SERIAL No.:
N
11189
WARNING:
AC INPUT
ATTENTION:
REPLACER LE FUSIBLE.
UTILISER UN FUSIBLE DE
RECHANGE DE MEME TYPE
180º0º
OFFON
65
ET CALIBRE
POWER
OFF ON
PowerCube +
Series
Instruction Manual
PHASE
75
180º0º
85
OFFON
AUTO
POWER
!
BRITAIN’S MOST FAMOUS LOUDSPEAKERS
IMPORTANT INFORMATION: PLEASE READ CAREFULLY
CAUTION
RISK OF ELECTRIC SHOCK DO NOT OPEN!
The lightning flash with arrowhead symbol, within an equilateral triangle, is intended to alert the user to
the presence of uninsulated dangerous voltage within the product’s enclosure that may be of sufficient
magnitude to constitute a risk of electric shock to persons.
The exclamation point within an equilateral triangle is intended to alert the user to the presence of
important operating and maintenance (servicing) instructions in the literature accompanying the appliance.
!
Read Instr uctions: All the safety and operating instructions should be read before the product is operated.
Retain Instructions: The safety and operating instructions should be retained for future reference.
Heed Warni ngs: All warnings on the product and in the operating instructions should be adhered to.
Follow Instructions: All operating and use instructions should be followed.
Cleaning: Unplug this product from the wall outlet before cleaning. Do not use liquid cleaners or aerosol cleaners. Use
a damp cloth for cleaning.
Attachments: Do not use attachments not recommended by the product manufacturer as they may cause hazards.
Water and Moisture: Do not use this product near water — for example, near a bath tub, wash bowl, kitchen sink, or
laundry tub, in a wet basement; or near a swimming pool; and the like.
Accessori es: Do not place this product on an unstable cart, stand, tripod, bracket, or table. The product may fall, causing
serious injury to a child or adult, and serious damage to the product. Use only with a cart, stand, tripod, bracket or table
recommended by the manufacturer, or sold with the product. Any mounting of the product should follow the manufacturer’s
instructions, and should use a mounting accessory recommended by the manufacturer.
Moving the Product: A product and cart combination should be moved with care. Quick stops, excessive force, and
uneven surfaces may cause the product and cart combination to overturn.
Ventilation: Slots and openings in the cabinet are provided for ventilation and to ensure reliable operation of the
product and to protect it from overheating, and these openings must not be blocked or covered. The openings should
never be blocked by placing the product on a bed, sofa, rug, or other similar surface. This product should not be placed
in a built-in installation such as a bookcase or rack unless proper ventilation is provided or the manufacturer’s
instructions have been adhered to.
Power Supply Cords: Power supply cords should be routed so that they are not likely to be walked on or pinched by
items placed upon or against them, paying particular attention to cords at plugs, convenience receptacles, and the
point where they exit from the product.
Power Sources: This product should be operated only from the type of power source indicated on the marking label. If
you are not sure of the type of power supply to your home, consult your product dealer or local power company. For
products intended to operate from battery power, or other sources, refer to the operating instructions.
Polarisation: This product is equipped with a polarized alternating-current line plug (a plug having one blade wider
than the other). This plug will fit into the power outlet only one way. This is a safety feature. If you are unable to insert
the plug fully into the outlet, try reversing the plug. If the plug should still fail to fit, contact your electrician to replace
your obsolete outlet. Do not defeat the safety purpose of the polarized plug.
Lightning: For added protection for this product during a lightning storm, or when it is left unattended and unused for
long periods of time, unplug it from the wall outlet and disconnect the antenna or cable system. This will prevent
damage to the product due to lightning and power-line surges.
Overloading: Do not overload wall outlets, extension cords, or integral convenience receptacles as this can result in a
risk of fire or electric shock.
Object and Liquid Entry: Never push objects of any kind into this product through openings as they may touch
dangerous voltage points or short-out parts that could result in a fire or electric shock.
Heat: The product should be situated away from heat sources such as radiators, heat registers, stoves, or other products
(including amplifiers) that produce heat.
Servicing: Do not attempt to service this product yourself as opening or removing covers may expose you to dangerous
INTRODUCTION PRECAUTIONS
Congratulations on your choice of Wharfedale powered sub-woofer. Please read this owner’s
manual carefully which will help you install the equipment and get the maximum listening
pleasure from its use.
If you decide to sell this unit or pass it on to another user, please include this instruction
manual with the product..
UNPACKING Remove the polystyrene packing pieces and then lift out the sub-woofer. Remove
the plastic bag. Retain all the packing and the carton in case it is necessary to transport the unit
in the future.
DO NOT attempt to lift the subwoofer via the polythene bag. Support it carefully. If the
subwoofer is too heavy, get someone to hep you.
POWER CONNECTIONS This sub-woofer is factory set to operate from the mains voltage
marked on the amplifier panel. Before connecting check that this voltage is correct for your
mains supply.
! 230 volt products — 220 volts to 240 volts
! 115 volt products — 110 volts to 120 volts
If you move to an area with a different mains supply, consult your Wharfedale dealer for advice.
voltage or other hazards. Refer all servicing to qualified service personnel.
Damage Requiring Service: Unplug this product from the wall outlet and refer servicing to qualified service personnel
under the following conditions:
a) When the power supply-cord or plug is damaged
b) If liquid has been spilled, or objects have fallen into the product
c) If the product has been exposed to rain or water.
d) If the product does not operate normally by following the operating instructions. Adjust only those controls that are
covered by the operating instructions as an improper adjustment of other controls may result in damage and will often
require extensive work by a qualified technician to restore the product to its normal operation.
e) If the product has been dropped or damaged in any way.
f) When the product exhibits a distinct change in performance — this indicates a need for service.
Replacement Parts: When replacement parts are required, be sure the service technician has used replacement parts
specified by the manufacturer or have the same characteristics as the original part. Unauthorised substitutions may
result in fire, electric shock, or other hazards.
Safety Check: Upon completion of any service or repairs to this product, ask the service technician to perform safety
checks to determine that the product is in proper operating condition.
WARNING: To reduce the risk of fire or electrical shock do not expose this product to rain or moisture. The product must
not be exposed to dripping and splashing and no object filled with liquids such as a vase of flowers should be placed
on the product.
DO NOT allow foreign objects to fall into any of the units.
NO naked flame sources, such as candles must be placed on the product.
NEVER remove any components and refer all servicing to qualified personnel. This product contains no user serviceable
parts.
WALL OR CEILING MOUNTING: The product should be mounted to a wall or ceiling only as recommended by the
manufacturer.
WARNING: The mains power switch for this appliance is located on the rear panel. To permit free access to this switch
the apparatus must be located in an open area without any obstructions.
The IEC socket which fits into the mains connector located on the rear panel of this unit is a moulded unit. If this
becomes damaged in any way do not attempt to repair or connect a replacement plug to the cord. Consult your dealer
for a suitable replacement
CAUTION: Changes or modifications not expressly approved by the manufacturer could void the user’s authority to
operate this device.
ESSENTIAL INFORMATION FOR UK USERS
The power cord on your Wharfedale powered subwoofer may be supplied with a plug incorporating a fuse, the value of
which is indicated on the pin face of the plug. Should the fuse need to be replaced, an ASTA or BSI approved BS1362 fuse
must be used of the same rating. If the plug is cut off it must NOT be
re-used. Dispose of any such plug safely. There is a danger of electric
shock if a cut-off plug is inserted into a mains socket.
The wires in the mains lead are coloured in accordance with the
following code:
Green and Yellow — Earth: Blue — Neutral: Brown — Live.
As the colours of the wires in the mains lead may not correspond
with the markings identifying the terminals in the replacement
mains plug, proceed as follows:
The wire coloured Blue must be connected to the terminal marked
with the letter «N» or coloured Black. The wire coloured Brown must
be connected to the terminal marked with the letter «L» or coloured
Red. The wire coloured Green and Yellow must be connected to the
terminal marked with the letter ‘E’,or coloured Green, or Green and
Yellow, or marked with the Earth symbol
NEVER remove any parts or components and refer all servicing to qualified personnel. This
product contains no user serviceable parts.
DO NOT connect the mains power to any signal input terminal on the sub-woofer Control Panel
DO NOT change any connections to the sub-woofer or your system without first switching off
the power to all the components in your AV system
DO NOT use your amplifier at its maximum volume setting. The resulting distortion may
damage your loudspeakers and sub-woofer. The position of the Volume Control on your
amplifier is NOT a reliable guide as to ‘how loud’ your equipment will play. Allow your
amplifier some
“headroom” so it can operate without stress.
DO turn down the volume control on your amplifier or receiver before turning the equipment on
or off. This will protect your sub-woofer against switching ‘thumps’ and other spurious signals.
Make sure that adequate clearance (at least 450mm) exists between the sub-woofer and the
TV otherwise the powerful drive-unit magnets may interfere with the colours on the screen. If
this occurs, switch the TV set off. After 15 minutes switch on the TV set. The internal circuits of
the TV set should now restore normal colour balance.
(GREEN/YELLOW)
NEUTRAL
(BLUE)
EARTH
FUSE
LIVE
(BROWN)
WHARFEDALE POWERCUBE+ CONNECTIONS
POWERCUBE PC 8+ & PC 10+ POWERCUBE PC12+
LINE LEVEL
INPUT OUTPUT
LEFT
RIGHT
LEFT
RIGHT
CROSSOVER
CROSSOVER
VOLUME
FREQUENCY
FREQUENCY
55
45
35
VOLUME
SPEAKER LEVEL INPUTS
65
PHASE
75
(Hz)
180º0º
85
OFFON
AUTO
POWER
CONTROL PANEL GUIDE
b Subwoofer Volume Control
c Crossover Frequency Control
d Phase Control
N111 89
SUB-WOOFER AMPLIFIER
MODEL: POWER CUBE 10+
MODEL: POWER CUBE 10+
WHARFEDALE INTERNATIONAL LTD,HUNTINGDON, UNITED KINGDOM
SERIAL No.:
WARNING:
TO REDUCE THE RISK OF FIRE OR ELECTRICAL SHOCK,
DO NOT EXPOSE THIS PRODUCT TO RAIN OR MOISTURE
CAUTION:
DISCONNECT SUPPLY CORD BEFORE CHANGING FUSE,
REPLACE ONLY WITH SAME TYPE FUSE AND RATING
ATTENTION:
DEBRANCHER AVANT DE REPLACER LE FUSIBLE,
UTILISER UN FUSIBLE DE RECHANGE
DE MEME TYPE ET CALIBRE
!
e Auto Power Switch
f Power On-Off Switch
g Mains Power Fuse
h IEC Mains Input Socket
i Speaker Level Inputs
j Line Level Inputs
1) Line Level Outputs
FUSEFUSE
FUSE
T2A 250V
AC INPUT
~230V/50Hz 100W
POWER
O
OFF ON
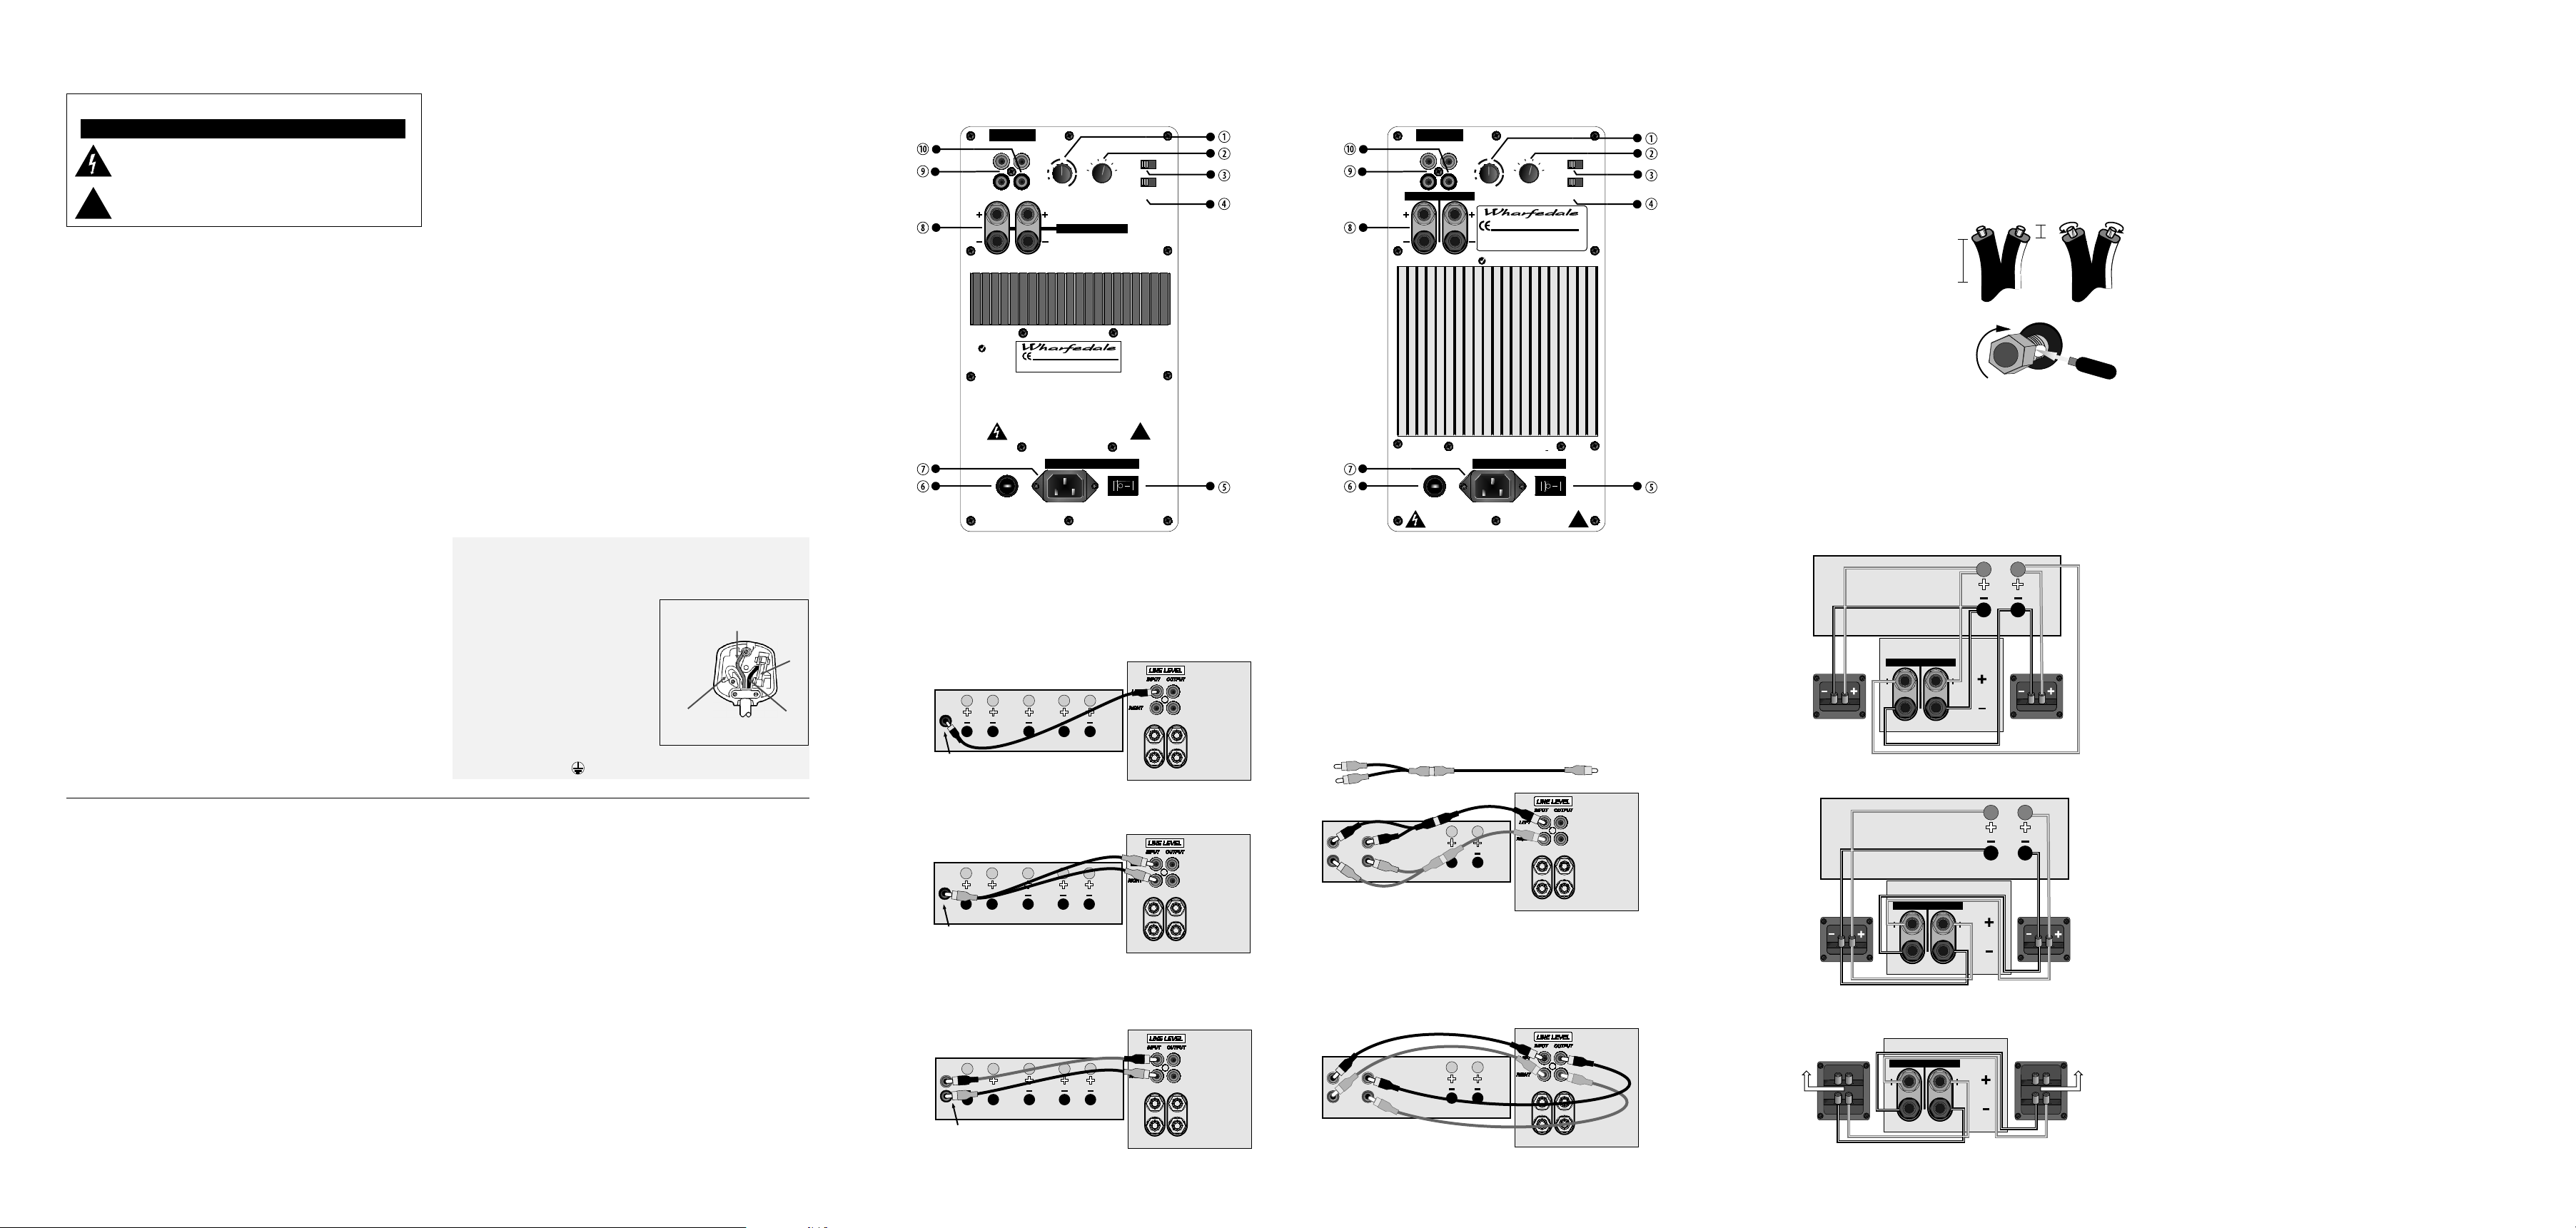
LINE CONNECTIONS TO AN A/V PROCESSOR PRE OUT — MAIN IN CONNECTIONS
Your Powercube+ subwoofer has been designed for optimum performance with a Digital If you use a separate stereo pre and power amplifier, or an amplifier where the pre and main
processor. If your AV processor has a line level or LFE subwoofer output you should use this amplifier can be separated, connect the sub-woofer as shown. There are two alternative
connection. You will need to purchase a single screened RCA phono lead from your dealer. methods.
Connect this lead to the Left line input of the Subwoofer as shown below.
A-V AMPLIFIER
A: You will need two screened RCA ‘Y’ adaptors and two single RCA phono cables.
Remove the Pre-Main links on your amplifier. Connect the socket (common) of an RCA ‘Y’
adaptor to one of the mono cables. Connect one leg of the ‘Y ’ adaptor to the Left Channel Pre
Out socket on the amplifier and the other leg to the Left Channel Main In socket. Connect the
SUBWOOFER
CENTRE FRONTREAR
LEFTLEFT RIGHTRIGHT
Subwoofer Out
(Line Level)
Alternatively, you may use a split mono lead from the processor to both inputs of the
subwoofer. In this case the input level at the subwoofer will be slightly higher.
A-V AMPLIFIER
SUBWOOFER
CENTRE FRONTREAR
Subwoofer Out
(Line Level)
LEFTLEFT RIGHTRIGHT
remaining plug on this combination to the Left Channel Line Level Input on the sub-woofer.
Repeat this for the Right Channel.
PRE
MAIN
OUT
IN
L
R
B: You will need two stereo (or four single) screened RCA cables.
Connect a Stereo cable from the Line Level Inputs of the sub-woofer to the Pre Out sockets of
STEREO LINE OUTPUT CONNECTIONS
If your amplifier has a spare preamplifier output or a stereo sub-woofer output, connect the
sub-woofer as shown. You will need a stereo screened RCA phono cable.
A-V AMPLIFIER
L
SUBWOOFER
R
Subwoofer or Pre Out
(Line Level)
CENTRE FRONTREAR
LEFTLEFT RIGHTRIGHT
the amplifier. Now connect a second Stereo cable from the Line Level Outputs of the subwoofer to the Main In sockets of the amplifier. Make sure that the Right and Left Channels are
not mixed up! The sub-woofer is now inserted within the system loop.
PRE
MAIN
OUT
IN
L
R
LINE LEVEL
INPUT OUTPUT
LEFT
RIGHT
SPEAKER LEVEL INPUTS
LEFT
FUSE
T2A 250V
DISCONNECT SUPPLY CORD
BEFORE CHANGING FUSE.
REPLACE ONLY WITH SAME
TYPE FUSE AND RATING
AMPLIFIER
AMPLIFIER
VOLUME
VOLUME
SUB-WOOFER AMPLIFIER
MODEL:POWER CUBE 12+
WHARFEDALE INTERNATIONAL HUNTINGDON,UNITED KINGDOM
SERIAL No.:
RIGHT
N
11189
WARNING:
TO REDUCE THE RISK OF FIRE OR ELECTRICAL SHOCK
DO NOT EXPOSE THIS PRODUCT TO RAIN OR MOISTURE
AC INPUT
FUSEFUSE
~230V/50Hz 150W
CAUTION:
LEFTRIGHT
LEFTRIGHT
CROSSOVER
CROSSOVER
FREQUENCY
FREQUENCY
65
55
45
35
(Hz)
CROSSOVER
FREQUENCY
ATTENTION:
REPLACER LE FUSIBLE.
UTILISER UN FUSIBLE DE
RECHANGE DE MEME TYPE
75
85
POWER
O
OFF ON
ET CALIBRE
PHASE
180º0º
OFFON
AUTO
POWER
!
SUBWOOFER
SUBWOOFER
(x2)
SPEAKER LEVEL CONNECTIONS
The high level Speaker connections should be used only if your amplifier does not have a line
level subwoofer output. In this connection the subwoofer is fed together with the Front
loudspeakers. For this you will need two extra twin core cables.
Choose a good quality audio speaker cable of reasonable size. Avoid using cheap ‘bell’ or
‘zip’ cables. Audio speaker cable has a polarity stripe or rib along one conductor to simplify
connecting your speakers.
Split the cable at each end to a depth of
30mm. Strip about 7mm of insulation from
7mm
each end and lightly twist to gather the wire
strands.
30mm
The Speaker Level connectors are screw
terminals located on the control panel.
Unscrew a terminal and insert the cable into
the hole at the base. Re-tighten the terminal
securely. Make sure that the terminal grips
the bare wire and there are no loose strands which could touch adjacent terminals.
There are two methods of connecting the subwoofer.
A: Ensure the Front loudspeakers are correctly connected.
Using one of the additional twin core cables, connect the Left Speaker Terminals on the sub bass
unit to the Front Left speaker terminals on the amplifier. Connect the Red (+) speaker terminal
on the amplifier to the Red (+) terminal on the subwoofer. Connect the Black (-) speaker
terminal on the amplifier to the Black (-) terminal on the subwoofer. Now connect the Right
Speaker terminals on the subwoofer to the Front Right speaker terminals on the amplifier.
FRONT RIGHT
SPEAKER
AMPLIFIER
SPEAKER LEVEL INPUTS
SUBWOOFER
RIGHT
LEFT
RIGHT
FRONT
LEFT
FRONT LEFT
SPEAKER
B Alternatively you may connect the subwoofer to the Front speakers instead of to the
amplifier.
FRONT RIGHT
SPEAKER
AMPLIFIER
SPEAKER LEVEL INPUTS
SUBWOOFER
RIGHT
LEFT
RIGHT
FRONT
LEFT
FRONT LEFT
SPEAKER
if the speakers are bi-wired, you must connect the subwoofer to the bass terminals only.
AMP
TO
FRONT RIGHT
SPEAKER
TREBLE
BASS
SUBWOOFER
SPEAKER LEVEL INPUTS
RIGHT
LEFT
FRONT LEFT
SPEAKER
TREBLE
BASS
TO
AMP
OPERATION
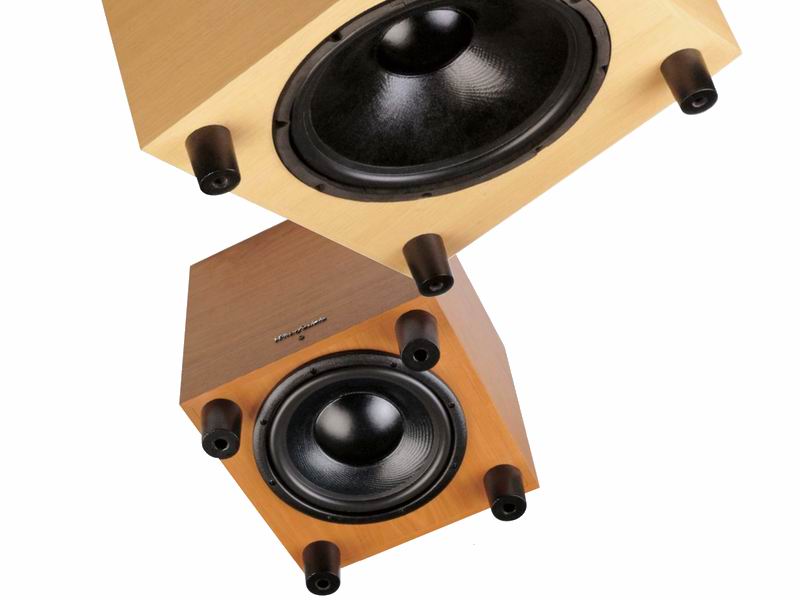
POSITIONING THE UNIT
Although the unit may be placed almost anywhere in the room, even behind the sofa or the
TV set, we recommend that it be placed in front of the listener and as central to the listening
position as possible. The subwoofer should not be operated within 450mm of a television set
as the drive unit magnet may distort the picture.
We suggest you position the subwoofer about 20cm (8 inches) from the wall. Placing the unit
close to the wall will enhance the bass; placing it across the corner of the room will increase
the bass further, possibly at the expense of clarity. Experiment with a variety of locations and
sources before making a final decision.
As the subwoofer is a powered unit there should be a mains outlet within easy reach.
The bass ports are mounted at the rear of the subwoofer and should not be obstructed by
placing the unit against soft furnishings. Do not place the subwoofer close to surfaces or
objects that may rattle. The floor under the subwoofer should be sound with no loose
floorboards, etc.
SETTING UP
Set the subwoofer power switch to OFF. Turn the system Volume Control to minimum. Recheck all system connections. Connect the supplied subwoofer power lead to the IEC power
socket on the subwoofer and connect the mains plug into the into the wall socket. Switch on
the mains power. Set the subwoofer volume control to the mid position (12o’clock) before
proceeding.
VARIABLE CROSSOVER This control should initially be set to 85 Hz when the subwoofer is used
with small bookshelf speakers and to 65 Hz when used with large floor standing speakers.
PHASE SWITCH: The Phase switch should be initially set to 0°.
AUTO SWITCH: the Auto switch should be initially set to OFF.
FINE TUNING
Switch on the subwoofer power switch and check that the power indicator on the front of the
cabinet glows. Now switch on the system. Play a programme with extended bass and set the
system volume to a reasonable level. Adjust the subwoofer volume control to produce the
desired level of bass. Do not overdo things!
PHASE SWITCH: If the bass is indistinct or lacks depth, the Phase switch may need
adjustment. Set the switch to 0º and listen carefully to some music with extended bass. If
there is insufficient bass output from the sub-woofer set the Phase switch to 180º. Select the
position which produces the most natural, extended bass.
CROSSOVER ADJUSTMENT. This adjusts the blend between the subwoofer and the main
speakers. and enables the system to be set up for optimum bass performance. The higher
settings are for use with small bookshelf loudspeakers, the lower settings for large
floorstanding models. If you choose too low a setting with small speakers, there will be a
‘hole’ in the bass response; too high a setting with large speakers will result in the upper bass
becoming bloated.
AUTO SWITCH. In normal mode the subwoofer is permanently on. This may result in low level
hum or noise from the subwoofer if the rest of the system is switched off and the subwoofer is
left switched on.
when a signal is detected at any of the inputs and turn it off (Standby Mode) after a period of
inactivity. We recommend that the AUTO switch be set to ON for normal operation.
In AUTO mode the indicator on the front of the subwoofer will glow RED when the unit is in
Standby mode and GREEN when operational. If your subwoofer is disconnected from the
mains power, or the Power switch is “Off”, the indicator will be extinguished.
MAINS OPERATION
When the system is not in use for extended periods, we suggest you switch off the subwoofer
to protect it from switching noises caused by domestic appliances, etc. The best practice is to
switch the complete system on and off from a central point. If you play the system with the
subwoofer switched off you will get no bass!
Always turn the main volume control to minimum when you switch the system on or off.
Setting the AUTO switch to ON will automatically turn the subwoofer on
User manual for Subwoofer Wharfedale PowerCube 12DX
On this page you are offered with user manual for PowerCube 12DX Subwoofer existing in our database. Icons placed on the left of file name will prompt you in which format and in what language user guide download Wharfedale PowerCube 12DX Subwoofer are represented in this file.
If the needed file doesn’t exist, therefore the desired owners manuals is missed in our database. It can be ordered in the File Request section.
You can also try to find the appropriate installation instruction for kindred Subwoofer Wharfedale models by clicking on the links shown below.
Files user guides for Wharfedale PowerCube 12DX are temporary unavailable.
Other models Wharfedale Subwoofer:
| Diamond SW150, PC SUPER 15, PC SUPER 15 DX, PC10+, PC10+ DX, PC12+, PC12+ DX, PC8+ DX, PowerCube 10A, PowerCube 10DX, PowerCube 12A, PowerCube 12DX, PowerCube 8A, SW250, SW300, SW380, Zaldek Subwoofer |
Здесь можно выбрать и купить сабвуфер Wharfedale PowerCube 12+ DX по низкой, лучшей цене, Тип установки напольный, тип активный, акустическое оформление фазоинверторного типа, назначение домашний, мощность 150 Вт, частотный диапазон 30 – 95 Гц, размер динамика 8, регулировка фазы +, регулировка уровня +, регулируемый кроссовер +, входы RCA (линейный), высокоуровневый (клеммы), выходы RCA (линейный), материал корпуса МДФ, габариты (вхшхг) 430x380x410 мм, вес 18.4 кг, выполнен в современном дизайне. Доставка и самовывоз возможны.
Для того чтобы сравнить несколько моделей сабвуферов укажите их названия в форме ниже
или посмотрите популярные сравнения в списке.
Реальные отзывы о Wharfedale PowerCube 12+ DX от пользователей и покупателей. Только честные отзывы владельцев. ✔
Добавить свой отзыв
Добавить свой отзыв
Интересные отзывы
Экран, размер, громкий динамик, батарея, слот для карты памяти и многое другое что в других отзывах. Просто, всего не перечислить. Камера 3 Мр (хотелось-бы по больше) нет авто фокуса, нет вспышки (хотя это планшет, просто, так и должно быть наверное…) Сенсорные кнопки не имеют подсветки. Левая… >>>>>
Лёгкая и компактная После недолгого использования стал подвисать. При попытке перелистнуть страницу ничего не происходит. На нажатия кнопок не реагирует. Через минут 2~5 перегружается… Приходится искать где закончил читать, через 5~10 страниц ситуация повторяется… Стал грешить на карту… >>>>>
1.Дома всегда чистая вода 2.Вода Минеральная 3.Длительный срок службы картриджей и мембраны 4.Низкая стоимость предфильтров (900-1000 рублей за 3 фильтра) 1.Трубочки и все соединения не вызывают доверия, всё из пластика 2.Высокая стоимость мембранны около 2400рублей 3.Высокая стоимость… >>>>>
работает без поломок уже полгода, убирает комнаты самостоятельно, без нашего вмешательства. шумит во время уборки, не сильно, но на нервные клетки действует, поэтому стараемся в это время уходить на улицу. Выполняет работу качественно, без нареканий. Правда, приходится складывать ковер в спальне,… >>>>>
Красивый интерфейс, оригинальное решение в плане эргономики. Долго не хотел подключаться в режиме репитера, не поддерживает технологию L2TP с билайном не получится использовать. Буду завтра возвращать в магазин. >>>>>
Наличие гриля и таймера Не нашла Купила себе духовой шкаф MAUNFELD MEOC 674W и очень рада удачной покупкой. Радует то, что его можно ставить где угодно, а также в нем удобное регулирование при помощи трех переключателей. Функций много и режимов, а особенно радует наличие гриля и таймера. С… >>>>>
Быстрый старт, удобный, легко переделывается в region free. Отличная картинка, отсутствие каких-либо LED-индикаторов что светят в глаза. Холодный. Управление по Anynet+, отличное дополнение к Samsung Smart-TV, можно управлять с пульта от телека. Дизайн строгий, без лишних наворотов. Недорогое… >>>>>
Отличный профессиональный фен, мощный, не перегревается, огромная скорость выдува и действительно холодный воздух, не шумный Не обнаружил Подарил жене на 8 марта, давно просила, остановился на этой модели по совету консультанта. Счастью любимой нет предела! Теперь и собирается быстрее)) >>>>>
Да нормально тут все видно, я перед тем как купить посмотрел ролики на ютубе, от реаьных пользователей, нормальное видео там. И днем и ночью все видно не плохо. номера в том числе . нужно быть слепым чтобы было сложно рассмотреть, ладно там ночью без фонарей — понятное дело. Ну может акум дохлый,… >>>>>
крепкая конструкция, недорого нет долго просматривала варианты перед покупкой кроватки для доченьки. Главное для меня это надежность, безопасность и функциональность. Тут все это слава богу есть! удобный столик, ящики — малышке тоже нравится >>>>>
Отличная цена в 1/2 цены конкурента, внешний вид , удаленное управление через приложение, куча датчиков и построение карты уборки, долгое время работы у меня на уборку 60 к.метров тратит 30��аряда. языковая поддержка , ждем глобальных много языковых прошивок, можно обновлять приложение на… >>>>>
Звук неожиданно басовитый для таких дешёвых наушников. Регулировка звука на проводе Провод всего 1,5 метра Хороший для таких наушников звук и хорошая чувствительность микрофона. Ожидал что будет хуже на много. НО — нормальные оказались. >>>>>
Выбор режима температуры. Нагревается внешняя сторона над пластинами. На первый взгляд отличный выпрямитель, быстро нагревается, пластмассой не воняет, длинный вращающейся шнур………….но есть одно НО!!! Почему-то вот вроде выбираешь нужную температуру,а он опять бегать начинает! Выбрала я… >>>>>
Дизайн, отсутствие антен, наличие гигибитных портов, вот и пожалуй все. Цена; Wi-Fi оставил желать лучшего особенно совместимость с 802.11g и 802.11b устройствами, с 802.11n в целом не плохо, но ожидал гораздо лучшего результата; не очень удобный веб-интерфейс (прошивка 1.0.0.7); PPPoE соединение… >>>>>
Множество текстовых форматов, можно вкинуть флешку, цена. не обнаружил Книгу комп видит без проблем. Также понравилось что поставляется сразу в обложке. Памяти хватает на уйму книг. За время пользования к книге нареканий нет, не виснет и не тормозит. Дисплей предает картинку будто реально читаешь… >>>>>
отлично сидят, удобный маленький пульт управления включения и выключения подсветки, прекрасная шумоизоляция недостатков не нашел Полностью доволен покупкой, думаю лучше за такую цену не найти >>>>>
широкий угол обзора передней камеры, 2 вида креплений. вторая камера снимает в зеркальном отражении, когда видишь запись в первый раз шокирует J. хорошая небольшая модель. >>>>>
работает без нареканий, скорость работы, простота настроек, OpenSource-прошивка Малый объём флеш-памяти Господа, если у когото возникают поблемы с настройками, не поленитесь найти нужную inf. в сети. Хаить железо ненадо. «Разруха не в клозетах, а в головах» >>>>>
Из достоинств: демократичная цена, нормальный звук, поддержка многих форматов, удобный пульт ДУ. Из недостатков: Не читат MKV-файлы, через USB заявлено, что читает файлы размером до 4 Гб, но реально, у меня файлы чуть больше 2 Гб загружаются 20-30 минут. Глюк какой-то. Нельзя отключить табло при… >>>>>
Дизайн, небольшой размер (удобно небольшой семье) Нет Радует возможность автоматизированно готовить в ней тесто, это так упрощает жизнь! Все делает на ура, претензий нет, рекомендую. >>>>>
-качество исполнения корпуса, эргономика -огромная поверхность тачпада, четкая реакция на все жесты -макимально мощная начинка, возможная в ноутбуках такого размера -корпус служит системе охлаждения радиатором, что уменьшает температурные нагрузки на внутренности (не берите во внимание результаты… >>>>>
Дизайн, отличная полноразмерная клавиатура. Производительность. Маленькие клавиши курсора Долго выбирал, очень доволен покупкой. Как оказалос довольно быстрая видеокарта — скорость работы выше чем в G210, G220. NFS Shift просто летает на максимальных настройках. Не могу выгнать сына — у него на… >>>>>
Маленький, удобный в руке, шустрый, камера неплохая, хороший динамик и звук, пыле- влаго- ударозащищенный, экран не царапается, кнопки не западают. При использовании только в режиме обычного телефона батареи хватает на 6-7 дней. Глючит. Бывает, заканчиваешь разговор, а он выключатся не хочет,… >>>>>
1. Очень легкий и плавный ход, точное позиционирование. 2. Кнопка «Sniper». 3. Качество изготовления отличное. 4. Стильный внешний вид. 1. «Куцый» зад, ладонь сползает, выгибается в запястье. 2. Кнопка «Sniper» не под пальцем. Большой палец не дотягивается. Если переложить руку, чтобы легко… >>>>>
Супер коляска! Мы довольны своим выбором) Хорошее качество и «все в ней включено» Вес и мало места для корзины >>>>>
глубокий насыщенный звук неплохое качество сборки слабый пластик (легко лопается, что странно для альпины с неплохим в целом качеством сборки) Брал вместо саундмакса (они просто развалились). Звук стал громкий, четкий, с явно выраженной серединой. Низы есть, но я на усилке их немного убавил (не… >>>>>
Прекрасное устройство 2 в 1 — навигатор и регитсратор. работает без перебоев. Очень хорошая ночная съемка, удобная подсветка. маленький экран Купил порекомендации товарища пару месяцев назад, много езжу, ситуации на дороге бывают разные, вещь очень необходимая. этой моделью остался даже больше… >>>>>
Очень хорошие наушники, легкие. Хороши звук. Очень удобные. Уши не болять после снятия Шнуры не достачно длинные. Очень хорошие наушники. Вот только нужны с проводами нужно быть осторожным >>>>>
Хорошо работает навигатор и камера заднего вида. Слабый радиоприёмник (по сравнению со штатной головой), Невозможно включить только навигатор, при этом обязательно будет включено ещё что-нибудь звуковое (радио, диск, USB), поэтому можно пользоваться этим навигатором или в зоне отличного… >>>>>
Все заявленные функции есть и работают без сбоев. 3G, Wi-fi не отваливаются. Относительно шустрый. Экран ужасающий. Углов обзора просто нет, с любой позиции наблюдается искажение цветов. Очень подвержен царапинам. Звук тоже ужасный, тихий и хрипит. Камера просто чудовищна. Но тексты каким-то… >>>>>
Акустическая система Wharfedale PowerCube 8+ DX Rosewood
Акустическая система Wharfedale PowerCube 8+ DX Rosewood
Компания Wharfedale основана в 1932 году Гилбертом Бриггсом (Gilbert Briggs). С момента основания быстро наметился устойчивый рост компании. И вскоре со своим коллегой Питером Уокером (Peter Walker) Гилберт получил широкую известность как талантливый инженер. Успех пришел после знаменитой серии демонстрационных концертов под названием “Live Vs Recorded” — можно перевести как «Запись или живое исполнение: что лучше?»
«Wharfe» Dale дословно означает «в долине реки Уарф». Именно здесь, в маленькой деревне под названием Айдл (Idle), в 3 милях от одного из нынешних производств, и была основана компания. Философия Гилберта: – «Лучший способ ведения бизнеса: назначай всему справедливую цену» Этот лозунг является ключевым к пониманию философии торговой марки Wharfedale. Гилберт всегда верил, что за хорошую аудиотехнику следует назначать справедливую цену: не больше, но и не меньше.
Среди участников теста этот сабвуфер отличается не только самыми скромными габаритами — он единственный, у которого диффузор излучателя направлен вниз. Признаюсь честно, первые ощущения после вскрытия упаковки были неоднозначны. С трудом верилось, что такая кроха способна хоть как-то удивить звучанием на фоне гораздо более солидных конкурентов. Однако и у этого малыша оказались свои сильные стороны.
Начну с отделки и общего уровня изготовления. Таким, не побоюсь этого слова, шикарным внешним видом не может похвастать ни один из участников. Крайне высоко и качество сборки — нет ни намека на какие-либо неаккуратно подогнанные узлы или детали. Здесь PowerCube 8+ DX просто не имеет себе равных.
Небольшой внешнй кубик совсем немного отстает от других по общему весу, сразу чувствуется, что корпус заглушили на славу. Техническое оснащение также соответствует габаритам. В этой модели применена 8-дюймовая головка, которая приводится в движение встроенным усилителем номинальной мощностью 100 Вт. В наличии все необходимые коммутационные разъемы: линейный вход и выход, а также высокоуровневые терминалы. Регулировка кроссовера доступна в пределах 30 — 85 Гц при заявленной нижней границе 40 Гц.
В ходе испытаний на музыкальных фрагментах сабвуфер приятно удивил сбалансированностью всех звуковых качеств. Не пытаясь сразить наповал сверхнизким басом он, тем не менее, продемонстрировал изрядное умение «поддать жару». Понятно, что концертные уровни громкости ему не под силу — появляются динамические ограничения и слышимые признаки компрессии, но при комфортных уровнях и на фонограммах с не очень насыщенным басом он способен оказать вполне адекватную поддержку снизу. В этом случае воспроизведение отличается образцовой корректностью и информативностью. Вполне адекватна ударная установка, ритмический рисунок которой передается верно. Лишь на сложной классике не хватает разрешающей способности и появляются первые признаки перегрузки.

Тестирование на кинематографическом материале выявило некоторые иные особенности сабвуфера. Он слегка тяготеет к верхнему басу, из-за чего низкочастотные эффекты могут терять в масштабе. Зато в рабочей полосе PowerCube 8+ DX способен показать все разнообразие тембров и абсолютно не страдает монотонностью воспроизведения. Наилучшим образом PowerCube8+ проявит себя в составе сателлитной системы в небольшой комнате. Только не стоит выкручивать ручку громкости до предела.
Основные параметры Wharfedale PowerCube 8+ DX
Количество полос 1
Максимальная мощность 100 Вт
Чувствительность 107 дБ
Диапазон воспроизводимых частот 40-95 Гц
Частота кроссовера 35-85
НЧ-излучатель 200 мм
Размер 295x345x325