
-
Page 1
hobb y 1 1 32,1 1 22 Owner´s manual[…]
-
Page 2
23 23 23 23 22 22 2 25 25 25 25 25 5 26 26 26 26 2 2 1 1 4 4 4 4 4 4 4 4 8 8 8 8 9 9 10 10 10 10 10 0 12 12 12 12 12 1 13 13 13 13 3 13 17 17 17 17 17 7 7 20 20 20 20 20 20 14 14 14 14 14 1 1 2 2 19 19 19 19 9 9 3 3 7 7 7 7 7 7 7 15 15 15 15 15 5 1 5 16 16 16 16 24 24 24 24 24 24 4 21 21 21 6 6 6 6 6 6 6 6 5 5 5 5 5 5 5 5 18 18 18 18 8 11 11 11 11 […]
-
Page 3
9 9 9 10 10 10 0 10 12 12 12 12 12 1 13 13 13 13 13 13 16 16 16 6 6 1 16 6 6 1 1 1 1 6 6 6 6 16 16 6 1 14 14 14 14 14 14 1 1 15 15 15 15 15 15 5 1 1 1 1 1 4 4 4 4 4 4 4 4 2 2 3 3 7 7 7 7 7 7 7 7 6 6 6 6 6 6 6 6 5 5 5 5 5 5 5 5 23 23 3 23 22 22 25 25 25 25 25 5 20 20 20 20 20 20 2 24 24 24 4 4 2 2 21 21 21 17 17 1 17 7 1 19 19 19 19 19 9 18 18 18 18[…]
-
Page 4
Congr atulations on purchasing your new PF AFF® hobb y ! Your hobby is so easy to use and offers a whole range of features and accessories for you to explore. Please spend some time reading these operating instructions as it is a great way to learn the machine and also to make full use of the features. Your Pfaff dealer will be at your service wit[…]
-
Page 5
This houshold sewing machine is designed to comply with IEC/EN 60335-2-28 and UL1594 IMPORT ANT SAFETY INS TRUCTIONS When using an electrical appliance, basic safety precautions should always be followed, including the following: Read all instructions before using this household sewing machine. D ANGER — T o reduce the risk of electric shock: • A[…]
-
Page 6
II Introduction T ABLE OF CONTENTS Introduction Standard accessories IV Optional accessories V Accessory tray V Stitch table VI 1. Oper ate your hobby 1132/ 1122 Carrying handle, carrying case 1:2 Connecting the foot control 1:2 Foot preassure dial 1:3 Dropping the feed dog 1:3 Presser foot lifter 1:4 Changing the presser foot 1:4 Removing and atta[…]
-
Page 7
III Introduction 3. Maintenance and trouble-shooting Cleaning 3:2 Changing the light bulb 3:3 Trouble-shooting 3:4 Index 3:6 Technical data 3:8[…]
-
Page 8
IV 2 5 4 3 1 Introduction Standard accessories 1 Standard presser foot A Part No. 820 546-096 2 Buttonhole foot B (only at 1132) Part No. 820 547-096 3 Zipper foot E Part No. 820 549-096 4 Blindhem foot G Part No. 820 550-096 5 Sliding buttonhole foot J Part No. 820 553-096[…]
-
Page 9
V 10 6 11 12 13 14 9 78 Introduction Accessory tray Your sewing machine has a removable accessory tray which is also used as an extended work support. The enclosed accessories are numbered. 6-7 Spool cap Part No. 4160424-01 8 Cushion felt Part No. 4160234-01 9 Brush Part No. 4160409-01 10 Seam ripper Part No. 4160304-01 Optional accessories — avail[…]
-
Page 10
VI Introduction Stitch table hobby 1132 1132/1122 Description A Buttonhole Standard buttonhole for blouses or bed linens B Straight stitch, needle position middle For all straight stitching and topstitching work up to 4 mm C Straight stitch, needle position left For all sewing and topstitching work requiring a left needle position D Zigzag stitch F[…]
-
Page 11
1. Oper ate your hobby 1132/1122[…]
-
Page 12
1:2 A B Operate your hobby 1132/1122 Connecting the foot control Before connecting to the power supply, make sure the voltage shown on the machine conforms to your electrical power . Connect the plug of the foot control to the connecting socket (A) of the sewing machine and to the wall socket. The sewing speed is regulated by pressing the foot cont[…]
-
Page 13
1:3 C DE Operate your hobby 1132/1122 Dropping the feed dog For certain sewing work, e.g. darning the feed dog has to be dropped. The slide for lowering the feed dog is located underneath the free-arm bed on the backside of the machine. To drop the feed dog, push the slide in the direction of the arrow, as shown in the picture (D). To raise the fee[…]
-
Page 14
1:4 B C A D Operate your hobby 1132/1122 Presser foot lifter The presser foot is raised or lowered with the presser foot lifter. You can raise the foot about 1/4″ (6 mm) higher than the normal up position for easy removal of the presser foot, or to help you place heavy fabric under the foot. A Lowered position B Normal up position C Extra lift[…]
-
Page 15
1:5 E F Operate your hobby 1132/1122 Removing and attaching the foot holder Turn off the main switch. To remove the foot holder Remove the thumbscrew (E) by turning it counterclockwise with a screwdriver and remove the foot holder. To attach the foot holder Match the hole in the foot holder with the threaded hole in the presser bar. Fit the thumbsc[…]
-
Page 16
1:6 A B C Operate your hobby 1132/1122 Bobbin winding Preparing the machine for bobbin winding Pull out the handwheel to disengage the clutch. Setting the spool Place a spool of thread on the spool pin with the thread coming off the spool as shown in the picture. Press the large spool cap (A) À rmly against the spool of thread. For a small spool, […]
-
Page 17
1:7 D E Operate your hobby 1132/1122 Thread through the hole in the bobbin (D) from the inside to the outside as shown in the picture. Place the bobbin on the bobbin winder spindle with the free end of the thread at the top. Push the bobbin to the right. Note : The bobbin can only be wound when it is moved fully to the right. Do not move the bobbin[…]
-
Page 18
1:8 A B D E C Operate your hobby 1132/1122 Inserting the bobbin Turn off the main switch. Place the bobbin in the bobbin holder with the thread running off as shown in the picture. Pull the thread into the front notch (A) on the front side of the bobbin holder. Pull the thread to the left, sliding it between the tension spring blades. Continue to p[…]
-
Page 19
1:9 G H F I F Operate your hobby 1132/1122 Threading the machine Turn off the main switch. Raise the presser foot and turn the handwheel towards you until the take-up lever (F) is in it’s highest position. Pull the thread from the spool and pass it under the thread guide (G). Then pull it down along the right threading slot. Pull the thread up[…]
-
Page 20
1:10 C E D Operate your hobby 1132/1122 Threading the twin needle Turn off the main switch Insert the twin needle. Insert the extra spool pin into its hole (C). Place a piece of felt and a spool on the extra spool pin. The threading path is the same as single needle threading. Slide one of the threads through the needle bar thread guide (D) on the […]
-
Page 21
1:11 A B Operate your hobby 1132/1122 Bringing up the bobbin thread Turn off the main switch. Raise the presser foot. Hold the needle thread and turn the handwheel towards you until the needle is at the top again and the bobbin thread has formed a loop. Pull 10 cm (4”) of both threads back and under the presser foot. Bring the bobbin thread (B) u[…]
-
Page 22
1:12 C D E F 0 1 2 3 4 Operate your hobby 1132/1122 Stitch length dial With the stitch length dial(E) you can adjust the stitch length to the required length, between 0 and 4 mm, by turning the dial to the setting mark (F). The higher the number, the longer the stitch The buttonhole marking shows the adjustment range when sewing the buttonhole. The[…]
-
Page 23
1:13 A B 5 4 3 2 1 0 Operate your hobby 1132/1122 Adjusting stretch stitch balance (only at 1132) If the stretch stitches are uneven when you sew on a particular fabric, correct them by turning the stitch length dial. Balancing stitches: If the stitches are drawn out, correct them by turning the dial in the “–” direction. If the stitches are […]
-
Page 24
1:14 V ariable needle position (only at 1132) The needle drop position of the straight stitches can be moved between the center (5) and left (0) with the stitch width dial. Note: Do not turn the stitch width dial while the needle is in the fabric, otherwise the needle may bend or break Operate your hobby 1132/1122 Reverse sewing Push the reverse st[…]
-
Page 25
1:15 Operate your hobby 1132/1122 Balancing needle thread tension The thread tension should be adjusted depending on the sewing materials, layers of fabric and sewing method. To ensure perfect sewing results, the needle thread tensions must be perfectly tuned. Balanced tension: The ideal straight stitch has threads locked between two layers of fabr[…]
-
Page 26
1:16 Operate your hobby 1132/1122[…]
-
Page 27
2. Utility stitches and pr actical sewing[…]
-
Page 28
2:2 Utility stitches and practical sewing Basic sewing Starting to sew Raise the presser foot and place the fabric under the foot. Lower the needle into the fabric. Lower the presser foot and smooth the threads toward the back. Depress the foot control. Gently guide the fabric along the seam guide letting the fabric feed by itself. Note : Pull the […]
-
Page 29
2:3 Utility stitches and practical sewing Finishing sewing Press the reverse stitch lever and sew several stitches in reverse at the end of the seam. Raise the presser foot and remove the fabric, pulling the threads to the back. Pull the threads up and into the thread cutter. The threads are cut the proper length for starting the next seam.[…]
-
Page 30
2:4 B A Utility stitches and practical sewing Free arm sewing For stitching sleeves, waistbands, pant legs or any other tubular garments. In order to sew with the free arm, you must remove the accessory tray. Hook your À ngers on the bottom left of the accessory tray and pull it to the left. When replacing the accessory tray to its proper position[…]
-
Page 31
2:5 C Utility stitches and practical sewing Seam guides on the needle plate The seam guides on the needle plate help you to measure seam allowance. The numbers indicate the distance between the center needle position and the seam guide. Turning a square corner When the fabric edge facing you lines up with the cornering guide (C) as shown in the pic[…]
-
Page 32
2:6 Utility stitches and practical sewing Explanation of the sewing chart The following charts show the recommended settings for each stitch or technique. These charts also provide you with further instructions that are necessary when sewing the selected stitches. The choice of the sewing foot, the setting of the needle thread tension and recomende[…]
-
Page 33
2:7 Utility stitches and practical sewing Straight stitch Straight stitch B/C is the basic straight stitch. The stitch length can be increased up to 4 mm. It is easier to do some sewing jobs by changing the needle position, e.g. top- stitching a collar or sewing in a zipper. The needle position is determined by the stitch width dial. (5 is center, […]
-
Page 34
2:8 Utility stitches and practical sewing Stretch triple str aight stitch (only at 1132) This stitch is used for sewing all seams where great strength is needed, e.g. inside trouser seams, crotch and armhole seams. The stitch is sewn with two stitches forward and one stitch backward, forming a seam that does not rip easily. Also use it when constru[…]
-
Page 35
2:9 Utility stitches and practical sewing T ricot stitch (T riple zigzag stitch) This stitch is used to À nish the seam allowance on synthetics and other fabrics that tend to pucker. Place the fabric to leave a 1.6 cm (5/8″) seam allowance. Trim the extra allowance after sewing. It is also used for mending tears. Elastic stitch Because of its[…]
-
Page 36
2:10 Utility stitches and practical sewing What is an overlock stitch? For elastic materials and knits, the hobby 1132 offers an overlock stitch which sews two fabric layers together and overcasts simultaneously. It is more elastic than normal seams, very durable and quickly sewn. Open overlock stitch (only at 1132) With this stitch, thicker materi[…]
-
Page 37
2:11 Utility stitches and practical sewing Blindhem stitch (elastic) Stitch F is a blindhem stitch for woven or elastic materials. The hem is sewn and overcast at the same time. Stitch G Stitch F Blindhem Blindhem foot G is best suited for invisible hems; sewing by hand is no longer necessary. Note : On heavy weight fabrics that ravel, the raw edge[…]
-
Page 38
2:12 A B C D E F G A1 A4/2 A3 A4/2 Utility stitches and practical sewing Buttonholes Note : Make a test buttonhole on a sample duplicating the fabric, stabilizer and seams of the actual garment to check the settings. Use a stabilizer on stretch fabrics. Turn the handwheel toward you to raise the needle to its highest position. Carefully mark the le[…]
-
Page 39
2:13 I H Utility stitches and practical sewing Buttonhole with a gimp thread With the buttonhole foot raised, hook the cord on the cord spur (H) at the back of the buttonhole foot. Bring the ends toward you under the buttonhole foot until they clear the front end. Hook the À ller cord into the forks (I) on the front of foot to hold them tight. Low[…]
-
Page 40
2:14 A E D C B A1 A4/2 A3 A4/2 Utility stitches and practical sewing Sew 5 stitches. Stop sewing at a right stitch (C). Set the stitch selector dial at (A3). Sew until you reach the back marking of the buttonhole (D). Stop sewing at a right stitch. Set the stitch selector dial at (A4/2). Sew a few bartacks (E) and raise the needle from the fabric. […]
-
Page 41
2:15 Utility stitches and practical sewing Button sewing With zigzag stitch D you can sew on two- and four-hole buttons. Note : Lower the feed dog when sewing on buttons. Adjust the stitch width to match it with the span of the holes in the button. Turn the handwheel to check if the needle enters into each hole in the button. Lower the foot to hold[…]
-
Page 42
2:16 B A Utility stitches and practical sewing B 5 1.5-4 3-6 E Sewing on zippers There are various methods of sewing on zippers. For skirts, we recommend the fully concealed zipper, for men’s and ladies’ trousers the semi concealed zipper. Various zippers are available. We recommend using a metal zipper for strong fabrics such as denim. For all[…]
-
Page 43
2:17 Utility stitches and practical sewing Fully concealed, sew-in zipper • Insert the zipper foot on the right side (A) to sew on the left side of the zipper. • Baste in the zipper and lay it underneath the presser foot so that the teeth of the zipper run alongside the foot. • Stitch in half of the zipper, leave the needle in the fabric, rai[…]
-
Page 44
2:18 Utility stitches and practical sewing Darning with the elastic stitch Darning with the elastic stitch is suitable for repairing damaged areas. • Sew over the damaged area in rows until it is well covered. Make sure that the rows overlap. Sewing on patches To cover large holes it is necessary to sew a new piece of fabric onto the damaged area[…]
-
Page 45
3. Maintenance and trouble-shooting[…]
-
Page 46
3:2 A B C D A E E Maintenance and trouble-shooting Cleaning: Turn off the main switch It is very important to clean your sewing machine, because it will reward you with a longer service life. The more often you use the machine, the more care it needs. Do not dismantle the machine other than as explained in this section. Clean the outside of the mac[…]
-
Page 47
3:3 Maintenance and trouble-shooting Changing the light bulb Turn off the main switch • Disconnect the main plug and the foot control plug from the machine. • If you have used the machine, wait for the lamp to cool before touching it. Removal • Remove the cap and screw. Remove the face plate. • Push and turn the bulb counterclockwise, seen […]
-
Page 48
3:4 Maintenance and trouble-shooting T rouble-shooting The needle thread break s. The needle thread is not threaded properly. Page 1:9 The needle thread tension is too tight. Page 1:15 The needle is bent or blunt. Page 1:5 The needle is incorrectly inserted. Page 1:5 The needle thread and the bobbin thread are not set under the presser foot when st[…]
-
Page 49
3:5 Maintenance and trouble-shooting The cloth is not fed smoothly The feed dog is packed with lint. Page 3:2 The stitches are too À ne. Page 1:12 The feed dog is not raised after ”drop feed” sewing. Page 1:3 Loops on the seams The needle thread tension is too loose. Page 1:15 The machine does not sew or run The machine is not plugged in. Page[…]
-
Page 50
3:6 Maintenance and trouble-shooting E Extra spool pin 1:7 F Foot preassure dial 1:3 Free arm sewing 2:4 H Honeycomb stitch 2:9 I Inserting the bobbin 1:8 O Open overlock stitch 2:10 Optional accessories V P Presser foot lifter 1:4 Presser foot holder — remove and attach 1:5 R Repairing tears 2:18 Reverse sewing 1:14 S Seam guides on the needle pla[…]
-
Page 51
3:7 Maintenance and trouble-shooting Sewing on patches 2:18 Sewing on zippers 2:16 Special accessories V Straight stitch 2:7 Stretch stitch balance — adjust 1:13 Stretch triple straight stitch 2:8 Standard accessories IV Stitch length dial 1:12 Stitch selection 1:12 Stitch table VI Stitch width dial 1:13 T Thread tension 1:15 Threading for twin nee[…]
-
Page 52
T echnical data Dimensions (w x h x d) 385 x 280 x 170 Weight 8 kg Nominal voltage (Europe) 230 V Nominal voltage (USA/Canada) 120 V Nominal voltage (Australia) 240 V Power consumption 75 W Sewing lamp 15 W Sewing speed Max 800 stitches/minute Stitching width 0…5 mm Stitching length 0…4 mm Presser foot lift 6 mm Max. presser foot height 13 mm N[…]
-
Page 53
[…]
-
Page 54
[…]
-
Page 55
We reserve the right to change the machine equipment and the ass ort ment of accessories without prior notice, or make modi À cations to the performance or design. Such modi À cations, however, will always be to the bene À t of the user and the product. Intellectual property PFAFF and HOBBY are trademarks of KSIN Luxembourg II, S.ar.l. All trade[…]
-
Page 56
VSM Group AB • SE-561 84 Huskv arna • SWEDEN www .pfaff.com 412 90 09 — 26I • English • Inhouse • © 2009 KSIN Lux embourg II, S.ar .l. • All rights reserved • Printed in Sweden on environmentally-friendly paper[…]
Report abuse
Libble takes abuse of its services very seriously. We’re committed to dealing with such abuse according to the laws in your country of residence. When you submit a report, we’ll investigate it and take the appropriate action. We’ll get back to you only if we require additional details or have more information to share.
Product:
Get your user manual by e-mail
Enter your email address to receive the manual of Pfaff Hobby 1132 in the language / languages: English as an attachment in your email.
The manual is 1,08 mb in size.
You will receive the manual in your email within minutes. If you have not received an email, then probably have entered the wrong email address or your mailbox is too full. In addition, it may be that your ISP may have a maximum size for emails to receive.
The manual is sent by email. Check your email
If you have not received an email with the manual within fifteen minutes, it may be that you have a entered a wrong email address or that your ISP has set a maximum size to receive email that is smaller than the size of the manual.
Pfaff hobby 1132 Sewing Machine PDF User Guides and Manuals for Free Download: Found (2) Manuals for Pfaff hobby 1132 Device Model (Technical Specifications, Owner’s Manual)
The Pfaff hobby 1132 is a sewing machine that stands out for its reliability and versatility, making it a popular choice among both amateur and experienced sewers. Designed with user-friendliness in mind, this machine boasts functionality that caters to a variety of sewing projects, from simple repairs to elaborate quilting tasks. The Pfaff hobby 1132 is a fine testament to the brand’s commitment to quality and innovation in the world of sewing technology.
One of the most notable features of the Pfaff hobby 1132 is its ease of use. The intuitive design allows sewists to quickly set up and start sewing without extensive experience. The built-in needle threader saves time and frustration, especially for those new to sewing. Moreover, the clear instruction manual guides users through the different functions, enhancing the overall sewing experience.
This sewing machine comes equipped with a range of stitches, catering to various sewing styles and needs. Here are some of the key stitches available on the Pfaff hobby 1132:
- Straight stitch
- Zigzag stitch
- Buttonhole stitches
- Decorative stitches
These options enable users to tackle a multitude of sewing tasks with ease, providing both functionality and creative flexibility.
The build quality of the Pfaff hobby 1132 is impressive. Constructed with durable materials, this sewing machine promises longevity, ensuring that it can handle extensive use. Additionally, the machine operates smoothly, with minimal noise, allowing for a more pleasant sewing environment. The powerful motor ensures that even thicker fabrics can be stitched with precision and ease.
Another advantage of the Pfaff hobby 1132 is its adjustable presser foot pressure. Users can easily modify the pressure to suit different fabrics, from delicate silks to heavier denim. This feature enhances the versatility of the machine, making it suitable for a wide array of sewing projects. The large sewing area is another plus, providing ample space for larger fabrics or quilt pieces, which is essential for quilters and those who work on substantial projects.
However, like any product, the Pfaff hobby 1132 does have a few drawbacks. Some users have noted that while the machine is great for basic sewing tasks, it might not be as advanced as higher-end models, particularly for more intricate embroidery work. Additionally, the limited range of built-in decorative stitches may not meet the needs of those looking for a more extensive library of options.
In conclusion, the Pfaff hobby 1132 is a commendable sewing machine that excels in several areas, including ease of use, build quality, and versatility. Although it may not possess all the advanced features found in more expensive models, it remains an excellent choice for those seeking a reliable sewing companion. Whether you are a beginner eager to learn or an experienced seamstress looking for a dependable machine, the Pfaff hobby 1132 is sure to meet your sewing needs.
If you are considering investing in a sewing machine that offers a balance of quality and functionality, the Pfaff hobby 1132 should undoubtedly be on your list. Its reputation for durability and user-friendliness makes it a smart choice for anyone interested in sewing.
Page doesn’t exist.
Instruction/ maintenance manual of the product hobby 1132 Pfaff
- File size: N/A
- Number of pages: 56
Summary of contents each page of manual
Read the Pfaff hobby 1132 manual — avoid problems
An important point after buying a device Pfaff hobby 1132 (or even before the purchase) is to read its user manual. We should do this for several simple reasons:
- to know how to properly use the device
- to know how to perform maintenance/ periodic checks of correct operation of the product Pfaff hobby 1132
- to know what to do in case of failure Pfaff hobby 1132
If you have not bought Pfaff hobby 1132 yet, this is a good time to familiarize yourself with the basic data on the product. First of all view first pages of the manual, you can find above. You should find there the most important technical data Pfaff hobby 1132 — thus you can check whether the hardware meets your expectations. When delving into next pages of the user manual, Pfaff hobby 1132 you will learn all the available features of the product, as well as information on its operation. The information that you get Pfaff hobby 1132 will certainly help you make a decision on the purchase.
If you already are a holder of Pfaff hobby 1132, but have not read the manual yet, you should do it for the reasons described above. You will learn then if you properly used the available features, and whether you have not made any mistakes, which can shorten the lifetime Pfaff hobby 1132.
However, one of the most important roles played by the user manual is to help in solving problems with Pfaff hobby 1132. Almost always you will find there Troubleshooting, which are the most frequently occurring failures and malfunctions of the device Pfaff hobby 1132 along with tips on how to solve them. Even if you fail to solve the problem, the manual will show you a further procedure – contact to the customer service center or the nearest service center
Не Крутится Шпулечное Колесо
Шпулечное Колесо Не Прокручивается И Верхняя Нитка Не Зацепляется Для Выхода На Верх
Пффаф Експресион 2026
Делает Несколько Стежков И Останвливается На Табло Светится Wd
Не Круьится Махоаое Колесо
Заклинило Машинку
Регулятор Ширины Стежка На Переключается На 0
Регулятор Ширины Стежка Не Переключается На 0. Что Делаю. Поднимаю Иглу, Выставляю Иглу По Центру Регулятором (Ри), И Проворачиваю Регулятор Ширины Стежка — Пытаюсь Провернуть На «0». Он Не Идет, Зато Почему-То Вместе С Ним Проворачивается Риглы И Ставит
Ткань Не Продвигается
Не Цепляет Нижнюю Нитку
Не Работает Функция Скрепка
Делает Попытку, Но Реверса Нет
Натяжение Нити
Не Регулируется Натяжение Нити.
Верхняя Нитка Запутывается На Шпульке, Или Рвет Нить.
Верхняя Нить, Наматывается На Шпульке И Или Же Комок Сходит На Строчку И Идёт Дальше С Таким Же Темпом, Или Обрывает Нить. Как Устранить Этот Дефект, 2 Дня Не Шила, Никто К Машинке Не Подходил Тем Более Не Трогали.
Пропускает Стежки
Не Фиксируется Игла В Иглодержателе
Болт Будто Прокручивается ,И Игла Не Фиксируется
Слетела Пружинка С Нитинамотки.
Как Поставить Ее На Место ?
Шум При Работе
Не Работает Маховик
Маховик Сломался
Двигатель Не Набирает Обороты
Стежок
Нижняя Часть Стежка Образует Петли
При Зигзаге Не Цепляет Правую Петлю На Флисе
На Ткани Зигзаг Нормальный А На Флисе Прпвая Петля Не Цепляется
Шкала Программ
Красный Флажок Сбился По Отнашению Окошек
Самопроизвольно Включение Заднего Хода
При Смене Операций Машинка Проживает Около 30 Стежков Взад А Потом Начинает Шить Нормально Вперед
Jaguar Escape-500
Возле Рычага Для Намотки Шпульки Открутилась Гайка
Педаль Не Работает
Как Синхронизировать Вращение Чеснока И Иглы
Не Совпадает Вращение Челнока И Иглы
Рычаг-Нитепритягиватель Ударяет По Корпусу Машины
Всё Началось С Того, Что Появился Жуткий Стук При Шитье. После Долгих Мучений Поняла, Что Это Рычаг-Нитепритягиватель Ударяет По Корпусу Машины. И Игла При Прямой Строчке Не По Центру Лапки.
Верхняя Нить Не Захватывает Нижнюю Нить
Неработает Зигзаг
Вибрация
Туго Вращается Маховое Колесом
Туго Вращается Маховик
Не Выметывает Петли
Перестала Выметывать Петли Автомат. Делает Вначале Прямую Строчку И Уходит За Границы Петли, Так И Не Начав Делать Зигзаг В Обратном Порядке
Давление Лапки На Ткань
При Шитье Неравномерное Распределение Ткани,Верхний Слой Вытягивается,Как Изменить Давление Лапки
Иглодержатель
Иглодержательный Столбик Не Пробивает Ткань,Живет Своей Жизнью. То Есть Никак Не Участвует В Процессе И Его Можно Свободно Двигать Вверх Вниз
Не Работает Реверс
При Переключении Реверса Никаких Изменений Не Происходит
Машина Шьёт Задним Ходом
Машинка Шьёт Задним Ходом, На Реверс Не Реагирует.
Не Шьет Зигзаг
Выскакивает Гнездо Для Шпуьки
На Позиции 85-86 Ни Делает Петлю
Горизонтальный Катушкодержатель
Сломан Катушкодержатель
Игла Попадает На Край Лапки
Игла В Brother Px-100 При Опускании Попадает,Задевает Край Лапки (По Центру). На Лапке Видны Следы (Заусеницы) От Попадания Иглы. Игла В Результате Или Ломается, Или Нет, В Зависимости От Толщины Ткани. Т.е. При Увеличении Толщины Игла Уже Постоянно Задев
Brother Star 120E
Начинает Шить Потом Пищит И Перистает Шить
Иголка Ломаеться Верхную Нитку Рветь
Лапка Стоит На Месте Не Шьет
Не Переключается На Педаль
Все Работает Но Без Педали. На Подключенную Педаль Никакой Реакции
Не Горит Лампа
Какую Нужно Покупать, Есть Ли Светодиодная
Не Переключает Строчку
Не Оверлаживает И Не Шьет Зигзагом
Меняю Лапку На Оверлог А Она Не Реагирует
Женоме608
Как Отрегулировать: Игла — Челнок В Горизонтальной Плоскости
Братьев Супер Ace M-965
На Дисплее Мигает Надпись Fubregler Ist Ausgeschaltet И Издают Звуковой Сигнал.машина Не Шьёт
Брайзер Супер Ace M-965
На Дисплее Мигает Надпись Fubregler Ist Ausgeschaltet И Издают Звуковой Сигнал.машина Не Шьёт
Машина Останавливается,Издаёт Звук Типа Повизгивает,Игла Недвигается Отключаю Машину ,Прокручиваю Маховое Колесо Снова Включаю И Такая Же История Дальше
Как Раскрыть Машины Чтоб Исправить Поломку
Нет Натяжения Нижней Нити
Только Верхняя Строчка ,Нижней Нет
Машина Шьёт Нормально Около Метра,А Потом Нитка Ср
На Утолшении Ткани Закусывает Иглу Что Делать
Неисправно Шьет
При Прошиве Простой Строчки Идут Пропуски Не Прошитые
Гнездо Челнока..погнута Напровляющая Нержавейка
Накатывает Нить… Гнет Иглу…
Как Смазать Швейную Машину Pfaff Select 1526
Тугое Натяжение Верхней Нити
Нить Очень Трудно Проходит(С Катушкой Норм Все),А В Игле Не Тянется- Рвет. Что Делать? В Середине Есть Тумблер От От 0 До 10 — Крутила- Не Помогает.
Не Загорается Буква А
Что Бы Вышить Буквы,Нажимаем Двойной Иглой А Буква Не Загорается Только При Первоначальном Включении А Затем Пропадает
Машинка Велтон Всв103
Наприбавляеться Стежок
Машинаfemili Platinum 4500
При Шитье Высвечивается Ошибкаfc
=== ВСЕМ ПРИВЕТ! ===
Мне повезло, что у моих родителей была в советское время швейная машинка, потом они купили электрическую. Шить меня научили на уроках труда и с тех пор я что-то шью. Я швея- самоучка и никогда не посещала никаких курсов. Шью только для себя и моей семьи.
Сегодня я хочу поделится с вами моим впечатлением от использования Швейной машины Pfaff Hobby 1132.
*
=== ПОКУПКА ===
Эту машинку я купила несколько лет назад, тогда ее стоимость была равна 50% от моей зарплаты. Машинка мне вышла 10 000р. С тех пор я ее люблю и обожаю.
Машинку я покупала в специализированном салоне швейных машин и мне дали гарантию на обслуживание 5,5 лет. За это время я ни разу машинку в ремонт не сдавала.
*
=== ШВЕЙНАЯ МАШИНА===
В комплекте с машиной идет жестких пластиковый чехол-кофр. Машинке в таком кофре ничего не страшно. Я храню машинку в этом кофре , а картонную коробку от машинки давно выкинула.

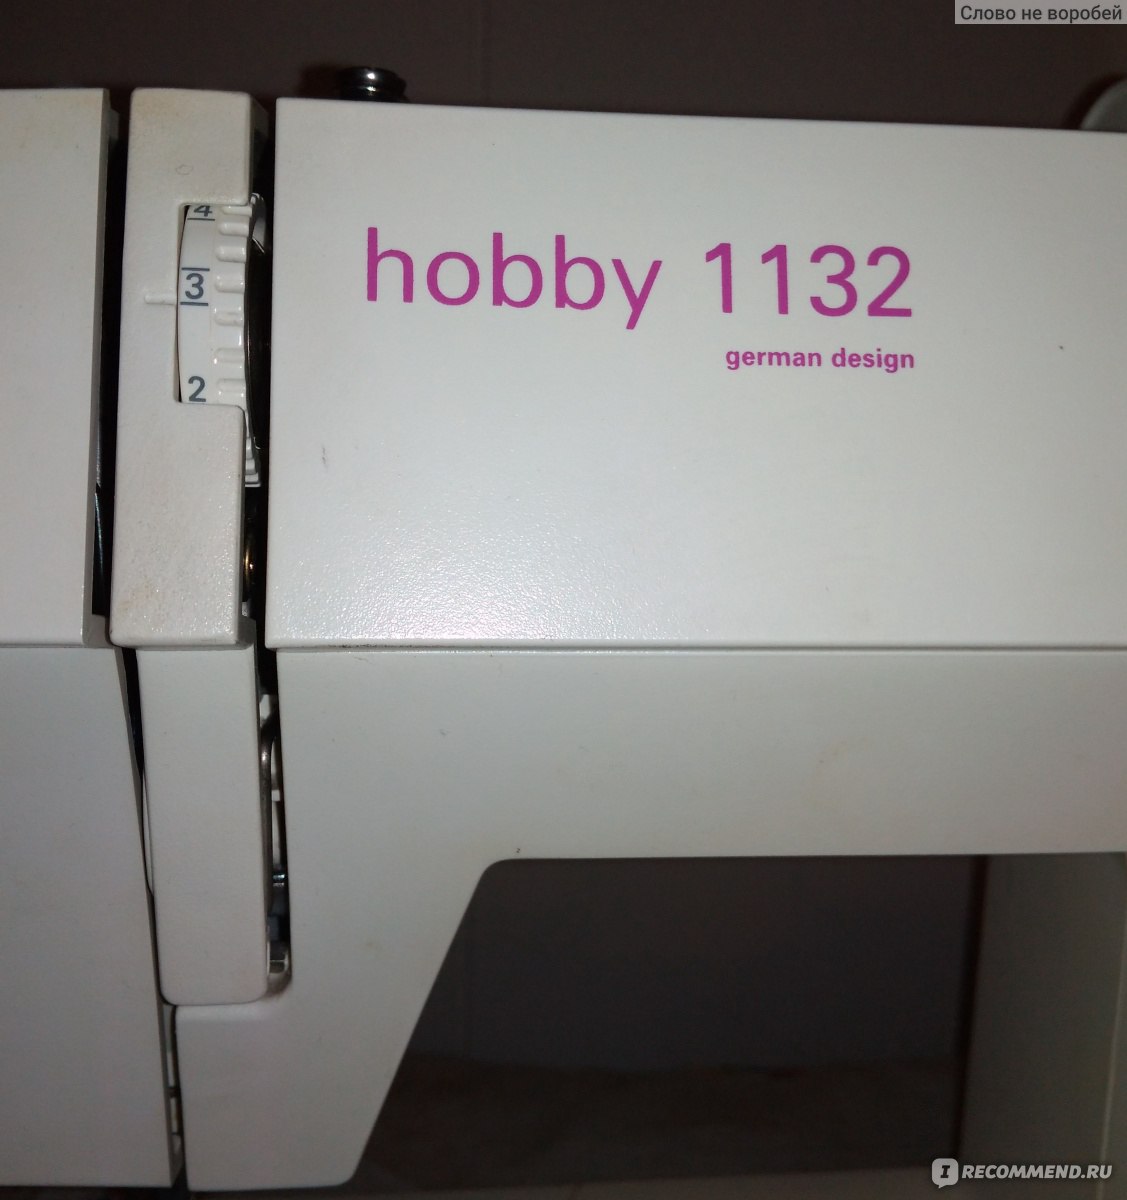
Сама машинка на первый взгляд выглядит угловатой, и меня первое время смущал ее вид. Сейчас я на нее смотрю и любуюсь, моя красотка)))

Основные характеристики модели:
Страна-производитель: Германия
Тип управления: электромеханика
Челнок: горизонтальный
Швейные операции: 15 штук
Режим исполнения петли: полуавтоматический
Топ-3 строчек: эластичная, потайная, потайная эластичная
Ширина и длина выполняемого стежка (max): 5 и 4 мм
Расстояние от рабочей поверхности до прижимной лапки (max): 11 мм
Режим “реверс” (работа в обратную сторону): присутствует
Очень важно, что эта модель оснащена горизонтальной шпулькой (челноком). Такая функции значительно облегчает работу, но зато стоимость таких машинок всегда выше «обычных»
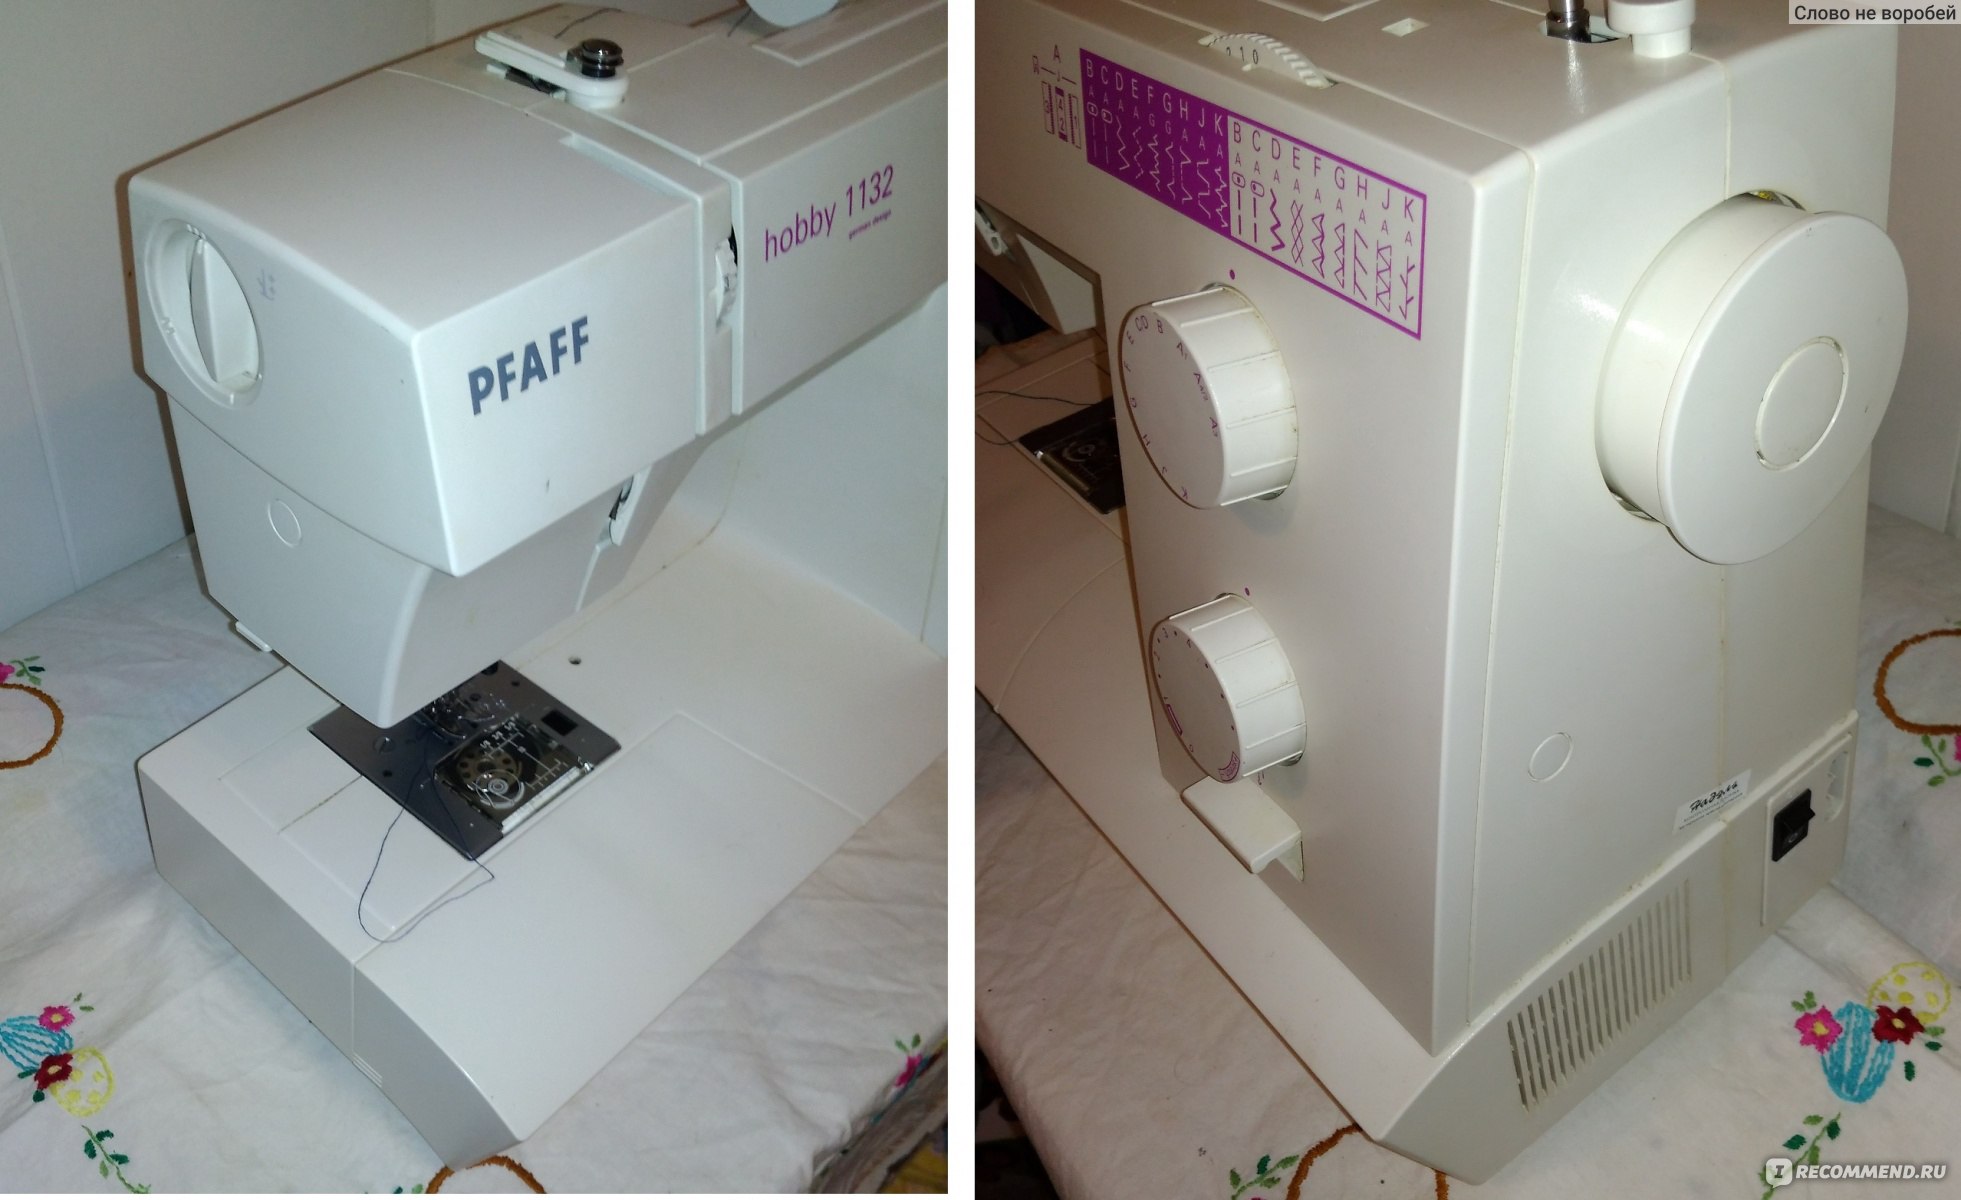
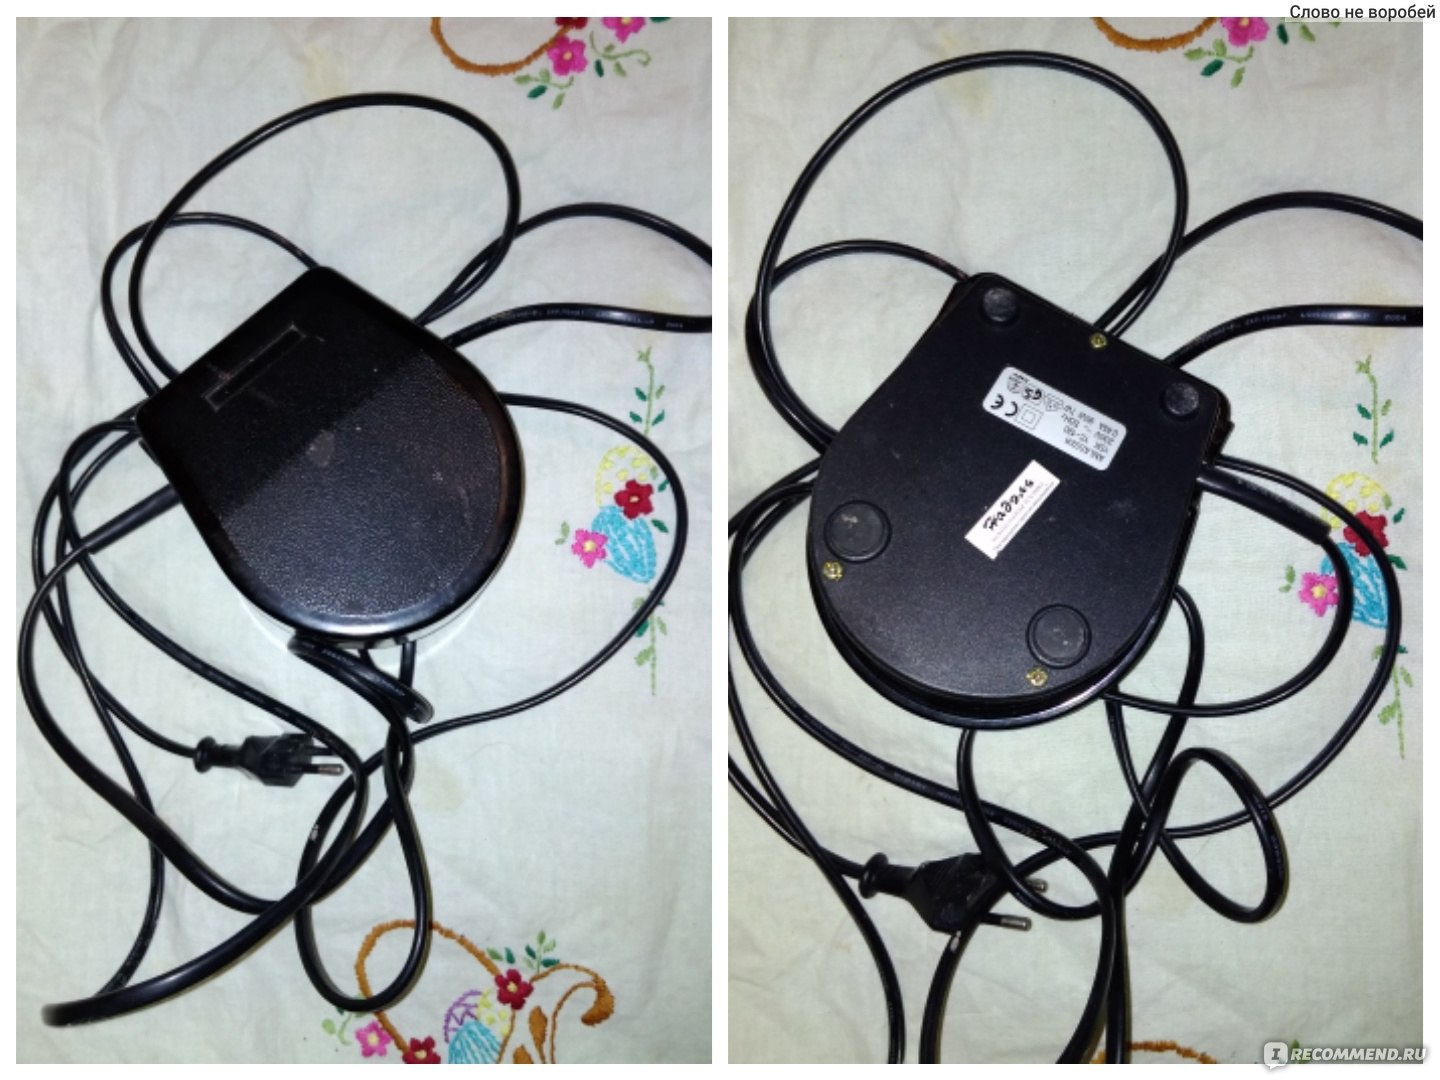
Включение машинки осуществляется с помощью рычага, расположенного на торце. Тут же расположен разъем для ножной педали. Скорость работы машины регулируется силой нажатия на ножную педаль.

Ножная педаль имеет стандартный вид: с одной стороны провода-штекер для машинки, с другой стороны- вилка для розетки.
К машинке идет очень качественная инструкция. Инструкция на плотной глянцевой бумаге, цветная . В ней подробно указано, как работать с машинкой.
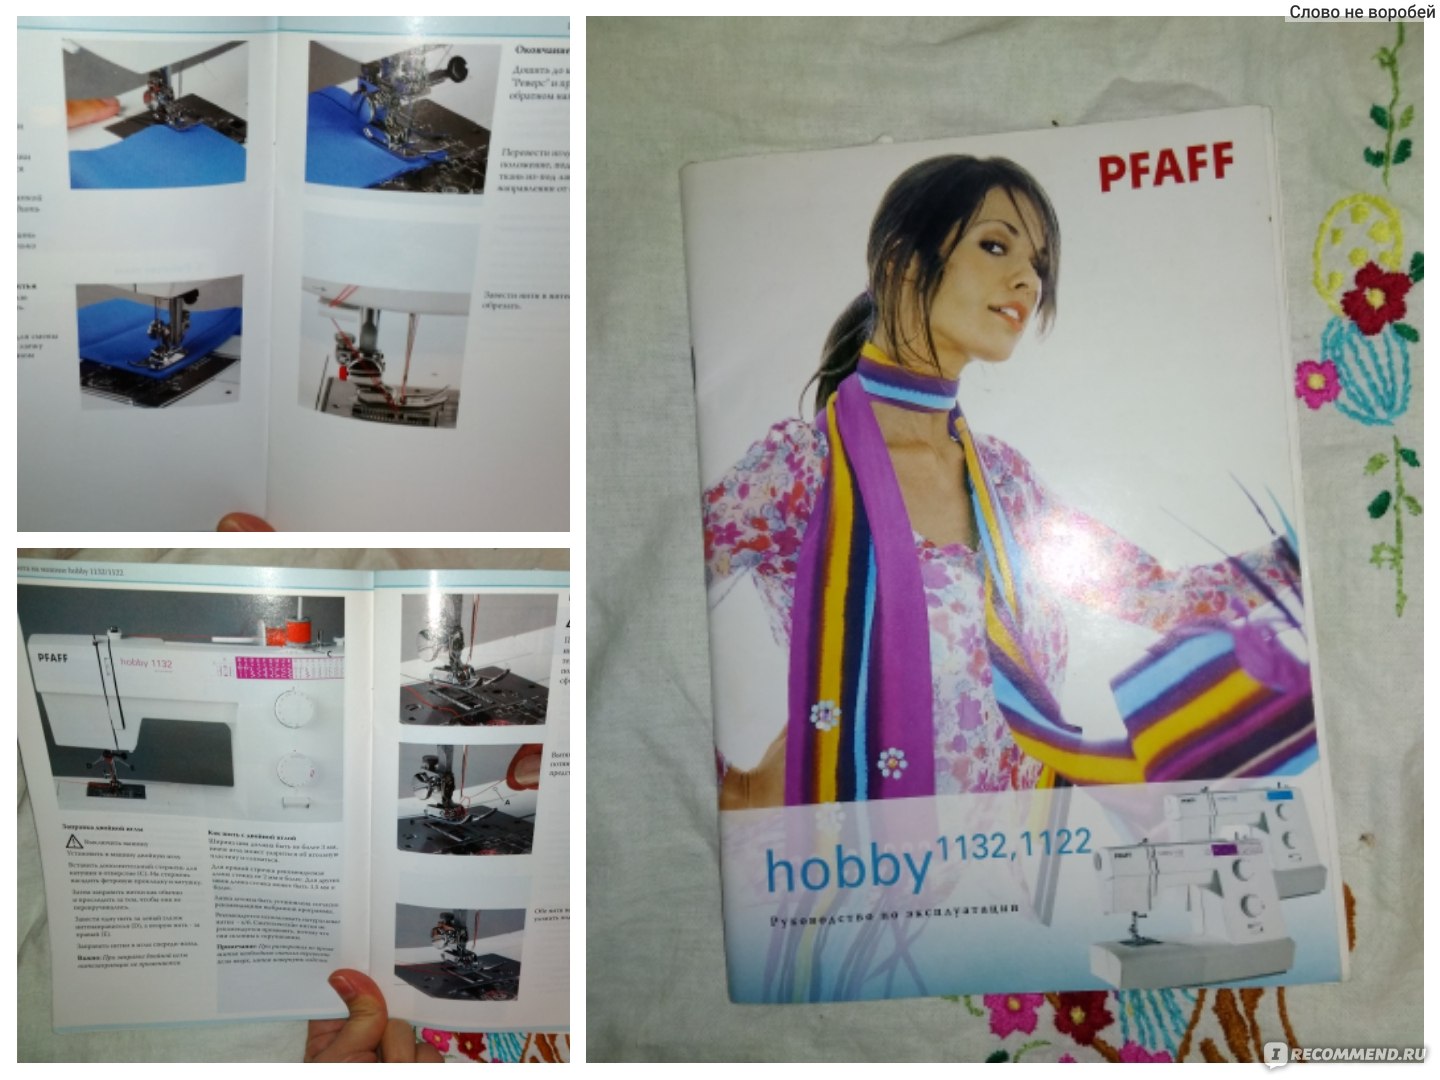
В инструкция приведено много примеров готовых стежков. При этом под каждый стежком указана таблица настроек : номер лапки / настройка длины и ширины стежка и т.д.

Заправка рабочей нити у машины по алгоритму очень близка к обычный машинкам. Тут же располагается настройка натяжения верхней нити.
Справа на лицевой части находится основное управление машинкой

В верхней части расположен рисунок со всеми видами основных швов.Тут же указано буквенное имя лапки, которую необходимо использовать в работе.
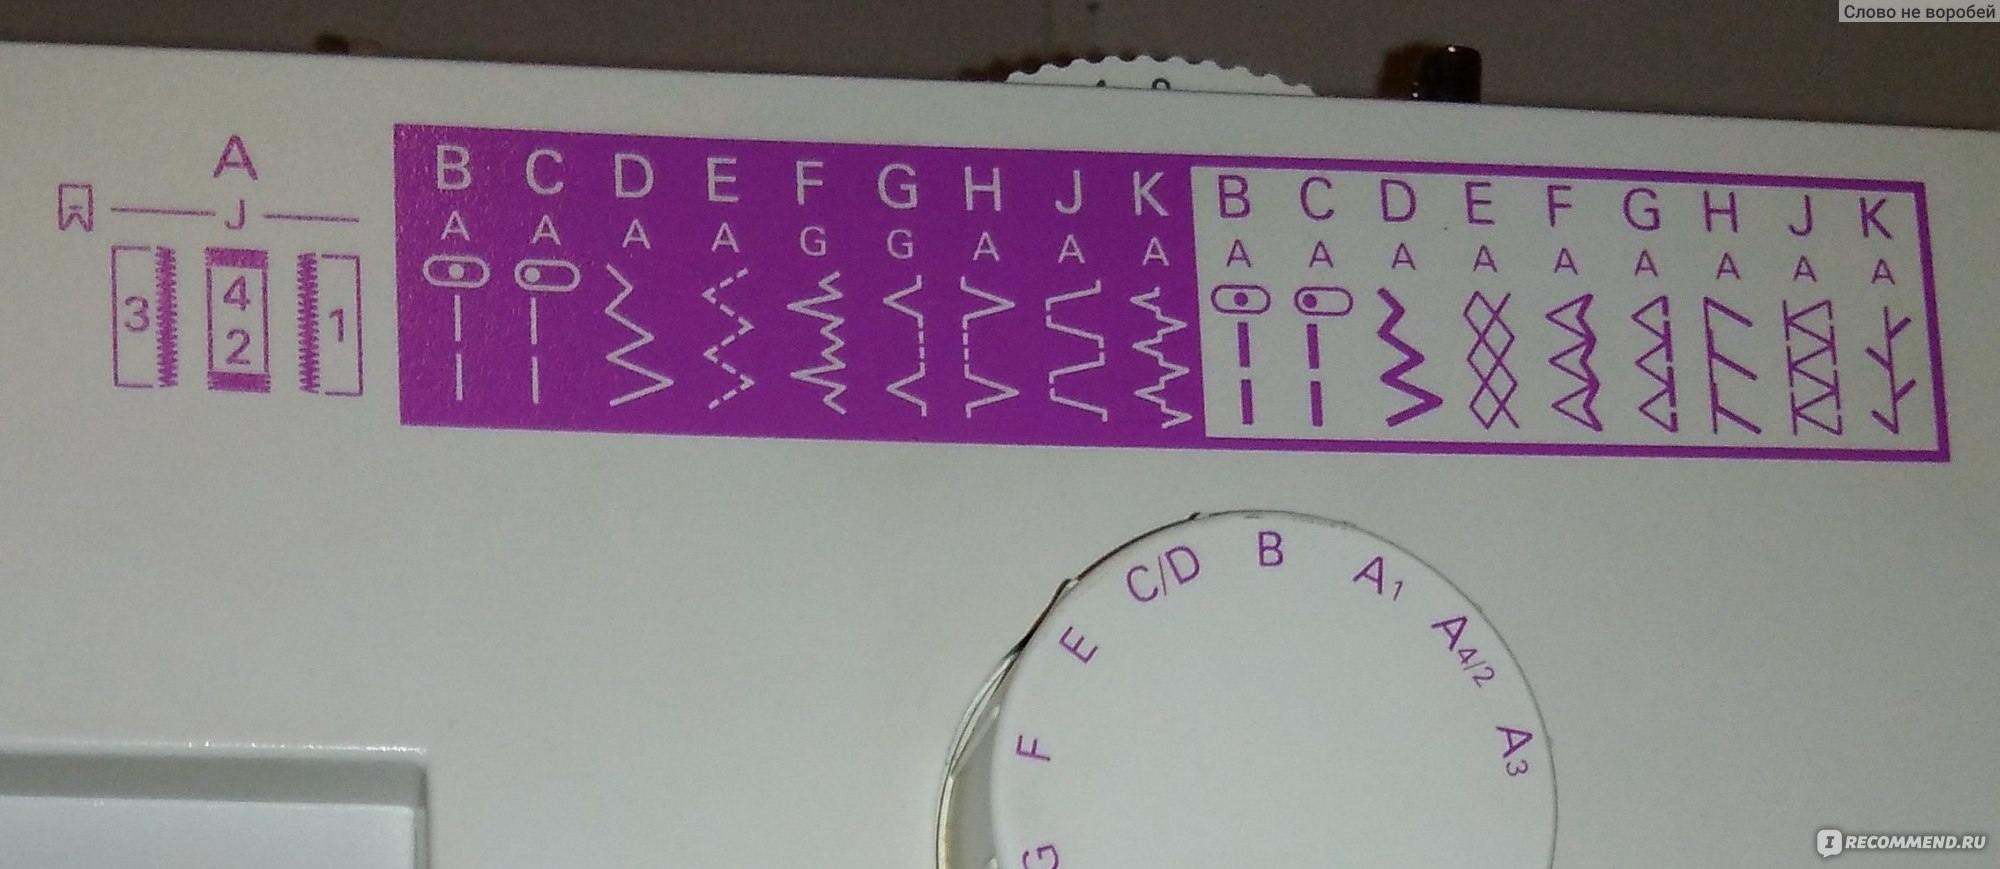
Под рисунком швов расположен поворотный регулятор настройки швов, на нем нужно выбирать «букву» для шва. У меня сейчас выбран шов «В»

Обратите внимание , у этой машинки настраивается не только длина, но и ширина стежка. Регулировка ширину стежка идет от 1 до 5мм. Сейчас у меня установлена ширина стежка 5мм.
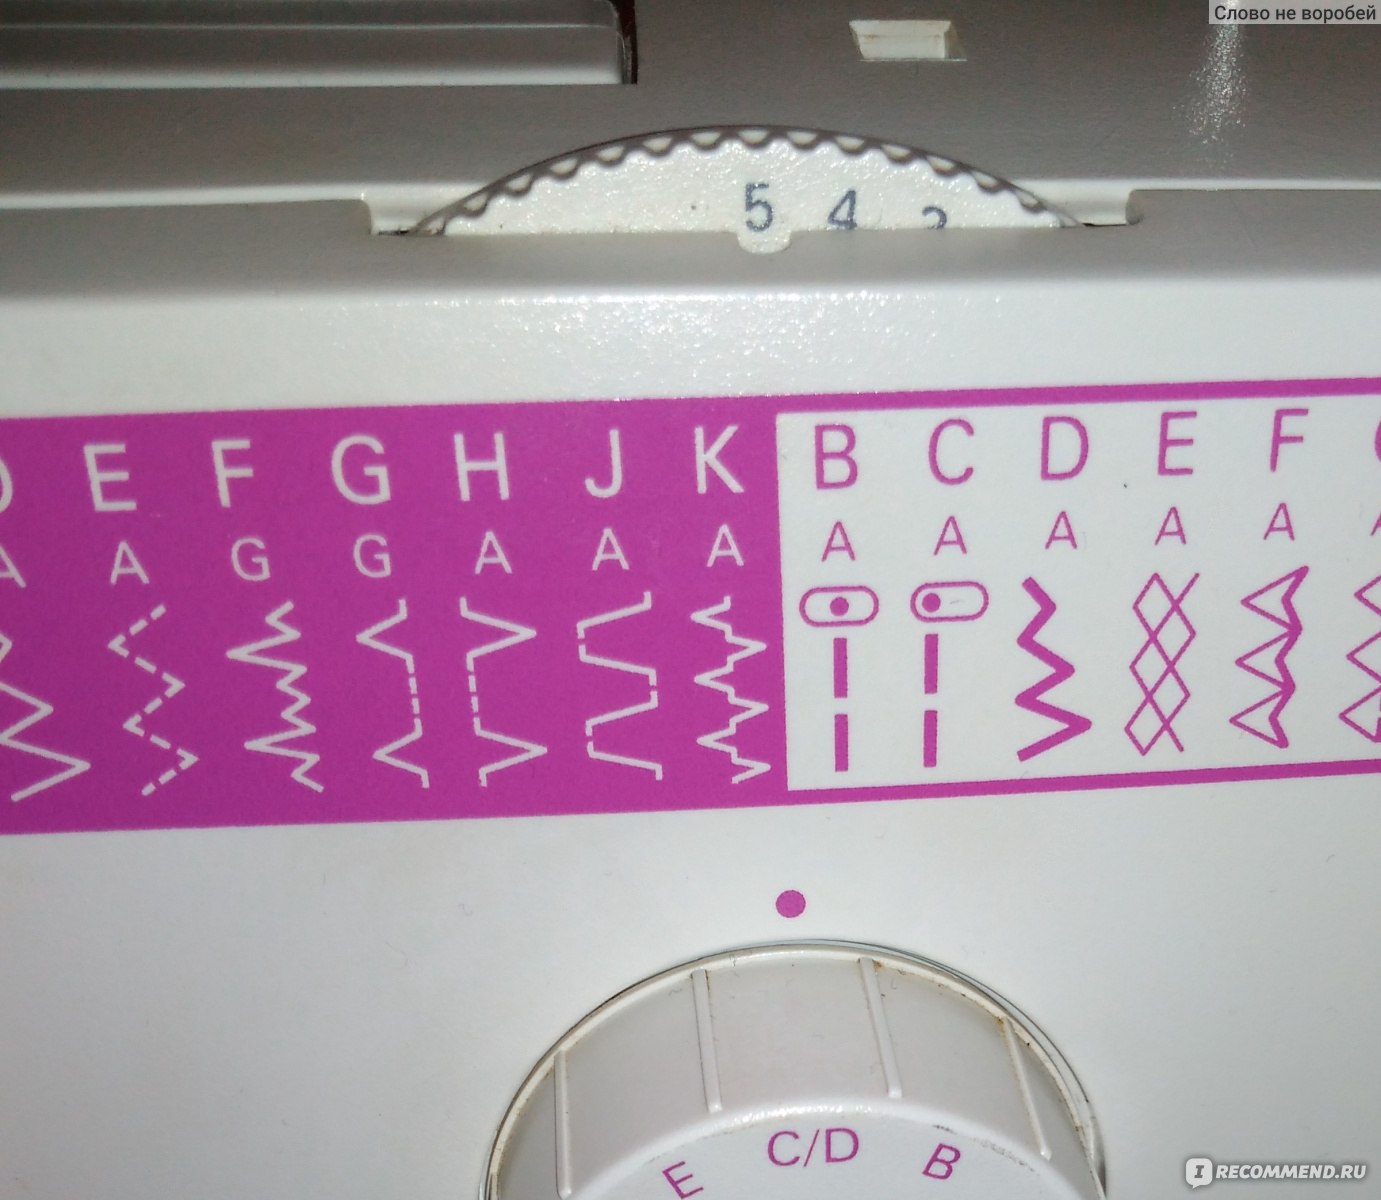
Длина стежка настраивается с помощью поворотного регулятора. Длина стежка регулируется от 1 до 4мм, а также есть настройка «srtetch» для трикотажа.
Под настройкой длины стежка есть рычаг для функции «реверс» /задний ход/. Без такого «реверса» машинку вообще брать не стоит.

С правого торца расположено маховое колесо (оно отвечает за движение иголки) . У него есть возможность отключения (к примеру, когда нужно намотать нить на шпульку)

Рабочая поверхность у машинки выглядит вот таким образом. Над рабочей поверхностью есть лампочка. Я ее за 5 лет ни разу пока не меняла.

В передней части рабочего стола расположен отсек для аксессуаров. Отсек легко открывается. Пластик прочный, все целое и нет ни одной царапинки.

Внутри отсека у меня хранятся аксессуары, которые шли в комплекте с машинкой. Это запасная пластиковая шпулька / ось для тюрячка / отвертка / дополнительные лапки.

В комплекте к машине с завода шло 4 дополнительные лапки. У каждой лапки есть буквенное имя и в инструкция указано, для каких швов нужно использовать эти лапки. Я признаюсь, этими лапками пользуюсь очень редко. В большинстве работ обхожусь без них.

Отсек для аксессуаров съемный. Это удобно, когда нужно прошить рукав или штанину.

Конструкция фиксации иголки стандартная. В верхней части расположено устройство для обрывания нити (стрелка на фото), в нижней части есть «красная» кнопка для замены рабочей лапки.

=== ГОРИЗОНТАЛЬНАЯ ШПУЛЬКА===
Изначально у всех швейных машин была вертикальная шпулька. Вертикальная шпулька прячется внутри конструкции машинки под иголкой. Что бы вытащить такую шпульку, нужно разобрать переднюю часть машинки (снять отсек для аксессуаров), затем достать металлический колпачок и из него вытащить саму шпульку.
Горизонтальная шпулька— это недавнее изобретение, когда шпулька БЕЗ колпачка лежит под пластиковой дверцей прямо под иголкой. для того, что бы ее доставить не нужно ничего разбирать и мучаться с колпачком.

Кроме того, во время работы я всегда вижу шпульку, вижу сколько на ней осталось нити и , даже если нить запуталась ее не нужно обрывать!! Я просто достаю шпульку, разматывают нить и ставлю шпульку на место!!!
Я после работы с «горизонтальной шпульки» больше никогда не куплю себе машинку с «вертикальной шпулькой».

Сейчас у меня закончилась нить на шпульке (это видно через прозрачную пластиковую дверцу). Для открывания дверцы справа расположена рычаг. Я наживаю на рычаг и дверца приоткрываться.

Я полностью снимаю дверцу и шпулька прямо передо мной.

Вытаскиваю шпульку, теперь буду наматывать нить.

Для этого в верхней части машинки есть специальное устройство.
В квадратное отверстие я сталю ось для тюрячка ниток. Заправляю нить в фиксатор, который расположен в передней части машнику (этот фиксатор регулирует равномерные натяжение и намотку нити)

Теперь ставлю шпульку на вращающуюся ось и включаю машинку.

Нить начинает равномерно наматываться, при этом она двигается вверх-вниз по шпульке и толщина намотки всегда одинаковая.

Намотанную шпульку я кладу в углубление ,она там НИКАК не крепится и заправлю нить.

Затем закрываю шпульку пластиковой дверцей. Можно шить дальше!

Из минусов горизонтальной шпульки могу отметить только один — во время работы шпулька от натяжения нити «подпрыгивает» и стучит о пластиковую дверцу. Я слышу этот стук, хоть он и не громкий.. Я специально сходила в магазин, где покупала машинку, и уточнила этот момент, мне сказали, что это «нормально».
=== ПРИМЕРЫ РАБОТ ===
Я очень довольна своей машинкой. Она шьет плавно, тихая в работе. Качество сборки на высоте, у меня все целое, нигде нет трещин, и нет никаких претензий к работе машинки. При этом за 5 лет я ни разу ее не носила в ремонт и даже не смазывала.
Машинку я храню в кофре на нижней полке шкафа, рядом с моим оверлоком (см. отзыв в конце отзыва).
Сейчас я покажу пару моих работ.
Последнее время я много шью для кукол и в этот отзыв решила поместить одежду для кукол.
Машинка с легкость шьет плотный джинс с 2 слоя (при этом добавлю, что джинс в 4 слоя машинка шьет с трудом / петляет / наматывается нить. Я больше 2х слоев джинса не беру).

Мне очень нравится, что у этой машинки не просто один стежок «зиг-заг», а «зиг-заг», который можно настроить самому. Настройка стежка идет по длине стежка (1-4мм) и по ширине (1-5мм). Тут можно выбрать любое сочетание для каждого изделия.
Стежок всегда ровный, если с первого раза я вижу, что стежок «не идет», то настраиваю натяжение верхней нити. В итоге, всегда получается хороши результат.

У машинки много декоративных стежков. Я ими пользуюсь редко. В работе мне хватает прямого обычного стежка + вариации со стежком «зиг-заг». Когда у меня не было оверлока, я всегда обметывала вещи с момощью стежка «зиг-заг».
Сегодня я шью джинсы и платье для кукол. Низ у джинсовой ткани, что бы он не распускался я выполнила декоративным стежком (2 шва — прошила 2 раза // эта машинка шьет только одной иглой!)

Вот такое платье для кулы у меня получилось. Дочка довольна.

Из этих же материалов я сшила костюм для Беби Борн.

Для другой куклы получилось вот такое легкое платье.

Низ платья я также прошила мои любимым «зиг-загом». Все ровно , стежок к стежку!

=== МНЕ НРАВИТСЯ===
1. Хорошее качество сборки и пластика
2. Прочный пластиковый чехол-кофр в комплекте
3. ГОРИЗОНТАЛЬНАЯ шпулька
4. Регулировка не только длины, но и ширины стежка
5. Много вариантов декоративных швов
6. Подробная красочная инструкция с фото
7. Работает плавно, тихая
8. Пользую 5 лет без поломок
=== МНЕ НЕ НРАВИТСЯ===
1. Цена
2. Угловатый внешний вид
3. Горизонтальная шпулька «стучит» о дверцу во время работы
=== РЕЗЮМЕ===
Я влюблена в мою швейную машинку и считаю, что это отличный вариант для новичка или для тех, кто шьет для себя. За 5 лет я ни разу не пожалела о покупке!
Pfaff Hobby 1132 к покупке рекомендую!

*
*
Другие отзывы о технике:
1/ если хотите посмотреть мои другие работы, то отзыв о моем ОВЕРЛОКЕ ❤️❣️ Моя мечта сбылась! ❤️❣️ Мои работы внутри ►►
*
2 / на кухне у меня стоит ПОСУДОМОЙКА. ??? «Что лучше норковая шуба или посудомойка???»
*
3/ Наводит порядок в доме ПЫЛЕСОС. ?️?️?️
*
4/ Утро начинается с КОФЕВАРКОЙ. ???
*
5/ Блендер заменил мне кухонный комбайн ►► Он умеет все ❗❗❗ и легко заменит кухонный комбайн! ? Подробные фото-рецепты внутри! ►►
*
6/ Моя ВЫПЕЧКА в отзые про минни- ПЕЧКУ . ???
*
7/ Ночью радует меня и детей НОЧНИК- увлажнитель-аромалампа. ???
*
Ну и мой заработок за год. ??? Сколько реально заработать за 1 год??? Считаем мой ДЕНЕЖКИ $$$
*
Все удачных покупок, Ваш Воробей ?