
При покупке видеорегистратора Xiaomi 70Mai Dash Cam 4K A800S пользователи получают приятный бонус: возможность синхронизации с телефоном по Wi-Fi. Для этого необходимо включить точку Wi-Fi на смартфоне, скачать приложение 70Mai (оно находится в свободном доступе) и установить его на мобильное устройство.
При открытии программа попросит выбрать из списка ту модель, которая вам нужна. Также система сообщит, что необходимо активировать точку доступа на видеорегистраторе и дать согласие на определение вашего положения в пространстве. На 70Mai Dash Cam 4K A800S следует включить Wi-Fi и подключиться к сети, используя имя и пароль. Подтвердить совершенное действие необходимо методом нажатия на правую кнопку на корпусе аппарата. После того, как на экране появится сообщение об успешном подключении, можно переходить к настройкам.
На основном окне программы будет воспроизводиться видео, поступающее с видеорегистратора Xiaomi в режиме онлайн. Предусмотрена возможность сделать фото, найти нужный видеофайл в галерее.
В верхней части экрана разместилось меню настроек, где можно отключить дисплей регистратора, выключить запись при отсутствии подключения к электропитанию. Доступна опция настройки записи в парковочном режиме. Важный момент: устройство обязательно должно быть подключено к гнезду прикуривателя с постоянным питанием, иначе запись парковки не будет осуществляться.

Пользователи могут выбрать подходящее разрешение для видеосъемки, перебросить видео из галереи на смартфон. Кстати, файлы в галерее рассортированы по папкам. В одной из них хранятся данные, которые перезаписываются циклически, т.е. новые файлы записываются поверх старых. В отдельной папке есть видеофайлы, хранящиеся в защищенной от перезаписи области. Они туда автоматически попадают при срабатывании датчика удара.
Можно регулировать яркость экрана, показатели громкости, продолжительность записи, включать/выключать систему ADAS, выбирать уровень чувствительности при столкновении. Настроек действительно много, что позволяет адаптировать работу видеорегистратора 70Mai Dash Cam 4K A800S к потребностям конкретного пользователя.
70MAI A800S 4K Dash Cam
User Manual
Product Overview
Please read this manual carefully before using the product and keep it in a safe place.
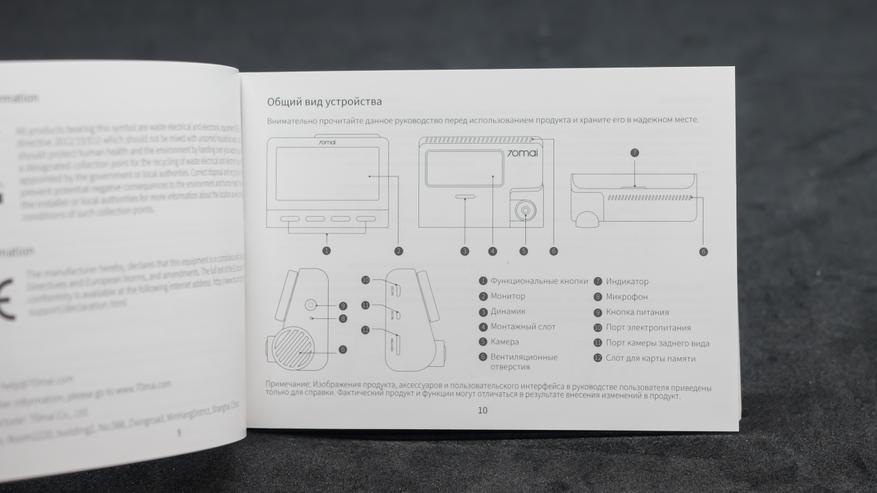
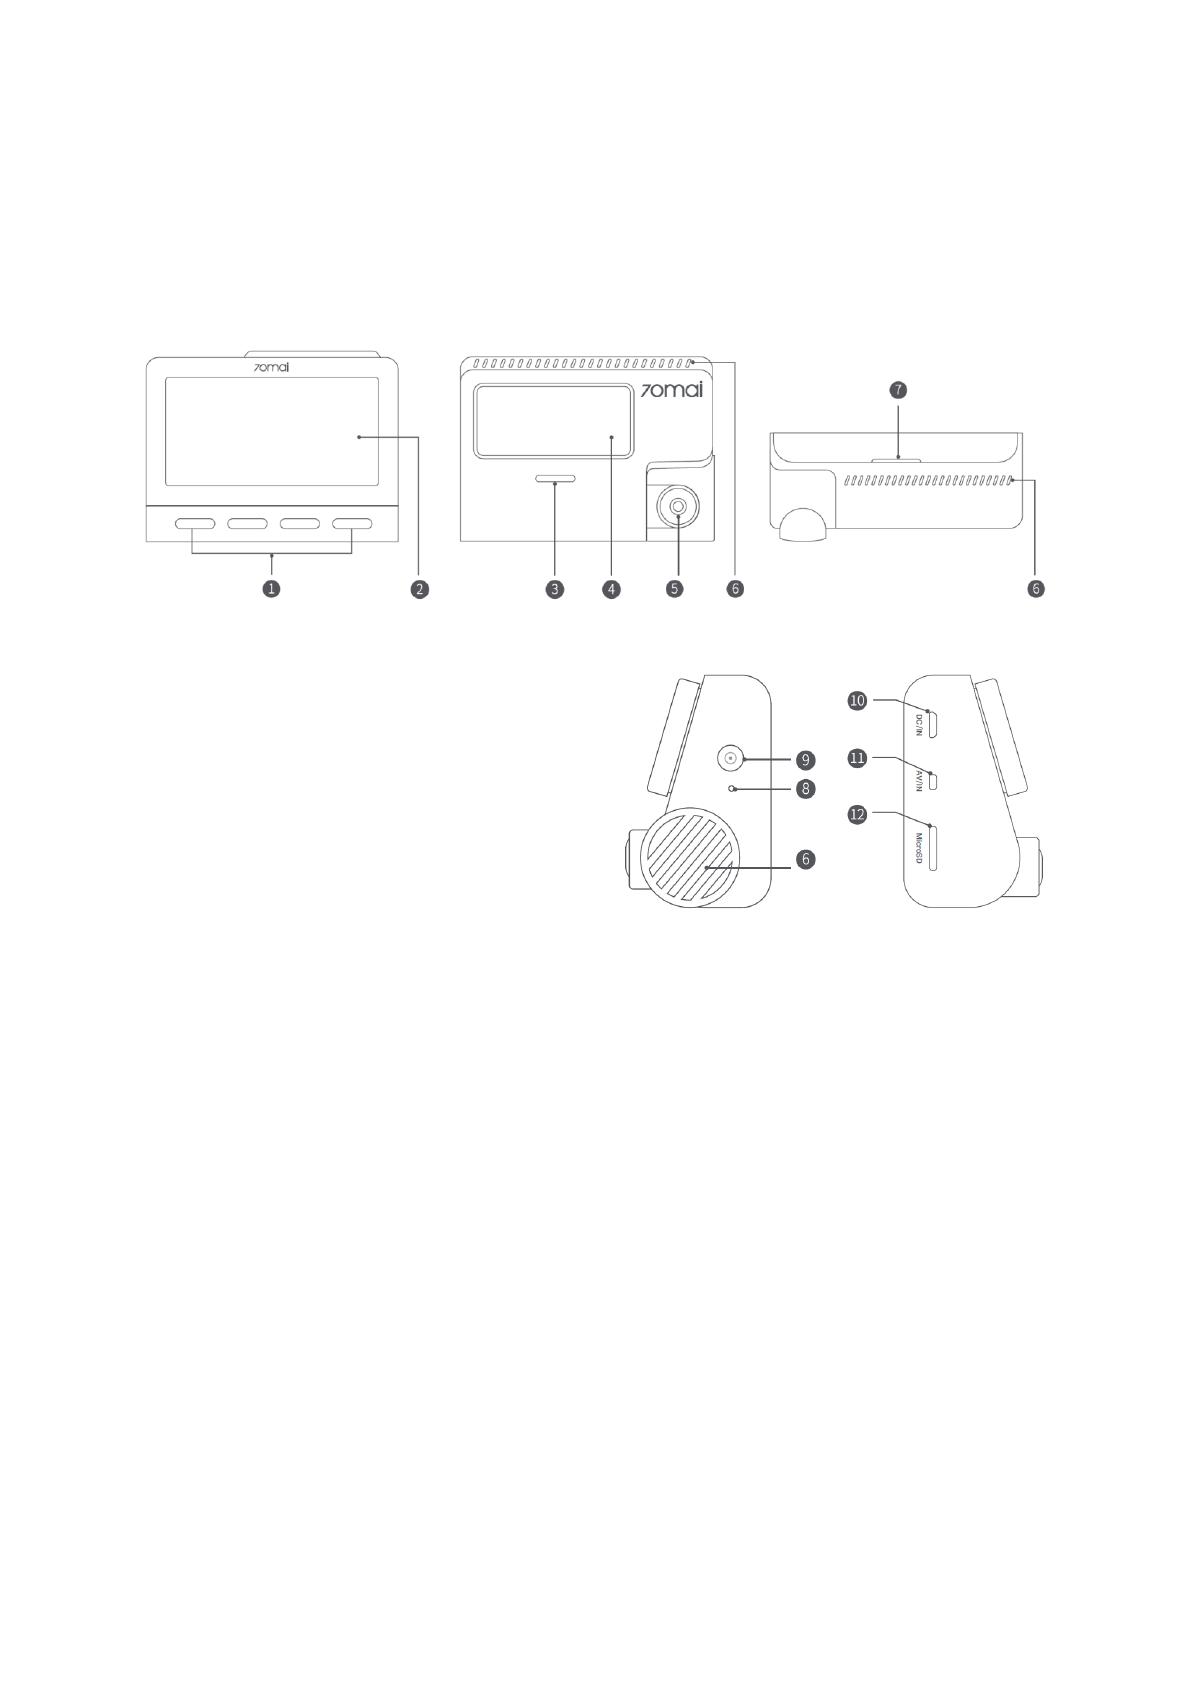
| 1. Function Buttons 2. Display 3. Speaker 4. Mounting Slot 5. Camera 6. Ventilation Holes |
7. Indicator 8. Microphone 9. Power Button 10. Power Port 11. Rear Camera Port 12. Memory Card Slot |
Note: Illustrations of the product, accessories, and user interface in the user manual are for reference purposes only. The actual product and functions may vary due to product enhancements.
Installation
- Installing the electrostatic sticker. Clean your windshield and put the electrostatic sticker on the recommended area as shown in the figure below. Avoid the edge of the windshield and select the flat and smooth area for the installation. Make sure you remove air bubbles between the sticker and the glass.
- Installing the memory card. Insert the memory card into the card slot with its contacts facing up until you hear a click. The memory card is well-installed.
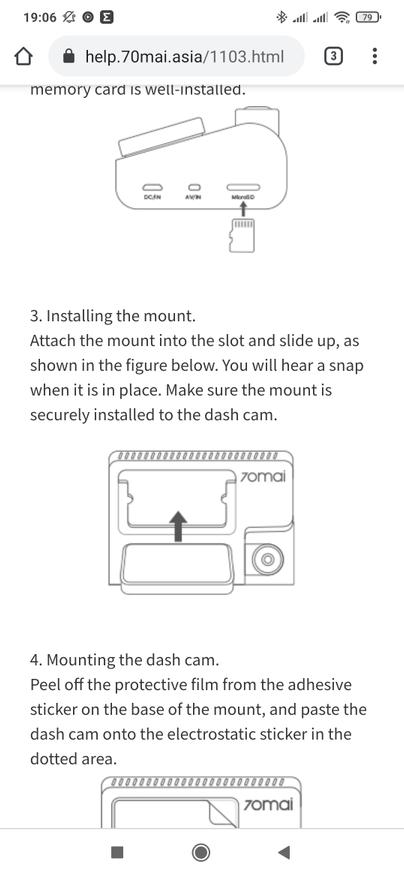
- Installing the mount. Attach the mount into the slot and slide up, as shown in the figure below. You will hear a snap when it is in place. Make sure the mount is securely installed on the dashcam.
- Mounting the dashcam. Peel off the protective film from the adhesive sticker on the base of the mount, and paste the dashcam onto the electrostatic sticker in the dotted area.
- Connecting the power supply. As shown in the figure below, run the power cord along the top of the windshield, down the A-pillar, and around the glove compartment, so that the power connector is near the cigarette lighter. Connect the power cord to the car charger, then plug the charger into the cigarette lighter socket.

Note:
• Use the included crowbar to hide the power cord underneath the vehicle’s headliner and rubber seal along the A-pillar.
• Depending on the vehicle, the cigarette lighter socket may be located in a different position. The above figure is for reference only. - Adjusting the dashcam angle. Turn on the dashcam and adjust the camera angle based on the preview screen to ensure that the camera is facing the front of the vehicle.

Accessories (optional)
The rear recording function of this product needs to be used with the rear cameras. Scan the QR code below to obtain the operation guide for the rear camera.
Note: To avoid the rear camera malfunction due to device incompatibility, it is recommended to use a rear camera from the 70mai brand.
https://help.70mai.asia/1472.html
Download 70mai App
This product may be used in conjunction with the 70mai App. Please search for «70mai» in the App Store or scan the following QR code to download and install the App.
https://www.70mai.com/en/download/?souce=QrcodeVue
Note: Android 4.4 & iOS 9.0 or above is required to connect to the dash cam’s Wi-Fi hotspot with a mobile phone.
Online Guide
Scan the below QR code to access the online guide. The guide provides detailed product information including descriptions of functions. Please carefully read this guide before use in order to avoid damage due to incorrect use.
https://help.70mai.asia/1471.html
Packing list
- 70mai Dash Cam MOOS X1
- Mount X1
- Power Cord x 1
- Dual USB Car Charger X1
- Wiring Crowbar x 1
- Electrostatic Sticker X 2
- Adhesive Sticker X 2 (with 1 pre-applied to the mount)
- User Manual X1
Memory Card Instructions
- A memory card (sold separately) must be installed in the dashcam before use.
- The dashcam supports standard MicroSD cards. Please use memory cards with a minimum capacity of 32 GB and a rating of U1(UHS-1) or above.
- The default file partition format of the memory card may be inconsistent with the format supported by the dashcam. When inserting the memory card for the first time, please format it in the dash that came before use. Formatting the memory card will delete all files on the card. Please back up important data to another device beforehand.
- The memory card may become damaged or deteriorated after repeated cycles of overwriting, and this may affect its ability to save video and image files. If this occurs, immediately replace it with a new memory card.
- Please use a high-quality memory card purchased from a reputable vendor. Inferior memory cards may have issues such as actual reading/writing speeds that do not match the stated speeds and an actual storage capacity that does not match the stated storage capacity. We shall not be held liable for lost or damaged videos caused by the use of a low-quality memory card.
- In order to avoid reading and writing speeds decreasing after prolonged use, it is recommended to format the memory card in the dashcam every two weeks.
- Do not insert or remove a memory card while the dashcam is turned on.
Precautions
Before using this dash cam, please read all the precautions and the online guide to ensure correct and safe use.
- This dashcam is intended to assist drivers with the purpose of recording the environment outside the vehicle. The dashcam does not guarantee the user’s driving safety. We shall not be held liable for any accident, damage, or loss of information caused by operating the dashcam while driving.
- Due to differences in vehicle conditions, driving style, driving environment, etc., some functions may not work properly. A power failure, usage in environments outside the normal operating temperature or humidity range, a collision, or a damaged memory card may cause the dashcam to function abnormally. There is no guarantee that this dash cam will function normally under all circumstances. Videos recorded by this dash cam are for reference only.
- Please install this dashcam correctly, and do not block the driver’s line of sight, nor block the vehicle’s airbag, in order to avoid product failure or personal injury.
- Please use the included car charger, power cord, and other accessories in order to avoid product failure due to non-conformance. We shall not be held liable for any loss or damage caused by the use of a non-genuine car charger or power cord .
- If the battery becomes deformed, swollen, or starts leaking during use or storage, stop using the dashcam immediately in order to avoid safety issues, and contact after-sales service.
- Please keep this dashcam away from any strong magnetic fields, as they may cause damage to the dashcam.
- Do not use this dash cam in environments with temperatures over 60°C or below -10°C.
- Please only use this dash cam within the scope permitted by law.
FCC
Changes or modifications not expressly approved by the party responsible for compliance could void the user’s authority to operate the equipment.
This equipment has been tested and found to comply with the limits for a Class B digital device, pursuant to Part 15 of the FCC Rules. These limits are designed to provide reasonable protection against harmful interference in a residential install-nation. This equipment generates, uses, and can radiate radio frequency energy and, if not installed and used in accordance with the instructions, may cause harmful interference to radio communications. However, there is no guarantee that interference will not occur in a particular installation. If this equipment does cause harmful interference to radio or television reception, which can be determined by turning the equipment off and on, the user is encouraged to try to correct the interference by one or more of the following measures:
— Reorient or relocate the receiving antenna.
— Increase the separation between the equipment and receiver.
— Connect the equipment into an outlet on a circuit different from that to which the receiver is connected.
— Consult the dealer or an experienced radio/TV technician for help.
This device complies with Part 15 of the FCC Rules. Operation is subject to the following two conditions: (1) this device may not cause harmful interference, and (2) this device must accept any interference received, including interference that may cause undesired operation. This equipment complies with FCC radiation exposure limits set forth for an uncontrolled environment.
This equipment should be installed and operated with a minimum distance of 20 cm between the radiator & your body. This transmitter must not be co-located or operating in conjunction with any other antenna or transmitter.
Regulatory Compliance Information
WEEE Information
All products bearing this symbol are waste electrical and electronic equipment (WEEE as in directive 2012/19/EU) which should not be mixed with unsorted household waste. Instead, you should protect human health and the environment by handing over your waste equipment to a designated collection point for the recycling of waste electrical and electronic equipment, appointed by the government or local authorities. Correct disposal and recycling will help prevent potential negative consequences to the environment and human health. Please contact the installer or local authorities for more information about the location as well as the terms and conditions of such collection points.
EU Declaration of Conformity
The manufacturer hereby, declares that this equipment is in compliance with the applicable Directives and European Norms, and amendments. The full text of the EU declaration of conformity is available at the following internet address: https://help.70mai.asia/1193.html
Safety information
Caution
Battery abuse or mishandling can cause overheat, liquid leakage, or an explosion. To avoid possible injury, do the following:
- Do not open, disassemble, or service any battery.
- Do not attempt to replace the internal rechargeable lithium batteries.
- Do not crush or puncture the battery.
- Do not short-circuit the battery, or expose it to water or other liquids.
- Keep the battery away from children.
- Keep the battery away from fire.
- Do not leave the battery in an extremely high-temperature environment or an extremely low air pressure environment.
- Stop using the battery if it is damaged, or if you notice any discharge or the buildup of foreign materials on the battery leads. We recommend that the batteries be charged about once every three months to prevent overcharge.
- Do not put the battery in the trash that is disposed of in landfills. When disposing of the battery, comply with local laws or regulations.
Specifications
| Product: Dash Cam | Model: A800S | Input: 5V 2A |
| Resolution: 3840 x 2160 | Lens: FOV140°/F1.8 | Power Supply: Car cigarette lighter socket |
| Battery Type: Lithium polymer battery | Wireless Connectivity: Wi-Fi IEEE 802.11 b/g/n 2.4 GHz and 5Ghz | Battery Capacity: 500 mAh |
| FCC ID: 2A0K9-A8005 |
Service: [email protected]
For further information, please go to www.70mai.com
Manufacturer: 70mai Co., Ltd.
Address: Room2220, building2, No.588, Zixingroad, MinHangDistrict, Shanghai, China
Documents / Resources
tags: 4K Dash Cam, 70mai, A800S Dash Cam, Dash Cam A800S,
- June 9, 2024
- 70mai
Table of Contents
- 70mai A800S Series Dash Camera
- Product Overview
- Installation
- Accessories (optional)
- Packing List
- Memory Card Instructions
- Precautions
- FCC
- Regulatory Compliance Information
- Safety Information
- Specifications
- Read User Manual Online (PDF format)
- Download This Manual (PDF format)
70mai A800S Series Dash Camera

Product Overview
Please read this manual carefully before using the product and keep it in a
safe place.

- Function Buttons
- Display
- Speaker
- Mounting Slot
- Camera
- Ventilation Holes
- Indicator
- Microphone
- Power Button
- Power Port
- Rear Camera Port
- Memory Card Slot
Note: Illustrations of the product. accessories, and user interface in
the user manual are for reference purposes only. The actual product and
functions may vary due to product enhancements.
Installation
-
Installing the electrostatic sticker.
Clean your windshield and put the electrostatic sticker on the recommended
area as shown in the figure below. Avoid the edge of the windshield and select
the flat and smooth area for the installation. Make sure you remove air
bubbles between the sticker and the glass. -
Installing the memory card.
Insert the memory card into the card slot with its contacts facing up until
you hear a click. The memory card is well-installed. -
Installing the mount.
Attach the mount into the slot and slide up, as shown in the figure below. You
will hear a snap when it is in place. Make sure the mount is securely
installed to the dash cam. -
Mounting the dash cam.
Peel off the protective film from the adhesive sticker on the base of the
mount, and paste the dash cam onto the electrostatic sticker in the dotted
area. -
Connecting the power supply.
As shown in the figure below, run the power cord along the top of the
windshield, down the A-pillar, and around the glove compartment, so that the
power connector is near the cigarette lighter. Connect the power cord to the
car charger, then plug the charger into the cigarette lighter socket.
Note:- Use the included crowbar to hide the power cord underneath the vehicle’s headliner and rubber seal along the A-pillar.
- Depending on the vehicle, the cigarette lighter socket may be located in a different position. The above figure is for reference only.
-
Adjusting the dash cam angle.
Turn on the dash cam and adjust the camera angle based on the preview screen
to ensure that the camera is facing the front of the vehicle.
Accessories (optional)
The rear recording function of this product needs to be used with the rear
cameras. Scan the QR code below to obtain the operation guide for rear camera.
Note: To avoide the rear camera malfunction due to device
incompatibility, it is recommended to use a rear camera from 70mai brand.
Download 70mai App
This product may be used in conjunction with the 70mai App. Please search for
“70mai” in the App Store or scan the following QR code to download and install
the App.
Note: Android 4.4 & iOS 9.0 or above is required to connect to the dash
cam’s Wi-R hotspot with a mobile phone.
Online Guide
Scan the below QR code to access the online guide. The guide provides
detailed product information including descriptions of functions. Please
carefully read this guide before use in order to avoid damage due to incorrect
use.
Packing List
- Dash Cam x 1
- Mount x 1
- Power Cord x 1
- Dual USB Car Charger x 1
- Wiring Crowbar x 1
- Electrostatic Sticker x 2
- Adhesive Sticker x 2 (with 1 pre-applied to the mount)
- User Manualx1
Memory Card Instructions
- A memory card (sold separately) must be installed in the dash cam before use.
- The dash cam supports standard MicroSD cards. Please use memory cards with the minimum capacity of 32 GB and rating of U1(UHS-1) or above.
- The default file partition format of the memory card may be inconsistent with the format supported by the dash cam. When inserting the memory card for the first time, please format it in the dash cam before use. Formatting the memory card will delete all files on the card. Please back up important data to another device beforehand.
- The memory card may become damaged or deteriorated after repeated cycles of overwriting, and this may affect its ability to save video and image files. If this occurs, immediately replace it with a new memory card.
- Please use a high-quality memory card purchased from a reputable vendor. Inferior memory cards may have issues such as actual reading/writing speeds that do not match the stated speeds, and an actual storage capacity that does not match the stated storage capacity. We shall not be held liable for lost or damaged videos caused by the use of a low-quality memory card.
- In order to avoid reading and writing speeds decreasing after prolonged use, it is recommended to format the memory card in the dash cam every two weeks.
- Do not insert or remove a memory card while the dash cam is turned on.
Precautions
Before using this dash cam, please read all the precautions and the online
guide to ensure correct and safe use.
- This dash cam is intended to assist drivers with the purpose of recording the environment outside the vehicle. The dash cam does not guarantee the user’s driving safety. We shall not be held liable for any accident, damage, or loss of information caused by operating the dash cam while driving.
- Due to differences in vehicle conditions, driving style, driving environment, etc., some functions may not work properly. A power failure, usage in environments outside the normal operating temperature or humidity range, a collision, or a damaged memory card may cause the dash cam to function abnormally. There is no guarantee that this dash cam will function normally under all circumstances. Videos recorded by this dash cam are for reference only.
- Please install this dash cam correctly, and do not block the driver’s line of sight, nor block the vehicle’s airbag, in order to avoid product failure or personal injury.
- Please use the included car charger, power cord, and other accessories in order to avoid product failure due to non-conformance. We shall not be held liable for any loss or damage caused by the use of a non-genuine car charger or power cord.
- If the battery becomes deformed, swollen, or starts leaking during use or storage, stop using the dash cam immediately in order to avoid safety issues, and contact after-sales service.
- Please keep this dash cam away from any strong magnetic fields, as they may cause damage to the dash cam.
- Do not use this dash cam in environments with temperatures over 60°C or below-10°C.
- Please only use this dash cam within the scope permitted by law.
FCC
Changes or modifications not expressly approved by the party responsible for
compliance could void the user’s authority to operate the equipment. This
equipment has been tested and found to comply with the limits for a Class B
digital device, pursuant to Part 15 of the FCC Rules. These limits are
designed to provide reasonable protection against harmful interference in a
residential installation. This equipment generates, uses and can radiate radio
frequency energy and, if not installed and used in accordance with the
instructions, may cause harmful interference to radio communications. However,
there is no guarantee that interference will not occur in a particular
installation. If this equipment does cause harmful interference to radio or
television reception, which can be determined by turning the equipment off and
on, the user is encouraged to try to correct the interference by one or more
of the following measures:
- Reorient or relocate the receiving antenna.
- Increase the separation between the equipment and receiver.
- Connect the equipment into an outlet on a circuit different from that to which the receiver is connected.
- Consult the dealer or an experienced radio/TV technician for help.
This device complies with Part 15 of the FCC Rules. Operation is subject to
the following two conditions: (1) this device may not cause harmful
interference, and (2) this device must accept any interference received,
including interference that may cause undesired operation. This equipment
complies with FCC radiation exposure limits set forth for an uncontrolled
environment. This equipment should be installed and operated with a minimum
distance of 20 cm between the radiator & your body. This transmitter must not
be co-located or operating in conjunction with any other antenna or
transmitter.
Regulatory Compliance Information
WEEE Information
All products bearing this symbol are waste electrical and electronic
equipment (WEEE as in directive 2012/19/EU) which should not be mixed with
unsorted household waste. Instead, you should protect human health and the
environment by handing over your waste equipment to a designated collection
point for the recycling of waste electrical and electronic equipment,
appointed by the government or local authorities. Correct disposal and
recycling will help prevent potential negative consequences to the environment
and human health. Please contact the installer or local authorities for more
information about the location as well as terms and conditions of such
collection points.
EU Declaration of Conformity
The manufacturer hereby, declares that this equipment is in compliance with
the applicable Directives and European Norms, and amendments. The full text of
the EU declaration of conformity is available at the following internet
address: https://help.70mai.asia/1193.html
Safety Information
Caution Battery abuse or mishandling can cause overheat, liquid leakage,
or an explosion. To avoid possible injury, do the following:
- Do not open, disassemble, or service any battery.
- Do not attempt to replace the internal rechargeable lithium batteries.
- Do not crush or puncture the battery.
- Do not short-circuit the battery, or expose it to water or other liquids.
- Keep the battery away from children.
- Keep the battery away from fire.
- Do not leave the battery in an extremely high-temperature environment or an extremely low air pressure environment.
- Stop using the battery if it is damaged, or if you notice any discharge or the buildup of foreign materials on the battery leads. We recommend that the batteries be charged about once every three months to prevent overcharge.
- Do not put the battery in trash that is disposed of in landfills. When disposing of the battery, comply with local laws or regulations.
Specifications

Service: help@70mai.com
For further information, please go to www.70mai.com
Manufacturer: 70mai Co., Ltd.
Address: Room 2220, Building 2, No. 588, Zixing Road, Minhang District,
Shanghai, China
Read User Manual Online (PDF format)
Read User Manual Online (PDF format) >>
Download This Manual (PDF format)
Download this manual >>
Для работы проектов iXBT.com нужны файлы cookie и сервисы аналитики.
Продолжая посещать сайты проектов вы соглашаетесь с нашей
Политикой в отношении файлов cookie
Здравствуйте друзья
В этом обзоре я расскажу про систему видеорегистрации для автомобилей — 70 mai A800 / A800S (отличаются между собой только процессором), которая состоит из двух камер, фронтальной разрешением в 4К и задней с разрешением FHD. Задняя камера — опциональна, можно пользоваться и без нее.
По своему опыту скажу — то установка видеорегистратора просто маст хев для каждого автомобилиста, так как может здорово выручить в определенные моменты и доказать свою правоту. Сильно экономить на этом не стоит, видео должно быть достаточно качественным чтобы зафиксировать мелкие, но очень важные детали, в частности номера автомобилей.
Содержание
- Где купить ?
- Параметры
- Поставка — A800
- Внешний вид — A800
- Поставка — RC06
- Внешний вид — RC06
- Запуск
- Настройки
- Приложение 70 mai
- Установка — A800
- Установка — RC06
- Примеры съемки
- Видео версия обзора
Где купить ?
Официальный магазин 70 mai на Aliexpress — цена на момент публикации $126, 49 за комплект (регистратор + камера заднего вида)
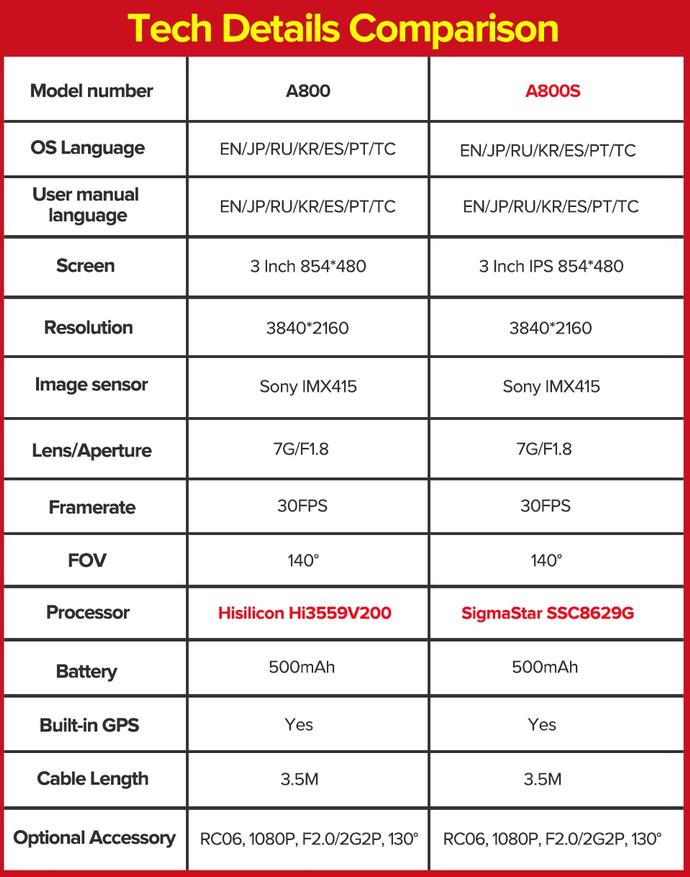
Параметры
Фронтальный видеорегистратор
- Модель — 70 mai A800 или A800S
- Разрешение — 4К, 3840х2160 с частотой 30 кадров в секунду
- Матрица — Sony IMX415
- Экран — 3,5 дюйма, 854 * 480 точек
- Объектив — 7 линз, ИК фильтр, светосила 1.8, угол обзора 140 градусов
- Процессор — для A800 — HiSilicon Hi3559V200 для A800S — SigmaStar SSC8629G
- Хранилище — micro SD, Class 10, максимальный объем — 256 ГБ
- Функции — GPS, Wi-fi, ADAS, 3D DNR, съемка парковки, автоматическая запись происшествий
- Аккумулятор — 500 мАч
- Размер 88х59,8х36,3 мм
- Длина кабеля — 3,5 метра
Камера заднего вида
- Модель — 70 mai RC06
- Разрешение — FHD, 1920×1080 с частотой 30 кадров в секунду
- Объектив — светосила 2,0, угол обзора 130 градусов
- Совместимые модели — 70 mai A800 и 70 mai A800і
- Длина кабеля — 5,5 метров
Поставка — A800
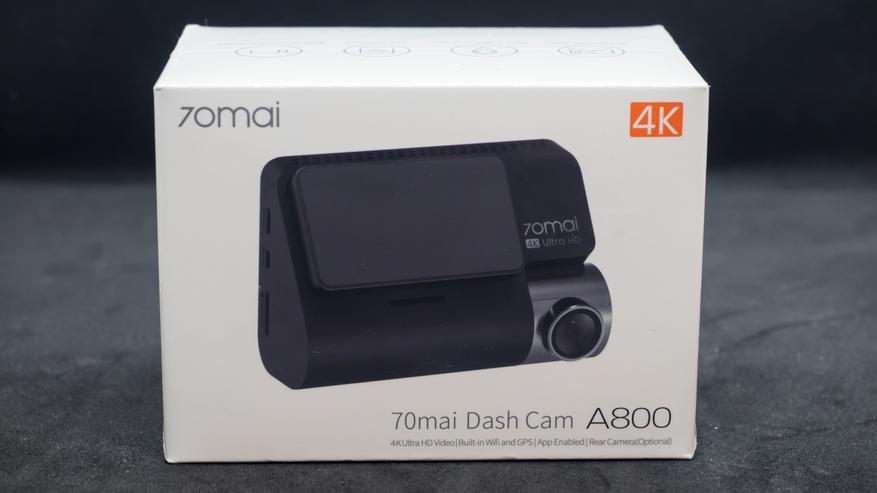
Поставляется видеорегистратор в плотной картонной коробке, оформленной в стиле похожим на экосистему Xiaomi, но все же уточню что 70 mai — это отдельная компания, специализирующаяся в основном, на автотоварах. Еще раз напомню, что рассматриваемая в обзоре модель — A800, эта модель при покупке с камерой заднего вида поставляется в отдельных коробках, поэтому в обзоре я сделаю разделение — сначала расскажу про основной модуль, а потом про камеру заднего вида.
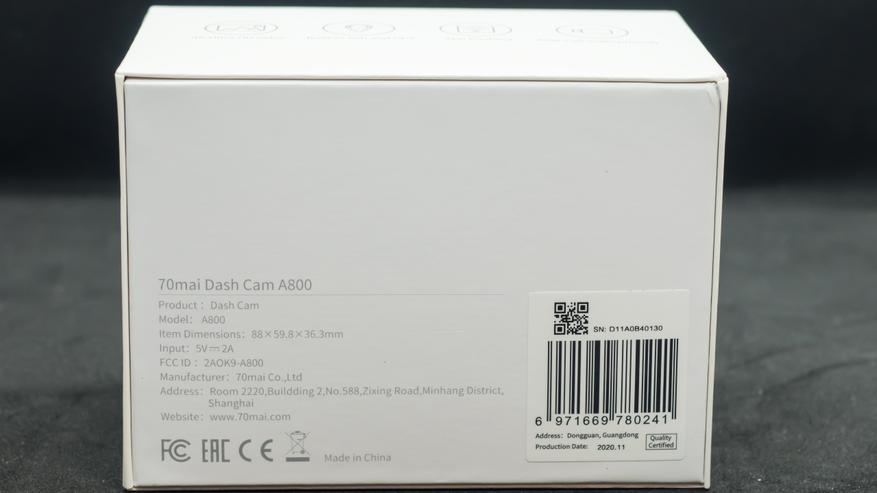
Доехала посылка меньше чем за три недели, все в целости и сохранности, коробка даже не помялась, но даже если бы это произошло — то регистратор защищен со всех сторон и плотно удерживается в середине в специальной вставке.
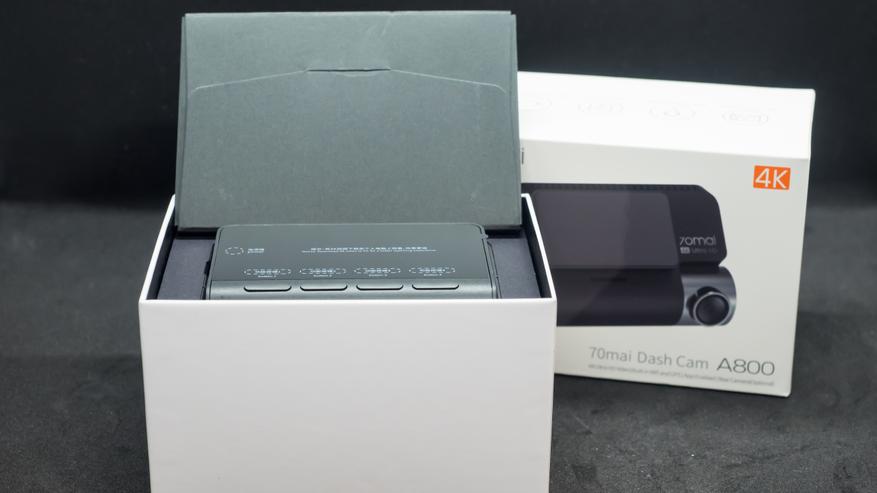
Вот все что нашлось в коробке с регистратором. Еще раз уточню — это самодостаточное устройство и если вы не видите необходимости в использовании камеры заднего вида, то он прекрасно работает и без нее.
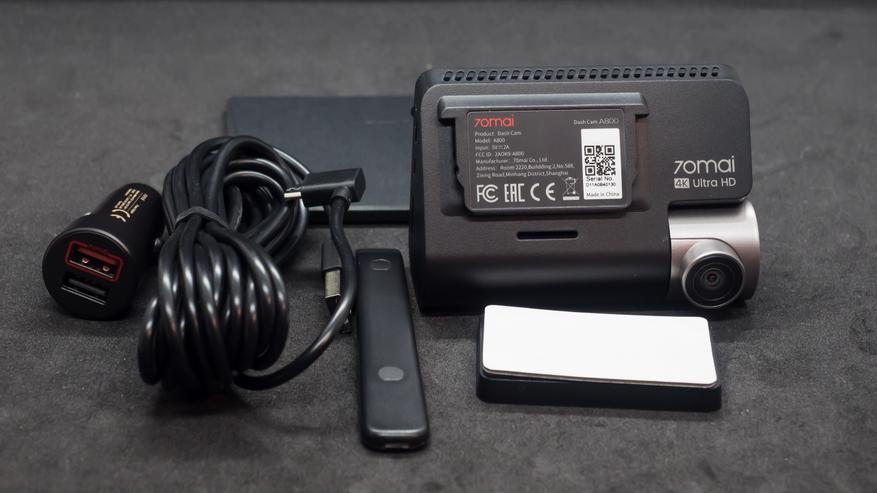
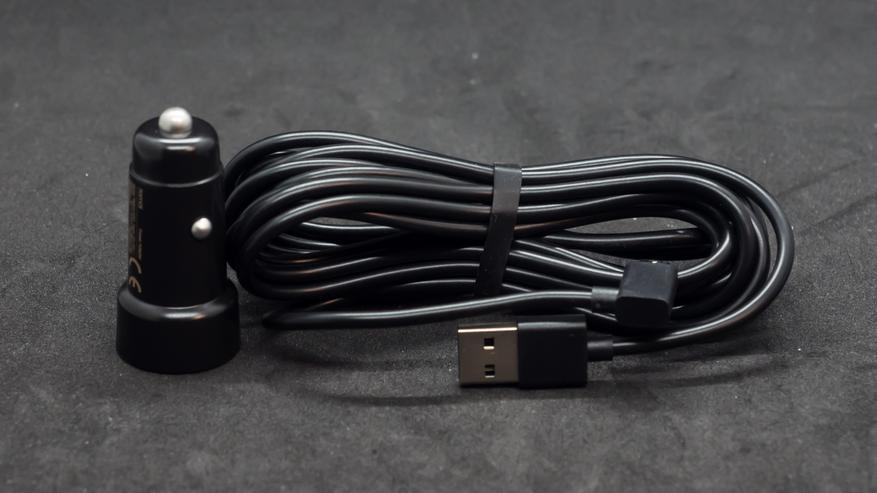
Длина комплектного кабеля питания составляет 3,5 метра, так что провести его любыми окольными путями под обшивкой, а адаптер в прикуриватель имеет два USB выхода, что дает возможность использовать его например для зарядки телефона.
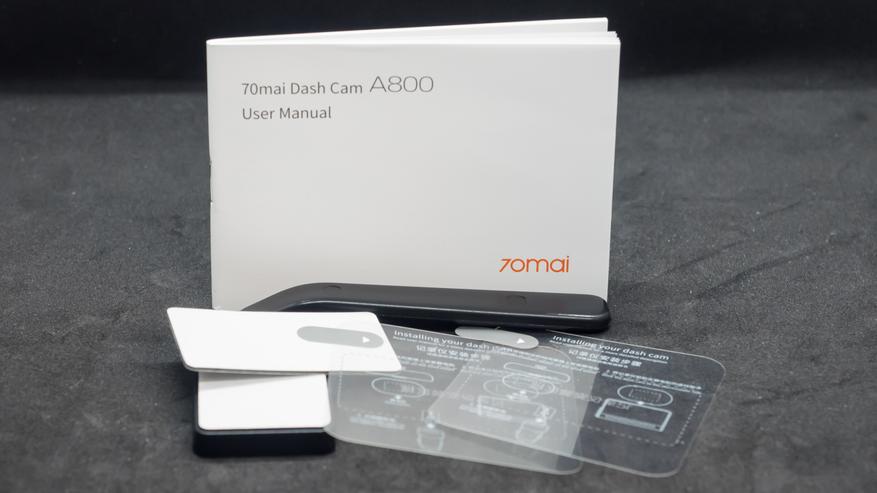
Также, в комплекте имеется мультиязычная инструкция, пластиковый ломик и набор для крепления на стекло — он отличается от более привычного, на присоске и кстати он более надежный, скажу по опыту использования одного из первых регистраторов 70 mii. Подробнее про крепление — чуть дальше.
В числе прочих в инструкции нашелся и раздел на русском языке. Но должен сказать что тут только самая основная информация, подробный вариант доступен по ссылке упакованной в QR код.
Здесь собрана уже вся возможная информация по устройству, правда на английском языке. Но по большому счету — для использования достаточно и краткого варианта из бумажной версии.а
Внешний вид — A800
У регистраторов 70 mai довольно узнаваемый дизайн, которые остается почти неизменным. Более простые модели имеют цилиндрический вид, а старшие версии — вот такую треугольную форму, На скошенных фронтальных гранях — находится салазки для установки на крепление и поворотный объектив.
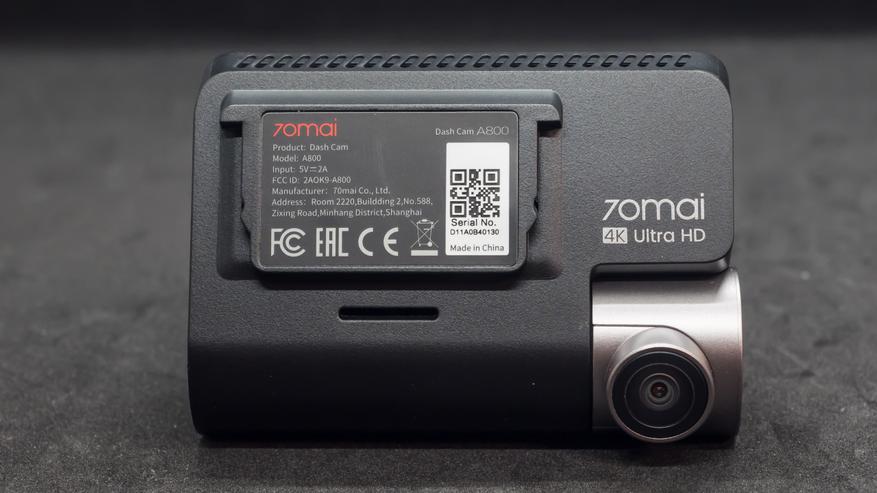
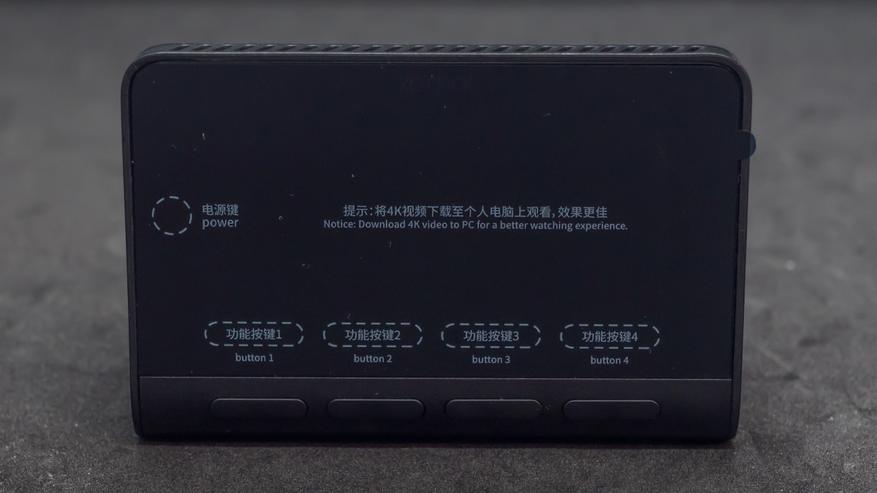
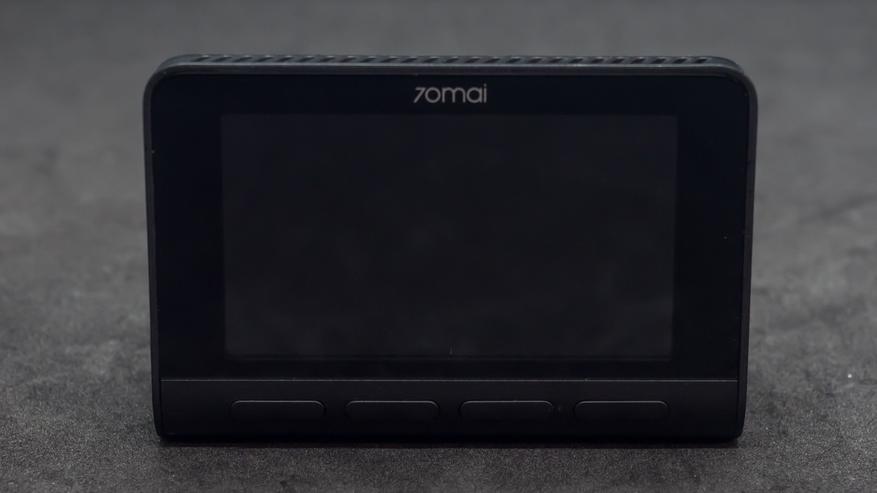
На задней, самой большой грани пирамидки регистратора находится 3.5 дюймовый экран, в транспортном состоянии защищенный пленкой и четыре функциональные кнопки.
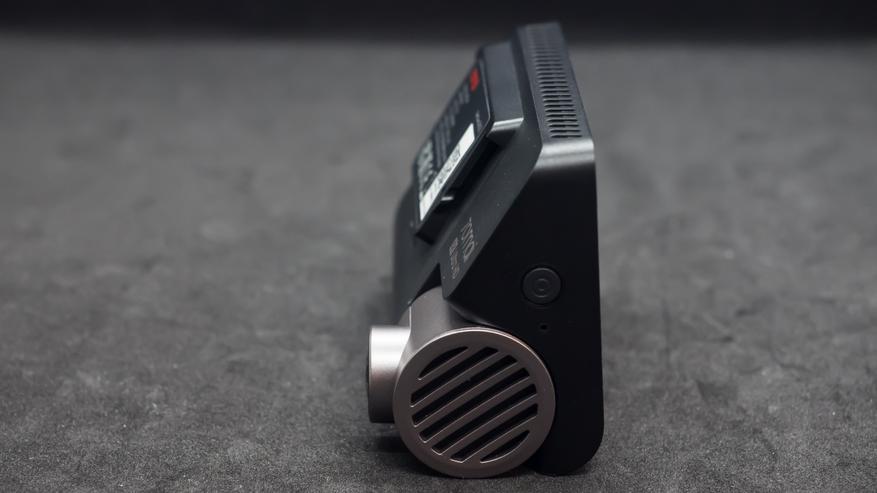
На боковой грани со стороны объектива находится кнопка включения и отверстия для микрофона. В большинстве случаев кнопка будет не нужна — регистратор включается автоматически при подаче питания, но есть варианты, о них чуть дальше, когда ей нужно будет пользоваться.
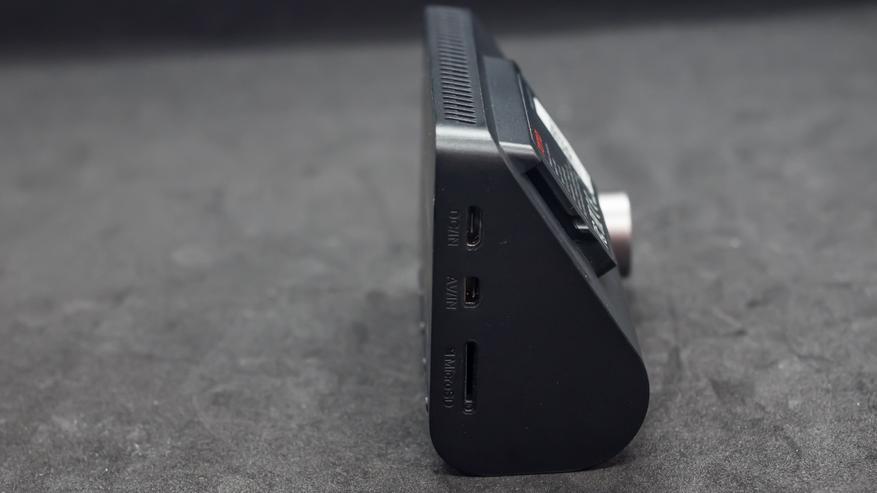
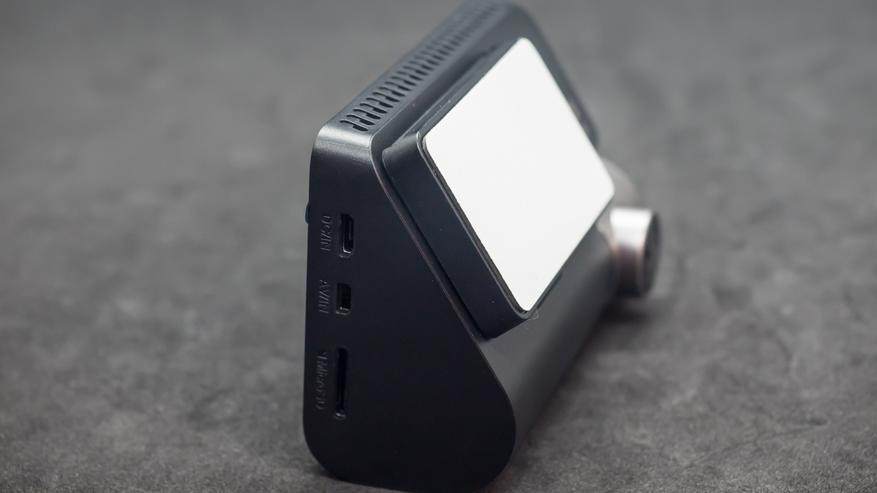
С другой боковой стороны находятся разъемы для подключения питания, камеры заднего вида, по нему передаются и данные и питание для самой камеры и слот для установки карты памяти формата micro SD
Перед использованием снимаем пленку с экрана. На корпусе для кнопок подписей не сделано, так как они могут выполнять разные функции, они будут отображаться на экране регистратора.
Что касается карты памяти — то для 4К регистратора, а еще если с камерой заднего вида — желательно использовать объем не менее, а лучше более 32 ГБ, классом не ниже 10го. Что касается максимального объема —
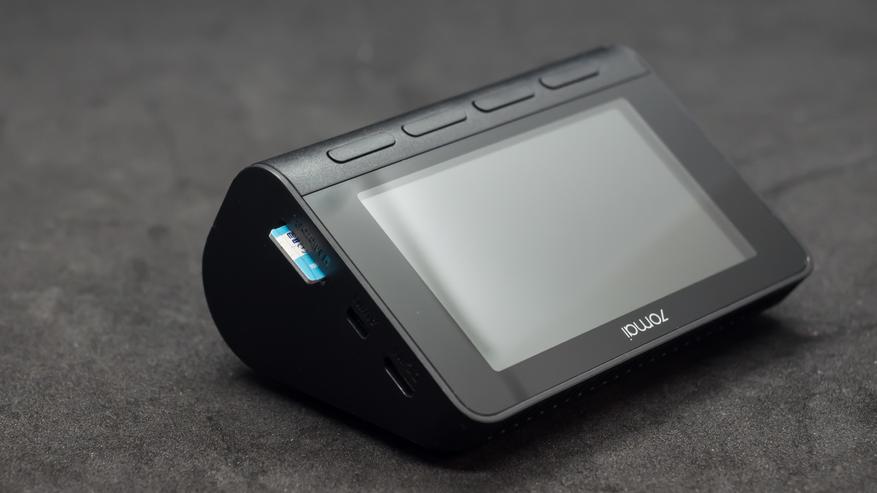
С установленным креплением для лобового стекла. Оно представляет собой пластиковую крышку, которая клеится на двусторонний скотч. Причем не к стеклу, пугаться не надо, а к специальной комплектной пленке которая наклеивается на стекло, по типу защитной пленки для экрана телефона.
Поставка — RC06
Камера заднего вида, в данном комплекте поставляется в отдельной коробке. Судя по описанию, для модели A800S есть вариант когда и регистратор и камера заднего вида идут одной коробкой.
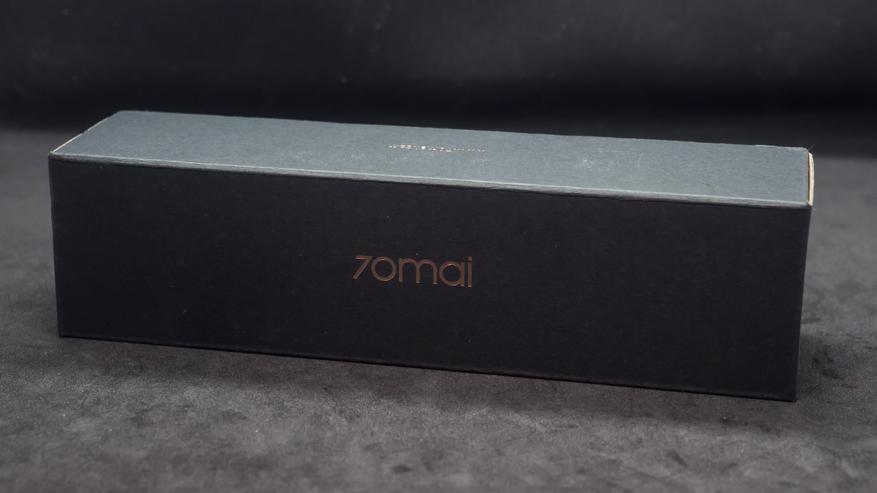
В отличии от оформления регистратора — эта коробка черного цвета, сразу и не скажешь что это один комплект. На одной из сторон указан номер модели и краткие параметры устройства.
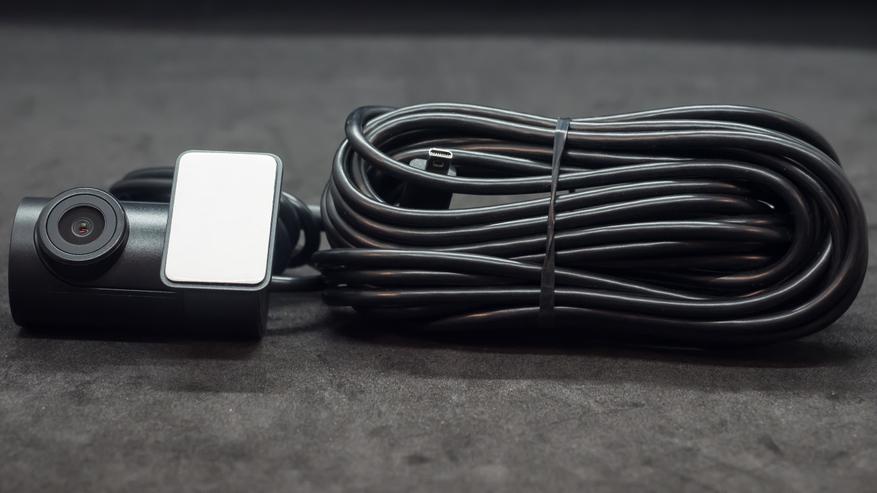
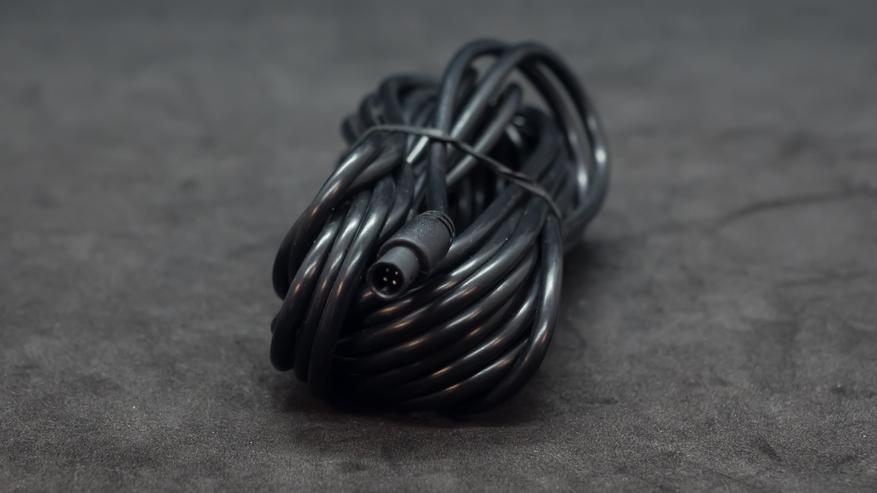
Внутри нашлась камера заднего вида с кабелем который необходимо провести через салон автомобиля к регистратору, по нему же камера получает питание.
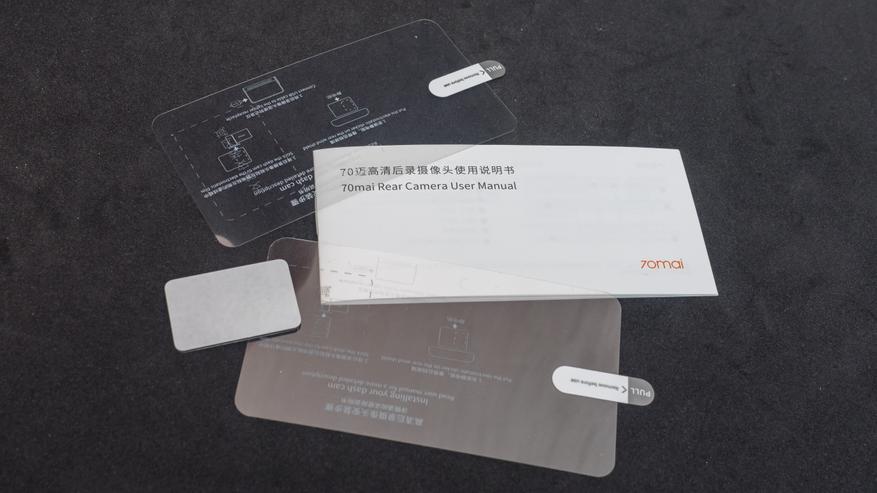
Инструкция и комплект крепления — 2 пленки для наклеивания на стекло и запасной кусок двустороннего скотча, первый уже установлен на самой камере.
Внешний вид — RC06
Устройство внешне напоминает уменьшенную версию популярных бюджетных регистраторов 70 mai Dash Cam 1 или 1 S. Кстати самой первой, еще китайской версией я пользовался довольно долго, на моем youtube канале есть и обзор и ее перепрошивка в глобальную версию.
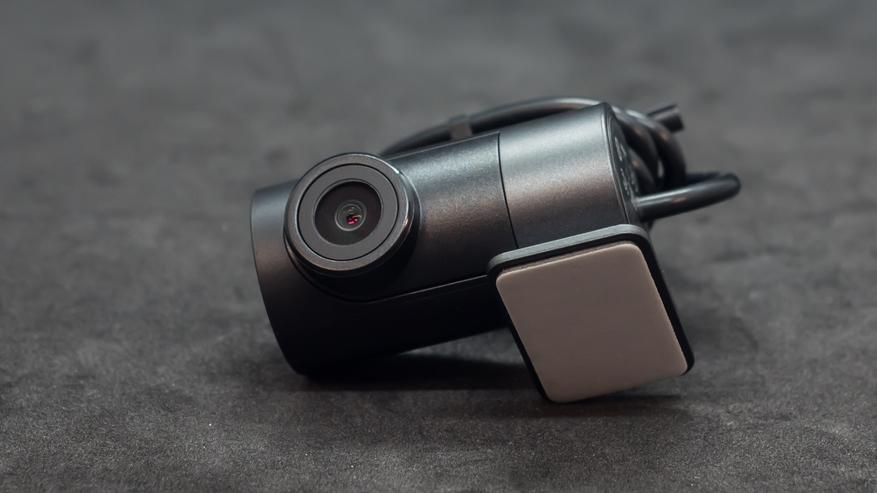
Но в отличии от регистратора — который является самостоятельным устройством, это просто камера, отдельно ее использовать нельзя, она предназначена для использования с регистраторами A800 и A800S.
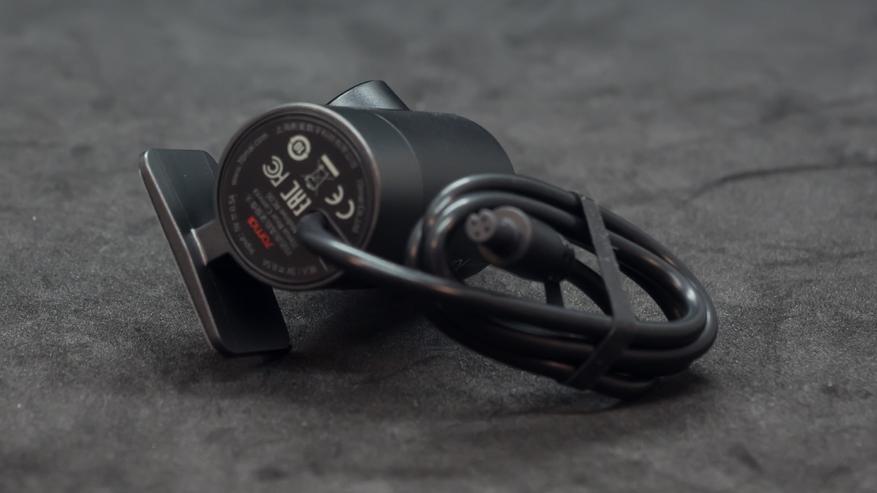
Соединение провода камера с основной частью — необходимо совместить стрелки друг напротив друга, после чего совпадут ключи внутри разъемов. Иначе можно повредить разъемы.
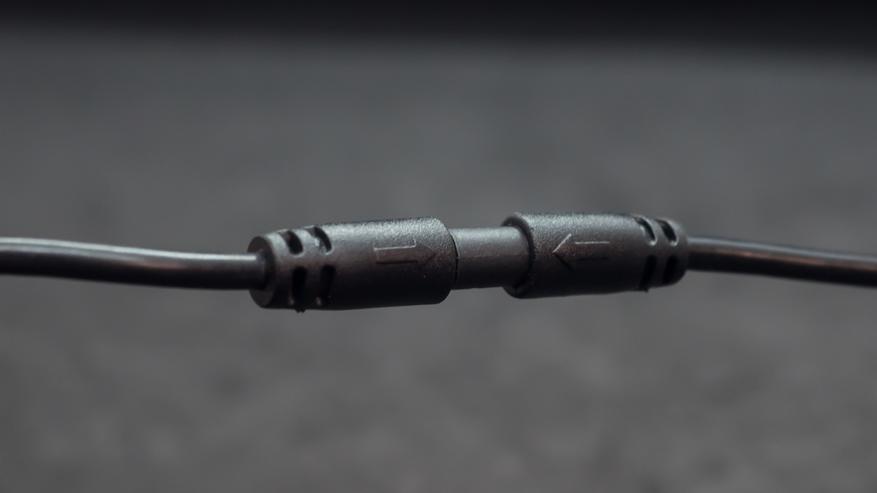
Длина основной части кабеля — 5,5 метров, так что его легко хватит чтобы аккуратно и незаметно провести через весь салон автомобиля от заднего стекла до лобового.
Запуск
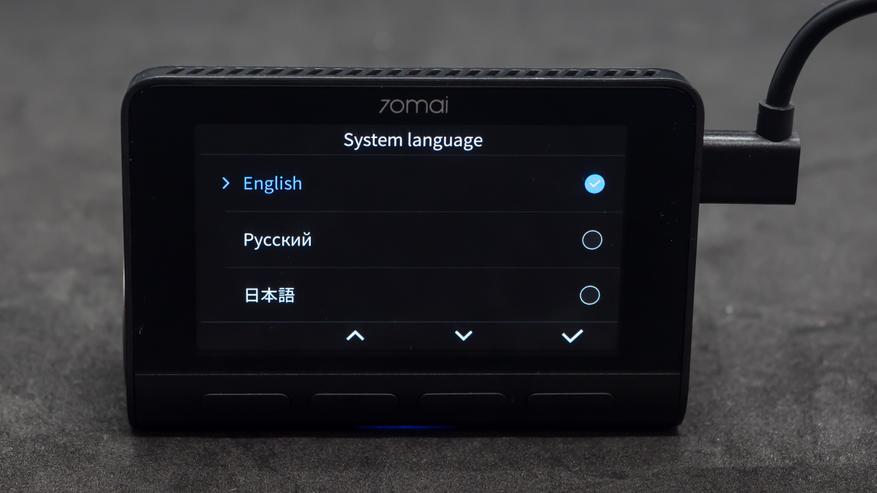
После подключения кабеля питания, кстати он специально ориентирован под углом вверх, это удобно при установке — включается диалог выбора языка. Русский присутствует.
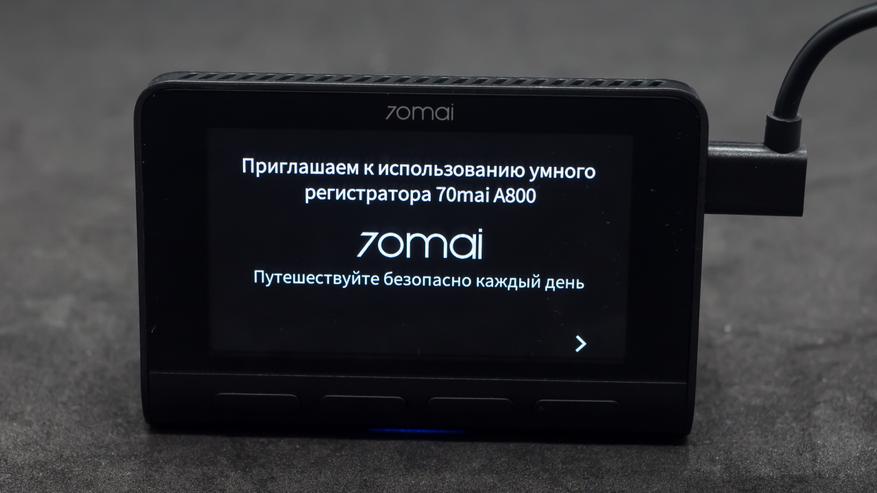
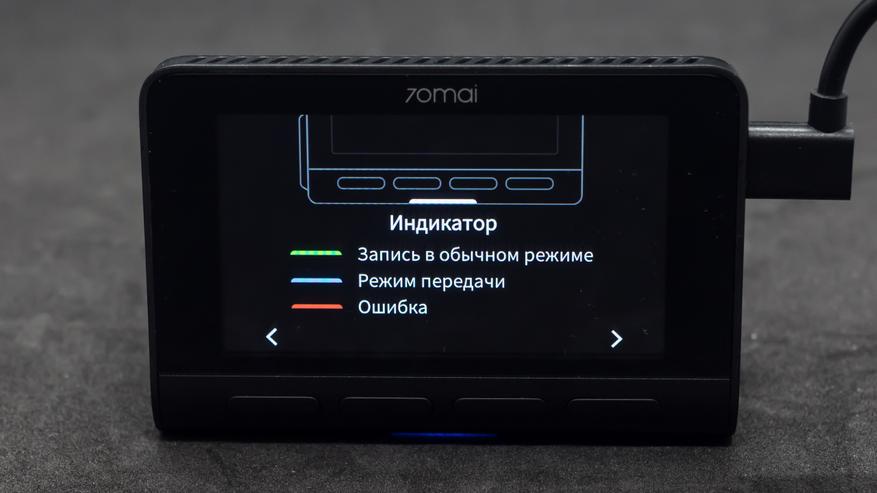
Далее запускается небольшое приветствие в несколько шагов, которое покажет основные функции устройства. В нижней части находится светодиодный индикатор — тут его видно по синему свечению. Всего их три и каждый цвет означает какой-то статус.
Устанавливаем часовой пояс для устройства, по умолчанию тут выбран Пекин. Системное время, кстати забегая вперед — скажу что оно может синхронизироваться с телефоном, поэтому на этом этапе можно точно не устанавливать.
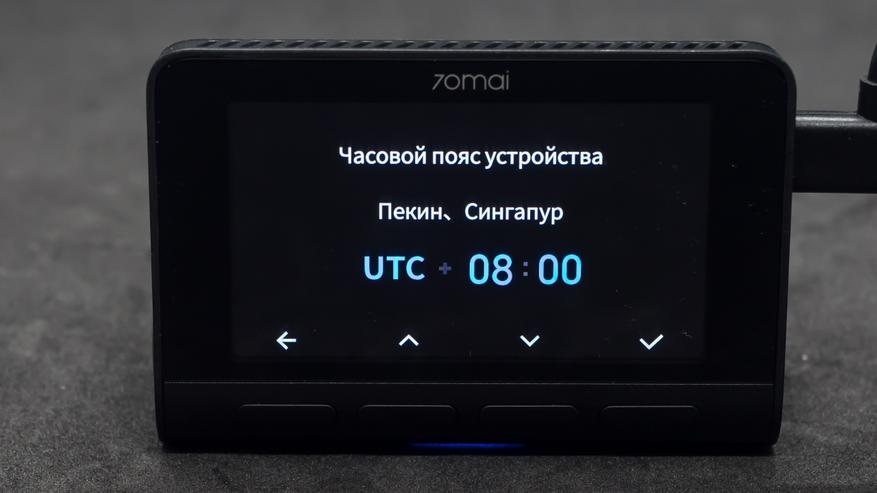
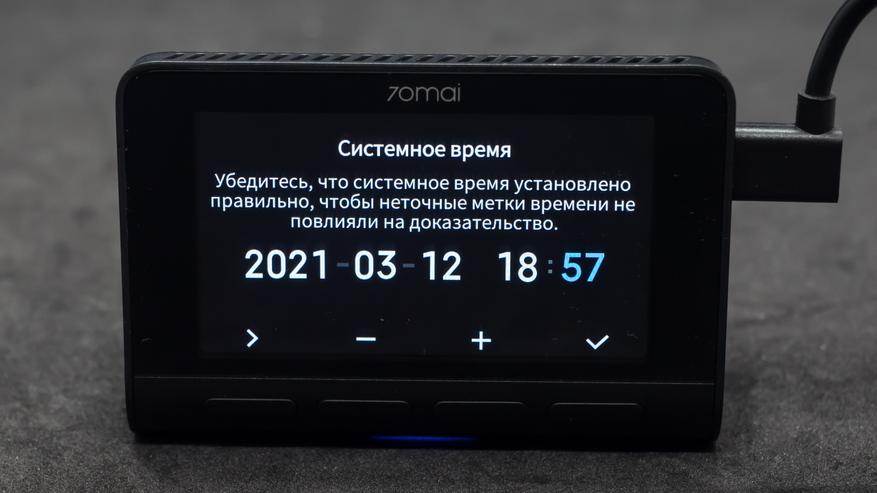
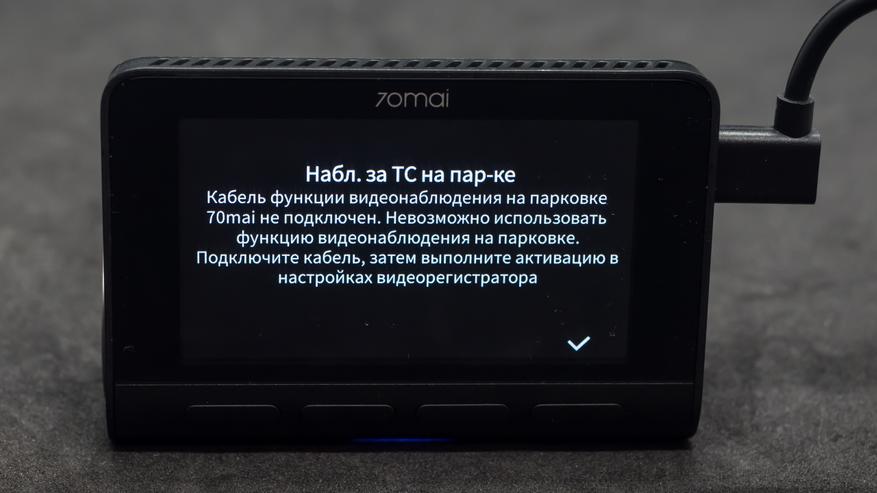
Можно приобрести специальный кабель который подключается напрямую к цепи которую питает аккумулятор, даже при заглушенном двигателе, что даст возможность включить опцию съемки в течении заданного времени на парковке. Регистратор предлагает и я тоже рекомендую скачать и установить приложение 70 mai, которое облегчит настройки и получение записанных данных с регистратора.
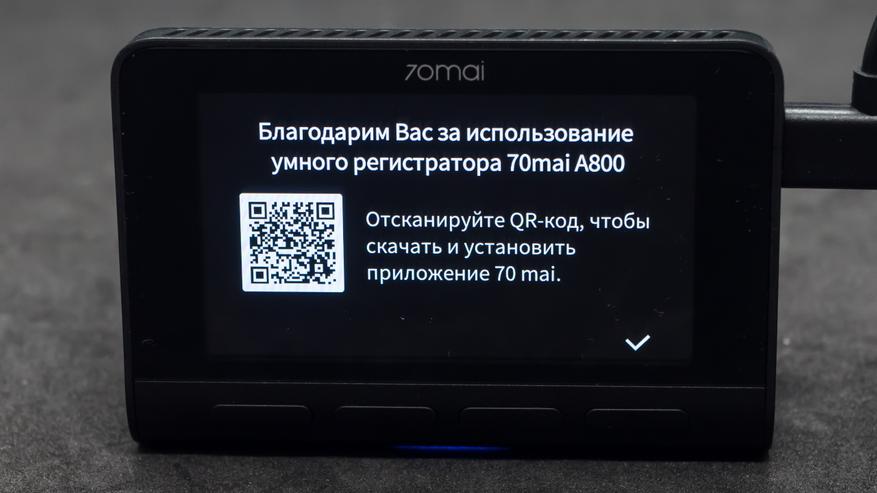
Для начала работы осталось установить только карту памяти, после чего будет предложено ее отформатировать. Еще раз напомню — для записи видео в разрешение 4К нужен класс карты не ниже 10го, и объем хотя — бы 32 ГБ, лучше больше — максимум 256 ГБ.
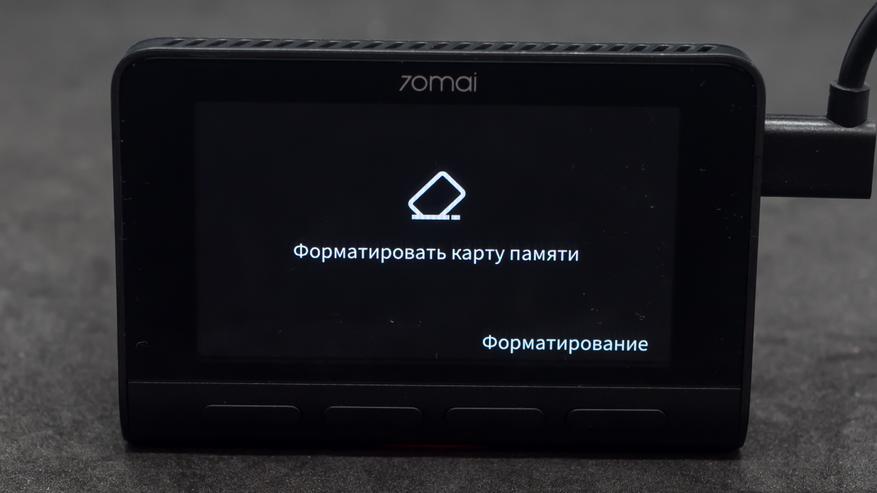
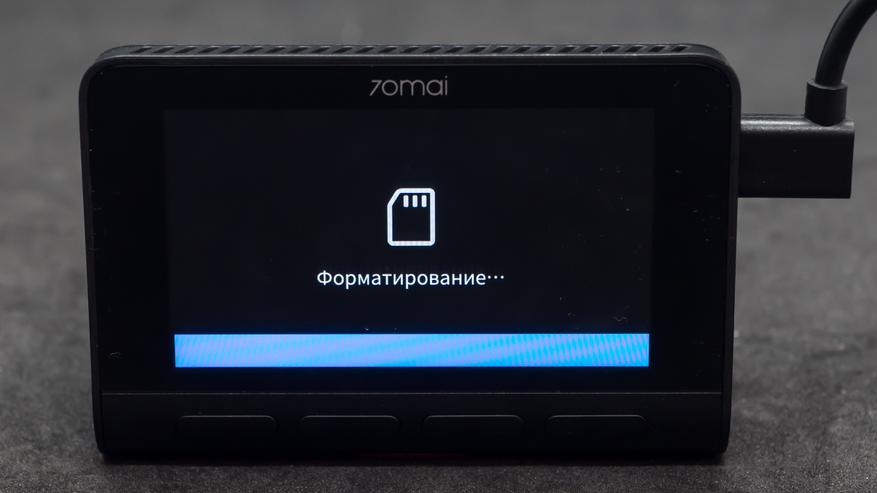
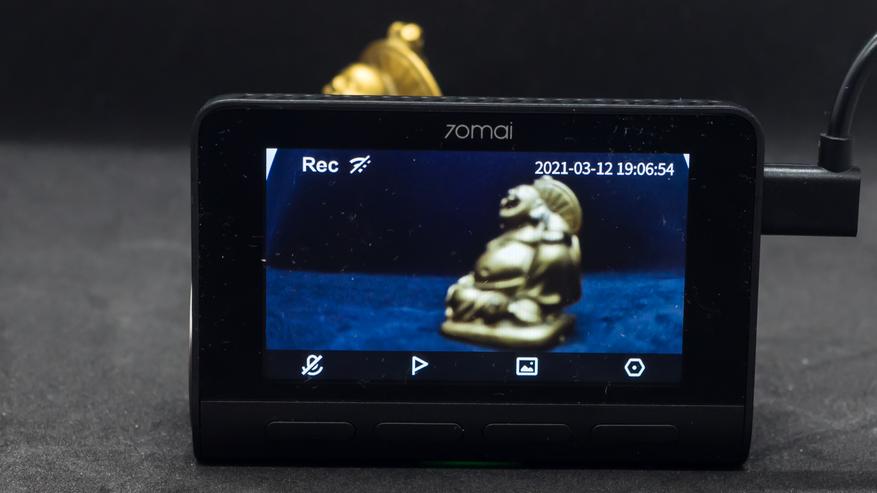
Съемка начинается автоматически после включения регистратора. Обратите внимание что по умолчанию его микрофон отключен — для включения надо нажать левую кнопку.
Настройки
Правая кнопка дает доступ к меню настроек, которые тоже показывается на русском, или другом выбранном вами языке. Меню настроек видео — функции клавиш — отображаются в виде значков над ними, экран не сенсорный.
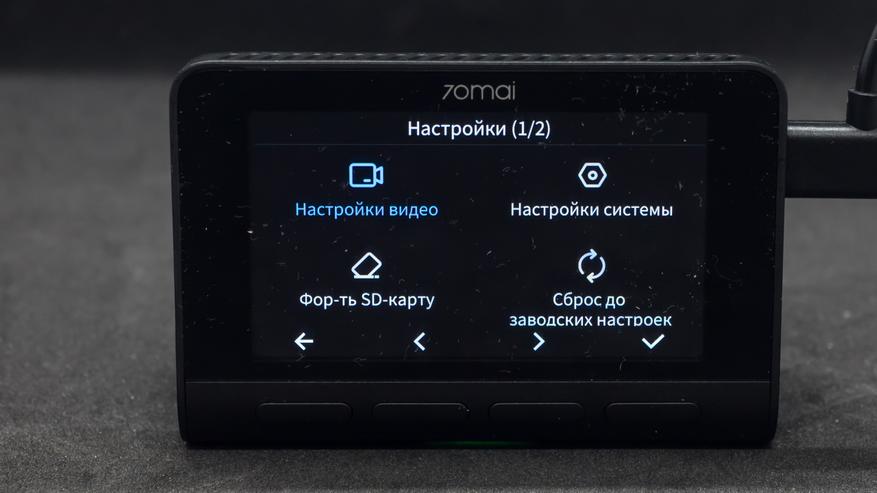
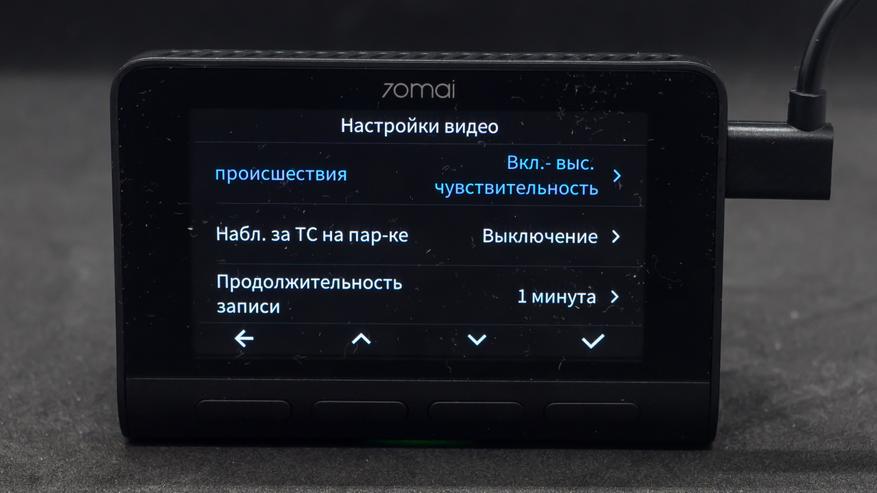
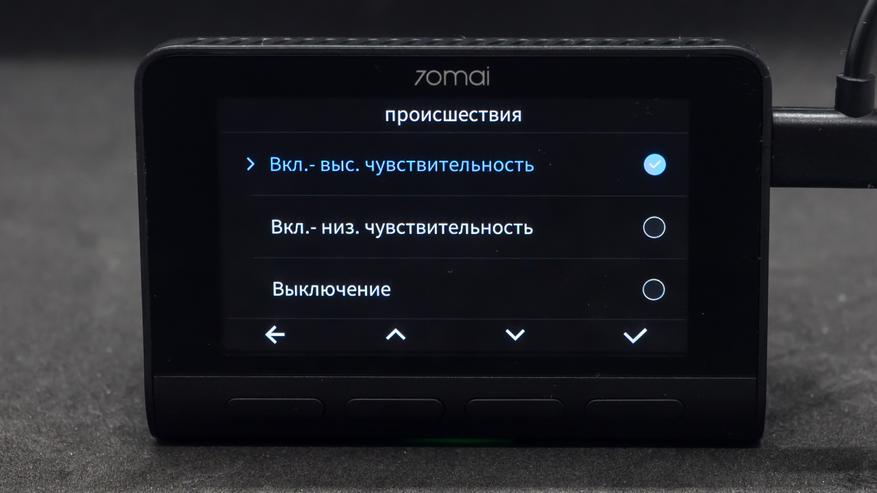
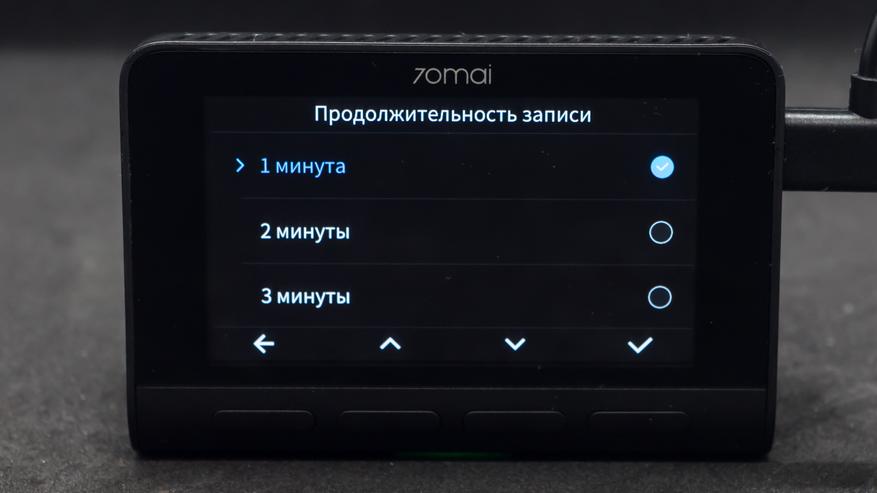
Датчик происшествия реагирует на сотрясение после чего пишет ролик в отдельную папку, где он не будет затираться при обычной записи. Это может пригодиться при аварии. Продолжительность одного ролика. Чем короче ролик тем чаще он финализируется, тем больше шансов что при какой-то аварийной ситуации он успеет сохранится на карточку. Пауз между роликами нет.
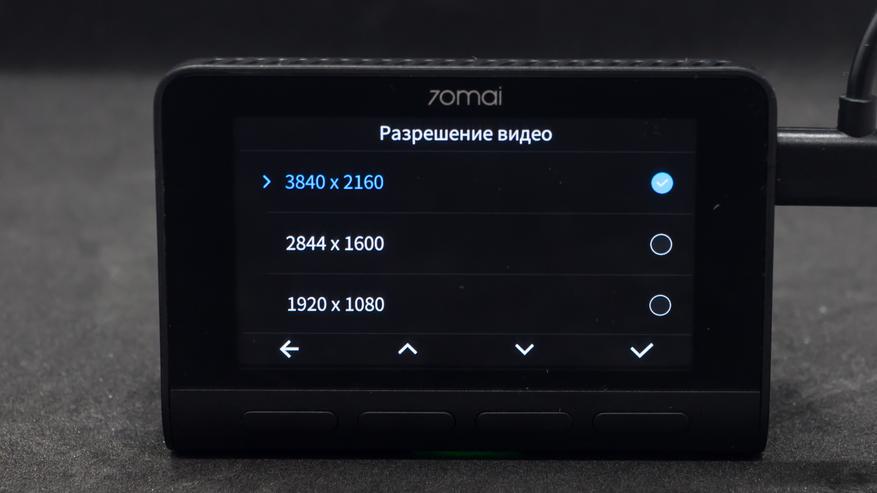
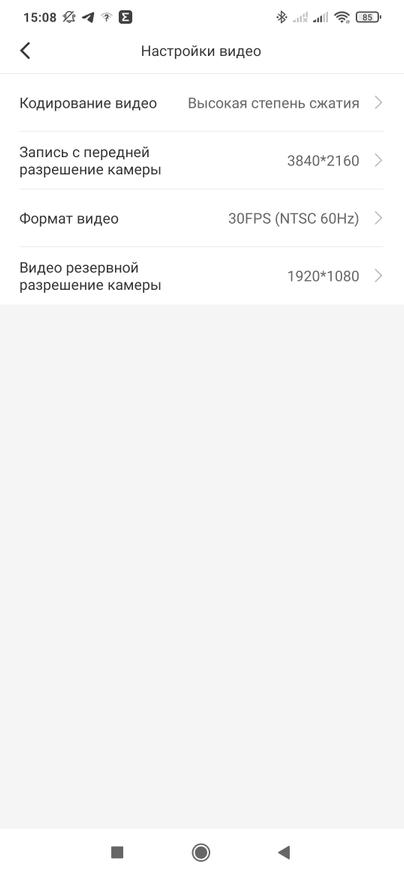
Меню настроек качества самого видеопотока который будет писаться на карту памяти. Можно выбрать одно из трех вариантов разрешения. Я считаю что надо писать в максимальном, для самой высокой детализации.
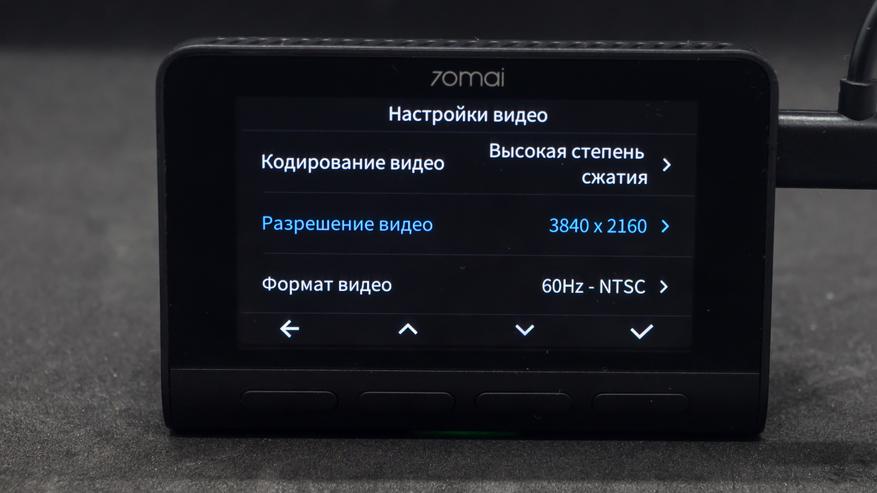
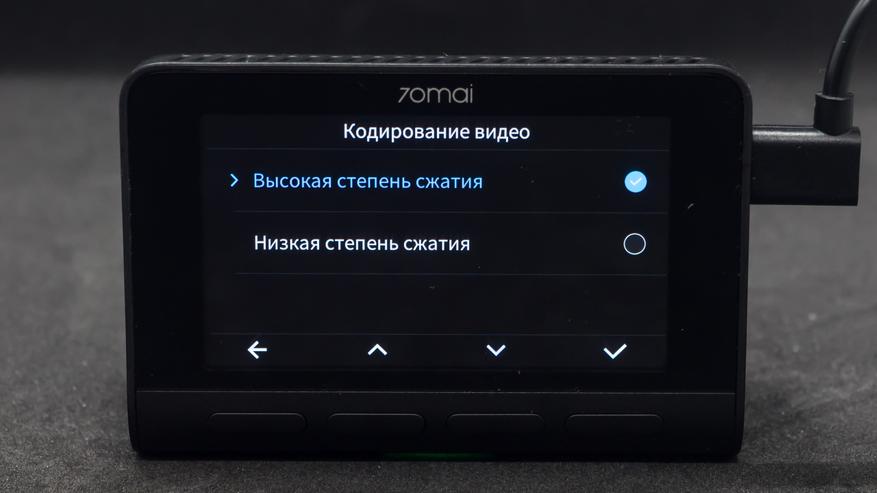
Степень сжатия — влияет на объем данных, в этом обзоре будет показана съемка с установкой высокой степени сжатия. Меню настроек системы — так выглядит опции установленные по умолчанию.
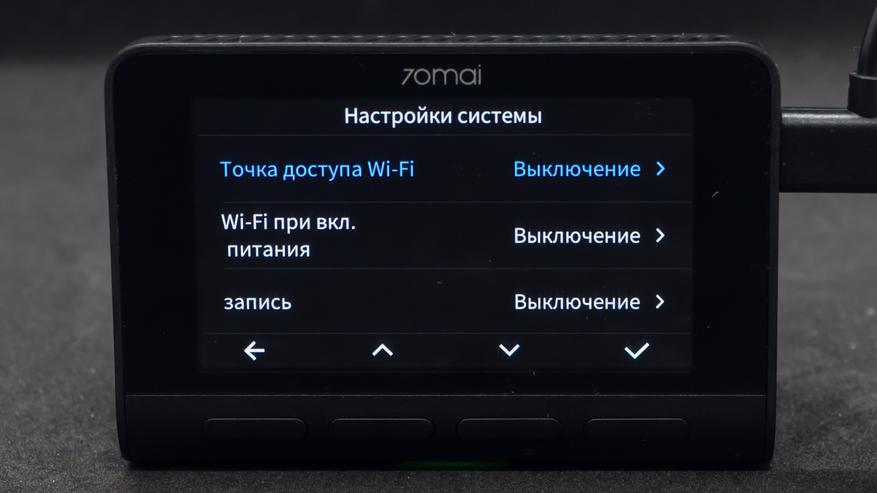
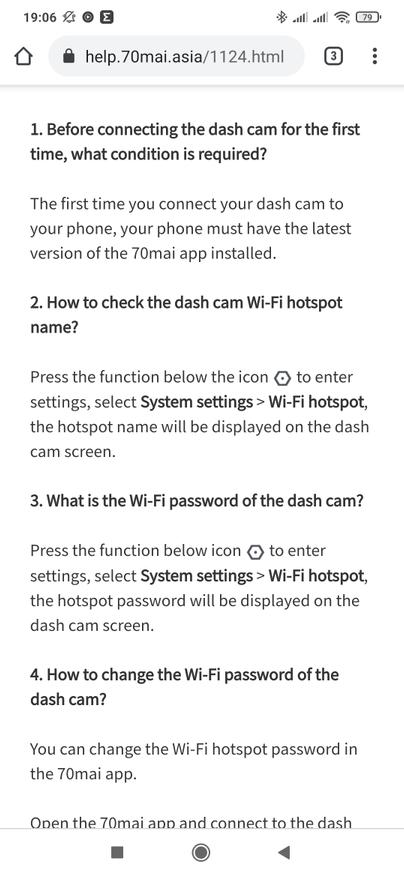
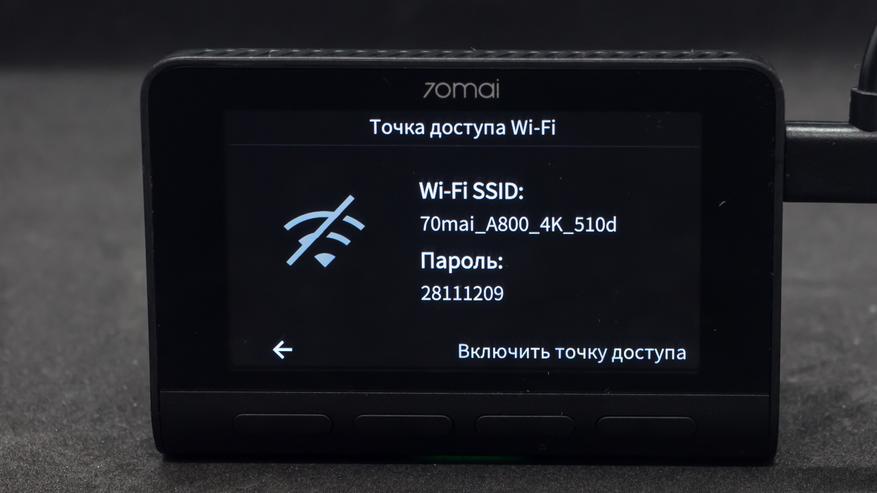
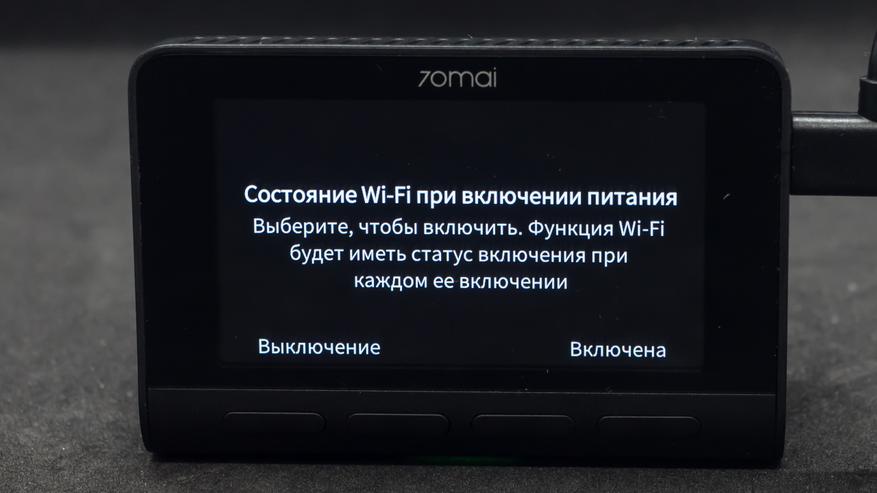
Точка доступа wi-fi позволяет напрямую подключаться к регистратору при помощи телефона. Параметры доступа указаны сразу на экране. При желани wi-fi можно включать автоматически сразу после подачи питания на регистратор.
Приложение 70 mai
И вот мы наконец добрались до приложения для работы с регистратором. Оно универсальное для всех моделей 70mai. Нужно выбрать из списка свой вариант.
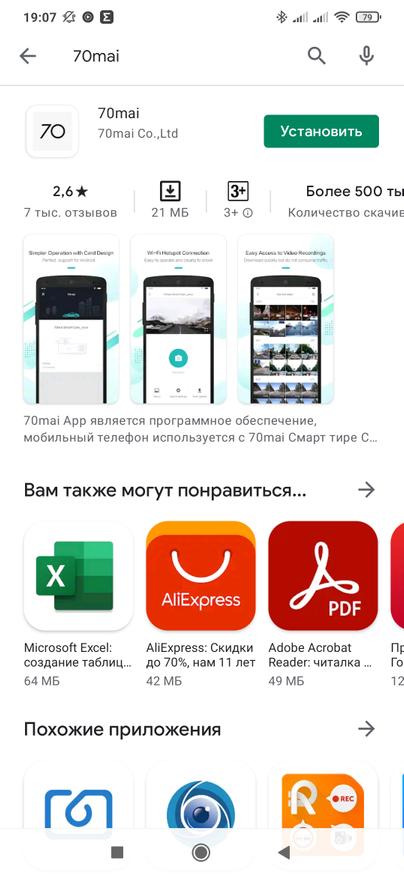
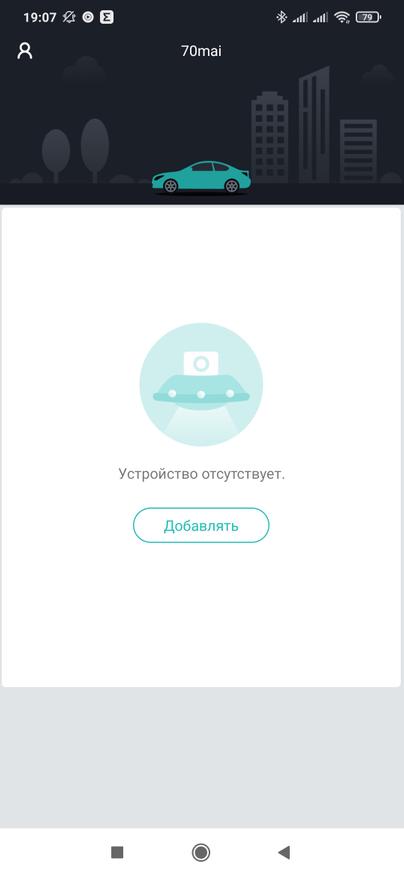
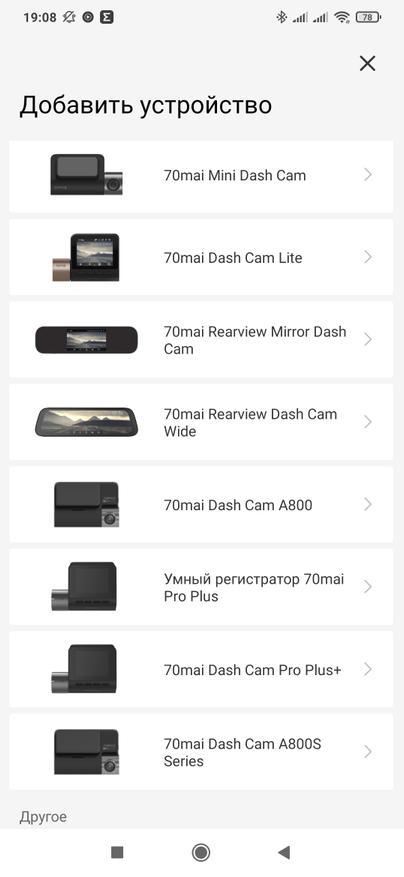
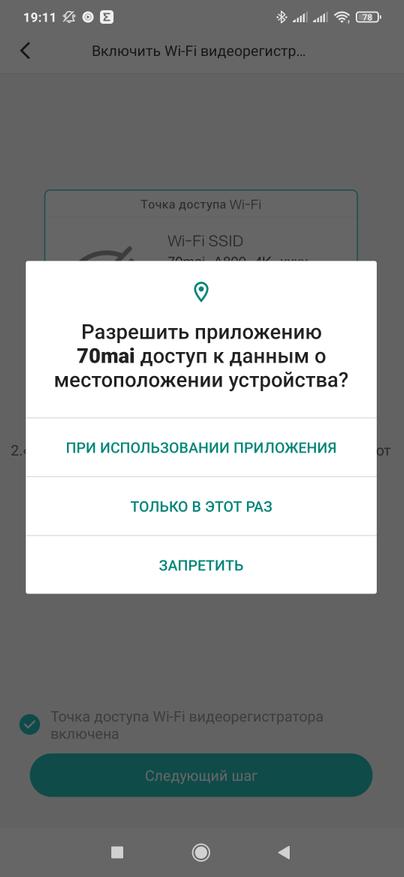
После этого приложение скажет о необходимости активации точки доступа на регистраторе и попросит разрешение на определение местоположения. На регистраторе надо включить wi-fi и используя имя сети и пароль с экрана — подключится к этой сети.
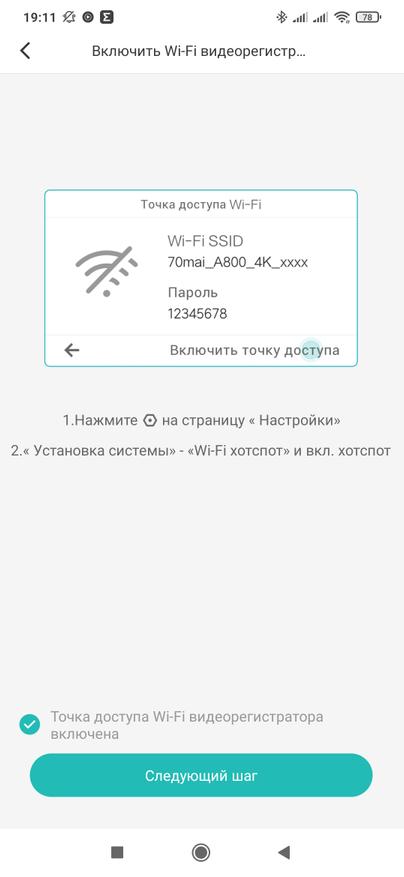
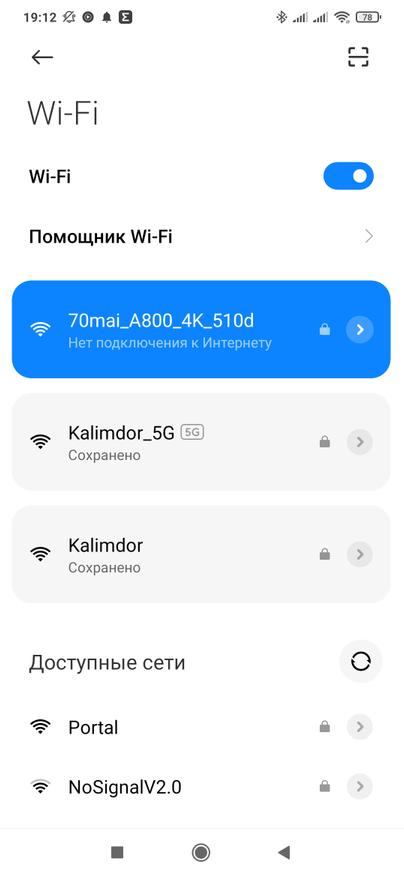
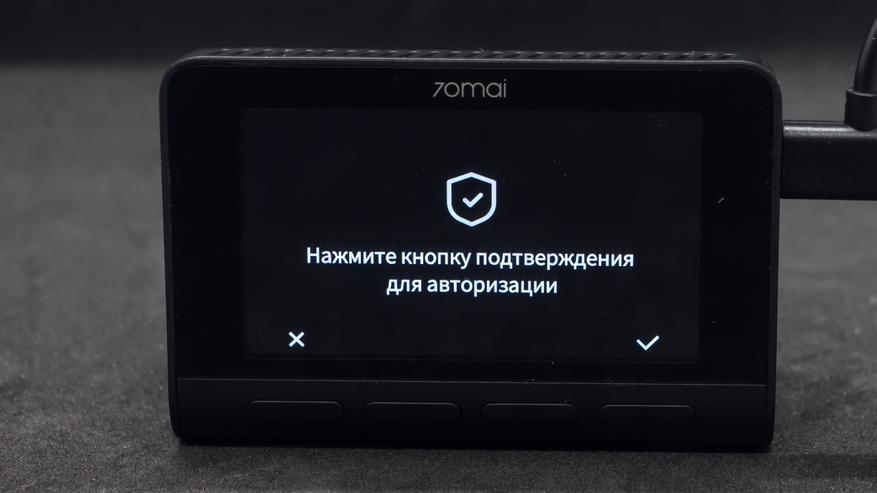
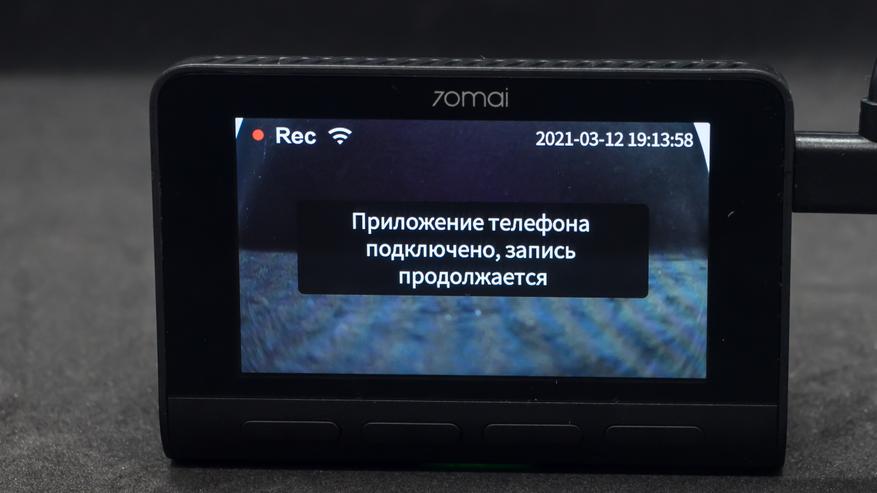
Для подтверждения подключения нужно нажать на правую кнопку на регистраторе. Кстати в целях безопасности, время за которое нужно подтвердить подключение — лимитировано. На экране регистратора появится уведомление о том, что к нему подключен телефон, при этом запись будет продолжена в штатном режиме.
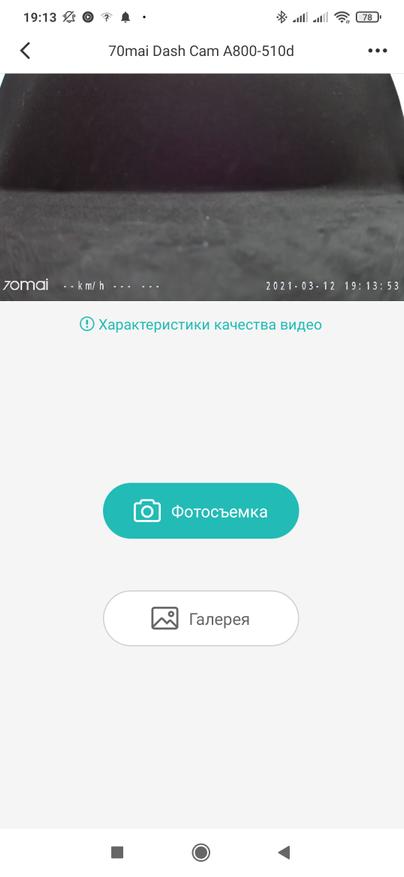
Главный экран приложения показывает видеопоток с регистратора, тут же можно сделать фотографию и перейти в галерею записанных видео. Справа сверху находится меню настроек, повторяющее то, что мы уже рассмотрели на самом регистраторе. Но с телефона все несколько удобнее.
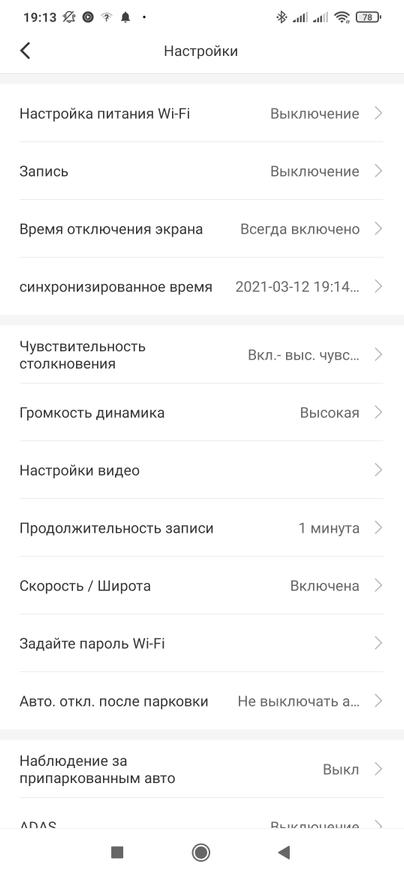
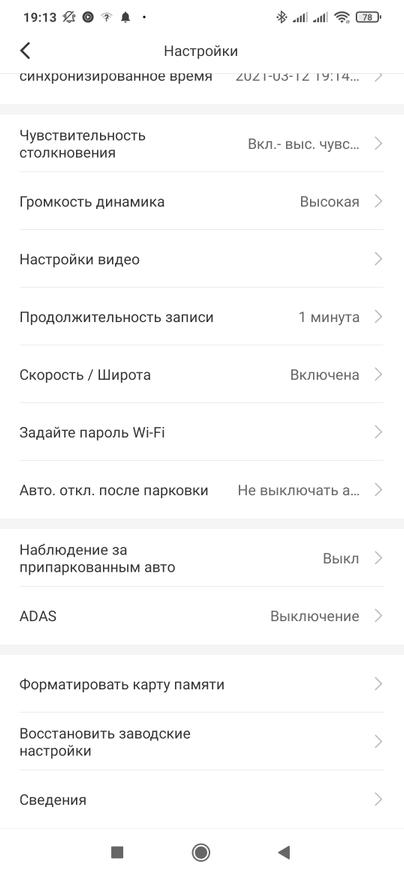
Включение точки доступа wi-fi одновременно с регистратором, но учтите что если телефон будет подключаться к этой сети — она не имеет выхода в интернет. Выключение записи при отключении внешнего питания. Кому мешает работающий экран — его тоже можно отключать.
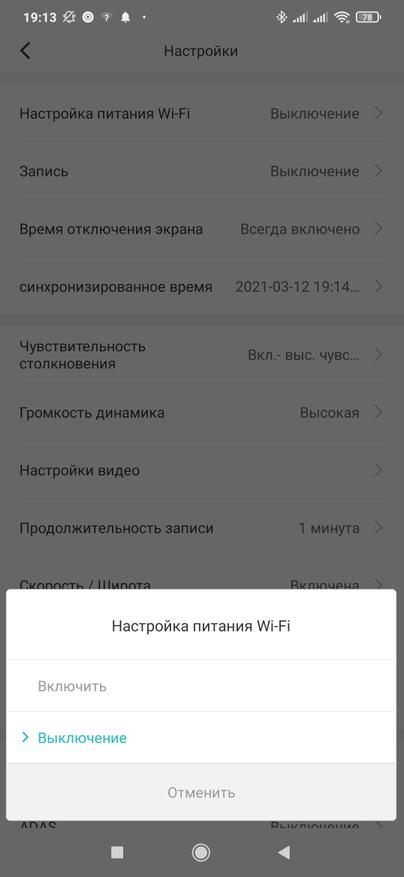
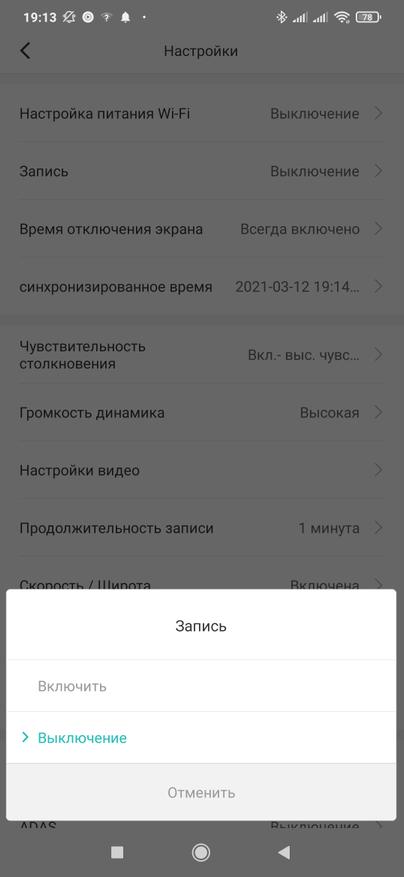
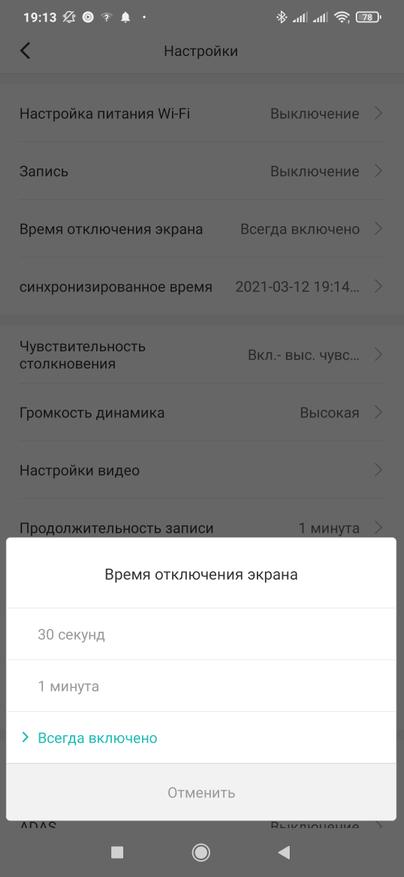
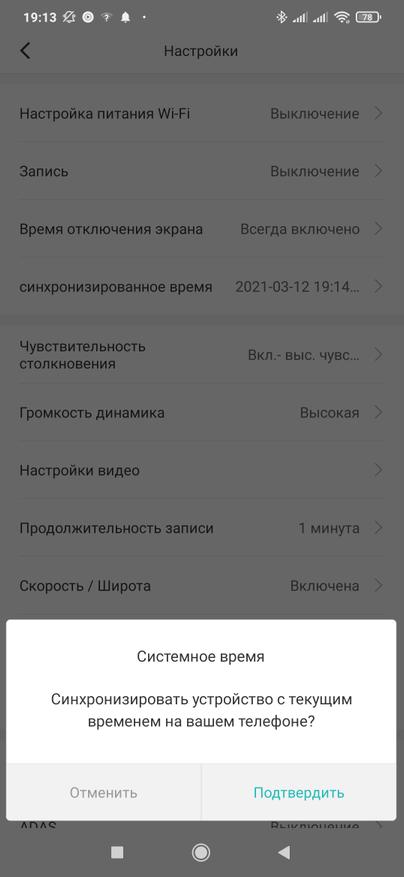
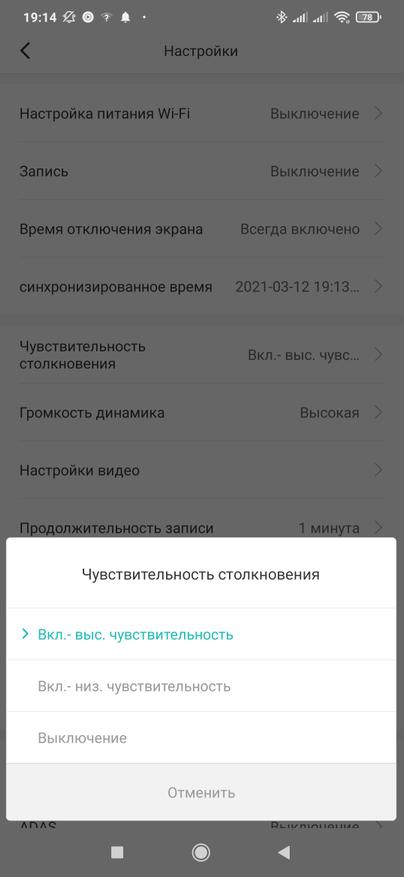
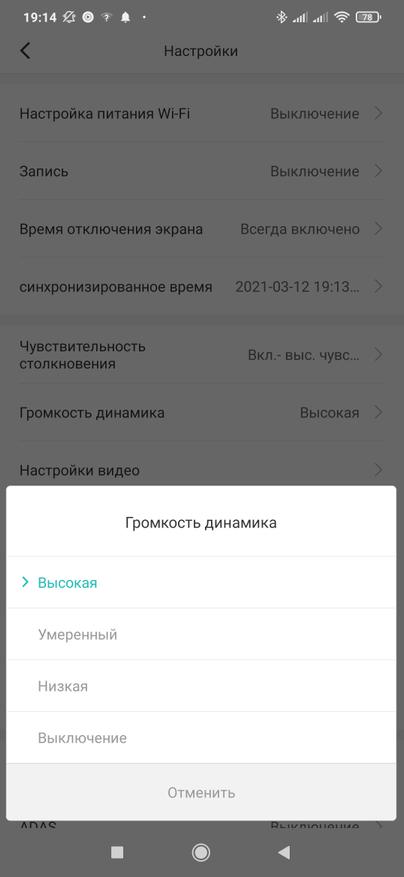
Вот то меню синхронизации времени с телефоном, про которое я уже говорил. Чувствительность датчика для записи роликов происшествия и громкость динамика.
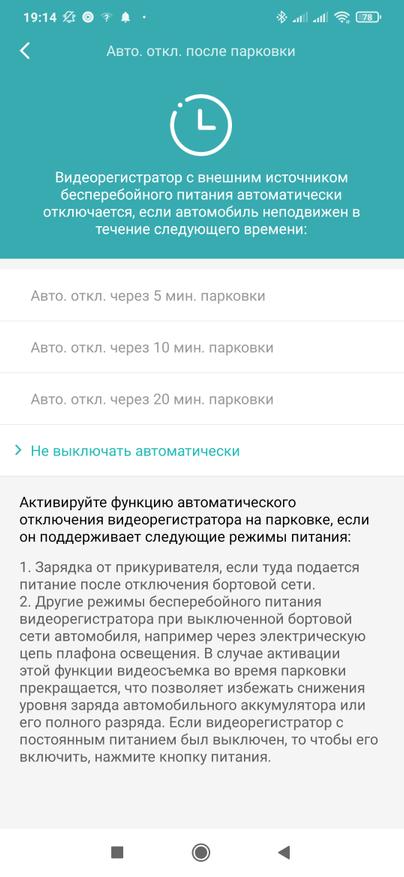
Меню которое позволяет настроить запись с парковки, при условии что на регистратор подается постоянное питание. Для этого можно использовать специальный кабель приобретаемый отдельно, либо гнездо прикуривателя с постоянным питанием.
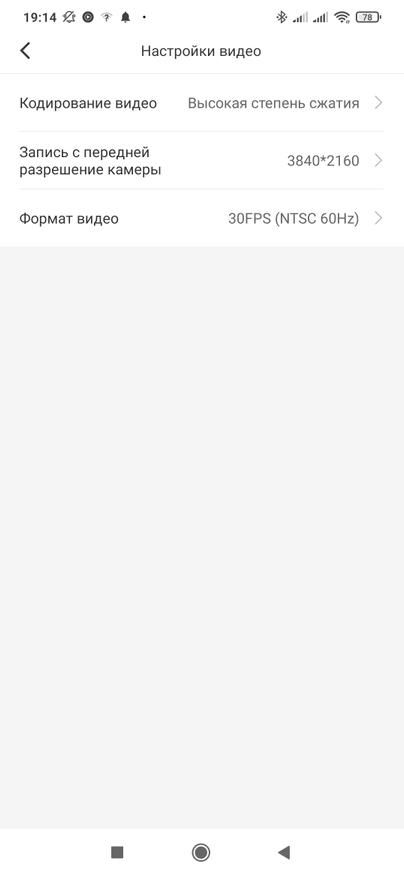
Выбор разрешения камеры регистратора тут, аналогично экранному меню, состоит из трех опций, для задней камеры — ее меню появится после подключения — доступно только одно разрешение.
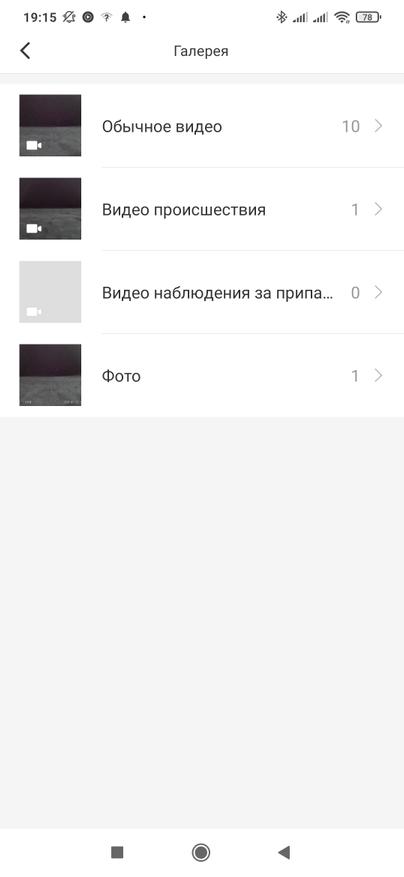
Галерея видео делится на папки — нормальное видео, оно пишется по кругу затирая старые записи, отдельно видео происшествий — по датчику удара, видео на парковке и фотографии. Все видео можно просматривать и при необходимости загружать на телефон.
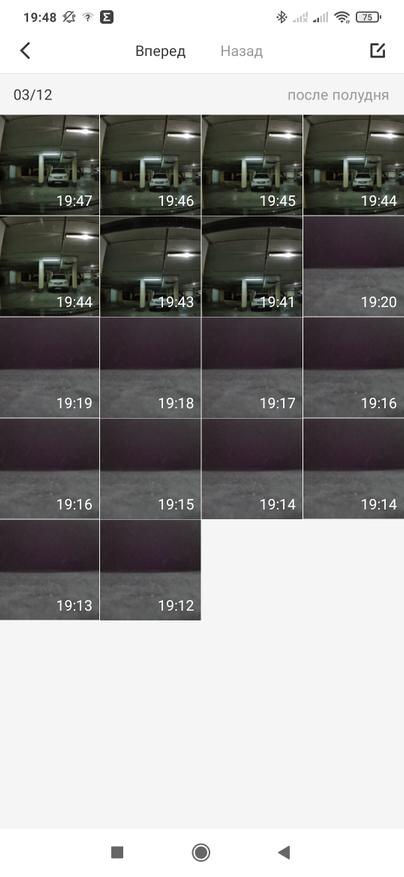
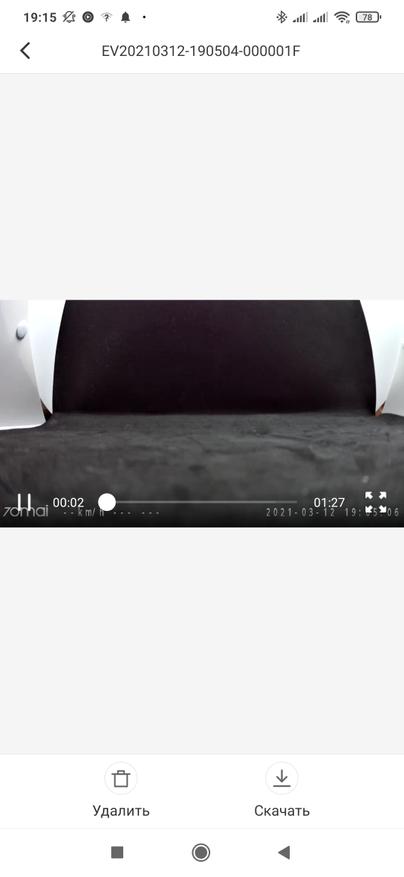
Кстати в ходе теста, я неаккуратно задел регистратор, и он опрокинулся с одной грани на другую — без отрыва от поверхности, этого хватило для активации записи происшествия — ролик который пишется в отдельную папку.
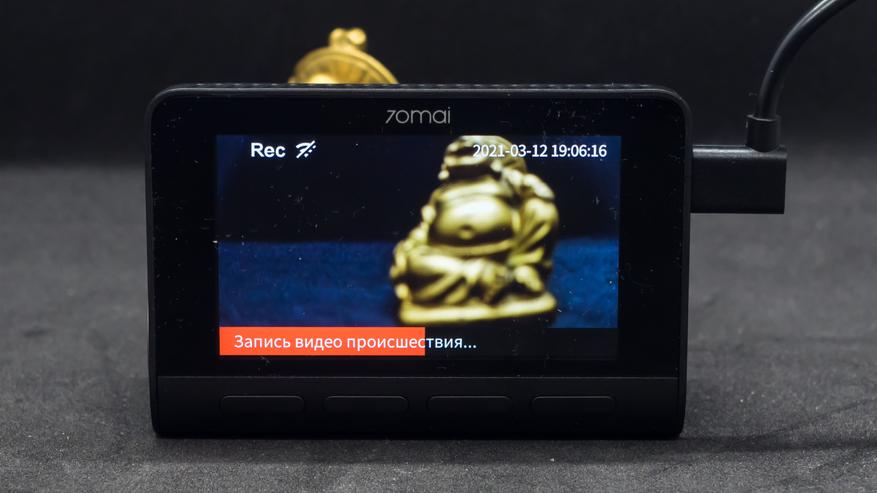
Забегая вперед скажу что размер файлов длиной в 1 минуту, которые пишет регистратор в 4 К разрешении с высоким уровнем сжатия составляет примерно 200 МБ, задней камеры — в среднем 50 МБ.
Установка — A800
Теперь самое время перейти к установке видеорегистратора. Так как он может использоваться отдельно, установку я тоже разделю на две части и начну с главного.
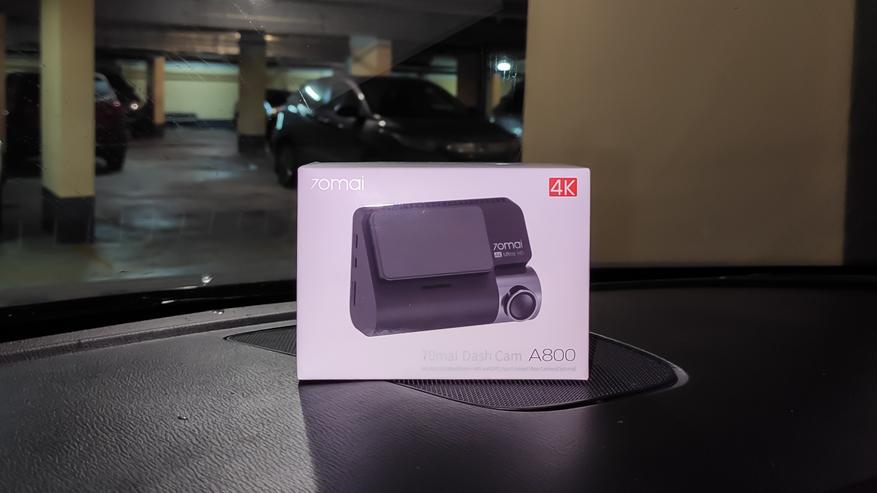
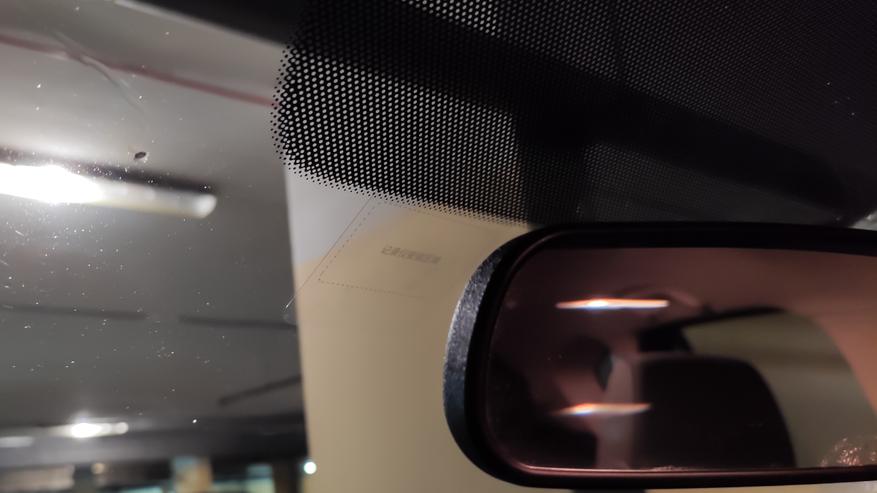
Протираем средством для мытья стекол тот участок, на который планируется установка регистратора. Приклеиваем комплектную прозрачную пленку. Она практически невидима, совершенно не мешает, при этом отлично держится и при необходимости снимается не оставляя следов. Принцип как у защитных пленок для телефона. Главное приклеить с минимумом пузырей.
Теперь нам нужен регистратор, а точнее его крепление на которое уже наклеен двусторонний скотч. Клеим его на пленку.
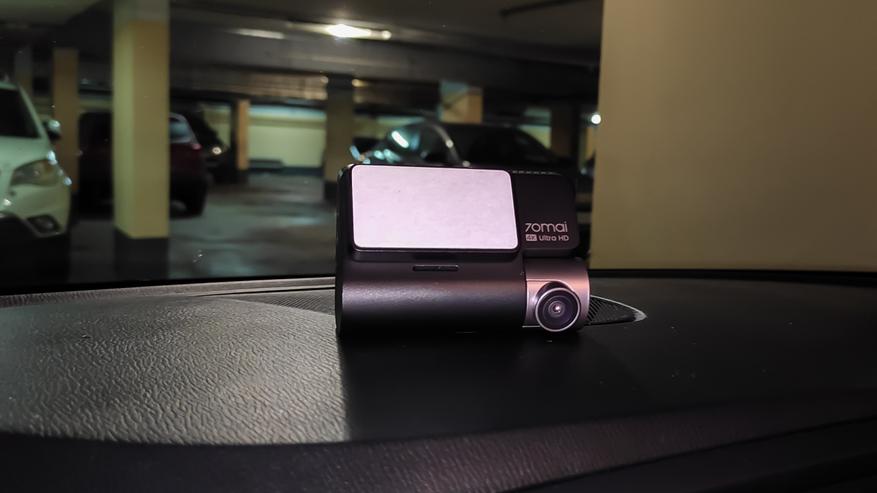
И надеваем на крепление регистратор — быстро надежно и удобно. Не будет отпадать в самый неподходящий момент как присоска.
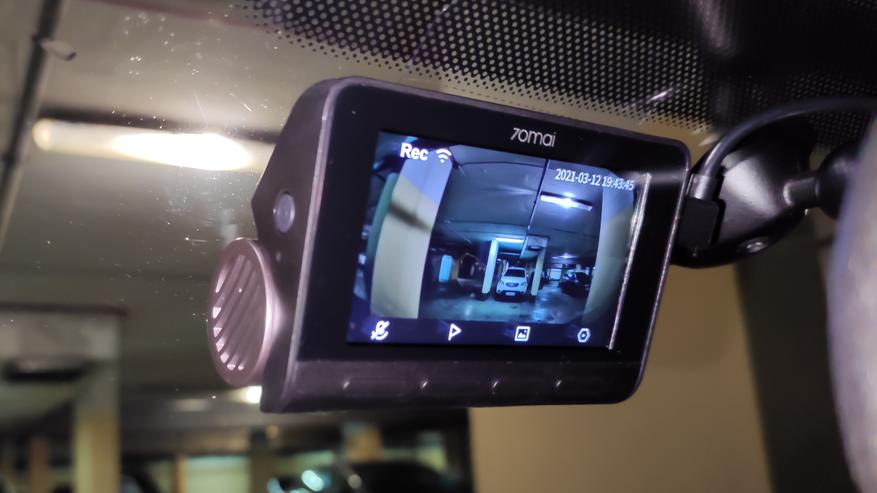
Еще раз отмечу, что комплектный адаптер в прикуриватель имеет два USB разъема, что позволит, например, зарядить от него телефон.
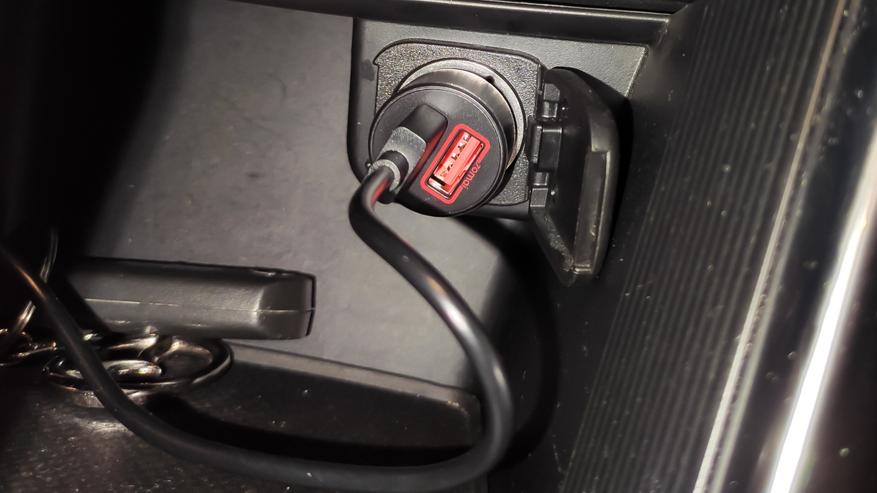
Вот так выглядит установленный регистратор снаружи. К сожалению не очень детализировано из-за плохого освещения в паркинге.
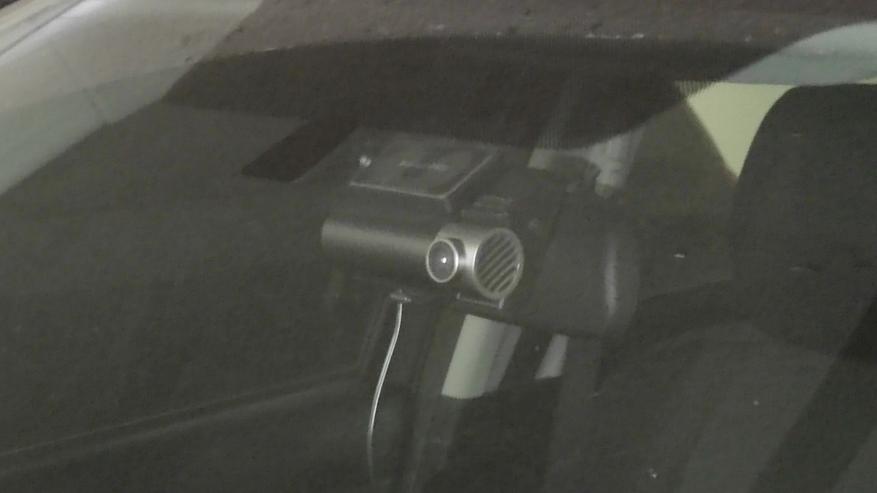
Установка — RC06
Теперь камера заднего вида, она не может использоваться самостоятельно и является аксессуаром к видеорегистратору.
Процесс установки — такой же, готовим внутреннюю поверхность стекла, но уже сзади. Клеим пленку из комплекта поставки камеры заднего вида. Сразу ориентируем ее так, чтобы она не заслоняла камере обзор.
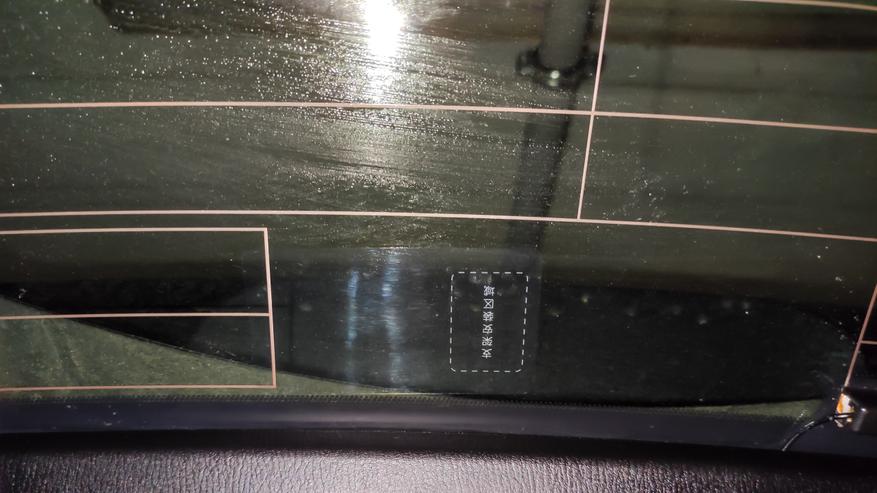
Крепление находится на самой камере, после установки не предполагается что ее нужно будет снимать.
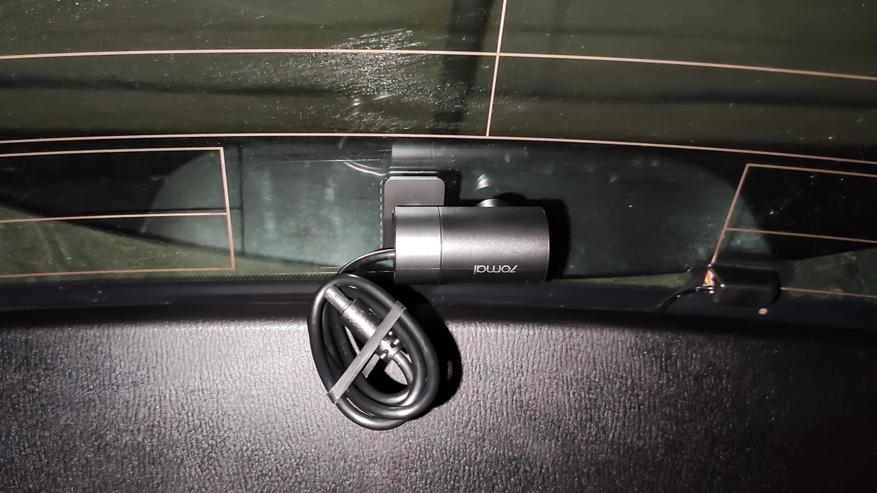
Клеим на пленку — обратите внимание что основная часть пленки находится с другой стороны и не мешает съемке.
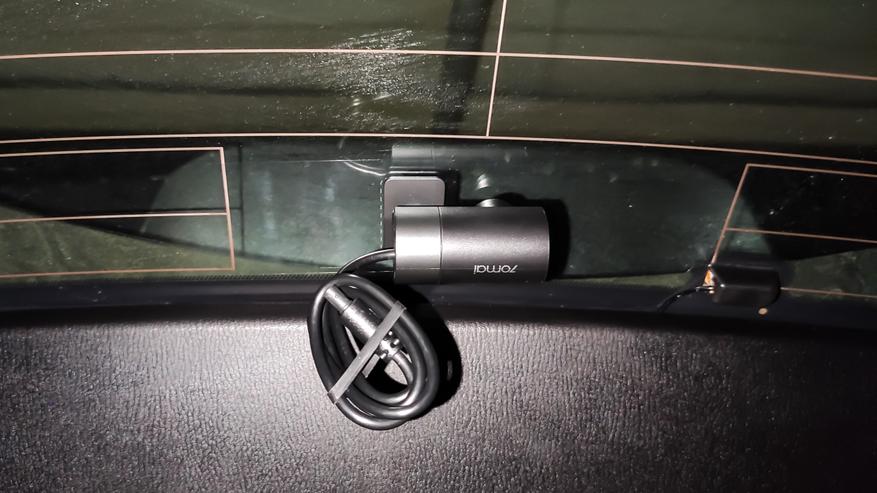
Подключаем кабель и думаем как максимально красиво и незаметно провести его через весь салон автомобиля. На самом деле это не так сложно как кажется.
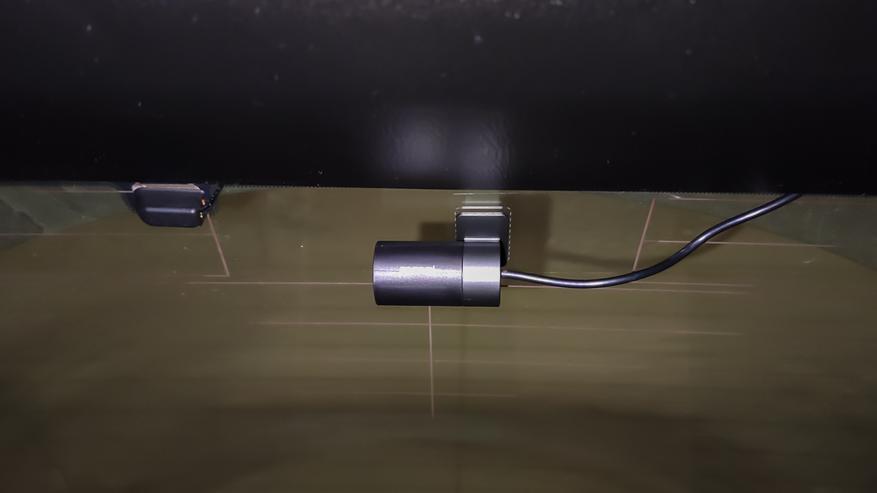
Разъем кабеля рассчитан на установку совместно с кабелем питания — длина разъемов подобрана так, что провода не мешают друг другу.
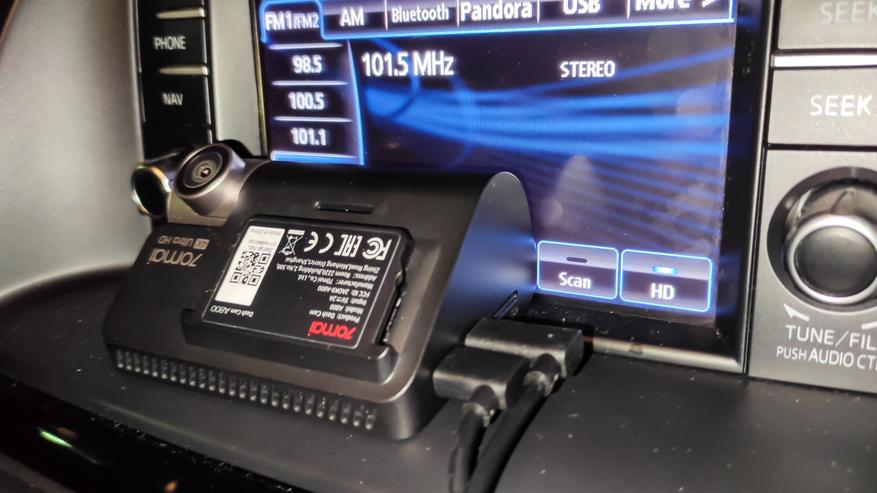
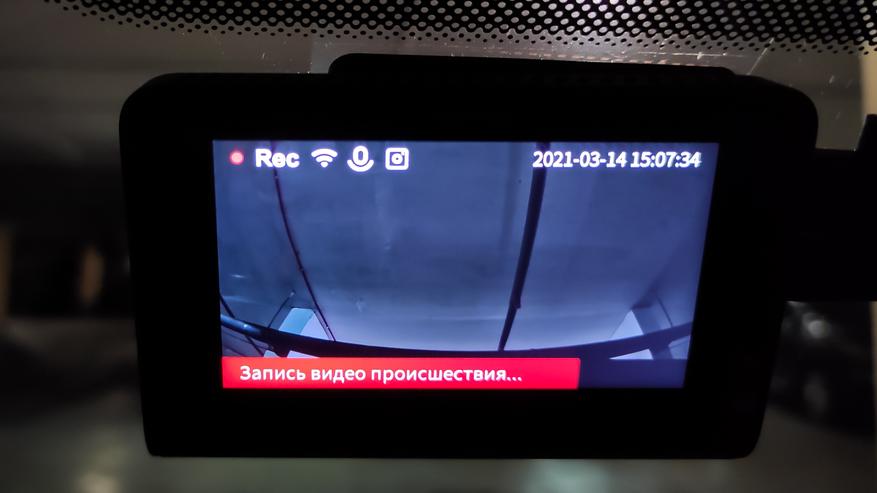
Пока я вешал обратно регистратор, он снова решил что что-то произошло и записал еще одно видео происшествия.
Примеры съемки
И наконец главная часть обзора — съемка. Все что будет показано дальше и звук и видео снято исключительно при помощи видеорегистратора и камеры заднего вида. Разрешение — оригинальное, правда обработанное Youtube, тем не менее весьма близко по качеству от оригинала.
Это ссылка сразу на таймкод с которого начинается съемка с регистратора.
Полная версия —
Видео версия обзора
Спасибо за внимание

Dash Cam A800S-1
User Manual • Uživatelský manuál •
Užívateľský manuál • Használati utasítás •
Benutzerhandbuch


3
Dear customer,
Thank you for purchasing our product. Please read the following instructions carefully
before first use and keep this user manual for future reference. Pay particular attention
to the safety instructions. If you have any questions or comments about the device,
please contact the customer line.
www.alza.co.uk/kontakt
✆ +44 (0)203 514 4411
Importer Alza.cz a.s., Jankovcova 1522/53, Holešovice, 170 00 Praha 7, www.alza.cz
4
Please read this manual carefully before using the product and keep it in a safe place.
Product Overview
Note: Illustrations of the product, accessories,
and user interface in the user manual are for
reference purposes only. The actual product
and functions may vary due to product
enhancements.

Installing the electrostatic sticker.
Clean your windshield and put the electrostatic
sticker on the recommended area as shown in
the figure. Make sure you remove air bubbles
between the sticker and the glass.
Note: Make sure to stick the electrostatic sticker
on a flat and smooth part of the windshield,
press it firmly, and avoid sticking it on the edge of
the windshield’s film to prevent it from falling
down.
Installing the memory card.
Insert the memory card into the card slot with its
contacts facing down until you hear a click. The
memory card is installed.
Installing the mount.
Attach the mount into the slot and slide up, as
shown in the figure on the left. You will hear a
snap when it is in place. Make sure the mount is
securely installed to the dash cam.
Mounting the dash cam.
Peel off the protective film from the adhesive
sticker on the base of the mount, and paste the
dash cam onto the electrostatic sticker in the
dotted area.
Connecting the power supply.
As shown in the figure, run the power cord along
the top of the windshield, down the A-pillar, and
around the glove compartment, so that the
power connector is near the cigarette lighter.
Connect the power cord to the car charger, then
plug the charger into the cigarette lighter socket.
Notes: Use the included crowbar to hide the
power cord underneath the vehicle’s headliner
and rubber seal along the A-pillar. Depending on
the vehicle, the cigarette lighter socket may be
located in a different position. The figure on the
left is for reference only.
Adjust the dash cam angle.
Turn on the dash cam and adjust the camera
angle based on the preview screen to ensure that
the camera is facing the front of the vehicle.

6
70mai app
This product may be used in conjunction with the 70mai app. Please
search for “70mai” in the App Store or Google Play or scan the QR
code to download and install the app.
Note: Android 4.4 or iOS 9.0 or above is required to connect to the
dash cam’s Wi-Fi hotspot with a mobile phone.
Memory Card
• A memory card (sold separately) must be installed in the dash cam before use.
• The dash cam supports standard MicroSD cards. Please use memory cards with
the minimum capacity of 32 GB and rating of U1(UHS-1) or above.
• The default file partition format of the memory card may be inconsistent with the
format supported by the dash cam. When inserting the memory card for the first
time, please format it in the dash cam before use. Formatting the memory card
will delete all files on the card. Please back up important data to another device
beforehand.
• The memory card may become damaged or deteriorate after repeated cycles of
overwriting, and this may affect its ability to save video and image files. If this
occurs, immediately replace it with a new memory card.
• Please use a high-quality memory card purchased from a reputable vendor.
Inferior memory cards may have issues such as the actual reading/writing speeds
do not match the stated speeds, and the actual storage capacity does not match
the stated storage capacity. We shall not be held liable for lost or damaged
videos caused by the use of a low-quality memory card.
• In order to avoid reading and writing speeds decreasing after prolonger used, it is
recommended to format the memory card in the dash cam every two weeks.
• Do not insert or remove a memory card while the dash cam is turned on.

7
Precautions
Before using this dash cam, please read all the precautions to ensure correct and safe
use.
• This dash cam is intended to assist drivers with the purpose of recording the
environment outside the vehicle. The dash cam does not guarantee the user’s
driving safety. We shall not be held liable for any accident, damage, or loss of
information caused by operating the dash cam while driving.
• Due to differences in vehicle conditions, driving style, driving environment, etc.,
some function may not work properly. A power failure, usage in environments
outside the normal operating temperature or humidity range, a collision, or a
damaged memory card may cause the dash cam to function abnormally. There is
no guarantee that this dash cam will function normally under all circumstances.
Videos recorded by this dash cam are for reference only.
• Please install this dash cam correctly, do not block the driver’s line of sight, nor
block the vehicle’s airbag, in order to avoid product failure or physical injury.
• Please use the included car charger, power cord, and other accessories in order
to avoid product failure due to non-conformance. We shall not be held liable for
any loss or damage caused by the use of a non-genuine car charger or power
cord.
• If the battery becomes deformed, swollen, or starts leaking during use or storage,
stop using the dash cam immediately in order to avoid safety issues, and contact
after-sales service.
• Please keep this dash cam away from any strong magnetic fields, as they may
cause damage to the dash cam.
• Do not use this dash cam in environments with temperatures over 60 °C or below
-10 °C.
• Please only use this dash cam within the scope permitted by law.

8
Safety Information
Caution: Battery abuse or mishandling can cause overheat, liquid leakage, or an
explosion. To avoid possible injury, do the following:
• Do not open, disassemble, or service any battery.
• Do not attempt to replace the internal rechargeable lithium batteries.
• Do not crush or puncture the battery.
• Do not short-circuit the battery or expose it to water or other liquids.
• Keep the battery away from children.
• Keep the battery away from fire.
• Do not leave the battery in an extremely high-temperature environment or an
extremely low air pressure environment.
• Stop using the battery if it is damaged, or if you notice any discharge or the build-
up of foreign materials on the battery leads. We recommend that the batteries be
charged about once every three months to prevent overcharge.
• Do not put the battery in trash that is disposed of in landfills. When disposing of
the battery, comply with local laws or regulations.
Specifications
Wi-Fi IEEE 802.11 b/g/n 2.4GHz and 5GHz
List of Contents
• Dash cam
• Mount
• Power cord
• Wiring crowbar
• Electrostatic sticker ×2
• Adhesive sticker ×2 (with one pre-
applied to the mount)

9
Warranty Conditions
A new product purchased in the Alza.cz sales network is guaranteed for 2 years. If you
need repair or other services during the warranty period, contact the product seller
directly, you must provide the original proof of purchase with the date of purchase.
The following are considered to be a conflict with the warranty conditions, for
which the claimed claim may not be recognized:
• Using the product for any purpose other than that for which the product is intended
or failing to follow the instructions for maintenance, operation, and service of the
product.
• Damage to the product by a natural disaster, the intervention of an unauthorized
person or mechanically through the fault of the buyer (e.g., during transport,
cleaning by inappropriate means, etc.).
• Natural wear and aging of consumables or components during use (such as
batteries, etc.).
• Exposure to adverse external influences, such as sunlight and other radiation or
electromagnetic fields, fluid intrusion, object intrusion, mains overvoltage,
electrostatic discharge voltage (including lightning), faulty supply or input voltage and
inappropriate polarity of this voltage, chemical processes such as used power
supplies, etc.
• If anyone has made modifications, modifications, alterations to the design or
adaptation to change or extend the functions of the product compared to the
purchased design or use of non-original components.

10
EU Declaration of Conformity
Identification data of the manufacturer’s / importer’s authorized representative:
Importer: Alza.cz a.s.
Registered office: Jankovcova 1522/53, Holešovice, 170 00 Prague 7
CIN: 27082440
Subject of the declaration:
Title: Dash cam
Model / Type: 70mai A800S-1
The above product has been tested in accordance with the standard(s) used to
demonstrate compliance with the essential requirements laid down in the
Directive(s):
Directive No. 2014/53/EU
Directive No. 2011/65/EU as amended 2015/863/EU
Prague, 1.10.2022

11
WEEE
This product must not be disposed of as normal household waste in accordance with
the EU Directive on Waste Electrical and Electronic Equipment (WEEE — 2012/19 / EU).
Instead, it shall be returned to the place of purchase or handed over to a public
collection point for the recyclable waste. By ensuring this product is disposed of
correctly, you will help prevent potential negative consequences for the environment
and human health, which could otherwise be caused by inappropriate waste handling of
this product. Contact your local authority or the nearest collection point for further
details. Improper disposal of this type of waste may result in fines in accordance with
national regulations.

12
Vážený zákazníku,
děkujeme vám za zakoupení našeho produktu. Před prvním použitím si prosím pečlivě
přečtěte následující pokyny a uschovejte si tento návod k použití pro budoucí potřebu.
Zvláštní pozornost věnujte bezpečnostním pokynům. Pokud máte k přístroji jakékoli
dotazy nebo připomínky, obraťte se na zákaznickou linku.
www.alza.cz/kontakt
✆ +420 255 340 111
Dovozce Alza.cz a.s., Jankovcova 1522/53, Holešovice, 170 00 Praha 7, www.alza.cz

13
Před použitím výrobku si pečlivě přečtěte tento návod a uschovejte jej na bezpečném
místě.
Přehled produktů
Poznámka: Vyobrazení výrobku, příslušenství a
uživatelského rozhraní v uživatelské příručce
slouží pouze pro referenční účely. Skutečný
výrobek a funkce se mohou lišit v důsledku
vylepšení výrobku.

Instalace elektrostatické nálepky.
Očistěte čelní sklo a nalepte elektrostatickou
nálepku na doporučené místo, jak je znázorněno
na obrázku. Ujistěte se, že jste odstranili
vzduchové bubliny mezi samolepkou a sklem.
Poznámka: Dbejte na to, abyste elektrostatickou
samolepku nalepili na rovnou a hladkou část
čelního skla, pevně ji přitlačte a nelepte ji na okraj
fólie čelního skla, abyste zabránili jejímu pádu.
Instalace paměťové karty.
Vložte paměťovou kartu do slotu pro kartu
kontakty směrem dolů, dokud neuslyšíte
cvaknutí. Paměťová karta je nainstalována.
Instalace držáku.
Připevněte držák do drážky a posuňte jej nahoru,
jak je znázorněno na obrázku vlevo. Když je držák
na svém místě, uslyšíte cvaknutí. Ujistěte se, že je
držák bezpečně nainstalován na palubní kameru.
Montáž palubní kamery.
Odlepte ochrannou fólii ze samolepky na
základně držáku a nalepte palubní kameru na
elektrostatickou nálepku v tečkované oblasti.
Připojení zdroje napájení.
Jak je znázorněno na obrázku, veďte napájecí
kabel podél horní části čelního skla, po A-sloupku
a kolem přihrádky na rukavice tak, aby se
napájecí konektor nacházel v blízkosti zapalovače
cigaret. Připojte napájecí kabel k nabíječce
automobilu a poté zapojte nabíječku do zásuvky
zapalovače cigaret.
Poznámky: Pomocí přiloženého páčidla
schovejte napájecí kabel pod strop vozidla a
gumové těsnění podél A-sloupku. V závislosti na
vozidle může být zásuvka zapalovače cigaret
umístěna na jiném místě. Obrázek vlevo je pouze
orientační.
Nastavte úhel natočení palubní kamery.
Zapněte palubní kameru a na základě náhledu na
obrazovce nastavte úhel kamery tak, aby
směřovala na přední část vozidla.

15
Aplikace 70mai
Tento produkt lze používat ve spojení s aplikací 70mai. Vyhledejte
prosím «70mai» v App Store nebo Google Play nebo naskenujte QR
kód pro stažení a instalaci aplikace.
Poznámka: Pro připojení mobilního telefonu k hotspotu Wi-Fi
autokamery je vyžadován systém Android 4.4 nebo iOS 9.0 nebo
novější.
Paměťová karta
• Před použitím je nutné do autokamery vložit paměťovou kartu (prodává se
samostatně).
• Autokamera podporuje standardní karty MicroSD. Používejte paměťové karty s
minimální kapacitou 32 GB a stupněm U1 (UHS—1) nebo vyšším.
• Výchozí formát oddílu souboru na paměťové kartě nemusí být shodný s
formátem podporovaným autokamerou. Při prvním vložení paměťové karty ji
před použitím naformátujte v autokameře. Formátováním paměťové karty dojde
ke smazání všech souborů na kartě. Důležitá data si prosím předem zálohujte na
jiné zařízení.
• Paměťová karta se může po opakovaných cyklech přepisování poškodit nebo
znehodnotit, což může ovlivnit její schopnost ukládat video a obrazové soubory.
Pokud k tomu dojde, okamžitě ji vyměňte za novou paměťovou kartu.
• Používejte vysoce kvalitní paměťovou kartu zakoupenou u renomovaného
prodejce. Horší paměťové karty mohou mít problémy, například skutečné
rychlosti čtení/zápisu neodpovídají udávaným rychlostem a skutečná úložná
kapacita neodpovídá udávané kapacitě. Neneseme odpovědnost za ztrátu nebo
poškození videa způsobené použitím nekvalitní paměťové karty.
• Aby se zabránilo snížení rychlosti čtení a zápisu po delším používání,
doporučujeme paměťovou kartu v autokameře každé dva týdny naformátovat.
• Nevkládejte ani nevyjímejte paměťovou kartu, pokud je autokamera zapnutá.

16
Bezpečnostní opatření
Před použitím této autokamery si přečtěte všechna bezpečnostní opatření, abyste
zajistili její správné a bezpečné používání.
• Tato palubní kamera je určena pro řidiče, kterým pomáhá zaznamenávat
prostředí mimo vozidlo. Přístrojová kamera nezaručuje bezpečnost jízdy
uživatele. Neneseme odpovědnost za případné nehody, škody nebo ztrátu
informací způsobené provozem palubní kamery během jízdy.
• Vzhledem k rozdílným podmínkám ve vozidle, stylu jízdy, jízdnímu prostředí atd.
nemusí některé funkce fungovat správně. Výpadek napájení, používání v
prostředí mimo běžný rozsah provozní teploty nebo vlhkosti, kolize nebo
poškozená paměťová karta mohou způsobit nestandardní funkci palubní kamery.
Neexistuje žádná záruka, že tato palubní kamera bude fungovat normálně za
všech okolností. Videa nahraná touto autokamerou slouží pouze jako referenční.
• Tuto palubní kameru instalujte správně, neblokujte zorné pole řidiče ani airbag
vozidla, abyste předešli selhání výrobku nebo fyzickému zranění.
• Používejte přiloženou nabíječku do auta, napájecí kabel a další příslušenství,
abyste předešli selhání výrobku z důvodu neshody. Neneseme odpovědnost za
ztráty nebo škody způsobené použitím neoriginální nabíječky do auta nebo
napájecího kabelu.
• Pokud se baterie během používání nebo skladování zdeformuje, nabobtná nebo
začne vytékat, okamžitě přestaňte autokameru používat, abyste předešli
bezpečnostním problémům, a kontaktujte poprodejní servis.
• Tuto palubní kameru uchovávejte mimo dosah silných magnetických polí, protože
mohou způsobit její poškození.
• Tuto palubní kameru nepoužívejte v prostředí s teplotou vyšší než 60 °C nebo
nižší než —10 °C. Všimněte si, že teplota výrobku se při jeho používání zvyšuje.
• Tuto autokameru používejte pouze v rozsahu povoleném zákonem.

17
Bezpečnostní informace
Upozornění: Zneužití baterie nebo nesprávné zacházení s ní může způsobit přehřátí,
únik kapaliny nebo výbuch. Abyste předešli možnému zranění, postupujte následovně:
• Baterii neotevírejte, nerozebírejte ani neprovádějte servis.
• Nepokoušejte se vyměnit vnitřní dobíjecí lithiové baterie.
• Akumulátor nemačkejte ani nepropichujte.
• Baterii nezkratujte a nevystavujte ji působení vody nebo jiných kapalin.
• Baterii uchovávejte mimo dosah dětí.
• Baterii uchovávejte mimo dosah ohně.
• Nenechávejte baterii v prostředí s extrémně vysokou teplotou nebo extrémně
nízkým tlakem vzduchu.
• Pokud je baterie poškozená nebo pokud zjistíte, že se vybíjí nebo se na jejích
vodičích usazují cizí materiály, přestaňte ji používat. Doporučujeme akumulátory
nabíjet přibližně jednou za tři měsíce, aby nedošlo k jejich přebití.
• Baterii nevyhazujte do odpadků, které se ukládají na skládky. Při likvidaci baterie
dodržujte místní zákony nebo předpisy.
Specifikace
Lithium-polymerová baterie
Wi-Fi IEEE 802.11 b/g/n 2,4GHz a 5GHz
Obsah balení
• Přístrojová kamera
• Montáž
• Napájecí kabel
• Zapojovací páčidlo
• Elektrostatická nálepka ×2
• Samolepka ×2 (s jednou
předlepenou na držáku)

18
Záruční podmínky
Na nový výrobek zakoupený v prodejní síti Alza.cz se vztahuje záruka 2 roky. V případě
potřeby opravy nebo jiného servisu v záruční době se obraťte přímo na prodejce
výrobku, je nutné předložit originální doklad o koupi s datem nákupu.
Za rozpor se záručními podmínkami, pro který nelze reklamaci uznat, se považují
následující skutečnosti:
• Používání výrobku k jinému účelu, než pro který je výrobek určen, nebo
nedodržování pokynů pro údržbu, provoz a servis výrobku.
• Poškození výrobku přírodními podmínkami, zásahem neoprávněné osoby nebo
mechanicky vinou kupujícího (např. při přepravě, čištění nevhodnými prostředky
apod.).
• Přirozené opotřebení a stárnutí spotřebního materiálu nebo součástí během
používání (např. baterií atd.).
• Působení nepříznivých vnějších vlivů, jako je sluneční záření a jiné záření nebo
elektromagnetické pole, vniknutí kapaliny, vniknutí předmětu, přepětí v síti,
elektrostatický výboj (včetně blesku), vadné napájecí nebo vstupní napětí a nevhodná
polarita tohoto napětí, chemické procesy, např. použité zdroje atd.
• Pokud někdo provedl úpravy, modifikace, změny konstrukce nebo adaptace za
účelem změny nebo rozšíření funkcí výrobku oproti zakoupené konstrukci nebo
použití neoriginálních součástí.

19
EU prohlášení o shodě
Identifikační údaje zplnomocněného zástupce výrobce/dovozce:
Dovozce: Alza.cz a.s.
Sídlo společnosti: Jankovcova 1522/53, Holešovice, 170 00 Praha 7.
IČO: 27082440
Předmět prohlášení:
Název: Přístrojová kamera
Model / typ: 70mai A800S-1
Výše uvedený výrobek byl testován v souladu s normou (normami) použitou
(použitými) k prokázání shody se základními požadavky stanovenými ve směrnici
(směrnicích):
Směrnice č. 2014/53/EU
Směrnice č. 2011/65/EU ve znění 2015/863/EU
Praha, 1.10.2022

20
WEEE
Tento výrobek nesmí být likvidován jako běžný domovní odpad v souladu se směrnicí EU
o odpadních elektrických a elektronických zařízeních (WEEE — 2012/19/EU). Místo toho
musí být vrácen na místo nákupu nebo předán na veřejné sběrné místo
recyklovatelného odpadu. Tím, že zajistíte správnou likvidaci tohoto výrobku, pomůžete
předejít možným negativním důsledkům pro životní prostředí a lidské zdraví, které by
jinak mohly být způsobeny nevhodným nakládáním s odpadem z tohoto výrobku. Další
informace získáte na místním úřadě nebo na nejbližším sběrném místě. Nesprávná
likvidace tohoto typu odpadu může mít za následek pokuty v souladu s vnitrostátními
předpisy.