
6 4 V o i c e E x p a n d a b l e S y n t h
M u s i c i a n ’ s M a n u a l
V e r s i o n 1 . 5 0

M R — R a c k M u s i c i a n ’ s M a n u a l :
Documentation Team: Robby Berman, Jonathan Coulton, Tom Tracy, Bill Whipple
Copyright © 1995, 1996
ENSONIQ® Corp
155 Great Valley Parkway
Box 3035
Malvern, PA 19355-0735
USA
Printed in U.S.A.
All Rights Reserved
Please record the following information:
Your Authorized ENSONIQ Dealer:___________________________ Phone:_______________
Your Dealer Sales Representative:_________________________________________________
Serial Number of Unit:___________________________ Date of Purchase:_________________
Your Authorized ENSONIQ Dealer is your primary source for service and support. The above information will
be helpful in communicating with your Authorized ENSONIQ Dealer, and provide necessary information
should you need to contact ENSONIQ Customer Service. If you have any questions concerning the use of this
unit, please contact your Authorized ENSONIQ Dealer first. For additional technical support, or to find the
name of the nearest Authorized ENSONIQ Repair Station, call ENSONIQ Customer Service at (610) 647-3930
Monday through Friday 9:30 AM to 12:15 PM and 1:15 PM to 6:30 PM Eastern Time. Between 1:15 PM and
5:00 PM we experience our heaviest call load. During these times, there may be delays in answering your
call.
You can utilize ENSONIQ’s Automatic Fax Retrieval System to obtain further information about your MRRack and other ENSONIQ products. The Fax Retrieval System is available 24 hours a day at (800) 257-1439.
If you’re connected to the Internet, visit ENSONIQ’s World Wide Web site at www.ensoniq.com for more
information on the MR-Rack and other ENSONIQ products. CompuServe subscribers can also find ENSONIQ
at GO ENSONIQ.
This manual is copyrighted and all rights are reserved by ENSONIQ Corp. This document may not, in whole
or in part, be copied, photocopied, reproduced, translated, or reduced to any electronic medium or machine
readable form without prior written consent from ENSONIQ Corp. The MR-Rack software/firmware is
copyrighted and all rights are reserved by ENSONIQ Corp. Although every effort has been made to ensure the
accuracy of the text and illustrations in this manual, no guarantee is made or implied in this regard.
IMPORTANT:
Note: This equipment has been designed and found to comply with the limits for a Class B digital device,
pursuant to Part 15 of the FCC rules. These limits are designed to provide reasonable protection against
harmful interference in a residential installation. This equipment generates, uses and can radiate radio
frequency energy and, if not installed and used in accordance with the instructions, may cause harmful
interference to radio communications. However, there is no guarantee that interference will not occur in a
particular installation. If this equipment does cause harmful interference to radio or television reception,
which can be determined by turning the equipment off and on, the user is encouraged to try to correct the
interference by one or more of the following measures:
* Reorient or relocate the receiving antenna.
* Increase the separation between the equipment and receiver.
* Connect the equipment into an outlet on a circuit different from that to which the receiver is connected.
* Consult the dealer or an experienced radio/TV technician for help.
Changes or modifications to the product not expressly approved by ENSONIQ could void the user’s FCC
authority to operate the equipment.
CAUTION! Danger of explosion if battery is incorrectly replaced. Replace only with the same or
equivalent type recommended by the manufacturer. Discard used batteries according to
manufacturer’s instructions.
In order to fulfill warranty requirements, the MR-Rack should be serviced only by an Authorized ENSONIQ
Repair Station. The ENSONIQ serial number label must appear on the outside of the unit, or the ENSONIQ
warranty is void.
• ENSONIQ, MR-Rack are trademarks of ENSONIQ Corp.
Part # 9310 0191 01 — E Model # MM-130
I n s t a n t M R — R a c k !
The following is not a description of the only way to use the MR-Rack—it simply
gets you down to the business of making music immediately. It doesn’t explain
any of the whys and wherefores or discuss the many creative possibilities of the
MR-Rack. The rest of this manual, however, does.
To Get Started
1. Turn the MR-Rack’s front-panel Volume knob down all the way.
2. Connect the MR-Rack’s Main Outs (the two jacks on the right when viewing
the MR-Rack from the rear) to a mixer or stereo keyboard amplifier set to
conservative levels, or connect a pair of stereo headphones to the MR-Rack’s
front-panel Phones jack.
3. Connect the MIDI Out of your sequencer/interface/controller, etc. to the MRRack’s MIDI In.
4. Power up your sequencer/interface/controller, etc.
5. Connect the MR-Rack to a grounded AC outlet, using its supplied AC cord.
6. Power up the MR-Rack.
7. Bring up the MR-Rack’s Volume knob about halfway—you can adjust it
later, after you start playing some music. Your display looks something like
this:
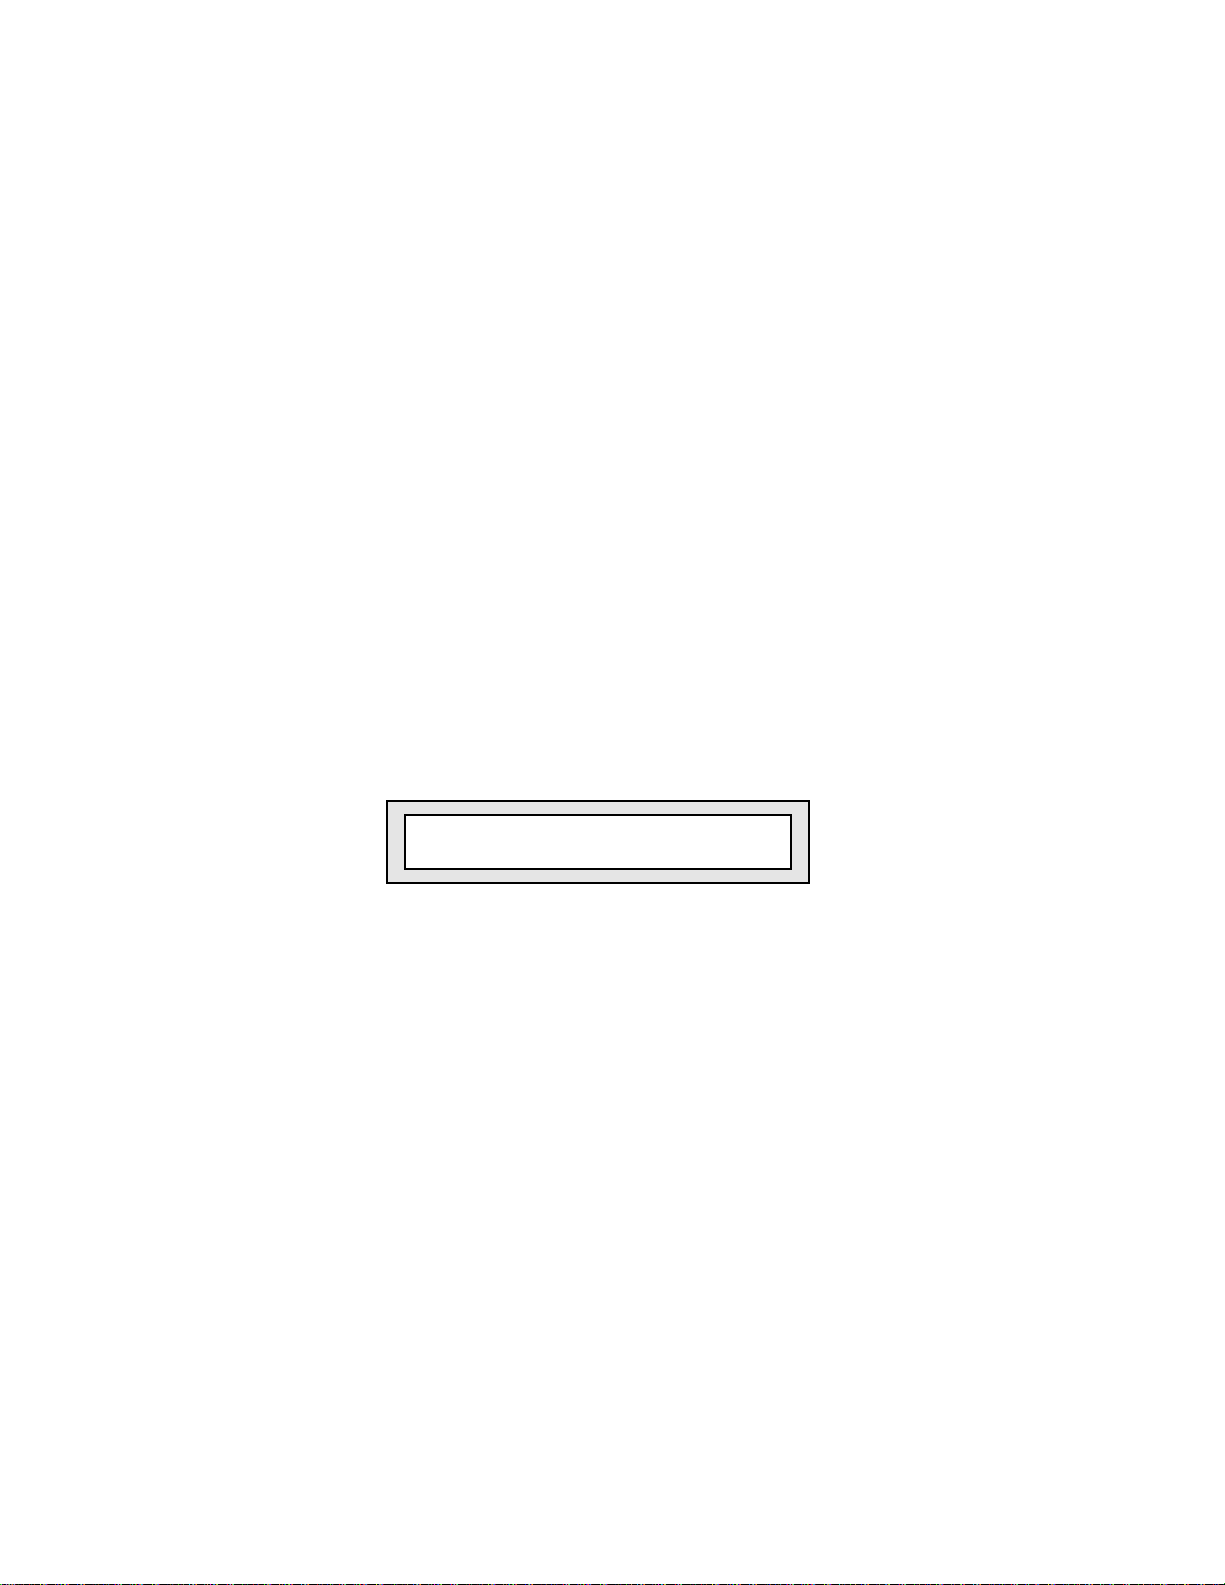
pt01:§01 ROM:004:030
DEMO-SND: Dense Mist
You’re seeing the Sound selected for Part 01. The MR-Rack contains 16 Parts,
which are currently set to MIDI channels 1-16. Try the Sound out, if you like, by
setting your MIDI controller to transmit on MIDI channel 1.
To Change the Sound on This Part
1. Turn the Sound Type knob clockwise or counter-clockwise to select the type
of Sound you want.
2. Turn the Sound Name knob in either direction to choose a particular Sound.
To Get to the Other 15 Parts (MIDI Channels 2-16)
• Press one of the Select Parts buttons to select another Part.
The number of the Part you’re working on will be shown in the upper left-
hand part of the display.
To Mute a Part
• Select the Part you want to silence and press the Mute button.
The button’s red LED will light, and the word “mute” will be displayed.

T e m p e r a t u r e G u i d e l i n e s
The MR-Rack contains a substantial
amount of computerized and
electronic circuitry that can be
susceptible to damage when exposed
to extreme temperature changes.
When the MR-Rack is brought inside
after sitting in a cold climate (i.e.,
the back seat of your car),
condensation builds up on the
internal circuitry in much the same
way a pair of glasses fogs up when
you come inside on a cold day. If the
unit is powered up as this
condensation occurs, components
can short out or be damaged.
Excessively high temperatures also
pose a threat to the unit, stressing
both the internal circuits as well as
the case. With this in mind, it is
highly advisable to follow these
precautions when storing, mounting
and setting up your MR-Rack:
• Avoid leaving the MR-Rack in
temperatures of less than 50
degrees Fahrenheit or more than
100 degrees Fahrenheit.
• When bringing the MR-Rack
indoors after travel, allow the
unit at least 20 minutes to reach
room temperature before
powering up. In the case of
excessive outdoor temperatures
(below 50 degrees Fahrenheit or
above 100 degrees Fahrenheit),
allow an hour or more before
power up.
• Avoid leaving the MR-Rack
inside a vehicle exposed to direct
sunlight.
C l e a n U p a n d M a i n t e n a n c e
Clean the exterior of your MR-Rack
with a soft, lint-free, dry (or slightly
damp) cloth. You can use a slightly
dampened cloth (with a mild neutral
detergent) to remove stubborn dirt,
but make sure that the MR-Rack is
thoroughly dry before turning on
the power. Never use alcohol,
benzene, volatile cleaners, solvents,
abrasives, polish or rubbing
compounds.
R a c k M o u n t I n s t r u c t i o n s
The MR-Rack can be rack mounted
in a standard 19” audio rack:
• The MR-Rack occupies one
standard rack space (1 3/4”). We
recommend the use of nylon
washers when rack mounting
any unit. This will protect the
faceplate from any damage.
• If you’re using only two screws
to mount your unit into a rack
space (we don’t recommend this),
we suggest that you support the
bottom of the unit.
• You may want to install the MRRack into a rack using quickrelease screws. Quick release
screws don’t require a
screwdriver, so it’s easy to move
things in and out of a rack. Four
posts are screwed into the rack
holes, the unit goes over the
posts, and then knurled nuts are
screwed on by hand.
P o l a r i z a t i o n a n d G r o u n d i n g
Like many modern electrical devices,
your ENSONIQ product has a threeprong power cord with earth ground
to ensure safe operation. Some
products have power cords with
only two prongs and no earth
ground. To ensure safe operation,
modern products with two-prong
power cords have polarized plugs
which can only be inserted into an
outlet the proper way.
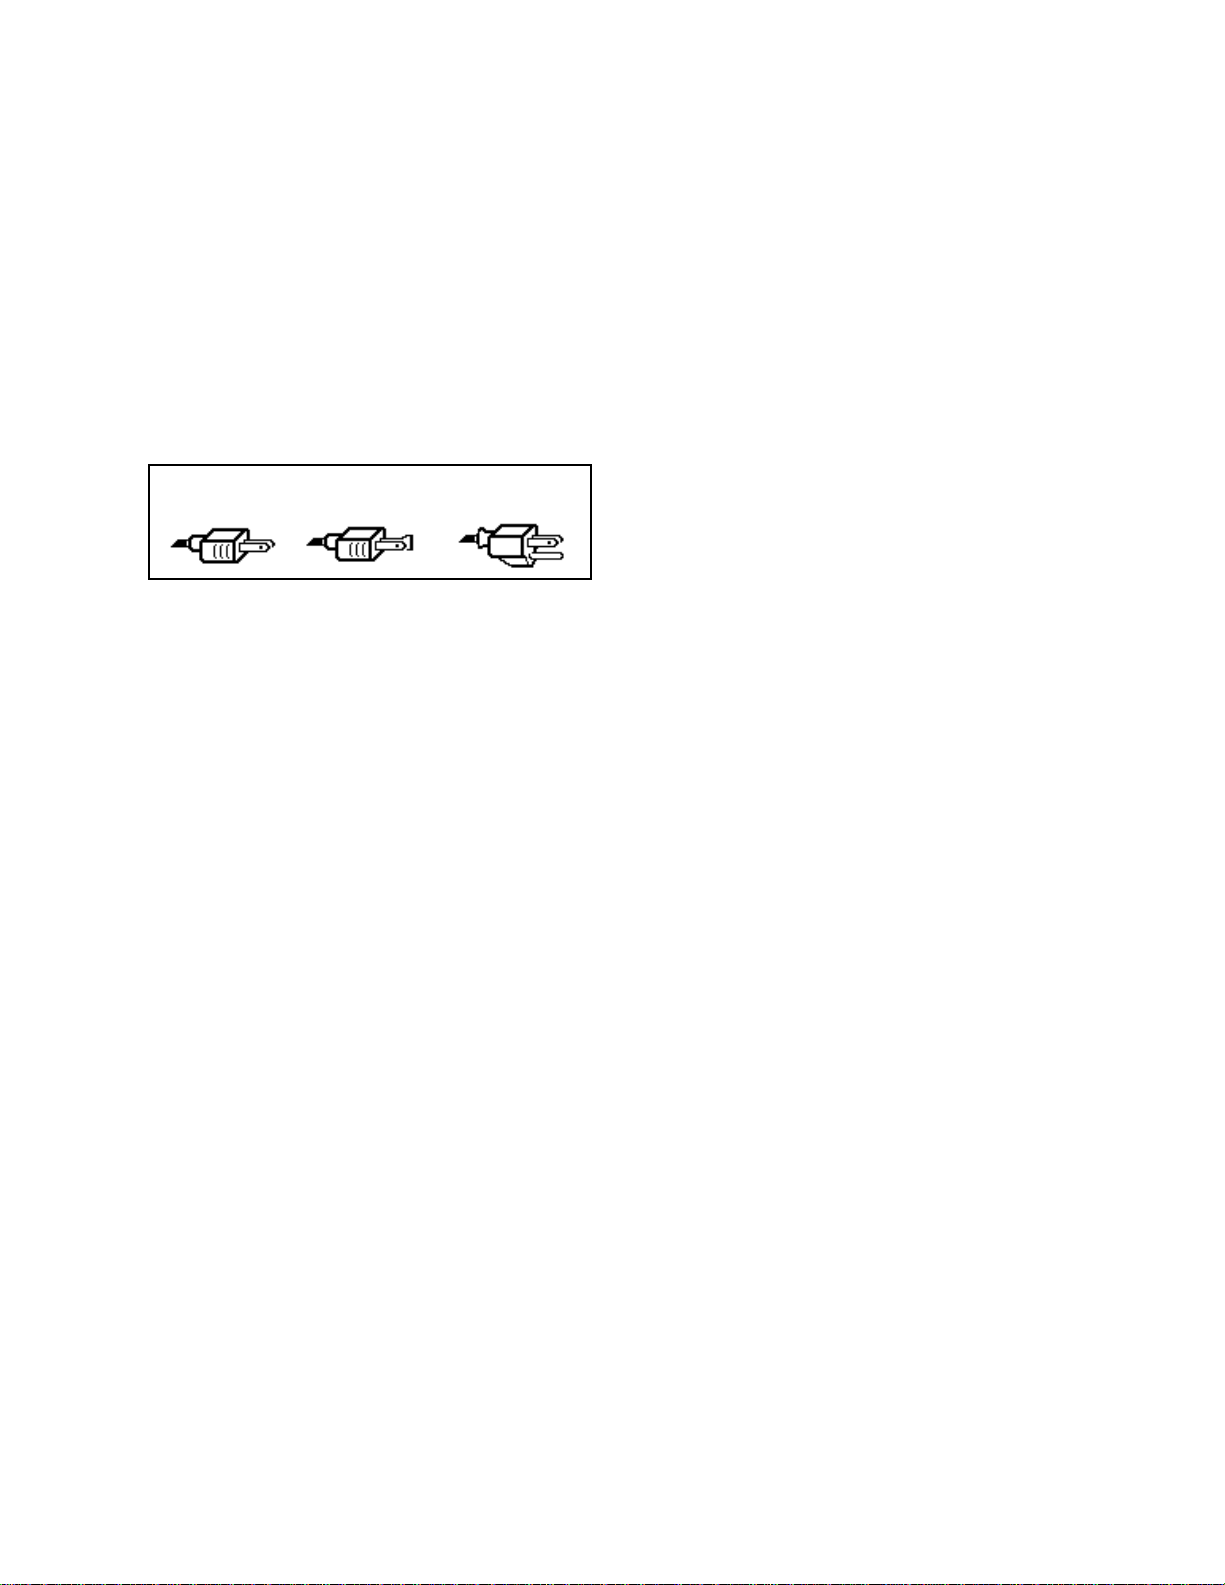
Three-prong
PolarizedNon-polarized
Some products, such as older guitar
amplifiers, do not have polarized
plugs and can be connected to an
outlet incorrectly. This may result in
dangerous high voltages on the
audio connections, which could
cause you physical harm or damage
any properly grounded equipment to
which they are connected, such as
your ENSONIQ product.
To avoid shock hazards or
equipment damage, we recommend
the following precautions:
• If you own equipment with twopronged power cords, check to
see if they are polarized or nonpolarized. You might consider
having an authorized repair
station change any nonpolarized plugs on your
equipment to polarized plugs to
avoid future problems.
• Exercise caution when using
extension cords or plug adapters.
Proper polarization should
always be maintained from the
outlet to the plug. The use of
polarized extension cords and
adapters is the easiest way to
maintain proper polarity.
• Whenever possible, connect all
products with grounded power
cords to the same outlet ground.
This will ensure a common
ground level to prevent
with earth ground
equipment damage and minimize
hum in the audio output.
AC outlet testers are available from
many electronic supply and
hardware stores. These can be used
to check for proper polarity of outlets
and cords.
A C L i n e C o n d i t i o n i n g
As with any computer device, the
MR-Rack is sensitive to sharp peaks
and drops in the AC line voltage.
Lightning strikes, power drops, or
sudden and erratic surges in the AC
line voltage can scramble the
internal memory, and in some cases,
damage the unit’s hardware. Here
are a few suggestions to help guard
against such occurrences:
• A Surge/Spike Suppressor. The
cheaper of the options, a
surge/spike suppressor absorbs
surges and protects your gear
from all but the most severe
over-voltage conditions. You can
get multi-outlet power strips
with built-in surge/spike
suppressors for little more than
the cost of unprotected power
strips, so using one is a good
investment for all your electronic
equipment.
• A Line Conditioner. This is the
best, but by far the more
expensive way to protect your
gear. In addition to protecting
against surges and spikes, a line
conditioner guards the
equipment against excessively
high or low line voltages. If you
use the MR-Rack in lots of
different locations with varying
or unknown AC line conditions,
you might consider investing in
a line conditioner.

Table of Contents
Instant MR-Rack!
Chapter 1—Welcome
Welcome!……………………………………………………………………………………………………..1
Getting Ready to Listen…………………………………………………………………………………1
Powering Up…………………………………………………………………………………………………1
Choosing Sounds…………………………………………………………………………………………2
Understanding the MR-Rack…………………………………………………………………………..3
Sounds……………………………………………………………………………………………………..3
Parts…………………………………………………………………………………………………………3
Performances……………………………………………………………………………………………..4
Choosing Performances on the MR-Rack……………………………………………………4
Effects……………………………………………………………………………………………………….4
Drum Kits………………………………………………………………………………………………….5
Staks………………………………………………………………………………………………………..5
SoundFinder™…………………………………………………………………………………………..5
How the MR-Rack’s Memory Works………………………………………………………………5
ROM and RAM…………………………………………………………………………………………..6
ROM Cards………………………………………………………………………………………………..6
SRAM Cards………………………………………………………………………………………………6
EXP Series Wave Expansion Boards……………………………………………………………..6
The MR-Rack Display…………………………………………………………………………………6
Playing the MR-Rack Demo……………………………………………………………………………7
To Play the MR-Rack Main Demo………………………………………………………………7
Playing Other Demos…………………………………………………………………………………….7
To Play Other MR-Rack Demos…………………………………………………………………7
Other Points of Interest…………………………………………………………………………………8
All Notes Off………………………………………………………………………………………………8
The MR-Rack’s Battery……………………………………………………………………………….8
Battery Low Warning……………………………………………………………………………….8
If You Experience Odd Behavior…………………………………………………………………..9
To Perform A Soft Reset……………………………………………………………………………9
To Perform a Standard Reinitialization……………………………………………………..9
To Perform a Hard Reinitialization…………………………………………………………….9
Available Options for Your MR-Rack………………………………………………………………10
Need More Help?……………………………………………………………………………………………10
Table of Contents
Chapter 2—Connections
Introduction…………………………………………………………………………………………………13
To Get Ready…………………………………………………………………………………………….13
What Connections Need to be Made?……………………………………………………………13
Making MIDI Connections……………………………………………………………………………..13
Using the MR-Rack with a Controller……………………………………………………………14
What You’ll Need…………………………………………………………………………………….14
To Connect the MR-Rack………………………………………………………………………….14
Connecting the Rest of Your System…………………………………………………………14
Using the MR-Rack with a Workstation………………………………………………………..14
What You’ll Need…………………………………………………………………………………….14
To Connect the MR-Rack………………………………………………………………………….15
Connecting the Rest of Your System…………………………………………………………15
Using the MR-Rack with a Stand-Alone Sequencer………………………………………..15
What You’ll Need…………………………………………………………………………………….15
To Connect the MR-Rack………………………………………………………………………….16
Connecting the Rest of Your System…………………………………………………………16
Editing Sounds with the MR-Rack and a Computer……………………………………….16
ENSONIQ MR-Rack Musician’s Manual Table of Contents — 1

Table of Contents
Sequencing with the MR-Rack, a Computer and a Controller…………………………17
Using the MR-Rack with a Computer, Controller and MIDI Merger…………………..18
Using the MR-Rack with a Computer, Controller and MIDI Patchbay………………19
Making Audio Connections……………………………………………………………………………21
Making the Power Connection……………………………………………………………………….22
Powering Up………………………………………………………………………………………………22
Confirming Your MIDI Connection…………………………………………………………………23
To Verify that the MR-Rack is Receiving MIDI……………………………………………….23
Setting Volume Levels…………………………………………………………………………………..24
Using the MR-Rack for General MIDI Music……………………………………………………..25
Moving On…………………………………………………………………………………………………..25
What You’ll Need…………………………………………………………………………………….16
To Connect the MR-Rack…………………………………………………………………………16
Connecting the Rest of Your System…………………………………………………………17
What You’ll Need…………………………………………………………………………………….17
To Connect the MR-Rack…………………………………………………………………………17
Connecting the Rest of Your System…………………………………………………………18
What You’ll Need…………………………………………………………………………………….18
To Connect the MR-Rack…………………………………………………………………………18
Connecting the Rest of Your System…………………………………………………………19
What You’ll Need…………………………………………………………………………………….20
To Make Your MIDI Patchbay Connections………………………………………………..20
Connecting the Rest of Your System…………………………………………………………20
To Connect the MR-Rack’s AC Power…………………………………………………………22
To Confirm that the MR-Rack is Responding to MIDI………………………………….24
Chapter 3—Personalizing Your System
Using the Global Pitch Bend Settings……………………………………………………………..26
Global Pitch Bend Up and Down…………………………………………………………………27
To Determine the Global Pitch Bend Up Range…………………………………………..27
To Determine the Global Pitch Bend Down Range………………………………………27
Setting the Global Pitch Bend Mode…………………………………………………………….27
To Determine the Global Pitch Bend’s Behavior…………………………………………28
Retuning the MR-Rack………………………………………………………………………………….28
Fine Tuning the MR-Rack…………………………………………………………………………..28
To Fine Tune the MR-Rack………………………………………………………………………28
Using Pitch Tables……………………………………………………………………………………..28
To Assign a Global Pitch Table…………………………………………………………………29
To Assign a Part to a Special Pitch Table…………………………………………………..29
Synchronizing the MR-Rack to MIDI………………………………………………………………29
To Set the Global Tempo Clock as the Timing Reference……………………………..29
To Sync the MR-Rack’s Clock to an External MIDI Device……………………………29
To Set the Global Clock Tempo…………………………………………………………………30
Protecting Part Settings…………………………………………………………………………………30
To Protect Part Parameter Settings When New Sounds are Selected……………..30
To Protect Part Parameters from Reset All Controllers MIDI Messages……………31
To Allow the Selection of New Sounds to Reset Part Parameter Settings……….31
To Allow Reset All Controllers Messages to Reset Part Parameter Settings…….31
Letting the MR-Rack Pick Your Chorus or Reverb…………………………………………….31
To Let the MR-Rack Automatically Pick a Sound’s Chorus or Reverb……………32
To Protect Part Effect Bus Settings When a New Sound is Selected………………32
Using the MR-Rack’s Four Outputs………………………………………………………………..32
Routing Sounds to Specific Outputs……………………………………………………………33
To Send a Part, Its Sound and Effect to the Desired Outputs………………………33
To Send a Part and Its Dry Sound to the Desired Outputs………………………….33
Determining the Behavior of the Aux Outs…………………………………………………..34
To Enable Automatic Aux Out Routing Based on Cabling…………………………..34
To Use the Aux Outs with Permanently Connected Outputs………………………34
Auditioning Sounds on the MR-Rack……………………………………………………………..35
To Set What’s Heard When the Audition Button is Pressed…………………………35
Table of Contents — 2 ENSONIQ MR-Rack Musician’s Manual

Table of Contents
Waking up……………………………………………………………………………………………………35
To Set How the MR-Rack Will Wake Up …………………………………………………….36
Protecting the MR-Rack’s Memory…………………………………………………………………..36
To Enable the Write Protect Prompt…………………………………………………………..36
To Disable the Write Protect Prompt………………………………………………………….36
Setting the Stak MIDI Channel………………………………………………………………………37
To Set the Stak MIDI Channel………………………………………………………………….37
Adjusting Stak Coherence……………………………………………………………………………..37
To Perfectly Synchronize the Start of All Notes in a Stak…………………………….37
To Allow All Notes in a Stak to Start Normally……………………………………………38
Using MIDI Program Changes…………………………………………………………………………38
Changing Performances Via MIDI…………………………………………………………………38
To Select New Performances With MIDI Program Changes……………………………38
To Disable the Selection of Performances By Program Changes……………………39
Setting the Global Reception of MIDI Bank Selects and Program Changes………..39
To Enable Reception of Bank Selects and Program Changes…………………………39
To Disable Reception of Bank Selects and Program Changes………………………..39
Responding to MIDI “Panic” Messages……………………………………………………………..40
Setting the MR-Rack’s Response to Reset All Controllers MIDI Messages…………….40
To Set the Response to Reset All Controllers Messages………………………………..40
Setting the MR-Rack’s Response to All Notes Off MIDI Messages………………………..40
To Set the MR-Rack’s Response to All Notes Off Messages……………………………40
Using MIDI SysEx………………………………………………………………………………………….41
Enabling and Disabling System Exclusive Communication…………………………….41
To Enable or Disable SysEx Communication……………………………………………..41
Using SysEx Device IDs…………………………………………………………………………………41
To Set the MR-Rack’s SysEx Device ID Number…………………………………………..41
Setting Up New Real-Time Controllers…………………………………………………………….42
To Set Up the Four System Controllers……………………………………………………..42
Learning How Much RAM is Available for New Sounds…………………………………….43
To Find Out How Much Free Memory (RAM) is Available in the MR-Rack……..43
Learning the Number of Banks on a Data Card………………………………………………..43
To Learn How Many Banks are on the Currently Installed Card…………………..44
Identifying Installed Wave Expansion Boards………………………………………………….44
To Identify an Installed Expansion Board………………………………………………….44
Using the MR-Rack to Play General MIDI Music……………………………………………….45
To Use the MR-Rack as a General MIDI Sound Module………………………………..45
To Set the MR-Rack to Power Up Ready for General MIDI Music…………………..45
To Reset the MR-Rack for Use with Non-General MIDI Music……………………….46
MR-Rack General MIDI Details for the Curious………………………………………………46
Chapter 4—Parts
To Select a Performance……………………………………………………………………………..47
To Select a Part………………………………………………………………………………………….47
Choosing a Sound for a Part……………………………………………………………………….48
To Change Sounds on a Part……………………………………………………………………48
A Note About Sounds and Effects………………………………………………………………..49
To Designate a Part as the Insert Control Part……………………………………………49
Auditioning Sounds…………………………………………………………………………………..49
To Audition a Sound……………………………………………………………………………….49
To Stop the Auditioning of a Sound………………………………………………………….49
Editing Parts………………………………………………………………………………………………49
Understanding Part Parameters………………………………………………………………………51
The Two Kinds of Part Parameters……………………………………………………………….51
Parts Parameters and Sounds…………………………………………………………………..51
When a Part Has Been Edited………………………………………………………………………51
Working With an Edited Performance That Hasn’t Yet Been Saved………………….51
To Recall an Edited Performance……………………………………………………………….52
Saving a Performance…………………………………………………………………………………52
To Save a Performance…………………………………………………………………………….52
ENSONIQ MR-Rack Musician’s Manual Table of Contents — 3

Table of Contents
Saving a Part’s Sound………………………………………………………………………………..53
The Structure of MR-Rack Sounds………………………………………………………………55
How Sound-Related Part Parameters Work…………………………………………………..55
Getting Back to Square One In a Flash…………………………………………………………..56
To Instantly Reset the MR-Rack’s Parts, Sounds, and Effects…………………………56
Protecting Your Part Edits…………………………………………………………………………..56
Muting and Soloing Parts……………………………………………………………………………..57
Mute…………………………………………………………………………………………………………58
Solo………………………………………………………………………………………………………….58
Group Solo……………………………………………………………………………………………….59
Setting a Part’s MIDI Channel………………………………………………………………………..60
Using Staks………………………………………………………………………………………………….61
Controlling a Part’s Loudness………………………………………………………………………..63
Adjusting a Part’s Stereo Positioning………………………………………………………………64
Adding Effects to Part Sounds………………………………………………………………………..65
Routing a Non-Insert Control Part to an FX Bus via MIDI………………………………65
Controlling a Part’s Pitch Bend Response………………………………………………………..66
Retuning a Part……………………………………………………………………………………………67
Using Special Pitch Tables…………………………………………………………………………….68
Determining Whether a Part’s Sound Will Glide………………………………………………69
Setting a Part’s Glide Time………………………………………………………………………….70
Delaying Part Sounds…………………………………………………………………………………..71
Customizing Part LFOs…………………………………………………………………………………71
Controlling the Shape of Part Sounds…………………………………………………………….74
To Save a Part’s Sound……………………………………………………………………………53
To Set What Happens to Edits When New Sounds Are Selected…………………..56
To Set the MR’s Response to Reset All Controllers Messages………………………..57
About the Mute LED………………………………………………………………………………..57
To Mute a Part………………………………………………………………………………………..58
To Un-Mute a Part…………………………………………………………………………………..58
To Solo a Part…………………………………………………………………………………………59
To Un-Solo a Part……………………………………………………………………………………59
To Learn Whether Other Parts Were Already Muted……………………………………59
To Group-Solo Parts……………………………………………………………………………….60
To Un-Solo a Part from a Group Solo………………………………………………………..60
To Learn Whether Other Parts Were Already Muted……………………………………60
To Set a Part’s MIDI Channel……………………………………………………………………60
To Create a Stak……………………………………………………………………………………..61
To Set a Part’s Maximum Volume……………………………………………………………..63
To Adjust the Relative Loudness of a Part…………………………………………………63
To Invert a Part’s Response to Volume and Expression Values…………………….64
To Set a Part’s Panning……………………………………………………………………………65
To Route a Part to an Effect……………………………………………………………………..65
To Set the Part’s Response To a Pitch Bend Wheel Pushed Forward…………….66
To Set the Part’s Response To a Pitch Bend Wheel Pulled Back……………………67
To Re-Tune a Part by Octaves………………………………………………………………….67
To Re-Tune a Part by Semitones………………………………………………………………67
To Fine-Tune a Part………………………………………………………………………………..68
To Assign a Part to a Special Pitch Table…………………………………………………..68
To Enable a Part’s Glide Mode From the MR-Rack’s Front Panel…………………..69
To Disable a Part’s Glide Mode From the MR-Rack’s Front Panel…………………69
To Enable or Disable a Part’s Glide Mode via MIDI………………………………………70
To Set a Part’s Glide Time………………………………………………………………………..71
To Set a Part’s Delay Time……………………………………………………………………….71
To Convert Sync’d LFOs and Noise to Normal LFOs and Noise……………………72
To Set the Relationship of Sync’d LFOs and Noise to the System Clock……….72
To Change a Part Sound’s Normal (Unsynchronized) LFO Rates………………….73
To Set a Part Sound’s LFO Depth…………………………………………………………….73
To Set a Part’s LFO Delay………………………………………………………………………..73
To Adjust the Attack Time of Notes in a Part……………………………………………..74
Table of Contents — 4 ENSONIQ MR-Rack Musician’s Manual

Table of Contents
To Adjust the Decay of Notes in a Part………………………………………………………74
To Adjust the Release of Notes in a Part…………………………………………………….75
To Adjust the Filter Cutoff of a Part…………………………………………………………..75
To Adjust the Filter Attack of a Part…………………………………………………………..75
To Adjust the Filter Decay of a Part…………………………………………………………..76
To Adjust the Filter Release of a Part…………………………………………………………76
To Adjust Amp and Filter Envelopes’ Velocity Sensitivity…………………………….77
Changing a Part’s Key Range………………………………………………………………………….77
To Set a Part’s Keyboard Range………………………………………………………………..77
To Create a Keyboard Split……………………………………………………………………….78
To Create a Split with Layered Regions……………………………………………………..78
Setting Part Velocity Ranges………………………………………………………………………….79
To Set a Part’s Velocity Window……………………………………………………………….79
Isolating Velocity-Dependent Components of Sounds………………………………………79
To Extract Favorite Velocity-Dependent Components of Sounds………………….80
Setting a Part’s Response To MIDI Pressure Messages……………………………………….80
To Set a Part’s Pressure Response……………………………………………………………..80
Working with Program Changes and Bank Selects……………………………………………81
To Enable or Disable a Part’s Reception of Program Change Messages…………..81
To Enable or Disable a Part’s Reception of Bank Select Messages………………….81
Finding Out What Bank Select and Program Change Values to Send………………82
How to Select the Current Sound Via MIDI………………………………………………..82
Enabling and Disabling Part Response to MIDI Controllers……………………………….82
To Enable or Disable a Part’s Reception of Data Entry Messages…………………..82
To Enable or Disable a Part’s Reception of Pitch Bend Messages…………………..83
To Enable or Disable a Part’s Reception of Mod Wheel Messages…………………..83
To Enable or Disable a Part’s Reception of Foot Pedal Messages……………………83
To Enable or Disable a Part’s Reception of Volume Messages……………………….83
To Enable or Disable a Part’s Reception of Pan Messages…………………………….84
To Enable or Disable a Part’s Reception of Expression Messages…………………..84
To Enable or Disable a Part’s Reception of Sustain/Sostenuto Messages………84
Working With System MIDI Controllers…………………………………………………………..84
To Enable or Disable a Part’s Reception of Assigned System Controllers……….84
Editing Drum Kits…………………………………………………………………………………………85
To Edit a Drum Kit You’ve Chosen for a Part……………………………………………..85
To Edit the Current Performance’s PerfEditKit…………………………………………….86
Selecting a DrumKey for Editing…………………………………………………………………..87
To Select a DrumKey for Editing……………………………………………………………….87
Changing the Source of a DrumKey’s Sound………………………………………………..87
To Change the Sound Type Used by the Selected DrumKey…………………………88
Changing a DrumKey’s Sound by its Sound Name………………………………………..88
To Change a DrumKey’s Sound By its Name………………………………………………88
Changing a DrumKey’s Sound by its Program Change Number……………………….89
To Change a DrumKey’s Sound By Program Change Number………………………89
Changing a DrumKey’s Volume……………………………………………………………………89
To Change a DrumKey’s Volume……………………………………………………………….90
Changing a DrumKey’s Panning………………………………………………………………….90
To Change a DrumKey’s Panning……………………………………………………………..90
Changing a DrumKey’s Effect………………………………………………………………………91
To Change a DrumKey’s Effect………………………………………………………………….91
Changing a DrumKey’s Tuning……………………………………………………………………92
To Change a DrumKey’s Tuning……………………………………………………………….92
Saving Your Edited Drum Kit Sound……………………………………………………………92
To Save Your Drum Kit as a New Sound……………………………………………………92
Using RPNs and NRPNs to Edit Part Parameters………………………………………………..94
ENSONIQ MR-Rack Musician’s Manual Table of Contents — 5

Table of Contents
Chapter 5—Effects
Understanding the MR-Rack Effects………………………………………………………………..95
Insert Effects……………………………………………………………………………………………..96
Global Chorus…………………………………………………………………………………………..96
Global Reverb……………………………………………………………………………………………96
Dry…………………………………………………………………………………………………………..97
Understanding Effect Busses………………………………………………………………………….97
The Insert Bus…………………………………………………………………………………………..97
The Chorus Bus………………………………………………………………………………………..97
The Three Reverb Busses……………………………………………………………………………98
The Dry Bus……………………………………………………………………………………………..98
Understanding the Special Alt. FX Bus…………………………………………………………98
A Diagram of the MR-Rack Effects…………………………………………………………………..99
Working with the Insert Effect………………………………………………………………………..99
Using the Insert Control Part………………………………………………………………………100
Editing the Insert Effect………………………………………………………………………………101
Selecting an Insert Effect Preset…………………………………………………………………..102
Using the Insert FX Bus Input Mix……………………………………………………………….103
Adding Global Reverb to the Insert Effect……………………………………………………..104
Adding Global Chorus to the Insert Effect…………………………………………………….105
Modulating the Insert Effect in Real Time……………………………………………………..105
Choosing a Real-Time Insert Effect Modulator………………………………………………106
Verifying That Your Real-Time Controller Is Enabled…………………………………….107
Setting the Real-Time Insert Effect Modulation Reception Window…………………107
Setting the Insert Effect Parameter to be Modulated in Real-Time……………………108
Setting the Allowable Amount of Real-Time Insert Effect Modulation………………109
Determining Which MR-Rack Outputs the Insert Effect Will Use……………………..110
Working with the Global Chorus……………………………………………………………………111
Selecting a Global Chorus Preset…………………………………………………………………112
Using the Chorus Bus Wet/Dry Mix…………………………………………………………….112
Adding Reverb to the Global Chorus……………………………………………………………113
Adjusting the Global Chorus LFO Rate………………………………………………………..114
Adjusting the Global Chorus Depth…………………………………………………………….115
Adjusting the Global Chorus Center…………………………………………………………….115
Adjusting the Global Chorus Spread……………………………………………………………116
The LightReverb Bus……………………………………………………………………………….98
The MediumReverb Bus…………………………………………………………………………..98
The WetReverb Bus…………………………………………………………………………………98
To Designate a Performance’s Insert Control Part……………………………………….100
Using the Insert Control Part to Determine the Insert Effect…………………………100
Using the Insert Control Part to Pick Insert Effects Via MIDI…………………………100
To Edit the Insert Effect……………………………………………………………………………101
To Manually Select an Insert Effect…………………………………………………………..101
To Select an Insert Effect Preset………………………………………………………………..102
To Set the Insert FX Bus Wet/Dry Input Mix……………………………………………..103
To Add Global Reverb to the Insert Effect…………………………………………………..104
To Add Global Chorus to the Insert Effect………………………………………………….105
To Assign a Real-Time Insert Effect Modulator……………………………………………107
To Confirm That Real-Time Controller Reception Is Enabled……………………….107
To Set the Insert Effect’s Modulation Reception Window…………………………….108
To Select an Insert Effect Parameter for Real-Time Modulation…………………….109
To Set the Insert Effect Modulation Amount………………………………………………109
To Set the Insert Effect’s Output Routing………………………………………………….110
To Access the Global Chorus Parameters…………………………………………………..111
To Select a Global Chorus Preset………………………………………………………………112
To Set the Chorus FX Bus Wet/Dry Input Mix…………………………………………..113
To Add Global Reverb to the Global Chorus………………………………………………113
To Adjust the Global Chorus LFO Rate……………………………………………………..114
To Adjust the Global Chorus Depth………………………………………………………….115
To Adjust the Global Chorus Center…………………………………………………………116
Table of Contents — 6 ENSONIQ MR-Rack Musician’s Manual

Table of Contents
To Adjust the Global Chorus Spread…………………………………………………………116
Adjusting the Global Chorus Phase……………………………………………………………..117
To Adjust the Global Chorus Phase…………………………………………………………..117
Determining Which MR-Rack Outputs the Global Chorus Will Use…………………118
To Set the Global Chorus’s Output Routing………………………………………………118
Working with the Global Reverb……………………………………………………………………..118
To Access the Global Reverb Parameters……………………………………………………119
Selecting a Global Reverb Preset………………………………………………………………….119
To Select a Global Reverb Preset……………………………………………………………….119
Setting Reverb Amounts for the Light, Medium and Wet Reverb Busses…………..120
To Set the LightReverb Amount………………………………………………………………..120
To Set the MediumReverb Amount……………………………………………………………121
To Set the WetReverb Amount………………………………………………………………….121
Setting the Global Reverb’s Volume……………………………………………………………..122
To Set the Global Reverb Overall Volume………………………………………………….122
Setting the Global Reverb’s Decay Time……………………………………………………….122
To Set the Global Reverb’s Decay Time……………………………………………………..123
Setting the Global Reverb’s High-Frequency Damping……………………………………123
To Set the Global Reverb’s HF Damping…………………………………………………….123
Setting the Global Reverb’s Brightness…………………………………………………………124
To Set the Global Reverb’s HF Bandwidth………………………………………………….124
Setting the Global Reverb’s Diffusion…………………………………………………………..125
To Set the Global Reverb’s High-Frequency Diffusion…………………………………125
To Set the Global Reverb’s Low-Frequency Diffusion………………………………….125
Setting the Global Reverb’s Definition………………………………………………………….126
To Set the Global Reverb’s Definition………………………………………………………..126
Determining Which MR-Rack Outputs the Global Reverb Will Use………………….127
To Set the Global Reverb’s Output Routing……………………………………………….127
Working with Dry Sounds……………………………………………………………………………..128
To Set the Dry Bus’s Output Routing……………………………………………………….128
Bypassing Effects………………………………………………………………………………………….128
Bypassing and Un-Bypassing With the Effects Button…………………………………..129
To Bypass an Individual Effect Using the Effects Button……………………………..129
To Un-Bypass an Individual Effect Using the Effects Button………………………..130
To Use the Effects Button Alone to Bypass All Effects at Once……………………..130
To Use the Effects Button to Un-Bypass All Effects at Once…………………………130
Bypassing and Un-Bypassing with the Bypass Parameter………………………………131
To Bypass and Un-Bypass Effects With the Bypass Parameter……………………..131
Quick Bypass of All Effects with the Bypass Parameter………………………………..132
Learning Which Effects are Bypassed When the Red Effects LED Is Lit……………..132
To Easily Find Out Which Effects are Bypassed………………………………………….132
Chapter 6—Special Commands
The Four Special Commands…………………………………………………………………………133
To Abort a Command………………………………………………………………………………133
Saving Commands………………………………………………………………………………………..134
Saving the Current Performance………………………………………………………………….134
To Save the Current Performance……………………………………………………………..134
Saving the Current Effects Setup…………………………………………………………………135
To Save the Current Effects Setup…………………………………………………………….135
Saving the Current PerfEditKit…………………………………………………………………….136
To Save the Current PerfEditKit………………………………………………………………..136
Saving the Current Part’s Sound…………………………………………………………………137
To Save the Current Part’s Sound…………………………………………………………….137
Dump Functions…………………………………………………………………………………………..139
Dumping the Current Performance………………………………………………………………139
To Dump the Current Performance……………………………………………………………139
Dumping the Current PerfEditKit…………………………………………………………………139
To Dump the Current PerfEditKit………………………………………………………………140
Dumping the Current Part’s Sound……………………………………………………………..140
ENSONIQ MR-Rack Musician’s Manual Table of Contents — 7

Table of Contents
Dumping All RAM Performances………………………………………………………………….141
Dumping All RAM Sounds………………………………………………………………………….141
Performing a System Parameters Dump………………………………………………………..142
Sending SysEx Data Back to the MR-Rack……………………………………………………143
Copy Functions……………………………………………………………………………………………143
Copying RAM Performances to a PCMCIA Card……………………………………………..143
Copying PCMCIA Card Performances to RAM………………………………………………..144
Copying RAM Sounds to a PCMCIA Card……………………………………………………..146
Copying PCMCIA Card Sounds to RAM………………………………………………………..147
Initialize Functions………………………………………………………………………………………148
Initializing a Performance……………………………………………………………………………148
Initializing an Effects Setup………………………………………………………………………..149
Initializing a PerfEditKit………………………………………………………………………………150
Initializing a Part’s Sound…………………………………………………………………………..151
Initializing RAM Performances…………………………………………………………………….152
Initializing RAM Sounds…………………………………………………………………………….152
Initializing the System Setup………………………………………………………………………153
Formatting a PCMCIA Card…………………………………………………………………………154
To Dump the Current Part’s Sound…………………………………………………………..140
To Dump All RAM Performances……………………………………………………………….141
To Dump All RAM Sounds……………………………………………………………………….141
To Perform a System Parameters Dump…………………………………………………….142
To Receive a SysEx Dump………………………………………………………………………..143
To Copy RAM Performances to a PCMCIA Card…………………………………………..143
To Copy PCMCIA Card Performances to RAM……………………………………………..144
To Copy RAM Sounds to a PCMCIA Card…………………………………………………..146
To Copy PCMCIA Card Sounds to RAM……………………………………………………..147
To Initialize a Performance……………………………………………………………………….148
To Initialize an Effects Setup……………………………………………………………………149
To Initialize a PerfEditKit………………………………………………………………………….150
To Initialize a Part’s Sound………………………………………………………………………151
To Initialize RAM Performances………………………………………………………………..152
To Initialize RAM Sounds………………………………………………………………………..152
To Initialize the System Setup………………………………………………………………….153
To Initialize and Format a PCMCIA Card……………………………………………………154
Chapter 7—Expanding the MR-Rack
Using PCMCIA Data Cards……………………………………………………………………………..156
Working With ROM PCMCIA Data Cards………………………………………………………156
To Install a ROM Data Card…………………………………………………………………….156
To Remove a ROM Data Card…………………………………………………………………..158
Accessing a ROM Card’s Sounds, Performances and Demos………………………..158
Working With SRAM PCMCIA Data Cards…………………………………………………….158
SRAM PCMCIA Cards and Batteries……………………………………………………………..158
To Install the Battery in an SRAM PCMCIA Card………………………………………..158
To Install a New SRAM Data Card…………………………………………………………….159
To Initialize and Format a PCMCIA Card……………………………………………………161
To Install an Already-Formatted SRAM Data Card……………………………………..161
To Remove an SRAM Data Card……………………………………………………………….162
Accessing an SRAM Card’s Sounds, Performances and Demos…………………….162
Using ENSONIQ EXP Series Wave Expansion Boards……………………………………….162
An Important Note About Electro Static Discharge………………………………………..162
Installing and Removing Expansion Boards…………………………………………………….163
How To Install an Expansion Board………………………………………………………….163
How To Remove an Expansion Board……………………………………………………….164
To Identify an Installed Expansion Board………………………………………………….165
Updating the MR-Rack Operating System……………………………………………………….166
Learning the Version Number of Your MR-Rack Operating System………………….166
To Find the Operating System………………………………………………………………….166
Table of Contents — 8 ENSONIQ MR-Rack Musician’s Manual

Table of Contents
Chapter 8—Insert Effect Parameters
List of MR-Rack Insert Effects…………………………………………………………………………168
List of Effect Modulators………………………………………………………………………………..168
LFO Wave Shapes………………………………………………………………………………………..169
Distortion Curves…………………………………………………………………………………………169
Insert Effect Parameters…………………………………………………………………………………170
Common Insert Effect Parameters…………………………………………………………………170
Common Modulation Parameters…………………………………………………………………170
Insert Effect Descriptions……………………………………………………………………………….170
01 Parametric EQ………………………………………………………………………………………170
02 Hall Reverb…………………………………………………………………………………………..171
03 Large Room………………………………………………………………………………………….171
04 Small Room………………………………………………………………………………………….171
05 Large Plate……………………………………………………………………………………………172
06 Small Plate…………………………………………………………………………………………..172
07 NonLinReverb1…………………………………………………………………………………….173
08 NonLinReverb2…………………………………………………………………………………….173
09 Gated Reverb………………………………………………………………………………………..174
10 Stereo Chorus………………………………………………………………………………………175
11 8-VoiceChorus……………………………………………………………………………………..175
12 Rev→Chorus………………………………………………………………………………………..176
13 Rev→Flanger………………………………………………………………………………………..177
14 Rev→Phaser…………………………………………………………………………………………178
15 Chorus→Rev………………………………………………………………………………………..179
16 Flanger→Rev………………………………………………………………………………………..180
17 Phaser→Rev…………………………………………………………………………………………181
18 EQ→Reverb………………………………………………………………………………………….182
19 Spinner→Rev……………………………………………………………………………………….183
20 DDL→Chorus……………………………………………………………………………………….184
21 DDL→Flanger……………………………………………………………………………………….185
22 DDL→Phaser………………………………………………………………………………………..186
23 DDL→EQ……………………………………………………………………………………………..187
24 Multi-Tap DDL……………………………………………………………………………………..188
25 Dist→Chorus………………………………………………………………………………………..189
26 Dist→Flanger………………………………………………………………………………………..190
27 Dist→Phaser…………………………………………………………………………………………192
28 Dist→AutoWah…………………………………………………………………………………….193
29 ResVCF→DDL……………………………………………………………………………………….194
30 Dist→VCF→DDL……………………………………………………………………………………195
31 Pitch Detuner……………………………………………………………………………………….197
32 Chatter Box………………………………………………………………………………………….198
33 Formant Morph…………………………………………………………………………………….199
34 RotarySpeaker………………………………………………………………………………………200
35 Tunable Spkr……………………………………………………………………………………….202
36 Guitar Amp………………………………………………………………………………………….203
37 Dist→DDL→Trem………………………………………………………………………………….205
38 Comp→Dist→DDL…………………………………………………………………………………206
39 EQ→Comp→Gate………………………………………………………………………………….208
40 EQ→Chorus→DDL………………………………………………………………………………..209
Chapter 9—Supplemental Information
List of SoundFinder Types…………………………………………………………………………….211
Performance Types……………………………………………………………………………………..211
Sound Types……………………………………………………………………………………………..211
List of Wave Names and Classes…………………………………………………………………….213
What Is MIDI………………………………………………………………………………………………..214
Life In The MIDI World………………………………………………………………………………..214
ENSONIQ MR-Rack Musician’s Manual Table of Contents — 9

Table of Contents
Understanding MIDI……………………………………………………………………………………..214
MIDI Hardware…………………………………………………………………………………………..214
How MIDI Channels Work…………………………………………………………………………..215
How MIDI Messages Work……………………………………………………………………………216
The Art of MIDI………………………………………………………………………………………….217
What Is General MIDI……………………………………………………………………………………217
General MIDI Sounds…………………………………………………………………………………217
General MIDI Drum Kits……………………………………………………………………………..217
Earning the Logo……………………………………………………………………………………….217
General MIDI Sound Map………………………………………………………………………………218
GM and GS Percussion Key Maps (Channel 10)……………………………………………….219
MR-Rack MIDI Implementation………………………………………………………………………221
MIDI Implementation Chart…………………………………………………………………………..222
MIDI Controllers Reception Behavior………………………………………………………………223
List of MIDI Controller Names………………………………………………………………………..224
Reset All Controllers (MIDI controller 121) Reception Behavior………………………….225
Registered Parameters……………………………………………………………………………………225
Non-Registered Parameters…………………………………………………………………………….226
Registered and Non-Registered Parameters (RPN/NRPN)……………………………………226
Universal Non-Real-Time SysEx General MIDI On/Off……………………………………..227
Pitch Tables and the MIDI Tuning Standard Format………………………………………..228
List of ROM System Pitch Tables……………………………………………………………………228
Using the MR-Rack Outputs………………………………………………………………………….230
A Note About the Main and Aux Output Jacks…………………………………………….230
Ground Compensated Outputs…………………………………………………………………..231
Using XLR Outs with the MR-Rack………………………………………………………………231
Using Headphones with the MR-Rack…………………………………………………………..231
Troubleshooting the MR-Rack……………………………………………………………………….232
If the MR-Rack Doesn’t Play………………………………………………………………………..232
If You’re Hearing Sounds You Don’t Expect to Hear………………………………………232
If You’re Seeing One Sound on the Display but Hearing Another…………………..233
If You’re Selecting New Sounds But What You Hear Remains the Same………….234
If Sounds Are Behaving Unexpectedly………………………………………………………….234
If the Sounds You’re Hearing Sound Unexpectedly Strange……………………………235
If You’re Hearing Music You Don’t Expect to Hear…………………………………………236
Sounds That You Expect to Hear Are Unexpectedly Silent…………………………….236
The MR-Rack is Not Responding to Program Changes or Bank Selects…………….237
You’re Trying to Modulate a Sound Via MIDI, But Nothing’s Happening…………237
You’re Trying to Modulate an Effect Via MIDI, But Nothing’s Happening…………238
Error/Informational Messages………………………………………………………………………..239
Storage Prompts and Messages………………………………………………………………………239
The Unisyn MR-Rack Software………………………………………………………………………241
Using the Unisyn Sound Editor……………………………………………………………………..241
Getting Pre-Existing Standard Sounds From the MR-Rack Into Unisyn…………..241
Creating New Standard Sounds or Editing Pre-Existing Sounds……………………..242
Copying Layer Parameters…………………………………………………………………………..242
Sending Standard Sounds From Unisyn to the MR-Rack……………………………….243
Sound Editor Overview………………………………………………………………………………244
Sound Settings………………………………………………………………………………………….245
Edit Context Parameters……………………………………………………………………………..246
Select Parameters………………………………………………………………………………………247
Pitch Parameters………………………………………………………………………………………..249
Wave Parameters……………………………………………………………………………………….250
Sending the Aux Signals to the Headphones……………………………………………..231
To Route the Aux Signals to the Main Outputs
To Move a Standard Sound From the MR-Rack Into Unisyn……………………….241
To Prepare Unisyn for Sound Editing………………………………………………………..242
To Copy Layer Parameters Within the Same Standard Sound…………………….243
To Copy Layer Parameters Between Standard Sounds………………………………..243
To Send Sounds From Unisyn to the MR-Rack…………………………………………..243
Table of Contents — 10 ENSONIQ MR-Rack Musician’s Manual

Table of Contents
Envelope 1 Parameters………………………………………………………………………………..252
Filter Parameters………………………………………………………………………………………..254
Filter 1 Parameters……………………………………………………………………………………..254
Filter 2 Parameters……………………………………………………………………………………..255
Envelope 2 Parameters………………………………………………………………………………..255
Amp Parameters…………………………………………………………………………………………257
Envelope 3 Parameters………………………………………………………………………………..258
LFO Parameters…………………………………………………………………………………………260
Effect Parameters………………………………………………………………………………………..262
Using the Unisyn DrumKit Editor……………………………………………………………………263
Getting Pre-Existing Drum Kit Sounds From the MR-Rack Into Unisyn……………263
To Move a Drum Kit Sound From the MR-Rack Into Unisyn………………………..263
Creating New Drum Kit Sounds, Editing Pre-Existing Sounds with Unisyn………263
To Prepare Unisyn for Drum Kit Sound Editing…………………………………………..264
Sending Drum Kit Sounds From Unisyn to the MR-Rack……………………………….264
To Send Drum Kit Sounds From Unisyn to the MR-Rack…………………………….264
DrumKit Editor Overview……………………………………………………………………………265
DrumKey Parameters………………………………………………………………………………….265
Drum Kit Parameters………………………………………………………………………………….266
Using the Unisyn Perform (Performance) Editor………………………………………………..267
Getting the Current Performance From the MR-Rack to Unisyn………………………267
To Move the Current MR-Rack Performance Into Unisyn……………………………..267
Creating New Sounds and Editing Pre-Existing Performances with Unisyn………268
To Prepare Unisyn for Sound Editing…………………………………………………………268
Sending a Performance From Unisyn to the MR-Rack…………………………………….268
To Send a Performance From Unisyn to the MR-Rack………………………………….268
Perform (Performance) Editor Overview…………………………………………………………269
Part Assign Parameters……………………………………………………………………………….269
Part Pan Parameters…………………………………………………………………………………..269
Part Volume Parameters……………………………………………………………………………..269
Part Edit (1/3) Parameters…………………………………………………………………………..269
Part Edit (2/3) Parameters…………………………………………………………………………..271
Part Edit (3/3) Parameters…………………………………………………………………………..273
Reverb………………………………………………………………………………………………………274
Reverb Routing………………………………………………………………………………………….274
Reverb Params…………………………………………………………………………………………..275
Chorus……………………………………………………………………………………………………..275
Chorus Routing…………………………………………………………………………………………275
Insert………………………………………………………………………………………………………..276
Insert Routing…………………………………………………………………………………………276
Output Assigns………………………………………………………………………………………….277
Glossary………………………………………………………………………………………………………278
How did we do?…………………………………………………………………………………………….282
ENSONIQ MR-Rack Musician’s Manual Table of Contents — 11

Table of Contents
Table of Contents — 12 ENSONIQ MR-Rack Musician’s Manual

We lc om e !
Congratulations on your purchase of the MR-Rack, and thank you for choosing ENSONIQ.
We designed the MR-Rack with a single goal in mind: to create an easy-to-use box packed
with great sounds. With ENSONIQ’s exclusive SoundFinder™, picking Sounds couldn’t be
easier.
This chapter will show you how to find Sounds in the MR-Rack. It will also provide an easyto-understand conceptual overview of the MR-Rack, show you how to play the built-in
demonstration songs, offer a few technical notes and provide you with some additional
reading resources to help deepen your understanding of sound and MIDI.
Chapter 1—Welcome
Ch apt e r 1
We lc om e
Ge t t ing R e ady to List e n
The simplest way to listen to the MR-Rack is by using stereo headphones. Turn the frontpanel Volume knob all the way down and plug your headphones into the Phones jack. Turn
the Volume knob up to a comfortable listening level once the MR-Rack starts making sound.
The Phones jack output is designed to work with both low- and high-impedance
headphones. Make sure you set the Volume knob carefully—high output volume levels could
damage your hearing.
You may also use MR-Rack’s rear-panel Main Outs. If you’re connecting the MR-Rack to a
mixer, turn the MR-Rack’s Volume knob all the way up for the best possible sound. Adjust
the input trims on your mixer to set the MR-Rack to an appropriate level.
If you’d like to run the MR-Rack’s Main Outs through your home stereo, bear in mind that
the MR-Rack is capable of producing a far greater dynamic range than what your system
may be used to, and so, a little care is required. Turn the MR-Rack’s Volume knob to about
12 o’clock, and operate your stereo at conservative levels to be on the safe side.
There’s a more detailed description of how to connect the MR-Rack and set appropriate
volume levels in “Setting Volume Levels” in Chapter 2 of the MR-Rack Musician’s Manual.
P ow e r ing U p
Once you’ve got a listening method established, you can power up the MR-Rack.
1. Plug the MR-Rack’s line cord into the line receptacle on its rear panel.
2. Connect the other end of the cable to a grounded AC outlet.
3. Press the Power button on the MR-Rack’s front panel.
ENSONIQ MR-Rack Musician’s Manual 1
Chapter 1—Welcome
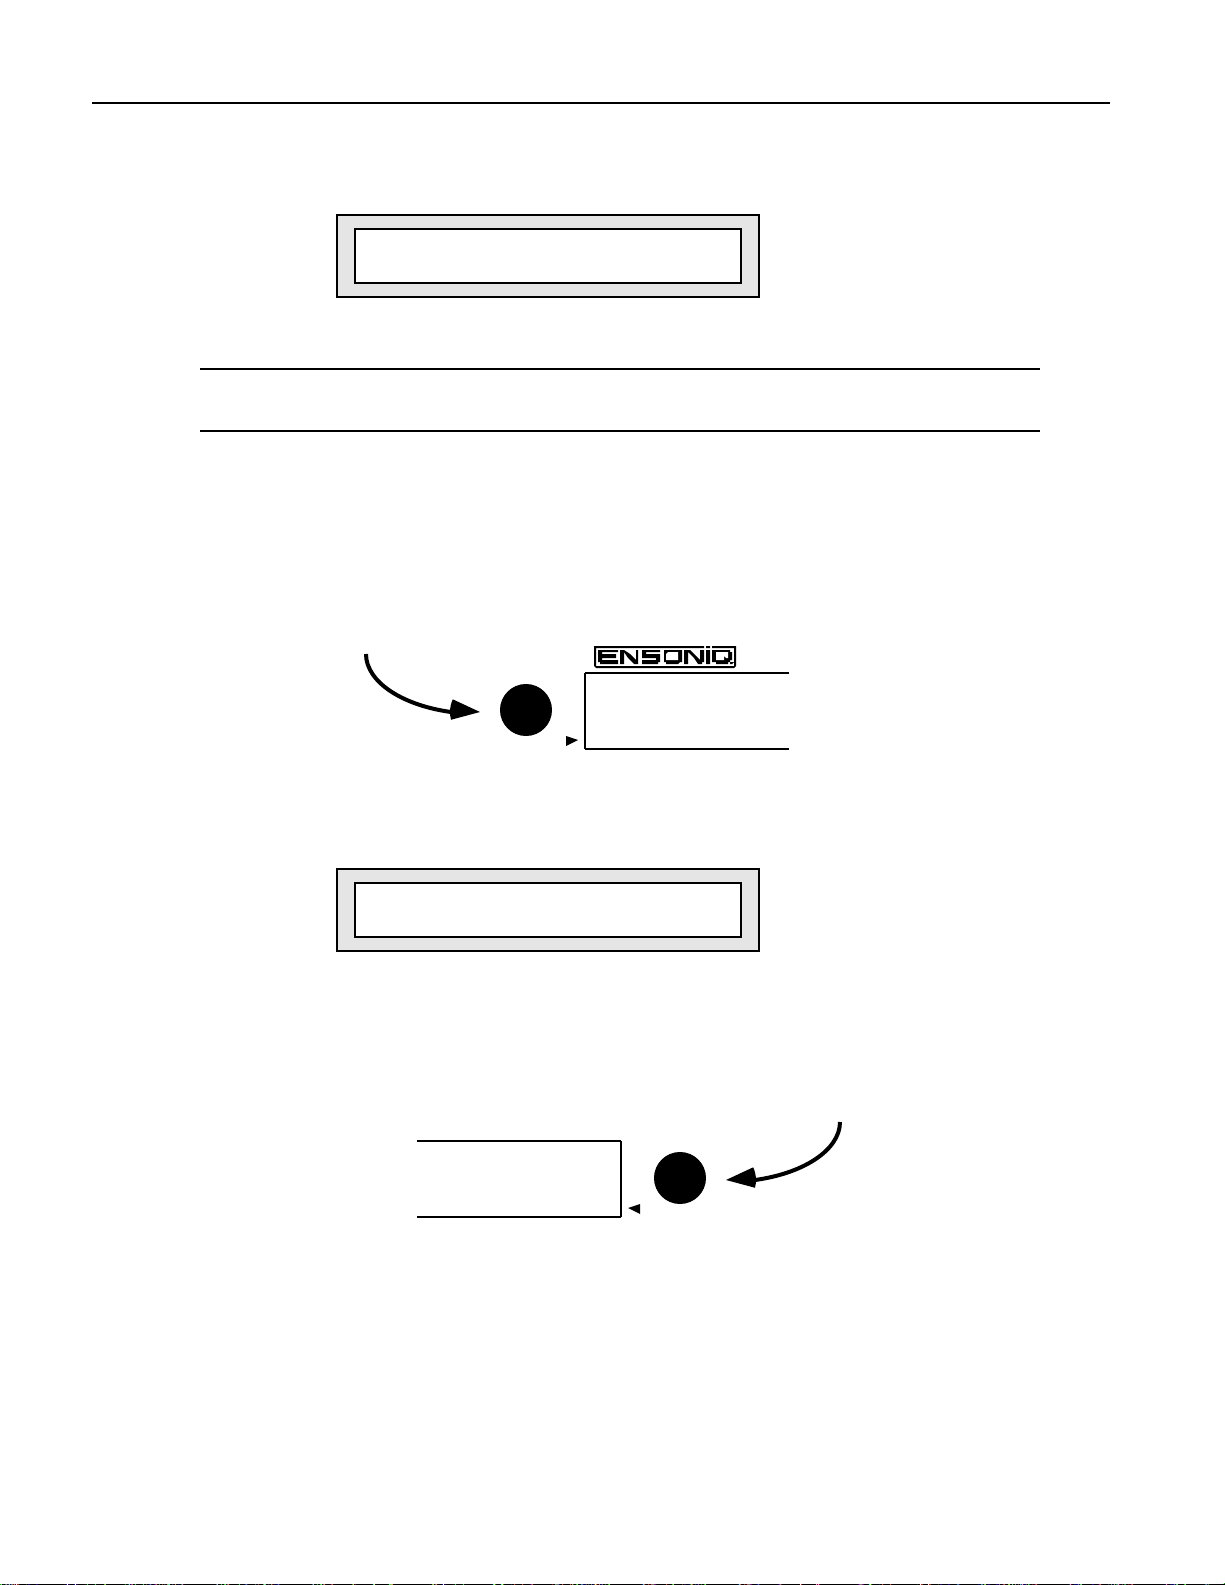
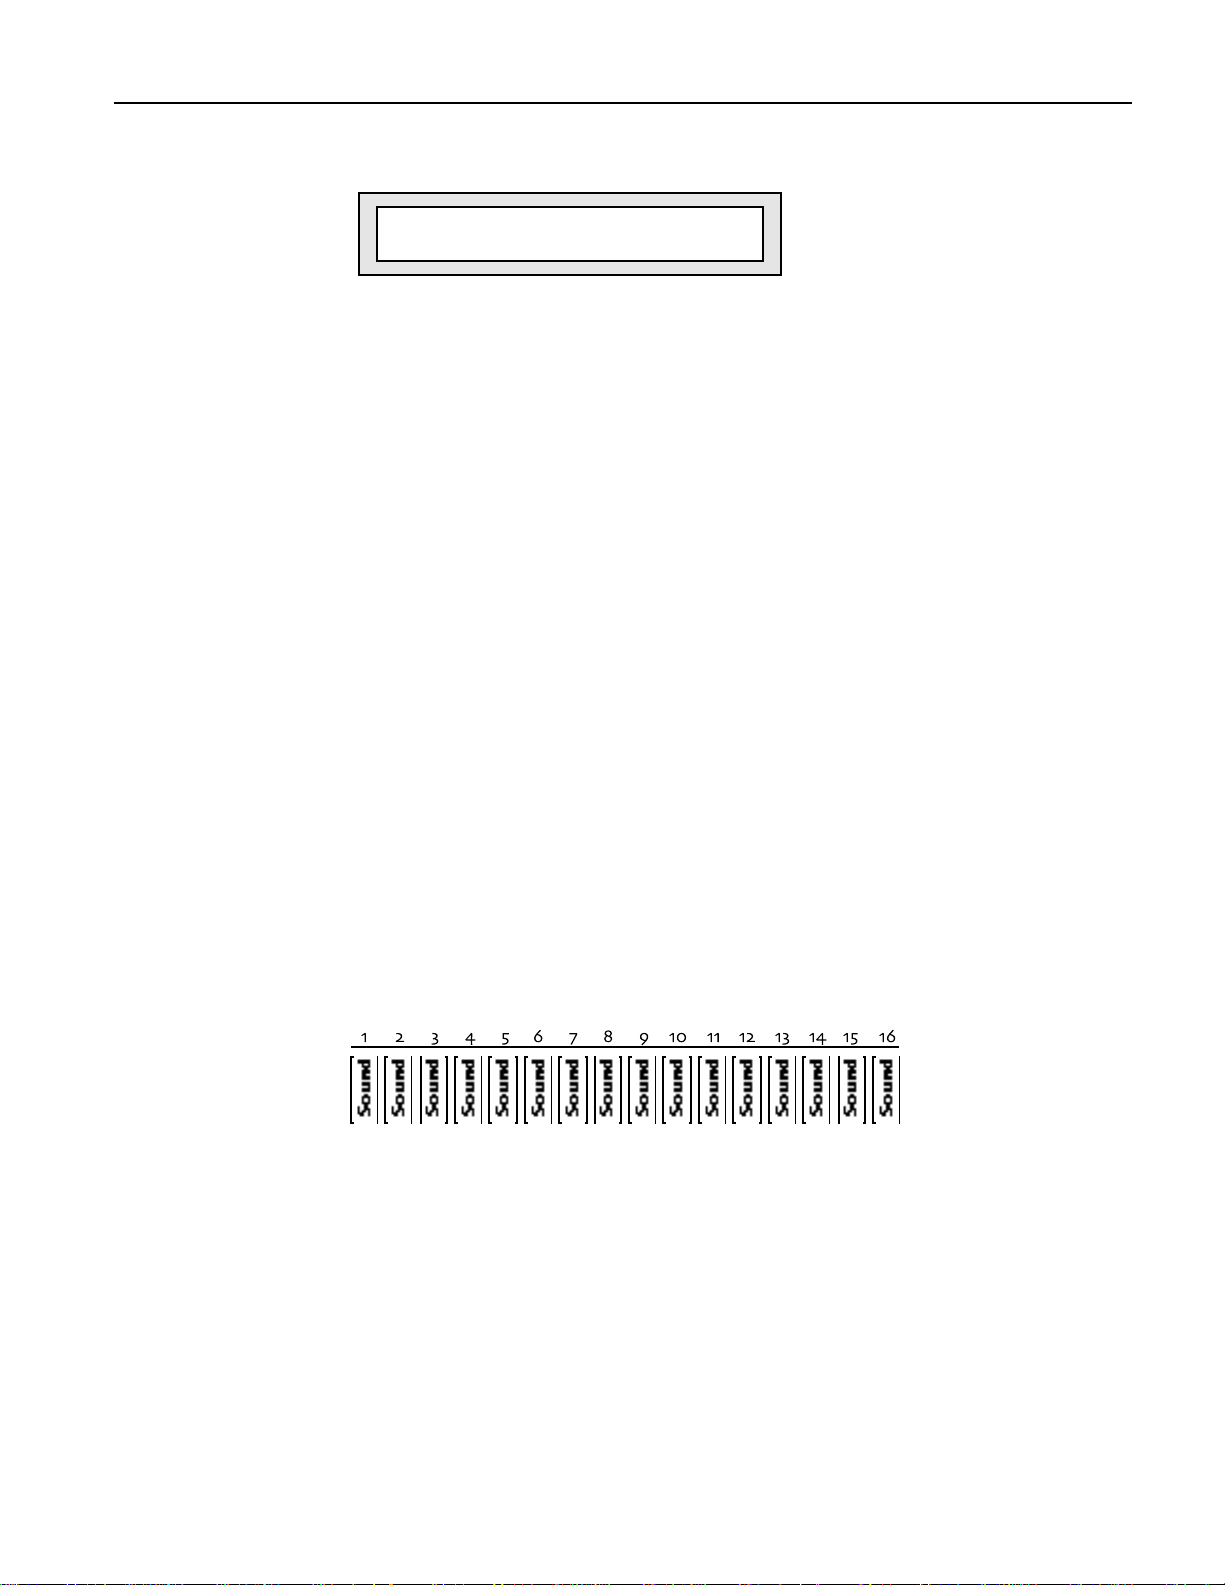
Once the MR-Rack completes its power-up sequence, the display will look something
like this:
You’re ready to start exploring the MR-Rack Sounds.
Note: If you’ve already customized the MR-Rack’s wake-up mode—as described in
Chapter 3—press the Performance and Sound buttons simultaneously.
C hoosing Sounds
The MR-Rack’s SoundFinder™ makes choosing Sounds a snap!
1. Press the Sound button—its LED lights up.
2. Turn the left-hand Sound Type knob on the MR-Rack’s front panel clockwise or
counter-clockwise.
pt01:§01 ROM:004:030
DEMO-SND: Dense Mist
Sound Type
SoundFinder™
As you turn the Sound Type knob, you’ll see different Sound categories appear in the
lower left part of the MR-Rack’s display.
pt01:§01 RAM:005:021
VOCALS : Aaaahhhs
i
Sound Type
3. Find a Sound Type category that interests you.
4. Turn the Sound Name knob clockwise or counter-clockwise to choose a Sound of the
selected type.
64 Voice Expandable Synth
SoundFinder™
Sound Name
2 ENSONIQ MR-Rack Musician’s Manual
Sound names appear on the lower right-hand portion of the display.
pt01:§01 RAM:001:015
VOCALS :Airy Voices
5. To hear what a Sound sounds like, press the Audition button. A brief demo of the
Sound will play. (You can change what plays when you press the Audition button—see
“Auditioning Sounds on the MR-Rack” in Chapter 3.)
If you’ve already connected your MR-Rack to your MIDI set-up, you can set your
controller to MIDI channel 1 and use it to play the Sound. You can also use MIDI
program changes to select other Sounds. Chapter 2 shows how the MR-Rack can be
wired into your rig.
U nde r st anding the M R — R ac k
The MR-Rack is easy to use, once you understand its simple internal structure. Here’s how
it works.
Chapter 1—Welcome
i
Sound Name
Sounds
Sounds are the basic building blocks of the MR-Rack. They’re constructed from digital
sound waves resident in the MR-Rack’s permanent memory.
If you’ve got a Macintosh or IBM-compatible computer, you can also create your own
Sounds using the Unisyn editor ENSONIQ will supply to you when you send in your
completed MR-Rack warranty card.
You can add additional Sounds by purchasing MRC Series Sound Cards and ENSONIQ EXP
Series Wave Expansion Boards, which will be explained later in this chapter.
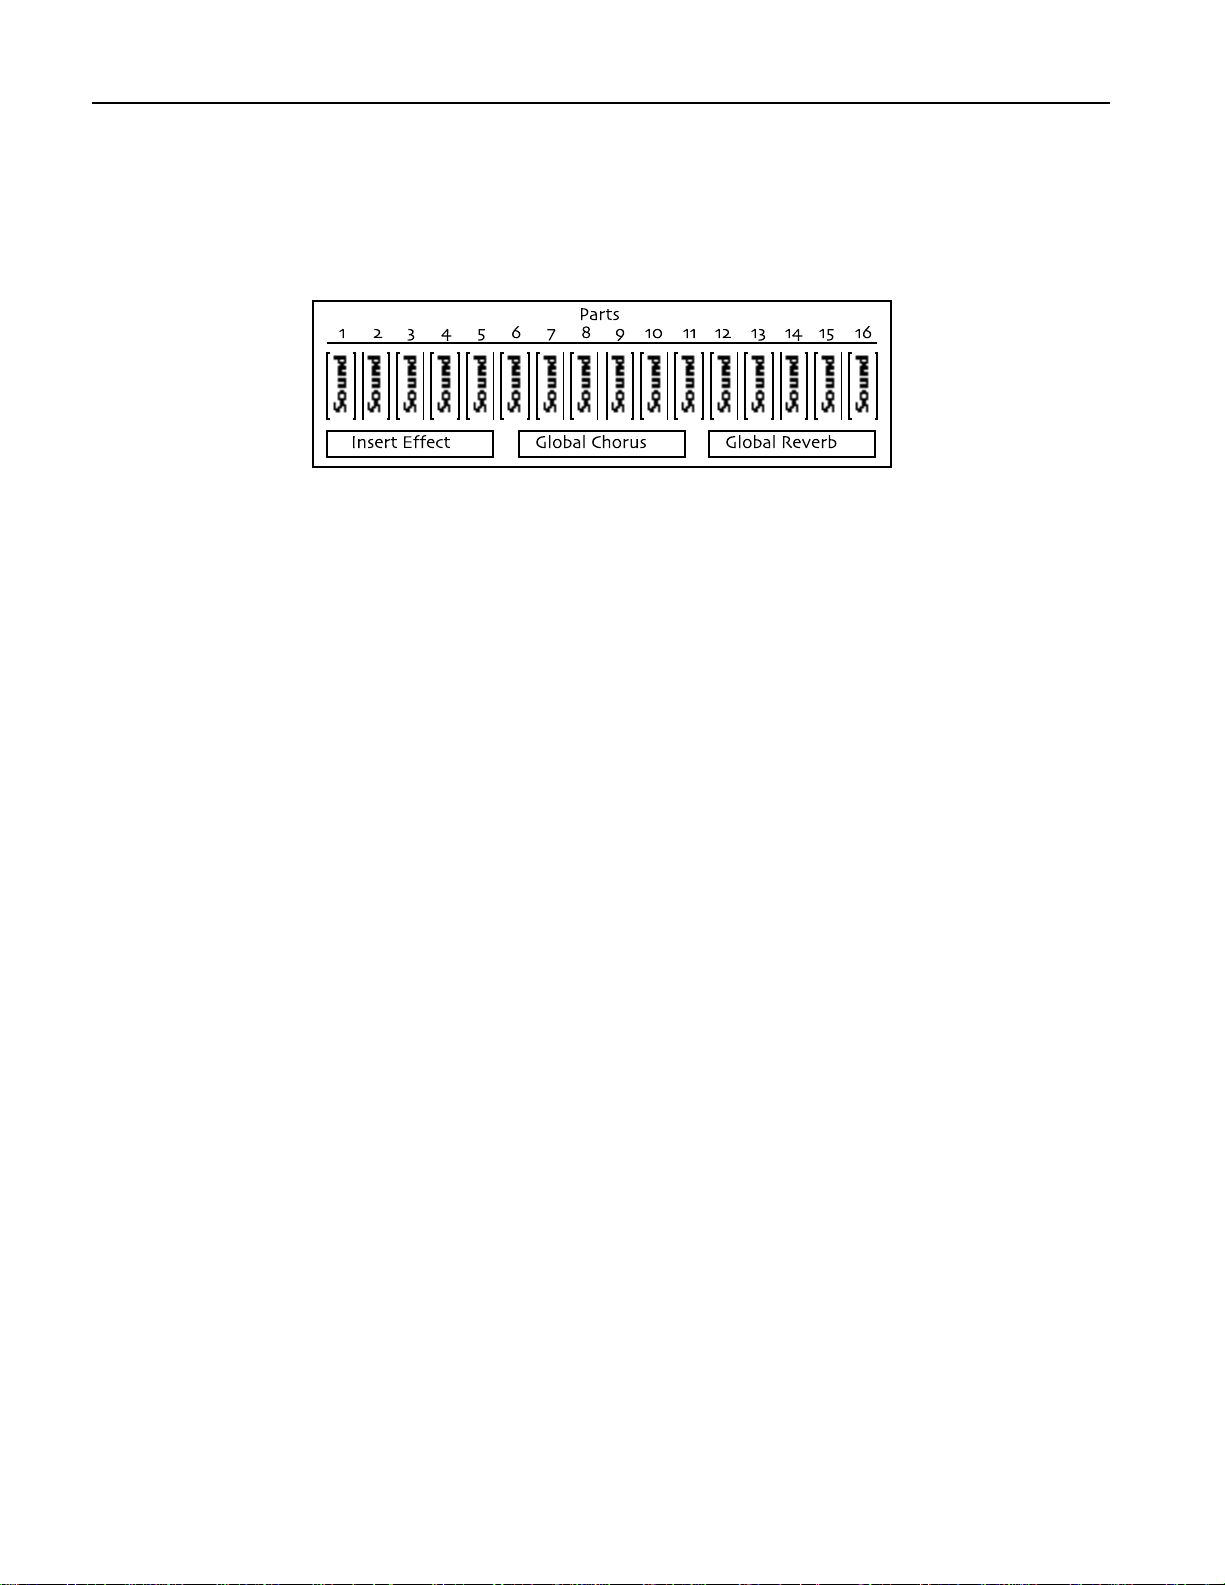
Parts
The MR-Rack can play 16 individual Sounds at once. Each Sound fits into one of 16 slots,
called Parts. You can select any MR-Rack Sound for use by any Part.
Each Part can have its own MIDI channel, and provides options—called Part parameters—for
controlling the behavior of the Part. Part parameters also offer tools that allow each Part to
shape the Sound it uses. See Chapter 4 for details.
ENSONIQ MR-Rack Musician’s Manual 3
Chapter 1—Welcome
Performances
A collection of up to 16 Parts—including all the Sounds they contain and any of the
alterations you’ve made to them, as well as a complete Effects setup—is called a
Performance.
You can save Performances to the MR-Rack’s internal memory. This is useful for keeping
track of the Sounds and settings for a particular song, project or live performance.
Choosing Performances on the MR-Rack
You can select the Performances in the MR-Rack in a manner very similar to the manner in
which Sounds are selected.
1. Press the Performance button so that its amber LED lights.
2. Turn the Sound Type knob clockwise or counter-clockwise to choose the type of
Performance you’d like.
3. Turn the Sound Name knob clockwise or counter-clockwise to pick an individual
Performance.
Performances can also be selected via MIDI. See “Using MIDI Program Changes” in Chapter
3 for details.
Effects
The MR-Rack contains a powerful 24-bit effect processor that provides a wide range of
Effects that can be applied to any Sound. Each Performance contains three types of Effects:
• an Effect that can be borrowed from one of the Sounds in the Performance, known as
the Insert Effect.
• a Global Chorus
• a Global Reverb
To provide maximum flexibility, the MR-Rack offers six busses to these Effects:
• the Insert FX Bus
• the Chorus FX Bus
• the LightReverb FX Bus
• the MediumReverb FX Bus
• the WetReverb FX Bus
• the Dry FX Bus
Each bus has its own settings that determine how it will use the Effect—or Effects—it can
access, as well as which rear-panel outputs it will ultimately utilize. Parts may be assigned
to any one of the six busses. The bus settings and the Part assignments are saved with each
Performance. For more information on Effects, see Chapter 5.
4 ENSONIQ MR-Rack Musician’s Manual

Chapter 1—Welcome
Drum Kits
The MR-Rack contains a special category of Sounds called Drum Kit Sounds. Drum Kit
Sounds allow you to have up to 64 non-Drum Kit Sounds assigned to individual keys.
Though these are most commonly drum and percussion Sounds, you can use any kind of
Sound you’d like in a Drum Kit. Each Drum Kit key has its own Volume, Pan, Tuning and
Effect settings. You can use as many Drum Kits in a Performance as there are Parts. In
addition, every Performance offers an editable Drum Kit, called the PerfEditKit, which you
can customize and save as a Drum Kit Sound that you can use again. Drum Kits are
described fully in “Editing Drum Kits” Chapter 4.
Staks
The MR-Rack features an innovative device called a Stak, which is used for grouping Sounds
together on a single MIDI channel. Staks make it easy to create layered Sounds and
keyboard splits. Every Performance provides one Stak, which is created by assigning Parts
to the designated Stak MIDI channel.
Staks provide a number of improvements over the traditional method of stacking or splitting
Sounds assigned to a common MIDI channel. In conventional layers and splits, a program
change sent over the common MIDI channel would set all of the layered or split Sounds to
the same program number, ruining your carefully chosen sound selection—Staks, on the
other hand, are program-change proof. The Stak MIDI channel can also be changed with a
single adjustment, sparing you the work of reassigning every layered or split component
individually, should you need to change the channel you want to use. And since the Stak
MIDI channel is a global setting, you can easily access Staks in ROM Performances without
having to copy the Performance into RAM.
For more information on Staks, see “Using Staks” in Chapter 4.
SoundFinder™
SoundFinder™ is an exclusive ENSONIQ feature that makes it simple to find the Sounds
and Performances you want. Computer users may be familiar with databases, which allow
you to view information in a manner of your choosing. SoundFinder™ operates in much the
same way. The MR-Rack keeps a list of all the Sounds and Performances available to it at
any given time, and shows them to you in logical, musically convenient categories called
Sound Types and Performance Types.
Sound Types let you view Sounds by instrument family—Vocals or Bells, for example—or by
a number of other useful criteria, including the location in the MR-Rack’s memory where
they reside. The ALL-SND category is especially useful, since it shows all of the MR-Rack’s
Sounds arranged in alphabetical order. If you program your own sounds, you can store
them in the USER-SND or *CUSTOM SoundFinder categories.
Performance Types allow you to view Performances according to where in the MR-Rack they
reside.
How the MR-Rack’s Memory Works
Sounds and Performances are stored in memory locations called banks. Each bank may
store up to 128 Sounds—depending on how much memory each Sound requires—and 32
Performances. The MR-Rack is designed to access up to 128 banks. Banks may reside in the
MR-Rack’s internal memory or on PCMCIA data cards and ENSONIQ EXP Series Wave
Expansion Boards you can purchase separately.
Banks become most important when using MIDI Program Changes to select Sounds and
Performance. Each Sound or Performance is invoked with a Bank Select message—which
tells the MR-Rack where the Sound or Performance resides—and a Program Change
ENSONIQ MR-Rack Musician’s Manual 5

Chapter 1—Welcome
message, which pinpoints the Sound or Performance itself.
Tip: When you’d like to know the necessary Bank Select and Program Change for a
Sound you’ve currently got selected, press the Sounds button and consult the upper
right-hand corner of the MR-Rack’s display: the pair of three-digit numbers tell you,
first, the Bank Select and, second, the Program Change required for that Sound. To
learn a Performance’s Bank Select and Program Change, press the Performance
button—the Performance display shows Bank Select and Program Change
information in the same manner as the Sound display.
ROM and RAM
ROM (“Read Only Memory’”) and RAM (“Random Access Memory”) are the two areas within
the MR-Rack’s internal memory where Performances and Sounds are stored in banks.
Performances and Sounds saved into ROM memory are permanent and unalterable—these
Performances and Sounds are always available. (You can edit them using the MR-Rack’s
Part parameters, and then save the edited versions to non-ROM memory locations.)
Performances and Sounds you edit or create are saved into the MR-Rack’s RAM memory
bank. RAM can be used over and over again, and, therefore, Performances and Sounds
stored in RAM can be edited, re-saved or erased, as you wish.
ROM Cards
The Data Card slot on the MR-Rack’s front panel allows you to add new Sounds and
Performances to the MR-Rack through the purchase of ENSONIQ’s MRC Series Sound
Cards. These PCMCIA ROM cards are inserted into the Data Card slot on the MR-Rack’s
front panel. The Sounds and Performances on these cards are permanent. (You can use the
various Part parameters to customize them, and then save the edited versions to the MRRack’s RAM memory.)
SRAM Cards
The Data Card slot on the MR-Rack’s front panel also allows you to add additional RAM
memory banks through the purchase of SRAM PCMCIA cards, such as ENSONIQ’s MC-512
card. These cards are great for storing your own MR-Rack Sounds and Performances.
EXP Series Wave Expansion Boards
The MR-Rack can be upgraded to hold more digital sound waves and more Sound and
Performance banks with the installation of ENSONIQ EXP Series Wave Expansion Boards.
EXP Boards are mounted inside the MR-Rack’s case—you can easily install them yourself!
For more details, see “Using ENSONIQ EXP Series Wave Expansion Boards” in Chapter 7.
The MR-Rack Display
The MR-Rack’s display has been designed to provide you with all the information you’ll need
as you use the MR-Rack. The display will change as you perform different tasks, since what
you’ll need to know at any given time will vary depending on what you’re doing. Each
chapter in the MR-Rack Musician’s Manual contains an introductory section describing how
the display will function in that chapter’s context.
P laying the M R — R ac k D e m o
The MR-Rack can play special demonstration songs to give you an idea of how terrific it
sounds.
6 ENSONIQ MR-Rack Musician’s Manual
Chapter 1—Welcome
To Play the MR-Rack Main Demo
1. Press the Audition button, and hold it down.
2. While still holding Audition, press the Save button.
3. Let go of both buttons.
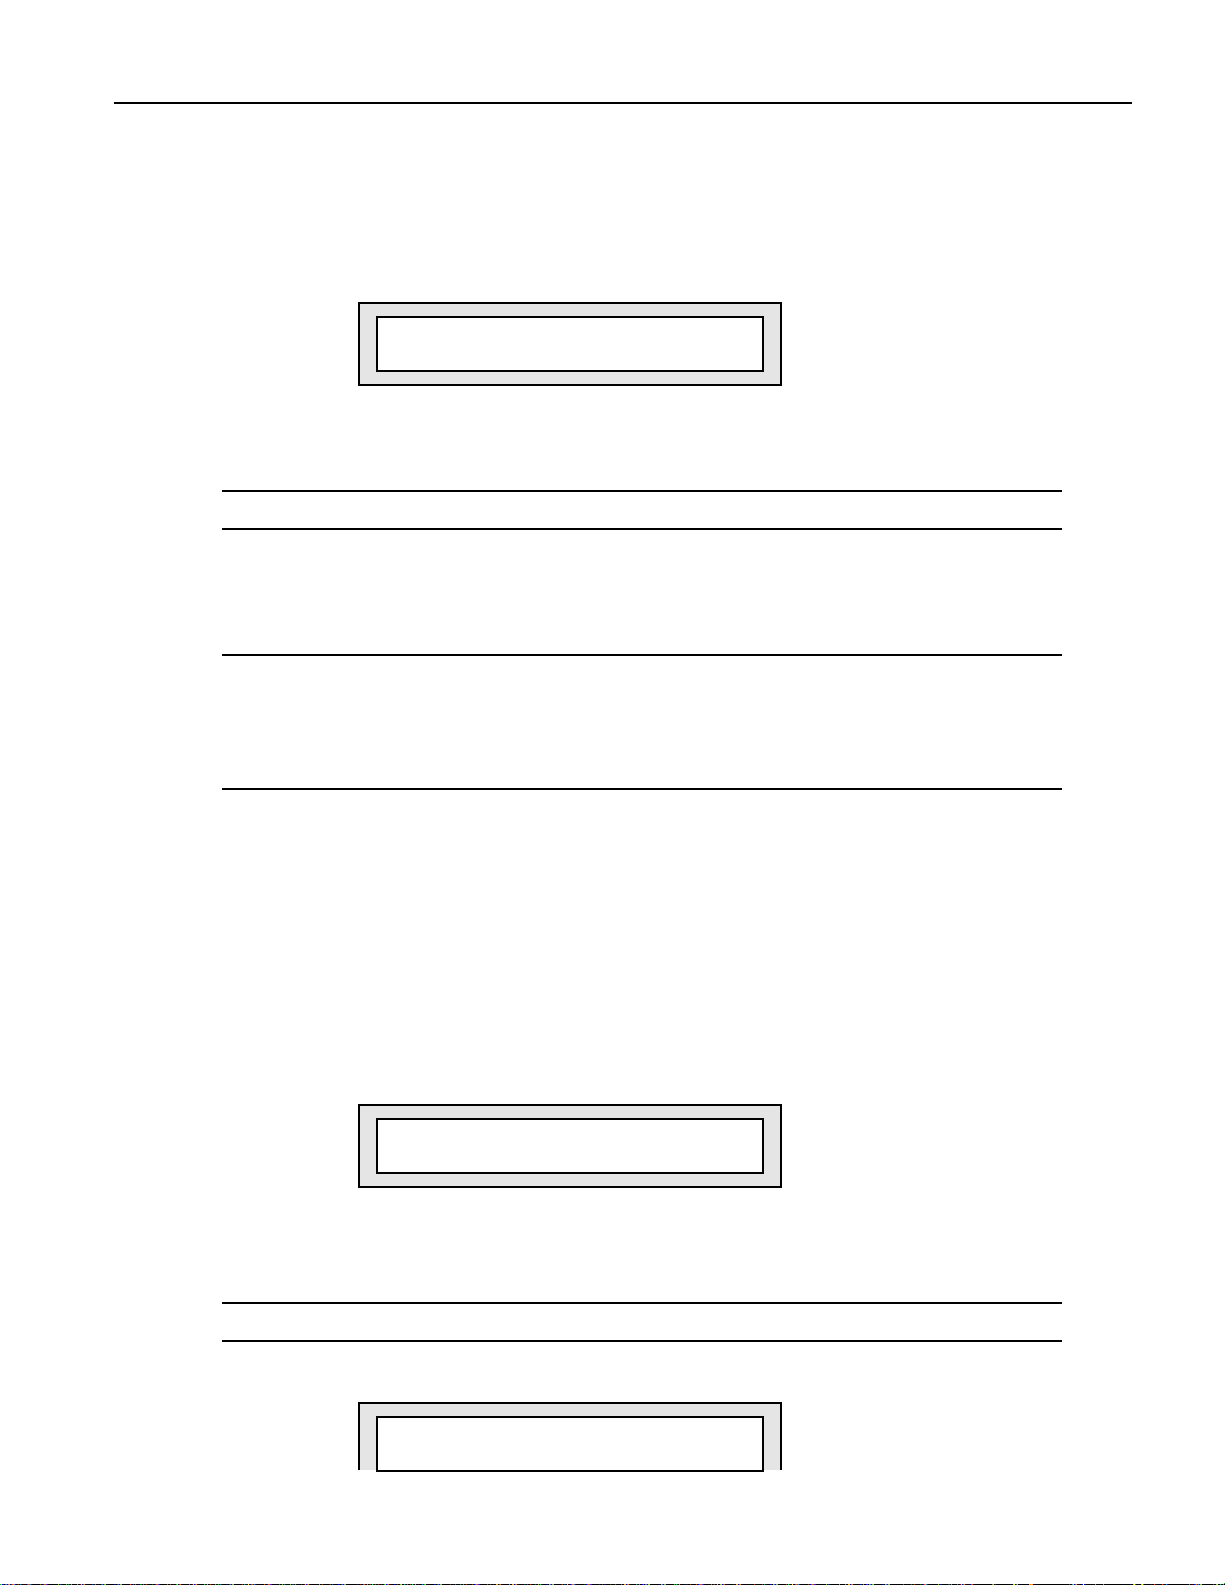
In an unexpanded MR-Rack, the display shows:
Hit ENTER to Play:
MAINDEMO:MR Internal
If you’ve installed any Expansion boards or a ROM card containing MAINDEMO-type
demonstration songs, your display will differ. Turn the Value knob counter-clockwise
until the display looks as it does above.
Note: When MR-Rack demos are being viewed or playing, MIDI In is disabled.
4. Press Enter to play the demo.
5. Press Enter again to stop the demo.
6. When you’re done listening to the demo song, press Exit to return to normal MR-Rack
operation.
Note: When you press Exit after selecting and/or listening to the MR-Rack’s demos,
three System parameters are reset if the MR-Rack’s WakeUpMode System parameter
is set to Demo: the AutoSelect FXBus and Part Param Reset parameters are set to
On, and the Perf ProgChgRecv parameter is set to Off (see Chapter 3 if you’d like
more information on these System parameters).
P laying Ot he r De m os
ROM data cards, wave expansion boards and future operating systems can provide
additional demos for your MR-Rack.
To Play Other MR-Rack Demos
1. Press the Audition button, and hold it down.
2. While still holding Audition, press the Save button.
3. Let go of both buttons.
4. Turn the left-hand Sound Type knob to select a demo type.
Hit ENTER to Play:
WORLD : Paddy&Pals
Demo Type
i
The demos you see may differ from the demos shown here.
Note: When MR-Rack demos are being viewed or playing, MIDI In is disabled.
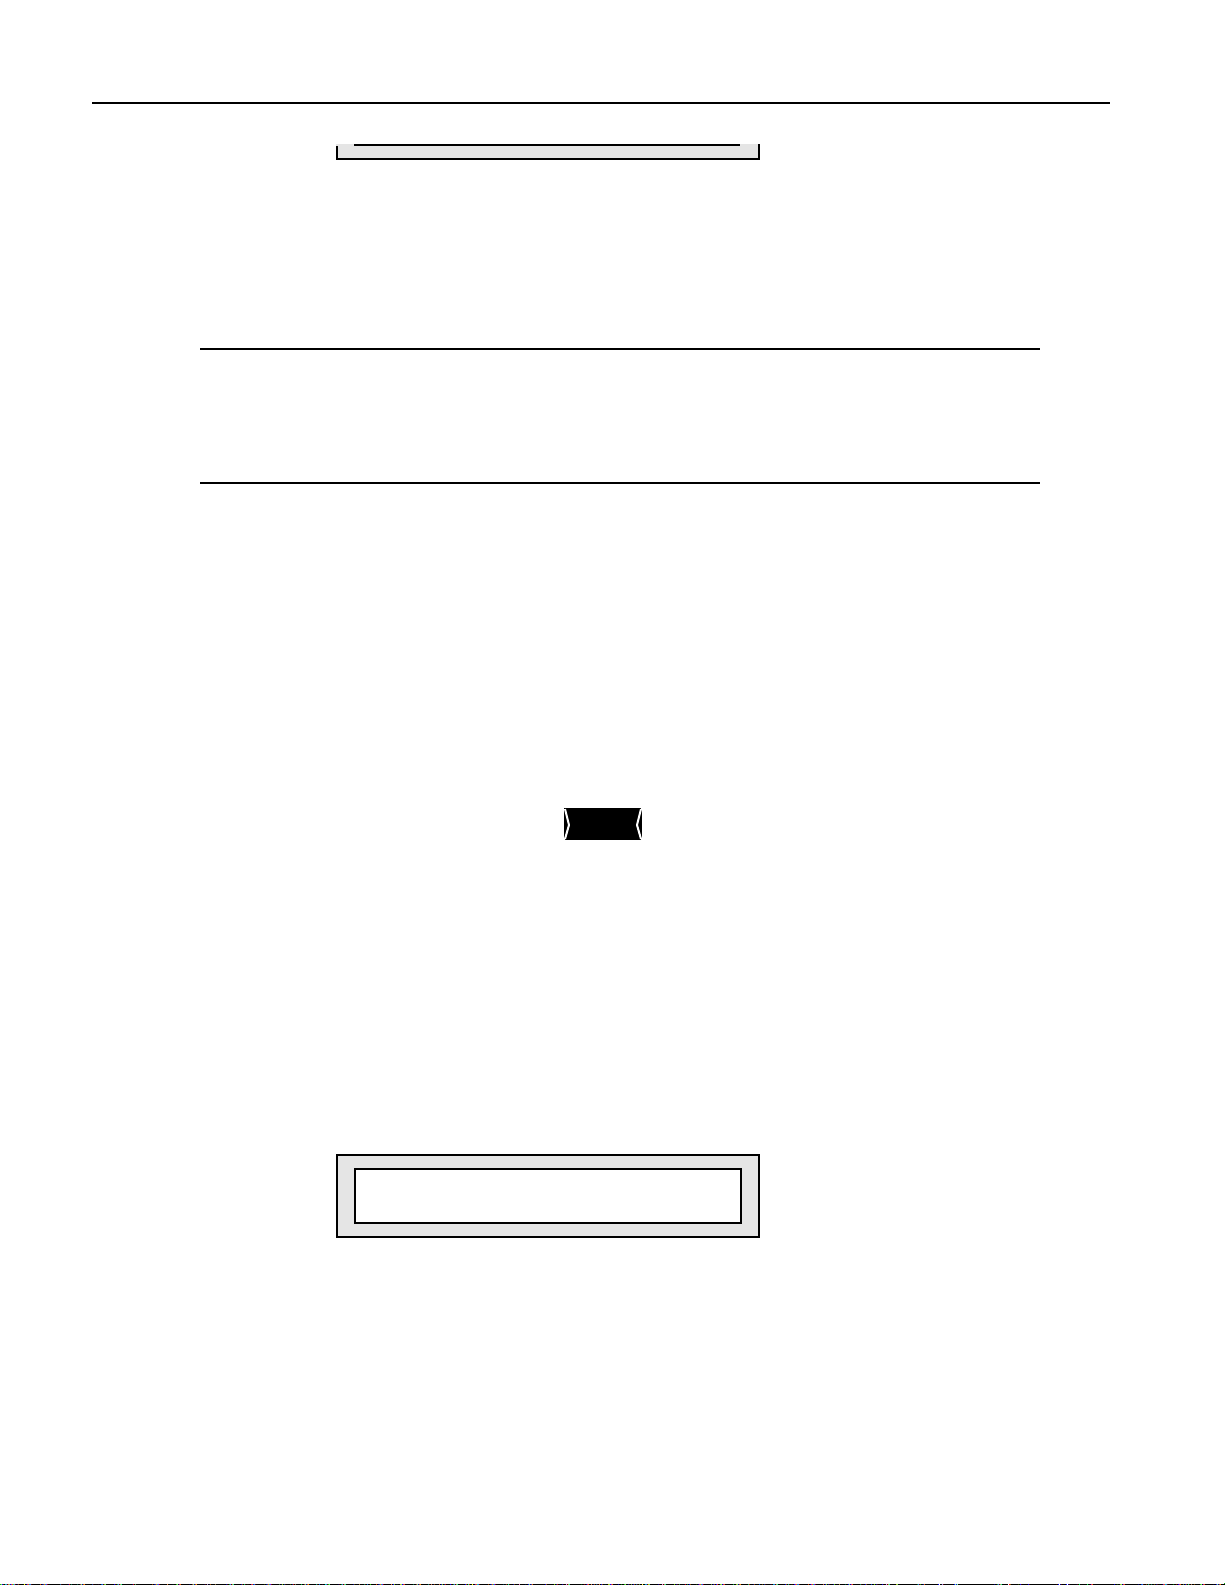
5. Turn the right-hand Sound Name knob to choose a demo.
Hit ENTER to Play:
AMBIENT : MR Trance
ENSONIQ MR-Rack Musician’s Manual 7
Chapter 1—Welcome
6. Press Enter to play the demo.
7. Press Enter again to stop the demo.
8. When you’re done listening to the demo songs, press Exit to return to normal MR-Rack
operation.
Note: When you press Exit after selecting and/or listening to the MR-Rack’s demos,
three System parameters are reset if the MR-Rack’s WakeUpMode System parameter
is set to Demo: the AutoSelect FXBus and Part Param Reset parameters are set to
On, and the Perf ProgChgRecv parameter is set to Off (see Chapter 3 if you’d like
more information on these System parameters).
Ot he r P oint s of In te r e st
All Notes Off
When using MIDI equipment, there are occasions when your system may get confused. This
can cause a barrage of notes to sound which will continue until you do something to stop
them. The MR-Rack provides an All Notes Off button, which you can double-click (press two
times quickly) to silence these unwanted notes. You’ll find it to the right of the MR-Rack’s
display. Think of the All Notes Off button as a “panic button.”
i
Demo Name
All Notes Off
Audition
The MR-Rack’s Battery
The MR-Rack “remembers” Sounds, Performances and its various settings even when its
power is turned off, since it contains a battery which keeps its memory intact. All batteries
eventually become discharged, and though your MR-Rack battery should last for years, you
may eventually need to have it replaced by an Authorized ENSONIQ Repair Station.
Battery Low Warning
The MR-Rack will tell you when its battery needs replacing. It will flash the following when
you power up:
Sorry! Main battery
is low. See manual.
8 ENSONIQ MR-Rack Musician’s Manual

Chapter 1—Welcome
This display will appear only briefly, and then allow you to proceed normally. Make sure that
everything in RAM that you’d like to keep—or any special System settings—has been safely
stored on a Data Card or external MIDI storage device, and take the MR-Rack to an
Authorized ENSONIQ Repair Station as soon as possible to have the battery replaced.
For more about saving MR-Rack data, see Chapter 6.
If You Experience Odd Behavior
If your MR-Rack is behaving peculiarly—for instance, the display is showing characters that
shouldn’t be there, or you’re experiencing surprising Unexpected Event messages—a soft
reset may cure the problem. There are three special procedures you can try:
• A soft reset is similar to turning the MR-Rack’s power off and then on again. This
procedure doesn’t erase or adversely affect the contents of the MR-Rack’s memory.
• A reinitialization procedure clears out the MR-Rack’s internal memory, including any
system data corruption. Reinitializing erases the contents of the MR-Rack’s internal
memory. This means that any Performances, Sounds, Effect set-ups or PerfEditKits
stored in RAM will be lost. If you decide to reinitialize, try saving any items you want to
preserve to a Data Card or via MIDI SysEx (see Chapter 6 for details).
• A hard reinitialization procedure performs a very deep-level reinitialization of the MRRack. This means that any Performances, Sounds, Effect set-ups or PerfEditKits stored
in RAM will be lost. If you decide to reinitialize, try saving any items you want to
preserve to a Data Card or via MIDI SysEx (see Chapter 6 for details). This procedure
should be used in cases when the MR-Rack’s front-panel buttons, for some reason,
don’t allow you to perform a standard reinitialization.
To Perform A Soft Reset
1. Press and hold down the Save button.
2. While still holding Save, press the Exit button.
If performing a soft reset doesn’t end the strange occurrences, you may need to
reinitialize the MR-Rack. Make sure that everything in RAM that you’d like to keep—or
any special System settings—has been safely stored on a Data Card or external MIDI
storage device before you reinitialize, since reinitialization will clear the MR-Rack’s
internal memory.
To Perform a Standard Reinitialization
Make sure that everything in RAM that you’d like to keep—or any special System
settings—has been safely stored on a Data Card or external MIDI storage device before you
reinitialize, since reinitialization will clear the MR-Rack’s internal memory.
1. Press and hold down the Save button.
2. While still holding Save, press the Enter button.
3. Let go of both buttons.
4. Press the Enter button again to perform the reinitialization
To Perform a Hard Reinitialization
Make sure that everything in RAM that you’d like to keep—or any special System
settings—has been safely stored on a Data Card or external MIDI storage device before you
reinitialize, since reinitialization will clear the MR-Rack’s internal memory.
1. Using its front-panel Power switch, turn the MR-Rack’s power off.
The hard reinitialization process is performed by switching the MR-Rack off and on
eight times in rapid succession. Use the following technique:
2. Turn the MR-Rack’s power back on just until the display flickers on, then shut if off
again, then immediately back on—do this eight times.
If reinitializing the MR-Rack fails to correct the problem, contact an Authorized
ENSONIQ Repair Station.
ENSONIQ MR-Rack Musician’s Manual 9

Chapter 1—Welcome
A vailable Opt ions f or Your M R — R ac k
These optional accessories are available from your Authorized ENSONIQ Dealer:
• EXP Series Wave Expansion Boards — a user-installable board for Sound memory
expansion. Each EXP Board contains 256 ROM Sounds, up to 24 MB of wave ROM,
with Performances and demos. The MR-Rack can have up to three different EXP Wave
Expansion Boards.
• ROM Card — a PCMCIA type ROM card containing 256 ROM Sounds, and 32 ROM
Performances
• SRAM Card, including ENSONIQ’s MC-512 Card — a PCMCIA type SRAM card
containing a variable number of banks of Sounds and Performances. The number of
banks on a card depends on the size of the card. Each bank is equal in size to the base
unit RAM, and can hold the same number of Sounds (up to 128 RAM Sounds per bank)
and Performances (128 RAM Performances per bank). The number of RAM Sounds
depends on the number of layers in each Sound.
N e e d M or e He lp?
Whether you’re an aspiring programmer looking for additional information about basic effect
processing techniques and MIDI theory, or a professional sound engineer working with
advanced applications, you may want more detailed information beyond the scope of this
manual. The following books can help enhance your understanding of effect processing,
MIDI, and related topics. These, in addition to the numerous monthly magazines, provide a
wealth of information. While we don’t endorse any one of these publications, we offer this
partial list as a resource for you to draw on.
The Mix Bookshelf
For prices and more information call: (800) 233-9604
MIDI
BECOMING A COMPUTER MUSICIAN, Jeff Bowen
MAKING MUSIC WITH YOUR COMPUTER, David (Rudy) Trubitt, Ed.
MIDI: A COMPREHENSIVE INTRODUCTION, Joseph Rothstein
MIDI XPLAINED, Steinberg/Jones
THE MIDI MANUAL, David Huber
UNDERSTANDING MIDI, David Wills
WHAT’S MIDI?, Jon Eiche
RECORDING
IMPROVING YOUR SIGNAL PROCESSING SKILLS, (cassette & manual) Bill Gibson
MASTER HANDBOOK OF ACOUSTICS, F. Alton Everest
MODERN RECORDING TECHNIQUES, Huber & Runstein
SOUND REINFORCEMENT HANDBOOK, Davis & Jones
SYNTHESIS
FUNDAMENTAL TECHNOLOGIES OF THE SYNTHESIZER, Errol G. Specter
SYNTHESIZER PERFORMANCE, Jeff Pressing
WHAT’S A SYNTHESIZER?, Jon Eiche
VIDEOS
SHAPING YOUR SOUND, (video series) Tom Lubin
Alfred Publishing Company
For prices and more information call (818) 891-5999
10 ENSONIQ MR-Rack Musician’s Manual

MIDI
ADVANCED MIDI APPLICATIONS, GPI
BASIC MIDI APPLICATIONS, GPI
WHAT IS MIDI?, GPI
Hal Leonard Publishing
For prices and more information call (414) 774-3630
MIND OVER MIDI, GPI
TUNING IN: MICROTONALITY IN ELECTRONIC MUSIC, Scott R. Wilkinson
Monthly Magazines
The following magazines offer many specific articles and columns that can provide
additional information.
THE TRANSONIQ HACKER
For prices and more information about this independent news magazine for ENSONIQ
Users, call (503) 227-6848
KEYBOARD
For subscription rates and more information call (800) 289-9919
Chapter 1—Welcome
ELECTRONIC MUSICIAN
For subscription rates and more information call (800) 888-5139
HOME & STUDIO RECORDING
For subscription rates and more information call (818) 407-0744
MIX
For subscription rates and more information call (800) 888-5139
EQ
For subscription rates and more information call (212) 213-3444
ENSONIQ MR-Rack Musician’s Manual 11

Int r oduc t ion
The MR-Rack is an outstanding addition to any MIDI set-up. This chapter describes how to
connect the MR-Rack in some of the most popular MIDI environments.
The key to setting up any MIDI system is to approach the process in an orderly, methodical
manner. As each cable or wire is added, the system grows in complexity. If you have a firm
grasp of what’s connected, and where, you’ll find managing your rig to be much more
pleasant. As you add more gear—or troubleshoot—the extra care you take now will pay off in
the ease with which you’ll be able to adapt your system to future needs.
Chapter 2—Connections
Ch apt e r 2
Con ne ct i ons
To Get Ready
It’s always good policy to turn everything off—and all volume settings down—before you wire
equipment together. This protects you and your gear from unwelcome surprises.
1. Turn the volume off for each piece of equipment you plan to include in your set-up.
2. Turn down any mixer faders or other volume controls for the sound system you’re
using.
3. Turn off the power for everything being included in your set-up.
What Connections Need to be Made?
In any MIDI system, there are three types of connections to be made:
• MIDI connections
• Audio connections
• Power connections
M aking MID I C onne c t ions
The MR-Rack will communicate with the rest of your equipment via MIDI. The nature of
these connections and the number of MIDI cables you’ll need varies, depending on your setup. Each system has its own needs, which we’ll explain in the individual set-ups in this
chapter.
The MIDI set-ups described in “Making MIDI Connections” are:
• Using the MR-Rack with a controller
• Using the MR-Rack with a workstation
• Using the MR-Rack with a computer/stand-alone sequencer
• Editing Sounds with the MR-Rack and a computer
• Sequencing with the MR-Rack, a computer and a controller
• Using the MR-Rack with a computer, a controller and a merger
• Using the MR-Rack with a computer, a controller and a MIDI patchbay
If you’ve got questions about MIDI itself, or any of the terms above, consult the Glossary or
“What Is MIDI?” sections of Chapter 9.
ENSONIQ MR-Rack Musician’s Manual 1
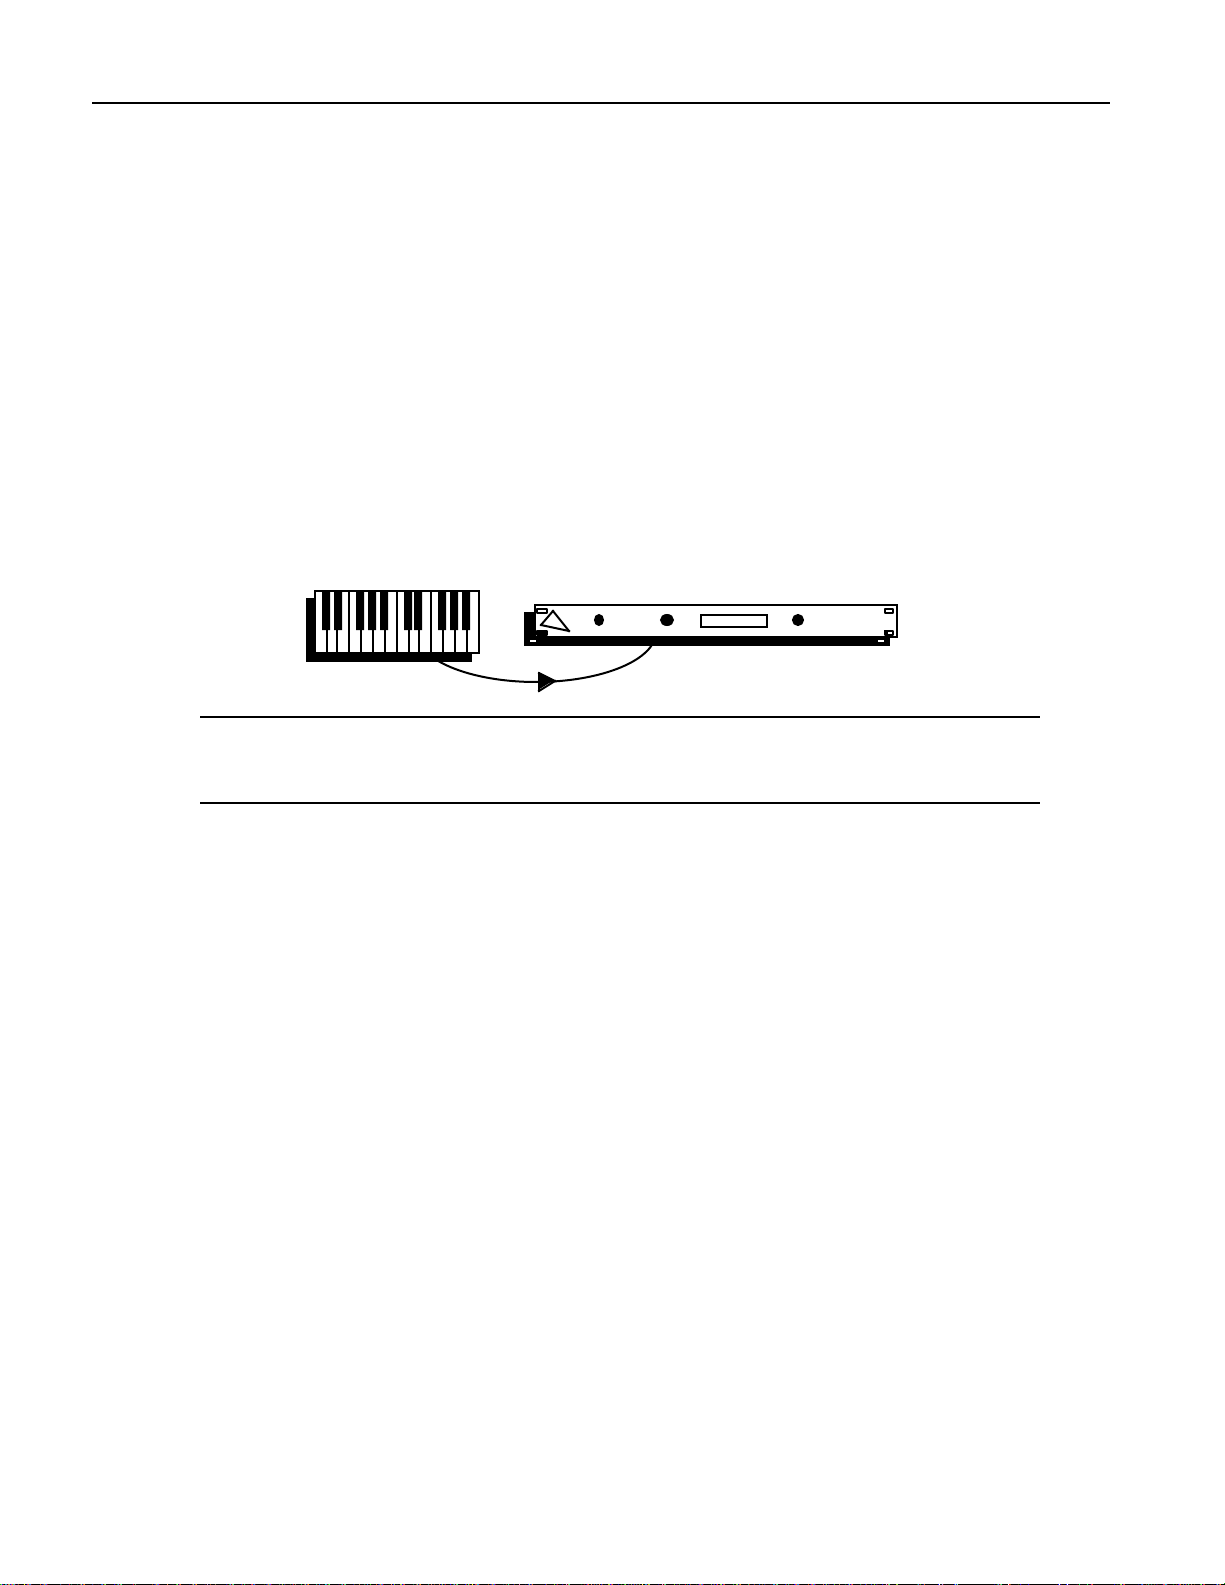
Chapter 2—Connections
Even if your plans for the MR-Rack differ from the scenarios described in this chapter,
you’re likely to find the set-ups you’ll find here useful as starting points for your own system
design.
Using the MR-Rack with a Controller
The MR-Rack can be used as a sound source with any type of MIDI controller. This includes
MIDI keyboards, MIDI drum pads or triggers, MIDI guitars, or anything else a musician
might play which sends out MIDI data.
What You’ll Need
• A single MIDI cable.
• Stereo headphones, for verifying your connections
To Connect the MR-Rack
1. Connect one end of your MIDI cable to your controller’s MIDI Out.
2. Connect the other end to the MR-Rack’s MIDI In.
Note: If your set-up utilizes a MIDI patcher, consult your patcher’s documentation to
learn how to set up the equivalent of this MIDI connection, or see “Using the MRRack With a Computer, Controller and MIDI Patchbay” later in this chapter.
Connecting the Rest of Your System
Now that you’ve made the MIDI connections between your controller and the MR-Rack, skip
ahead to “Making Audio Connections” later in this chapter.
Using the MR-Rack with a Workstation
A workstation is a MIDI instrument with a keyboard, a sequencer, built-in synthesizer or
sampler, effects processor and disk drive or memory card. Adding an MR-Rack vastly
expands the workstation’s sonic palette and provides 64 voices of added polyphony. The MRRack can be played via MIDI from a workstation’s keyboard, or addressed by its sequencer.
Often, a workstation’s disk drive can be used to archive the memory contents of external
devices—such as the MR-Rack—through the “dumping” of MIDI System Exclusive (SysEx)
data. (If you’d like to know more about SysEx, see the Glossary and “What Is MIDI?” in
Chapter 9.) Consult your workstation’s manual to see if yours can receive MIDI SysEx
dumps—if not, you can simply skip the MIDI connection which would run from the MRRack back to your workstation. To learn how to perform a SysEx dump from the MR-Rack,
see Chapter 6.
What You’ll Need
• Two MIDI cables
• Stereo headphones, for verifying your connections
To Connect the MR-Rack
1. Connect one end of a MIDI cable to your workstation’s MIDI Out.
2. Connect the cable’s other end to the MR-Rack’s MIDI In.
3. Connect one end of the other MIDI cable to the MR-Rack’s MIDI Out.
2 ENSONIQ MR-Rack Musician’s Manual
Loading…
The MR-61 can be expanded with up to 3 of the EXP series expansion boards. It is also available in rackmount form as the Ensoniq MR-Rack.
The MR series contains 36 transwaves that can be used to generate wave sequences.
Transwave list:
- Transwave
- Aah Ooh Xw
- Ana Bs Xwave
- Ana Vox-X
- Analog Pad X
- Bell Xwave 1
- Bell Xwave 2
- Bell Xwave 3
- Bell Xwave 4
- Drawbar Xw
- Mellow Sweep
- Multi Bell
- Organ Xwave
- Osc Sync Xw 1
- Osc Sync Xw 2
- Phase Sync
- Pulse X
- Rap Bs Xwave
- Resonance
- Rez Bs Xwave
- Rez Sweep
- Rezo-X 4
- Rezo-X 3
- Rezo-X 2
- Rezo-X 1
- Scratch Wave
- Soft Analog
- Techno Bass
- Tine Xwave
- Transwave Aa
- Transwave Ah
- Transwave Ee
- Transwave Oo
- Transwave Z
- Tri Sweep
- Wakka Wakka
Specifications
Year Released: 1996
MSRP: 2595.00 USD
Keyboard: 61 keys with velocity and aftertouch
Polyphony: 64 notes
Multitimbral: 16 parts
ROM: 13 MB (1210 waveforms with 468 drums)
Sequencer Memory: 50,000 notes
Effects: 40 effects at 24-bit resolution
Sequencer: 16 Tracks
User Demo Videos
Rating
File Downloads
Ensoniq MR-Rack Manual
Items for Sale on Reverb
Ensoniq MR-61 64-Voice Expandable Keyboard 1996 — Black ($400)
Ensoniq MR-61 64-Voice Expandable Keyboard 1996 — Black ($539.10)
Ensoniq — EPS-16 Plus , KS-32 , ASR-10 , KT-76 , MR-61 , TS-10 , ASR-88 , EPS-16 Plus — Slide potentiometer ($16.99)
EnsoniqEPS-16 Plus , KS-32 , ASR-10 , KT-76 , MR-61 , TS-10 Slide Potentiometer Slider ($11.82)
Ensoniq MR-61 / MR-76 — Version 2.11 Firmware OS Update Upgrade Eprom MR61 MR76 ($22.51)
Ensoniq MR-61 / MR-76 — Version 1.20 Rom C Firmware OS Update Upgrade Eprom MR61 MR76 ($22.51)
Ensoniq MR & ZR Series MRD-100 Floppy Disk for MR61 MR76 ZR76 MRD100 2020s ($9.99)
Ensoniq — MR61 , MR76 ( all Encoder) — ZR — 76 FX/MIXDOWN — Encoder ($16.90)
Ensoniq — MR61 , MR76 ( all Encoder) — ZR — 76 FX/MIXDOWN Encoder ($13.01)
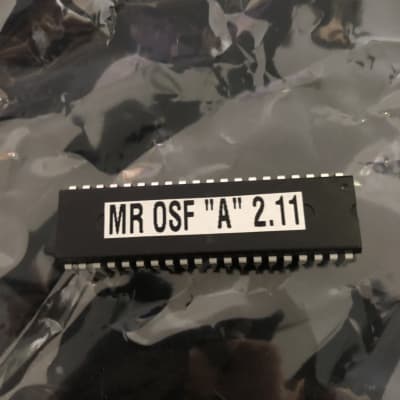
Ensoniq V2.11 ROM For MR-61 & MR-76 40 pin EPROM Upgrade Firmware Chip MR61 MR76 os rom a ($53.55)
Ensoniq MR-61/MR-76 Sample memory board Mr-flash 1990 ($342.12)
+7 (495) 215-16-67
8 (800) 333-16-67
с 9:00-19:00 — ежедневно (МСК)
Заказать звонок
×
Обратный звонок
Представьтесь
Номер вашего телефона
Ваш вопрос
я даю согласие Shopozz на обработку персональных данных
в соответствии с Федеральным законом от 27.07.2006 года №152-ФЗ «О персональных данных», на условиях и для целей, определенных Политикой конфиденциальности.
×
Доставка товаров с аукциона eBay и интернет-магазинов США в
Россию (Москва, Санкт-Петербург, Новосибирск, Екатеринбург,
Казань, Нижний Новгород, Челябинск, Красноярск, Самара, Уфа,
Ростов-на-Дону, Омск, Краснодар, Воронеж, Волгоград, Пермь и
другие города).
© Shopozz — сервис покупок за рубежом
Ensoniq released their MR-61 music workstation synthesizer in 1996 to generally favorable reviews despite it being quite a departure from previous Ensoniq keyboards. According to marketing at the time, Ensoniq specifically designed the MR-61 for composers after studying the songwriting process and taking note of what tools are used the most. Ensoniq then made sure to implement these in the MR-61, with features such as the Idea Pad, which functions as a MIDI capture buffer. It allows users to play around and then listen to the playback before sending whatever they like over to the 16-track recorder. The nice thing about the Idea Pad is that it doesn’t just remember whatever notes are played on the MIDI keyboard but also changes such as pitch-bending.
To help players get into the groove, the MR-61 also has an onboard drum machine with a selection of natural-sounding rhythms. Each of the rhythms has eight different types of variations as well as eight fills, so you have access to plenty of variety per style. The drum machine can also be linked to the onboard 16-track recorder for added convenience. It’s worth noting that it is impossible to create drum patterns inside the machine, but PC software was later developed to rectify this. After creating the drum patterns on the computer, it was then possible to load the rhythms onto disk and use them with the MR-61.
Once you are ready to move over to the sequencer Ensoniq has also made sure to incorporate plenty of options when it comes to shaping your performance. Best of all, all editing that you perform on the MR-61 is non-destructive thanks to its Undo feature. It also has a Song Editor which can be used to build your arrangement. Another first for Ensoniq was the inclusion of slots that could hold up to three expansion cards. These cards are capable of holding up to 24 megabytes of data for samples and sounds. There are three known expansion cards for the MR-61, which are Perfect Piano, World Sounds, and Urban Dance Project.
Notable appearances by the Ensoniq MR in popular music is the 1997 Janet Jackson album, The Velvet Rope, and the track Together Again in particular. One of the things to keep in mind when purchasing a second-hand MR-61 is that the original hardware was released with an operating system that had several operational and MIDI software bugs. These problems were later fixed via an updated OS chip, but tracking one down these days can be troublesome.
Lookup Prices for MR-61 on eBay
Demos & Media
Specifications
-
-
#1
Вопрос ко всем владельцам или знатокам этих двух станций. Меня интересует звук танцевальной музыки из 90-х, в частности, классический евродэнс типа Masterboy или Culture Beat. Слышал что Ensoniq использовался при создании хитов середины 90-х. Вот я хочу выяснить, звучание какого инструмента ближе всего к классическому евродэнсу — TS или MR? TS был выпущен в 93-м году, а MR в 96-м, но почему-то TS продают в два раза дороже, чем MR. Что это — дань моде на винтаж, или всё же TS более качественный по звуку, чем более поздняя серия? Кто поможет разобраться?
-
-
#2
На Vintage Synth Explorer много полезной инфы можно почерпнуть.
Обе обозначенные модели для Евродэнса — как телеге пятое колесо.
Если и использовались Энсоники для данного направления, то, скорее всего, модели ESQ-1 или SQ-80. Или вообще сэмплеры типа EPS или ASR.
-
-
#3
В 00:00 — вот это точность
А продают тс10 дорого не из за евроденса.
-
-
#4
В 00:00 — вот это точность
Это золушка писала. )))
А продают тс10 дорого не из за евроденса.
А из-за чего?
Так может тогда поставим вопрос по-другому: КАКАЯ ИЗ ЭТИХ СТАНЦИЙ даёт БОЛЕЕ КАЧЕСТВЕННОЕ звучание? И вообще — чем они могут быть полезны сегодня как аранжировщики?
-
-
#5
Серия TS звучит «больше эстрадно-торжественно, чем попсово».
-
-
#6
И вообще — чем они могут быть полезны сегодня как аранжировщики?
как бы так сказать… эти аппараты сегодня помогут Вам развить творчество и креативность в оправдывании стремных покупок.
-
-
#7
@MSerg, то есть Вы считаете, что данные аппараты сегодня абсолютно не востребованы в студиях звукозаписи? Например, проф. музыканты до сих пор делают музыку при помощи винтажных ямах SY серии, хотя они были выпущены раньше, чем Ensoniq, не считая того, что бас до сих пор создают при помощи синтов 80-х. Вот и хочется узнать, что же всё-таки за конёк такой этот Ensoniq…
Серия TS звучит «больше эстрадно-торжественно, чем попсово».
У меня эстрада как раз с попсой и ассоциируется.
-
-
#8
@Dsasa, если у кого-то что-то стоит в студии, это не значит, что на этом по факту работают. У меня есть SY-85, но она никогда не была использована в реальной работе т.к. банально стремно звучит. Но люди приходят смотрят сколько всего стоит и эти декорации производят своё особое впечатление, которое не имеет отношения к реальной работе.
-
-
#9
@MSerg, Вы в каком жанре пишите музыку?
-
-
#10
У меня эстрада как раз с попсой и ассоциируется
Это как бы не совсем так называемая «традиционная эстрада». )) Лично мне всегда в дополнение к Ensoniq хотелось что-то от Roland или Yamaha, в общем, чтоб и американское, и японское.
-
-
#11
@Slava V, можете сказать, насколько Ensoniq подходит для написания танцевальной музыки в стиле 90-х? В плане инструментала, джаза, фолька, попа, баллад и т.п. с ним всё понятно. Но меня интересует как раз техно направление.
-
-
#12
Я не могу себя считать знатоком этого направления, но в те годы мне почему-то казалось (из личного знакомства с инструментами, а также аранжировок знакомых музыкантов), что для такого больше походит, например, Alesis QS-6 или что-то такое. Тут еще играет роль использование сэмплерных библиотек, особенно с расширением до 8 Мб, хотя с позиций нынешнего времени даже не знаю, насколько это актуально.
Ну вот, например.
-
-
#13
Судя по этому примеру, Ensoniq не блещет электронными звуками.
-
-
#16
@Zerocool, не знал этого! Но всё же эту станцию называют легендой, вот это меня и зацепило. К тому же выпущен он в то самое время, когда евроданс и близкие к нему направления были в самом расцвете.
-
-
#17
@Dsasa, вы хотите купить ts для электроники и желаете всеобщего одобрения?
-
-
#18
Судя по этому примеру, Ensoniq не блещет электронными звуками
В демках тембры «по умолчанию», у этих инструментов есть 6 осциляторов, на каждом — 3 Envelope, 2 фильтра с выбором типа. Можно накручивать интересные вещи. Есть интересные ударные типа «808», дэнсовая бочка, органчик для риффов со щелчком четкий и плотный, во многих плагинах такого не встречал.
Весь вопрос в том, собираетесь ли делать все на одном инструменте, или совместно с другими.
Можете посмотреть в сторону SD1 — он как-то чуть мягче звучит, синтетические басы есть симпатичные, например.
А насчет Ensoniq MR-61 — у него есть модульная версия, может дешевле обойтись.
В ВКонтакте есть группа на эту тему, можно пообщаться с завсегдатаями, которые в теме насчет разных моделей.
https://vk.com/ensoniq
А насчет легендарности серии TS — она появилась не на пустом месте. К моменту ее появления бренд Ensoniq уже был довольно популярен и эти инструменты олицетворяли новый уровень рабочих станций по сравнению с «пресловутыми» KORG M1 или Roland D-20.
Вот плагины появились, имитирующие инструменты 90-х.
Последнее редактирование:
-
-
#19
@Dsasa, вы хотите купить ts для электроники и желаете всеобщего одобрения?
Скажу так, мне нравится что-нибудь эдакое непластмассовое и чтобы подходило под критерии классического евродэнса из 90-х, и узнал я о нём из темы про эмуляцию звука евродэнс, вот и заинтересовался. Потом решил узнать — что же всё-таки ближе по-звучанию к нему — TS или MR. Я Ensoniq вообще ни разу не щупал, только видеопримеры смотрел, пэды вроде бы хорошие, неплохая имитация живого звука, но с моим стилем так и не разобрался. Судя по вашим постам тут, желание его покупать теперь на крайне низком уровне.
Весь вопрос в том, собираетесь ли делать все на одном инструменте, или совместно с другими.
Я прекрасно понимаю, что на одном синте сделать классику жанра не получится. Но всё же отдавать 30-50 рублей только лишь за пару звуков или за ту же конфетку в другой обёртке — сомнительный вариант лично для меня. А так спасибо за инфу!
Вот плагины появились, имитирующие инструменты 90-х.
Вопрос только в том, насколько достоверно они имитируют.
-
-
#20
но почему-то TS продают в два раза дороже, чем MR. Что это — дань моде на винтаж, или всё же TS более качественный по звуку, чем более поздняя серия? Кто поможет разобраться?
Как мне объяснили — просто у TS-10 (не 12) есть до сих пор своя ниша — «восточные» музыканты (Узбекистан и т.п.), где этот инструмент по сей день считается культовым, а также имеет некоторые характерные (для этой музыки) тембры и удобную для исполнения такими звуками клаву (поэтому 12-й и в пролёте). Даже примеры видел как-то, выкладывали (если Фуркат зайдёт в эту тему — может и поделится ссылкой). По общему звучанию, насколько мне помнится из 93-94, народ вообще предпочитал SD-1, но сами тембры в TS-10 были более разнообразны и актуальны, поэтому всё же переходили на TS-ки в своё время.
ensoniq ts 10 , ts 12 блещет «совком » приличная часть нашей эстрады начала 90 ых , а так же большая часть фонограмм тех же лет , сделаны на нем
если вы поклонник данного «винтажа «
— то это выбор для вас , больше ни на что этот прибор не годен
Плюсанусь, если нужно аутентично повторить аранж какой-нить «Ля-ля-фа» или другого подобного «нафталина» — то в самый раз, куда ещё его сегодня можно запихнуть — хз.
-
-
#21
@Alex_HS,
Верно кстати про нишу , еще по этой же причине — ориентальными музыкантами любим korg prophecy , хотя по части удобства рулежки и интерфейса — отвратительнее этого корга нет ничего ) ….
-
-
#22
@Dsasa, Не Masterboy не Culture Beat не использовали Энсоники …. Вобще из евроденсеров мало кто использовал энсониковский звук …
У Мастербоев светились JX-8p , семплер Имакс первый (на аналоговых фильтрах который), D50 , по звуку ещё были JD990 , вроде что-то с курца звучало… с энсоника не
Culture Beat тоже скорее всего JD990 , и роландо , аналоговая история
У меня есть ASR-10 … да, к нему есть хорошие библиотеки в танцевальных направлениямх в стиле 90ых
Ensoniq CDR-14 — Analog and Digital Synth
Ensoniq CDR-16 — DanceTools
Masterbits Dance T.R.A.X.
Masterbits Tekkno T.R.A.X.
итп… наверно эти же звуки и на TS серии пойдут…
Про MR серию не знаю… уже совсем что-то новое… у них только интересная карта есть в денс направлении… но там звуки уже второй половины 90ых аля скутер
Хочется классики евроденса по звуку, тогда Вам нужны аналоговые Роланды — Juno, Jupiter, JX… и другие аналоги Matrix-1000, Bass Station, Moog … Ромплеры JD, JV … D110 D50 U220 итп .. фм — аля DX TX … вот это всё классика евроденса … ну и АКАИ конечно же. Энсоник ASR/TS можно рассматривать только как альтернативу Акаиным семплерам, или с использованием вышеуказанных родных библиотек, это тоже даст какой-то свой уникальный результат.
Последнее редактирование:
-
-
#23
@TechnoIsBack, спасибо, чётко разложил. У меня нет желания 100% копировать звучание тех исполнителей, да и смысл? Всё-таки, в наше время можно сделать звучание ярче, чем было в 90-х, и звучание тех же пил, использовавшихся в евродэнсе 90-х сегодня можно сделать более разнообразным. главное, чтобы всё оставалось в рамках классики этого направления. Поэтому у меня нет особого желания (да и свободных средств) покупать синты 80-х годов, за исключением разве что TX81Z — его я думаю приобрести после праздников. Вот аппараты первой половины 90-х меня пока больше интересуют.
@TechnoIsBack, какой синтезатор Вы можете посоветовать для лида? Я имею ввиду какой из них будет более универсален в плане извлечения лида?
-
-
#24
я люблю аналоговый звук.. поэтому взял бы что-то из JX-8p, Jupiter, Matrix, Moog … Korg DW-8000, Prophet VS, Waldorf Microwave первый … из более простых решений D-110/550 , JD-990
Самым универсальным наверное будет юпитер, но он и самый дорогой.. наряду с мугами
Здесь вопрос, не что самое универсальное, а какой звук Вы любите и на звук каких групп ровняетесь? Смотрите, что они использовали, и ответ будет очевидным. (Вопреки многим мнениям, мол если вы купите те же синты вам не стать такими же звёздами )) здёздами не стать.. это да.. но без этих инструментов добиться аутентичного звука тоже трудно)
Последнее редактирование:
-
-
#25
JX-8p, Jupiter, Matrix, Moog … Korg DW-8000, Prophet VS, Waldorf Microwave первый … из более простых решений D-550 , JD-990
Самым универсальным наверное будет юпитер, но он и самый дорогой.. на ряду с мугами
Хороший совет для человека, (как бы помягче сказать) не стесненного в средствах.
А для простых смертных …. Для лида можно использовать любой VA-синтезатор. И не только VA. Повторюсь — ЛЮБОЙ.
-
-
#26
Вопрос не стоял в ограниченности ресурсов, либо совете вст синтезатора
Про тот период музыки , о котором спрашивает человек .. тогда VA ещё не было и в помине.. только через пару лет он вышел… чем и запорол всё дальнейшее развитие нормальной музыки )) (ой щас затроллят)
-
-
#28
Хороший VA.. если Вы любите транс … даже самый лучший по моему мнению для транса, не смотря на нордлиды и вирусы разные.. ну это вкусовщина
Можно ли на нём накрутить звуки близкие к евроденсу? Можно на чём угодно… даже на паршивом вст… пару пил везде найдётся… всё зависит от того, какого звучания Вы хотите в результате
-
-
#29
«Виртуально-аналоговый» и «аналог-моделирующий» — это идентичные понятия?
даже самый лучший по моему мнению для транса, не смотря на нордлиды и вирусы разные
Вывод из того, что я читал — вирус — лучший по характеру звучания, но jp8000 — лучше в плане удобства управления.
-
-
#30
Самым универсальным наверное будет юпитер, но он и самый дорогой
да ладно, 200-300 штук рублей на хороший звук не жалко. Правда 99% слушателей не отличат его от vst, но это уже мелочи