-
Ночь распродаж
В магазине — по ценам сайта
Скажите на кассе «Хочу как на сайте»
Условия возврата
Обменять или вернуть товар надлежащего качества можно в течение 14 дней с момента покупки.
Подробнее
О товаре
Набор Newsun Toys для вязания шарфиков
Создай потрясающий аксессуар своими руками! С набором для вязания шарфиков Newsun Toys это будет несложно. Поддержите творческий порыв маленькой рукодельницы и помогите ей выглядеть стильно.
- Направляйте пряжу с помощью ткацкого станка.
- Используйте крючок для вязания.
- Понятная инструкция поможет создать красивый аксессуар.
- Комбинируйте цвета пряжи, создавая уникальные вещи.
- Набор подходит для вязания шарфов, поясов и других аксессуаров.
В комплекте:
- 1 ткацкий станок
- Крючок
- Игла
- Пряжа
ВНИМАНИЕ! Предназначено для детей от 6 лет.
Характеристики
| Код товара | 1000047845 |
|---|---|
| Артикул | MBK-280 |
| Длина упаковки, см | 35 |
| Ширина упаковки, см | 7 |
| Высота упаковки, см | 29.5 |
| Вес упаковки, кг | 0.44 |
| Страна производства | Китай |
-
- Общие впечатления
- Набор интересный, дочке 6 лет понравилось наматывать пряжу
- Достоинства
- Интересная расцветка пряжи
- Недостатки
- Огромная коробка, внутри набор в 3 раза меньше. Инструкция не с первого раза понятна даже взрослому, было бы идеально производителю сделать ссылку на видеоинструкцию.
Все отзывы (13)
Вопросы покупателей
Спросите что-нибудь о товаре у других покупателей
Ещё товары
Часто задаваемые вопросы
Цена на Набор для творчества NEWSUN — 429 ₽.
Да, можем доставить товар в любой регион России, в том числе в следующие города: Москва, Санкт-Петербург, Екатеринбург, Краснодар, Пермь, Самара, Нижний Новгород, Воронеж, Новосибирск, Казань.
Вам будет начислено 9 бонусов. Бонусами можно оплатить 100 % стоимости покупки: 1 бонус = 1 рубль.
Да, в нашем интернет-магазине возможно купить данный товар в рассрочку. Для этого выберите оплату Долями при оформлении заказа. Вы платите одну четверть от суммы заказа сразу, а остальные три будут списываться с карты через каждые две недели.
Да, у нас вы можете увидеть 2 фото под названием товара.
В нашем интернет-магазине действует много акций и скидок. Вы можете ознакомиться с ними в разделе акций из меню сайта.
Цены в интернет-магазине могут отличаться от розничных магазинов.
Категории
- 3d ручка
- Мозабрик
- Набор для выжигания по дереву
- Мольберт детский
- Мольберт двухсторонний
- Раскопки для детей
- Алмазная мозаика рыжий кот
- Мозаика рыжий кот
- Доски для выжигания
- Конструктор мозабрик
- Сборные модели
- Картина по номерам рыжий кот
- Тесто для лепки
- Краска для моделирования
- Доска для рисования
- Мозаика для детей
- Выжигательный аппарат
- Юный биолог
- 3д ручка myriwell
- Бумажные модели для склеивания
- Товары для творчества
- Наклейки барби
Описание
Шарфы нужны девочкам не только для тепла, но и для красоты. Набор для вязания Knits Cool (Spin Master) дарит возможность своими руками сделать тонкий шарф – он не греет, зато делает образ невероятно романтичным.
В наборе 18 м фиолетовой пряжи с пестрыми вкраплениями и подробная инструкция. Это дополнение к Студии вязания Knits Cool. Сам станок приобретается отдельно.
Для работы используйте самые крупные стержни из основного набора, чтобы придать плетению воздушность и легкость. Петли вывязываются прямо руками – вам не нужны спицы и другие инструменты!
Шарф состоит из нескольких рядов, а по краям расположена бахрома – яркая финальная точка. Готовое изделие можно носить не только как шарф, но и как декоративный пояс. Экспериментируйте с образами и своими творческими возможностями! На примере этого аксессуара создавайте собственные из другого материала.
Вязание развивает у девочек любовь к ручному труду, усидчивость, терпеливость, самостоятельность. Они раскрывают творческие способности, развивают вкус и художественное мышление.
Обогатите свой гардероб ручными аксессуарами с набором для вязания Knits Cool от компании «Спин Мастер»!
Этот товар также ищут как: кнайтс кул/книтс кул/нетскул/нет скул/нитс кул/ниц кул/ницкул/нит скул/нитку/нитс скул/найцкул/ницку
Параметры товара: длина пряжи 18 м, упаковка – картонная коробка с подвесом 150х255х35 мм, вес 75 г
Вес: 0,08 кг.
Отзывы
Добавить отзыв:
Доставка и оплата
При оформлении заказа в корзине, для Вашего заказа будет рассчитана стоимость доставки и дана подробная информация о вариантах и сроках доставки. Подробнее о вариантах доставки и оплаты вы можете прочитать здесь.
Гарантия
1. Возврат товара может быть осуществлен в течение 7 дней с момента его получения.
2. Возврат товара надлежащего качества возможен, если:
- он не был в употреблении,
- сохранен его товарный вид, заводская упаковка
3. Возврат или обмен товара ненадлежащего качества осуществляется в течение гарантийного срока, установленного производителем. Возврат товара ненадлежащего качества осуществляется за счет компании «Умная Игрушка».
4. Возврат денежных средств покупателю осуществляется в течение 10 дней с момента получения нами возвращенного товара или с момента принятия решения о возврате денежных средств.
С подробными условиями гарантии Вы можете ознакомиться здесь.
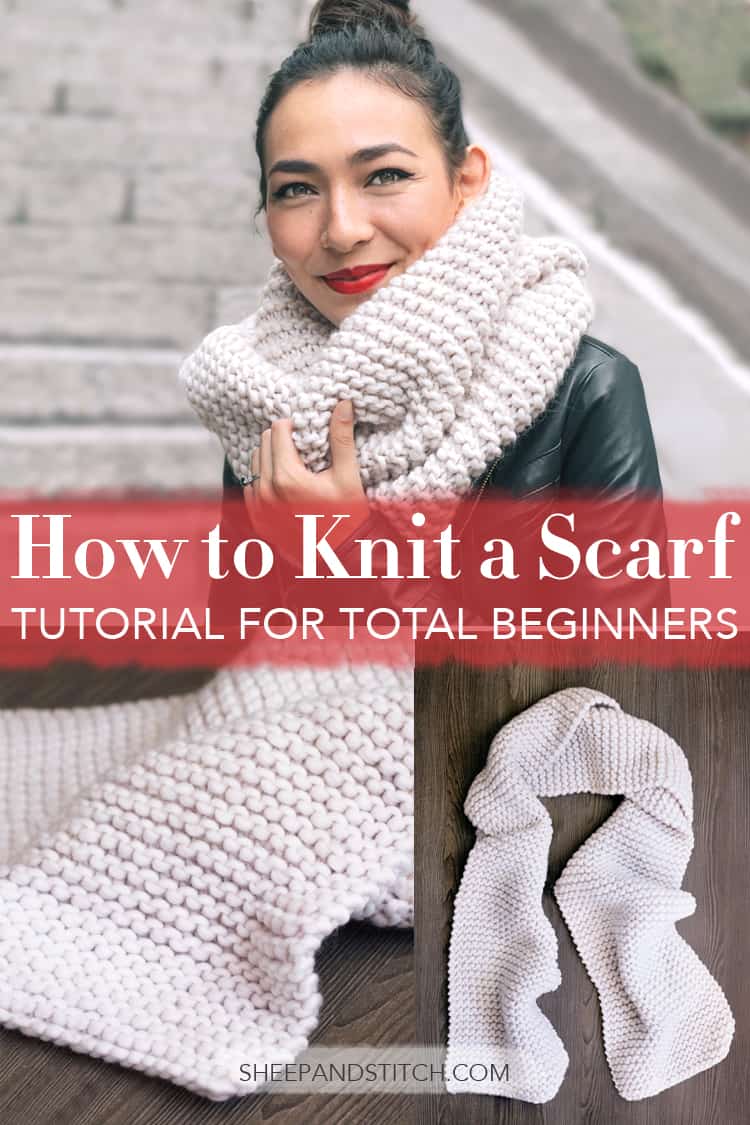
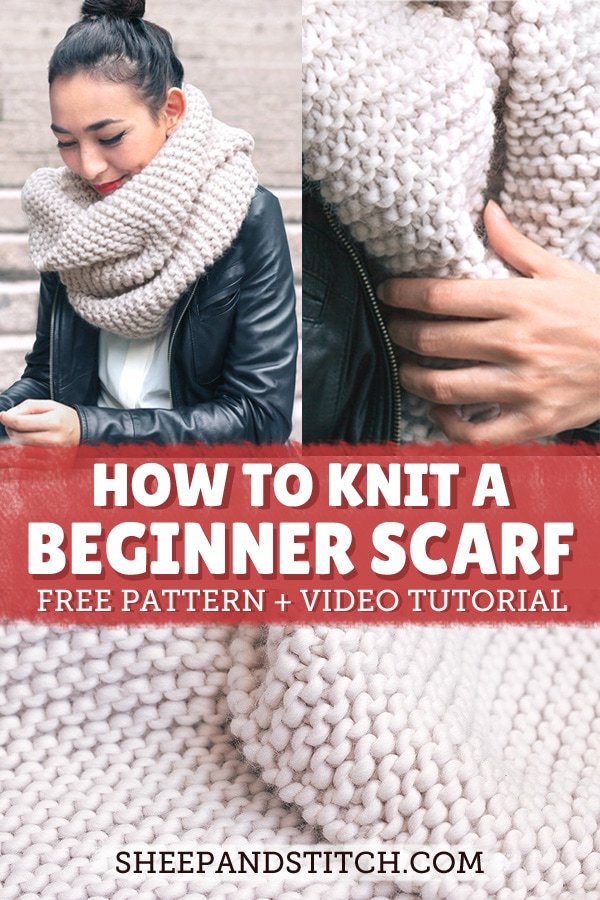
Want to learn how to knit a scarf? This FREE knitting pattern & video tutorial will show you how to make a knitted scarf, even if you are a brand-new beginner.
Table of Contents
- How to Knit a Scarf for Beginners
- What yarn do you need to make a scarf?
- How thick should the yarn be?
- Supplies Needed for Knitting a Scarf
- How do I make my scarf a different size?
- How do you start Knitting a Scarf?
- Beginner Knit Scarf Knitting Pattern
-
- You Will Need:
-
- Shop Supplies for this Project
-
- How to Make a Gauge Swatch:
- Blocking
- Beginner Knit Scarf Instructions
- Beginner Knit Scarf Formula
- To Block: (video tutorial here)
- To Add Fringe:
- To Attach the Fringe:
- Including Yarn Tails in Your Fringe
- Trimming Your Fringe
- To Make An Infinity Scarf:
-
How to Knit a Scarf for Beginners
One of the first things that beginner knitters often want to make is a simple scarf. It’s just a long rectangle! If you can cast on, make the knit stitch, and bind off, you can make this easy scarf.
What yarn do you need to make a scarf?
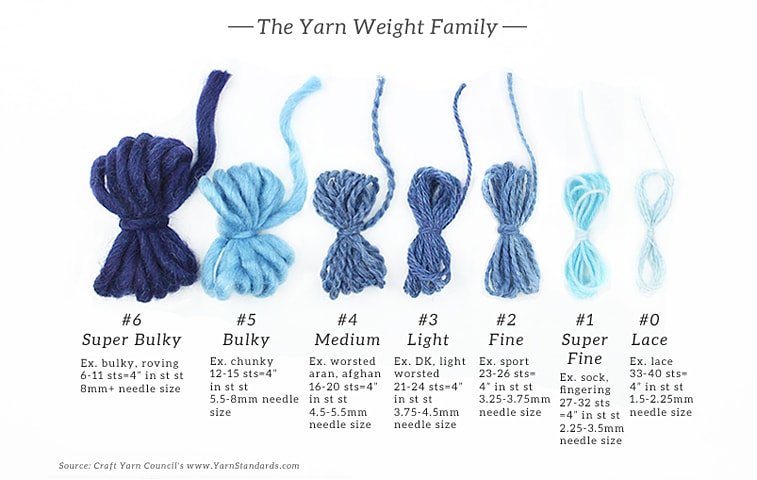
For a basic scarf, you can use almost any smooth yarn you like. In this tutorial, we’ll be using a #5 Bulky Weight yarn, which is also called chunky yarn. This makes a chunky scarf. Here are some tips for how to choose the best yarn for scarves:
Smooth, Consistent Thickness
Some yarns have a lot of texture, and can be very furry or fluffy, which can make it harder to see your stitches. There are also some yarns available that have a ‘thick and thin’ spin to them, which makes the yarn varies in thickness throughout the skein or ball. I recommend a plain, smooth yarn that does not change thickness through the skein.
Solid Color
There are many beautiful multi-colored yarns out there, but I would not recommend them if you are a brand-new beginner. It’s important that you first learn and practice the basic techniques on a solid colored yarn, so you can see what you are doing as clearly as possible. Once you have become more familiar with the basic stitches, you can use a multi-colored yarn if you like, but it’s best to use a solid color if this is your first project.
Soft
Your yarn should also be soft, of course! This knit scarf is going to be work against the neck, so if the yarn has any scratchiness to it, it can irritate the skin. When you go yarn shopping, feel each skein of yarn carefully to make sure it is not scratchy. Here’s a tip: the best way to tell if a yarn is soft enough for a scarf is to gently rub the ball of yarn against your neck. If it doesn’t feel scratchy, then it’s soft enough!
Fiber Content
When knitting a scarf, as long as the yarn is soft, fiber content mainly affects the way you will need to wash the finished scarf. Please check the washing instructions on the yarn label to see if the yarn must be hand washed, or if it can be washed by machine.
A Note about Wool Yarn:
One common misconception about wool is that if wool makes your skin itchy, you are allergic to it. This is not actually true. It is possible to be allergic to wool, but it is not very common. If a person has a true wool allergy, that means wool fibers can give them watery, itchy eyes, and make them sneeze, similar to an allergic reaction to dogs or cats.
Being sensitive to wool is fairly common, though. If wool makes your skin itchy, that does not necessarily mean you have a wool allergy. It may just be that the particular types of wool you have tried tend to have more coarse fibers, which can irritate sensitive skin. If you have experienced skin irritation from wool before, try a softer, higher-quality wool with finer fibers, like fine merino wool.
How thick should the yarn be?
For this project, we’ll be using #5 Bulky yarn, but for a scarf, you can technically use any yarn thickness you like. #4 Medium / Worsted Weight yarn is also a good choice for beginners.
For more info on the Standard Yarn Weight System that classifies the thickness of a yarn, click here.

Supplies Needed for Knitting a Scarf
Here’s what you’ll need to make your first knitted scarf:
Knitting Needles
Since a scarf is just a long rectangle, you can use almost any type of knitting needles you have. Straight, circular, or interchangeable needles will all work for this project. I’m using Knit Picks Birch Straight Knitting Needles for my scarf.
Yarn
Of course, you’ll need yarn for your scarf. Follow the guidelines in the section above, and choose a yarn that is labeled #5 Bulky Weight. This knitting pattern makes a fairly large garter stitch scarf, and calls for at least 275 yards of #5 Bulky Weight yarn.
You’ll also need:
Scissors
A Yarn Needle or Blunt Tapestry Needle
Measuring Tape
A Crochet Hook (optional, for adding fringe)
A Note About This Scarf Pattern & Video Tutorial
Every knitter is different. I knit using a variation of the Continental style, which means I hold the yarn in my left hand like a right-handed crocheter. (I use my Ergonomic Speed Knitting Method, more info on that here.) You may hold your yarn in the right hand, which is typically called English style knitting.
In this tutorial, I’ll be demonstrating the knit stitch both ways, showing how to hold the yarn in the left hand or the right hand. Just choose the technique that feels most comfortable for you.
How do I make my scarf a different size?
Typically, free knitting patterns give specific instructions (a pattern) for making the exact same scarf in the photos. This scarf pattern includes both a pattern (exact instructions) and a formula for making your own custom scarf in any size from whatever yarn you like.
If you want to make a different sized scarf, or use a different yarn weight, you can follow these instructions as a formula or guidelines. You can adjust the width by starting with a different number of cast on stitches, and adjust the length just by stopping whenever you like the length of your scarf.
How do you start Knitting a Scarf?
My step-by-step video will show you exactly how to do this in detail. First, we’ll start by making a slip knot. This becomes the first stitch on your needle. Then, we cast on the total number of stitches needed for the width of our scarf. You can use a long-tail cast on, or any other cast on technique you like.
Once we have stitches on the needle, we hold that needle in the left hand, and it becomes our left needle. The empty needle goes in the right hand, and becomes the right needle. Once we’re holding the working yarn and needles in our hands, we can begin working knit stitches, knitting every stitch across every row until the scarf reaches the desired length. Finally, we bind off all of the stitches on our needle to finish off the end of our scarf.


Ready to get started? Let’s knit a scarf!
Beginner Knit Scarf Knitting Pattern
by Yay For Yarn
Project Level: Easy
This pattern includes both a precise pattern for my Bulky Weight scarf and a formula for making your own custom scarf.
Finished Size:
9” wide by 50” long, not including fringe / 61” long, including fringe
OR make your own custom size
You Will Need:
275 Yards of #5 Bulky Weight yarn OR At Least 200g of yarn in weight of your choice
US Size 10.5 / 6.5 mm Knitting Needles or size needed to obtain gauge (For custom scarf, I recommend a needle size 1 size larger than your yarn label recommends, or 2 sizes larger than your yarn label recommends if you are a tight knitter)
Measuring Tape
Scissors
Yarn Needle or Blunt Tapestry Needle
Crochet Hook (optional, for adding fringe)
Shop Supplies for this Project
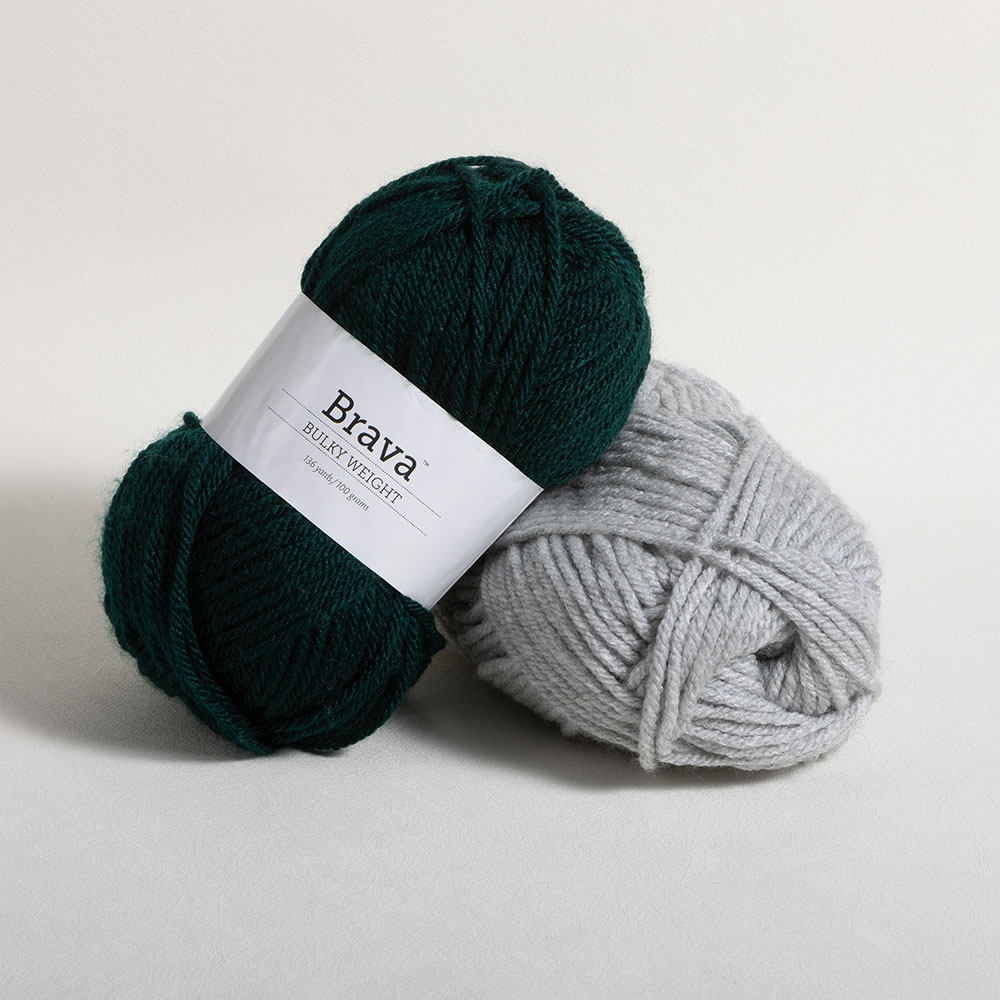
KnitPicks Brava Bulky
Buy Now →
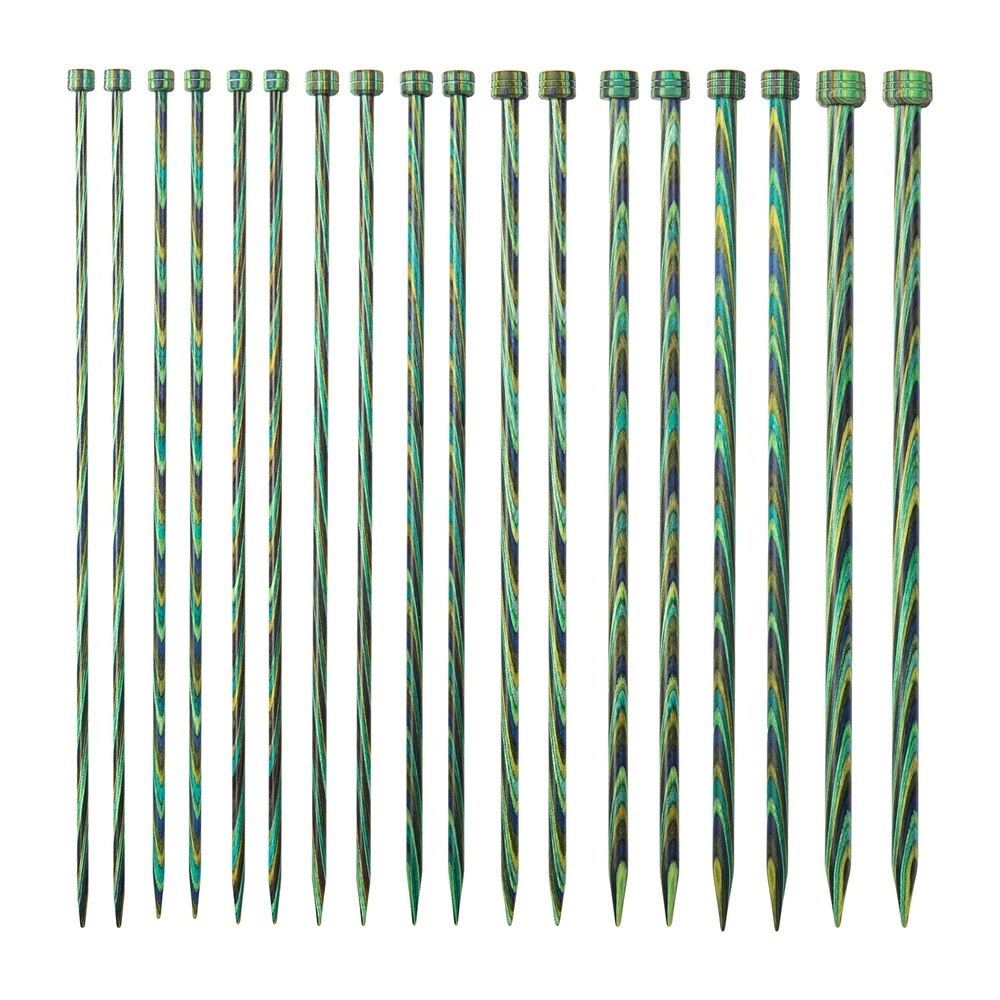
KnitPicks Caspian Straight Knitting Needles
Buy Now →

Chibi Metal Yarn Needles – Amazon
Buy Now →
Knitter’s Pride Rainbow Folding Scissors
Buy Now →
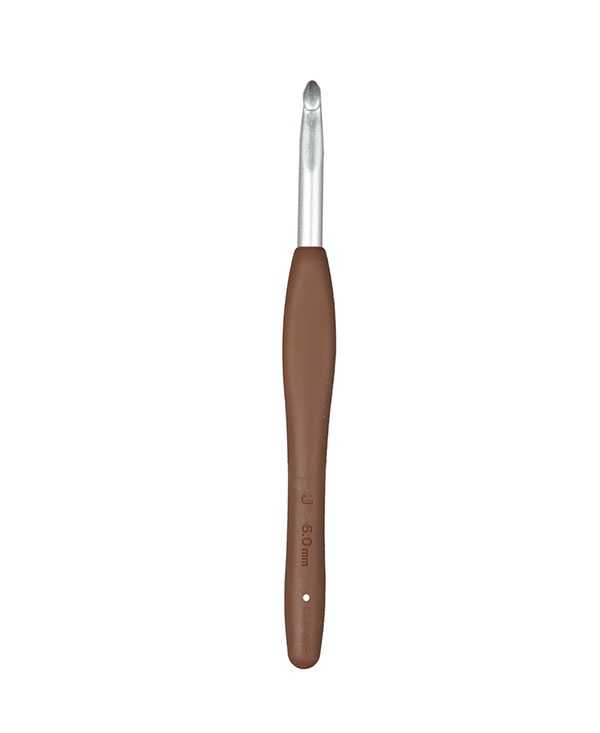
Clover Amour Crochet Hooks
Buy Now →
Featured Links powered by

Gauge: 10 sts in 3” (7.6 cm) and 20 rows = 4” (10 cm) in garter stitch after blocking
How to Make a Gauge Swatch:
Cast on enough stitches to make a piece of knitting at least 5” (12.7 cm) wide. Knit each stitch across every row until piece measures at least 5” (12.7 cm) long from cast on edge, then bind off. Please block your swatch for an accurate measurement. (Click Here to learn more about gauge.)
Blocking
Then, you’ll need to block your square. Blocking is a step that should be done on almost every knitting project. It helps relax the fabric, and get it to its final look and feel. Since blocking relaxes the fabric a bit, it can change the size of your stitches. This is why it is important to measure your gauge after you have blocked your gauge swatch. Then, the finished project will come out to the correct size after it is blocked. Click Here to learn more about how to block your knitting.
Once your gauge swatch is blocked, you can measure your gauge. You will need to know how to count your stitches and rows to properly measure your gauge. Click Here to learn how to count stitches, and Click Here to learn how to count rows.
Beginner Knit Scarf Instructions
Cast on 32 sts, leaving a yarn tail at least 6″ long.
Row 1: Knit each stitch across.
Repeat Row 1 until you have worked a total of 250 rows. Bind off loosely, leaving a tail at least 6” long.
Beginner Knit Scarf Formula
To make your own custom scarf, you’ll need to determine the number of stitches to cast on and rows to work based on your gauge swatch.
Step 1: Find your number of stitches per inch.
(This is sometimes a whole number, but not always.) First, you’ll need to measure how many stitches fit within a given measurement in your swatch, then divide the number of stitches by the measurement. For example, if you get 24 stitches in 4 inches, 24÷4=6, so in that case, you would have a gauge measurement of 6 stitches per inch.
Step 2: Find your number of rows per inch.
To do this, you’ll need to measure how many rows fit within a given measurement in your swatch, then divide the number of stitches by the measurement. (Again, this is sometimes a whole number, but not always.) For example, if you get 42 rows in 4 inches, 42÷4=10.5, so in that case, you would have a gauge measurement of 10.5 rows per inch.
Step 3: Decide on a finished length and width for your scarf.
The finished size of your scarf is entirely up to you. For an adult sized scarf, I recommend making the total length at least 55”-60” long. For a child sized scarf, 45” is a good total length.
If you plan to add fringe, the fringe will make up 9”-11” of the total length of the scarf. Decide how long you want the fringe to be on each end, then multiply that number by 2, and subtract that from the total finished length of your scarf. For example, if you want 5” fringe on each end of a 60” scarf, the fringe will make up 10” of the total length of your scarf, so the knitted portion of your scarf should measure 50” long.
As for the width of the scarf, I recommend at least 6” wide for an adult sized scarf, or at least 4” wide for a child sized scarf. You can make your scarf much wider if you prefer.
If you’d like to make an infinity scarf, the finished length will depend on how many times you want the scarf to wrap around the neck. For a cowl or infinity scarf that goes around the neck once, I recommend making the scarf 10”-12” wide and 22”-24” long. For an infinity scarf that wraps around the neck twice, I recommend making the scarf 44”-48” long.
Step 4: Calculate the number of stitches and rows for your scarf.
At this point, you’ve decided on a finished length and width for the knitted portion of your scarf. You’ll need to multiply the number of stitches per inch by the finished width of your scarf. For example, if you have a gauge of 3 stitches per inch, and you want your finished scarf to be 7” wide, 3×7=21, so you’ll cast on 21 stitches. To determine the length of your scarf, you’ll need to multiply the number of rows per inch by the finished length of your scarf. For example, if you have a gauge of 5.5 rows per inch, and you want the knitted portion of your scarf to measure 48” long, 5.5×48=264, so you’ll knit a total of 264 rows.
Begin knitting your scarf by loosely casting on the number of stitches you have determined for the width of your scarf, making sure to leave a yarn tail at least 6”-8” long. Then, knit the total number of rows you have determined for the length of your scarf, knitting every stitch across each row.
When you’ve finished knitting the total number of rows needed for your scarf, bind off loosely, leaving a tail at least 6”-8” long (or at least 1 yard long if you’re making an infinity scarf). If you’re making a scarf without fringe, you can weave in any yarn tails at this point, but if you’re making an infinity scarf, do not weave in your long yarn tail. We will use it for seaming later.
To Block: (video tutorial here)
For natural fibers, lay project out on foam blocking mats. Spray with water until fully saturated, allow to dry.
OR
For acrylic fibers, lay project out on an ironing board or several layers of towels. Hold a steaming iron 2”-3” over the surface of the fabric, making sure all of the fabric is penetrated by the steam. Allow to cool/dry.
To Add Fringe:
For the scarf PATTERN:
From your remaining yarn, cut 64 lengths of yarn that are each 12” long. Do not stretch the yarn as you measure it out against your ruler or measuring tape.
For the scarf FORMULA:
Since you have already determined the length of your fringe, here’s how to determine how long to cut each length of yarn.
Take the length you want the finished fringe on each end to be, and multiply that number by 2. For example, if you want your finished fringe to measure 4.5” long, 4.5×2=9. Then, add 1” (9+1=10). (The extra inch allows room for the small amount of each piece of yarn that is tied to the edge of the scarf, and to allow for trimming the fringe straight.) In this example, you would cut your lengths of yarn 10” long to get fringe that finishes at about 4.5”.
To determine how many lengths of yarn to cut, multiply the number of stitches you cast on by 2. So for example, if you cast on 37 stitches, 37×2=74, so you would cut 74 lengths of yarn. Do not stretch the yarn as you measure it out against your ruler or measuring tape.
To Attach the Fringe:
We will be adding a length of fringe to each stitch in the cast on edge and each stitch in the bind off edge of our scarf. For each stitch in the end of your scarf, insert your crochet hook into that stitch, bringing your hook underneath the fabric, and poking it up through the stitch along the edge.
Fold a length of fringe yarn in half, and grab the yarn at the fold with your crochet hook tip. Use the crochet hook to pull the fold through the fabric, just enough so that the folded part of the yarn makes a loop around the hook. Then, wrap the remaining length of the fringe yarn around the crochet hook, and use the hook to pull those yarn tails through the loop. Tug on the yarn tails to tighten. Repeat with each piece of fringe along both ends of your scarf.
Including Yarn Tails in Your Fringe
When you reach the corner of your scarf, where there is a yarn tail remaining from the knitting, add a piece of fringe to that last stitch as normal, but be sure to include the yarn tail from the knitting when you pull the fringe yarn tails through the loop and tighten to secure. This includes the yarn tail as part of the fringe so we don’t have to weave it in.
If your fringe yarn does not lay straight, and has some bends or kinks in it, you can straighten it by blocking or steaming the fringe. I highly recommend doing this if your fringe yarn has bends or kinks, as it makes the finished fringe look much neater.
Trimming Your Fringe
Finally, we trim the fringe. No matter how precisely you measured your lengths of fringe, the fringe on your scarf will still be a tiny bit uneven. The trimming step is optional, but if you would like to trim it straight, you can do so by laying the scarf and the fringe out on a flat surface, straightening all of the fringe, and carefully trimming the fringe across to create a straight edge. A quilting ruler and rotary cutter on a self-healing cutting mat would work great for this, but if you don’t have those items, sharp scissors will work just fine as well. Just keep in mind that when the scarf is worn, the fringe will move around, and no one will notice if some of the fringe pieces are a tiny bit uneven.
To Make An Infinity Scarf:
Lay your infinity scarf out on a flat surface, and bring the ends of the scarf together. Thread the long yarn tail through your yarn needle for seaming, and use a whip stitch to sew the two ends of the scarf together. When you reach the end of your seam, take one more stitch in the same place as your last stitch, wrap the yarn around the needle, and pull the needle through to make a knot. You can now weave in your yarn tail. (I like to weave it into the seam.)
Enjoy your finished Beginner Knit Scarf!
This pattern is intended for your personal use only. You may not share it, copy it, sell it, give it away, or mass-produce the finished product. However, you may sell the finished items on a small scale, as long as you convey in your item description that you used a Yay For Yarn pattern.
Yay For Yarn Copyright© 2021 – Current. All patterns and photos are owned by Yay For Yarn.

Pin the image below to save this project for later!
Learning how to knit a scarf can seem hard if you’re a total beginner. There are two needles to move around, and yarn that looks like it could snag into knots. It looks intimidating!
But the truth is that knitting is like any other skill. It’s no different than learning how to ride a bike or how to cook. All it takes is some time and practice.
The upside is that, unlike riding a bike or cooking, there’s no risk of skinned knees or charred fingers. Knitting is pretty safe. In fact, knitting has several health benefits!
All you need are your hands, some yarn, and a pair of needles.
How to Knit a Scarf Video Tutorial
Learning how to knit a scarf is the best beginner project because it boils down to three simple steps:
- cast on
- knit stitch
- cast off
Short, sweet and very do-able, these three steps make up your scarf journey. Get them under your belt and you can officially call yourself a knitter!
This video tutorial up top will show you how to knit a scarf, with a few extra tips thrown in. Follow along at your own pace and re-watch sections if you need a review. Jump around the video chapters with these timestamps:
0:32 Choosing Yarn and Needles
2:16 Cast On
7:33 Knit Stitch
13:46 Next Row and Pep Talk
16:01 How to Hold Your Needles
18:31 Slipped Selvedge
19:34 Cast Off
24:29 Weaving in Ends
What Yarn Should I Use?
You can use any yarn that takes your fancy.
But keep in mind that the bigger the yarn, the better. My ideal yarn for beginners is a chunky weight. Bigger yarns are easier to grip and manipulate than lighter yarns. They’re less fiddly and they also knit up quicker.
Beware of light-weight yarns like lace or super fine yarn. Imagine knitting with sewing thread. That’s what knitting with lace is like. Do not do it. Not if you’re a beginner.
Not only will it take light years to finish your scarf, but lighter yarns require smaller needles. And smaller needles are harder to control.
Make things easy for yourself and choose a yarn that’s at least a medium weight if not larger. Not sure what yarn weight is? Check out this post I wrote all about the yarn weight family.
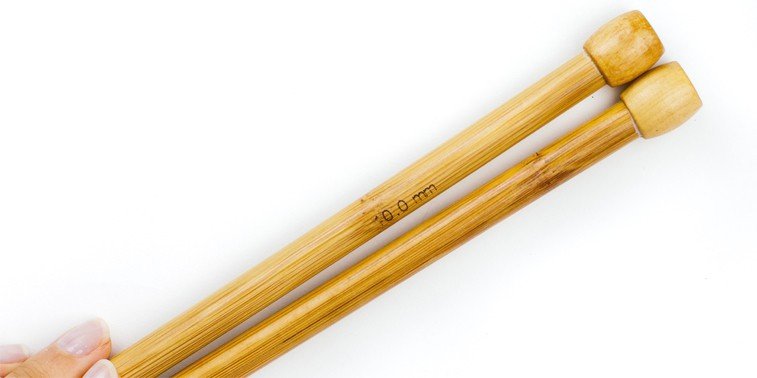
What Needles Should I Use?
Once you’ve chosen yarn, look at the yarn label. It will give you a recommended needle size.
Use this as a guide for choosing your needles. I typically go within 1mm of the recommended needle size. If the yarn label suggests a 5mm needle, I might also try out a 4mm or 6mm needle.
For beginners, I suggest using bamboo or wooden needles. They have more surface drag, meaning that they “grip” the yarn better and are less slippery to work with.
Materials Used in the Video
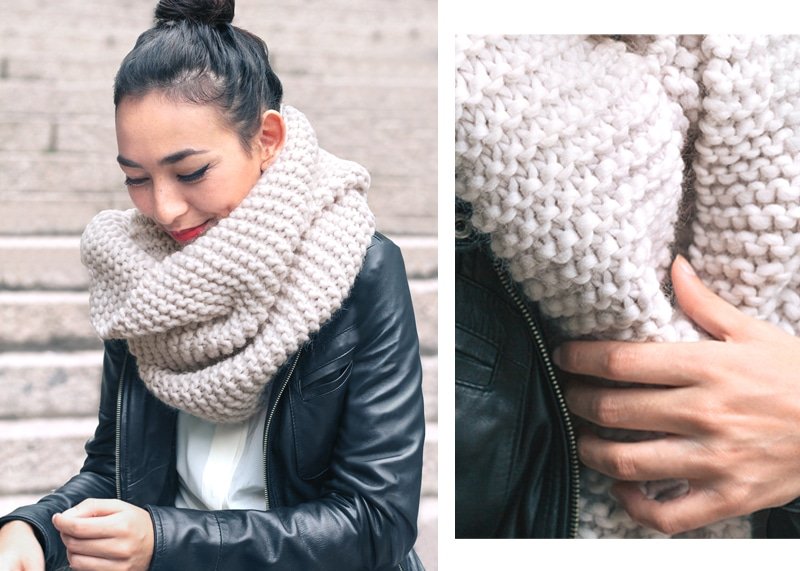
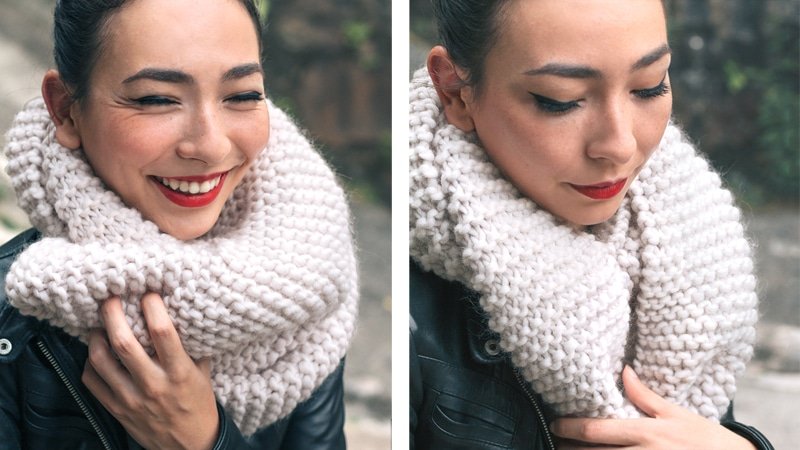
The sumptuous white scarf that you see in the photos was knit with:
- Yarn: 2 skeins of TJOCKT Martta the Merino in color Pearl (200 grams, 140m/153yds per skein)
- Similar yarns: MillaMia (2-ply merino), Lana Grossa Ragazza (1-ply merino), Malabrigo Rasta (beautiful hand-dyed 1-ply), Wendy with Wool (acrylic-wool blend, budget option)
- Needles: US 15/10mm knitting needles (similar)
Finished Scarf Measurements: width is 9.25″ and length is 65″
Instructions:
Cast on stitches 22 stitches
Slip first stitch, knit every row until scarf measures the length you desire. (My scarf measures 65″).
Cast off loosely and weave in ends with tapestry needle.
Knitting Mistakes & How to Avoid Them
Along the way you’ll make mistakes. It’s okay. Mistakes are part of the journey, so expect them. Embrace them. You need to make mistakes to get to your final destination (which, in this metaphor, is your scarf!).
If you drop a stitch, keep moving forward. Don’t look back. At first, the goal is to get the basic steps of the knit stitch down.
Once you’re comfortable with the knit stitch, your hands will naturally settle into the rhythm of knitting and you’ll make less mistakes. Think of your first ten rows as practice.
“One who makes no mistakes makes nothing at all.” – Giacomo Casanova Tweet This
Once you’re knitting comfortably, consider ripping back your work and starting your scarf fresh. You’ll be a lot more confident, and your scarf will have less mistakes in it.
Don’t think of your practice rows as “wasted.” It’s the practice that makes the perfect!
Helpful Knitting Resources for New Knitters:
- How to Knit: The Ultimate Guide (my favourite page!)
- 3 Beginner Mistakes and How to Fix Them (one of the most popular posts on this site)
- How to Join 2 Balls of Yarn
- The Yarn Weight Family
Grab a Friend & Knit Together!
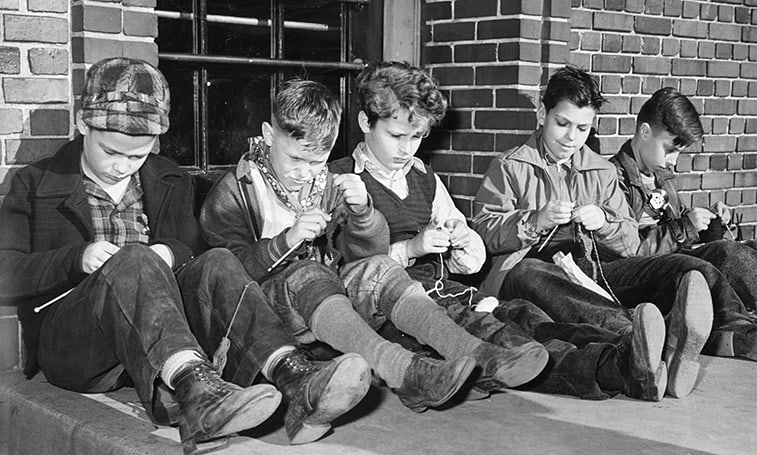
Learning is more fun with friends! Do you have friends who are crafty or who want to learn how to knit a scarf?
Maybe you know someone like Liz Lemon who takes up knitting every two years and fails. Help a friend out! Share this video and knit together. As the saying goes, sharing is caring!