
Manual
View the manual for the DJI FPV Goggles V2 here, for free. This user manual comes under the category remote controllers and has been rated by 4 people with an average of a 8.3. This manual is available in the following languages: English. Do you have a question about the DJI FPV Goggles V2?
Ask your question here
DJI FPV Goggles V2 specifications
Below you will find the product specifications and the manual specifications of the DJI FPV Goggles V2.
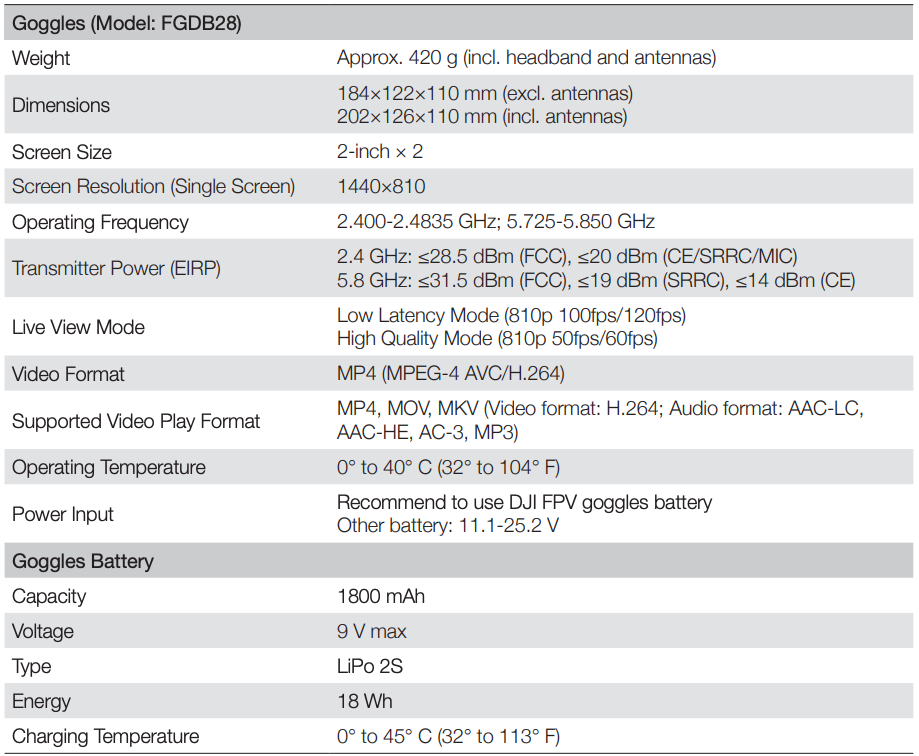
The DJI FPV Goggles V2 is a dedicated head-mounted display designed for immersive flying experiences. With a monochromatic coloration, it has a weight of 420 grams and dimensions of 184mm in width, 122mm in depth, and 110mm in height. The goggles boast a maximum refresh rate of 144 Hz, providing smooth visuals during high-speed flights.
Powered by a 1800 mAh Lithium Polymer battery, the DJI FPV Goggles V2 can last up to 1.85 hours on a single charge, making it ideal for extended use. With a DC input voltage of 9V and a power consumption of 10W, the goggles offer a balance between performance and efficiency.
Equipped with high-definition, low-latency image transmission technology, the DJI FPV Goggles V2 delivers clear visuals with minimal delay, enhancing the overall flying experience. The goggles also feature strong anti-interference capabilities, ensuring stable connectivity in challenging environments.
It is important to avoid exposing the inside of the goggles to direct sunlight to prevent damage. Dual-frequency support is available when used with the DJI FPV Drone, while only 5.8 GHz is supported with the DJI FPV Air Unit. Users should be aware of local regulations regarding frequency bands and follow all laws when operating the goggles.
Type
Dedicated head mounted display
Operating temperature (T-T)
0 — 40 °C
Power source type
Battery
USB connector type
USB Type-C
General
| Brand | DJI |
| Model | FPV Goggles V2 | CP.FP.00000018.01 |
| Product | remote controller |
| EAN | 190021029644, 6941565904003 |
| Language | English |
| Filetype | User manual (PDF) |
Features
| Type | Dedicated head mounted display |
| Product colour | Grey |
| Coloration | Monochromatic |
| Maximum refresh rate | 144 Hz |
| Viewing angle | 54 ° |
| Interpupillary distance (min) | 58 mm |
| Interpupillary distance (max) | 70 mm |
| Control type | Buttons, Rotary, Touchpad |
| Brand compatibility | DJI |
| Recommended age (min) | — yr(s) |
Weight & dimensions
| Weight | 420 g |
| Width | 184 mm |
| Depth | 122 mm |
| Height | 110 mm |
Operational conditions
| Operating temperature (T-T) | 0 — 40 °C |
Power
| Power source type | Battery |
| Battery capacity | 1800 mAh |
| DC input voltage | 9 V |
| Battery life (max) | 1.85 h |
| Battery technology | Lithium Polymer (LiPo) |
| Power consumption (typical) | 10 W |
Sensors
| Accelerometer | Yes |
| Gyroscope | Yes |
| Electronic compass | Yes |
Ports & interfaces
| USB connector type | USB Type-C |
| Card reader integrated | Yes |
| Compatible memory cards | MicroSD (TransFlash) |
| Maximum memory card size | 256 GB |
Packaging content
| Manual | Yes |
| Quantity per pack | 1 pc(s) |
show more
Frequently asked questions
Can’t find the answer to your question in the manual? You may find the answer to your question in the FAQs about the DJI FPV Goggles V2 below.
What is the weight of the DJI FPV Goggles V2?
The DJI FPV Goggles V2 has a weight of 420 g.
What is the height of the DJI FPV Goggles V2?
The DJI FPV Goggles V2 has a height of 110 mm.
What is the width of the DJI FPV Goggles V2?
The DJI FPV Goggles V2 has a width of 184 mm.
What is the depth of the DJI FPV Goggles V2?
The DJI FPV Goggles V2 has a depth of 122 mm.
A battery in my remote controller has started to corrode. Is the device still safe to use?
The product can still be used safely after proper cleaning. Remove the battery with gloves and clean the battery compartment with a toothbrush and vinegar. After drying, new batteries can be inserted into the device.
What type of USB connection does the DJI FPV Goggles V2 have?
The DJI FPV Goggles V2 has a USB Type-C connection.
Is the manual of the DJI FPV Goggles V2 available in English?
Yes, the manual of the DJI FPV Goggles V2 is available in English .
Is your question not listed? Ask your question here
DJI FPV Goggles V2 User Guide
v1.0 2021.01

DJI Digital FPV System
1
2

3


4
Press once to check the battery level.
Press, then press and hold to turn on/off.
5

Linking
Ensure that all devices are powered on.
- Press the link button on the air unit. The linking status indicator will turn solid red.
- Press the link button on the goggles. The goggles will beep continually.
- The linking status indicator of the air unit turns solid green. The goggles will stop beeping when they are successfully linked and the video display is normal.
If you need to use the Goggles and remote controller together, the air unit must be linked to the goggles before the remote controller.
6
When powered on, connect the goggles to a computer and run DJI ASSISTANT™ 2 for activation.
7
5D Button
Toggle to scroll through the menu. Press to confirm.
Record Button
Press to start or stop video recording.
Back Button
Press to return to the previous menu or exit the current mode.
Channel Adjustment Buttons
Press to switch channels.
Disclaimer and Warning
Please read this entire document and all safe and lawful practices DJITM provided carefully before use. Failure to read and follow instructions and warnings may result in serious injury to yourself or others, damage to your DJI product, or damage to other objects in the vicinity. By using this product, you hereby signify that you have read this disclaimer and warning carefully and that you understand and agree to abide by the terms and conditions herein. You agree that you are solely responsible for your own conduct while using this product, and for any consequences thereof. DJI accepts no liability for damage, injury or any legal responsibility incurred directly or indirectly from the use of this product.
DJI is a trademark of SZ DJI TECHNOLOGY CO., LTD. (abbreviated as “DJI”) and its affiliated companies. Names of products, brands, etc., appearing in this document are trademarks or registered trademarks of their respective owner companies. This product and document are copyrighted by DJI with all rights reserved. No part of this product or document shall be reproduced in any form without the prior written consent or authorization of DJI.
This document and all other collateral documents are subject to change at the sole discretion of DJI. For up to date product information, visit http://www.dji.com and click on the product page for this product.
This disclaimer is available in various languages. In the event of divergence among different versions, the English version shall prevail.
Usage
Visit http://www.dji.com/fpv (User Manual) to learn more about how to use this product with DJI FPV Air Unit.
Specifications


Please refer to http://www.dji.com/service for after-sales service for your product where applicable.
DJI shall mean SZ DJI TECHNOLOGY CO., LTD. and/or its affiliated companies where applicable.
Compliance Information
FCC Compliance Notice
This device complies with Part 15 of the FCC Rules. Operation is subject to the following two conditions: (1) This device may not cause harmful interference, and (2) This device must accept any interference received, including interference that may cause undesired operation.
Any changes or modifications not expressly approved by the party responsible for compliance could void the user’s authority to operate the equipment.
This equipment has been tested and found to comply with the limits for a Class B digital device, pursuant to part 15 of the FCC Rules. These limits are designed to provide reasonable protection against harmful interference in a residential installation. This equipment generates, uses and can radiate radio frequency energy and, if not installed and used in accordance with the instructions, may cause harmful interference to radio communications. However, there is no guarantee that interference will not occur in a particular installation. If this equipment does cause harmful interference to radio or television reception, which can be determined by turning the equipment off and on, the user is encouraged to try to correct the interference by one or more of the following measures:
- Reorient or relocate the receiving antenna.
- Increase the separation between the equipment and receiver.
- Connect the equipment into an outlet on a circuit different from that to which the receiver is connected.
- Consult the dealer or an experienced radio/TV technician for help.
This equipment complies with FCC radiation exposure limits set forth for an uncontrolled environment. End user must follow the specific operating instructions for satisfying RF exposure compliance. This transmitter must not be co-located or operating in conjunction with any other antenna or transmitter.
The portable device is designed to meet the requirements for exposure to radio waves established by the Federal Communications Commission (USA). These requirements set a SAR limit of 1.6 W/kg averaged over one gram of tissue. The highest SAR value reported under this standard during product certification for use when properly worn on the body.
ISED Compliance Notice
This device contains licence-exempt transmitter(s)/receiver(s) that comply with Innovation, Science and Economic Development Canada’s licence-exempt RSS(s). Operation is subject to the following two conditions: (1)This device may not cause interference.(2)This device must accept any interference, including interference that may cause undesired operation of the device.
This equipment complies with RSS-102 radiation exposure limits set forth for an uncontrolled environment. This equipment should be installed and operated with minimum distance 20cm between the radiator and your body. This transmitter must not be co-located or operating in conjunction with any other antenna or transmitter.
This equipment complies with ISED radiation exposure limits set forth for an uncontrolled environment. End user must follow the specific operating instructions for satisfying RF exposure compliance. This transmitter must not be co-located or operating in conjunction with any other antenna or transmitter. The portable device is designed to meet the requirements for exposure to radio waves established by the ISED.
These requirements set a SAR limit of 1.6 W/kg averaged over one gram of tissue. The highest SAR value reported under this standard during product certification for use when properly worn on the body.
EU Compliance Statement: SZ DJI TECHNOLOGY CO., LTD. hereby declares that this device is in compliance with the essential requirements and other relevant provisions of the Directive 2014/53/EU.
A copy of the EU Declaration of Conformity is available online at www.dji.com/ euro-compliance
EU contact address: DJI GmbH, Industriestrasse 12, 97618, Niederlauer, Germany
GB Compliance Statement: SZ DJI TECHNOLOGY CO., LTD. hereby declares that this device is in compliance with the essential requirements and other relevant provisions of Radio Equipment Regulations 2017.
A copy of the GB Declaration of Conformity is available online at www.dji.com/ euro-compliance
Environmentally friendly disposal
Old electrical appliances must not be disposed of together with the residual waste, but have to be disposed of separately. The disposal at the communal collecting point via private persons is for free. The owner of old appliances is responsible to bring the appliances to these collecting points or to similar collection points. With this little personal effort, you contribute to recycle valuable raw materials and the treatment of toxic substances.
DJI Support
http://www.dji.com/support
DJI is a trademark of DJI.
Copyright © 2021 DJI All Rights Reserved.
Printed in China.
Documents / Resources
tags: dji FPV, Goggles v2,
DJI FPV Goggles V2 User Guide
v1.0 2021.01
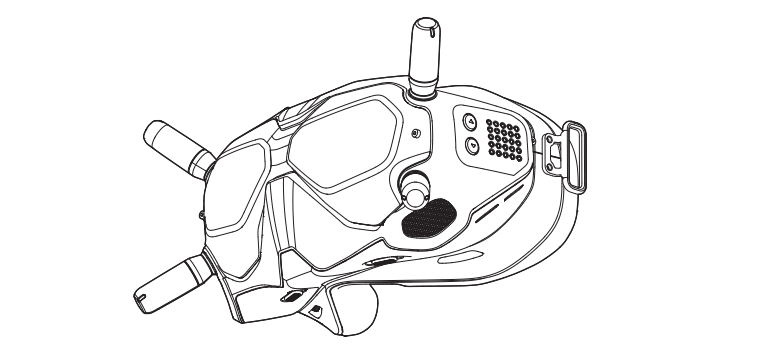
DJI Digital FPV System
1
2

3

4
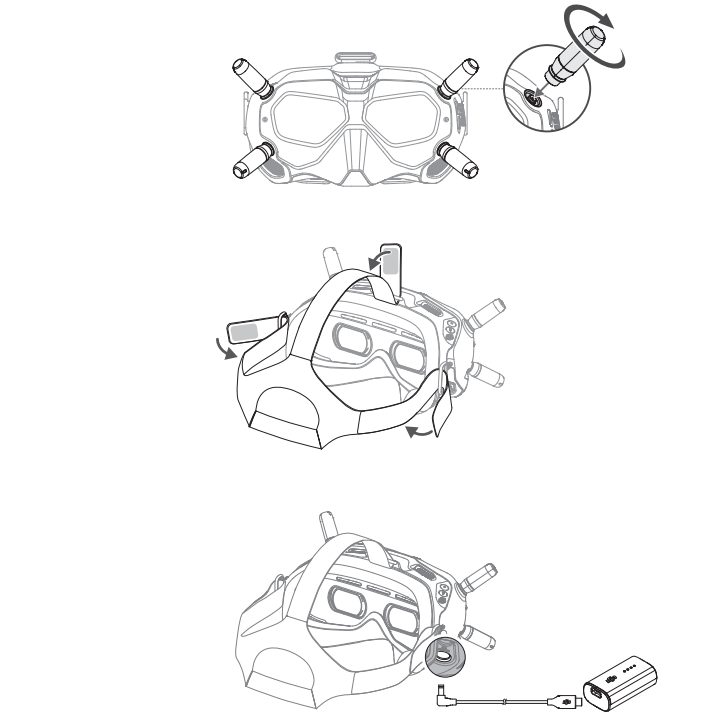
Press once to check the battery level.
Press, then press and hold to turn on/off.
5
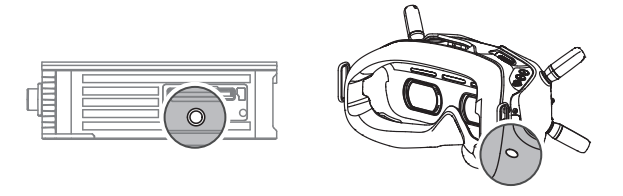
Linking
Ensure that all devices are powered on.
- Press the link button on the air unit. The linking status indicator will turn solid red.
- Press the link button on the goggles. The goggles will beep continually.
- The linking status indicator of the air unit turns solid green. The goggles will stop beeping when they are successfully linked and the video display is normal.
If you need to use the Goggles and remote controller together, the air unit must be linked to the goggles before the remote controller.
6
When powered on, connect the goggles to a computer and run DJI ASSISTANT™ 2 for activation.
7
5D ButtonToggle to scroll through the menu. Press to confirm.
Record ButtonPress to start or stop video recording.
Back ButtonPress to return to the previous menu or exit the current mode.
Channel Adjustment ButtonsPress to switch channels.
Disclaimer and Warning
Please read this entire document and all safe and lawful practices DJITM provided carefully before use. Failure to read and follow instructions and warnings may result in serious injury to yourself or others, damage to your DJI product, or damage to other objects in the vicinity. By using this product, you hereby signify that you have read this disclaimer and warning carefully and that you understand and agree to abide by the terms and conditions herein. You agree that you are solely responsible for your own conduct while using this product, and for any consequences thereof. DJI accepts no liability for damage, injury or any legal responsibility incurred directly or indirectly from the use of this product.
DJI is a trademark of SZ DJI TECHNOLOGY CO., LTD. (abbreviated as “DJI”) and its affiliated companies. Names of products, brands, etc., appearing in this document are trademarks or registered trademarks of their respective owner companies. This product and document are copyrighted by DJI with all rights reserved. No part of this product or document shall be reproduced in any form without the prior written consent or authorization of DJI.
This document and all other collateral documents are subject to change at the sole discretion of DJI. For up to date product information, visit http://www.dji.com and click on the product page for this product.
This disclaimer is available in various languages. In the event of divergence among different versions, the English version shall prevail.
Usage
Visit http://www.dji.com/fpv (User Manual) to learn more about how to use this product with DJI FPV Air Unit.
Specifications

Please refer to http://www.dji.com/service for after-sales service for your product where applicable.
DJI shall mean SZ DJI TECHNOLOGY CO., LTD. and/or its affiliated companies where applicable.
Compliance Information
FCC Compliance Notice
This device complies with Part 15 of the FCC Rules. Operation is subject to the following two conditions: (1) This device may not cause harmful interference, and (2) This device must accept any interference received, including interference that may cause undesired operation.
Any changes or modifications not expressly approved by the party responsible for compliance could void the user’s authority to operate the equipment.
This equipment has been tested and found to comply with the limits for a Class B digital device, pursuant to part 15 of the FCC Rules. These limits are designed to provide reasonable protection against harmful interference in a residential installation. This equipment generates, uses and can radiate radio frequency energy and, if not installed and used in accordance with the instructions, may cause harmful interference to radio communications. However, there is no guarantee that interference will not occur in a particular installation. If this equipment does cause harmful interference to radio or television reception, which can be determined by turning the equipment off and on, the user is encouraged to try to correct the interference by one or more of the following measures:
- Reorient or relocate the receiving antenna.
- Increase the separation between the equipment and receiver.
- Connect the equipment into an outlet on a circuit different from that to which the receiver is connected.
- Consult the dealer or an experienced radio/TV technician for help.
This equipment complies with FCC radiation exposure limits set forth for an uncontrolled environment. End user must follow the specific operating instructions for satisfying RF exposure compliance. This transmitter must not be co-located or operating in conjunction with any other antenna or transmitter.
The portable device is designed to meet the requirements for exposure to radio waves established by the Federal Communications Commission (USA). These requirements set a SAR limit of 1.6 W/kg averaged over one gram of tissue. The highest SAR value reported under this standard during product certification for use when properly worn on the body.
ISED Compliance Notice
This device contains licence-exempt transmitter(s)/receiver(s) that comply with Innovation, Science and Economic Development Canada’s licence-exempt RSS(s). Operation is subject to the following two conditions: (1)This device may not cause interference.(2)This device must accept any interference, including interference that may cause undesired operation of the device.
This equipment complies with RSS-102 radiation exposure limits set forth for an uncontrolled environment. This equipment should be installed and operated with minimum distance 20cm between the radiator and your body. This transmitter must not be co-located or operating in conjunction with any other antenna or transmitter.
This equipment complies with ISED radiation exposure limits set forth for an uncontrolled environment. End user must follow the specific operating instructions for satisfying RF exposure compliance. This transmitter must not be co-located or operating in conjunction with any other antenna or transmitter. The portable device is designed to meet the requirements for exposure to radio waves established by the ISED.
These requirements set a SAR limit of 1.6 W/kg averaged over one gram of tissue. The highest SAR value reported under this standard during product certification for use when properly worn on the body.
EU Compliance Statement: SZ DJI TECHNOLOGY CO., LTD. hereby declares that this device is in compliance with the essential requirements and other relevant provisions of the Directive 2014/53/EU.
A copy of the EU Declaration of Conformity is available online at www.dji.com/ euro-compliance
EU contact address: DJI GmbH, Industriestrasse 12, 97618, Niederlauer, Germany
GB Compliance Statement: SZ DJI TECHNOLOGY CO., LTD. hereby declares that this device is in compliance with the essential requirements and other relevant provisions of Radio Equipment Regulations 2017.
A copy of the GB Declaration of Conformity is available online at www.dji.com/ euro-compliance
Environmentally friendly disposal
Old electrical appliances must not be disposed of together with the residual waste, but have to be disposed of separately. The disposal at the communal collecting point via private persons is for free. The owner of old appliances is responsible to bring the appliances to these collecting points or to similar collection points. With this little personal effort, you contribute to recycle valuable raw materials and the treatment of toxic substances.
DJI Supporthttp://www.dji.com/support
DJI is a trademark of DJI.Copyright © 2021 DJI All Rights Reserved.Printed in China.
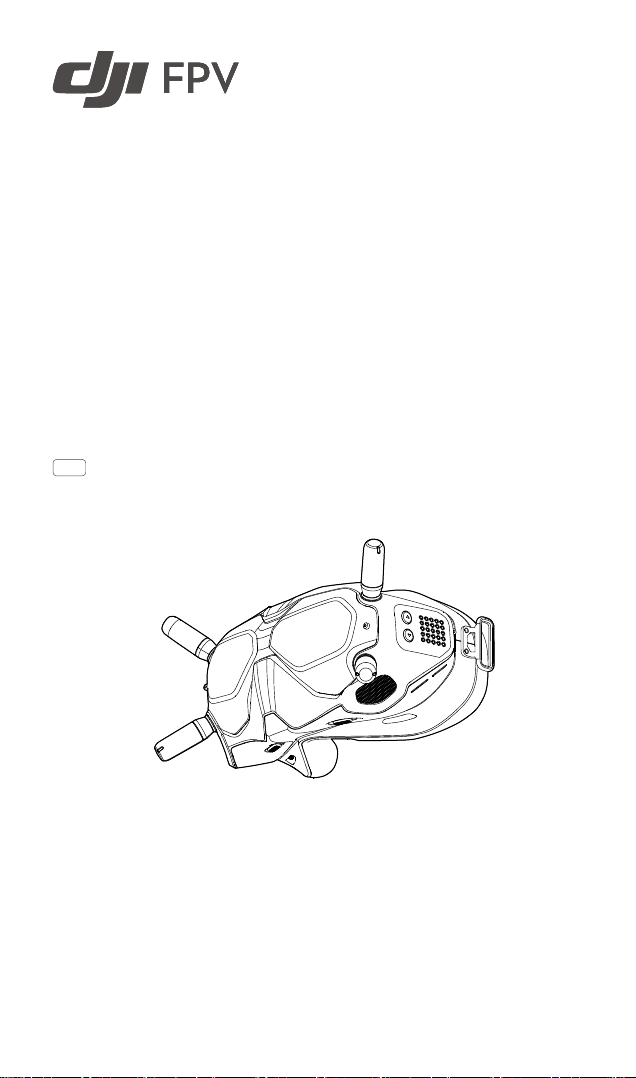
Goggles V2
User Guide
使用说明
使用說明
ユーザーガイド
사용자 가이드
Bedienungsanleitung
Guía de usuario
Guide de l’utilisateur
Guida dell’utente
Gebruiksaanwijzing
Manual do utilizador
Guia do usuário
Руководство пользователя
2021.03v1.2
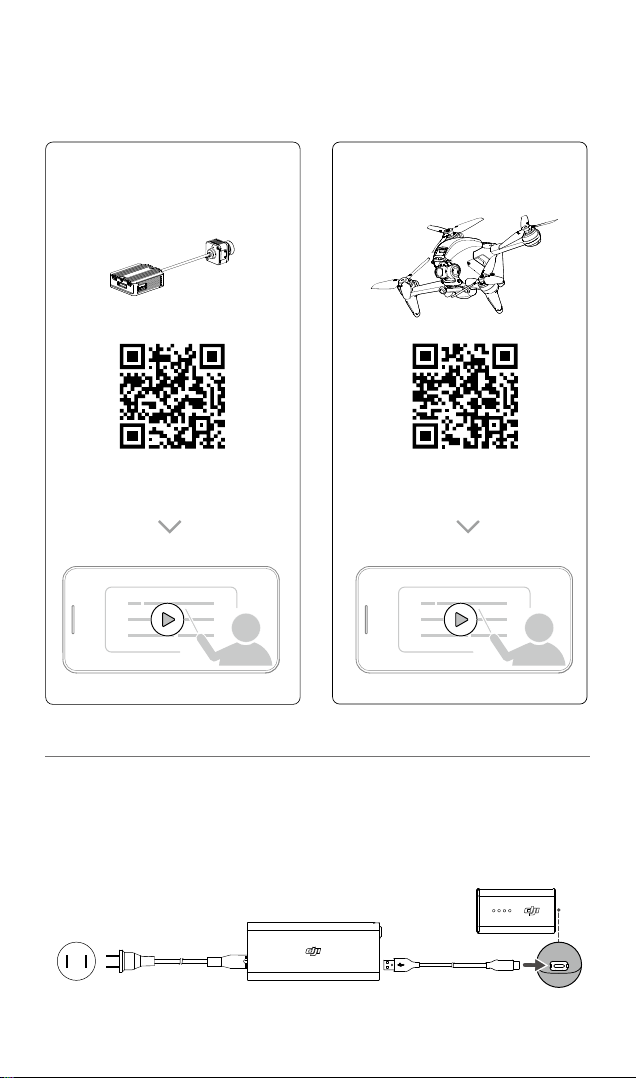
1
DJI Digital FPV System
www.dji.com/fpv/video
DJI FPV
www.dji.com/dji-fpv/video
2
1
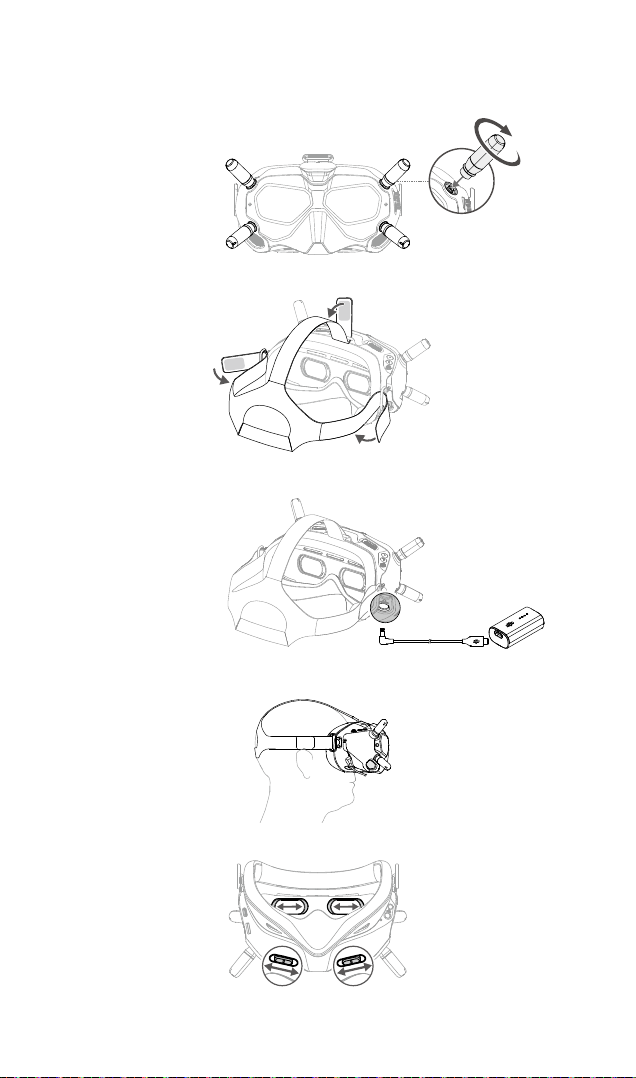
3
58 – 70 mm
2
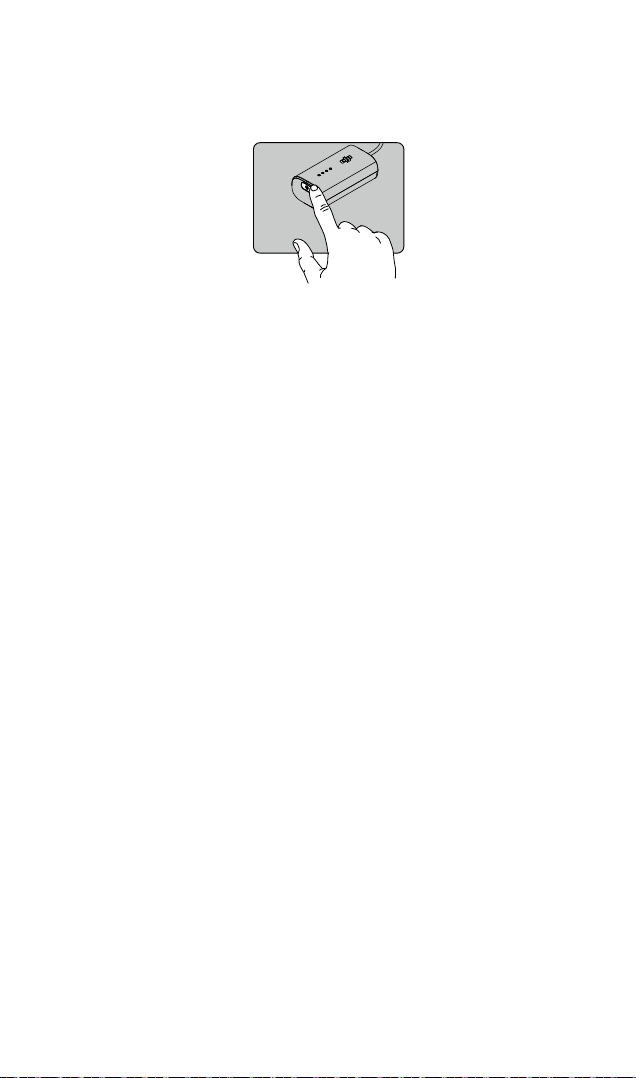
4
EN Check battery level: press once.
Power on/off: press then press and hold.
CHS 检查电量:短按一次。
开机 / 关机:短按一次,再长按 2 秒。
CHT 檢查電量:短按一次。
開機 / 關機:短按一次,再長按 2 秒。
JP
バッテリー残量確認:1 回押す。
電源をオン/オフ:1 回押して、長押し。
배터리 잔량 확인 : 한 번 누르기
KR
전원 켜기 / 끄기 : 한번 누르고 다시 길게 누르기
DE Einmal drücken: Akkustand überprüfen.
Ein-/auszuschalten: Kurz drücken, dann nochmals drücken und gedrückt halten.
ES Comprobar nivel de batería:
Encender/apagar:
FR Vérication du niveau de batterie :
Allumer/Éteindre :
allumer/éteindre.
IT Vericare il livello della batteria: premere una volta.
Accendere/spegnere: premere, quindi premere e tenere premuto.
NL Controle batterijniveau: één keer drukken.
Aan- en uitzetten: Indrukken en vasthouden.
PT Vericar o nível da bateria: prima uma vez.
Ligar/desligar: prima, e em seguida prima de forma contínua.
PT-BR Vericar o nível da bateria: pressione uma vez.
Ligar/desligar: pressione uma vez, então pressione novamente e segure.
RU Проверить заряд аккумулятора:
Включение/выключение:
presione una vez.
pulse, vuelva a pulsar y mantenga pulsado.
appuyer une fois
appuyez une fois, puis appuyez et maintenez le bouton enfoncé pour
нажмите один раз.
нажмите, затем нажмите еще раз и удерживайте кнопку.
3
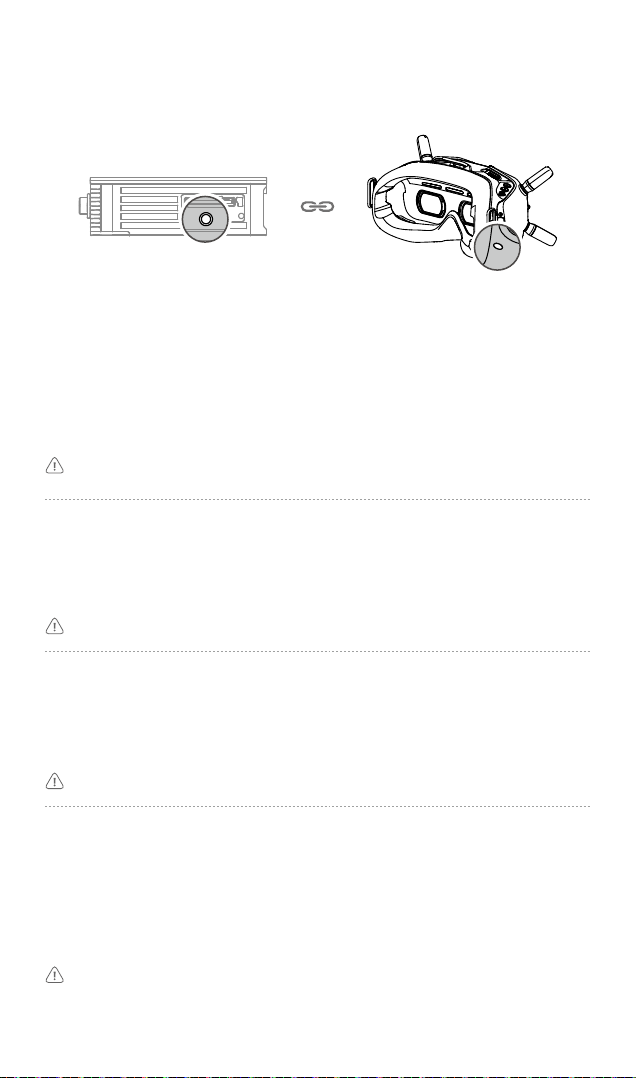
5
Linking
Ensure that all devices are powered on.
1) Press the link button on the air unit. The linking status indicator will turn solid red.
2) Press the link button on the goggles. The goggles will beep continually.
3) The linking status indicator of the air unit turns solid green. The goggles will stop beeping when they
are successfully linked and the video display is normal.
If you need to use the Goggles and remote controller together, the air unit must be linked to the
goggles before the remote controller.
对 频
对频前请确保所有设备均已开启。
1) 按下天空端的对频按键,对频状态指示灯红灯常亮。
2) 按下飞行眼镜的对频按键,飞行眼镜响起嘀 — 嘀…的提示音。
3) 对频成功后,天空端对频状态指示灯绿灯常亮,飞行眼镜提示音停止并显示图传。
若同时使用飞行眼镜和遥控器,天空端需先完成与飞行眼镜的对频,再进行和遥控器的对频。
配 對
配對前請確保所有裝置均已開啟。
1) 按下天空端的配對按鈕,配對狀態指示燈將呈現紅燈恆亮。
2) 按下飛行眼鏡的配對按鈕,飛行眼鏡會響起「嘀 — 嘀…」的提示音。
3) 配對成功後,天空端配對狀態指示燈將呈現綠燈恆亮,飛行眼鏡提示音停止,並顯示圖像傳輸。
若同時使用飛行眼鏡和遙控器,需要先完成天空端與飛行眼鏡的配對,再進行與遙控器的配對。
リンク
すべての機器の電源が入っていることを確認します。
1) エアユニットのリンクボタンを押します。リンクステータスインジケーターが赤色に点灯
します。
2) ゴーグルのリンクボタンを押します。ゴーグルからビープ音が連続して鳴ります。
3) エアユニットのリンクステータスインジケーターが緑色に点灯します。正常にリンクされ、
動画ディスプレイが正常になると、ゴーグルのビープ音が止まります。
ゴーグルと送信機を一緒に使用する必要がある場合は、エアユニットはゴーグルにリンクして
から、送信機にリンクする必要があります。
4

연동
모든 기기의 전원이 켜졌는지 확인합니다 .
1) 에어 유닛의 연동 버튼을 누릅니다 . 연동 상태 표시등이 빨간색을 유지합니다 .
2) 고글의 연동 버튼을 누릅니다 . 고글은 계속 신호음 소리를 냅니다 .
3) 에어 유닛의 연동 상태 표시등이 녹색을 유지합니다 . 성공적으로 연동되고 동영상 디스플레이가 정상이
면 , 고글 신호음이 멈춥니다 .
고글과 조종기를 함께 사용해야 하는 경우 , 에어 유닛을 고글에 먼저 연동한 후 조종기를 연동해야 합니다 .
Koppeln
Stell sicher, dass alle Geräte eingeschaltet sind.
1) Drück die Kopplungstaste an der Lufteinheit. Die Kopplungsstatusanzeige leuchtet permanent
rot.
2) Drück die Kopplungstaste auf den Goggles. Die Goggles piepsen kontinuierlich.
3) Die Kopplungsstatusanzeige der Lufteinheit leuchtet permanent grün. Die Goggles hören auf zu
piepen, sobald sie erfolgreich gekoppelt wurden und die Videowiedergabe normal angezeigt wird.
Wenn du die Goggles und die Fernsteuerung zusammen verwenden möchtest, muss die
Lufteinheit vor der Fernsteuerung mit den Goggles verbunden werden.
Vinculación
Asegúrese de que todos los dispositivos estén encendidos.
1) Presione el botón de enlace en la unidad aérea. El indicador de estado de enlace se enciende en
rojo jo.
2) Presione el botón de enlace en las gafas. Las gafas emitirán un pitido continuo.
3) El indicador de estado de enlace de la unidad aérea se enciende en verde jo. Las gafas dejan de
pitar cuando se enlazan correctamente y la visualización del vídeo es normal.
Si necesita usar las gafas y el control remoto a la vez, la unidad aérea debe enlazarse a las gafas
antes que al control remoto.
Appairage
Assurez-vous que tous les dispositifs sont sous tension.
1) Appuyer sur le bouton d’appairage de l’unité aérienne. Le voyant d’état de l’appairage passe au
rouge xe.
2) Appuyez sur le bouton d’appairage du casque. Le casque émet alors un bip continu.
3) Le voyant d’état de l’appairage de l’unité aérienne passe au vert xe. Le casque cesse de biper
lorsqu’il est correctement lié et que l’achage vidéo est normal.
Si vous devez utiliser le casque et la commande à distance en même temps, l’unité aérienne doit
être liée au casque avant la commande à distance.
Collegamento
Accertarsi che tutti i dispositivi siano accesi.
1) Premere il pulsante di collegamento sull’aeromobile. L’indicatore di stato del collegamento diventa
rosso e rimane sso.
2) Premere il pulsante di collegamento sul visore. Il visore emetterà un bip continuo.
3) L’indicatore di stato del collegamento dell’unità aerea diventa verde sso. Gli occhiali smetteranno
di lampeggiare quando collegati correttamente e la visualizzazione delle immagini si stabilizza.
Se è necessario utilizzare gli occhiali e il radiocomando insieme, l’unità aerea dev’essere
collegata agli occhiali prima del radiocomando.
5

Koppelen
Zorg ervoor dat alle apparaten zijn ingeschakeld.
1) Druk op de verbindingsknop op de luchteenheid. De statusindicator voor koppeling zal continu
rood worden.
2) Druk op de verbindingsknop op de bril. De bril piept continu.
3) De statusindicator voor koppeling van de luchteenheid wordt continu groen. De bril zal met piepen
stoppen wanneer deze met succes is gekoppeld en het videoscherm normaal is.
Als u de bril en afstandsbediening samen wilt gebruiken, moet de luchteenheid vóór de
afstandsbediening aan de bril worden gekoppeld.
Ligação
Assegure-se de que todos os dispositivos estão ligados.
1) Pressione o botão de ligação na unidade de ar. O indicador de estado de ligação ca vermelho
xo.
2) Prima o botão de ligação nos goggles. Os goggles emitirão um sinal sonoro contínuo.
3) O indicador de estado de ligação da unidade de ar ca verde xo. Os goggles param de emitir um
sinal sonoro quando ligados com êxito e o visor de vídeo é normal.
Se precisar de utilizar os Goggles e o telecomando em conjunto, a unidade de ar deve ser ligada
aos óculos antes do telecomando.
Vinculação
Verique se todos os dispositivos estão ligados.
1) Pressione o botão de vinculação na unidade aérea. O indicador de status de vinculação cará
vermelho sólido.
2) Pressione o botão de vinculação nos óculos de proteção. Os óculos de proteção emitirão um sinal
sonoro contínuo.
3) O indicador de status de vinculação da unidade aérea cará verde sólido. Os óculos de proteção
param de emitir sinal sonoro quando forem vinculados com êxito e a exibição do vídeo for normal.
Se precisar usar os óculos de proteção e o controle remoto juntos, a unidade aérea deve ser
vinculada aos óculos de proteção antes do controle remoto.
Сопряжение
Убедитесь, что все устройства включены.
1) Нажмите кнопку сопряжения на дроне. Индикатор состояния сопряжения загорится
красным цветом.
2) Нажмите кнопку сопряжения на очках. Очки начнут издавать непрерывный звуковой сигнал.
3) Индикатор состояния сопряжения на дроне должен загореться зеленым цветом. При
успешном сопряжении очки перестанут издавать сигнал, а изображение на экране
нормализуется.
В случае необходимости совместного использования очков и пульта дистанционного
управления необходимо выполнить сопряжение дрона с очками до сопряжения с пультом
управления.
6

687
When powered on, connect the goggles to a computer and run DJI ASSISTANTTM 2 for activation.
飞行眼镜需在供电状态下连接至电脑并运行DJIASSISTANT
飛行眼鏡需在供電狀態下連接至電腦並執行DJIASSISTANTTM2調參軟體啟動。
電源が入ったら、ゴーグルをパソコンに接続し、DJI ASSISTANT
전원이 켜진 상태에서 고글을 컴퓨터에 연결한 후 DJI ASSISTANT
TM
2调参软件激活。
TM
2 を実行して起動します。
TM
2 를 작동하십시오 .
Verbinden Sie die Goggles nach dem Einschalten mit einem Computer und starten Sie den DJI
ASSISTANT
Cuando estén encendidas, conecte las gafas a un ordenador y ejecute DJI ASSISTANT
TM
2 zur Aktivierung.
TM
2 para
la activación.
TM
Lorsqu’il est allumé, connectez le casque à un ordinateur et exécutez DJI ASSISTANT
2 pour
l’activation.
TM
Una volta acceso, collegare il visore a un computer ed eseguire DJI ASSISTANT
2 per
l’attivazione.
TM
Wanneer ingeschakeld, sluit u de bril aan op een computer en draait u DJI ASSISTANT
2 voor
activering.
TM
Quando ligado, ligue os óculos a um computador e execute o DJI ASSISTANT
Quando ligado, conecte os Goggles a um computador e execute o DJI ASSISTANT
2 para ativação.
TM
2 para
ativação.
TM
Подсоедините включенные очки к компьютеру и запустите DJI ASSISTANT
2 для
активации.
7
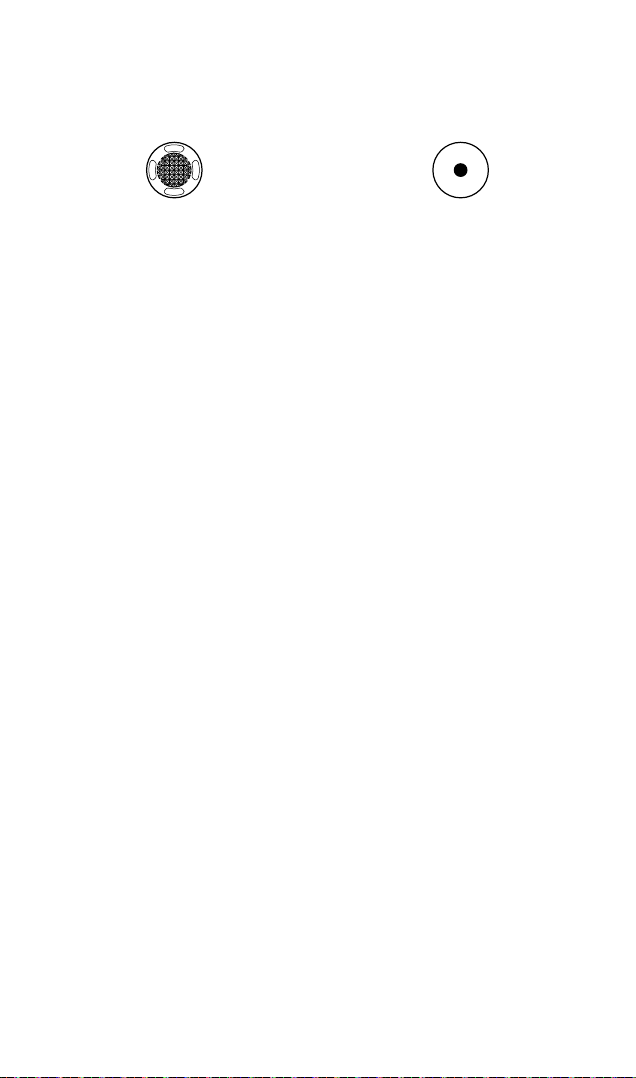
5D Button
Toggle to scroll through the menu.
Press to conrm.
五维按键
拨动以滚动界面菜单,按下确认
五維按鈕
撥動以滾動介面菜單,按下確認
5D ボタン
メニューをスクロールするように切り替え
ます。
押すと確定されます。
5D 버튼
토글하여 메뉴를 스크롤합니다
버튼을 눌러서 확인합니다
5D-Taste
Betätigen, um durch das Menü zu scrollen.
Zur Bestätigung drücken.
Botón 5D
Alterne para desplazarse por el menú.
Presione para conrmar.
Bouton 5D
Basculer pour faire déler le menu.
Appuyez pour conrmer.
Pulsante 5D
Attivare per consultare il menu.
Premere per confermare.
5D-knop
Wissel om door het menu te bladeren.
Druk om te bevestigen.
Botão 5D
Alterne para percorrer o menu.
Prima para conrmar.
Botão 5D
Alterne para percorrer o menu.
Pressione para conrmar.
Кнопка 5D
Коснитесь для просмотра меню.
Нажмите для подтверждения.
.
.
Record Button
Press to start or stop video recording.
录像按键
按下可开始 / 结束录像
錄影按鈕
按下可開始 / 結束錄影
録画ボタン
押すと録画が開始/停止されます。
녹화 버튼
버튼을 누르면 동영상 녹화가 시작되 거나
중단됩니다.
Videoaufnahmetaste
Startet und beendet die Videoaufnahme.
Botón de grabación
Pulse para iniciar o parar la grabación de
vídeo.
Bouton d’enregistrement
Appuyez une fois sur cette touche pour
démarrer/arrêter l’enregistrement.
Pulsante di registrazione
Premere il pulsante per avviare o interrompere
la registrazione video.
Opnameknop
Druk om de video-opname te starten/
stoppen.
Botão de gravação
Prima para iniciar ou parar a gravação de
vídeo.
Botão de gravação
Pressione para iniciar ou parar a gravação de
vídeo.
Кнопка записи
Нажмите, чтобы начать/остановить запись
видео.
Loading…
Недавно появившийся на рынке новый любительский дрон DJI FPV, который в полной комплектации, помимо пульта управления, включает и замечательные очки DJI FPV Goggles нового поколения, уже вызвал небывалый интерес среди поклонников продукции DJI и всех интересующихся беспилотными технологиями в целом.
Полный набор системы включает, помимо дрона, упомянутые очки DJI FPV Goggles V2 и пульт DJI FPV Remote Controller 2, которые необходимо перед полетами правильно подключить к летательному аппарату. Поэтому мы подготовили для вас пошаговую иллюстрированную инструкцию о том, как выполнить все операции и получить удовольствие от управления беспилотником в режиме первого лица. Наша инструкция будет полезна и тем, кто по тем или иным причинам вынужден был заменить один из компонентов: пульт, дрон или очки.
Перед операцией по подключению вам следует убедиться в том, что все три устройства – дрон, очки и пульт управления – имеют достаточный для этого заряд батарей. Важно также, что если вы купили комплект DJI FPV Combo, то вам не нужно выполнять операцию подключения, так как все устройства в комплекте уже привязаны друг к другу.
Более подробную информацию о дроне DJI FPV можно узнать из нашего обзора.
Подключение (связывание) дрона DJI FPV и очков Goggles
1. Нажмите 1 раз кнопку связывания на очках, чтобы услышать пикающий сигнал.
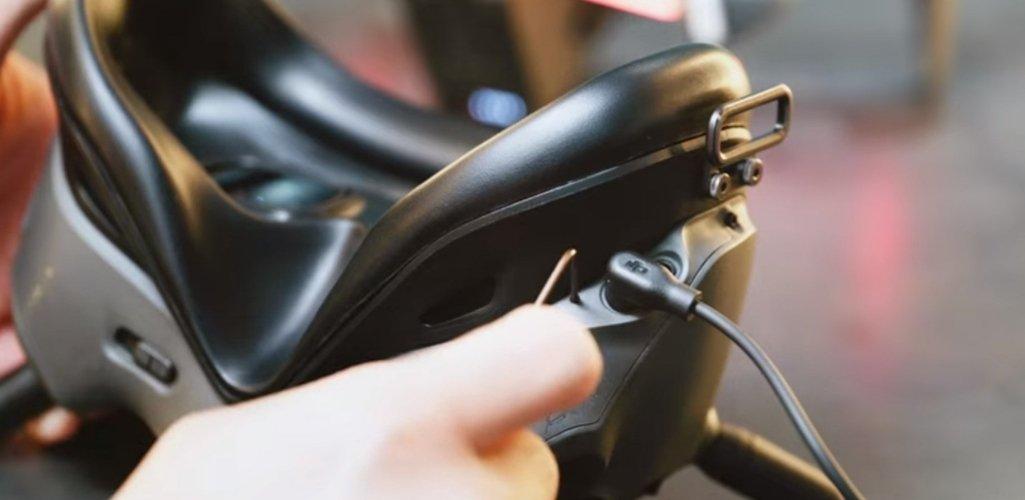
2. Нажмите и удерживайте 5 секунд кнопку питания дрона, пока не начнут мигать светодиодные индикаторы уровня заряда батареи, а также пока не послышится пикающий звук.
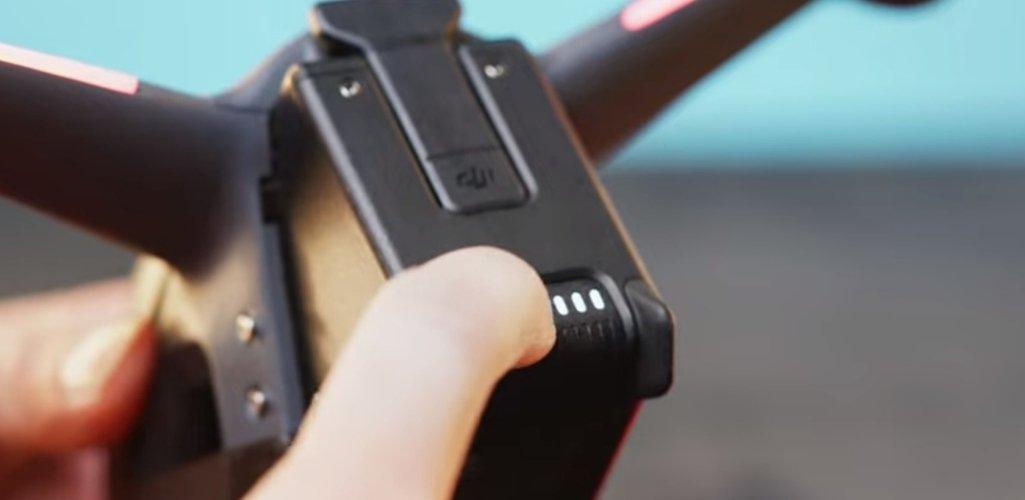
3. Чтобы произошло подключение дрона и очков, необходимо подождать от 5 до 30 секунд.
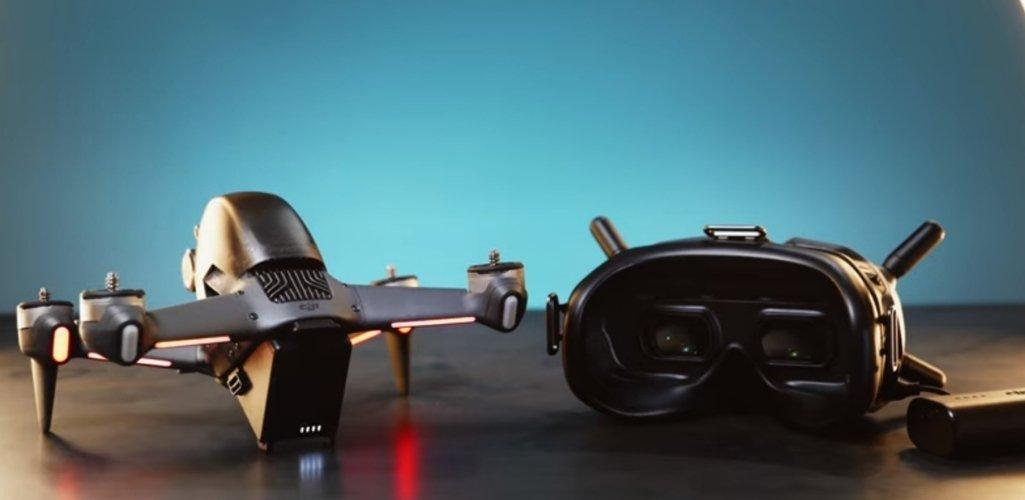
Об успешности подключения будет свидетельствовать немигающий световой сигнал индикатора батареи дрона и выведенный на дисплей уровень заряда батареи. Звуковой сигнал от очков прекратится, а на дисплее очков появится отображение в реальном времени с камеры дрона.
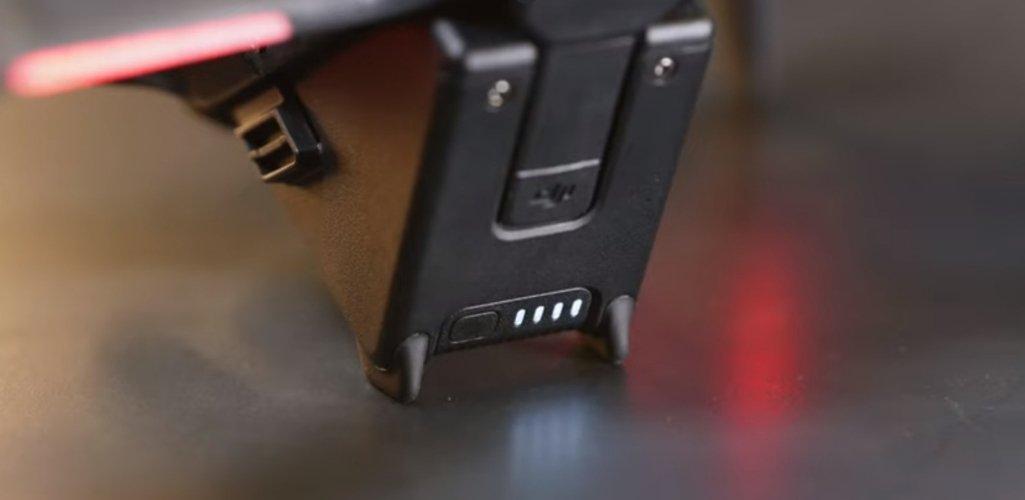
Подключение пульта управления к дрону DJI FPV
1. После включения питания очков приступайте к подключению к дрону пульта дистанционного управления…
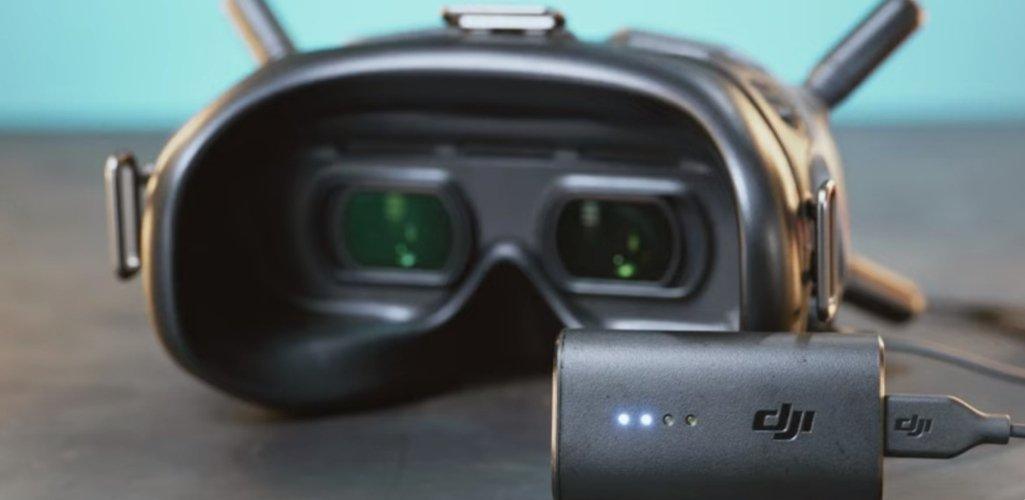
…и нажмите, а затем удерживайте в течение 5 секунд кнопку питания летательного аппарата, пока не послышится пикающий сигнал. Светодиодный индикатор батареи начнет последовательно мигать. Также начнет быстро мигать желтый светодиодный индикатор.
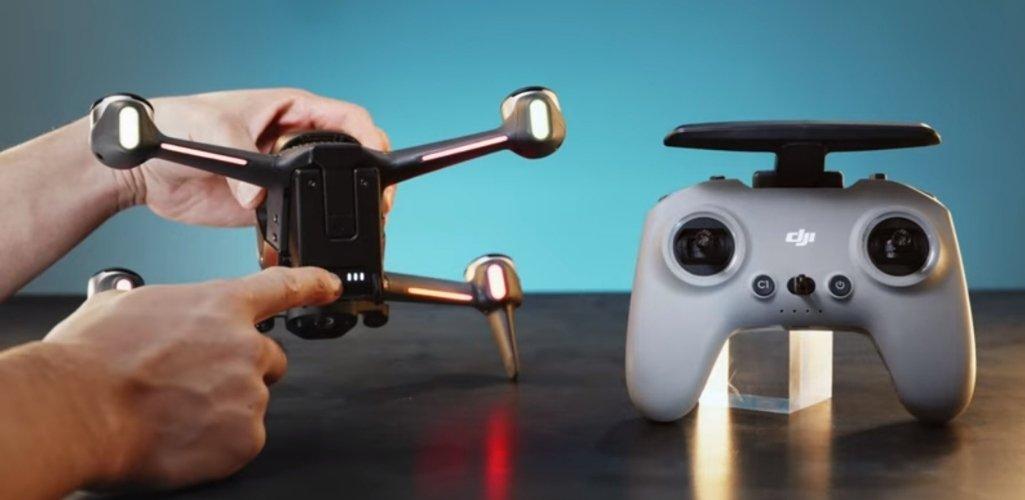
2. Нажмите и удерживайте 5 секунд кнопку питания пульта дистанционного управления, пока не начнет последовательно мигать светодиодный индикатор батареи и не послышится пикающий сигнал.
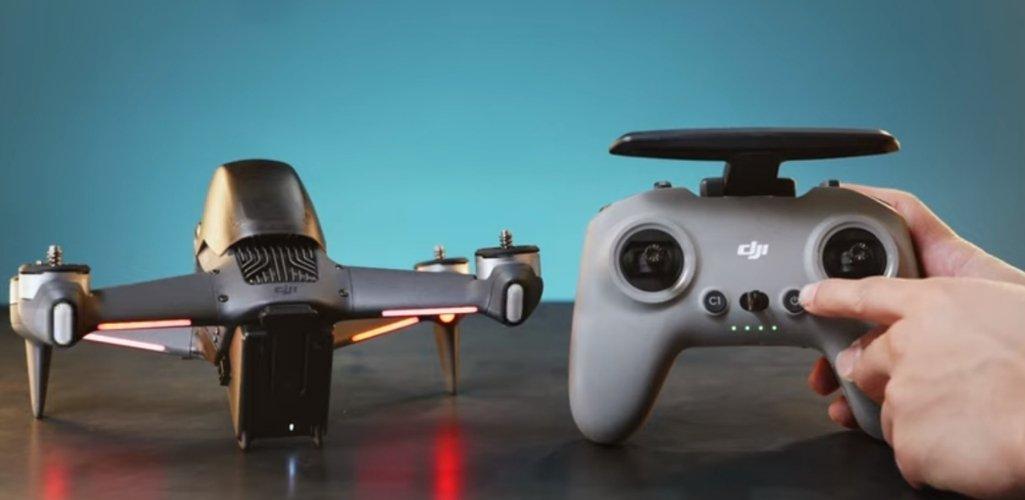
3. Подождите 5 – 30 секунд, пока пульт не подключится к дрону. Индикатор батареи станет гореть постоянно, а на дисплее появится отображение уровня заряда батареи.
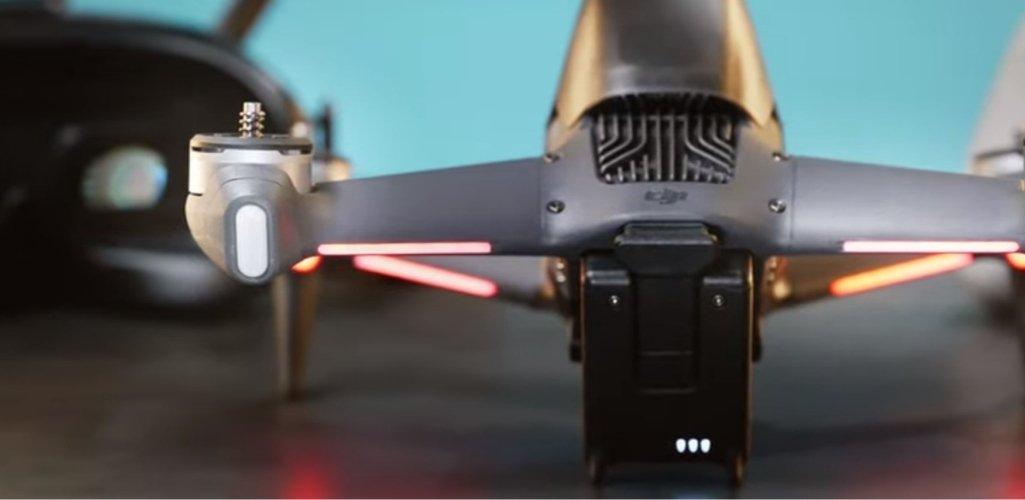
Если все операции прошли успешно и сопровождались описанными действиями, то устройства удалось успешно подключить.
Надеемся, эти советы помогут вам на начальном этапе использования системы дрона DJI FPV. А о том, как правильно применять на практике джойстик DJI Motion Controller, читайте в нашей предыдущей статье.
Статья подготовлена с использованием материалов с Интернет-ресурса www.heliguy.com.