
Printed in XXXXXX XX.XX-XX XXX
5.
Stylus CX7300/DX7400
Start Here • Установка • Встановлення
1.
4.
2.
6.
Do not connect the USB cable until you are instructed to do so.
Не подключайте USB кабель, пока не встретите указание сделать это.
Не підключайте USB кабель, поки не з’явиться вказівка зробити це.
Windows
No installation screen?
&
Окно установки не появилось?
&
Вікно встановлення не з’явилося?
&
If this screen appears, click
Cancel.
Если появится такое окно, нажмите Cancel (Отмена).
Якщо з’явиться таке вікно, натисніть Cancel (Скасувати).
Windows
Mac OS X
3.
Stylus CX8300/DX8400
Note:
The ink cartridges first installed in your printer will be partly used to charge the print head. These cartridges print fewer pages compared to subsequent ink cartridges.
Примечание:
Чернильные картриджи, впервые установленные в принтер, частично расходуются на прокачку системы подачи чернил. Этот картридж напечатает меньше страниц по сравнению со следующими
обычными чернильными картриджами.
Примітка:
Чорнильні картриджі, установлені в принтер, частково витрачаються на прокачування системи подачі чорнила. Цей картридж надрукує менше сторінок порівняно з наступними чорнильними картриджами.
Wait about 2.5 min •
Примерно 2,5 минуты • Приблизно 2,5 хвилини
Wait about 2.5 min •
Примерно 2,5 минуты • Приблизно 2,5 хвилини
Flashing •
Мигает • Блимає
On •
Вкл. • Вкл.
Note:
Do not open the ink cartridge package until you are ready to install it in the printer. The cartridges are vacuum packed to maintain its reliability.
Примечание:
Не открывайте упаковку чернильного картриджа, пока не будете готовы установить его в принтер. Вакуумная упаковка обеспечивает сохранность картриджа.
Примітка:
Не відкривайте упаковку чорнильного картриджа, поки не будете готові вставити його в принтер. Картридж перебуває у вакуумній упаковці для підтримки його надійності.
Stylus CX7300/DX7400
Stylus CX8300/DX8400
Getting More Information •
Дополнительные сведения • Додаткова інформація
Stylus CX8300/DX8400
Нажмите на кнопку для помощи
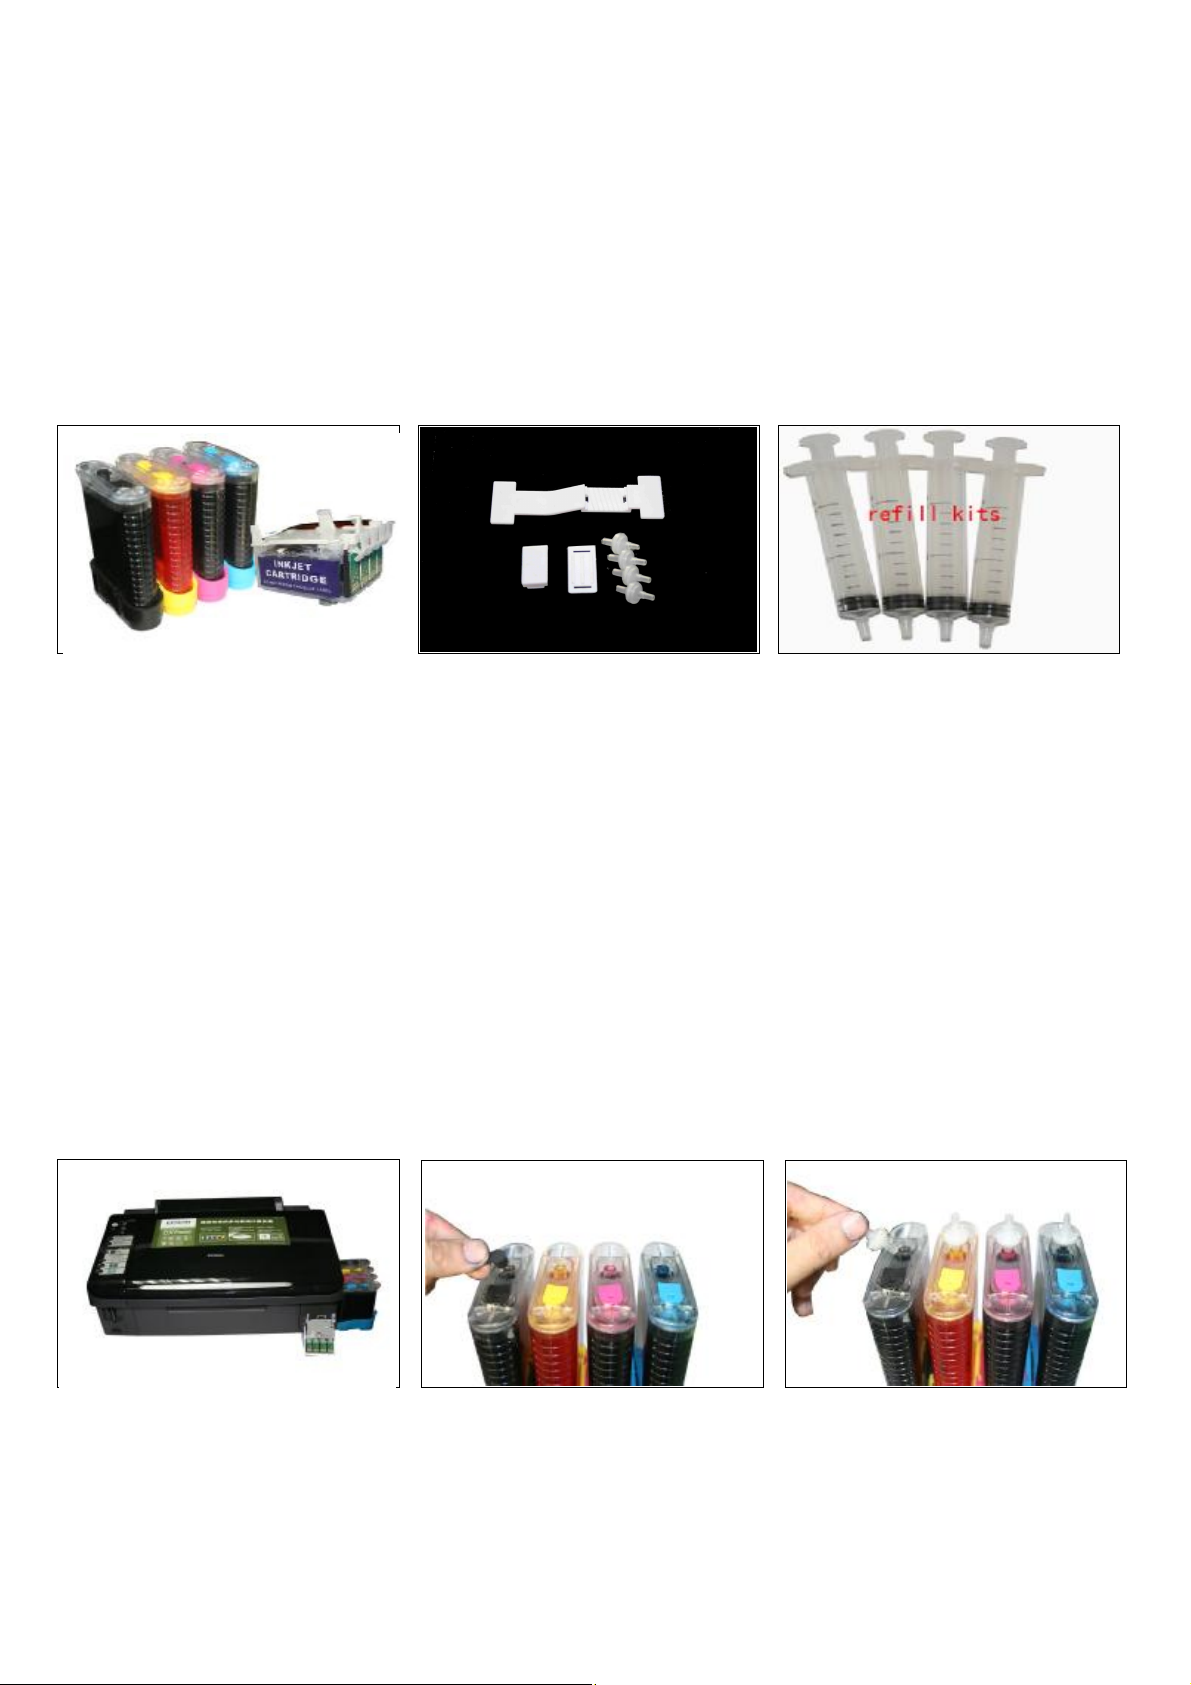
Instruction for EPSON CX7300
You are welcomed to use continue Ink Supply System which will greatly reduce your cost. And
it is the ideal products suiting for Color Inkjet Printer. Pls Please look over the instruction
carefully before using it, which will make you use this system easily, safely and stably.
1. General Guide
1、Components
a、CIS System 1set b、Air Filters 6pcs c、Support Arm 1set
d、Standby Refill Kit 6pcs e、Instruction CD 1pc
2、Opening box inspection
a、Check whether all the accessories are ready before installing.
b、Check whether there’s the leakage of the CISS, whether some tubes have been separated from the CISS
2. Printer Testing
1) Check whether the printer is in normal condition, like mechanical status, lubrication status etc.
2) Print testing lines to ensure the printing head is good condition.
3) Print pictures to see whether the printing image is good or not..
Please use this CIS System easily, it will not reduce or raise the accurateness of the printer. If the testing result is
abnormal, please consult the local dealer for this products.
3. Installation Procedures
Step 1: Preparation
Put the CISS on the right side of the printer. Pull out the small rubber plug from the Place 6pcs of air filters into
and place all the tubes at correct position. air hole as picture shown above.
Step 2: Take out the original cartridges
air holes,
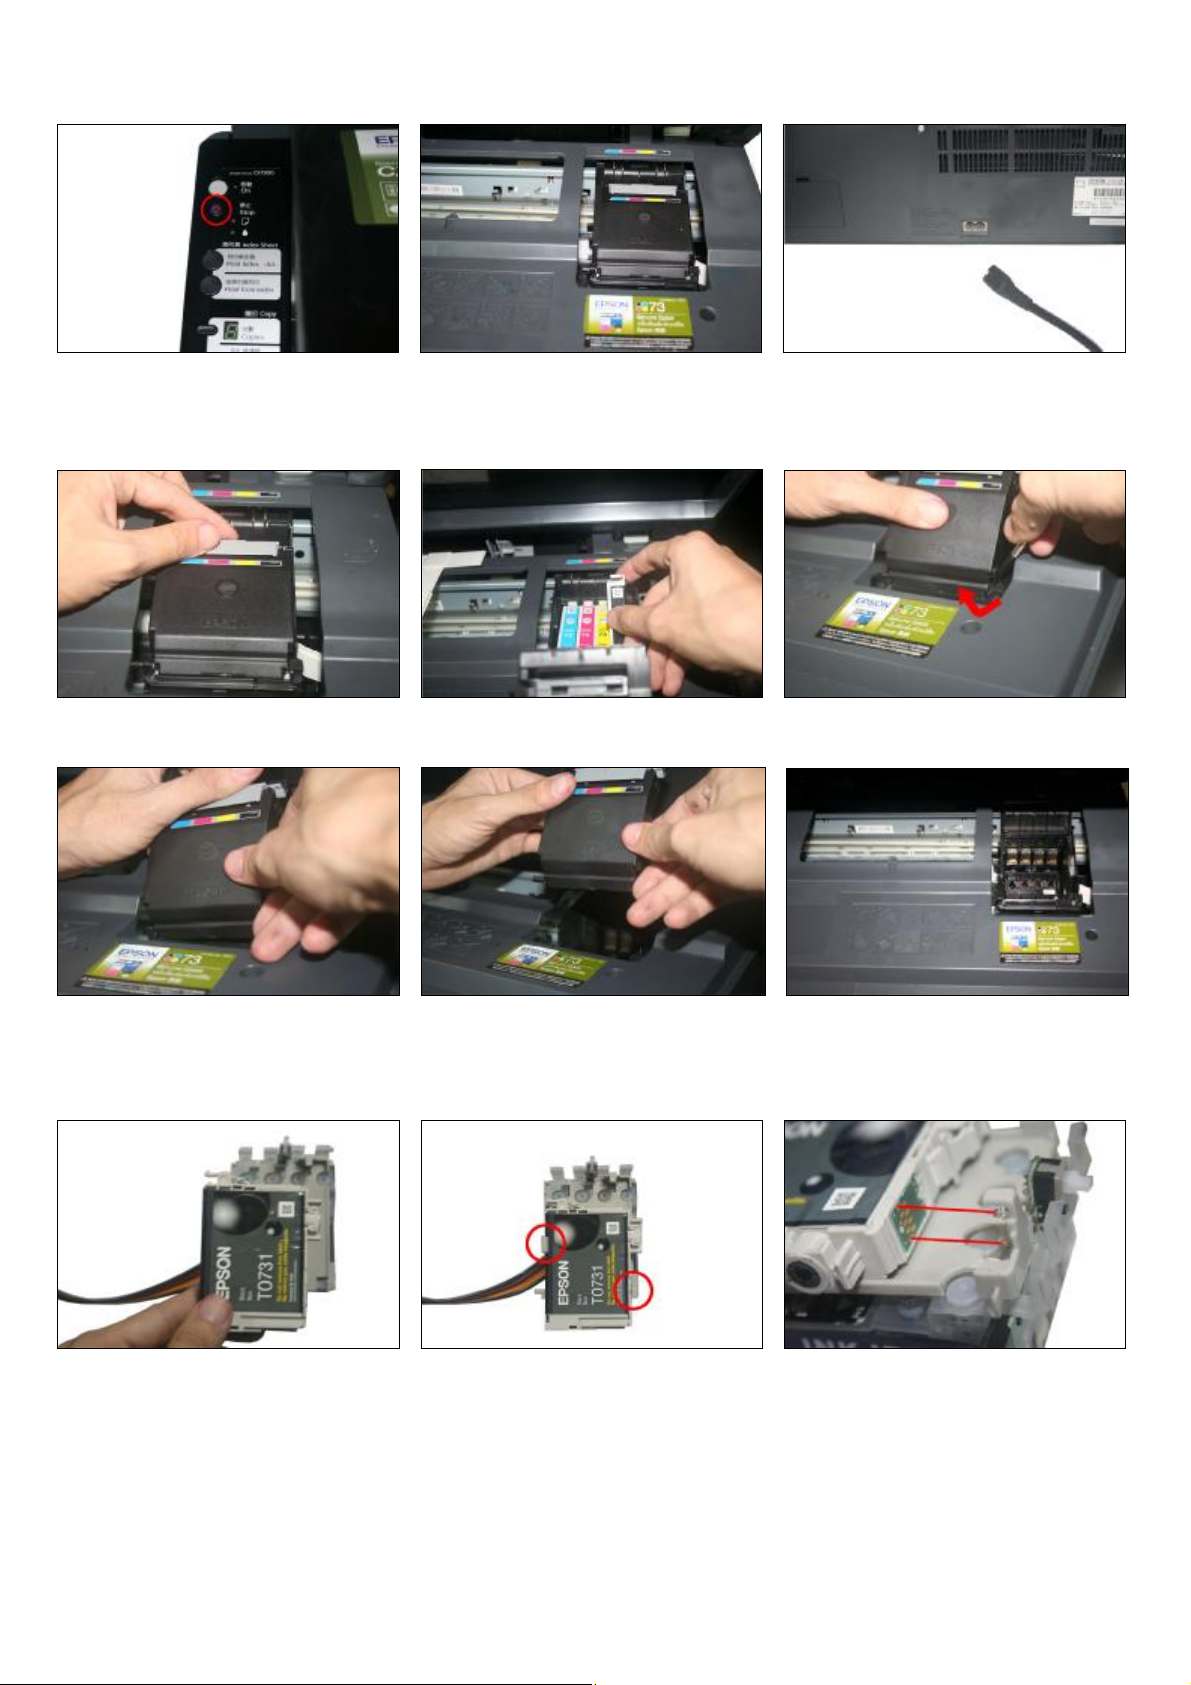
Press the ink-changing button Carriage move out Pull out the power line of the printer and
move the carriage to the right side.
Step 3: Remove the cartridge cover
Open the cartridge cover Take out the original cartridges prize the cover lightly along with the gap with
screwdriver
Take one side first. Then take out the whole cover Carriage is empty and get ready for putting in
the new CISS
Step 4: Install Original Cartridges
Put the original cartridge above the CIS Press the cartridge down until it is locked The two metal sheets at the top and bottom
Cartridges. by the two clips. Should match the two springs.

Push it upside until it is locked by the third clip in the red circle.
① reset button. ② switch.
If the switch is turned to up place,then CISS
should work with original cartridge.
If the switch is turned to down palce, then CISS
Can work without original cartridge.
Step 5: Install CIS Catridges
Move the carriage to the left side Make the cartridge round the printer cover as above show Move the carriage back to the
original position
Put in the special cartridge of CISS according to A sound Da will heard when the clip locks the cartridge completely
the color mark and lock the cartridge.
Step 6: Fix the Support Arm and Tube line
Fit the support arm like the picture shown Fix the balance arm on the support arm. Fix the tube on the support arm as the above
picture
English
Introduction
Important Safety Instructions …………………………………………………….. 3
Control Panel Functions
Buttons ……………………………………………………………………………………… 4
Lights ………………………………………………………………………………………… 5
Handling Paper
Selecting Paper ………………………………………………………………………… 6
Loading Paper………………………………………………………………………….. 6
Copying
Placing Originals on the Document Table …………………………………. 8
Copying Photos………………………………………………………………………… 8
Copying Documents ………………………………………………………………… 9
Speeding Up Copying ………………………………………………………………. 9
Printing from a Memory Card
Handling a Memory Card ……………………………………………………….. 10
Selecting and Printing Photos Using an Index Sheet…………………. 12
Printing from a Digital Camera
Using PictBridge or USB DIRECT-PRINT……………………………………….. 14
Replacing Ink Cartridges
Precautions …………………………………………………………………………….. 15
Replacing an Expended Ink Cartridge ……………………………………. 15
Maintenance
Checking and Cleaning the Print Head ………………………………….. 18
Aligning the Print Head……………………………………………………………. 19
Solving Problems
Error Indicators ………………………………………………………………………… 20
Problems and Solutions …………………………………………………………… 21
Basic Operation Guide
-for use without a computer-
График работы поддержки:
Пн-Пт: с 9:00 до 18:00
Сб-Вс: Выходной
График отправки ключей
Adjustment program и Canon Service Tool:
Рабочие дни:
с 09:00 до 18:00 в течении 5 — 15 мин.
с 18:00 до 23:00 в течении 1 часа
с 23:00 до 09:00 отправка не производится
Выходные дни:
с 09:00 до 23:00 По свободному графику
Мы работаем по московскому времени!
Прошивки для принтеров Samsung, Xerox, HP, Pantum вы можете получить в автоматическом режиме, круглосуточно, моментально после оплаты, сделав заказ через магазин
Делайте покупки через свой аккаунт на нашем сайте и накапливайте постоянную скидку до 17%